Alunar 3d desktop printer prusa i3 review
ALUNAR Prusa i3 3D Desktop Printer Review
0Posted on by John
ALUNAR Prusa i3 3D Printer Kit Overview
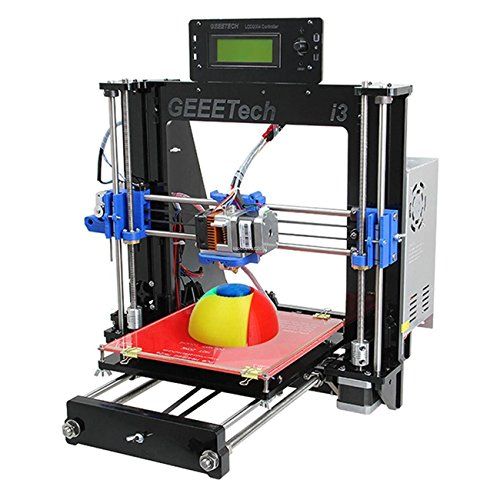
ALUNAR has joined the growing ranks of companies offering affordable, DIY 3D printer kits. Similar to machines like HIC Technology’s HICTOP 3DP-18 3D printer kit, ALUNAR’s Prusa i3 (also known as the ALUNAR 3D Desktop Printer M505) offers a significantly reduced price – so long as you’re willing to get your hands dirty.
So, what are you signing up for with a DIY 3D printer kit from ALUNAR? For starters, you’re getting the full challenge of building your own 3D printer. ALUNAR makes it clear up front that their Prusa i3 is for hobbyists and professionals alike, but that it “requires great passion, patience and strong practical abilities to assemble.”
It may seem a bit daunting, but it seems like ALUNAR is mostly covering their bases to make sure there is no confusion that this kit does not come pre-assembled. However, putting together the Prusa i3 3D Printer Kit (M505) means you get a rigidly built, high quality product at a fair price. You will be hard pressed to find a machine with this range of functionality for less, and as a DIY enthusiast, the assembly may likely be the best part!
For your convenience, ALUNAR provides links to multiple assembly videos on YouTube, as well as a quality guarantee and customer service.
The ALUNAR Prusa i3 3D printer, once assembled, supports multiple filament types. With a heated build plate and variable extruder temperature, this printer can use both common ABS and PLA filaments, and more advanced options, like wood filament and conductive PLA.
ALUNAR Prusa i3 3D Printer (M505) Specifications
- Acrylic Frame
- 0.012mm X/Y axis accuracy
- 0.004mm Z axis accuracy
- Single-color extruder
- 0.4mm extruder diameter
- SD card reader and LCD menu screen
- 100mm/s print speed
- 220 x 220 x 230mm max print size (8.
 66 x 8.66 x 9.06 inches)
 - Variable temperature nozzle (195C for PLA, up to a 250C maximum)
- 100C heated aluminum print bead
- 1.74 mm filament diameter
Included in the box:
- 3D printer kit
- Spool holder
- 1 roll 3D filament
- USB cable for online printing
- USB Card reader and TF card for offline printing
This ALUNAR 3D Desktop Printer Prusa i3 Kit review relies heavily on specifications from the company and data from over 250 purchasers or reviewers on Amazon. Be sure to check the latest reviews and current ALUNAR 3d printer deals on Amazon for the latest information to determine if this budget 3d printer is the right 3d printing solution for you.
Have you used the ALUNAR 3D Desktop Printer Prusa i3 Kit? Please comment and let the community know your thoughts, rating, or review.
3D Printer Reviews
ALUNAR® Upgraded DIY Desktop 3D Printer Review
6. 8 Okay
Common sense tells you to steer clear of such a cheap 3D printer, but curiosity still has you wondering. Is the ALUNAR Prusa i3 an amazing value or an expensive paperweight? Today's ALUNAR® Upgraded DIY Desktop 3D Printer review determines whether this machine is an awesome buy or if you should save up for something better.
More Details ❯
-
Printing Speed 7
-
Build Size 7
-
Precision 7.5
-
Value 8
-
Design 6.5
-
User Experience 5
More Details ❯
ALUNAR® Upgraded DIY Desktop 3D Printer Review Basics
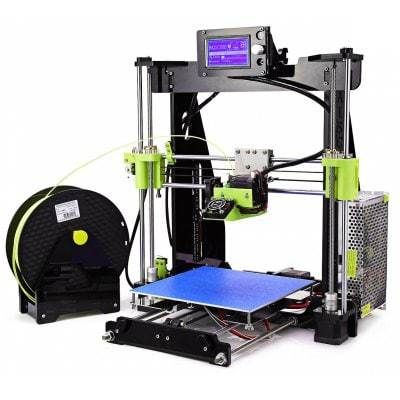
First and foremost, the ALUNAR Prusa i3 is a hardcore DIY kit, meaning it comes to your door in dozens of pieces.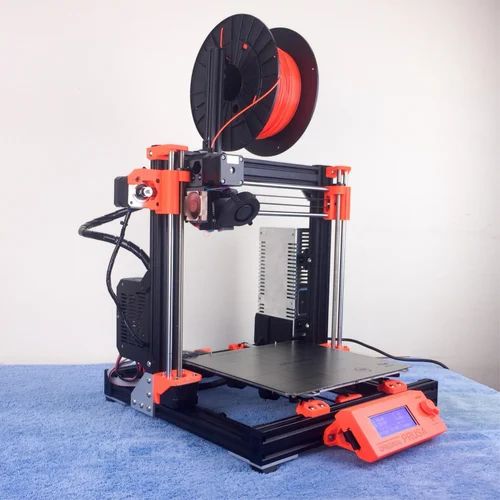 You need to perform both the electrical wiring and the base construction of this printer. Rest assured that all tools and plenty of spare parts are included, however. Total assembly takes between 5 and 8 hours, depending on your experience level.
Once assembled, this 3D printer’s basic specs are quite laudable. Starting with a relatively large 7.8”x7.8”x7” build space, the ALUNAR Prusa i3 prints at remarkable resolutions between 50 and 300 microns and at speeds from 40-120mm/s. Like many printers, optimal resolution and speed is somewhere between extremes, but this printer’s range is commendable nonetheless.
Enjoy the use of a heated aluminum print bed and three different nozzles (0.3mm, 0.4mm, 0.5mm) which reliably reach temperatures up to 240C. Upload models to this machine using tethered USB or a micro SD card, using the basic LCD interface to manage prints once you’re connected.
More Details ❯
ALUNAR® Upgraded DIY Desktop 3D Printer Review Pros
Print Quality
It’s hard to argue with results, and when properly assembled, the ALUNAR Prusa i3’s results are shockingly good.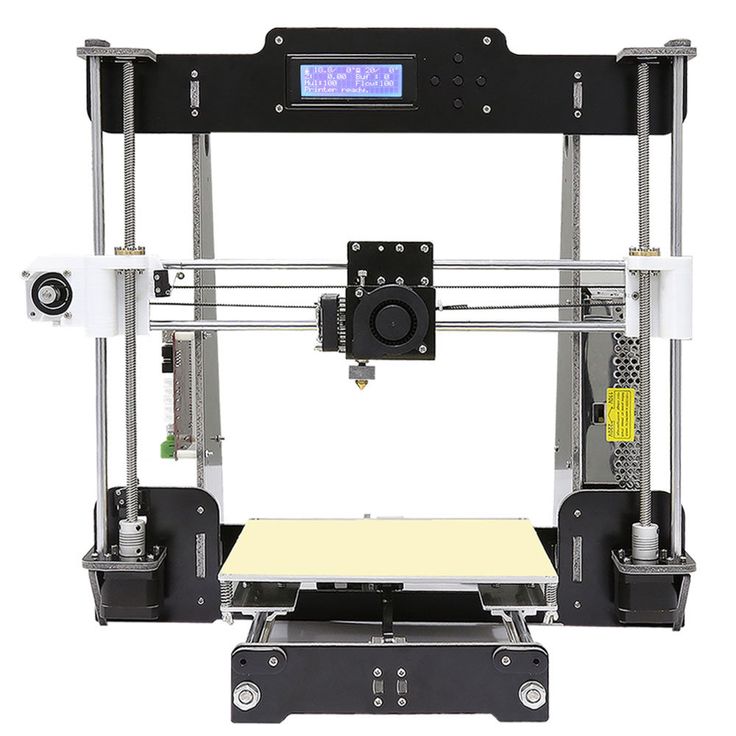 Tolerances are fine enough for pieces that fit into one another, around .4mm, while details made in “negative space” are well-rendered. We were also surprised to see that despite a lackluster extruder fan, edges and points print sharply.
Without upgrades, however, it’s worth noting that the ALUNAR Prusa i3 commonly suffers from visible waves and sometimes uneven layering. This is in large part due to the unstable acrylic frame. Luckily, this problem can be fixed with 3D printed parts.
Crazy Cheap
We’ve said it before but it’s worth repeating: the ALUNAR Prusa i3 is wildly affordable. With full-sized build space, heated aluminum print bed, multiple filament compatibility, and LCD display, this 3D printer is an excellent value by any measure.
More Details ❯
ALUNAR® Upgraded DIY Desktop 3D Printer Cons
Assembly is Needlessly Frustrating
ALUNAR is upfront with buyers that this 3D printer requires assembly, but that’s as far as they go to help.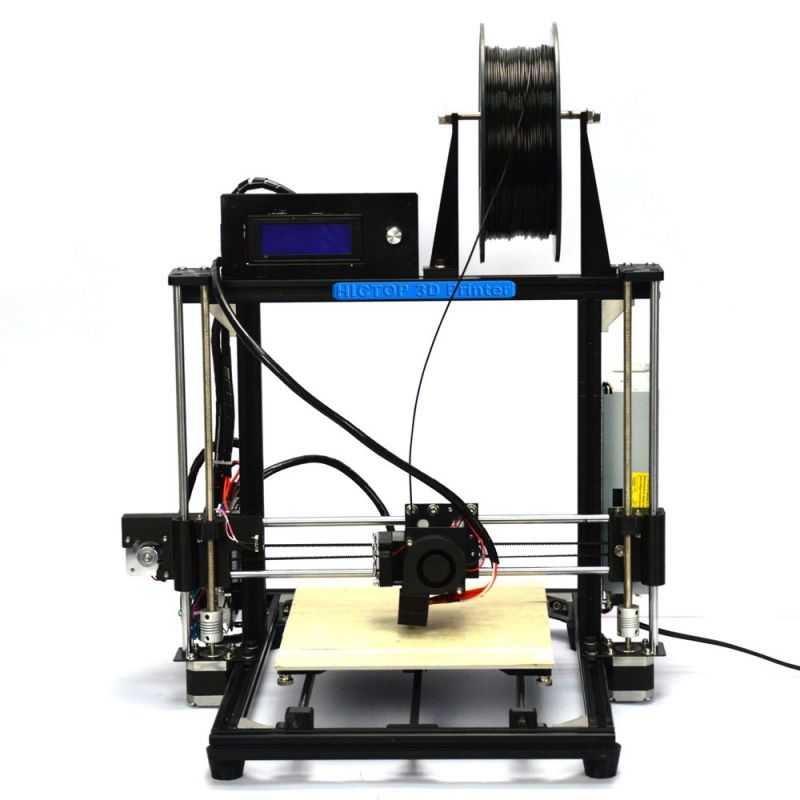 Included instructions and videos are not only outdated, they are poor-quality and confusing to follow. Even taking inventory of this printer’s parts is difficult, since they are mislabeled in the instructions!
The bottom line is that you need more than common sense to put this 3D printer together. If you do not have any mechanical experience, this project may prove too frustrating and ultimately not worth your time. Remember that even small missteps when assembling this 3D printer may result in poor print quality or much worse.
Upgrades Highly Suggested
If you’re still interested in the ALUNAR Prusa i3, you’re likely a serious tinkerer who loves working with your hands. In that case, the fact that you may need to spend days printing upgrades to stabilize and improve this printer’s performance isn’t such a bad thing. For others, however, it’s just a sign that you could save yourself the trouble by simply purchasing a more expensive machine to begin with. Consider, for example, the Anycubic i3 Mega, which costs a bit more but has similar specs and takes just minutes to assemble.
ALUNAR® Upgraded DIY Desktop 3D Printer Verdict
DIY 3D printer kits come in varying states of pre-assembly, ranging from “Paint By Number”-style simplicity to “Composite Atoms”-like complexity. The ALUNAR Prusa i3 definitely falls in the latter category, meaning it takes extreme patience and passion to complete. If that appeals to you, and the challenge of perfecting your handmade machine piece by piece is enticing, then the ALUNAR Prusa i3 is an unbeatable value.
For everyone else, the ALUNAR Prusa i3 is probably not worth the effort to build and upgrade. Don’t be enticed by this 3D printer’s rock-bottom price if you’re a beginner or aren’t prepared to dedicate many hours to its assembly.
More Details ❯
Share. Twitter Facebook Google+ Pinterest LinkedIn Tumblr Email
90,000 original review Prusa i3 MK3-the best 3D printer of spring 2019original review PRUSA I3 MK3-Best 3, D-printer of spring 2019
Writing of this original register The Prusa i3 MK3 was no easy task. Why? Because there are a lot of innovations that I want to talk about.
In February 2019, the MK3 received an upgrade to the MK3S. This is the only version you can buy in shop Prusa. It features an improved extruder, improved PINDA sensor, and other nice touches that make printing even more fun.
The original Prusa i3 MK3S is the “Best 3D Printer” according to All3dp.com and Make: Magazine, where MK3S also received an “editorial office” as a 3D printer with the highest rating in the 2019 digital manufacturing manual.
MK3S FUNCTIONALITY CAN BE EXPANDED WITH THE UNIQUE MULTI-MATERIAL UPGRADE 2.0 TO PRINT UP TO 5 MATERIALS SIMULTANEOUSLY. nine0004
Open source
First things first, this machine doesn't look too different from the old MK2 or even from many other i3 printers. Why is this design so popular? Because it is printer open source! Prusa has always published all design files for its machines, including the very first i3 that spawned thousands of derivative printers.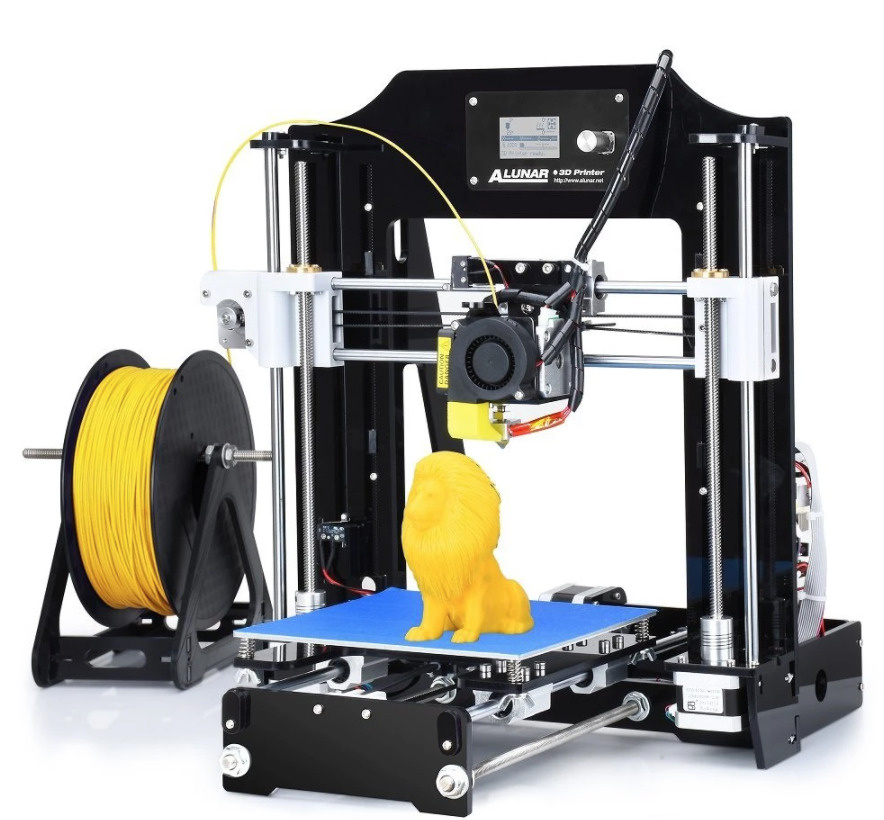
So yes, everything on this printer, from the frame, which of course is still just a metal frame, to the electronics and sensor boards, down to the firmware and improved slicer, everything now published on Github is licensed from open source, available to any person or company to use or modify their own products or projects. And it's just fantastic. nine0015
What's new in MK3?
Features & Design
After taking a closer look at our original Prusa i3 MK3 review, let's take a closer look at its features. This block is presented as a refinement of everything Prusa Research has achieved to date; it's more than just a reliability upgrade, but a new and improved desktop 3D printer with innovative technology.
Where previous models offered amazing print quality at a low price, the Prusa i3 MK3 aims to make FFF technology more intuitive and simple than before, with multiple sensors to alert users to potential problems and prevent failed prints.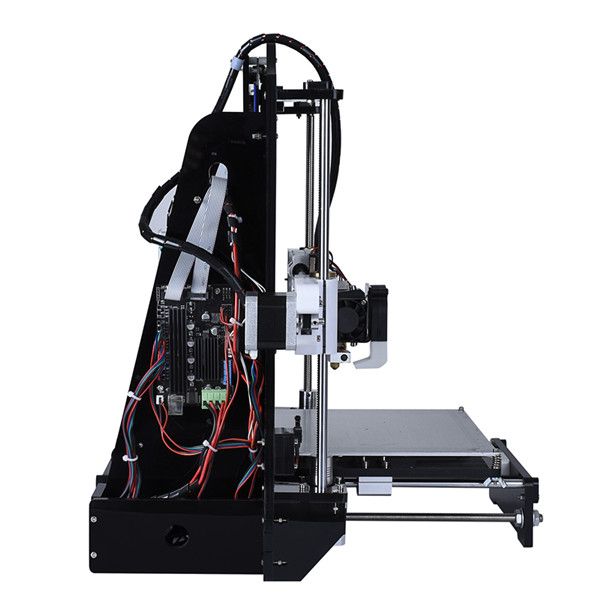 nine0015
There's more to say here, but let's summarize these new features:
- Filament Sensor
- Power Panic
- Speed sensitive fans and quieter cooling Noctua
- Ambient thermistor and PINDA 2 with thermistor
- EINSY RAMBo motherboard
- Trinamic2130 drivers with layer offset detection, fast and quiet printing
- New Y-axis
- Bondtech extruder nine0061 Magnetic Cotton MK52
- Powder Coated PEI Spring Steel Printing Sheet
- OctoPrint
Filament sensor uses an optical filament sensor to detect the presence and movement of a filament. This provides advance warning of when the filament is about to run out and the machine can pause printing and prompt the user to insert a new spool. It can also detect a stuck filament and recommend a "cold pull" to clear the nozzle and continue printing. nine0015
Other upgrades are Power Panic, where the Prusa i3 MK3 can recover and resume a print job after a power loss, and the new EINSY RAMBo motherboard, which is considered the most advanced 3D printer board for currently. How advanced is it? For example, it can monitor power, which allows it to detect blown fuses. On the other hand, it features Trinamic drivers which are very fast, quiet and can detect (and correct) layer misalignment during printing. nine0015
Elsewhere, the original Prusa i3 MK3 has a redesigned Y-axis for frame stiffness and an additional 10mm build volume at the Z-height. And there is an upgraded Bondtech drive extruder that grabs the filament from both sides to increase the pushing force of the filament and make it more reliable (especially for flexible filaments).
But perhaps the most obvious highlight of the Prusa i3 MK3 is the new MK52 magnetic heating plate that holds removable spring alloy steel sheets coated with PEI powder. When the sheet cools, it can be removed by simply bending the sheet inwards. nine0015
Setup
Whether you bought the Original Prusa i3 MK3 assembled or as a kit, the included 3D Printing Manual is a vital reference for your new 3D Printer. It contains all the necessary information about setup, calibration, printer materials and other frequently asked questions.
The steps for setting up and calibrating the machine are described in the assembly diagram below. But for advanced customization, we'd like to take a closer look at the three big benefits of the Prusa i3 MK3; panic sensor, crash detection and filament supply. nine0015
Testing these parameters on a regular 3D printer would be somewhat risky, perhaps even dangerous. Therefore, we do not recommend doing this on any machine other than the Prusa i3 MK3.
For the panic function, we connected it to a normal power supply with an on/off switch. We have started printing a model of Buddy, Prusa's pet. After about 20 minutes, we flipped the switch and waited 30 seconds before turning it back on.
And so, the Prusa i3 MK3 immediately detected a power failure and resumed printing exactly where it left off. Impressive! nine0015
Software
Oh yes, software.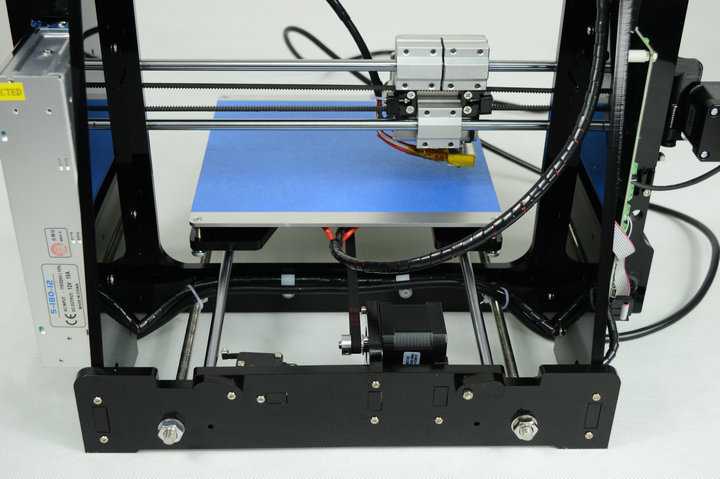 Any review of the original Prusa i3 MK3 would not be complete without discussing the software.
Simply put, users have many options when it comes to slicing their objects for printing.
The first and easiest option is PrusaControl . This is a simplified interface for coating your models. Select a thread from the list of presets, change the scale, orientation, line height and padding, and then generate your G-code. nine0015
This is a very good and efficient solution and is the software we used for most of the objects printed for this Prusa i3 MK3 review. The only downsides we could see were that if your requirements were a bit more complex then you should use something else.
For example, printing a chromatic vase requires a special "vase mode" that is standard in most other slicer software. Without it, you will end up printing a solid object that won't accept the flower no matter how hard you try. You won't find this in PrusaControl, which is a curious omission.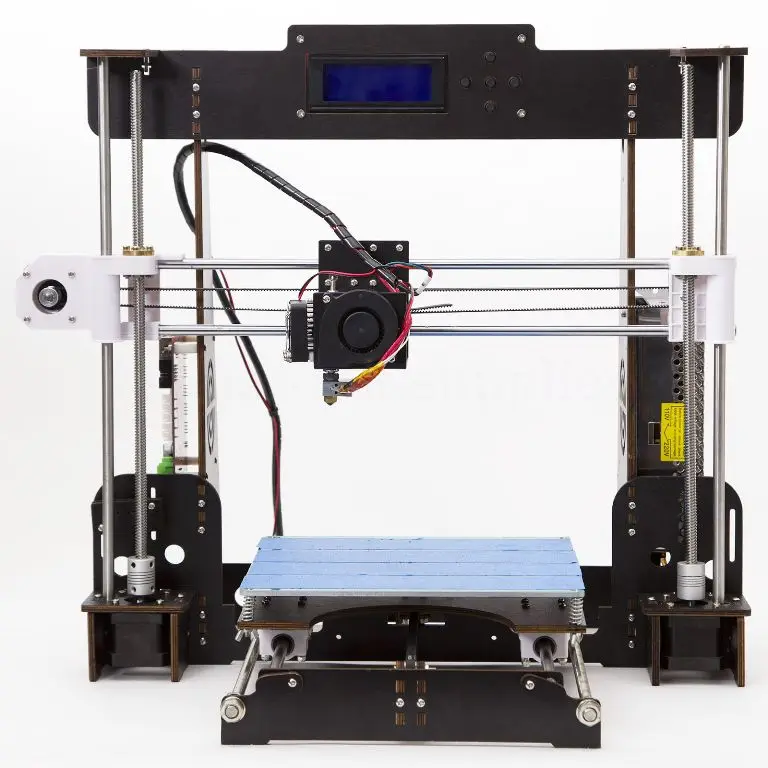 nine0015
Instead, we turned to the second, more complex option; Prusa3D Slic3r MK3. This open source slicing software definitely has a vase mode. In fact, it has one hundred and one modes to turn it on and off, and it can be a little tricky for absolute beginners. But in fact it is the same platform as the PrusaControl, except for the stabilizer wheels.
For the third option, we tested printing on a Prusa i3 MK3 using a paid software slicer such as Simplify3D. It works pretty well; it already has the required printer profile and it might be more useful if you are experimenting with custom supports. nine0015
Completion
The temptation is strong to win the Original Prusa i3 MK3 review with a perfect score of 10. This is simply the best kit for the 3D printer money can buy. It's quiet, fast, and pleasant to use.
And its technological prowess is such that it will easily surpass the 3D printer three times the price.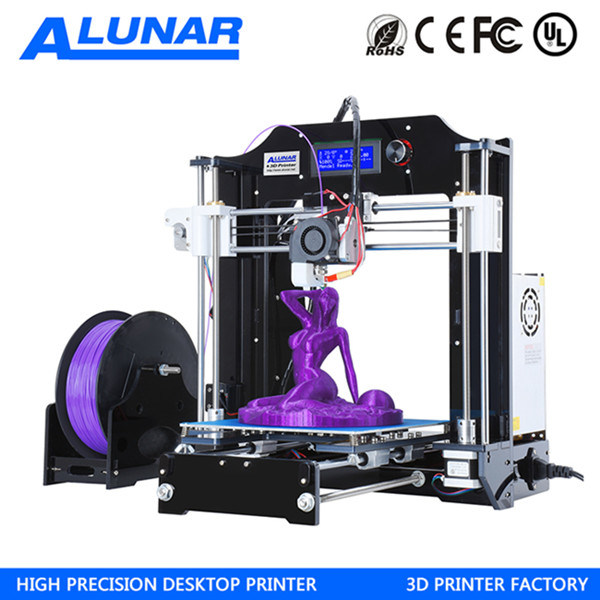 The crash detection and panic feature are great ideas that all 3D printers should offer as standard settings. And the removable print bed is something we didn't know we needed. nine0015
But we have to be objective in this Original Prusa i3 MK3 review, and there are one or two small issues holding it back. The main problem is that the filament sensor getting into the translucent filaments undermines our confidence in its operation.
Of course, this is an additional option and, of course, it does not prevent the printer from producing quality objects. And we fully expect the issue to be fixed in future production runs. But here and now, a mistake is a mistake and should not be discounted. nine0015
Are there viable alternatives to the Original Prusa i3 MK3? At this price and feature set, it would be pointless to even try. This 3D printer can be bought if you are looking for a low cost, sophisticated and market leading fused filament making machine.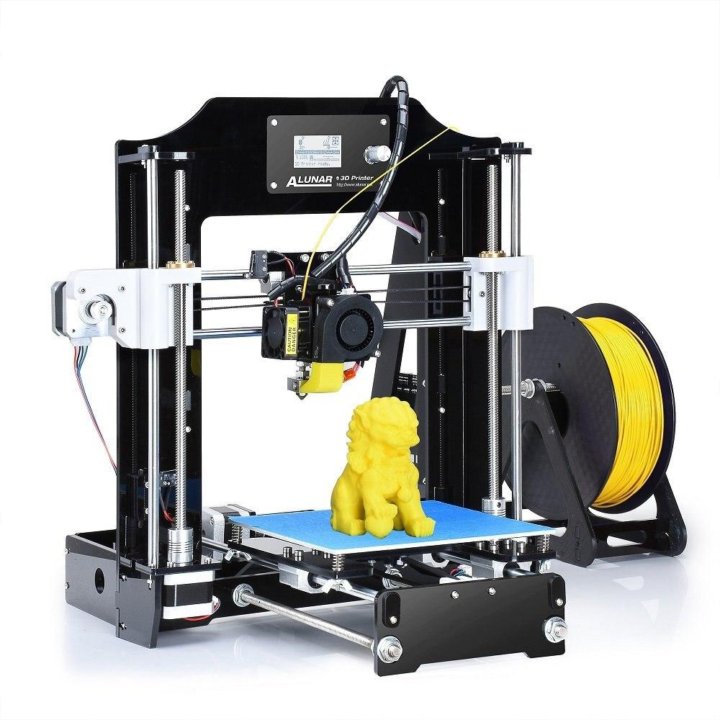
Review Prusa i3 Steel V2 by 3DiY
Choice
The idea to buy a new printer appeared quite a long time ago, because the troubles with delta calibration and the small area of the table did not allow to realize the most interesting ideas. Various souvenirs and small technical equipment are excellent, but parts with large flat surfaces are not always. There was an idea to once again send the printer for modernization, only the cost of repair with modernization named by technical support was close to the cost of the printer itself, but, unfortunately, it did not affect the size of the table ...
The main requirements when choosing a new printer were the "classic" coordinate system and ease of self-repair.
At the end of 2019, I purchased a used BiZon Prusa i3 Steel version 1 to get familiar with the construction of Prusa i3 printers.
In general, I liked the design. The frame is very strong, the components are standard and easily accessible. But a lot of little things, such as a printed extruder mechanism, Phillips screws, inconvenient stage adjustment, studs on the Z axis and linear bearings fixed with cable ties spoiled the impression...
After almost a year of using it, I decided to buy an updated version of the printer - Prusa i3 Steel V2. I learned most of the information about the new version from a wonderful review from Anatoly Yunakh. Taking into account the shortcomings that I encountered in the first version of BiZon, I asked to assemble a new printer immediately in an improved configuration, as well as with some assembly features. The 3DiY manager agreed, for which many thanks to him!
Unpacking
The printer is packed in a large carton. I asked to better wrap it with a film to protect it from rain. In addition, Business Lines used additional packaging when transporting between terminals. nine0015
The printer just sits in the box, but wrapped very well! Although, it would be nice to make a lodgment from foamed polyethylene.
Package
In addition to the box with the package, they sent me a gift PLA spool, which I did not expect when ordering a printer with changes ... A pleasant surprise!
In my case, this is black PLA Ecofil.
Box contents:
- Mirror.
- Power cord.
- USB cable.
- Clips for mirror.
- Probe 0.2 mm thick.
- Replacement driver A4988.
- Spool holder.
Choice of components from the list of possible improvements
- 32-bit SKR v1.3 board. I chose it largely because of the ease of updating the firmware.
- TMC2208 drivers on X, Y and Z axes. I would choose 2209 for all axes and extruder, but at that time they were not in the catalog...
- Thread end sensor. A very necessary thing!
- Trapezoidal screws Ø 8 mm (instead of default 5 mm).
- Double sided airflow.
- New screen with a beautiful handle.
Assembly Features
- Allen screws and washers were used in the assembly so that the screws do not damage the paint.
- X and Z axis bearings mounted with lubrication holes facing out. Moreover, the assembler even installed valves for lubrication (except for the lower X-axis bearing, otherwise the valve would hit the table). nine0062
- The wires to the heater and thermistor are in one braid, and the wires to the fans are in another.
Z axis bearing with valve and acme screw...
Same on the other side. By the way, the screw entering the slot of the optical limit switch dangled a little and I replaced it with such a design...
By the way, the washers are installed with their smooth side to the frame so that the sharp edges do not damage the paint.
Rear-side view. nine0015
First run
After adjusting the gap in the corners, loading the plastic and applying glue to the mirror, I printed a small test model that was on the SD card. With the TMC2208 drivers, the printer works so quietly that I went up several times to check if it prints...
Result...
It's not clear why a mouse was recorded as a test model, and even not with the most beautiful settings ... Later, for the sake of interest, I sliced it in Cura Arachne engine beta and printed it in normal quality ...
Small problem
The test model was successfully printed and it would seem, what could be wrong? And during the next calibration, when I checked the gap not only in the corners, a noticeable bump was found in the middle of the left side of the table, and no matter how hard I tried, it was impossible to achieve the same gap over the entire area. The mirror did not solve the problem. ..
..
I decided to contact technical support with a request to send a modified firmware with 25 calibration points. Sent very quickly! Having set up the table in this way a couple of times, I asked to reduce the gap setting step from 0.025 to 0.01 mm. The problem was solved! nine0015
Impressions
Great design! Much better than the first version! It's great that 3DiY can assemble the printer with modifications and configure the firmware at the request of the user.
Cons: I got an uneven table. Perhaps it's just a coincidence..
Wishes for the following printers:
1. I would like to see a board with connectors for hotend, thermistor, fans and a stepper motor on the carriage! This will greatly simplify the replacement of fans and maintenance of the extruder. You can use BLK boards like on UNI printers. nine0015
2. I propose to install 4 quiet drivers by default, completely abandoning the A4988.