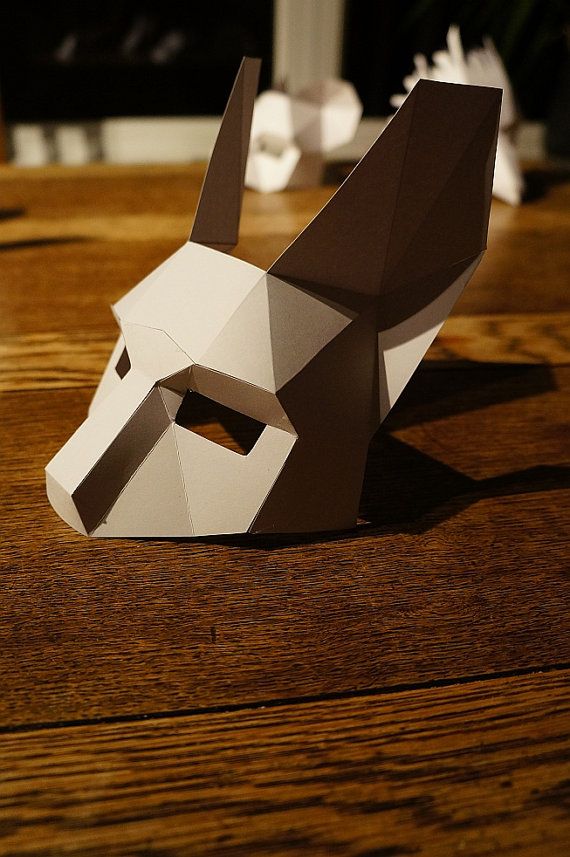
Make your own 3d print design
New 3D printer? Here's how to create your own printables
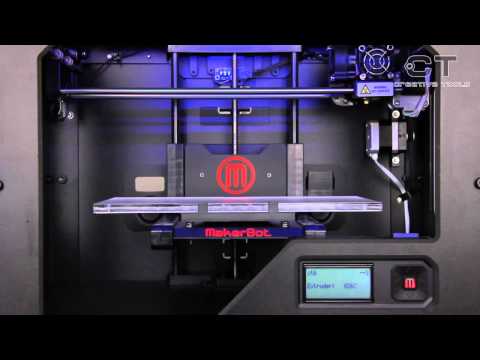
Recently I got the chance to spend some time with a Micro 3D Printer, my first foray into the world of turning a spool of plastic filament into, well, just about anything.
I had lots of fun downloading existing designs from sites like Pinshape and Thingiverse, but eventually I wanted to create objects of my own. Unfortunately, I don't have a degree in CAD or access to any kind of 3D-design software.
Good news: Turns out you don't need either one. Autodesk's Tinkercad is a free Web-based design tool that enables you to create 3D objects, then download those creations in a printer-friendly format. Here's how to get started.
Step 1: Head to Tinkercad and sign up for a free account using Facebook, Twitter or your e-mail address.
Step 2: The service will immediately walk you through a lesson to help you learn basic navigation, followed by another lesson that teaches camera controls, and so on. It's a good idea to go through all of these, just to familiarize yourself with the environment.
Step 3: When you're ready to create your own object, return to the Tinkercad dashboard, then click Create New Design. The tool will immediately send you to the design page, complete with a randomly assigned (and often amusing, like Tremendous Snaget-Fulffy) name for your project. You can change the name by clicking Design > Properties, though this can happen at any point along the way.
Step 4: Now it's time to start assembling your object. The toolbar on the right side is home to a wide assortment of prefab shapes you can drag to the workplane and modify as needed. (You can also import existing SVG (2D) or STL (3D) shapes if you have any.) For purposes of our tutorial, click Geometric, then drag the Hexagonal Prism to your workplane.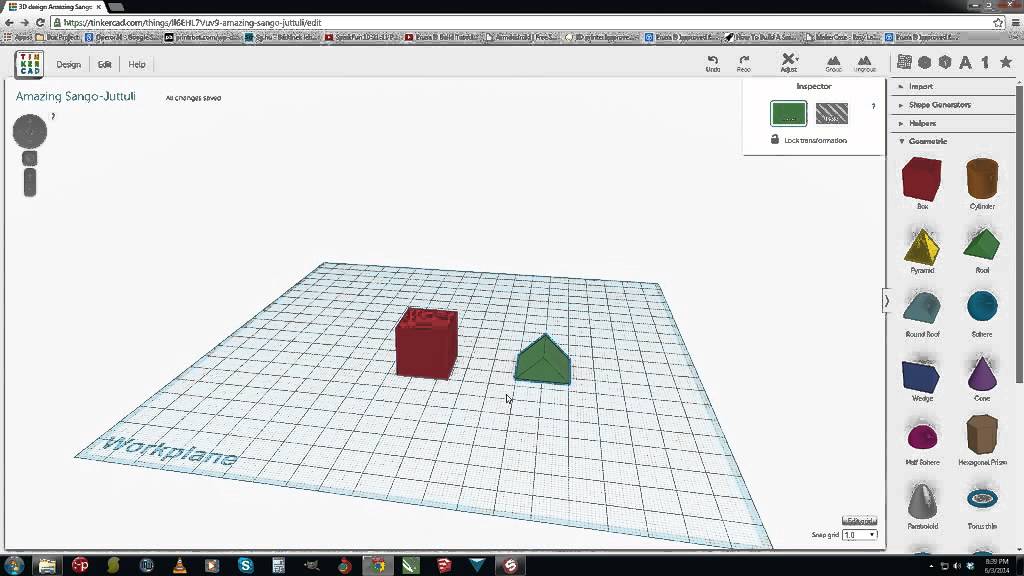
Step 5: Notice that the shape has five white "handles": one at each corner and one in the center at the top. When you mouse over any of them, you'll see corresponding measurements appear. Click and drag any of the corners to resize the prism in that direction; click and drag and center one to adjust the height. (The thing that looks like a black teardrop above the center handle is used to raise and lower the object relative to the workplane.)
Enlarge Image Screenshot by Rick Broida/CNETStep 6: As you add and modify more objects, remember the size of your 3D printer's print bed and build accordingly. When you're done, click Design > Download for 3D Printing and you'll immediately get an STL file you can load into your printer. (As you'll see, Tinkercad also has options for Minecraft versions, ordering 3D prints and uploading to Thingiverse.)
And that's all there is to it. This is a great place to start creating 3D objects to print.
Before you get back to it, here are some quick tips for the Tinkercad beginner:
- Use your mouse wheel to quickly zoom in and out.
- Click and hold the right mouse button, then move your mouse to change the viewing angle.
- After selecting an option, you'll see an Inspector window. Click the Hole option to make that shape "pass through" any solid shape. That's how you would, for example, create a cylindrical hole down the center of your prism.
- To make finer adjustments to object placement, click the Snap grid pull-down and choose a number smaller than the 1.0 default.
Have you found another good tool for creating 3D printer-ready designs? Name it in the comments!
What software to use for 3D printing: The complete guide
David Roberson13 May 2021
Guide
Before starting to 3D print, you will need to make sure you have gathered all the necessary software “ingredients” that will guide you through the printing process, from preparing your 3D model to managing printers themselves.
These include:
CAD software to create a 3D model (you can also use an existing 3D model, if you do not wish or need to design one)
Slicing software
Software to operate your printer remotely (this is optional, but can be convenient)
This article will go through each of these ingredients, and will also touch on how the Ultimaker platform creates a seamless end-to-end flow between hardware, software, and materials, empowering you to unlock the magic of 3D printing and make innovation happen.
What is a “slicer”?
A 3D printing slicer – also known as slicing or print preparation software – is a program that converts a 3D model into a language your 3D printer understands.
Slicing software, such as Ultimaker Cura, digitally cuts a model into flat layers, which your printer can then print one by one. With the Ultimaker platform, however, slicing software is not always needed, thanks to integrations that allow you to print directly from CAD or the Ultimaker Digital Library.
Preparing a 3D print using Ultimaker Cura software
What is the best CAD software to design 3D prints?CAD, or computer-aided design, software enables you to design a 3D model from the ground, up. There are many types of CAD software, each with its own benefits. AutoCAD, created by Autodesk, is perhaps the best-known among them since it was one of the first CAD software programs available for personal computers when released in 1982. Other CAD platforms include:
Fusion360 – great for designing and creating efficient mechanical parts
3ds Max – used in all types of 3D model creation, including video game design, architecture, and 3D printing
TinkerCAD – A free, browser-based CAD tool that allows users to build 3D models out of various shapes. Popular with CAD novices and for STEAM education
Blender – free, open-source 3D model creation software
Siemens NX – for designing and creating advanced 3D models
Solidworks – for designing and creating professional parts for industrial use
Catia – Advanced design software used for creating surfaces and engineering systems
Before you begin 3D printing, be sure to do your research and pick the CAD software that’s right for your use case. This way, you’ll get the most out of the model you choose to design and print.
Also check which file types your slicing software is compatible with, so you can make your 3D designs into 3D prints.
A design in CAD software (left screen), slicing software (right), and the finished print
How to design parts for 3D printing?
When designing for 3D printing, there are best practices to help you get the best results from your 3D printer and the parts it creates. Design parts optimized for 3D printing will improve print success rates, reduce costs through lower wastage, and boost the speed of your product development cycle.
Consider build volume. Your 3D prints can only be as large as your printer’s build volume. Be sure to know its dimensions, then create a part that can either be printed within those dimensions in one go, or plan to use modularity (printing then combining separate parts).
Decide orientation early. Because FFF prints layer by layer, determining the print orientation early in the process helps drive design choices, text alignment, and snap features.
Evaluate overhang support requirements. FFF printed parts are self-supporting up to 45 degrees. Overhangs below 45 degrees must be supported from below with support material.
Follow bridging support guidelines. For most basic filaments, FFF printing does not need support when bridging materials within a 10 mm gap.
Pay attention to nozzle size. When designing small features, you should consider height, wall thickness, and nozzle size. Larger nozzles will print faster than smaller nozzles, but at a cost of increased minimum thickness and height for your models.
Design with hole diameters in mind. Generally, 3D printed hole features should not be smaller than 2 mm. If accurate holes are required, it is recommended to design the holes smaller than intended and post-process with a drilling operation.
Avoid sharp corners. Sharp corners can be modelled in CAD, but the print may warp. Increasing the area of the surface in contact with the bed will decrease the likelihood of the warpage./cdn.vox-cdn.com/uploads/chorus_asset/file/19698917/Screen_Shot_2020_02_05_at_11.41.28_AM.png)
For a deep dive into these factors and more, check out our blog on design for 3D printing.
What software do I need to start a 3D print?
This depends on how much of the 3D printing workflow you need to perform.
As long as you already have access to a 3D model, you will typically need software that can slice that model, so your printer can get to work. Once you have started to print, you can also use software to manager your 3D printer (or printers) remotely.
But as we saw earlier, the slicing step can be avoided if you have a 3D printer integration installed in your CAD tool. If you already have access to a 3D printable file (such as a G-code on a USB stick) you can also go ahead and print without the need for any slicing software, as your digital file is already ready to print.
Controlling 3D printers remotely with Ultimaker Digital Factory software
Managing 3D printers remotely
Ultimaker S-line printers, the Ultimaker 2+ Connect, and the Ultimaker 3 can make use of a network connection to access cloud-based services on Ultimaker Digital Factory. By linking a printer to your Ultimaker account, your printer can then be controlled remotely, from outside of its local area network.
Want to learn more about 3D printing software?
Download our free white paper, “Important 3D printing software features,” which will help you determine the best 3D printing software for your business needs, as well as examine settings, print profiles, and other features that can help you get the most out of your printing experience.
Get the white paper
🌐 Best Files for 3D Printing Brand Logos・Cults
🌐 Best Files for 3D Printing Brand Logos
Download Files for 3D Printing Famous Logos
Obviously, the 3D designers of the Cults community are fans of design in general and therefore love logos. Therefore, they have recreated many international brand logos in STL format so that they can be easily 3D printed.
Popularity Rating
Superhero key rings
Free
HARRY POTTER LOGO
Free
FORTNITE LOGO
Free
LOGO DISNEY
Free
Minecraft 3D logo
Free
Logo marvel litofania
Free
Dodge Ram Logo Sign
Free
FORTNITE Logo Lamp
Free
LOGO FUNKO POP
Free
STAR WARS Logo Lamp
Free
LOGO ASTERIX
Free
yves saint laurent logo
Free
LOGO THE 100
Free
Marvel Avengers Logo
Free
A tribute to NETFLIX
Free
Silhouette Sailor Moon
1,17 €
LOGO OBELIX
Free
NASA LOGO BADGE 3D
4 €
Back to the Future Logo
1. 17 €
17 €
Pokemon logo
1.17 €
Mandalorian Logo
Free
NASA Logo
Free
LOGO SOLEX
Free
Metallica logo
1.17 €
Hot Wheels logo.
€1.17
The Mortal Kombat 11 logo is a standing sign!
Free
LOGO ONE PIECE
€1.50
Yu-Gi-Oh! Logo
€1.17
ThunderCats logo
1.17 €
Gundam Logo
1.17 €
Atari logo
1. 17 €
17 €
LOGO THE FIFTH ELEMENT
Free
The Walking Dead Logo
Free
YouTube Logo
Free
Iron Maiden Logo
Free
Logo Cults.
Free
logo "stranger things"
0,80 €
Teenage Mutant Ninja Turtles LOGO
0.85 €
Dragon Ball Z logo
1.17 €
LOGO DBZ
1.02 €
god of war logo
0,70 €
halo 5 logo
Free
warzone logo
0,70 €
naruto logo
1 €
naruto headset stand
1 €
sonic logo
1,25 €
Benfica logo
1. 60 €
60 €
NETFLIX LOGO
0,50 €
Minecraft 3D logo
FORTNITE Logo Lamp
Minecraft 3D logo
Dodge Ram Logo Sign
Check out our selection of best 3D logo files for 3D printer . All these STL files are easy to 3D print , so just download them, start your 3D printer and choose the print color. This collection has been created by selecting the best creations from the Cults 3D object library.
Behind every brand logo is an intense thought, maximum application and rationalization of every gesture. Each small element should show a certain brand value, color and shape play a major role. These elements are sometimes invisible, but they play an unconscious role in your perception of these brands. Whether you like or dislike the brands in question, it's still interesting to understand the meaning and different meanings of their logos.
3D printing is increasingly important for big brands , but also for small professionals. Through 3D modeling, they can create and 3D print their own logo. This is a great opportunity to develop your marketing, now you can 3D print a keychain with your own logo or give life to your talisman.
In this collection you will find many logos of big brands such as Apple, Nike, Adidas, Amazon, Fortnite, Star Wars, BMW, Audi... but you will especially love the Cults logo! By the way, if you want to know more about the meaning of our logo and name, here it is: Cults is an anacycle: if you read it backwards, you get Saint-Luc, the patron saint of painters and sculptors. If you read it backwards, you get .stl, the 3D format dear to all designers. And if you look closely at our logo, it's 3 D's inside each other!
how to make your own skateboard using generative design and 3D printing
This year, a young German designer Philipp Manger came to the Autodesk University Russia 2017 conference. He is the author of the T.O.S.T (Topology Optimized Skateboard Trucks) project, a skateboard with a unique suspension, which is designed using generative design and printed with titanium on a 3D printer. In an interview prepared for 3Dtoday with the participation of our friends from Autodesk, Philip talked about why he chose these technologies, what materials and software turned out to be the most suitable, and also shared his vision of the prospects for additive manufacturing.
Let me start by congratulating you on your well-deserved victory in the 3D Pioneers Challenge. Tell our readers a few words about yourself: who are you and what do you do?
In fact, I have received several awards. After the 3D Pioneers Challenge, I was nominated for the TCT Awards ( an award established by TCT Group, one of the leading international accelerators of 3D technology - approx. ) in the "Consumer Product Application" category, along with companies such as Carbon.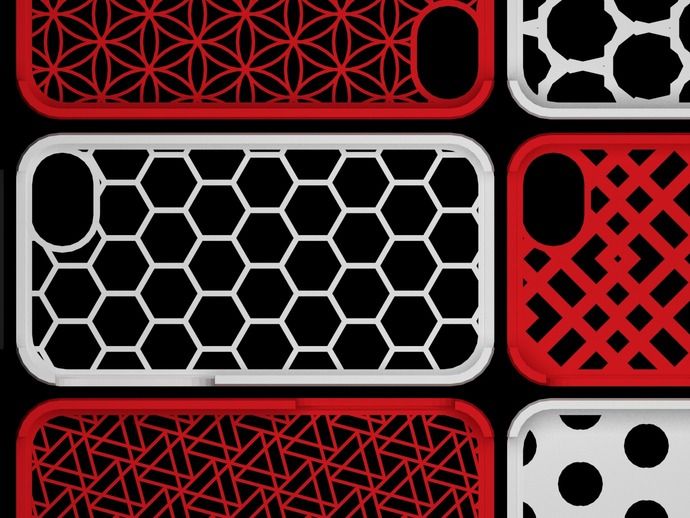
I study additive manufacturing and generative design at the University of Applied Sciences in Jena. I also worked for several companies producing various equipment, participated in the development of steering columns for Mini Cooper and BMW cars. I live in Germany and the company is located in Liechtenstein, so I had to move there for a while. Now I'm doing my research again and at the same time I'm working for a skateboard company.
Why did you choose a skateboard as your project?
First, I did research on additive manufacturing as part of my research projects. Secondly, this is my job, I design skateboard hangers. And thirdly, I really like to ride them ( smiles at ).
Tell us a little about the construction of the skateboard: what materials and 3D printing technologies were used? Did you have access to production facilities, or were the parts printed to order?
Skateboard printed in titanium using SLM technology. I was helped with production by the Fraunhofer Institute for Machine Tool and Molding Technology, which houses the most famous research community in Germany. They made it possible to use their equipment not only for 3D scanning and 3D printing of skateboard elements, but also for testing. My employer provided their skateboards for comparison.
How long did it take to design and build from idea to finished product?
The whole project, from idea to production, took a year. The design took about three months. During this time, I collected data using sensors, created a suspension model, and conducted several tests. The production took about 32 hours. In the future, I plan to make another version of the skateboard.
As far as we know, this skateboard is an example of generative design. What software did you use and what determined your choice?
I used Autodesk Netfabb software and Autodesk Fusion 360 cloud CAD. I created models in Fusion 360 and it saved me a lot of time. Topological optimization requires a lot of power and performance of a PC, and a cloud service allows you to simply upload a project to it. Just in time to start working on T.O.S.T, Fusion 360 had topological optimization tools that I liked. I have worked with 25 different load patterns and this feature has helped me get everything done very quickly. To optimize the internal structure, I used Netfabb and with its help I prepared the model for 3D printing.
Do you think it is possible to achieve similar results without the use of special software, and if so, how much would the time cost increase approximately?
I think it would be impossible. Of course, there are other topological optimization software out there, but it would likely take much longer to work with, simply because Fusion 360 allows you to do everything in the cloud. Without this, the project timeline would certainly have increased by several months.
Is there any commercial background in your project or is it just a demonstration of technology and your own skills?
I don't have any commercial plans yet. The first goal of the project was to explore the possibilities of hybrid design - in the sense of the combined use of topological optimization and optimization of the internal structure of the product. But I think that in 5-10 years there will be many projects, including commercial ones, made using this technology.
Have you ever tried to ride a skateboard, and if so, how did it feel?
Yes, of course, I rode it. The main thing that distinguishes my skateboard from any traditional one is that it is 20% lighter, while being just as durable. And of course, riding your own made skateboard is amazing!
How would you rate the future of additive manufacturing in the near and long term?
I am sure that additive manufacturing will have a huge impact on the development of many industries. In fact, this is already beginning to happen - it is increasingly being used not only in the "heavy" industry, but also by manufacturers of household items. Take Adidas, for example, which plans to mass-produce 3D printed sneakers. I think within 5-10 years most manufacturers will be using 3D printing to create customized products. That said, traditional methods will continue to exist - I don't think mass production is possible without them. That is, 3D printing will not completely replace them, although it will take a significant piece from them.
Finally, would you like to say a few words of parting words to the makers of 3Dtoday, no doubt impressed by your work?
The main thing is to literally burn with passion for your project. Do not be afraid to embody any ideas. If you believe in what you are doing, you will definitely get support. Well, do not forget to attend various events, make acquaintances. This is much more useful than simple letters ( smiles ).