3D scanner and printing
How to Choose the Best 3D Scanner to Use With Your 3D Printer
3D scanning has an important place at the beginning and end of 3D fabrication workflows. Engineers, product designers, and researchers use 3D scanners as a faster and more efficient way to start constructing digital models, whether by incorporating existing designs via reverse engineering, digitizing hand-sculpted clay designs, or referencing the exact shape of the human body.
After fabrication, 3D scanning can support quality control and help to verify the accuracy of a 3D printed part, or, after the part has been used, a scanner can reveal how it’s performed—a scan of a deformed part can show you where to reinforce the design in the next revision.
With such a wide range of product options from handheld 3D scanners to desktop 3D scanners, it can be difficult to choose the best 3D scanning system that’s right for your application and budget. In this post, we explore the most important factors to consider when purchasing a 3D scanner and showcase some of the key applications that are empowered by combining 3D scanning and 3D printing.
White Paper
3D scanning and 3D printing workflows can be applied to replication and restoration, reverse engineering, metrology, and more. Download our white paper to explore these applications and learn how to get started.
Download the White Paper
There are multiple scanning technologies currently on the market, all offering their own advantages and weaknesses.
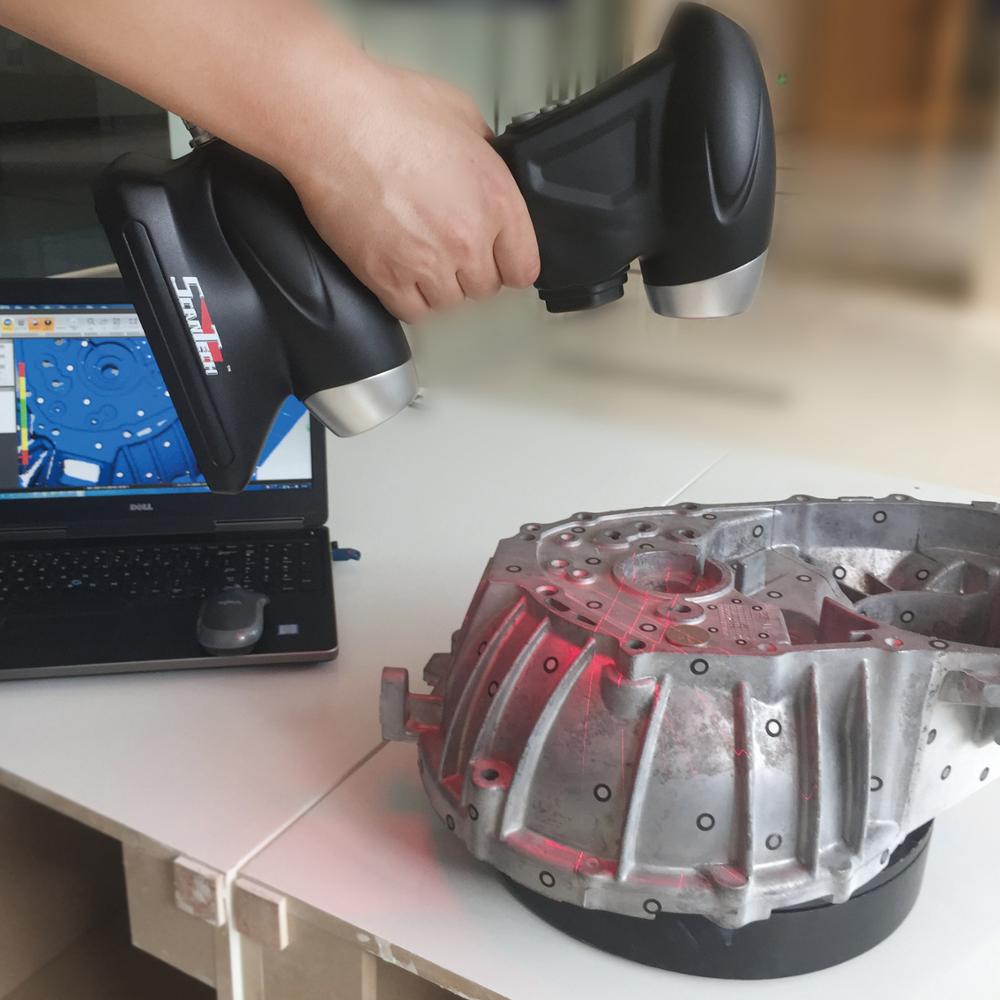
Laser triangulation uses light projected onto the object to take up to millions of measurements (dots) per second. The light reflected from the dots back into the scanner’s sensor to help it capture the geometry of the object. These types of scanners are often the most accurate, and are great for highly detailed parts that have opaque surfaces.
Laser triangulation scanners do have limitations. For example, this technology is not used in most portable scanners because the laser dots need to project from a stable source, and the source has to be kept a close distance from the scanned object. Laser triangulation scanners don’t always work on transparent or shiny surfaces either. Typically, they require reflective markers to be applied onto the object, which need to be removed after use and can be an obstacle depending on the object being scanned.
Finally, the laser dots can be harmful to human eyes, so it is important to use extra safety precautions when scanning body parts with a laser triangulation system, or to check with your scanner manufacturer to make sure the device is eye-safe.
Structured light scanners (also known as white light scanners or blue light scanners) generally use a projector with two cameras at angles on either side. A pattern of light is projected and laid over the component being scanned, the cameras capture the ways in which the object deforms the light pattern, and then multiple images are integrated into a single 3D snapshot.
Structured light scanners are available in both stationary and portable format—the technology is the most commonly used process for handheld 3D scanners.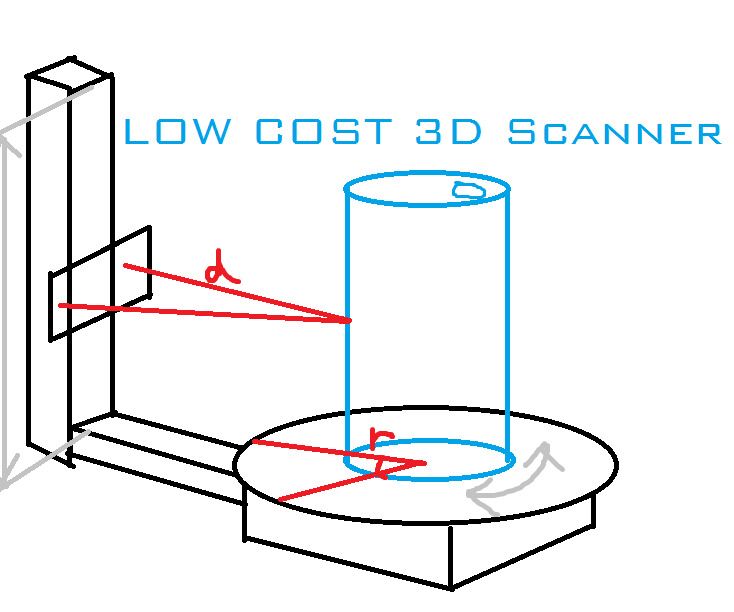 Structured light scanners are far more common in medical applications, since it is safe to use on both humans and animals and excels when an object is not perfectly still. Traditional white light scanners have been slower to scan than laser triangulation scanners.
Structured light scanning is the most commonly used technology in handheld 3D scanners.
Depth-sensing cameras project a field of dots in infrared (IR) to sample a 3D scene. Depth-sensing cameras are simple to use and are the least expensive scanning option, but their accuracy and resolution are low, and fine details are sometimes lost. Large objects may be captured with depth-sensing cameras, but accuracy declines with increased distance from the subject and at steeper angles to the camera.
Photogrammetry means the act of deriving precise measurements from photographs. It involves taking a set of overlapping photos of an object, building, person, or environment, and converting them into a 3D model using a number of computer algorithms. This is the most commonly used method when creating a 3D scan with a smartphone, since modern phone cameras are capable of capturing and combining a large numbers of photos. Photogrammetry should be considered the least expensive and least accurate method for creating 3D prints, and is not suitable for serious business applications.
LiDAR (light detection and ranging) sensors can be found on some higher-end smartphones and tablets, such as the latest versions of the iPhone Pro and the iPad Pro. This has made the iPhone and iPad viable scanners for those with only occasional scanning needs, offering performance a step above devices that only have access to photogrammetry. Applications that generate 3D mesh files via your smartphone’s or tablet's camera should be seen as the floor for entry-level scanning; users should expect additional work in their CAD software to remove gaps in meshes and improve the 3D model for applications like sending it to a 3D printer. Smartphones use fewer light points when scanning objects, resulting in less detail than a true, stand-alone scanner.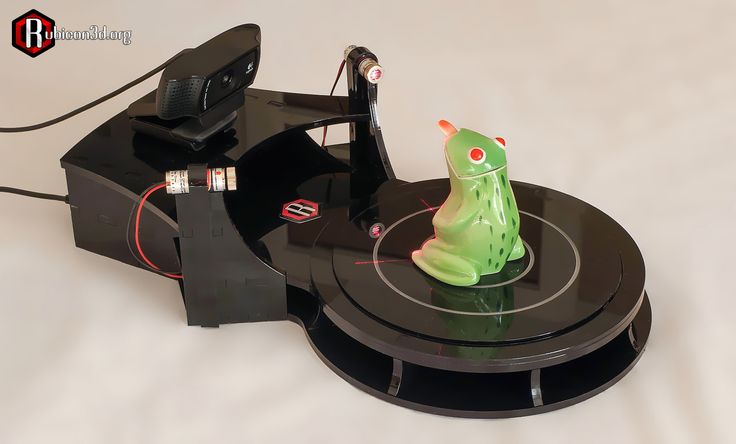 iPhones are good substitutes for scanners if you have significant CAD design ability or need to transfer basic models into a digital space.
WEBINAR
Watch this webinar with Peel 3D to explore how to integrate 3D scanners into your 3D printing workflow to elevate your product development process.
Watch the Webinar Now
Scan accuracy varies considerably between scanner technologies, and higher accuracy generally comes at a higher cost. The required tolerances of your final part can be a helpful guide for determining your accuracy requirements for a 3D scanner.
| High Price, Highest Accuracy ($15,000 and more) | More Affordable, High Accuracy ($12,000 and under) | Low price, Low Accuracy |
|---|---|---|
| Zeiss T-Scan Hawk Scantech Simscan EviXscan Optima+ M Creaform HandyScan 307 Silver Series | peel 3d peel 1, peel 2 & peel 2-S FARO Freestyle 2 Polyga Compact S1 | iPhone Pro and iPad Pro Structure Sensor Matter and Form 3D Scanner V2 Revopoint POP |
With accuracy in the range of 0. 1 mm or better, laser and structured light scanners are a good fit for professional applications and alongside high-resolution 3D printers. Formlabs stereolithography (SLA) 3D printers (such as the Form 3+) produce parts at a similar accuracy, and with a similar printable area, to the scan volume of many desktop 3D scanners.
Besides the accuracy between measured points and their actual location, scanners also vary in terms of resolution, which is the distance between captured points at a given scan distance. This means that details on the scanned object that are smaller than the scanner’s resolution won’t be captured. For example, a highly accurate 3D scanner with a lower resolution might detect the general shape of jewelry on a statue, but not clearly show individual details on a ring or necklace. Depending on your project requirements, this may or may not be a dealbreaker.
An easy way to remember these metrics is: accuracy is the measurement error between the part and digital value.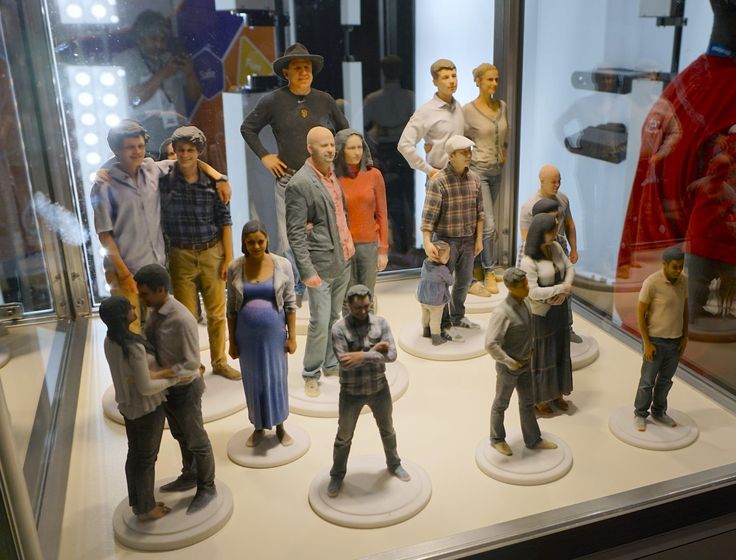 Resolution refers to the density of measurements.
Accuracy can mean slightly different things depending on the manufacturer and 3D scanning technology. For example, the accuracy of handheld scanners depends on the distance to the subject and the quality of scan reconstruction, while desktop scanners have consistent accuracy within the constrained scan volume. If you are considering buying a 3D scanner for precise measurement, make sure to compare like to like.
In general, structured light scanning provides the best resolution and accuracy when compared to laser scanning. For some artistic use-cases for 3D scanning you may need a lot of detail, while overall accuracy is less important—especially if you don’t require your part to fit precisely with other parts in an assembly. In these cases, photogrammetry is an excellent low-cost option to explore.
Both depth-sensing cameras and photogrammetry are a good solution for scanning large objects in order to create 3D printed scale models and also offer enough accuracy for capturing the shape of the human body.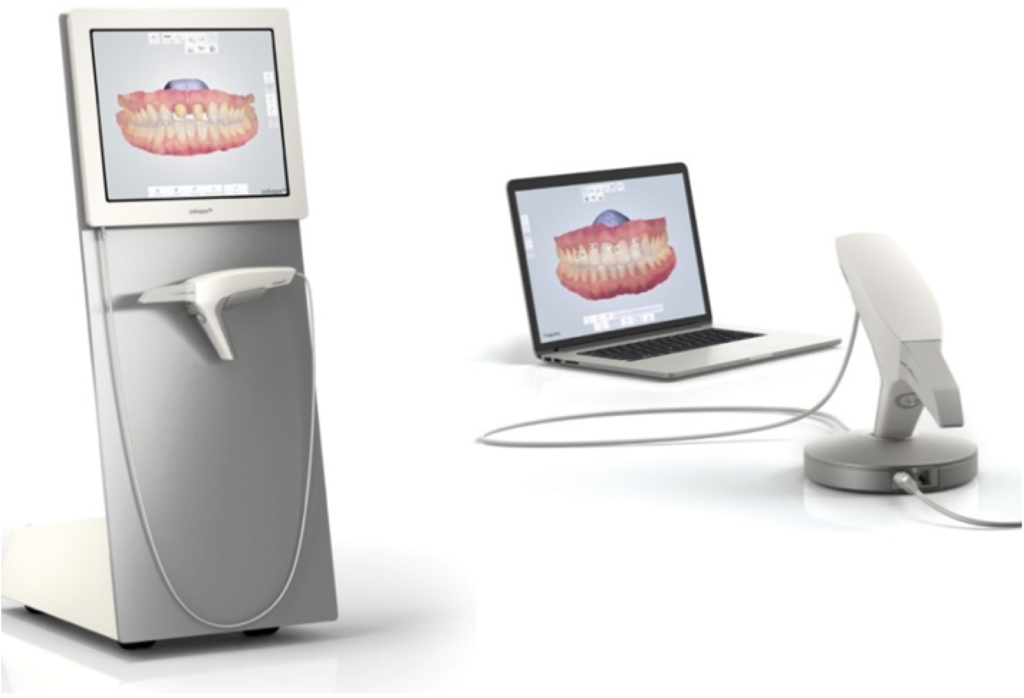
Several entry-level laser scanners are available using technology similar to higher-end systems. These scanners are a great way to start replicating small objects at 1:1 scale. As one would expect, the accuracy of entry-level laser 3D scanners is lower than a high-end scanner, but they can easily provide enough detail to replicate small decorative objects and figures where accuracy is not critical.
If you only have occasional 3D scanning needs, digitization services can scan your object, as well as perform CAD translation and accuracy inspection.
The area that a 3D scanner can capture varies significantly between scanners. Find a scanner that fits your size and resolution requirements without too much overhead, as cost typically increases with scan volume.
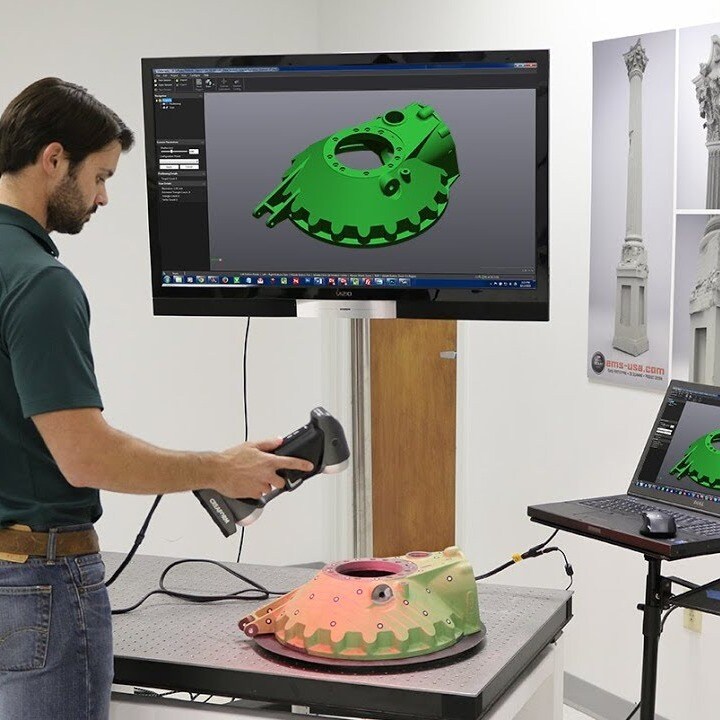
Handheld scanners can be manually moved around the object and have fewer size constraints than desktop models. Most inexpensive handheld scanners can capture objects from the size of a basketball to an entire room.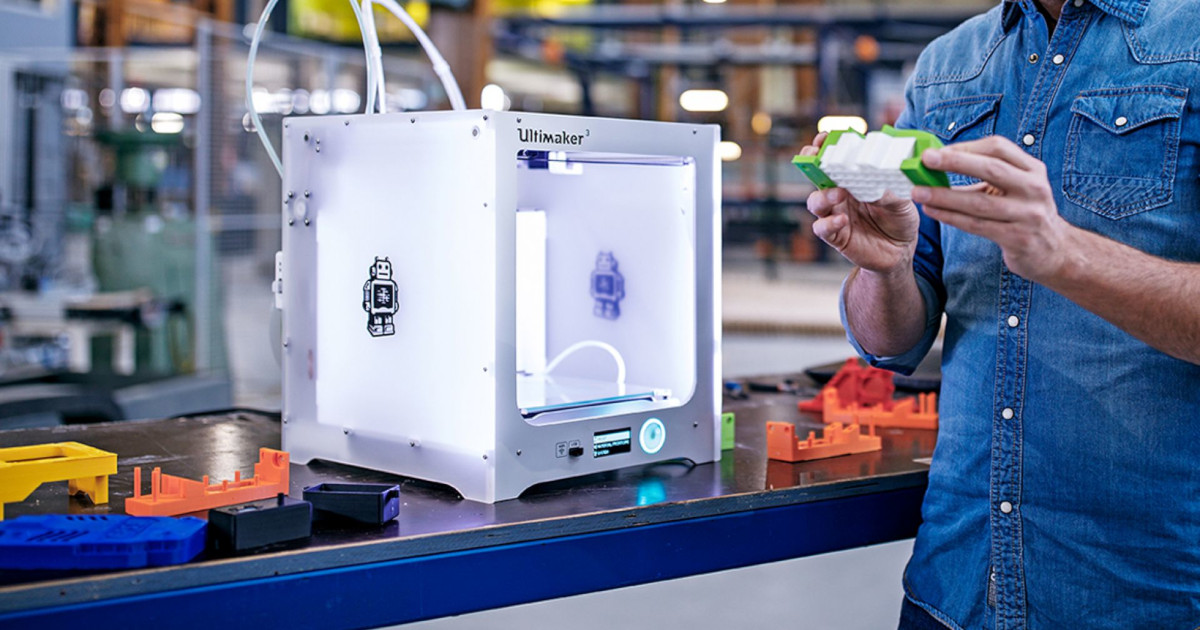 High-end handheld scanners have an even wider range, and fill the niche for all objects that require precise measurements, but cannot fit in a desktop scanner. Handheld scanners are also able to capture objects nearly instantaneously, which makes them well-suited for taking human measurements (where the subject is not perfectly still) for ergonomics and medical applications.
If the area of the model can’t be seen by the scanner, it will cause a gap in the model. You can automatically repair small missing sections with most scan software programs to create a 3D printable model. However, repaired holes are rarely accurate to the original object. For parts that demand close to perfect accuracy, auto-repair of gaps or holes will not be sufficient. Read our MeshMixer tutorial for advanced tips to edit and repair 3D files for 3D printing.
Many scanners use turntables to increase what the scanner can see. The sophistication of a scanner’s turntable affects how easily and completely the object is captured: some scanners have the ability to move the object around multiple axes, imaging the object from more angles. This feature is important when reverse engineering plastic parts with deep recesses and ribs, which are impossible to capture from a single angle.
Scanners may rotate the object to capture occluded areas. Red regions are occluded and will be missing in the scan. Areas with deep relief are difficult for a single axis turntable to fully capture due to occlusion.
Cost concerns are straightforward; how much you are willing to spend on a scanner will reflect your business’s budget and how often the scanner is going to be used. Higher cost scanners will be able to capture small objects and create highly-detailed meshes that don’t require significant touch-ups in CAD software. Handheld scanners are also often on the higher end of the price range, due to their portable nature. The low-cost scanning market offers a wide range of options, but you have to know what to look for.
Use this flowchart to determine what scanner you need based on accuracy, scan volume, and budget.
Download the high-resolution version of this infographic here.
A 3D scanner expands the capabilities of a 3D printer, allowing you to replicate the shape of almost any object. Together, the two technologies create a powerful, digital workflow that can simplify and sophisticate processes in a range of industries.
The output from a 3D scanner is a mesh of triangles representing the surface of an object at a real-world scale. In some cases, the scan can be used directly to replicate objects without any CAD work. A hybrid workflow can also be powerful, where solid CAD models are combined with scanned 3D models. For example, customized ergonomics capture a physical imprint of a part of the human body, and integrate them with a mechanical design.
3D scanners are also valuable tools for measuring the accuracy of manufactured objects. Many factors affect 3D print accuracy, and metrology-grade 3D scanners provide a clear picture of how a material performs for demanding applications.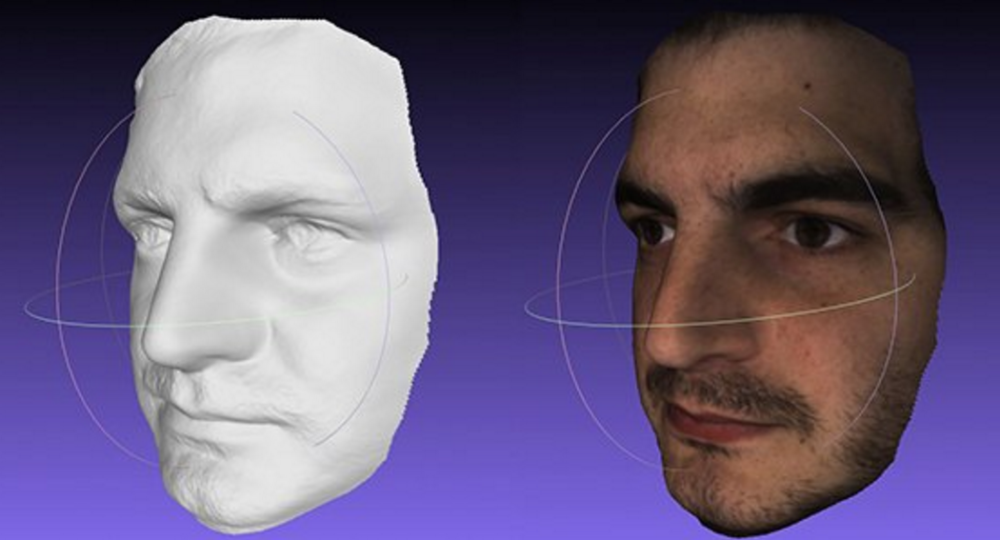
A variety of powerful workflows are enabled by combining a 3D printer and a 3D scanner:
- Reverse engineering to create replacement parts, products with custom ergonomics, and more.
- Replication and restoration of parts, especially in art and jewelry.
- Consumer audio for creating custom earpieces.
- Dental and medical applications, and how 3D scanning is enabling patient-specific workflows.
- Metrology to validate and measure the accuracy of manufactured objects.
Webinar
Watch this webinar for a detailed look at how to start using 3D scanning to improve part design and production when paired with reverse engineering CAD and 3D printing.
Watch the Webinar Now
3D scanners and 3D printers are essential parts of digital workflows across industries. Download our white paper or watch our webinar to get a detailed look into how to start using 3D scanning to improve part design and production and learn how to pair 3D printing and 3D scanning to empower a variety of workflows in engineering, product design, and more.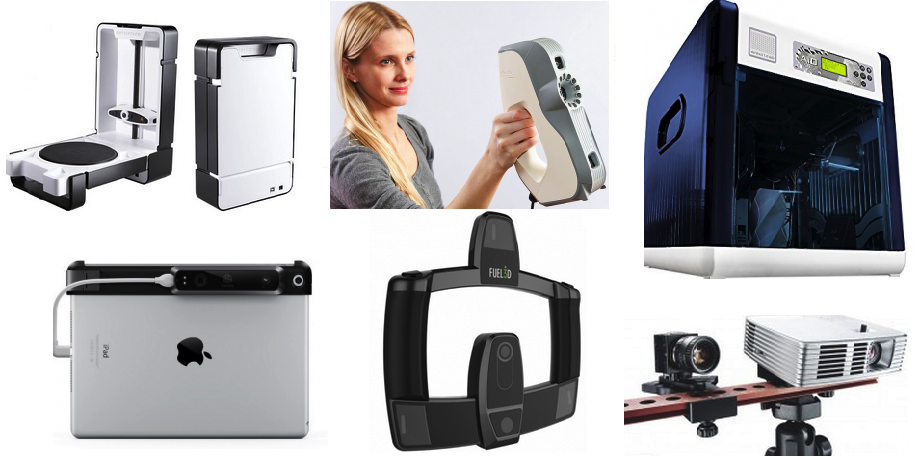
Learn more about the 3D printer side of the equation: get to know stereolithography (SLA) and selective laser sintering (SLS) 3D printing technologies and see Formlabs advanced 3D printing materials for yourself with a free sample 3D printed part.
Explore Formlabs 3D PrintersRequest a Free Sample Part
9 Accurate DIY 3D Scanners You Can 3D Print At Home (2023)
3D scanners can get really expensive. We’d know – we’ve tested and researched them in creating our ranking of the best 3D scanners . However, if you’re willing to be a little more thrifty you can save a lot of money building your own DIY 3D scanner — and have a cheap 3D scanner you can feel proud of building yourself!
DIY projects, especially in an area where precision is key, have an unfairly slap-dash reputation. In fact, there are some very accurate DIY 3D scanners on our list, you just need to assemble them yourself.
The best part: they’re almost free if you 3D print the parts — your only costs are the camera/parts.
However, don’t be fooled – you won’t get $20,000-quality scans from these kits.
And, it takes focus and skill to build such a technical piece of kit – hence we’ve included a couple of easy-assemble kits which cost more, but let you get right down to scanning.
Best DIY 3D Scanner Kit Under $200
HE3D Open Source Ciclop DIY 3D Systems Scanner Kit for 3D Printer
4.1
$159.00
Amazon here
Best 3D Scanner Under $1000
5.0
$719.00
Amazon here
03/20/2023 10:35 am GMT
Top Picks
Best DIY Scanners – Full Round-Up
- BQ Ciclop: Best 3D scanner kit overall
- Murobo Atlas: Good Ciclop DIY scanner alternative
- Cowtech Ciclop: Upgraded premium Ciclop scanner
- Openscan: Great open source 3D scanner
- AAScan: Great option for Android
- Revopoint POP 2: Best semi-assembled 3D scanner to save you time
For the DIY kits, we’ve included download links and links to documentation to get you started.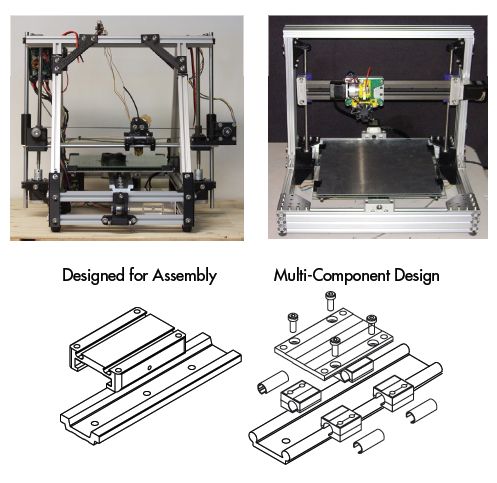
But first, let’s cover what to look for in a good homemade 3D scanner:
What Makes a Good DIY 3D Scanner?
- Price-performance ratio: for the price, how good are scans?
- Resolution: how crisp is scan quality
- Accessibility: you may be able to print most of the 3D scanner, but are the rest of the parts easy to buy?
- Ease of assembly and use: quick and easy builds are always better. The best 3D scanner projects can be built by anyone, newbie or expert.
The Best 3D Printable 3D Scanner Kits
Ciclop DIY 3D scanners
Many of the best DIY scanner kits are based on the original Ciclop open-source files. Massive companies like BQ have created their version, as well as tweaked versions such as CowTech Engineering’s take.
We’ve included them all here, as each option are some of the most DIY accurate 3D scanner options for this price range. For a pre-assembled scanner with the same quality, you’d likely need to spend double this.![]()
3DSourced is reader-supported. When you buy through links on our site, we may earn an affiliate commission. Learn more
BQ Ciclop
- Resolution: 0.3-0.5mm
- DIY 3D scanner technology: laser triangulation
- Price: around $150 — Available on Amazon worldwide here
Pros
Easily modifiable to individual preferences.
Very easy to build.
Laser triangulation technology gives precise and accurate scans.
Cons
Will take some time in setting up the scanner.
BQ are a Spanish technology giant who are well-known across Europe for their smartphones, tablets, and 3D printers. They’ve also developed their Ciclop DIY 3D scanner, which scans a volume up to 250 x 205 mm, based on laser triangulation technology.
An important feature of the BQ Ciclop is that it’s a completely open source 3D scanner. You’re free to modify it as you wish, following the RepRap philosophy. It’s easily accessible via USB or Bluetooth, and can 3D scan with a resolution of between 0.3-0.5mm.
- We also have a ranking of the best open source 3D printers.
Another great addition to this DIY 3D scanner is that it works with Horus open source 3D scanning suite which BQ also developed. This makes scanning much easier with the compatible program. You can buy just the electronics (includes an Arduino, webcam etc) and print the parts yourself for $115, or buy the whole kit for $240. Not bad.
However, it is worthy of note that the BQ Ciclop is difficult to assemble. Other DIY 3D scanners are quicker and simpler to build, though the Ciclop is still a fantastic DIY 3D digitizer.
Best DIY 3D Scanner Kit Under $200
HE3D Open Source Ciclop DIY 3D Systems Scanner Kit for 3D Printer
$159.00
Yes, you'll get better quality if you spend more on a scanner like the Revopoint POP range, but with this you get to build your own 3D scanner from the parts for several hundred dollars less.
Amazon here
We earn a commission if you make a purchase, at no additional cost to you.
03/20/2023 10:35 am GMT
Murobo Atlas — Great Raspberry Pi 3D Scanner
- Resolution: 0.25mm
- DIY 3D scanner technology: laser triangulation technology
- Price: $200-250 — Available on Amazon worldwide here
Pros
High-quality specs for the price.
Compatible with Raspberry Pi camera.
Can access the scanner via WiFi or with an SD card.
Cons
Has trouble with dark and shiny surfaces.
Another homemade 3D scanner, the Atlas has the highest quality specs of any DIY 3D scanner we researched. It includes a 3D printed body made from PLA and ABS filaments, which can be purchased online. If you’re a serious DIY fanatic, you can print the parts yourself via the download link here.
Depending on if you already own a Raspberry Pi or not, you can save money on the build. This is because the Atlas DIY 3D scanner uses a Raspberry Pi camera to take detailed 3D scans with an accuracy of 0.25mm. Depending on your choice, the Atlas is likely to cost between $200 and $250, which is far less than most professional 3D scanners.
Moreover, Murobo has made considerable efforts to make sure that the Atlas DIY 3D scanner is convenient and simple to use. To achieve this, the Atlas comes with FreeLSS free 3D software which enables you to easily take 3D scans. In addition, you can access your Atlas via your computer’s browser through WiFi, as well as via SD card.
Overall, this DIY 3D scanner Raspberry Pi collaboration is a really interesting and creative way of combining several different innovative technologies to create a scanning device. If you’re an Arduino fan instead, you may be able to make it work for you too.
CowTech Ciclop
- Price: $119 – $159 (depending on whether you’re 3D printing the parts or not) — Available on Amazon here
- Resolution: 0.
 5 mm
5 mm - Maximum scan volume: 200 x 200 x 205 mm
Pros
Adjustable laser holders.
Effective for laser triangulation 3D scanning.
Affordable.
Cons
Lack of consistency is a complaint from users.
BQ formed the foundations of the DIY 3D scanner kit, and remains one of the best DIY 3D scanner on tight budget options. Then back in 2015, CowTech Engineering used the foundations led by BQ, putting their unique spin on an updated model.
True to the open source movement, Cowtech started a Kickstarter campaign to raise money to put their version of the original, the CowTech Ciclop, into production. The team set the lofty goal to raise $10,000, and were met with surprise when the community rallies to raise $183,000. The CowTech Ciclop DIY 3D scanner kit was born.
So what are the differences between CowTech’s version and BQ’s DIY 3D scanner?
The CowTech Ciclop still uses the Horus 3D software program as it does a fantastic shop for 3D scanning objects.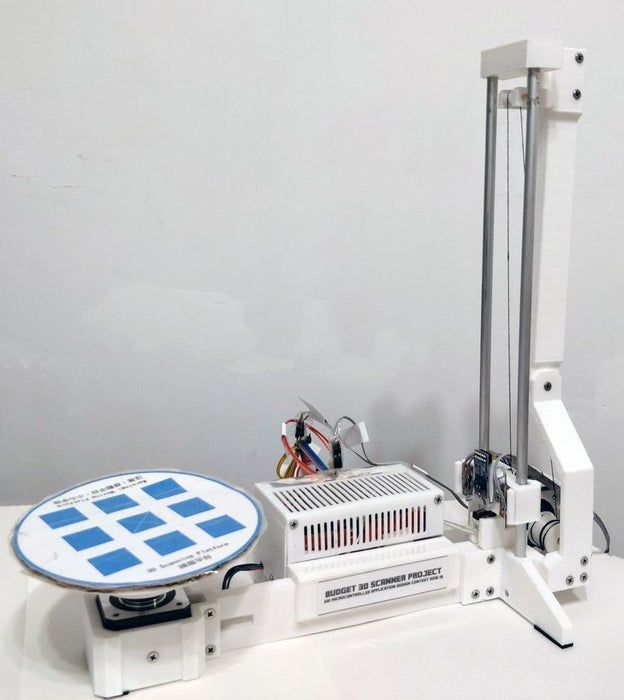 Differences however include a slightly different design, which the team spent days designing so that the parts could be 3D printed on any FDM 3D printer. Some desktop 3D printers only have a small build volume, so CowTech designed parts that can be printed on any printer with a build volume of 115 x 110 x 65 mm, which almost all 3D printers have.
Additionally, CowTech’s Ciclop has adjustable laser holders, and whereas the BQ Ciclop uses threaded rods, CowTech’s DIY 3D scanner uses laser-cut acrylic. This isn’t anything drastic and the scanners still look fairly similar, but CowTech only intended to improve the existing design, not reform it. CowTech sell the Ciclop, ready-to-scan, for $159 on their website. Overall, this is a great cheap DIY 3D scanner, and very effective for laser triangulation 3D scanning.
OpenScan Classic and OpenScan Mini
- Max Scan Volume: 180 x 180 x 180 mm / 80 x 80 x 80 mm
- Accuracy: Up to 50 microns
- DIY 3D scanner technology: Photogrammetry
- Price: Starting at $100.
 00 up to $200.00 for a complete kit with 3D printed parts and electronic
Pros
The OpenScan classic is compatible with DSLR cameras and smartphones.
High quality for a low price.
Cons
OpenScan Mini is tied to a Raspberry Pi and only works with either a Pi Camera or Arducam IMX 519
The Mini and Classic are two low-cost but high-quality 3D printed DIY scanner projects designed by German company OpenScan. In action, the OpenScan uses a stepper motor mounted to a 3D printed frame to rotate an object to capture images from various angles. These are then compiled into a high-quality 3D model using open-source software or OpenScanCloud, ready for 3D printing.
Where the OpenScan Classic and Mini differ from one another is max scan volume and camera/SBC options. The Mini features an 80 x 80 x 80 mm scan volume, while the Classic more than doubles the scan volume to a roomy 180 x 180 x 180 mm, perfect for scanning larger objects.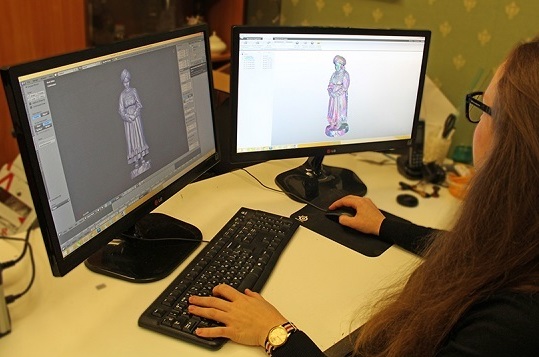 The Openscan Mini – the cheaper and smaller 3D printable 3D scanner.
The OpenScan Mini is tied to a Raspberry Pi and only works with either a Pi Camera or Arducam IMX 519 and includes one-click easy scanning. This allows the completed scanner to rotate not just the object but also the camera for a more detailed point cloud.
On the other hand, the OpenScan Classic is also compatible with Smartphones and DSLR cameras, which generally means better quality photos and, as a result, higher-quality models. It’s the tinkerer’s option and better suited for those that want to customize the scanner to their needs.
OpenScan offers a solution for all DIY skill levels and budgets, whichever model you decide on. You can customize kits based on your needs or order a complete kit that includes all the electronics and 3D printed parts.
The full assembly guide is here.
AAScan Open Source 3D Scanner Based on Arduino and Android
AAScan is a very recent (February 2020) DIY open source 3D scanner that’s fully automated in taking photos and moving the object around on the scan plate.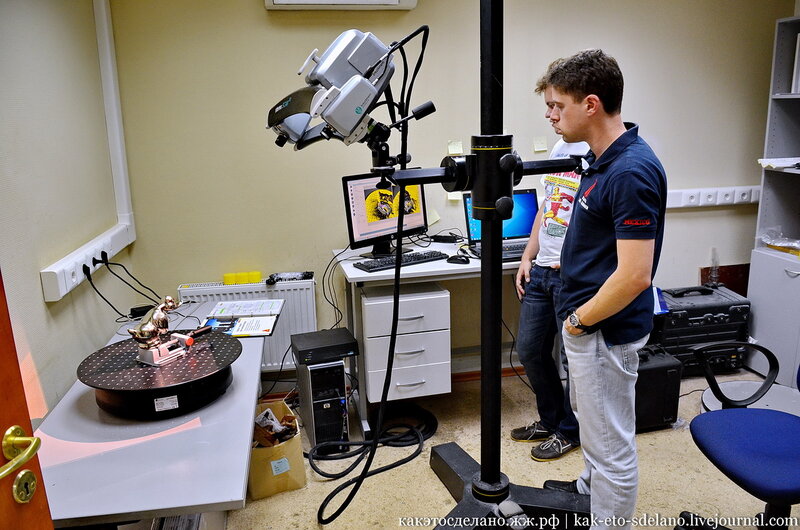 All the files are on Thingiverse, which we’ve linked below. Interestingly, the creator stresses that the AAScan is intended to be a purposefully minimalist machine, able to scan but not filled with extra features beyond this primary capacity.
All the instructions for how to build, print and assemble the AAScan are on the Thingiverse page, requiring an Arduino, some electronics, and either a 3D printer to print the plastic parts or someone else to print them for you — such as from a 3D printing service.
You can view the DIY scanner on Thingiverse here.
FabScan Pi
- DIY 3D scanner technology: laser triangulation
- Price: $100-200 depending on which version
The original FabScan was a DIY 3D scanner built by Francis Engelmann as part of his Bachelor’s thesis back in 2010. Since then, there have been numerous improvements made in new iterations up to the newest model, the FabScan Pi.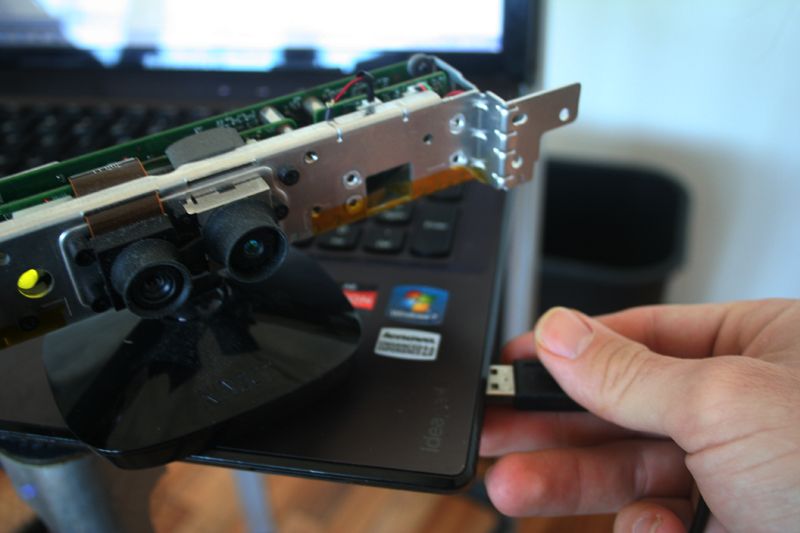 This new model uses a Raspberry Pi camera along with the new design to offer higher quality 3D scans.
Based on laser triangulation technology, the FabScan Pi is one of the best DIY 3D scanner options for those who are into doing it themselves. Depending on if you go for one of the older models or the latest, the price can vary between $100 and around $200 to completely create the 3D scanner. Overall, it’s a really cool kit and thesis which you can make at home.
If you want to create your own FabScan, you can follow the assembly guide here.
DIY Standalone 3D Scanner by Jun Takeda
- DIY 3D scanner technology: Photogrammetry
- Price: $200.00
The DIY Standalone 3D Scanner is an excellent option for those that want a hands-on project that results in a reasonably accurate and easy-to-use stationary 3D scanner.
By combining a Mbed board with a camera and OpenCV libraries, the scanning process is largely automated with just a single button push. The scanner captures multiple images of an object to create a 3D model that’s then output as an STL file written to an SD Card.
To complete the project, you’ll need a GR-LYCHEE as a centerpiece sided by smaller electronic parts, plastic sheets to create the housing, and various nuts and wiring to piece it all together.
As the name implies, it’s very much a DIY project and, as such, would best suit those happy to troubleshoot any potential hurdles with little hand-holding. Though there are instructions, you’re responsible for designing the housing, wiring the board, and calibrating the camera.
Arduino-Controlled Photogrammetry 3D Scanner by Brian Brocken
- DIY 3D scanner technology: Photogrammetry
- Price: ~$100
The Arduino-Controlled Photogrammetry 3D Scanner is a 3D printable 3D scanner DIY project that leverages the camera on any run-of-the-mill Smartphone and a cheap Arduino UNO SBC to keep costs low.
The core idea is to assemble a turntable consisting of 3D printed mechanical parts, including a print-in-place bearing. A Bluetooth-connected Smartphone does the actual scanning via the normal photogrammetry process. As for electronic components, you’ll need a servo motor, LCD screen, Arduino Uno, PCB, stepper motor, Bluetooth remote, regulator, and a small joystick module.
Once assembled, the Arduino-Controlled Photogrammetry 3D Scanner can capture anywhere from 2 to 200 photos in a single 360° rotation for reasonably detailed scans. The images are then sent to photogrammetry software such as AutoDesk Recap Photo to assemble a 3D model.
Aside from the cost of filament, expect to pay no more than $100 for all the parts and the STL files to 3D print the turntable.
Semi-assembled DIY scanners
Revopoint POP / POP 2
- Price: $500-700 — Available at Revopoint store here
- Accuracy: 0.3 mm
- Max Scan Volume: 200 x 300 x 300 mm
- Scan Speed: Up to 8 FPS
- DIY 3D scanner technology: Structured light
Pros
Both have versatile scanning options.
Good price for performance.
Lightweight and easily portable.
Cons
The scanner can often lose track of the object.
Though not technically a DIY scanner, we thought we’d slide in the Revopoint POP as a cheat option for those that want to save time and want largely better quality scans than you’d get with a homemade alternative.
It comes semi-assembled – you just need to attach the tripod, connect the USB and the turntable, add the sticker markers for better scan tracking, and optionally build and attach the larger turntable – so you can get started in just 5 minutes!
A basic mug scan we did on our Revopoint POP 2.The catch? At around $500, the Revopoint POP is considerably pricier than a DIY scanner. Still, it may be worth paying the premium for the convenience and reliability.
The Revopoint POP offers 0.3 mm accuracy (the POP 2 offers within 0.1 mm!) and automatic alignment technology, making for more detailed and smooth full-color 3D models than DIY scanners. It can capture 360° scans of objects up to 200 x 300 x 300 mm, besting most DIY options.
The main benefit of all this is high accuracy scans that are just about ready for 3D printing with very little post-processing needed to iron out imperfections and poor surface details.
A statue scan we did with our Revopoint POP 2.Ease of use also extends to the intuitive software, which works with Smartphones for on-the-go scanning and features exports to STL and OBJ formats. Alongside, it bundles in best-of both-worlds handheld and stationary modes. Five different scanning profiles allow you to tune the POP to each scan with face, body, feature, mark, and dark mode.
Read more: we tested and reviewed the Revopoint POP 2
Best 3D Scanner Under $1000
Revopoint here
Amazon here
We earn a commission if you make a purchase, at no additional cost to you.
Can You Make a 3D Scanner?
- Choose a DIY 3D scanner design.
- Source the non-3D printable parts such as the camera, stepper motor, single board computer (such as an Arduino), wiring, and other electronic parts.
- 3D print the housing, brackets, turntable, mounts, and other parts required for the 3D scanner project.
- Wire and assemble all the parts.
- Configure and set up the single board computer.
- Test and scan.
FAQs
Which is the Best DIY 3D Scanner?
This depends on how much DIY you want to take on yourself, and how much you are ready to spend.
One of the most cost-effective options is scanners based on the Ciclop open-source 3D scanner design. You can purchase a low-cost Ciclop scanner like the BQ Ciclop or CowTech Ciclop 3D scanner, then 3D print the parts from home and modify and tune the scanner to your liking.
Alternatively, the Revopoint POP is an excellent semi-assembled 3D scanner with great specifications and software at an affordable price for those that want to save time.
What is a DIY 3D Scanner?
A DIY 3D scanner is a cost-effective, home-made device constructed from manufactured or 3D printed parts designed to capture the characteristics of a specific object – such as size, surface details, and shape – by scanning it from multiple angles to create an equivalent point cloud that can be processed into a 3D model via software.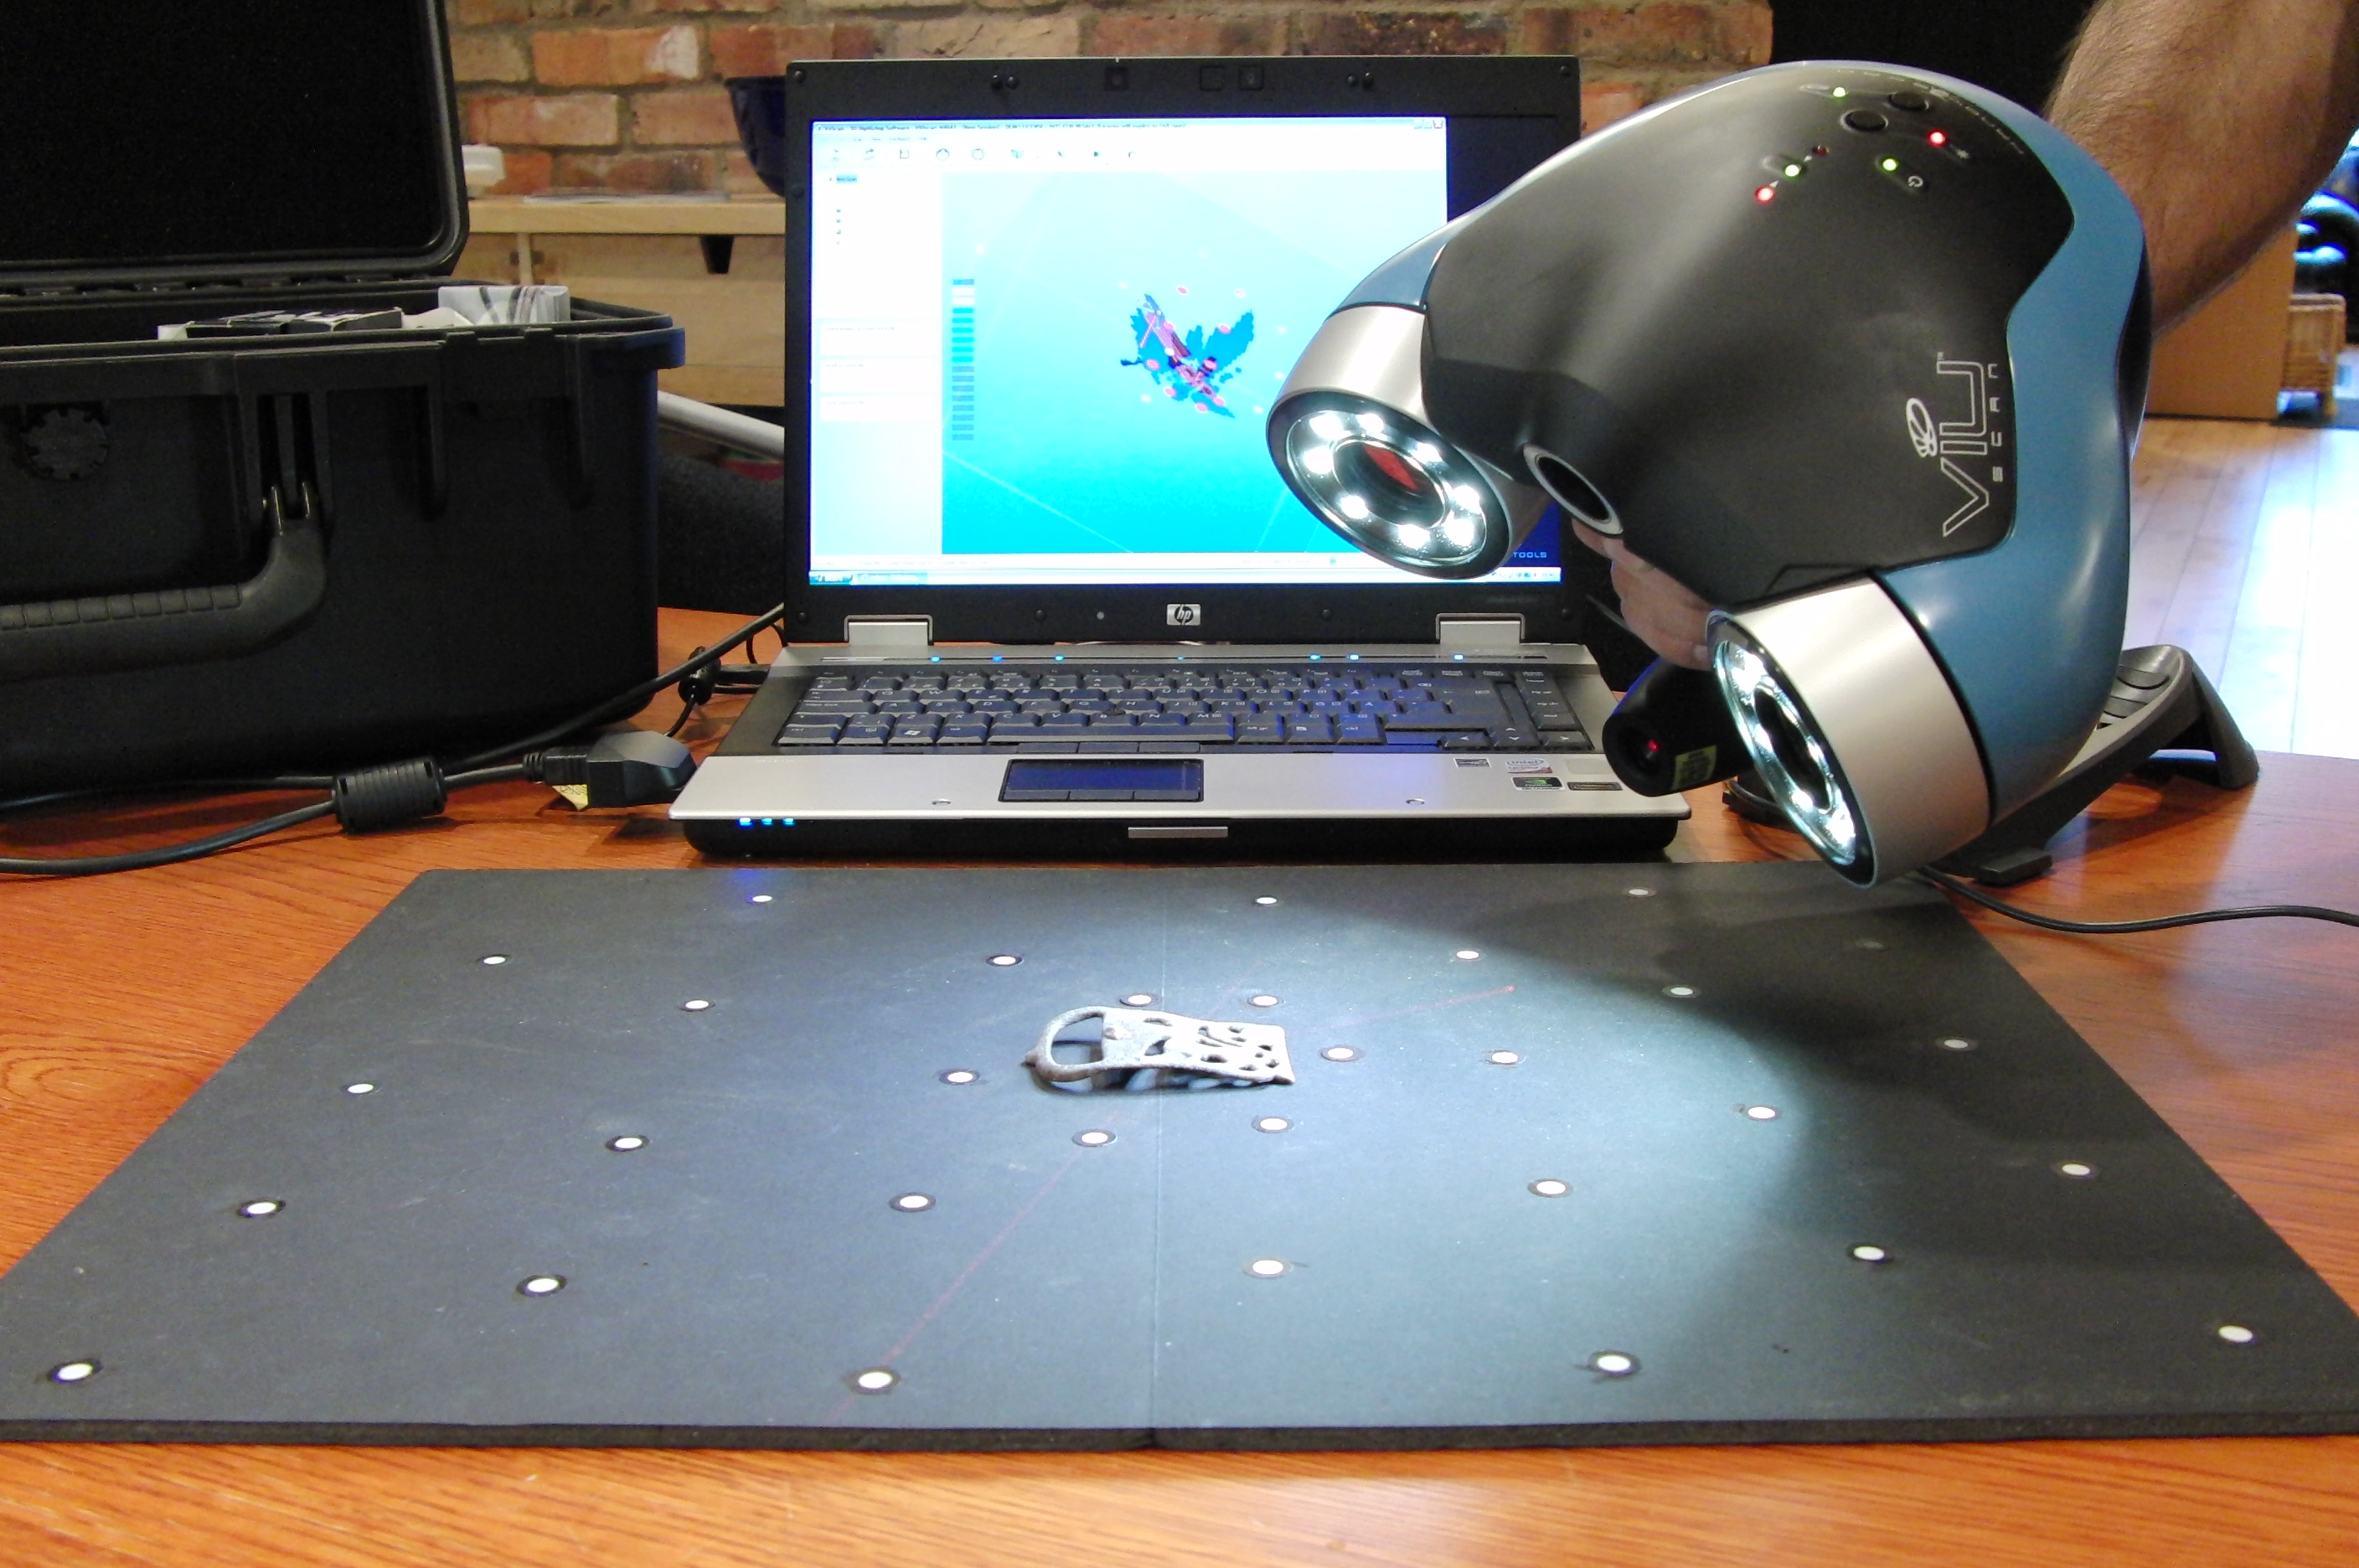
Other articles you may be interested in:
- The best 3D scanners
- The best low-cost 3D scanners
- Top 3D scanner apps for iOS and Android
- The best photogrammetry software
- Structured light 3D scanning vs laser scanning
- 3D body scanners: a guide
- Industrial 3D scanners
3D Printing Technologies - FDM, FFF, SLA, DLP, PolyJet, CJP, SLS, SLM
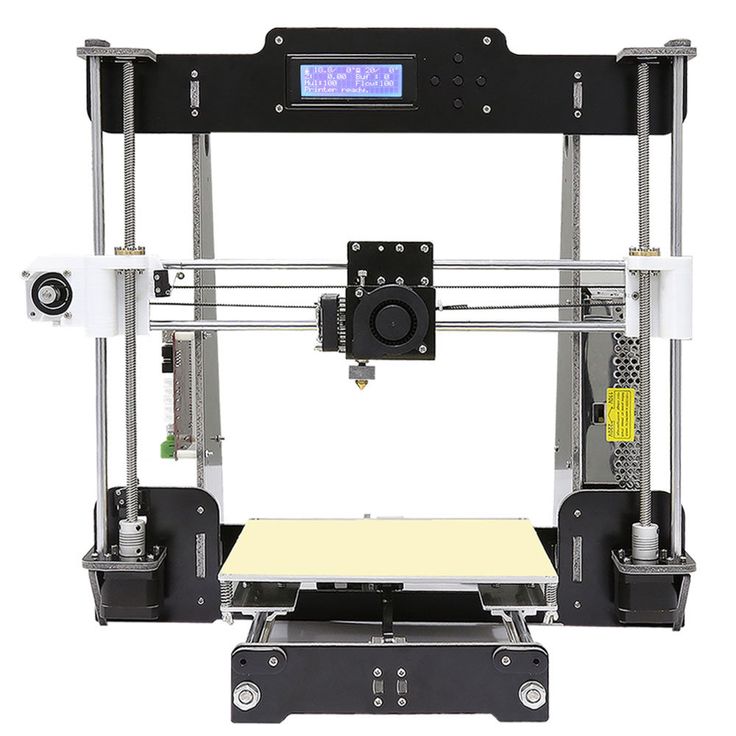
FUSED DEPOSITION MODELING PRINT TECHNOLOGY – + FDM
One of the most popular, simple and cheap 3D printing technologies is Fused Depsition Modeling. The technology was invented more than 20 years ago and implemented by Stratasys, and still it remains the most popular. The principle of building a prototype using this method is simple and clear. The simulated 3D object in STL format is transferred to the 3D printer software. After placing the model in a virtual working chamber (automatically or manually), cutting the model into horizontal layers, the 3D printing process begins. The extruder print head melts the filament, laying down layer by layer according to the model data. If necessary, before starting printing, auxiliary structures (supports) are automatically or manually placed on a virtual 3D model, which, after printing, can be removed with a special solution or manually.
There are many types of equipment that print using this technology. They differ in terms of accuracy, the number of print heads, the size of the working platform, the presence or absence of a closed working chamber, consumable options, etc. There are models that support the ability to use different materials when printing. There are also industrial FDM 3D printers and personal ones.
The following materials can be used in FDM 3D printing:
- ABS
- PLA
- SBS plastic
- Nylon
- Polycarbonate
- HIPS support material
- PVA support material
- PETG plastic
- FLEX rubber-like plastic
- RUBBER plastic with rubber properties
The most popular materials are ABS and PLA.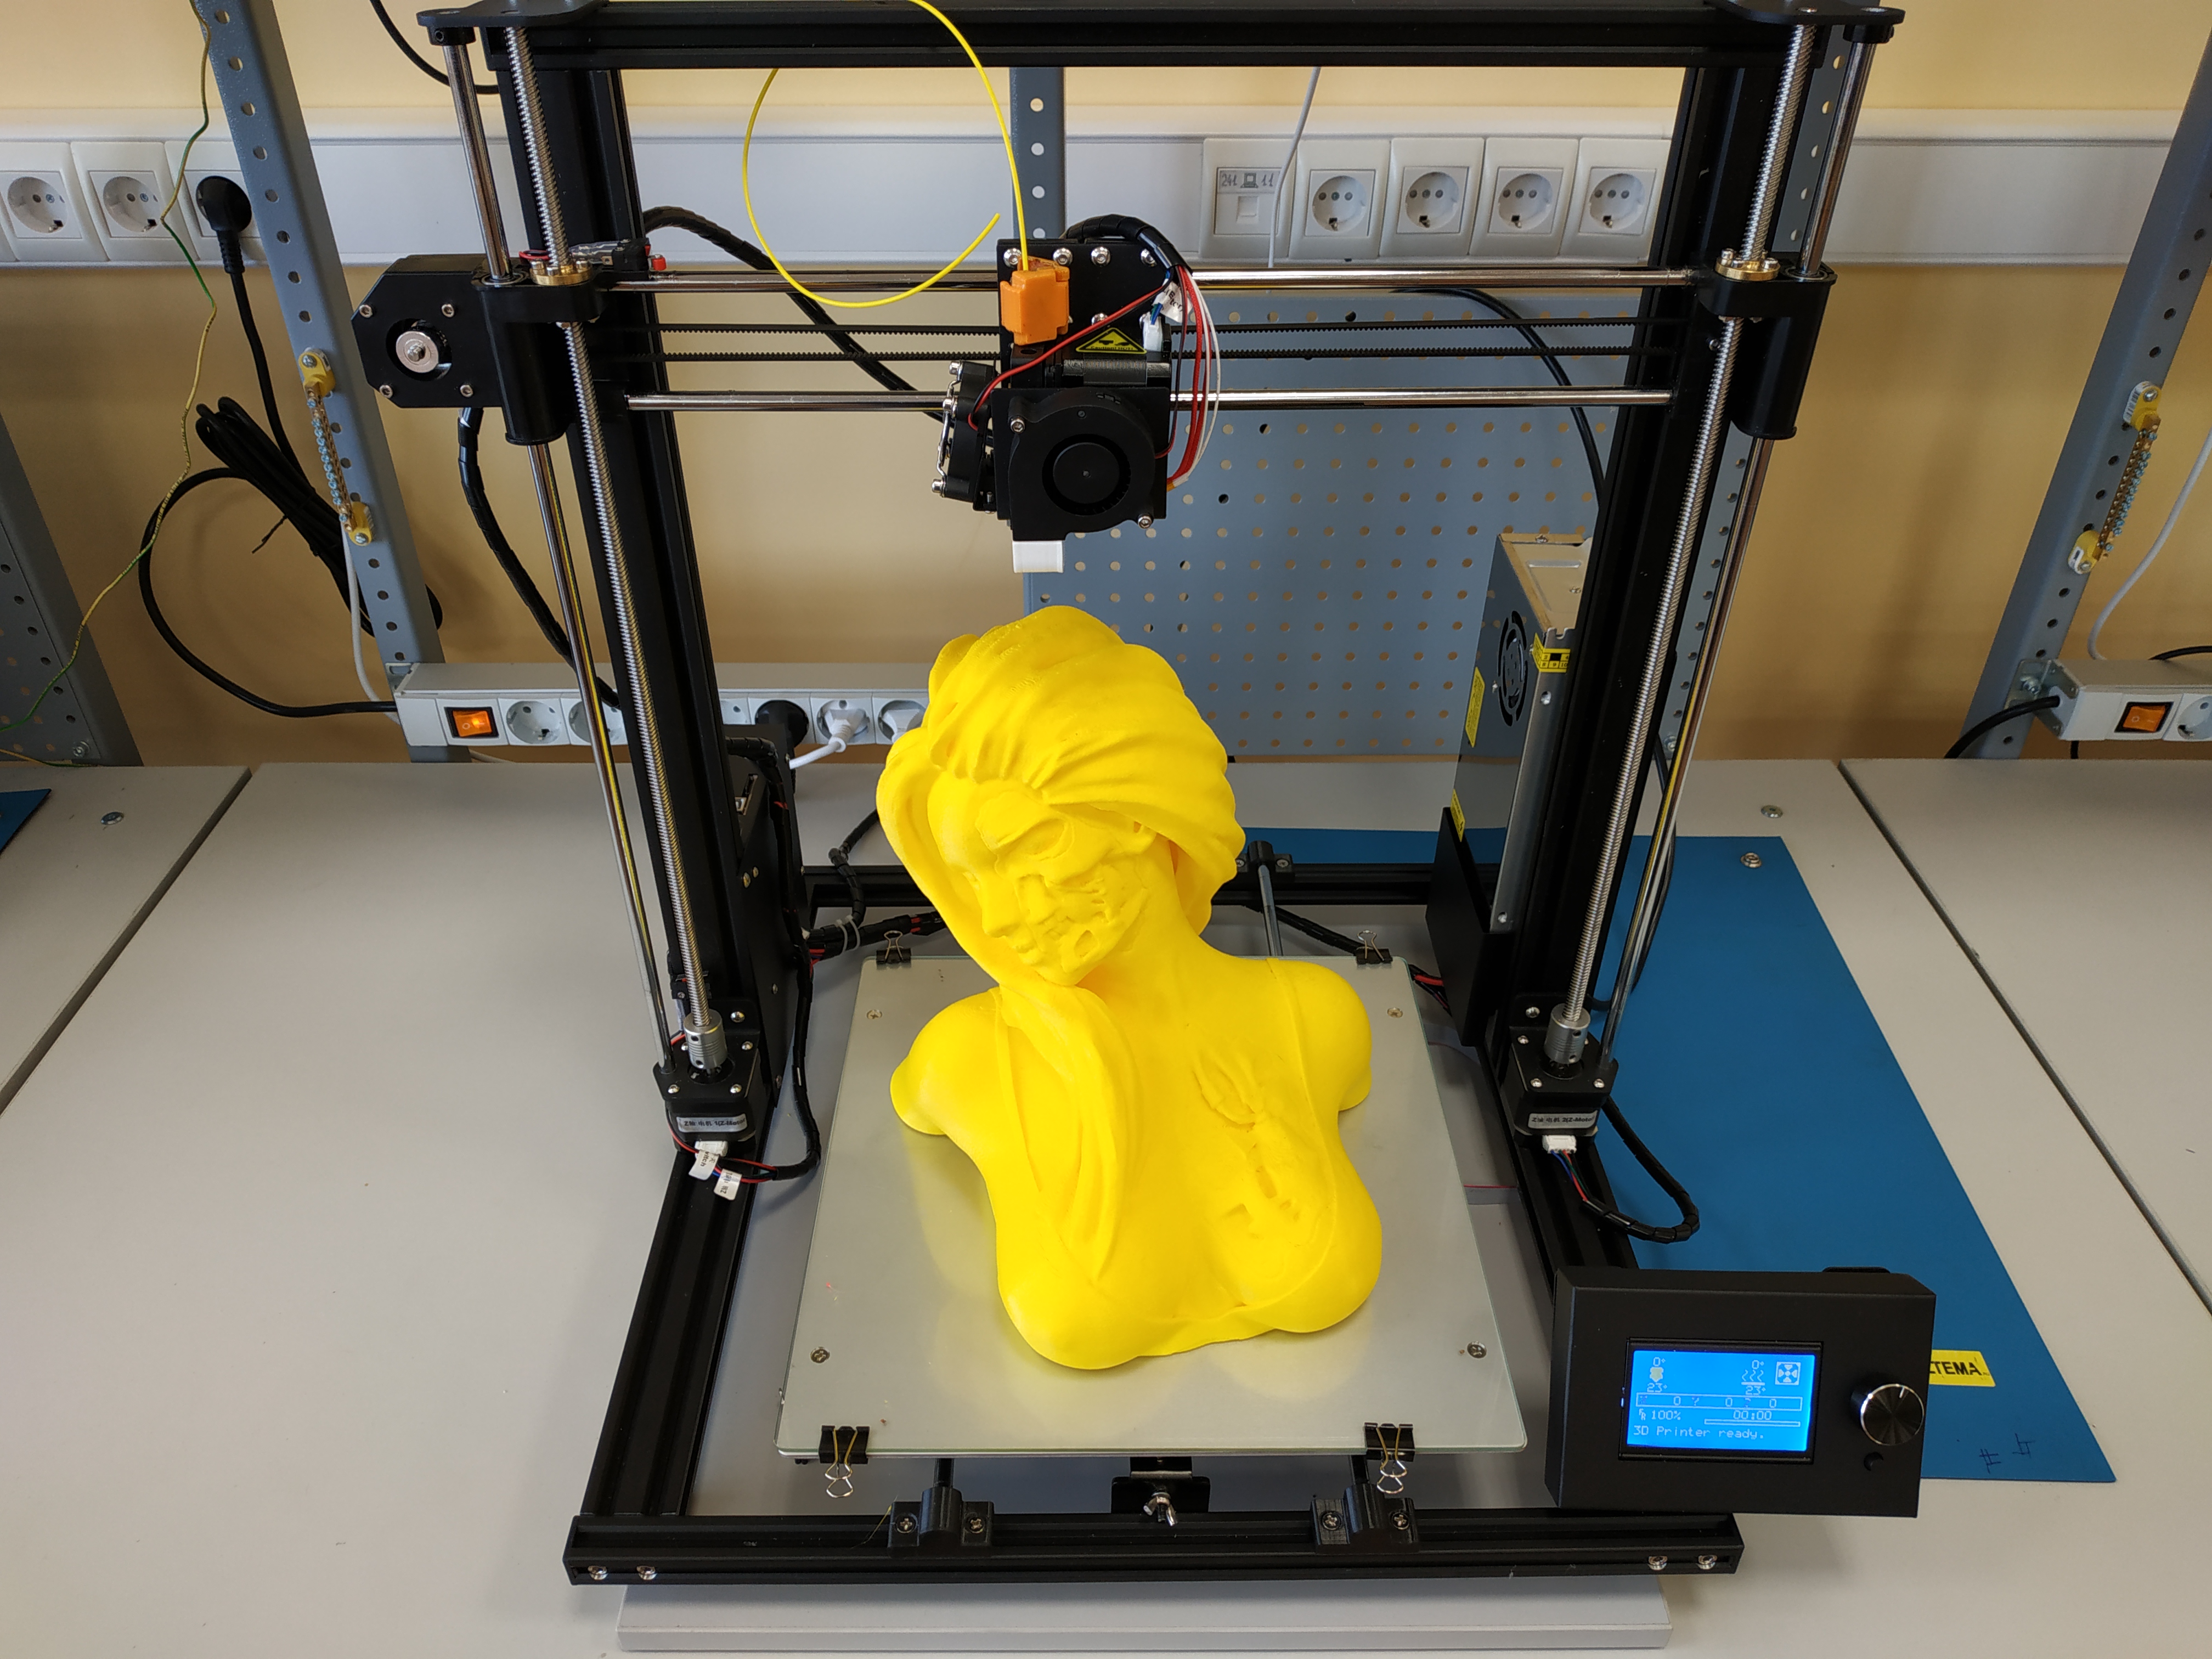 Products printed using FDM technology are characterized by elasticity, strength and stable physical characteristics, depending on the selected material. The construction accuracy varies from 0.027mm to 1mm. As a rule, the printed object has a layered (ribbed) surface, the severity of which depends on the thickness of one layer. This effect can be eliminated by post-processing with chemicals or grinding.
The advantages of FDM 3D printing technology include sufficient speed and ease of manufacture of products, safety, high accuracy, a wide choice of materials, as well as ease of use and maintenance of equipment. In addition, consumables for printing in this way are affordable. All this together makes this technology the most highly competitive and affordable in economic terms.
FDM 3D printing technology can be used for rapid prototyping and even small series production. Depending on the selected consumable material, this technology can be used to create parts of mechanisms, toys, interior items, jewelry, souvenirs and much more.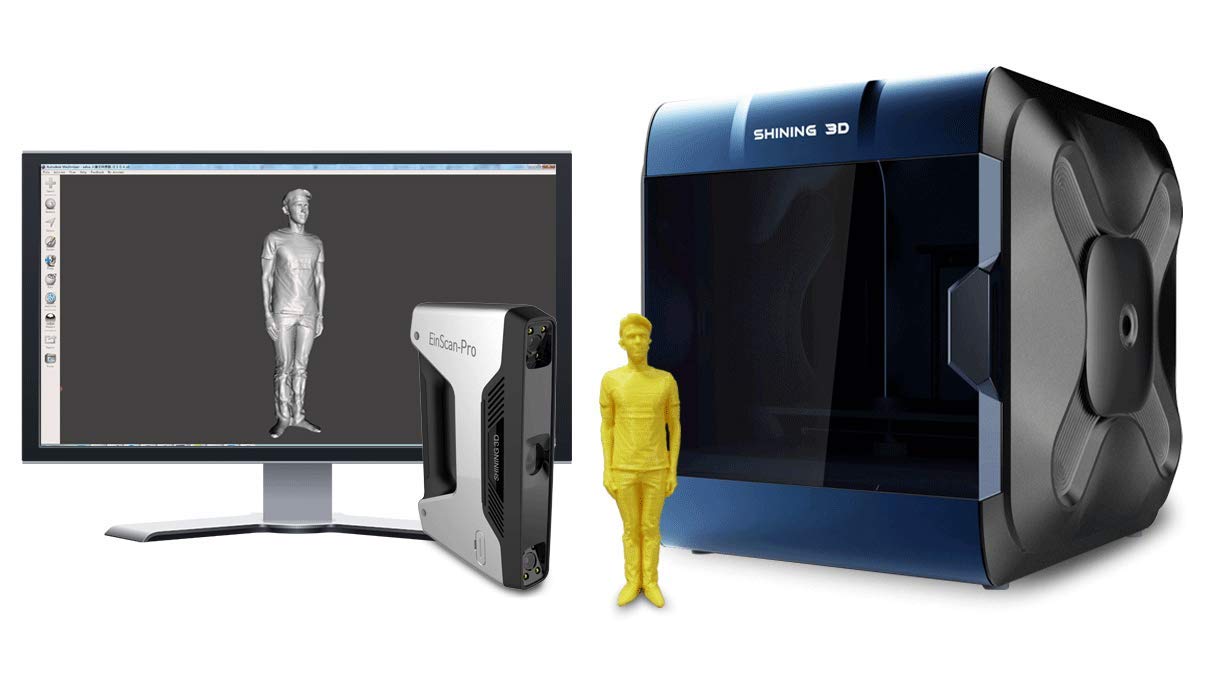 The use of high-strength engineering thermoplastics makes it possible to apply this 3D printing method to products used in the aerospace industry.
Our company has several 3D printers working on this technology. You can order high-quality 3D printing using FDM technology from us with any of the available materials and in any available color option. We guarantee you the quality and efficiency of order execution of any degree of complexity.
To order 3D printing using FDM technology, you need to send us a file in STL format. Trust our professionalism and take advantage of the most affordable 3D printing.
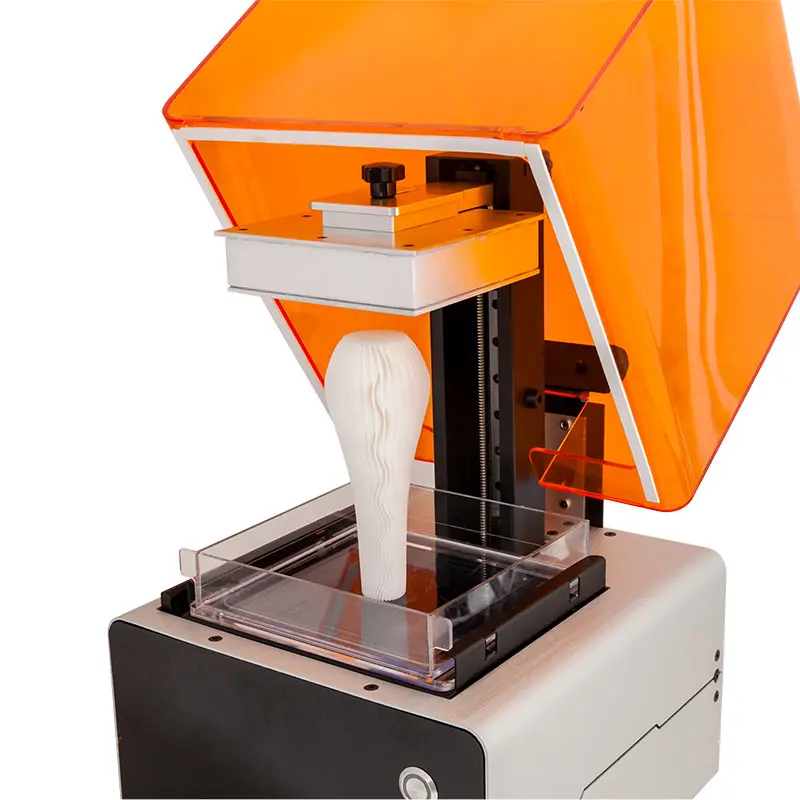
STEREOLITHOGRAPHY PRINT TECHNOLOGY – + SLA
SLA 3D printing technology or laser stereolithography is based on the layer-by-layer curing of a liquid photopolymer under the action of a laser beam. The technology was invented in 1986 by Charles W. Hull, who founded 3D Systems, which manufactures 3D printers that print using this technique.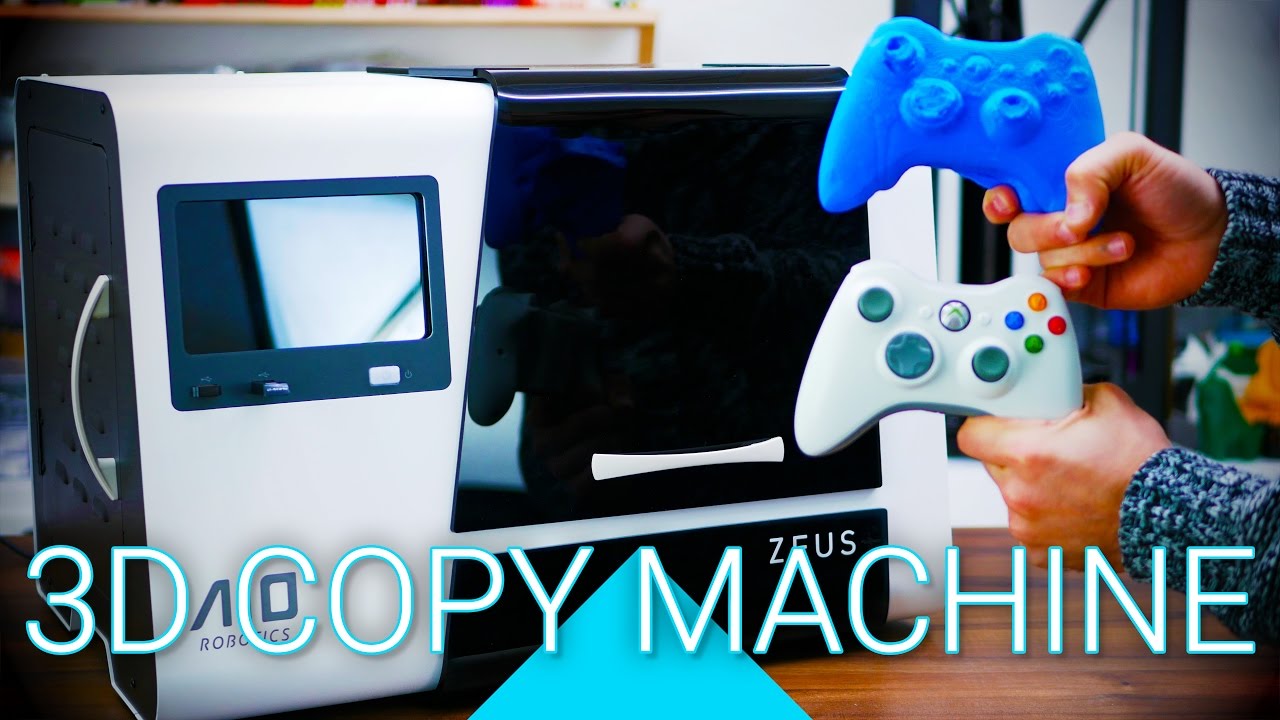
Photopolymer, which in this case acts as a consumable, is a resinous substance that changes its properties under the influence of ultraviolet radiation - it polymerizes and hardens. In this case, the wavelength and time of exposure to radiation will depend on the environmental conditions and the specific material.
The principle of building a model using laser stereolithography technology at the initial level is similar to any other - the modeled object in STL format is loaded into the 3D printer software, placed in a virtual working chamber and cut into layers. Photopolymer resin is poured into a special container. It contains a working platform on which the part will be built. Initially, the working platform is set so that it is covered with the thinnest layer of photopolymer (0.05-0.13 mm). This will be the size of the layer when printed. Then the laser is turned on, it irradiates the areas that will later become parts of the finished product. As a result of irradiation, the material hardens and the working platform sinks to the extent of the layer. The algorithm repeats again until all programmed layers are exhausted. Then the finished product is immersed in a special bath, into which a composition is poured to remove excess elements. And at the end, the product is again irradiated so that it gains maximum strength.
Stereolithography, like most other 3D printing technologies, requires support. After printing is completed, they are removed manually.
The main advantages of stereolithography technology are the highest precision and the ability to create the smallest and thin-walled objects. The technique is distinguished by easy post-processing of products and their almost perfect surface. The disadvantage of this technology is the impossibility of using several materials at once. Color printing is also not possible. The properties of the model and its color will determine the initial characteristics of one photopolymer. In addition, the cost of such printing and equipment is not cheap.
Due to the fact that stereolithography allows you to get a model of almost any degree of complexity, the main scope of this 3D printing is research.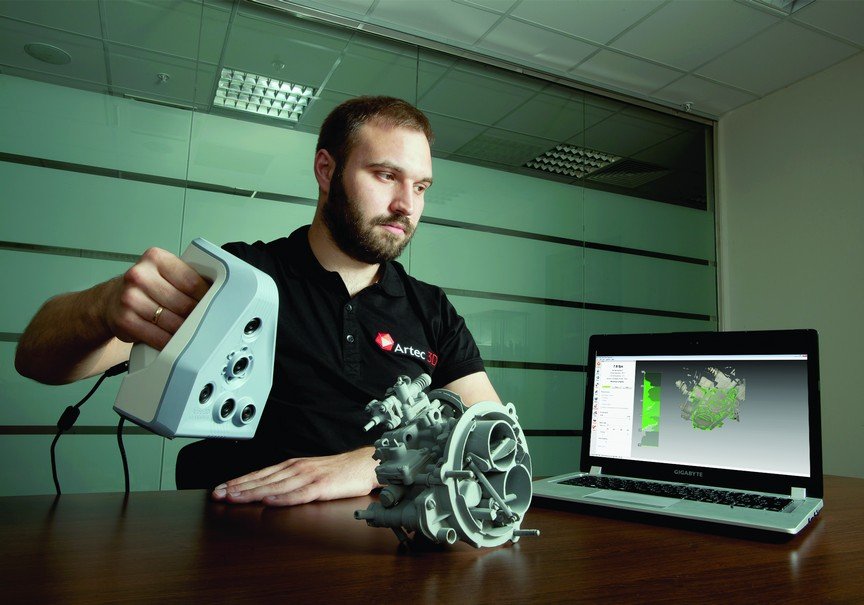 And due to the highest accuracy and detail, this technique is used in medicine, in particular in dentistry. Also, printed models are in demand in art, jewelry, museum work and restoration. There are photopolymers that can be used to print molded models. The model printed on a 3D printer, in this case, is poured with molding sand and placed in an oven for annealing at a temperature of 1000 degrees. As a result, the polymer burns out without leaving a trace, and the resulting form can be used for pouring metal under vacuum. As the metal cools, the mold breaks and the metal part is removed.
In our company you can order 3D printing using SLA technology. We have in our arsenal professional 3D printers using this technology and a wide range of photopolymer resins with various characteristics for 3D printing. We guarantee you high quality and prompt execution of the order. To order 3D printing using the laser stereolithography method, you need to provide us with a file in STL format.
Get the most out of high-precision and highly detailed stereolithographic 3D printing.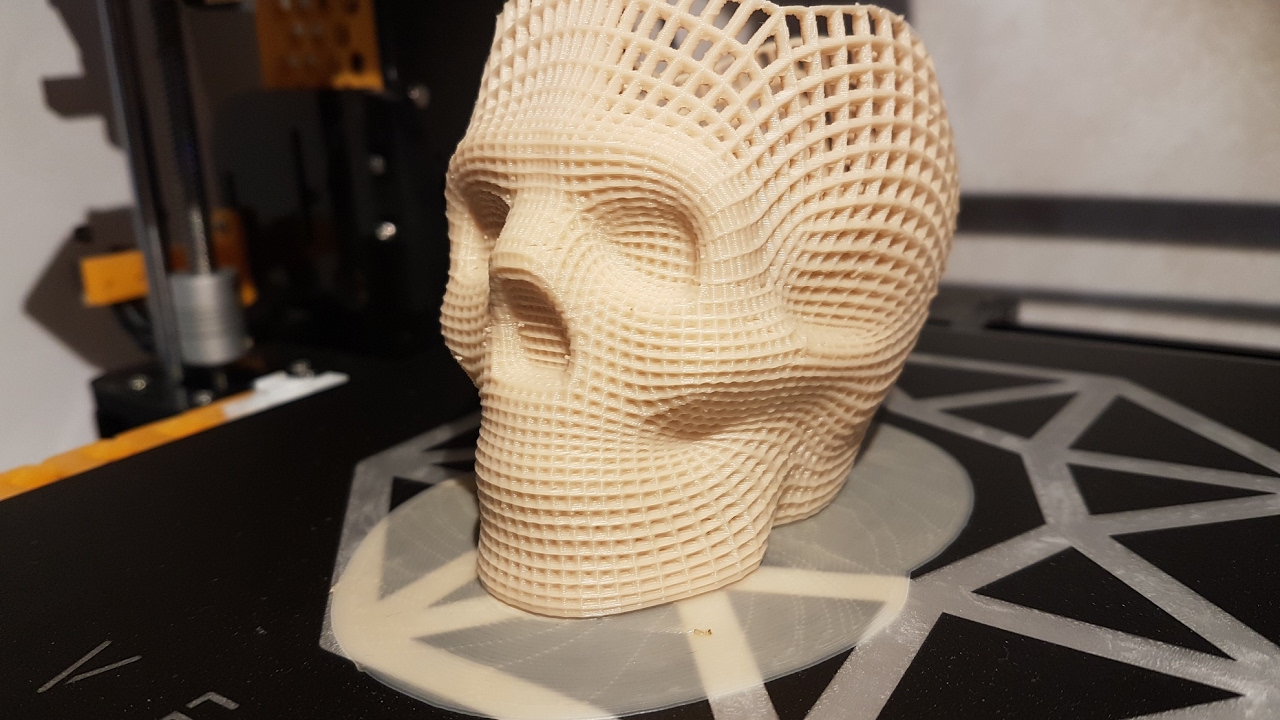
DIGITAL LIGHT PROCESSING PRINT TECHNOLOGY – + DLP
DLP 3D printing is one of the most accurate and fastest 3D printing methods. It is based on the technology that Larry Hornbeck invented for multimedia projectors. The peculiarity lies in the use of a special mirror matrix. Each individual pixel of this matrix is a microscopic mirror.
DLP stands for Digital Light Processing, which means "Digital Light Processing". Thus, this technology is one of the varieties of photopolymer 3D printing and photopolymer resin is used as a consumable. This resin is irradiated with projected light from the LEDs and hardens. The technology is very similar to stereolithography. However, with SLA 3D printing, each layer is, as it were, loomed with laser beams. And in DLP technology, the layer is completely projected onto a photopolymer using the same matrix with micromirrors, that is, this method is more like stamping. Thus, while maintaining the highest accuracy of 3D printing, it was possible to significantly increase its speed. At the moment, the speed of DLP printing is several times higher than FDM, SLM and SLA printing. For this reason, the DLP 3D printing technique is one of the most promising.
The thickness of one layer when printing using DLP technology is 10-15 microns, which is basically similar to the indicators for SLA 3D printing technology. For comparison, the FDM method implies a minimum thickness of at least 50 microns.
Since DLP printers are the main competitors of SLA printing, their application is about the same. They can print products for dentistry, jewelry, complex designs and even souvenirs. The technology is also in demand in the research area.
Photopolymers used in 3D printing with this method are diverse, and you can choose a material with the desired characteristics. For example, there are materials that mimic the properties of ABS plastic, hard engineering plastics, and even rubber. However, it is important to know that in some cases, under the influence of light, photopolymer products can crack and become brittle. This technology implies the impossibility of using several materials at once. Color printing is also not possible. The properties of the model and its color will determine the initial characteristics of one photopolymer.
However, there is also a drawback to DLP technology - as in the case of SLA 3D printers, the cost of equipment is very high, as in principle the price of photopolymers. Not every, even a large company, can afford such a 3D printer.
But this does not mean at all that you will not be able to take advantage of the speed and advantages of DLP printing, because you have the opportunity to order 3D printing on such a 3D printer in our company. To do this, you just need to provide us with an STL file with the desired model. We guarantee you prompt execution of the order and high quality.
Enjoy high-quality, fast, high-precision DLP printing.
PRINT TECHNOLOGY LED DISPLAY – + LED
One of the varieties of DLP 3D printing technology is LED 3D printing. That is, this method is based on the same digital light processing (as Digital Light Processing stands for). However, in devices for LED 3D printing, instead of a mirror chipped matrix, there is an LED display that immediately highlights a whole layer on the material, like a kind of light stamp. Using an LED display allows you to increase the speed of 3D printing. So it takes about 10-15 minutes to 3D print 2.5 cm along the Z-axis, and it's really fast. Although the print speed in any case will directly depend on the thickness of one layer.
As a consumable material, a photopolymer resin is used, which polymerizes under the action of ultraviolet light, that is, it changes its qualities, passing from a semi-liquid state to a solid one. There are many options for photopolymers, among which there are materials that, after the polymerization process, imitate the characteristics of solid, including engineering plastics.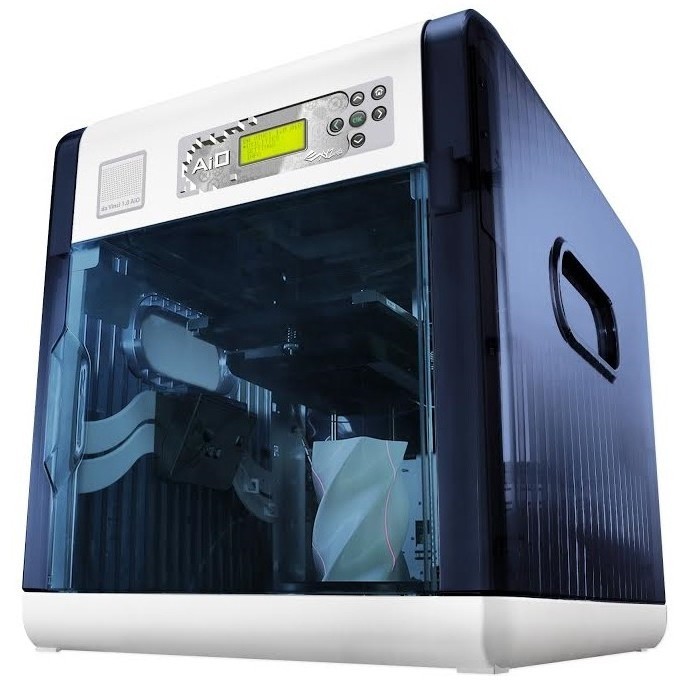 There are also those that are very similar to classic rubber after hardening, that is, they have the same strength and elasticity indicators. You can also choose biocompatible photopolymers. When choosing a material for printing, you should be guided by the technical characteristics and scope of a particular photopolymer.
Like any other photopolymer 3D printing, LED technology is characterized by the highest precision and detail. The thickness of one layer is only 10-15 microns. With its help, you can print thin-walled products, objects with complex geometry. Photopolymers practically do not shrink and do not change their geometry after hardening, and this is also an advantage, especially when it is necessary to print anatomically accurate models. The DLP LED 3D printing technology itself, although it provides for a layer-by-layer method for creating a model, still does not differ in pronounced layering of the finished model. The surface is almost perfectly smooth, requiring no additional processing.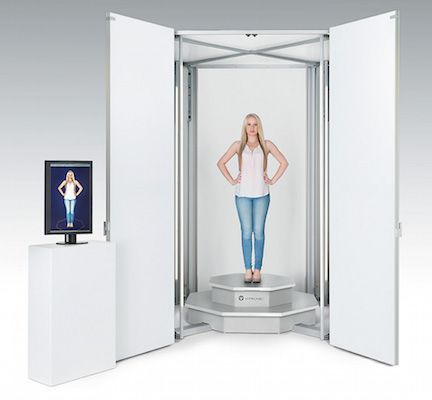
If complex objects are printed, support must be used. They can be set in automatic or manual mode immediately before printing during the positioning of the model in the virtual working chamber. These supports are subsequently removed manually.
LED technology implies the impossibility of using several materials at once. Color 3D printing is also not possible. The properties of the finished prototype and its color will determine the initial characteristics of the photopolymer used.
The field of application of LED 3D printing is basically the same as the field of use of DLP printing, since this technology is, in fact, its improvement. The technology is in demand in the production of hearing aids and earmolds, in dentistry and orthodontics, as well as in jewelry. Due to the high accuracy and detail of 3D objects printed using this technology, products will also be in demand in the field of research and engineering activities.
LED 3D printer is very expensive. However, this does not mean that its benefits are not available to you. You can order 3D printing using LED technology in our company. We offer you a large selection of photopolymer resins for printing and guarantee the high quality of models, in full compliance with the provided STL-file, and the prompt execution of the order.
Take full advantage of LED technology with our help.
POLYJET PRINT TECHNOLOGY – + PJ
PolyJet is a revolutionary 3D printing technology that is a powerful tool for high performance additive manufacturing. The technique was invented and patented by Stratasys. The operation of a PolyJet 3D printer is very similar to a conventional, well-known inkjet printer, but printing is carried out not on paper and not with simple ink, but on a special substrate in the chamber, and an acrylic-based liquid photopolymer acts as a material.
The PolyJet-enabled 3D printer is equipped with a special print head with nozzles. There can be several printheads, which allows you to print faster and even prototyping several objects at once. The printing process is carried out by dosed deposition of a photopolymer. One layer of 16 microns is sprayed at a time. Then this layer is exposed to an ultraviolet lamp and the photopolymer turns into a hard plastic. After that, the working platform with the substrate is lowered, and the algorithm is repeated again. When printing complex geometric shapes, a support material is used. For this technology, a special gel-like material has been created, which is easily removed with plain water or hands.
A key feature of PolyJet 3D printing technology is the ability to use multiple materials in one print run. At the same time, there are models of 3D printers that can mix photopolymers in various proportions, obtaining a variety of composite materials with certain characteristics. Also, this technology is characterized by the possibility of complex color reproduction. That is, it is possible to use color printing, the palette of which includes about 1000 colors and shades. In fact, it is the only additive manufacturing technology that supports these capabilities.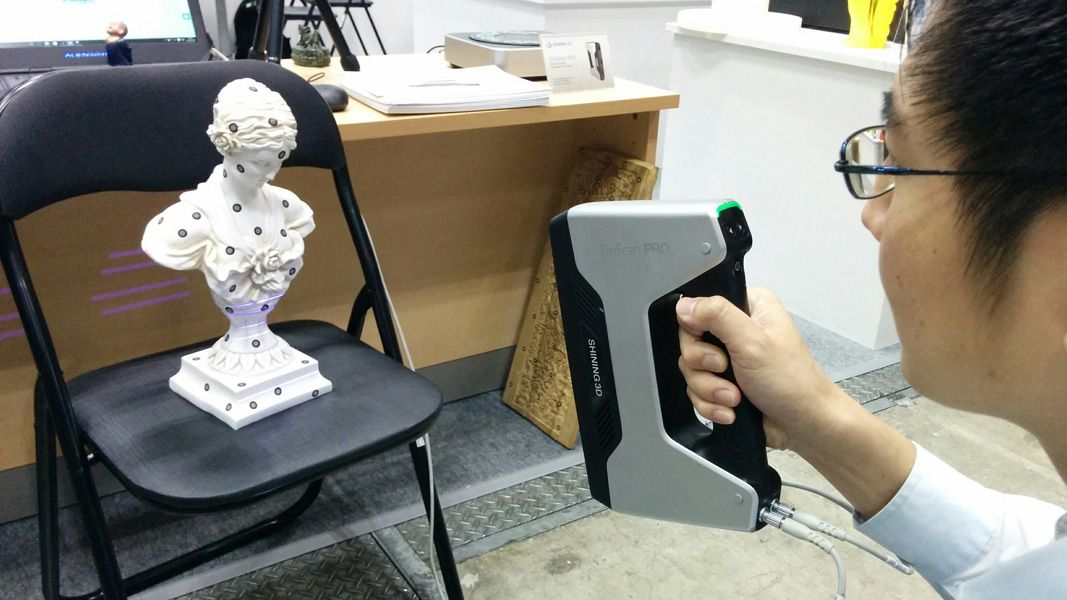
Other advantages of the method include: high printing speed, high accuracy and detail, perfect surface and generally excellent quality of printed objects. In addition, a wide range of materials allows you to create objects of almost any kind. More than 100 different photopolymer resins can be used as a base, mixing of which allows obtaining materials from transparent to completely opaque, from hard to elastic and rubbery. This is truly a new standard for realism in the most complex prints. PolyJet technology allows you to achieve perfect surface smoothness and imitate any even the most subtle texture. The camera of the PolyJet 3D printer is quite large, but if you need to print a large object, then it can be broken into parts, which are then simply glued together.
The only disadvantage of the technology is its high cost. The equipment is very expensive, and photopolymer resins are not cheap. But this does not mean that you cannot use this technology, because you have the opportunity to order 3D printing using PolyJet technology in our company. In a short time, we will implement your project on our own 3D printer. All you need is to provide us with the STL file.
PolyJet 3D printing technology is truly limitless.
COLOR JET PRINTING TECHNOLOGY – + CJP
Color inkjet 3D printing - CJP (ColorJet Printing) technology - a patented technique invented by 3D Systems. It consists in layer-by-layer gluing and coloring of the powder gypsum composite. 3D printing of this type is based on a technique called 3DP, which is its improvement.
3D printing by this method is based on the use of two materials: base and binder. To create the base layer, a consumable of the main type is used. It consists of gypsum mixed with a polymer. And the binder is used for gluing and staining the layers.
ColorJet Printing 3D printer has two cameras. A gypsum composite is poured into one of them, and the second chamber is used to remove excess material.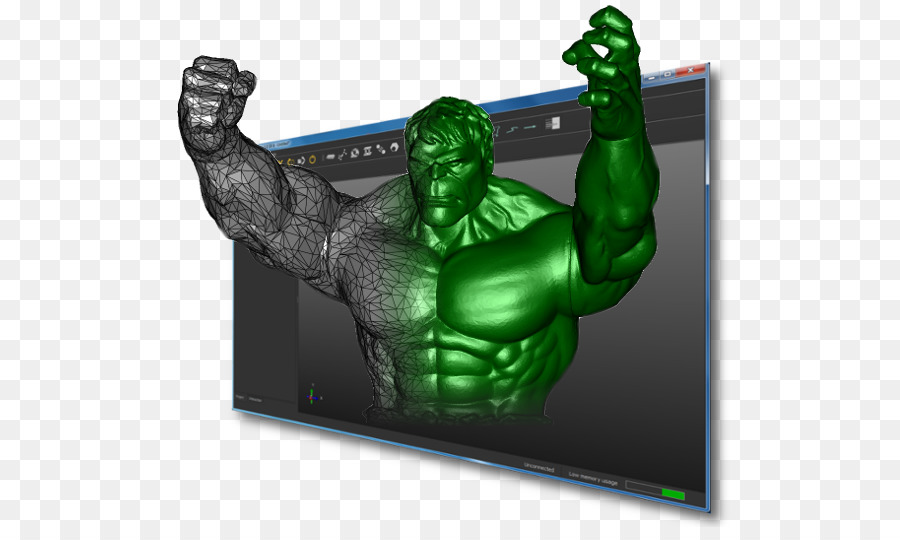 The model is "grown" in layers. A special roller distributes a thin layer of material on the working platform. The print head applies the adhesive and colors the main consumable particles. All this is carried out in accordance with the loaded mathematical 3D model. The working surface is lowered by the amount of the layer (0.1016 mm), and the roller again applies a layer of gypsum composite powder, and so on until the model is printed to the end.
ColorJet Printing technology has a relatively low cost of printed models. Its advantage is the absence of the need for supports, since the non-glued material will act as supporting structures. In addition, the material that was not used during printing can be reused. It turns out that this method of additive manufacturing is waste-free.
The CJP technology is the only one that uses the CMYK printing color palette. This palette includes 390 thousand colors and shades. The material is dyed during the gluing of the layer, resulting in details with excellent color reproduction.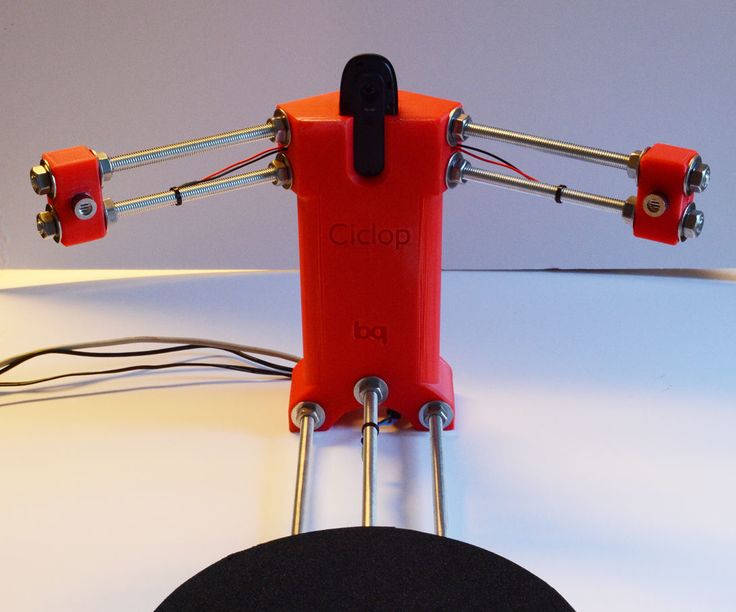
The accuracy of building a model by this method is very high, the minimum printed element has dimensions of 0.1-0.4 mm. The thickness of the walls of the prototype, which will not collapse under their own weight, is 0.102-0.089 mm.
Models printed using ColorJet Printing technology have a typical gypsum rough surface, characterized by a high degree of hygroscopicity. The strength of the models is average. However, finished models are easy to sand, paint and glue. To improve the characteristics of the model and protect them from moisture, you can cover the surface with varnishes, waxes, resins, as well as all kinds of fixatives.
The technology can be used for 3D printing of architectural models, product presentations, souvenirs, miniatures, etc. Despite the fact that the products are of low strength, they allow you to visually evaluate the prototypes.
CJP 3D printer has impressive dimensions and is quite expensive, despite the fact that the cost of printed prototypes is low, not everyone can afford such pleasure. In our company, you can order 3D printing using ColorJet Printing technology. We guarantee you prompt execution of the order and full compliance of the prototype with the modeled object. All you need is to provide us with an STL file with a 3D model.
Take advantage of CJP 3D printing technology with our help and appreciate all its advantages in practice.
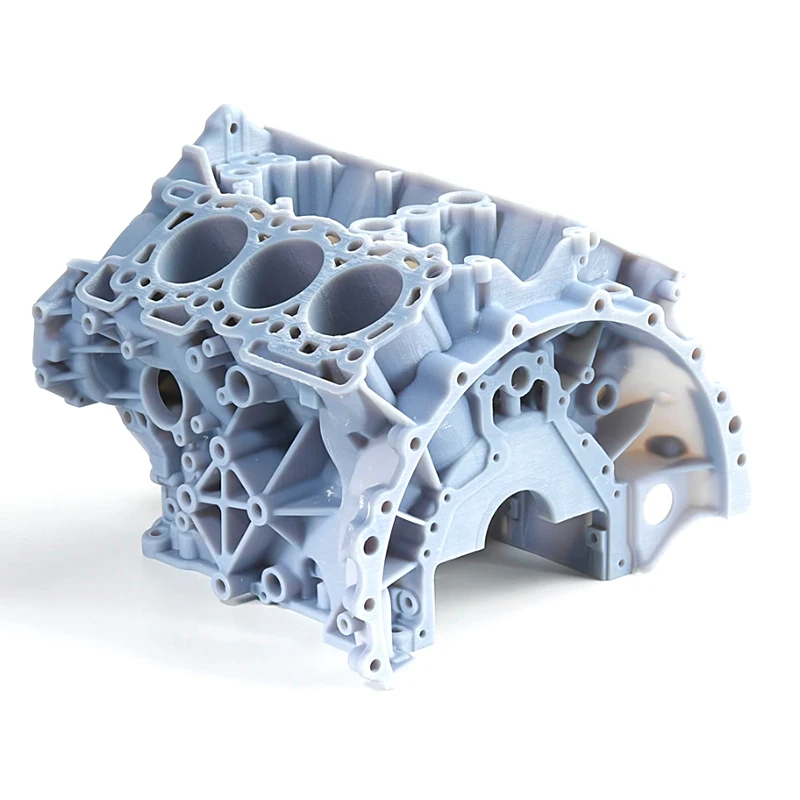
SELECTIVE LASER SINTERING PRINT TECHNOLOGY – + SLS
Selective, that is, selective, laser sintering is a 3D printing technology that was created back in 1979. However, for a long time it was not available to the market until DTM was created in 1996. In 2001, 3D Systems bought this company, and in 2014 the patent expired, and now this technology is available to a wide range of consumers.
The SLS 3D printing technique consists in the fact that the material is heated by a laser beam until the particles are sintered, that is, not completely. As a result, the model turns out not to be solid, but as if “sintered” from individual tiny particles. If we consider the structure under magnification, then individual particles of the material will be visible, as if glued to each other.
The operation of a 3D printer that prints using SLS technology is as follows. Powder material is poured into the chamber. A 3D model in STL format is loaded into the software. The working platform is exposed and a thin layer of material (thickness about 120 microns) is applied to it, leveled with a roller. The laser sinters the powder particles according to the loaded model. After the layer is completed, the platform is lowered and a new layer of material is applied. The procedure will be repeated until the very last layer is completed.
Since there is unused material in the working chamber, the need for supports simply disappears, because complex and overhanging parts will be supported by unused material. This allows you to get models of any, even very complex geometry.
Powder polymers, metals and their alloys, ceramics, glass, composite materials can be used as consumables. But in any case, the material must be in powder form. Due to the fact that the power of laser radiation can be adjusted, the degree of melting of the material can change, and, accordingly, the strength and uniformity of the structure of the resulting model. Currently, the most popular material for 3D printing using SLS technology is polyamide. This is a versatile powder material that can be used in almost any field. If powdered metal is used for printing, it is preheated to make printing faster and easier.
As a result of 3D printing, models are obtained with a surface that requires processing, in particular grinding. Models made of polyamide are sensitive to moisture, so they must be coated with a protective compound, such as moisture-resistant paint, if outdoor use is planned.
Selective laser sintering shows excellent results when used in small-scale production, as well as for the manufacture of master models.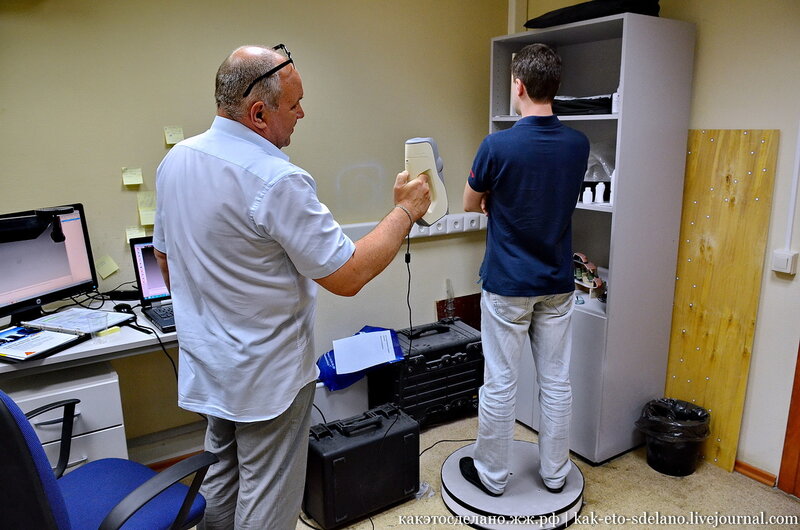 This 3D printing technology is in demand in the aerospace industry, in manufacturing, etc.
The disadvantages of SLS 3D printing technology are the high cost of equipment. In addition, the powder material is potentially harmful to the human body, so a separate room with air conditioning and an air filter is equipped for such 3D printers. All this imposes difficulties for additive manufacturing using this technique. But this does not mean that you cannot take advantage of the possibilities of selective laser sintering technology, because our company provides professional 3D printing services on such equipment. You can order 3D printing using SLS technology from us. All you need is to provide us with a file with a 3D model in STL format. We guarantee you high quality printing in full accordance with the provided 3D model.
SELECTIVE LASER MELTING PRINT TECHNOLOGY – + SLM
Selective (selective) laser melting - SLM is a 3D printing method from a mathematical CAD model, which is used to create 3D objects by melting metal powders. For this, high-power lasers are used.
Using this technology, it is possible to create precise metal parts that will later be used in various units and assemblies, including non-separable structures that change their geometry during use. This type of printing is becoming more and more widespread, because the parts created by this method are in many ways superior in their mechanical and physical characteristics to products produced by traditional methods.
The advantages of 3D printing using SLM technology are: the ability to solve the most complex production problems, including in the aerospace industry, where parts and assemblies have a hard load and serious requirements are imposed. Also, SLM printing is used in experimental and scientific and technical activities, where it is possible to significantly reduce the R&D cycle, because the most complex mechanisms and products can be created without serious equipment.
The technology also allows you to print objects with internal cavities, which can significantly reduce the weight of products.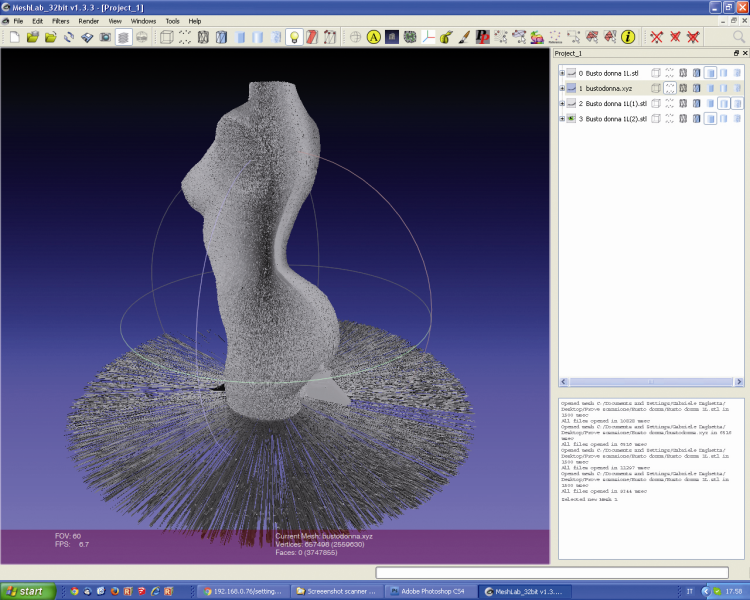
The essence of the method lies in the layer-by-layer application of metal powder on a special heated platform and its subsequent processing with a high-power laser, in accordance with the CAD model. The working chamber of the 3D printer, where the melting process itself takes place, is filled with argon or nitrogen. The choice of gas will depend on which consumable is selected for printing. Inert gas will be mainly consumed in preparation for printing, when the chamber is purged, because it is necessary to achieve conditions so that the percentage of oxygen in the chamber is no more than 0.15%. This is a necessary condition in order to avoid the oxidation of metals. Consumables can be: powdered metals and alloys. It can be tool or stainless steel, titanium and its alloys, aluminum, platinum, gold, as well as cobalt-chromium alloys.
The model is fused layer by layer. After the printing of the prototype is completed, it is removed from the chamber with the working platform and separated from it mechanically.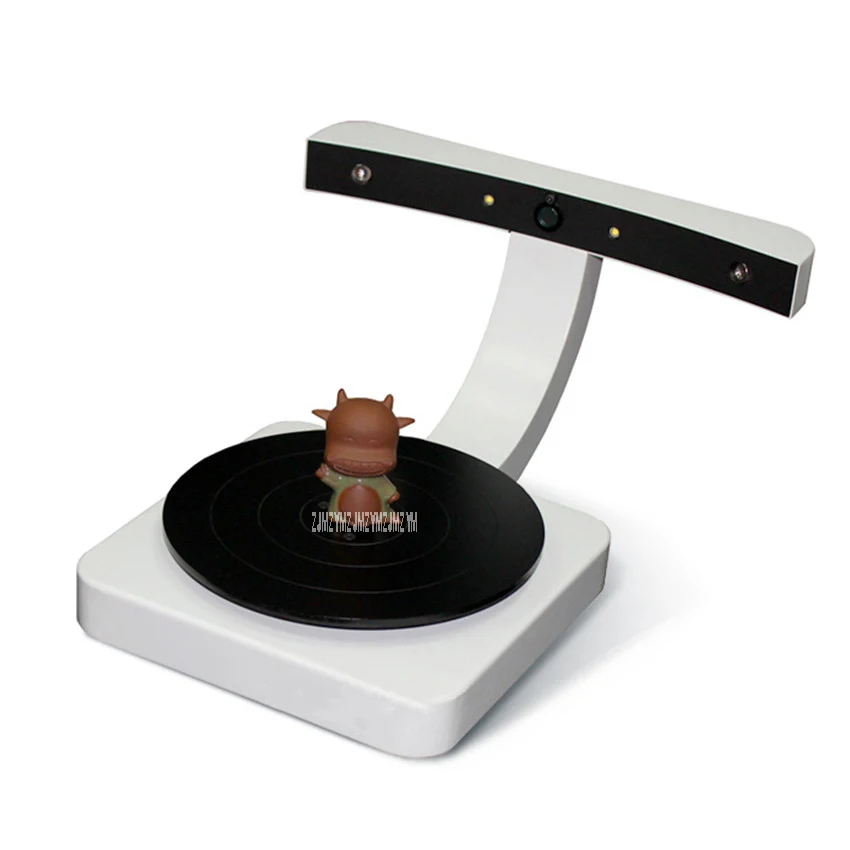 In the future, it may require processing, because the surface of the product may not be ideal. However, the product will be very strong and uniform in structure, similar to cast.
One of the advantages of the technology is its economy and non-waste. After all, unsintered material can be reused. The thickness of one layer is 20-100 microns. Thus, SLM 3D printing is a very precise and highly detailed additive manufacturing technique.
The cost of 3D printers using this method is very high. And in general, their operation is by no means a simple matter, requiring special conditions. But you have a great opportunity to use 3D printing using selective laser fusion technology with the help of our company. All you need is just to order 3D printing using this technique in our company. To do this, you need to provide us with an STL file with a CAD model for printing.
Take advantage of the innovative method of creating high-precision metal products - SLM printing.
ELECTRON BEAM MELTING PRINT TECHNOLOGY – + EBM
One of the most reliable metal 3D printing methods is EBM printing or electron beam melting.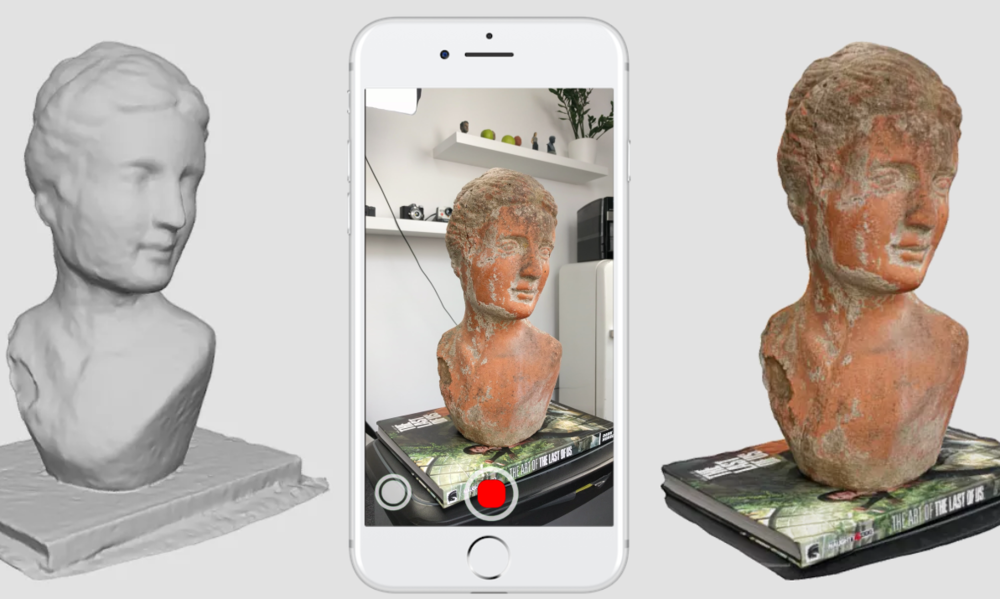 This is an additive manufacturing technology that is used to create high-strength, comparable to cast, metal products. Pure (without impurities) metal powder acts as a consumable. Printing is carried out in a vacuum chamber, which minimizes the oxidation of the material, such as pure titanium.
Electron beam melting is very similar to SLS 3D printing technology, that is, selective laser melting. However, it does not use powerful lasers, but electron emitters, which serve as sources of powerful energy used to melt metal. So-called electron guns fire high power electron beams that fuse metal powder. The method is similar to other 3D printing methods - the layering of consumables. A layer of metal powder is applied, and electron beams, following the contour of the model, fuse the material. Then the algorithm is repeated again until all layers are created and a finished three-dimensional object is obtained in accordance with the mathematical 3D model.
As a result of such 3D printing, a high-density metal model is obtained, and the porosity of the structure is absent. This means that additional processing by the method of firing for a strong fusion of the material in the model is not required. And the model itself will have high strength characteristics initially, that is, it will not differ in any way from cast products.
Electron beam melting is printed at high background temperatures of 700-1000 degrees Celsius. This avoids a strong temperature difference between the already cooled printed layer and the fresh hot layer. Therefore, printed parts will not suffer from residual mechanical stress. This is how the highest possible strength of EBM-printed products is achieved.
This 3D printing technology is used to create high-precision titanium prostheses and implants, such as hip and knee implants, skull parts, etc. Titanium combines strength and biocompatibility.
EBM printing is also used in the aerospace industry. With the help of this technology, load-bearing structural elements of various devices (aircraft, rockets), as well as parts of their engines, are printed.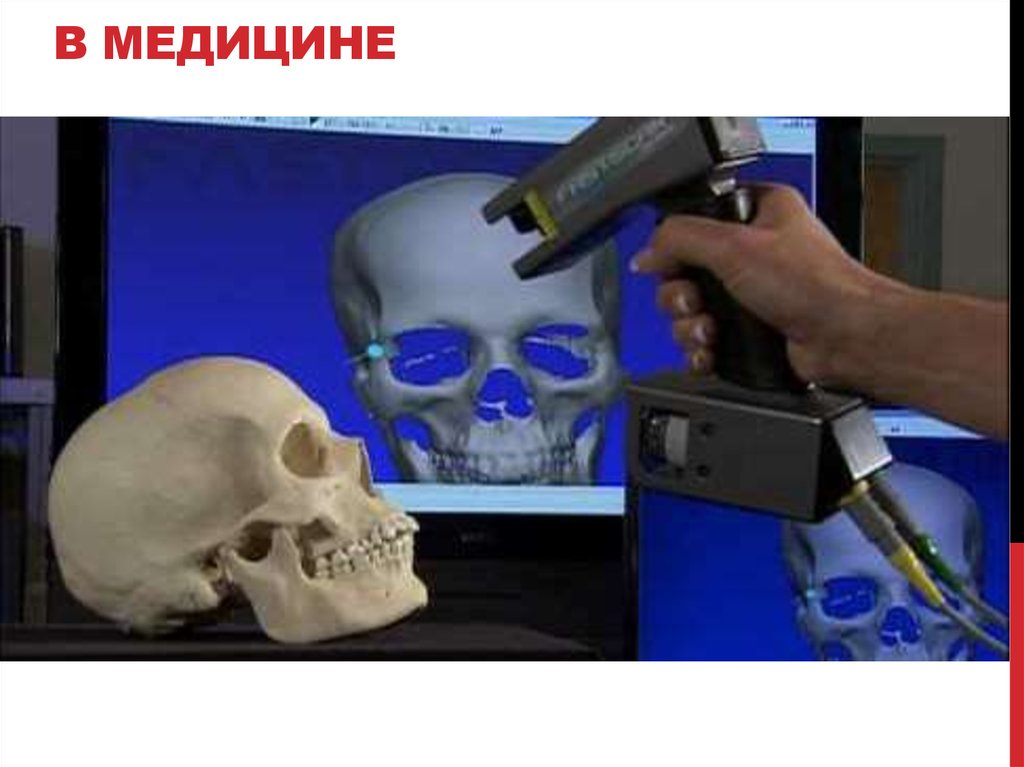 For this purpose, strong and light powder metals are used.
EBM printing equipment is very expensive. However, you can order 3D printing using the technology of electron beam melting of powder metal. We are ready to fulfill your order in the shortest possible time, and we guarantee the high quality of printed products, in full accordance with the provided STL file.
Take advantage of high-precision and high-strength metal 3D printing - electron beam melting (EBM).
Custom 3D modeling. 3D modeling services. Call
3D modeling services
Computer 3D modeling is the process of creating a model of a three-dimensional object in virtual space. There are several types of 3D modeling, which have fundamental differences. The first type - polygonal - is the construction of a model using polygons with three or four vertices. These polygons, combined into a single three-dimensional shape, form a polygon mesh or object. The more polygons will be used when building the model, the more accurately the object will be modeled. In this case, one speaks of high-poly modeling. Conversely, there is low-poly modeling with a small number of polygons. Such models have a more faceted appearance. Spline modeling involves the use of so-called splines - flexible three-dimensional patterns. 3D modeling of this type is reduced to the creation of a spline frame that will go around the geometric surface. In software tools specialized in this type of modeling, there are basic parametric objects used for work: line, arc, spiral, circle, ring and others. Spline modeling is considered more accurate, since when the scale of the object changes, the qualitative characteristics will not change. There are also other methods of 3D modeling, in particular 3D sculpting. In this case, the user has a tool - a brush and a 3D polygonal mesh. Using a brush, the sculpting process is imitated. There are also industrial 3D modeling using CAD (CAD programs): parametric, solid, surface, etc.
3D modeling applications
Using 3D modeling, you can create the following objects:
- architectural models;
- heroes and characters of games, films;
- locations for shooting movies and games;
- statues and souvenirs;
- cases for machinery and instruments;
- prostheses, orthoses;
- details of various mechanisms and much more.
How to order 3D modeling?
Our company can perform 3D modeling of various types:
- development of CAD models – creation of solid 3D models based on any drawings;
- development of artistic 3D models - creation of polygonal models of any complexity from drawings and drawings, including models of people, animals, etc.;
- 3D scan refinement – processing of 3D scan results, merging, registration, removal of noise, outliers, mesh optimization, texture correction, smoothing and error correction.
Learn more