3D print under extrusion
7 Ways How to Fix Under Extrusion – Ender 3 & More – 3D Printerly
If you own an Ender 3, you may have encountered the issue of under extrusion, where the printer is not able to push out enough filament to create a clean print. This problem can be frustrating, especially if you are new to 3D printing.
That’s why I wrote this article, to teach you some of the most effective ways to solve under extrusion in your Ender 3 printer.
What is Under Extrusion?
Under extrusion is a 3D printing problem that occurs when the printer is not able to extrude enough filament to create a smooth, solid print.
This can result in gaps and inconsistencies in the final print, which can be frustrating if you are trying to create a high-quality model.
Under extrusion can be caused by a number of factors, including clogged nozzles, low extruder temperature, or incorrect extruder calibration.
How to Fix Ender 3 Under Extrusion
Here’s how to fix Ender 3 under extrusion:
- Check your filament
- Clean the nozzle
- Adjust your extruder steps per millimeter
- Increase your extruder temperature
- Check your bed leveling
- Reduce infill speed
- Upgrade your extruder
1.
Before you start adjusting settings on your printer, the first step you should take is to check your filament.
Make sure that it is not tangled or kinked, as this can cause the filament to get stuck in the printer.
You should also ensure that the filament is loaded properly and that the spool is not tangled or twisted. If you notice any problems with your filament, you should replace it with a new spool.
One user was able to fix his under extrusion after noticing tangles in his filament spool and changing brands. Another user stated that this can be pretty common with cheaper brands.
Does anyone know how to fix this type of under-extrusion? from ender3
Check out the video below for detailed instruction on how to untangle filament.
2.
 Clean the Nozzle
Another step to fix Ender 3 under extrusion is cleaning the nozzle. It’s a common cause of under extrusion is a clogged nozzle.
Over time, the filament can build up inside the nozzle, which can cause the extruder to push out less filament than it should. To fix this problem, you will need to clean the nozzle.
To do this, heat up your printer to the temperature of your filament (200°C) for PLA, then use a needle or other fine object to carefully clear out any debris from the nozzle.
Users stated that clogged nozzles are the main cause for under extrusion and you’ll need to clean your nozzle thoroughly.
They also recommend checking if the length of the Bowden tube, which is the plastic tube that feeds filament from the extruder to the hot end, is right as that can also cause extrusion problems.
Filament doesn’t make it out of the nozzle? from ender5plus
Check out the video below for detailed instruction on how to clean an Ender 3 nozzle.
You can also use the cold pull technique to clean your nozzle. This consists of extruding some filament, then letting the nozzle cool down to around 90C and then manually pulling out the filament from the nozzle.
Check out the video below to see how this is done.
3. Adjust Your Extruder Steps Per Millimeter
If you have checked your filament and cleaned the nozzle but are still experiencing under extrusion, you may need to adjust your extruder steps per millimeter.
This setting determines how much filament your printer will push through the nozzle, and if it is set too low, your printer may not be able to extrude enough filament to create a solid print.
Users recommend this fix as it also helps to reach higher quality prints.
To adjust this setting, you must access your printer’s firmware and adjust the extruder steps per millimeter.
This can be a more complicated fix so check out the video below for a detailed instruction on how to adjust your extruder steps per millimeter.
4. Increase Your Nozzle Temperature
The next step you should take to fix under extrusion is increasing your nozzle temperature. If your printer is not extruding enough filament, it may be because the nozzle temperature is too low.
PLA filament, for example, requires a temperature of around 200 – 220°C. If your printer is not set to the correct temperature, it may not be able to melt the filament properly, which can result in under extrusion.
To fix this problem, you will need to increase the nozzle temperature until the filament is melting properly.
One user recommends increasing your temperature as a way to solve under extrusion.
What’s the most likely cause of under extrusion half way through print? from ender3
Another user suggests increasing your temperature and reducing your flow rate when suffering from under extrusion. He recommends inversely adjusting flow and nozzle temperature to reach better results.
Unexplained Under Extrusion. Extruder Gear Pushes Right Amount of Filament, but Print is Always Spongy? from 3Dprinting
Check out the video below for more information about diagnosing and fixing under extrusion.
5. Check Your Bed Leveling
Another fix is checking your bed level. If your printer’s bed is not leveled correctly and is too close to the bed, it can cause under extrusion by making it difficult for the nozzle to extrude material out to create a solid first layer.
To fix this problem, you should check your bed leveling and make any necessary adjustments.
I wrote an article titled How to Level Your 3D Printer Bed that can help you with that subject.
You can use a piece of paper to check the distance between the nozzle and the bed at various points, then adjust the bed until the distance is consistent.
One user recommends using the piece of paper method to level your bed as the tight springs will allow you to run for a few months without having to do any re-leveling of the bed.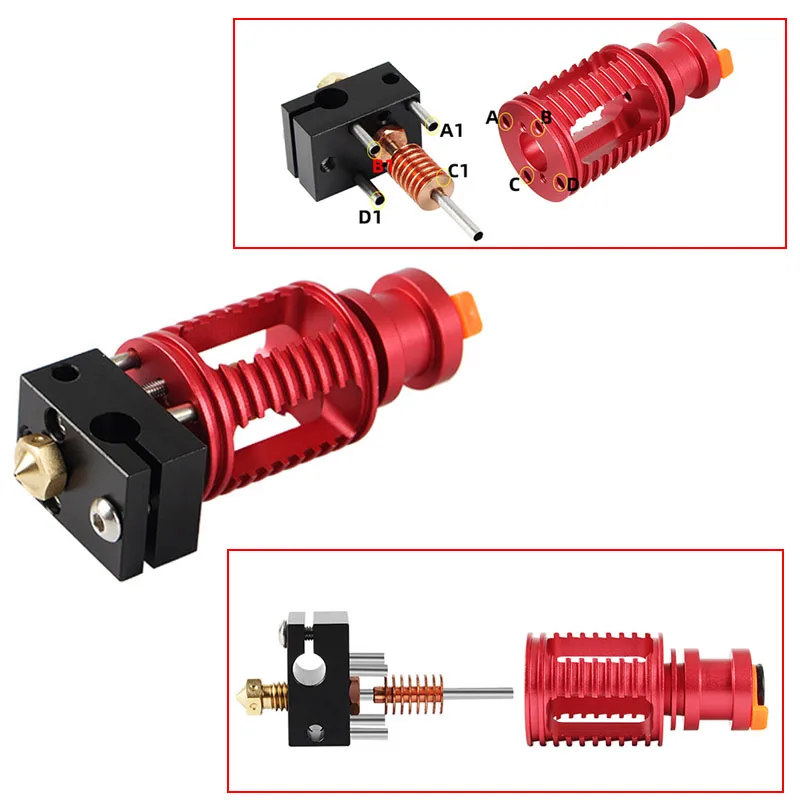
Check out the video below to see detailed instructions on how to level your bed using the piece of paper method.
6. Reduce Infill Speed
Another method you can try in order to fix under extrusion is to reduce infill speed.
When the infill speed is too high, the filament may not have enough time to melt properly, which can cause it to clog the nozzle or not adhere properly to the previous layers.
By reducing the infill speed, give the filament more time to melt and flow smoothly, resulting in a more consistent and solid print. You can find the infill speed setting in the slicing software you’re using.
One user who was experiencing under extrusion mostly on the infill portion of his prints got recommended this fix by other users as a way to solve his issue and it worked out well.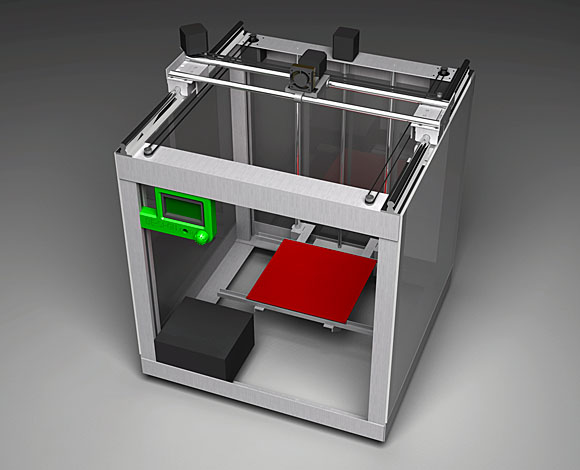
Under extrusion, but only on the infill? from 3Dprinting
7. Upgrade Your Extruder
If none of the above methods work, you may need to consider upgrading your extruder.
The extruder is responsible for pulling and pushing the filament through the printer, and a better extruder can provide better filament control, which can help prevent under extrusion.
There are many different extruder upgrades available for the Ender 3, so be sure to do your research to find the best option for your printer.
When upgrading your extruder you should consider factors such as ease of installation, filament compatibility, and durability.
A lot of users suggest the Bondtech BMG Extruder as one of the best options when it comes to extruder upgrades for the Ender 3.
Check out some popular extruder upgrades for the Ender 3 below. You can find any of them over at Amazon with great reviews.
- Creality Aluminum Extruder Upgrade
- Micro Swiss Direct Drive Extruder
Check out the video below for more great details about fixing under extrusion in a 3D printer.
How to fix under extrusion: Maintenance and print settings
When an FDM 3D printer works properly, it extrudes thermoplastic filament and deposits it in a sequence of two-dimensional layers. Sometimes, however, the 3D printer is unable to extrude the right amount of material, leading to noticeable issues like thin layers, missing layers, gaps, holes, and weakness of the printed part.
The problem of a 3D printer failing to supply adequate material is called under extrusion, and it happens to all printer users from time to time. Generally, under-extrusion is not a sign of any major hardware problem with the 3D printer, but the phenomenon can have a range of causes, which makes it tricky to diagnose the underlying issue. Under-extrusion can usually be solved by printer maintenance — cleaning the nozzle, for instance — or by adjustment of print settings.
This article examines what can cause under-extrusion and offers solutions for how to fix under-extrusion problems, both through physical maintenance of the 3D printer and adjustment of print parameters.
There are several potential causes of under-extrusion, and many of these relate to the condition and cleanliness of the 3D printer. Clogs, dirtiness, and incorrect calibration can all lead to extrusion problems, so learning how to identify these basic issues is an easy way to prevent under-extrusion.
Nozzle
FDM printers must feed a spool of thermoplastic filament through various parts of the machine, and there are a few areas where the material can leave a buildup of residue and cause clogging.
If under-extrusion starts happening suddenly (and you haven’t made any changes to the print setup) then a clogged nozzle is a likely culprit.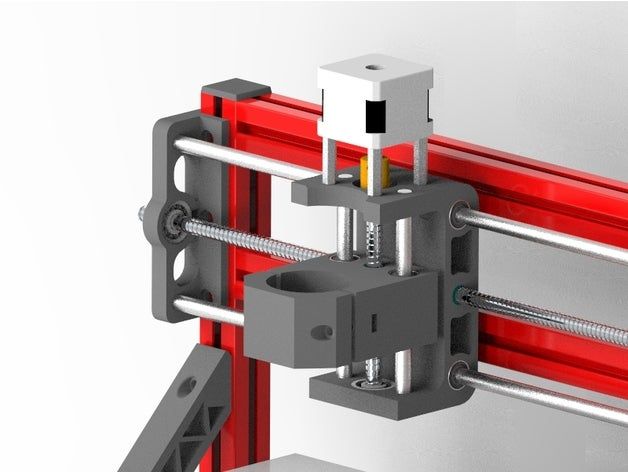 There are few ways to clean and remove blockages from a 3D printer nozzle, including:
Using a brass wire brush (not steel) to remove debris
Using a needle to remove internal debris
Running a special cleaning filament through the printer and performing a cold pull (letting the filament cool while it is in the nozzle, then pulling it out)[1]
Removing the nozzle and immersing it in a chemical such as acetone (best for ABS)
Removing the nozzle and using a heat gun to melt any filament left inside
Another hot end issue that can cause under-extrusion is a worn-out PTFE coupler — a component found on common FDM machines like the Creality Ender 3 and Ultimaker 2. The coupler should be replaced if it becomes deformed by heat.
Clogged nozzles can cause under-extrusion
Bowden tube
The hot end isn’t the only place where clogs can occur. Bowden tubes can also get clogged up with filament, and this can equally cause under-extrusion, as not enough filament is able to pass through.
A clogged Bowden tube is often the result of heat creep: when the tube gets hotter than it’s supposed to be and melts the filament before it reaches the hot end. To clean the tube, first remove it, then push a small piece of sponge or cloth through it using a piece of filament.
Gears and motor
Another common cause of under-extrusion is dirt on the extruder gears and motor. Any dirt or debris on these critical parts can be removed with a brush.
One reason why debris might accumulate in the extruder gears is incorrect tension on the filament. The tension must be great enough to cause small marks in the filament but not so great that the gears strip chunks out of the material, resulting in thin and weak layers.
Cooling fan
Bowden tubes can get clogged when filament melts too early on its journey to the nozzle. This is sometimes caused by issues with the printer’s cooling apparatus: if the fan is not able to regulate temperature, the material can overheat, leading to under-extrusion. The cooling fan may cease to function properly if it is installed improperly or if jamming has occurred. Check it for stray pieces of filament or other debris, and remove these items with a brush.
Filament
Problems with the 3D printing material can cause under-extrusion. These problems can include damp filament, knots in the filament, and incorrect material settings (discussed in the print settings section).
Damp filament can indirectly cause under-extrusion. This is because filament expands when it absorbs too much moisture, and a bloated strand of filament can cause clogging within the nozzle. Fortunately, it is easy to keep filament dry by storing it correctly and, if necessary, drying it out thoroughly before use.
Filament can also become tangled or knotted, especially when it is regularly removed from the 3D printer and replaced. Using a filament clip can help to prevent this issue.
Recommended reading: How to dry filament
Tangled filament can lead to under-extrusion
Firmware and software updates
Under-extrusion and myriad other issues can be caused by minor technical bugs, which tend to pop up when using outdated 3D printer firmware and slicer software. Install updates when they become available.
Cleaning, maintenance, calibration, and firmware updates can all help to prevent under-extrusion and related issues. Sometimes, however, adjustment of print settings (in slicer software like Cura, for example) is all it takes to fix under-extrusion.
Nozzle temperature
A common and easily resolvable cause of under-extrusion is insufficient nozzle temperature. If the hot end does not melt the material enough, it can struggle to push enough of it through the nozzle.
Slicers usually have default printing profiles for certain filaments. But it may be necessary to adjust the printing temperature by 5 or 10 °C to achieve the best results. Also note that non-brass nozzles such as hardened steel nozzles require higher temperatures, as they do not retain heat well.
Flow rate
Flow rate, the amount of plastic extruded per second, can be a cause of under-extrusion. When the set flow rate is higher than the actual capabilities of the printer, parts may come out under-extruded. Flow rate is defined by layer height, nozzle diameter, and printing speed.
In slicers such as Cura and Simplify3D, flow rate can be most easily adjusted via the extrusion multiplier parameter, which is usually set at around 90% (or 0.9) for PLA and 100% (or 1.0) for ABS.[2] When under-extrusion occurs, this value can be increased in small increments until the problem goes away.
Note that the default flow rate will be incorrect if the filament diameter has not been set properly. For example, if you are using 2. 85 mm filament but the slicer thinks you are using 1.75 mm, the printer will not feed through enough material at once. For the highest level of accuracy, you can use calipers to measure the exact diameter of your material.
First-layer calibration
Under-extrusion can be caused by printing the first layer too close to the build surface. Users sometimes calibrate the first layer very close to the build surface in order to improve adhesion, but this can have the negative effect of actually obstructing the nozzle and preventing the natural flow of filament [3]
First-layer calibration should strike a balance between adhesion and flow. If the print does not stick to the print bed, then a change in build surface material or use of an adhesive should be considered instead.
Recommended reading: How to clean 3D printer beds: Glass, PEI, adhesive
Retraction
Retraction is when the printer nozzle pulls back a bit of filament before it travels. Retraction can prevent issues like oozing and stringing, but incorrect retraction settings can cause under-extrusion issues.
When using significant retraction, under-extrusion may occur immediately after travel (when the printhead hops from one part of the print to another without depositing material), as the interruption of material deposition causes a loss of pressure. Under-extrusion may be mitigated by increasing the retraction extra prime amount, which increases pressure in the nozzle after retraction.
Although under-extrusion is difficult to stamp out altogether, carrying out regular maintenance and checking slicer settings can help to prevent the issue in most cases. If under-extrusion occurs, attempt the following:
Check nozzle and Bowden tube for clogs
Clean gears, motor, and cooling fan
Store filament in a secure, dry place and check the spool for knots and overlap
Update printer firmware
Try increasing nozzle temperature
Try increasing flow rate
Try printing first layer further from print surface
Try adjusting retraction settings
[1] How to perform a hot and cold pull [Internet]. Ultimaker. 2020 [cited 2022 Apr 19]. Available from: https://support.ultimaker.com/hc/en-us/articles/360011620800-How-to-perform-a-hot-and-cold-pull
[2] Under-Extrusion [Internet]. Simplify3D. 2019 [cited 2022 Apr 19]. Available from: https://www.simplify3d.com/support/print-quality-troubleshooting/under-extrusion/
[3] Under-extrusion [Internet]. Prusa Knowledge Base. 2021 [cited 2022 Apr 19]. Available from: https://help.prusa3d.com/en/article/under-extrusion_2007/
What technologies underlie 3D printing?
The plethora of 3D printing techniques currently on the market does not preclude continued ongoing research to develop more innovative technologies. Although the material differs depending on the printing method used, each technology has its own advantages. They are mainly related to the specific applications for which these printers are intended.
3D Printing Technology Overview
The 3D printing technologies available today are grouped into three main families. These include printing by wire deposition or extrusion (FFF, FDM), the use of liquid photosensitive resin (SLA, DLP), and finally the use of powder or sintering (SLS, SLM, DMLS).
Fusion or extrusion printing allows you to create an object layer by layer. It involves the use of plastic thread. Placed on the printhead, the latter melts and deposits superimposed layers on the print bed.
As for the liquid photosensitive resin, it is cured by projector or laser. This operation, also known as polymerization, causes the object to be created to form inside the tray containing the resin. Stereolithography (SLA) is one of the technologies that regularly uses this printing process. ₽
An energy source - for example, a laser - melts metal powder previously placed in a 3D printer tank. The term used for this type of printing is powder sintering or laser sintering. This is a technology with several options: SLS (Selective Laser Sintering) or SLM (Selective Laser Melting).
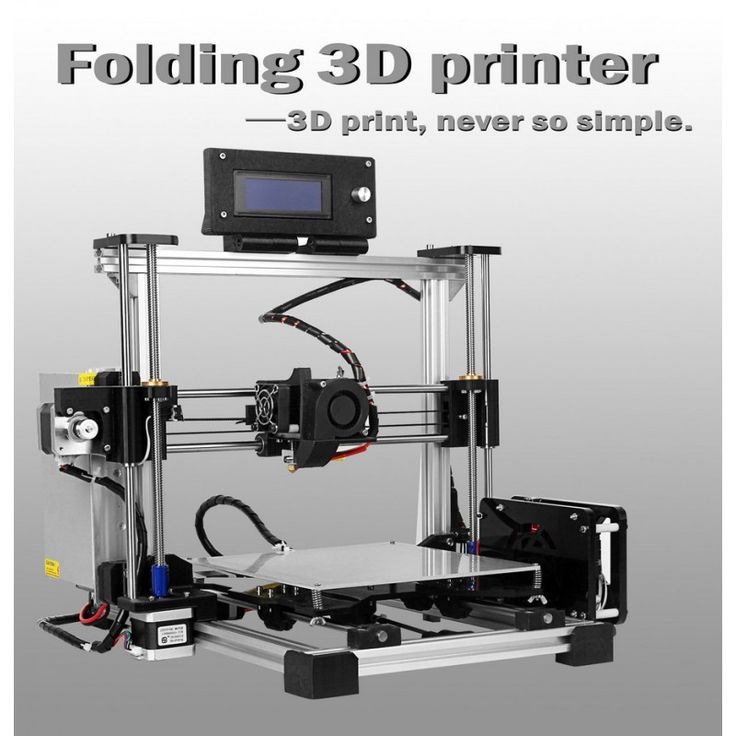
Molten filament printing
Two expressions are used to characterize this technology.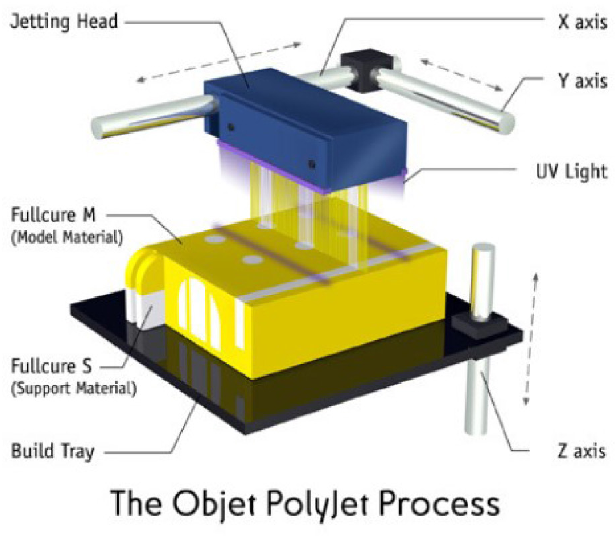 The first, FDM, comes from English (Fused Deposition Modeling).
As for the second one, FFF, it stands for Fused Filament Fabrication. The term extrusion is another name for this 3D printing process. The consumables are plastic filament (PLA or AB).
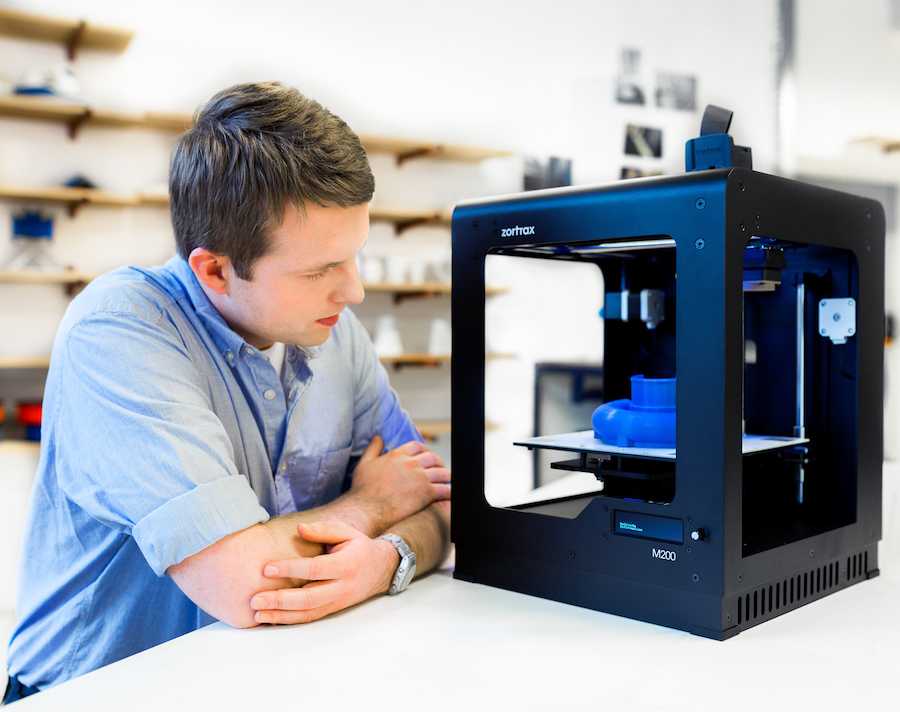
A 3D printer has a print head, also called a nozzle. It is on this nozzle that the previously heated fiber is melted. The nozzle moves along two axes, x and y, parallel to the print platform, which moves in the vertical direction. Only after the first layer is completed, the print platform lowers along its axis.
Molten thread is applied layer by layer to create a 3D object. The fusion of the various layers is due to the rapid solidification of the molten plastic. As soon as the layers of plastic are stacked on top of each other, we get a designed object, the model of which is visible on the computer screen. Extrusion can also be carried out using an energy source such as a laser and by direct application of energy. This 3D printing mode, better known by its acronym DED (Directed Energy Deposition), can be found on some industrial printers. The material pushed out by the energy source then melts before being fused into an object.
3D printing by polymerization of photosensitive resin
The use of SLA or DLP technology is typical for 3D printers using resin as the printing material. The process of their printing is polymerization. It refers to the curing of the photosensitive resin under the influence of a light source such as a laser or a light projector. The liquid resin in the printer tray hardens as a result of the reaction created by the light beams.
The print tray is located at the bottom of the tray that holds the liquid resin. A DLP projector or SLA laser emits light that hardens the resin from layer to layer. Finishing the layer allows the tray to sink further into the tray and so on until the object is made.
Having parts that require a high level of detail and resolution on the smooth side is a reason to use a 3D printer such as an SLA or DLP printer. Areas such as jewelry and medicine are the most common areas where this printing process is used. The production of molds intended for the manufacture of jewelry or dentures requires both precision and finesse.
Only resin polymerization makes it possible to distinguish between the two categories of SLA and DLP printers. On a DLP printer, the resin hardens layer by layer. In an SLA printer, on the other hand, it solidifies point by point. In addition, a DLP printer uses a projector, while an SLA printer uses a laser to print.
3D powder melt printing
Four technologies use this 3D printing process. These are powder sintering and melting, material grinding, paper lamination and, finally, 3D bioprinting.
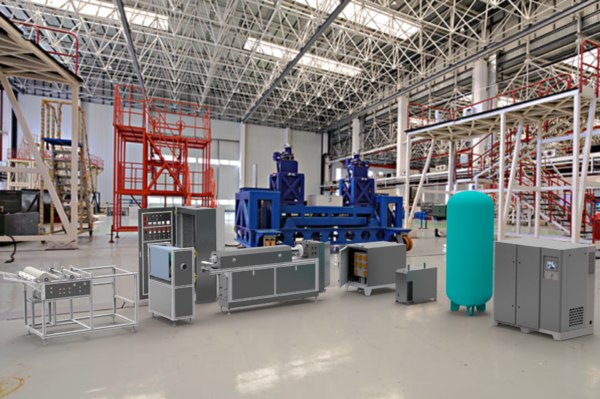
The use of metal powder as printing material is common in the industrial sector. Selective laser sintering or selective laser melting are two 3D printing technologies that use powder. In the field of aviation, for example, this technology allows the production of highly complex parts intended for use in aircraft.
Spraying or inkjet printing of material is a printing process in which molten material is deposited on a printing platform. The object is formed by the layer-by-layer solidification of the previously melted material. Multi-Jet Modeling (MJM) is another name for this printing method.
The 3D printing technology known as lamination uses paper or aluminum foil as the material. Objects produced using this technique are distinguished by the perspective of details and colors. The decoration and toy manufacturing sector are those who regularly use this technology.
The creation of living cells or organic tissues is the field of bioprinting experiments. This scientific process represents a real revolution in the field of medicine. Ultimately, bioprinting aims to produce functional organs or living tissues. While this technology is at the experimental stage. 3D bioprinters with this printing ability are not yet a reality. However, if they existed, such machines would make it possible to create organs and treat many pathologies.
Source
Tags:
3D printing technologies, 3D wire deposition or extrusion printing (FFF, FDM), 3D liquid photosensitive resin printing (SLA, DLP), 3D printer, 3D hot melt printing , 3D bioprinting
Problem with extrusion? You are here / Habr
Do you know what a real universal fakap is? Recently, I fully felt it in my skin. I hope the text will be useful for novice 3D printers, since the problem is not an isolated one, but it was not easy to find a solution, and even I, an old atheist, almost believed in miracles. Forgive me for the presentation, since I am not a writer or a blogger, but a simple engineer - a firm engineer.
In addition, the text is intended for people with minimal experience with 3D printing.
Solely for the reason not to inflate the article and not explain the purpose of various details and slang words. I'll start with the backstory. A little less than a year ago I bought myself an inexpensive 3D printer.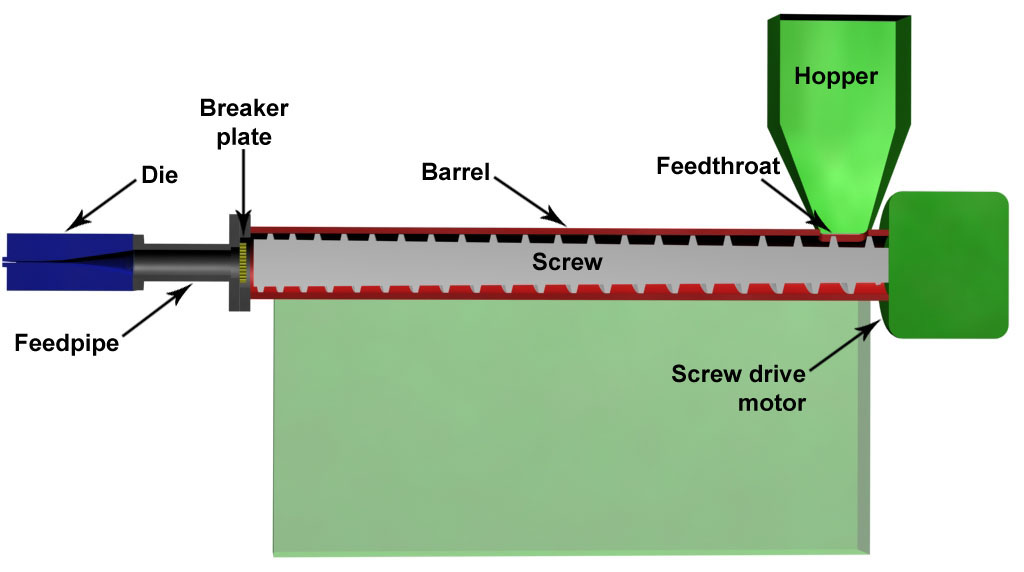 One of the most popular (not as advertising, but to make it clear what it is about) is Ender 3. The assembly was simple, there are many recommendations on the Web. Of course, assembling it according to the instructions, I would have received a non-working unit, but after “smoking the manuals”, I managed to complete the first test print for 5 plus for such a simple machine! Everything was fine up to a certain point. But then it began ...
If you're interested, welcome.
For those who are too lazy to read:
The extruder pressure roller arm has broken.
The printer was needed for a specific task - printing non-standard cases for various small-scale electronic crafts. After I played enough with ready-made models and provided my daughter with various little animals and little men, I mastered FreeCAD “on top” and began to do useful things. Everything went well . .. By and large, the print was launched "from the foot", set it and went to bed. Unless the first layer controlled. But the first "bells" appeared.
Somewhere part of the layer will fall out, somewhere the plastic will burn. I calibrated the table “according to a piece of paper”, sinned on the plastic and the nozzle, changed the settings in the slicer, plastics and nozzles - the problems disappeared. Bye…
At one "wonderful" moment, I ran into an "insoluble" problem. The end of March, a smooth transfer to a remote location (I successfully moved from the Moscow region to Minsk 2 years earlier), I decided to assemble a separate computer for work from what I had. In the stash was a good motherboard, processor, a couple of monitors and 2 cases. One is a huge full-fledged ATX, the other is a barebone. I decided to collect in a small one, so that it takes up less space. The case is non-standard. With cradle for 1 CD drive and 3.5 inch hard drive. I found 3x 2.5 SATA SSD of small volume, for the system and one is enough "more than" and 1x for 1Tb 2. 5 HDD.
All this "living creatures" was placed in a large building on a makeshift adapter from old bank cards. But, since a printer has already appeared, it would be nice to use it. I created a holder model, put it on print and went about my business. When I looked at how it prints, I saw only noodles ... From that moment on, the path of repair went, 2 months long. I will try to paint on the shelves, what helped and what did not, and what was the root cause.
Step 1 Adjusting the rollers {prevention is always good}
Once again, I set up the table “on a piece of paper”, launched it - the plastic does not stick. I changed the settings, plastics - without result. Instead of sticking to the table, it bends onto the nozzle. When I rechecked the nozzle gap settings, I found that the rollers were loose and the table had play by almost 5mm at the edges. It's strange how he used to print at all before ... It seemed that the reason was found.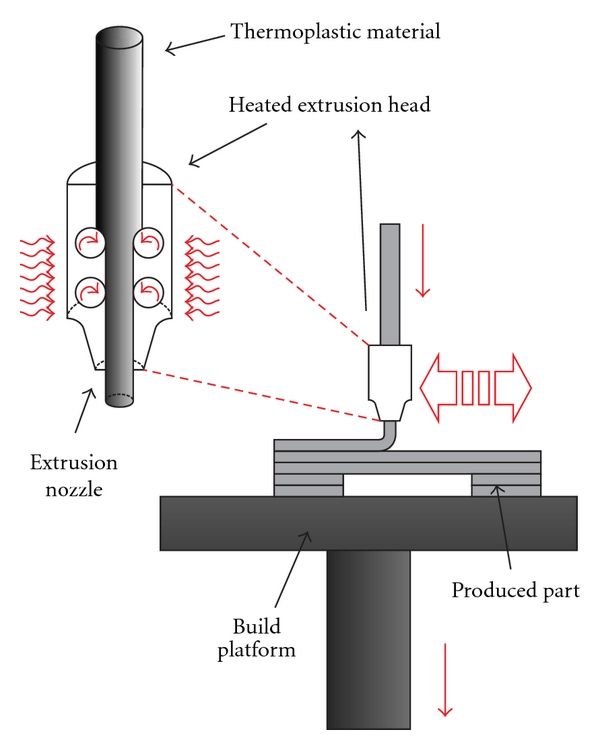 Adjusted. But it didn't get any better. With grief in half I printed the part, but the quality left much to be desired:
Clear gaps in print are visible.
And here are the bundles…
Step 2. Song of Ze[l]de {it's good when everything goes like clockwork}
The first thing that came to my mind was the problem in the Z-axis drive. And all the advice on the forums on a problem similar to mine pointed to this. Took it apart and checked for smoothness. The nut bit the thread a little and found a “bug” in a couple of rollers. When moving without the drive screw, the "X" rail stuck a little for 1 turn of the roller. I ordered a drive nut, rollers (spare parts are always good, but that was not the point). Using the method of combinatorics and some kind of mother, I distributed the axle rollers according to the loads so that the defective ones had minimal effort. The "bite" is gone. Cleaned and lubricated the drive screw.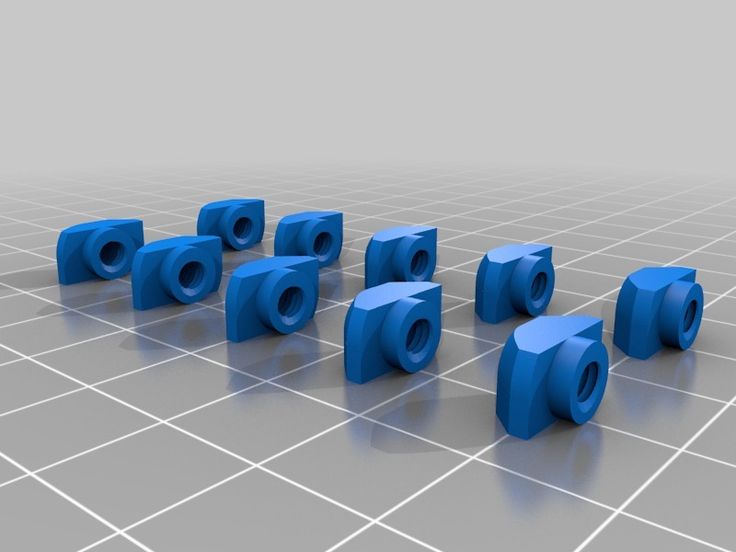 Adjusted the position of his engine. As a result, a light touch of a finger is enough to lower the carriage down. The result is negative.
Step 3. Slicer {tuning, but not solving the problem}
Updated slicer. Moreover, the new release just had an improvement related specifically to the print quality for my printer. Played around with flow and speed, layer thicknesses, etc. Even successfully printed some simple small cases and parts. But the settings were frankly wild: flow - + 10%, speed - -5%. Considering that after assembly, excellent printing was obtained at the “default” settings. The problem of printing complex parts has not disappeared ...
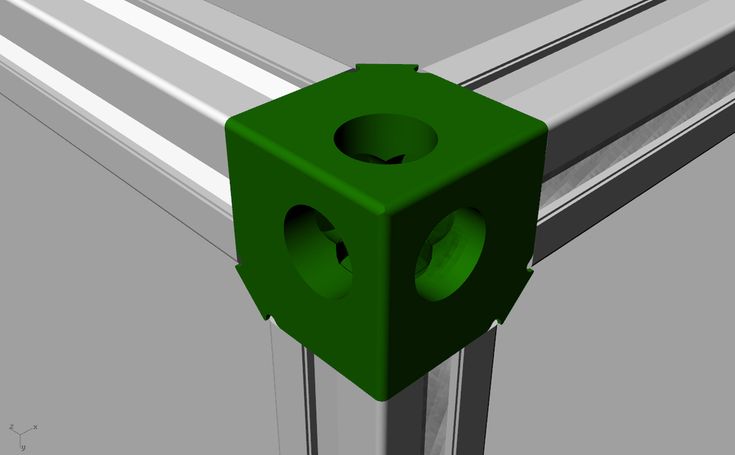
Based on this article: https://habr.com/en/post/494058/ I made a brushing timer for my daughter. I am preparing a separate description for it. Spoiler: eight-legged controller, firmware - 119 assembler commands.
Step 3. Extruder {and happiness was so close...}
Logic dictates that since there are no problems with the geometry and drives of the axes, there must be something with the feed.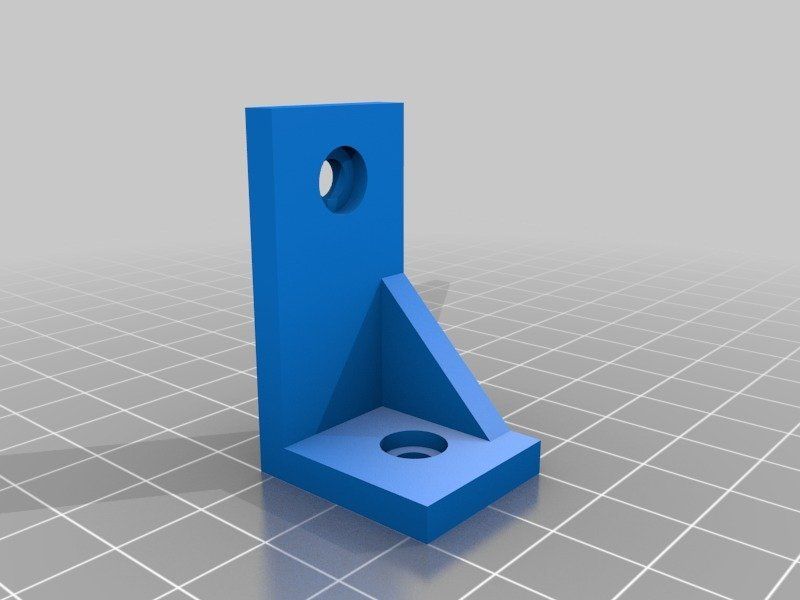 Removed the filament feed gear and cleaned it. No visible wear is observed. I returned it to its place, slightly shifting along the flight, to even out wear. The result is 0. Eh, if I look a little to the right, I would save a month of nerves and $ 200.
Step 4. Checking the SD drivers {no comment}
Excellent geometry, no problems with the mechanics. At the time of the first assembly, everything was much worse. A bunch of studied materials, improvements and settings, and the result is zero. I do not believe in miracles, electronics remained. Moreover, members of the forum often complain about burnt drivers. It is clear that a completely burnt out shoulder of the bridge can be detected “by eye” immediately, I thought about a “floating” malfunction. After all, the plastic lays down normally, then - passes, the thread becomes thinner, hair and other charms. I ordered an improved control board on ARM, but in order not to waste time, I decided to check the existing one. I removed the board, the Z-axis motor as an inductive load, assembled the stand on the table, set the temperature of the hot end with a resistor so that the extruder could be rotated. I looked at the waveforms on the SD coils. Everything is fine. He warmed the driver with a hairdryer (a crystal defect or unwelding sometimes manifests itself), mechanically acted on the driver IC, cooled propane with butane (gas for lighters). Note. It cools quite well to -20, it is not necessary to buy an expensive freezer for this. Everything is fine. Failures are not visible!
Step 5. Firmware update {I almost believed in miracle and conspiracy theory}
No, I am sure that miracles do not happen. There are bugs, glitches, tricks, lack of information, subjective perception of reality, after all. But not miracles! But how to explain that, with good mechanics and electronics, printing behaves extremely strangely? The Chinese made a bookmark in FW in order to additionally barry with boards? It is done elementarily, but, I think, they would have been discovered long ago and a white fluffy fox would have come to the trademark.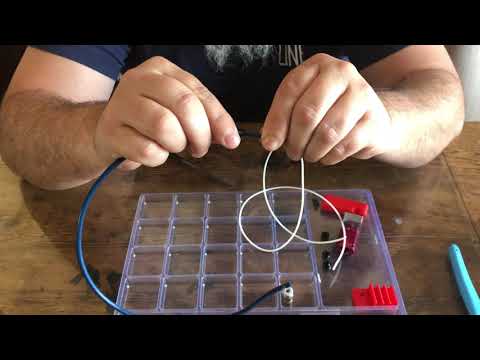 Bug in the firmware? Everything is possible, only somehow it manifested itself strangely.
Are the settings in the EEPROM messed up or is the FLASH * “buggy”? Most likely. Okay, since the board is on the table, nothing prevents it from being reflashed. Updated to "vanilla" Marlin 1.1.9, collected everything back. The result is that the miracle did not happen.
*Purely theoretical justification for the possibility of linking the problem with FLASH memory:
Let's say we have the following code fragment:
…
const uint8_t step = 0x18;
…
position += step;
…
At each iteration, the “step” setting is added to the current position. Since the program is executed on a microcontroller (MK), the code and constants are placed in ROM and can only be changed during an external programming procedure (we will omit the possibility of reprogramming the FLASH memory by internal means of the MK). This procedure is performed once by the manufacturer.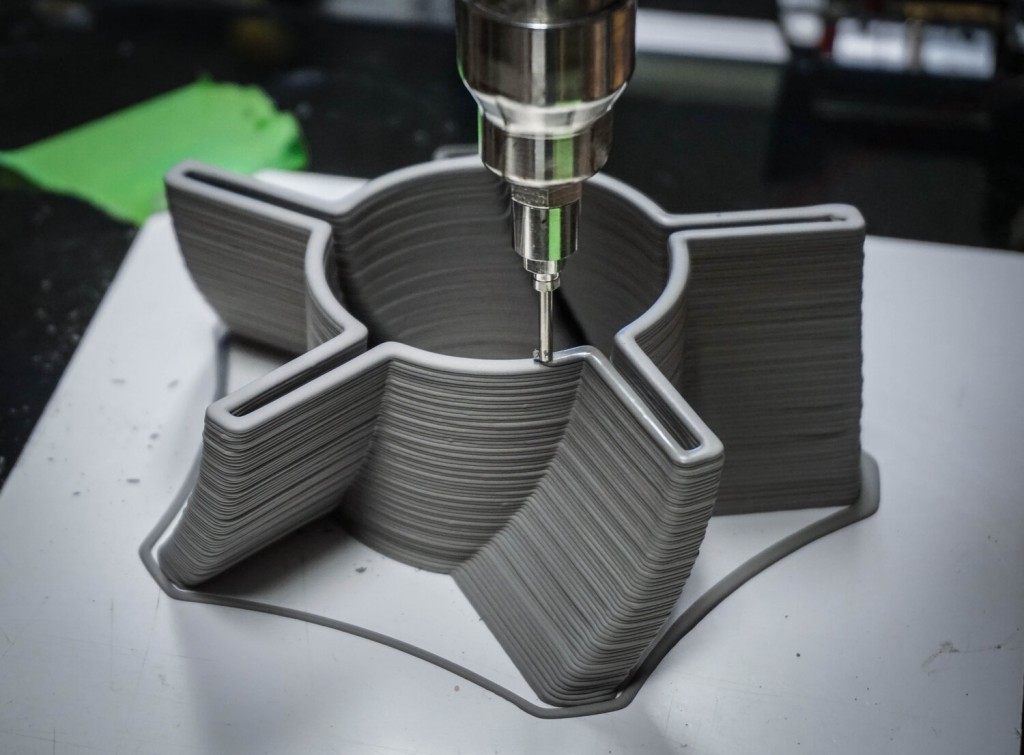 Now 2 important points: the controller processor reads commands and constants from ROM every time, forget about caches, Atmega does not have them. That is, if the loop went through 1000000 iterations, then the constant was read the same million times. With each read, FLASH degrades a little. I don’t know what the critical reading threshold for NOR is, I think it’s tens of billions, but TLC NAND already degrades quite well after 10-20K readings ... The second point is not the fact that our narrow-eyed friends did not use rejected controllers. I actually got one like this. PICs. Not soldered, but there are strange marks on the case. FLASH was not erased, at 3.6V they did not want to be erased or flashed. I had to raise it to 5V, after which the recording / verification began to take place. Let's say our constant was written to a defective cell. While the device is new, 0x18 was read stably. But from time to time (and for Atmega, the guaranteed time for saving data is not the longest) and degradation, at some point it began to read not 0x18, but 0x08.
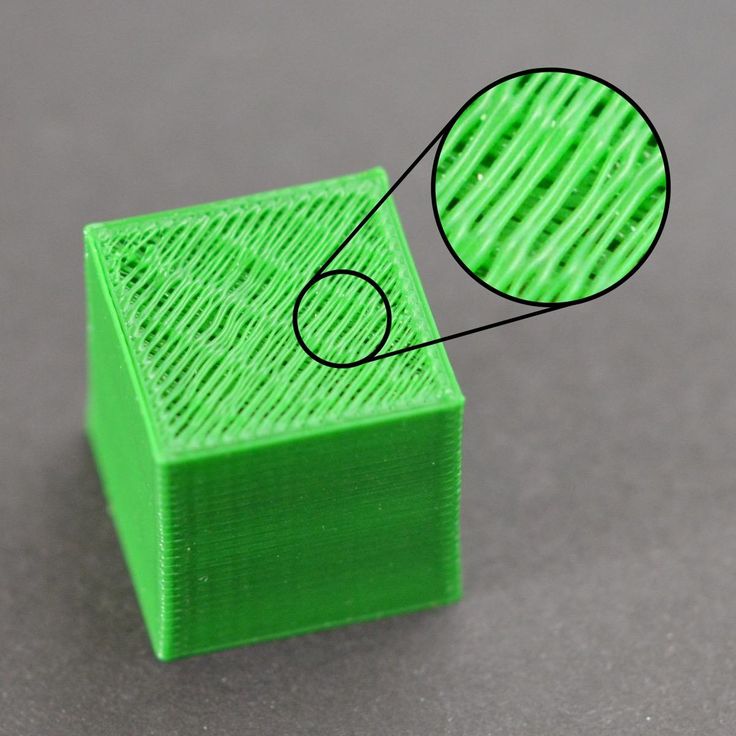 Not every time, but still. I know, rather than degrading 1 to 0, but vice versa, this is just an example. So, as long as the correct number is read stably, the movement occurs correctly, but when failures occur, an incorrect setpoint is added to the result, which leads to feed failures. This is the simplest and most unlikely example. There may be other glitches, for example, in the addition command, the source of R6 will change to R7. The assembler instruction remains valid, the processor will execute it, but the result will be incorrect ...
Step 6. Flush the “throat” {keep your head cool and the hot end clean, I recommend doing this immediately after buying a printer}
A gift from "heaven" was a link on one of the forums to a video from the manufacturer. There they honestly admit that not all hotends are equally useful, that is, they are well assembled.
Teflon tube not fully pressed in, cut uneven. The consequence is the formation of a cork and the extruder cannot normally advance the plastic. Here it is - my case!
Abnormal flow and retract values, everything converges. Despite late Saturday evening and a visit to a brasserie, I decided to check it out. Exactly. Guana is unmeasured there, right down to the remnants of the plastic that I used to print a month ago (the same green holder). Very likely to win! I cleared the “throat”, cut the tube evenly, pressed it in as far as it would go, also fixed the second end of the tube more tightly, many people use electrical tape, but I wound a little 0.7 wire, which allows you to freely unscrew the holder:
And here is the “killed” end of the tube, you can see that it was cut crooked:
The model is cut into layers with default settings. The seal ... The border went, the contour went, there is no snot during the retract. Hooray!!! Victory!!! I was about to write an article so that others would not suffer, but ... A complete fiasco. Thinning and tearing of plastic, gaps in printing. Already ready to give up.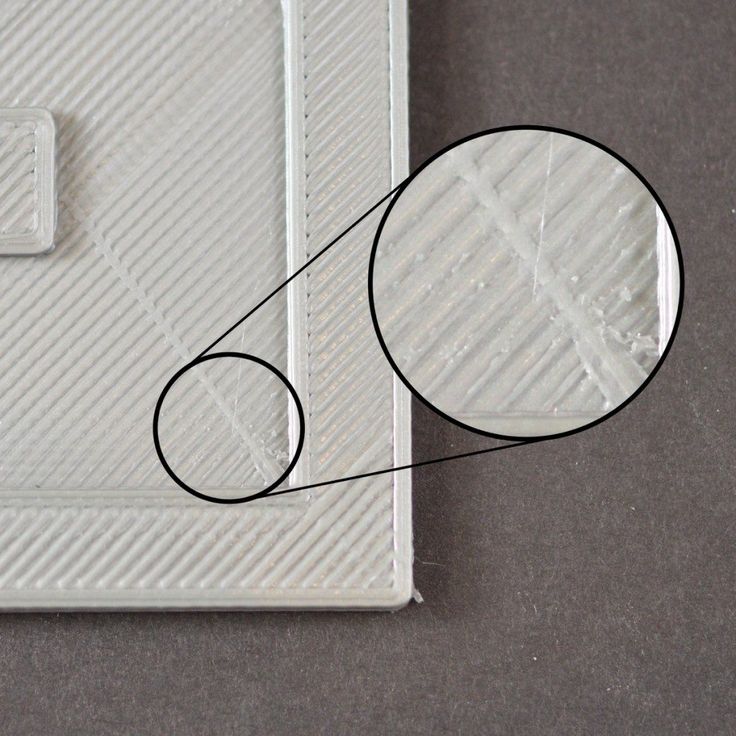 The wife encourages, but you throw it away, buy a new one! I can't do that. There must be a reason. That's just where??? There were no more reasonable (and censored) thoughts ...
Remark about cleaning the "throat":
All operations with the hot end are done only "hot", otherwise there is a chance to break everything. After warming up, the first step is to remove the nozzle and clean it from the remnants of the “cork”. I did this by heating the nozzle on a gas stove flame and carefully removing the plastic. Didn't clean the inside. Then, also on a heated hot end, the tube clamp is unscrewed. He can only move up. After retracting the latch, the tube should be gently but with force removed from the “throat”. We remove all the latches, since the damaged end still cannot be saved, carefully, back and forth, we clean out all the dirt, constantly removing it from the tube. As a result, the tube should easily pass through the throat through and through. The assembly was performed by the FIFO sequence. First, I installed the nozzle, then the tube clamp in the hot end, but did not tighten it completely, leaving about 1 turn. The worn part of the tube is cut off at a right angle and inserted into the throat as far as it will go. After that, the holder is tightened and the second one is installed, on the opposite side of the "teflon".
Step 7. Feed Calibration {with good mechanics, most likely not needed unless after replacement of drive parts or flashing}
In the instructions for upgrading to the "vanilla" Marlin, it was said that for the factory printer all settings are ideal, but the accuracy of the plastic feed may be slightly off. Okay, let's calibrate. He pulled out the plastic, warmed up the hot end (there is a lock in the firmware, it does not allow you to move “E” to a cold one). I unscrewed the tube from the feed mechanism, cut the plastic flush and executed the 300mm extrusion command. I have a ruler at 350. Extrusion lasts long enough, upon completion, I measured the length of the released filament and could not believe my eyes 226mm. I understand the difference of 3-5%, but not 25%! I'll try another plastic...
Note. I saw how the feed is regulated according to the marks on the bar marked with a marker, But with cutting, IHMO, more precisely.
Preparation for test extrusion:
After extrusion:
We measure with a ruler, in my case (after repair) it turned out 292mm. Next, go to the menu: control / motion / step mm, see how many steps per mm are set for the extruder. In my case it is 93. Do a simple calculation:
>>> (300*93)/292
95.54794520547945
Change the setting and save the setting. Re-extrusion - error at the measurement level.
Step 8. Victory!
At first I checked for PETG, I decided to change to PLA. The first one I overheated a little during drying, I attributed the inadequate spread to possible sticking on the coil. Cutting, extrusion. And nothing. Plastic is not supplied at all. The axis of the drive rotates slowly, but the screws show that there is movement. I looked, the bar did not lie correctly between the gear and the pressure roller. Okay, I'm correct. That the roller dangles a little. Gotta pull it up. And fig! Here he is the culprit of all my troubles:
The pressure roller arm is cracked. At the same time, the clamping force remained sufficient for partial advancement of the rod. Gear marks remained and the pressure roller rotated.
Accordingly, all games with the pressure spring setting were unsuccessful. The slips of the bar were invisible to the eye, and the crack could not be seen on the assembled mechanism. All! Engineer's ecstasy received! The lever was glued together, an aluminum mechanism was ordered, a spare was printed just in case (if it breaks while I wait for a new one). Here is a link to the model. Of course, it’s unpleasant to spend so much time and money over such a trifle, but it helped me dive much deeper into the processes of printing and catching glitches.