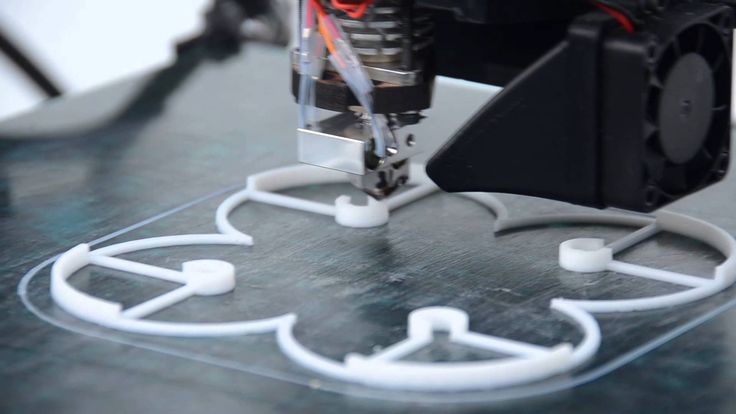
Kapton 3d printer
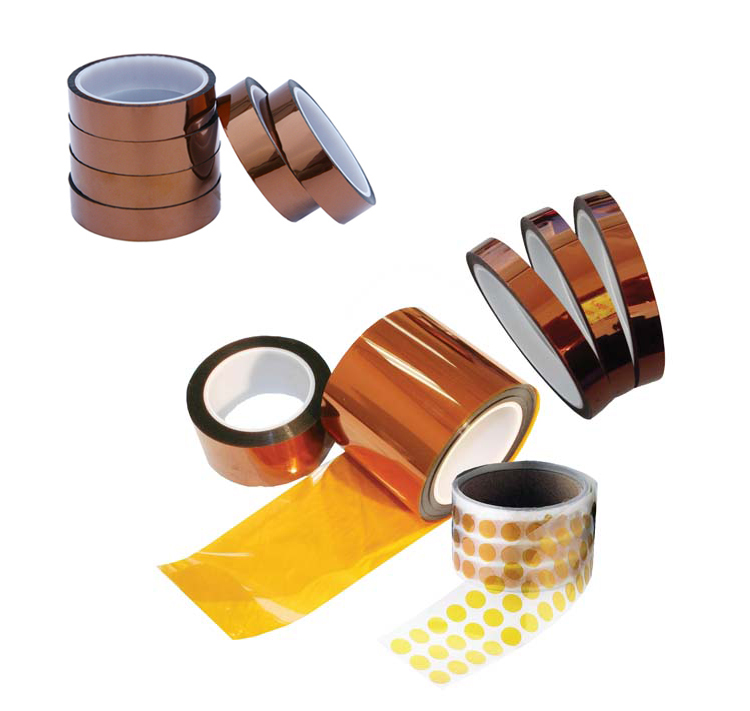
Kapton Tape for 3D Printers
Gizmo Dorks
$13.99
Current stock: 0
Kapton Tape for 3D Printing Beds
Get this superior quality Kapton tape for 3D printers! This tape works with many different 3D printing bed platforms. The beauty of Kapton tape is the ability of the polyimide film to withstand temperature. Therefore, many 3D printer users love applying this polyimide Kapton tape on 3D printers with heated build platforms. The plastic filament will have full adhesion to the polyimide film at the designated temperature, but it also has self releasing characteristics as the bed cools. Your print will be easy to pop off. Kapton tape is the practical choice for your 3D printer bed.
Kapton Tape Info
- Kapton layer thickness - 1 mil
- Adhesive (silicone) layer thickness - 1 mil
- Prints adheres well but come off cleanly
- Able to withstand high temperature from heated beds
- Durability to last several print cycles
- Works on many print surfaces
- Color - Amber Yellow
Available Sizes
Rolls
6. 25 inches by 100 feet
9 inches by 100 feet
Sheets of 10
6.25 inches by 6.25 inches
8 inches by 8 inches
9 inches by 12 inches
10 inches by 10 inches
12 inches by 12 inches
Application of Kapton Tape
Kapton tape can be applied via either the dry or wet method
Dry method
Apply the tape by rolling the tape on the build plate. Start with one edge first, and application is made easier if using a straight edge such as a ruler to adhere towards the other edge.
Wet method
Unroll and cut the desired size Kapton tape. If you are using the precut sheets, then simply peel away the protective backing. Spray down a thing layer of soapy water on to the build plate. Place the Kapton tape directly on to the soapy water mixture. The tape can be easily repositioned to the desired location because of the soapy water. Flatten and remove air bubbles along with excess soapy water with a squeegee. Allow the build plate to dry completely before use which will probably take a few hours.
Your shopping cart
Account
Log in
Email Address *
Password *
Forgot password?
New Customer
Create an account with us and you'll be able to:
- Check out faster
- Save multiple shipping addresses
- Access your order history
- Track new orders
- Save items to your wish list
Create Account
Forgot Password
Fill in your email below to request a new password. An email will be sent to the address below containing a link to verify your email address.
Email Address *
Bed Surfaces: Applying Kapton Tape
Certain filaments call for certain bed surfaces. Kapton Tape is a key choice for ABS, but it can get tricky when it comes to application. Learn how to apply this sticky tape flawlessly with our helpful tutorial.
Posted on April 28, 2016
by
MatterHackers
Kapton tape is the recommended bed surface for 3D printing ABS filament. The tape protects the bed surface and acts a base layer, while the hair spray or juice provides the adhesion.
Kapton tape (a registered trademark of DuPont) is a polyimide film. Created for the aerospace industry in the 1960s, Kapton tape as a flexible adhesive tape that is stable over a wide range of temperature, from -269C to +400C. The film was used for many awesome projects like the Apollo Lunar Module.
The tape was then discovered and utilized widely in the Electronics manufacturing industry for its electrical isolation properties in addition to the thermal stability. 3D printing, in particular the RepRap Community, discovered a new use for the robust material as a bed surface.
Kapton tape comes in large rolls which allow you to cover the entire bed with a single sheet. Unfortunately, applying the tape is tricky since it is easy to trap air bubbles underneath or make creases. In this guide we will show you an easy way to apply Kapton without trouble.
Step 1- Create Soapy Water Mixture
- First, you will need an empty spray bottle and some dish soap.
- Fill the spray bottle with water, then add a few squirts of dish soap. The exact mixture is not important.
- Shake vigorously.
Step 2- Remove Glass Bed
- Remove the glass build plate from your printer.
- If necessary, scrape off any residual plastic and clean the surface using Windex.
Step 3- Spray Bed With Soapy Water
-
Things are going to get messy at this point.
 Either lay down some towels or do this some place where you don't mind getting water everywhere.
 -
Spray the entire surface of your glass plate with the soapy water. Do not be afraid to use too much.
-
Spread the soap around and make sure that the entire plate is covered. If you miss a spot, the tape will get stuck there and you will have a problem.
Step 4- Lay Down Tape
- Pull enough tape off the roll to cover the entire bed, plus plenty of extra.
- Be careful not to let the tape get stuck to itself. You may need someone to help you at this point to hold the sheet as you cut it from the roll.
- Lay the tape down on the glass. The soap will prevent it from sticking and allow you to slide it around to get it in the right position.
- When you have the tape aligned correctly, stick the overhanging edges to the workbench below. This will hold the tape in place during the following steps.
Step 5- Squeegee Water Out
- Use a credit card or some other object with a hard edge to start pushing the soapy water out from under the tape.
- Begin at the center of the bed and work outwards.
- You will probably want to use a paper towel to soak up the water around the edges.
- Do your best to get out as much of the water as you can, especially around the edges. If you don't, they will be likely to peel up.
Step 6- Cut Tape to Size
- At this point you can cut off the excess tape with an art knife or sharp blade and then throw it away. The sheet will be stuck to the glass.
Step 7- Bake Moisture Out
- Now you have a perfectly applied sheet of Kapton with no bubbles underneath, however it is not ready for use yet.
- When the bed is heated, any residual moisture under the tape will boil, creating bubbles of water vapor.
 To prevent this, we need to thoroughly dry your build plate before use.
 - Install it back on the printer, and turn on the bed heater to low heat (60-70 °C).
- Let the build plate bake for an hour.
Step 8- Apply Hair Spray or ABS Juice
- You are now almost ready for printing.
- Apply your favorite bed adhesion solution. Hair spray works well and is convenient, but for the toughest prints you will want to use ABS juice.
Step 9- Print
- Heat your bed to at least 90 °C. If your printer is capable of getting up to 100 or 110 °C, then do so.
- Enjoy printing with ABS.
- If you are still having problems with peeling or layer separation, consider building an enclosure for your printer.
And that's it! It is really that easy. Now, get that Kapton tape on your printer and enjoy!
Happy Printing!
Article Tags
- 3D Printing
- Firmware
- 3D Design
- MatterControl
- Press Releases
- Small Business
- Automotive
- E3D
- Jewelry Making
- Engineering
- Entertainment Industry
- MatterControl Touch
- ESD Materials
- NylonX
- BCN3D
- Open Source
- Crafty Pen
- Digital Fabrication Anatomy
- How To
- Hardware and Upgrades
- Tips and Tricks
- Weekend Builds
- Top Ten
- Education
- Tech Breakdown
- Women in 3D Printing
- Project Ideas
- Advanced Materials
- Reference
- Vacuum Forming
- Pulse Dual Extrusion
- Product Spotlight
- Aerospace
- Jobs
- Military & Government
- Multi-Tool Machines
- Getting Started
- Healthcare
- How To Succeed With Any 3D Printing Material
- Creality3D
- Architecture
- 3D Printer Reviews
- Hacker of the Month
Related Products
View all related productsFrom classics to mysticism.
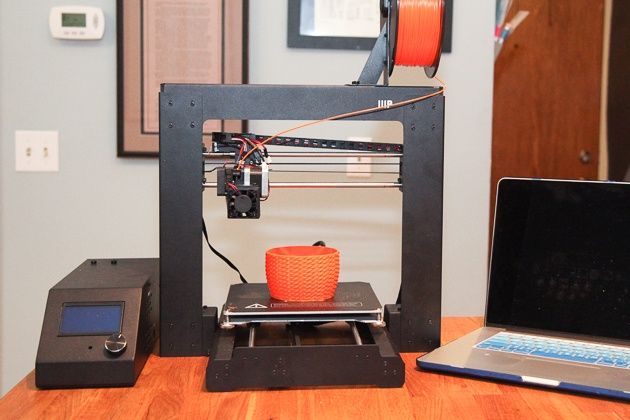
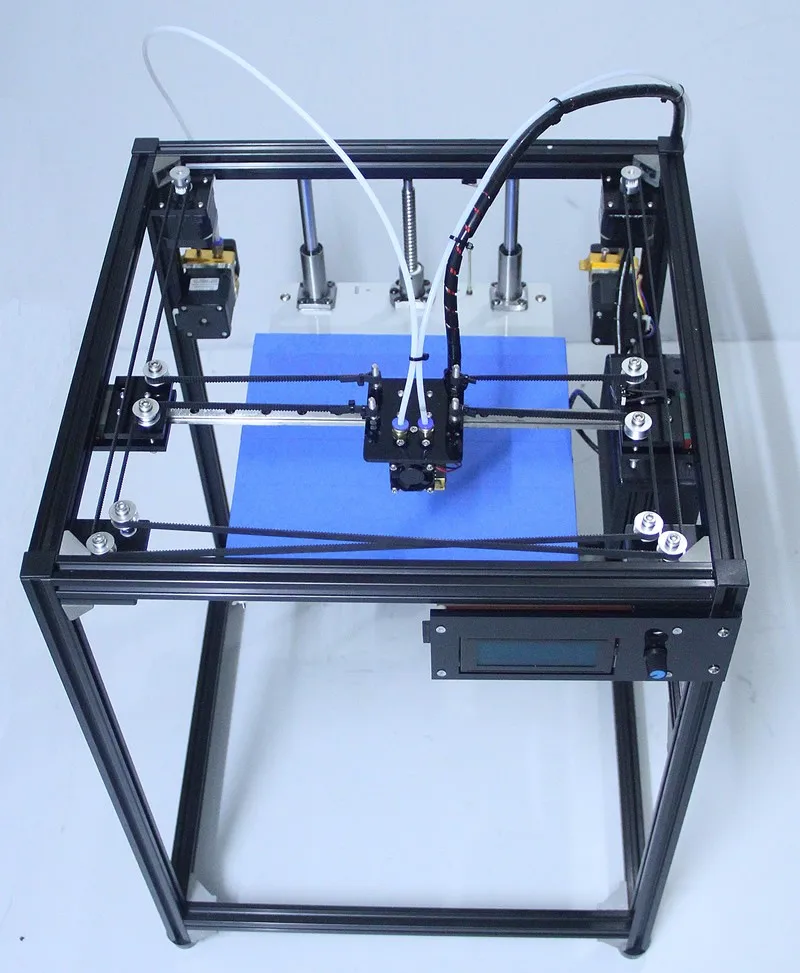
 My print surface test.
 Subjects:
1. Blue MARALSTSCH
2. Capton tape
3. film Lomond Self -adgeSive Inkjet Film 1708411
4. Sitall glass
9000 5. Catalyst - beer - beer 'Velkopopovicky KozetBlue masking tape
Great for printing small PLA parts without heating the bed. With an increase in the area of \u200b\u200bthe part, the edges rise along with the adhesive tape.
Kapton tape
I glue fresh tape, smear 'Light Goat' beer on a table warmed up to 110 degrees.
The bottom surface of the part (ABS) is smooth, except for the corners, which were unpleasantly raised. It does not adhere very well to fresh beer and the beer itself remains a brown film on the bottom surface of the part. Beer is easily washed off with water. The part separates well from the table after cooling, but it cannot be left overnight. The plastic begins to pull the tape and air bubbles form under the tape.
Such a surface after a few days of printing
Left the part overnight and the kapton wrinkled.
The bottom surface is glossy, but bubble holes remain
Lomond film
I looked at this film for a long time, but the moment came when it was time to replace the Kapton and I decided to experiment. I cut the film into two equal sheets and glued one onto the washed surface of borosilicate glass.
I completely forgot that the top layer of the film must be thoroughly washed off with water. At first, the ABS filament did not want to stick to the surface. After several calibrations of the nozzle relative to the table, the print still went. But the result did not satisfy me at all - the corners of the part were raised.
After the first print, there are air gaps under the film along the contour of the part.
I rubbed the surface of the film with my finger and remembered that the top layer needed to be washed off, which I did.
Sweat this bottom surface is obtained from ABS parts at Lomond. Minus one - it is very difficult to tear off the detail from the film.
After a few days of printing, air bubbles begin to increase and appear on the underside of the part. But this film is much denser and stronger than Kapton tape, so you can print much more before the appearance of obscene-sized bubbles.
Bubbles under the film.
Sitall glass
Let's move on to the mystical-cosmic material. So far, unexplored material that few people held in their hands.
Sitalls are crystalline materials obtained by introducing catalysts into molten glass, as a result of which crystallization centers appear in the volume of the material, on which crystals of the main phase grow. The term "sitalls" was proposed by the professor of Moscow Chemical Technology Institute. DI. Mendeleeva I.I. Kitaygorodsky and comes from the words "glass" and "crystal" . For the first time glass-ceramics were made in the 50s. 20th century Materials similar to sitalls are called pyroceram, devitroceram, glassceram abroad. Glass-ceramics have high strength, hardness, wear resistance, low thermal expansion , chemical and thermal resistance, gas and moisture impermeability.
Packaging
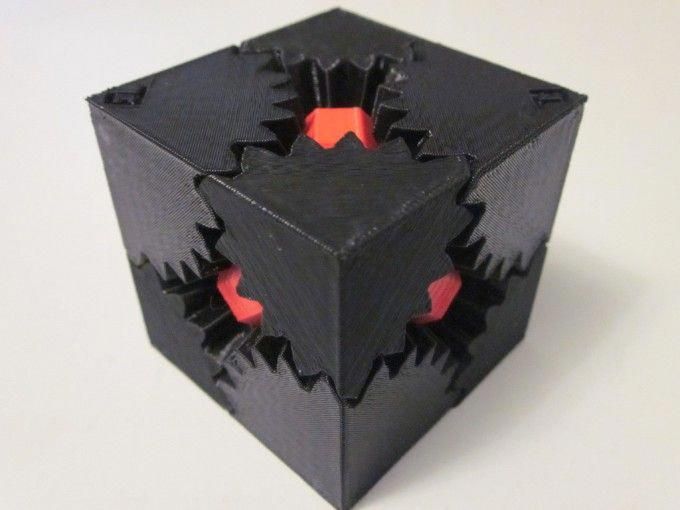
Wipe thoroughly with 646 Thinner. Reconfigured the dimension along the Z axis. Started printing the gear from the Prusa i3 Rework kit. ABS 265 degrees, table 116 degrees.
The result disappointed me. At 76 degrees on the table, the part is removed by hand, as if it had just been placed on glass.
Added 2 degrees to the table.
Brim cannot be printed.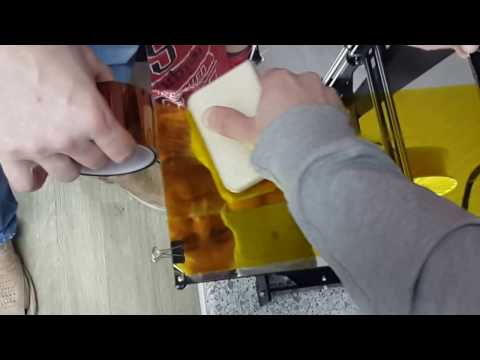 At a table temperature of 85 degrees, the part can be removed from the glass.
Now I wonder how Brim works. I'm printing an extruder part from the Prusa i3 Rework kit. If Brim will hold parts with a large bottom area, then this will be ideal, but so far I have not noticed any advantages in adhesion.
Table 118 degrees.
Looks like Kapton without beer so far.
Table 122 degrees. Model cal.stl from the Mendel90 project. I lowered the nozzle along Z by 0.1 mm.
Additional bubbles have appeared on the bottom surface of the part.
Tried to remove underprinted part from hot bed (119 degrees). Came off very easily.
I wiped the glass with alcohol - no effect.
Since the effect is like that of Kapton without beer, I decided to smear it with beer. The temperature of the table is 118 degrees.
This result is already acceptable. It shoots great.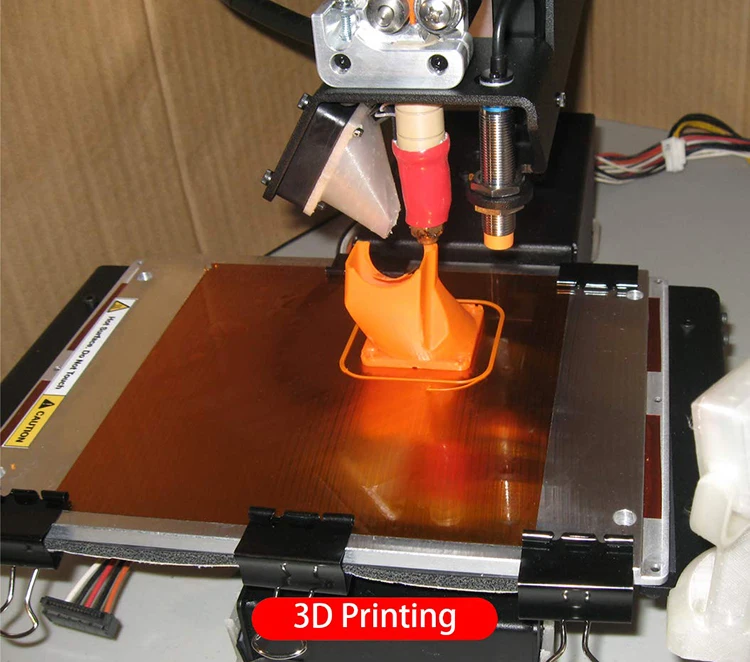
A little tack on a large part, just like beer should be.
My findings
Blue tape. Great for small PLA parts. Does not require table heating.
Kapton tape. Good for medium sized ABS and PLA parts. It is obligatory to heat the table and apply a layer of beer. Brim is required. If you print infrequently, then enough for a long time.
Lomond film 1708411. PLA did not print with plastic. Well suited for large-sized ABS plastic parts, until the moment comes to remove the part, it is very difficult to tear off (you can hit the part sideways). Brim (Brim) is not needed - gears without Brim are great. Dyuzhit longer kapton. Recommended for perfectionists.
Sitall glass. Printed with ABS only. Brim is required. The bottom part is glossy. On clean glass, the edges bend like on Kapton without beer. Be sure to smear with beer and get the 'eternal' kapton.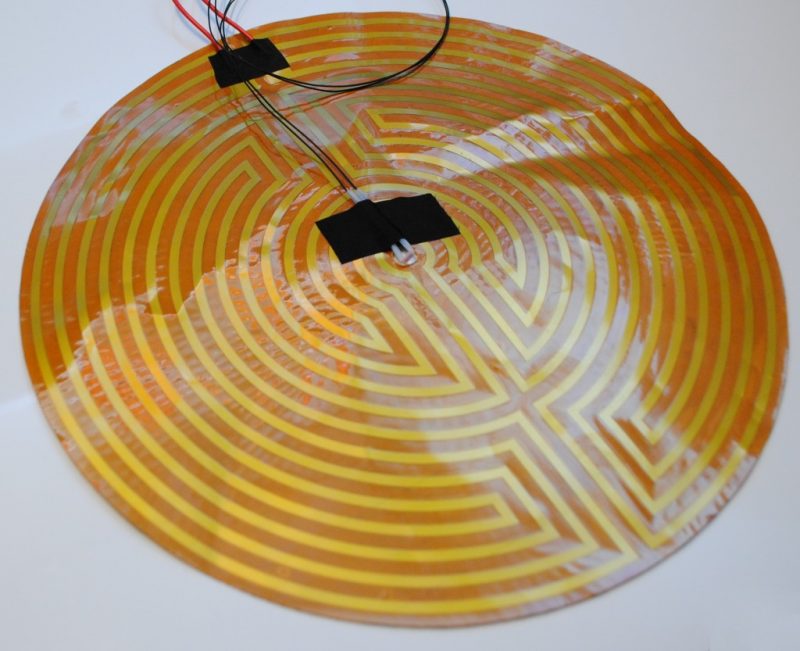 The part can be easily removed already at 80 degrees on the table. Ideal for those who want to automate the process of removing a part from the table using a manipulator or improvised men :)
Welcome to NIOZ.RU
Sort by
Item Name +/-
Item Price
Featured Items
Item Availability
Showing 1 - 60 of 661
153060150
Items
3D Scanner Ciclop
RUB 8500.00
Notify me when available
Item description
400 ml
RUB 1940.00
Item description
RUB 390.00
Product description
350 ml
RUB 850.00
Product description
Ready to print
RUB 23700.00
Item description
Ready to print out of the box
RUB 14500.00
Notify me when available
Item description
Print Ready
RUB 19900.00
Product description
Print ready
RUB 20900.00
Notify me when available
Item description
Ready to print
RUB 23900. 00
00
Item description
Ready to print out of the box
RUB 43500.00
Item description
Ready to print
RUB 39000.00
Product description
LCD 0.7/1.75 mm
RUB 1550.00
Notify me when available
Item description
OLED, 0.6/1.75mm, USB
RUB 2150.00
Notify me when available
Item description
RUB 650.00
Product description
Wiznet W5100 Arduino Shield
RUB 650.00
Notify me when available
Item description
RUB 550.00
Product description
Assembly kit
2500.00 RUB
Notify me when available
Item description
Volume: 1 l.
RUB 3100.00
Product description
Boscam 200mW, 5.8GHz
RUB 4550.00
Product description
Chimera, e3d
RUB 1700.00
Product description
Print head 1.75mm 0.4mm
1100. 00 RUB
Item description
Dual print head 1.75mm 0.4mm
2500.00 RUB
Notify me when available
Item description
Long
RUB 750.00
Item description
Short
RUB 700.00
Item description
RUB 100.00
Notify me when available
Item description
LERDGE 2IN1
Call for Quote
Notify me when available
Item description
Call for a quote
Notify me when available
Product description
Quantity: 1 set Weight: 10 g
RUB 100.00
RUB 1900.00
Notify me when available
Item description
APM2.6 mavlink
RUB 1350.00
Item description
ESP8266 is a highly integrated
chipRUB 650.00
Item description
RUB 250.00
Product description
Call for a quote
Notify me when available
Item description
11. 1V, 20C
RUB 1900.00
Item description
11.1V, 25C
RUB 1250.00
Notify me when available
Item description
11.1V, 25C
RUB 2100.00
Item description
Heat block v6
RUB 150.00
Item description
cartridge type thermistor
190.00 RUB
Item description
Heat block Volcano
Output parameters: 24 V, 600 W.
RUB 3300.00
Product description
12V 20A
RUB 1550.00
Product description
12V 30A
RUB 1950.00
Notify me when available
Item description
12V 5A
RUB 450.00
Notify me when available
Item description
24V 15A
RUB 2100.00
Notify me when available
Item description
RUB 250.00
Product description
Hobbed bolt
$150.00
Item description
Price per 10mm (free cutting)
RUB 13.