Cubify cube 3d printer 2nd generation review
Cubify Cube 3D printer (second-gen) review
3D printing is the talk of the town at the moment. Stories are flooding the press about how people are making everything from replacement Lego bricks to full working guns to wearable clothing and prototypes for the latest gadgets.
Our quick take
The Cubify Cube 3D printer makes 3D printing in the home a reality and certainly gives you a starting block that's ideal to explore what's possible.
Yes, there are limitations - but for the most part these are to be expected and at the entry-level position the Cube 3D printer pitches itself at.
Be warned though, there is the strong opportunity for this to be a five-minute wonder where you print whatever you can find on the internet and then the printer sits on your desk for the next six months doing nothing.
If you're serious about it and know your CAD software then there's stacks of potential - it just needs to end up in the right hands. Which we expect it will, because at £1200 it's no casual purchase that's for sure. If you want to explore, or are actually looking to use the Cubify for prototyping models, game pieces, or something else on a regular basis for your work, then the Cube 3D printer is perfect for that.
The second-gen Cubify Cube 3D printer is the future, right here, right now - the journey starts here and when 3D printing is as commonplace as any other printing in the future we can all look back, fondly, at where it began to infiltrate the home environment.
Kindly loaned to us for review by uk.dynamism.com
Cubify Cube 3D printer (second-gen) - 4.0 / 5
| FOR | AGAINST |
|---|---|
|
|
But it's not just restricted to the professionals - you can get in on the action too, and that's where the second-gen Cubify Cube 3D printer comes in. It's not cheap, but it undercuts the ultra-expensive devices out there and makes 3D printing at home a reality. Is it any good?
Printer ink this isn't
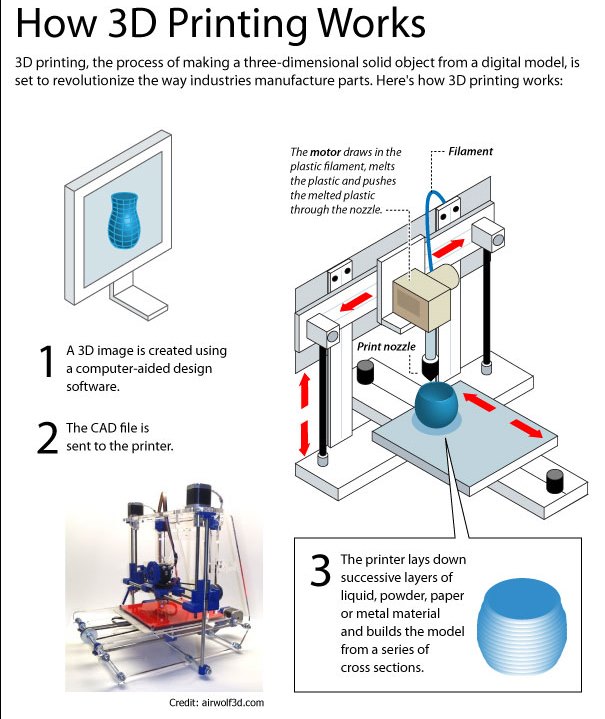
The Cube 3D printer works by enabling you design a three-dimensional product, and then send that design's instruction to the printer, either via Wi-Fi from your computer or by plugging in a USB stick. Unlike a "normal" printer you can't plug in directly to the computer by physical wires - that's reserved for firmware updates only.
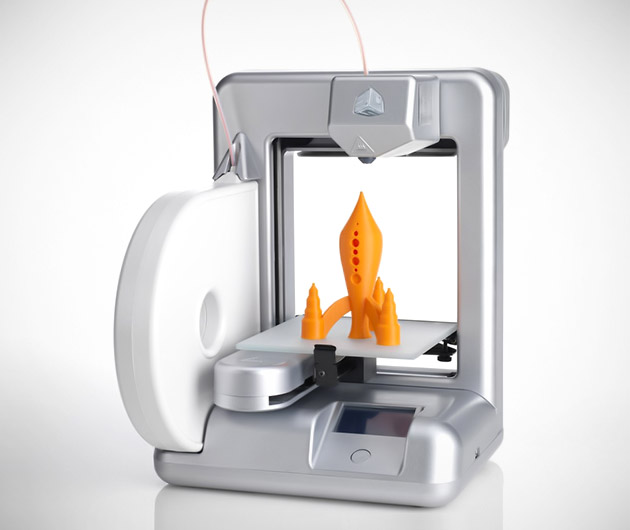
Once it's got the instructions, the Cubify gets to work building up your object by printing fine layers of PLA or ABS materials on top of each other. Printer ink this isn't - ABS is the same material used by Lego.
The material comes out of a cartridge hot, but quickly dries into a hard resin and the printing plinth moves up and down accordingly as it builds up those layers. It looks very cool.
Home printing
While you can get industrial-sized 3D printers that are the size of a cupboard and are used by the likes of Microsoft to design the Xbox One, the Cube is a lot more suited to a home user or someone starting out.
It is fairly small and can easily be put on your desk in an office. It looks a bit like a sewing machine in some respects - not like a standard printer. It sits taller than a standard paper printer too, but takes up about the same amount of desk space.
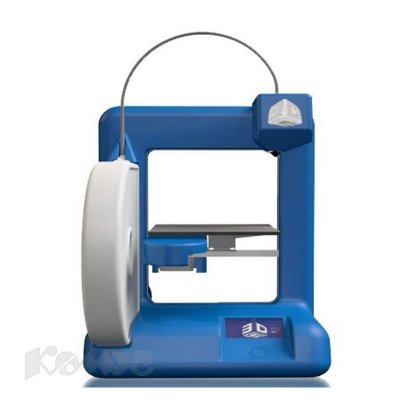
The Cubify 3D is available in Silver, White, Magenta, Blue or Green finishes - rather than the boring beige standard - for a bit of added personality. Fun stuff.
At £1200 it is still expensive, though, but that's about as cheap as you can buy at the moment.
Within that price bracket there's a limitation to the size of an object that you can create - anything within a cubic 140mm square, hence the name. That's a maximum 140mm tall, deep and wide.
That might sound small but that still gives you plenty of options to make things that you can use to litter your home with. Teacups, chess pieces, Lego parts, jewellery, dinosaurs, the list is endless if your imagination is.
Design process
The Cube doesn't come complete with creation software - that's an additional cost - but does include 25 free 3D files designed by professional artists to get you started.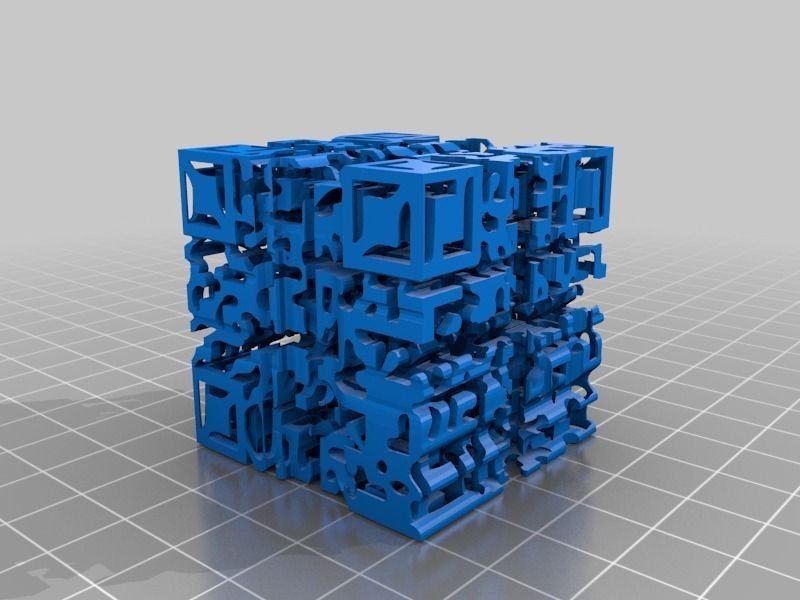 It's really helpful in helping you get to grips with what is possible and means that you can be printing something almost as soon as you've got it out of the box. Sometimes a blank canvas can be a stumbling block.
The Cube 3D printer is compatible with the industry standard STL file format. This carries the three-dimensional computer-aided design (CAD) content that defines the geometry to be printed. This is the typical file type output of a 3D design program or software tool. Something like MeshLab will work, or Adobe has added compatibility with the format in the latest Photoshop CC software.
Preparing the print
The Cube 3D printer does comes with its own dedicated printing software for both Windows and Mac. We used the Mac version and it's fair to say that it's clunky. This is very much a preferable PC application.
The software is centred around making sure your object is able to fit on the printer's printing plinth and therefore making sure you don't go beyond those pre-defined boundaries.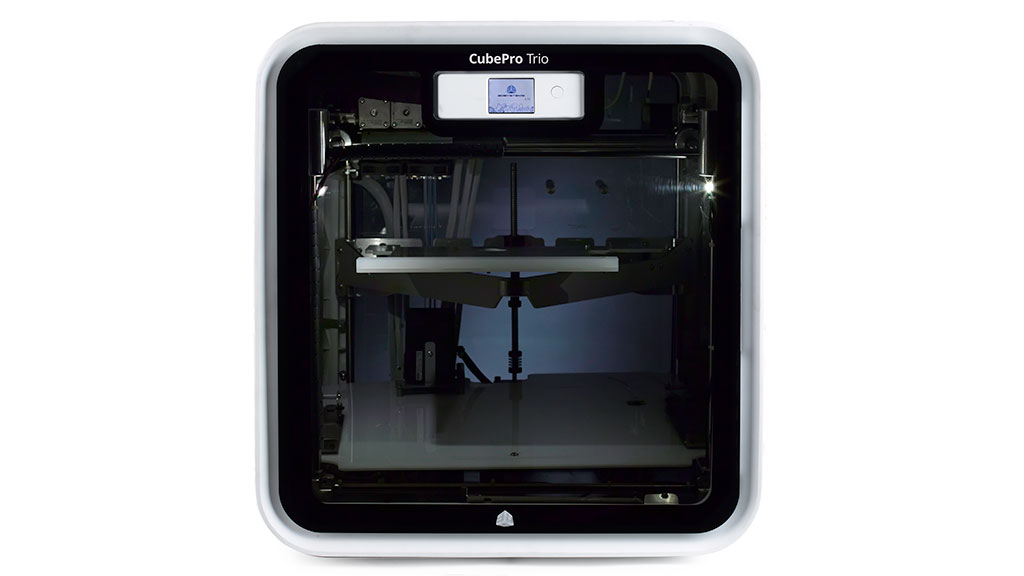 A bit like "the margins are outside the edge of the page, are you sure you want to continue?" Microsoft Word prompts then.
Once you import your design you can view it from all angles to make sure the print will work, scale and orient it and then send it to the printer.
Printing
The printer prints in both ABS and PLA but you can only print with one material at a time and only in one colour. That also has to come from Cubify, the company that makes the printer - it's not a case of popping to the shops and buying a budget replacement cartridge.
There are 16 different colours to choose from and the cartridge system, which is easy to install, will also let the machine know if you've got enough material for printing your object.
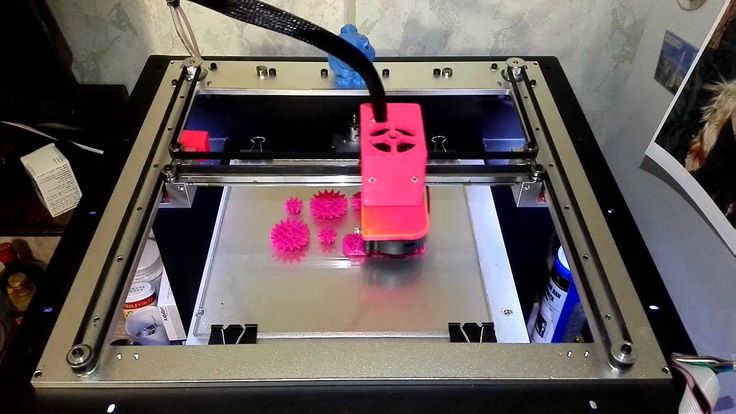
Unlike paper printing there's no "Fast Draft" option: the 3D print process is not quick. In one of our tests we printed a rook chess piece - one of the free designs that is included - and it took 90-minutes. Thankfully it involves little effort from you although you'll be mesmerised for the first couple of goes because it does look very, very cool.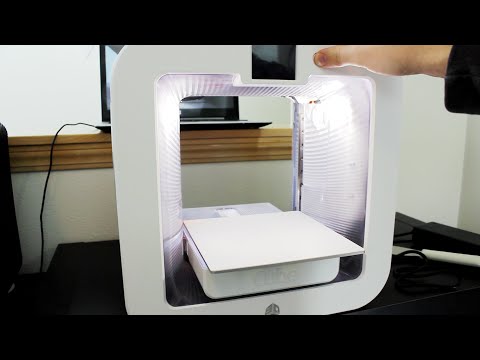 It's science fiction stuff.
Check mate
Just as we were fairly stunned when we printed out our first dot matrix print on paper all those years ago, you'll get that feeling of amazement all over again with a 3D print. Not that we're typically ultra-excited by printing but, you know, this is incredible stuff. It's the future right here.
Our rook now sits pride and place on our desk. It represents that moment; preserved in our own personal tech history - alongside the recently launched Back to the Future Lego set, naturally.
To recap
If you want to explore, or are actually looking to use this for prototyping models, game pieces, or something else on a regular basis for your work, then the Cube 3D printer is perfect for that, just be warned it might turn into an expensive paperweight when your excitement wanes.
Cube 3D Printer Review 2022
3.5
See Price
Since the popularization of 3D printers, and give the inherent difficulty of 3D printing, there’s been demand for affordable, easy to use models that work out of the box.
3D Systems and the widely popularized Cube 3D printer strive to plug that gap. Does it live up the hype? Let’s investigate as we pull apart the secret inner workings of the most stylish printer on the market.
| Printing Area | 152x152x152mm |
| Print Tech | Plastic Jet Printing |
| Supported Filament | ABS and PLA |
| Extruders | 2 |
| Layer Thickness | 70 microns and 200 microns |
Table of ContentsShow
Design
3D Systems is onto its third generation of the Cube with all the enhancements this encompasses. An all-in-one cube casing houses the printer, hence the name, and is advertised primarily as a user-friendly personal desktop model. With simplicity in mind, it aims to introduce first-timers to the world of 3D printing without the oft-complicated installation of entry-level DIY models.
Straight out of the box, the Cube is a piece of engineering bliss. Aesthetically pleasing, compact, classy, and dare we say, beautiful, it resembles a product distributed by Apple, where functionality and ease of use are as much a consideration as design.
The sleek white exterior panels are miles away from the functional, bare-bones design of plenty rival models. So much so that the Cube is very much at home sitting alongside other home office devices rather than confined to a workshop. The self-contained shell means keeping track of diverse components isn’t a factor.
The print area is a modest 152x152x152mm, providing enough working space for most small scale projects, especially for beginners trying their hand at 3D printing for the first time. With both 0.2mm and 0.07mm (200 and 70 microns) print resolution layers, the Cube offers a degree of versatility, but not enough to cater for a large variety of print projects.
The print head ensures the X-axis, while the PrintPad (read build plate) manages the Y and Z axis. The PrintPad is removable for easy cleaning in hot soapy water.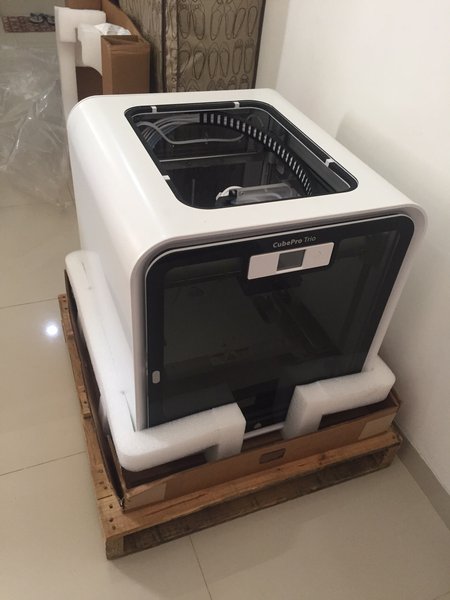 Every print job requires the application of Cube Glue, a weak adhesive produced by 3D Systems that assists the printed filament to solidly in place on the build plate. It takes some practice to apply the appropriate amount, and you need to wait for it to dry enough or suffer the consequences as we did.
The Cube sports dual extruders for simultaneous double color or material prints housed in out of sight purpose-built plastic casings that sit inside the vertical outer side panels. ABS and PLA are the only supported materials, and the Cube only works with 3D Systems proprietary filament Smart Cartridges that come in a selection of twenty-three colors.
These are significantly more expensive than generic filament bought from a hobbyist retailer, which was a big con for us when assessing the Cube 3D printer. These materials are of a higher quality, ostensibly, to justify the higher cost. To give 3D Systems its due, the ABS provided is recyclable, while the PLA is compostable, which softens the blow for the environmentally conscious maker.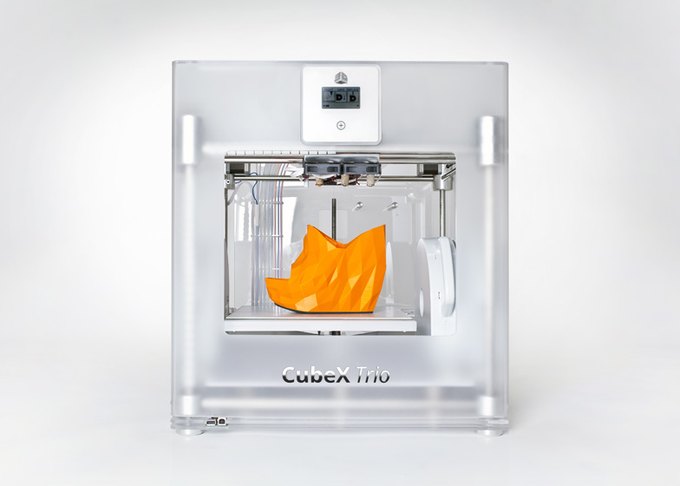 The company also asks users to ship back empty cartridges for recycling.
Each cartridge includes its own integrated, snap-in nozzle, which it must be said, is incredibly simple to install and, in theory, foregoes the need to battle with removing debris and build up from the extruders every time. Two cartridges come as standard with each new device.
Connectivity through a USB port mounted on the bottom of the side casing (the package includes a USB flash drive) and a WiFi connection allowing the user to trigger prints from their computer or via a flash drive, gives options.
3D Systems have even designed a dedicated Cubify mobile app for both Android and iOS (plus MacOS and Windows through the Cubify software) packed with printing ideas, blueprints, and guides. The software converts into the required file type and forwards the instructions to the printer. It cannot be used to design prints though.
The user interface, we love. Inviting and perfectly intuitive, it’s hard to go wrong using the in-built 2. 5” color touch screen LCD. Beginners should find getting around the settings and options a breeze. Indicators such as how much material is left are welcome additions for users who might not have yet developed the skills to gauge how much filament a project requires.
Printing
For a 3D printer touted as an out of the box solution, the printing process was hit or miss. The first few prints went well, especially for smaller prints. The results were generally error-free and full of detail with smooth contours and layers with few flaws. Ghosting was all but absent.
However, the Cube starts to struggle with larger projects that more often than not end in a bundle of filament only good for the landfill. The waste is especially hard to stomach given the exorbitant cost of the cartridges. The Cube Glue did little to fix the issue but works well for smaller prints.
Overall, the Cube is ideally suited to small jobs and is relatively economical with the material when it works correctly.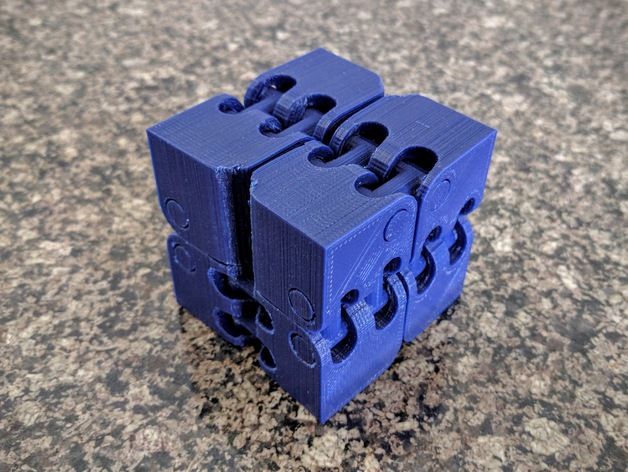 From what we can gather, the lack of a heated plate, and the fact the software didn’t factor in the need for supports worked to the detriment of larger prints that require stability and uniform heat distribution as vertical layers build up.
The Cube is loud, to the point that it can become an annoyance by reverberating into adjacent rooms. For such a little machine, the noise is disproportionate possibly due to clanks bouncing off the casing.
Where our opinion of the Cube shifted drastically was when we encountered systematic jamming in the jet on the print head. The problem appeared to happen after only a handful of jobs using a brand new cartridge. Either the filament reacts badly to being exposed and goes brittle, or warehouse storage is conducive to the chemical properties of the plastic to harden more than necessary while sitting in the cartridge. It was hard to tell.
Regardless, we have here a serious design flaw; feeding the filament through a tube doesn’t work well. Once a jam occurs, the nozzle does nothing but churn the plastic into a clumpy mess. If it isn’t a jam, the filament breaks inside the cartridge. There’s not much that can be done other than load in a replacement.
Speed wise, the Cube isn’t remarkable and gets the job done within acceptable limits.
Small prints can take anywhere from four to ten hours depending on the size, while bigger jobs were a bust most of the time, so we were never able to finish them to know how long the process takes.
Assembly
The Cube comes pre-assembled and only requires the user to install the cartridges, a straightforward procedure. The Cube is packaged well and comes with a quick start manual, USB key, cabling, glue, spatula, plyers, power supply, and the printer itself.
The Cube self-calibrates by make sure the build plate is perfectly level and at the right distance from the print head via a set of magnets under the plate, although the device asks the user to tweak the plastic circular knobs below the plate as required.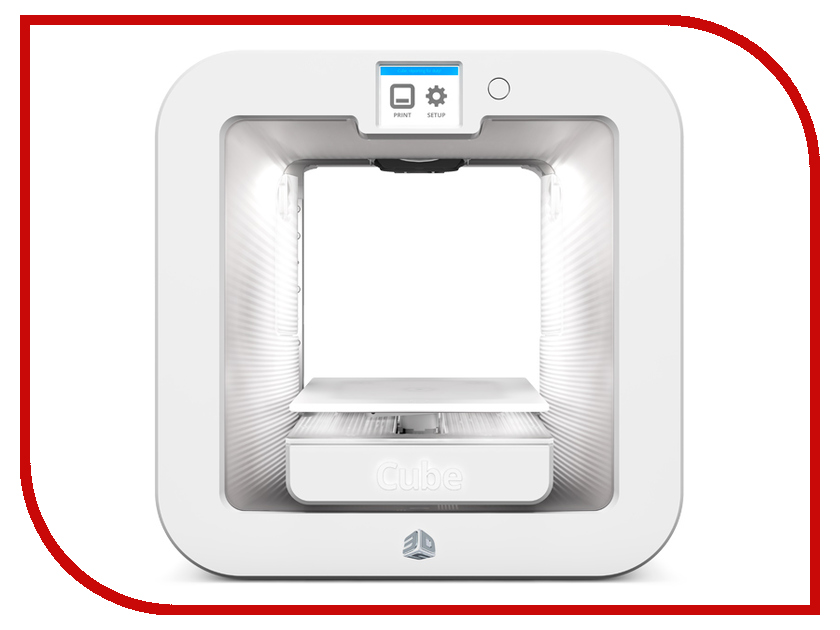 The instructions are straightforward and won’t daunt even the most unversed user.
That aside, the Cube allows you to be up and printing within 45 minutes after unboxing the device, unheard of for printers in this price range where hours of assembly are the name of the game.
Support
3D Systems has discontinued the Cube, and the model is no longer in production, arguably due to lackluster reviews caused by the filament jamming issue.
As a consequence, the Cube is now available at a fraction of the cost of its initial retail price, around the $1000 mark. You can pick one up for around $200-$300 on Amazon, if not less. 3D Systems continues to sell cartridges for the time being, although third-party manufacturers have popped up selling them at a fraction of the cost.
Support wise, 3D Systems offers a 90-day warranty for parts and labor, but no refunds whatsoever due to discontinuing the product. Specific resellers may offer different refund policies.
3D Systems has a robust after-sales support service with a dedicated phone team that can help with the jamming issue by walking through a variety of detailed fixes. They’ll also walk through updating the Cubify software to the latest firmware which helps with printing problems to a certain degree. Alongside are forums, guides, and articles about getting the most out of the Cube.
Verdict
The Cube isn’t a bad printer overall and produces some quality results for smaller projects. The design is the model’s strongest asset, and it’s hard to find fault with the look, feel, and ease of use (bar the jamming issue).
At a much-reduced price, the Cube is an ideal no-nonsense first time 3D printer for those who want to experience the joys of printing without the hassle and tinkering of similarly priced DIY equivalents. The dual extruder setup is also a bargain.
The cartridges are a downside, but if you buy them from a third-party, the costs are more palatable. There’s also a DIY fix for the jamming problem, which isn’t particularly difficult to perform and is an excellent way to introduce a beginner to the modification aspect of the hobby.
The Cube isn’t ideal, but its hard to argue with for the bargain price.
How to tame a Cubify Cube 2 3D printer / Sudo Null IT News
But there are 2 significant disadvantages.
The first drawback is that proprietary software does not allow you to change print settings at all. In general, it turns out that the printer will almost certainly print what is needed, but after several figures are printed, there is an irresistible desire to change something in the settings and it turns out that nothing can be changed in principle. Even the thickness of the layer. It turns out a 3D printer for housewives and schoolchildren.
The second drawback is the proprietary chip cartridge with plastic. The plastic in it is about 300 grams, and it costs as much as a few kilograms of usual. In addition, cartridges still need to be looked for.
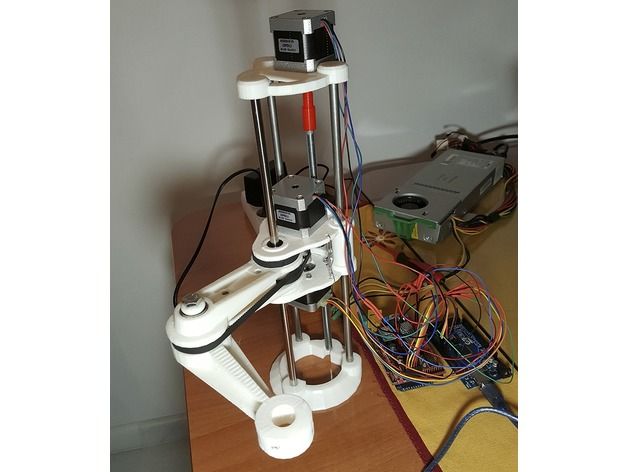
In general, without hesitation, I decided to replace the control electronics with a much more interesting one, in the form of an Arduino mega 2560 + Marlin firmware.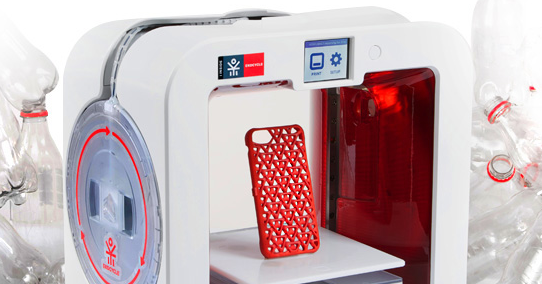
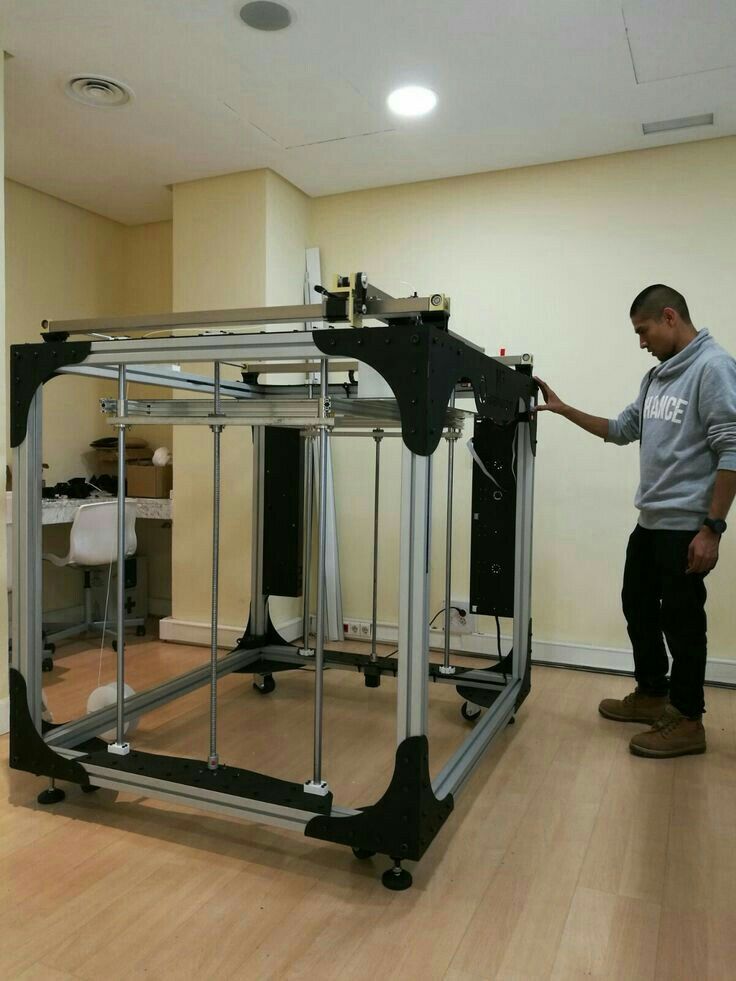
After disassembling the printer, the following board appeared to my eyes:
In the photo, the board with the native control controller already soldered out (it can be seen on the right side of the board with adhesive tape attached so as not to get lost). There are also trace signatures needed to connect the stepper motor drivers to the microcontroller.
Power circuits
The printer is powered by an external 24V power supply. This voltage is directly used by the power part of the stepper motor drivers, the extruder heating driver, and to power the fans. To power the logic part, this voltage is first reduced to 6V by a linear voltage regulator, after which it is fed to a 3.3V regulator - this voltage is used to power the MK, the logic part of the stepper motor drivers, the WiFi module and the built-in microSD memory card. Also, 6V is converted by a low-power regulator into a voltage of 5V, which is used to power an external USB flash drive
Control microcontroller
Everything is controlled by a PIC microcontroller, to which peripherals are connected, represented by stepper motor drivers, a WiFi module, a flash SD card, external USB ports and a touch graphic LCD display. I could not find documentation for this display, and it was lazy to disassemble its interface with a data logger. In general, I gave up all this luxury by desoldering the MK and cutting the power path to SD and WiFi.
Stepper motor drivers
There are 4 identical A3979 drivers installed on the board. Each driver receives 3 control signals #ENABLE, STEP and DIR. The microstepping mode with 16 cycles per step, which is the maximum available for this microcircuit, has been selected. The output current given by the REF pin voltage is also fixed.
How I almost burned the motors
to an increase in voltage at the output of the divider. Because of this, after the alteration, the current supplied to the motors increased greatly, but during the setup I did not notice this because I did not turn on the motors for a long time. And I noticed this jamb only when I had already calibrated everything, assembled and launched the first long-term print.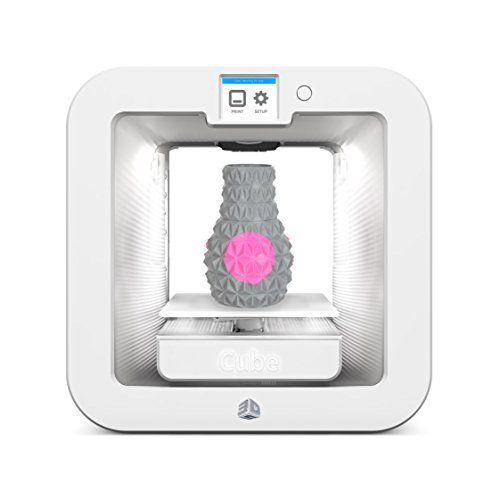 I printed a cube. Print time was over half an hour. And already at the end of printing, I felt the smell of burnt windings of stepper motors, which is not typical for printers. When trying to check the temperature, the SD almost got burned. The temperature was much more than 100 degrees. But it passed - the motors were not damaged. Therefore, I had to disassemble the printer again and change the resistance to reduce the current.
Heating element driver
There are 2 VN5050 chips on the board. This is a single channel load driver with output current up to 16.5A and current feedback. One of the microcircuits is connected to the extruder heater, and the second one controls the fans for blowing the model. Although, given the capabilities of this microcircuit, the second driver can be used without damage to switch the heating table (manufacturers most likely counted on this because a conventional logic level field effect transistor can also be used for a fan).
This chip is turned on by supplying a logical unit to the Isense input, no matter how paradoxical it may sound.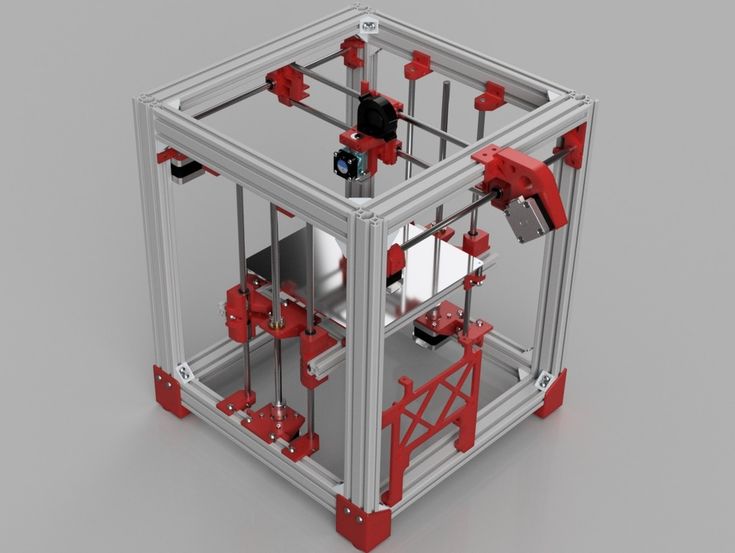
Fan control
In addition to fans for blowing the model, there are 2 more: cooling the board and blowing the extruder. They are controlled in the most clumsy way "on-off" through field-effect transistors.
Others
There is also a WiFi module and a microSD memory card on the board, but I turned off the power from them by cutting the track as these devices are unnecessary.
Modernization
From the very beginning, I set myself the goal of converting the printer with the lowest cost of purchasing components and materials, and the native board suited this very well. In fact, all that was required for the conversion was the Arduino mega 2560 board, a few resistors and a lot of thin wires.
When compiling the firmware, I indicated that I was using the RAMPS 1.4 shield with one extruder, so I plugged all the wires into the arduino, looking into the circuit.
First of all, the control controller and the 3. 3V stabilizer were soldered. After that, I, referring to the datasheets of the drivers, found and signed all the tracks responsible for controlling the peripherals. Also called the limit switches. It turned out that almost all inputs and outputs were usable with 5V logic.
The only thing that had to be redone was the thermistor connection. The thermistor is connected at one end to the common bus, and the second contact is connected to the 5V bus with a 4.7 kΩ resistor. The analog signal is taken from the second output of the thermistor and fed to the input of the controller A13.
The resistors that set the reference voltage in the stepper motor drivers have also been replaced. The fans for blowing the extruder and the board must be constantly turned on, so 5V was applied to the gates of the corresponding transistors. Drivers for controlling the heater and blowing fans of the model connected to the outputs D8 and D9.
Finished the arduino board a little. Soldered the power connector and USB.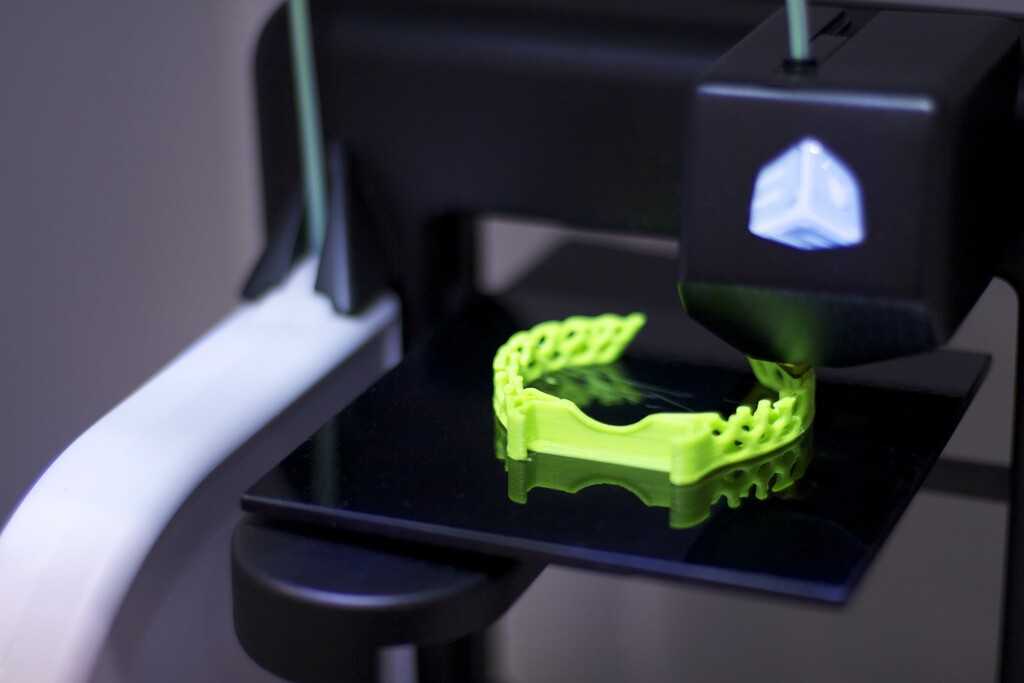 Also, in order for the controller to be powered exclusively from the printer and not turn on when the USB cable is plugged in and the printer is not powered, I soldered the output from the transistor:
Powered the controller by applying 6V voltage from the printer board to the Arduino Vin pin. To power the logical part of the stepper motor drivers, 5V was applied to the line, along which the 3.3V voltage from the arduino used to go. I connected the zero points of the arduino and the main board with one thick wire to avoid the formation of closed loops.
The connector installed on the board was used for the USB connection. During the first test, the printer often fell off the computer. This was most likely due to the tracks that used to carry the D+ and D- signals on the PCB, which were hanging in the air. I cut them right next to the connector and twisted the D + and D- wires together, going to the arduino board. After that, the connection was no longer interrupted.
As a result, this is what happened:
It's time to configure the firmware and software.
I used Marlin firmware. There is a lot of information on its configuration on the Internet, and I have repeatedly come across its configuration for different printers, but this time the situation was somewhat atypical. The thing is that the limit switch along the Z axis is installed at the bottom, that is, in the maximum position. Thus, when parking, the Z-axis becomes the maximum position. I conjured with the settings in the firmware for quite some time, until I knew Zen. But first things first.
#define ENDSTOPPULLUPS // enable pull-up resistors on limit switch inputs
const bool X_MIN_ENDSTOP_INVERTING = true;
const bool Y_MIN_ENDSTOP_INVERTING = true
const bool Z_MIN_ENDSTOP_INVERTING = true;
const bool X_MAX_ENDSTOP_INVERTING = true;
const bool Y_MAX_ENDSTOP_INVERTING = true;
const bool Z_MAX_ENDSTOP_INVERTING = true; // inversion of limit switches inputs
#define DISABLE_X false
#define DISABLE_Y false
#define DISABLE_Z false
#define DISABLE_E false // don't disable unused motors
#define INVERT_X_DIR true
#define INVERT_Y_DIR false
#define INVERT_Z_DIR true
#define INVERT_E0_DIR false // setting the correct direction of movement of the motors
#define X_HOME_DIR -1
#define Y_HOME_DIR -1
#define Z_HOME_DIR 1 // on the Z axis, the limit switch is at the maximum position
#define X_MIN_POS 0
#define Y_MIN_POS 0
#define Z_MIN_POS 0
#define X_MAX_POS 140
#define Y_MAX_POS 140
#define Z_MAX_POS 140 // minimum and maximum coordinates along the axes
#define HOMING_FEEDRATE {50*60, 50*60, 40*60, 0} // parking speeds
#define DEFAULT_AXIS_STEPS_PER_UNIT {80,80,80,115.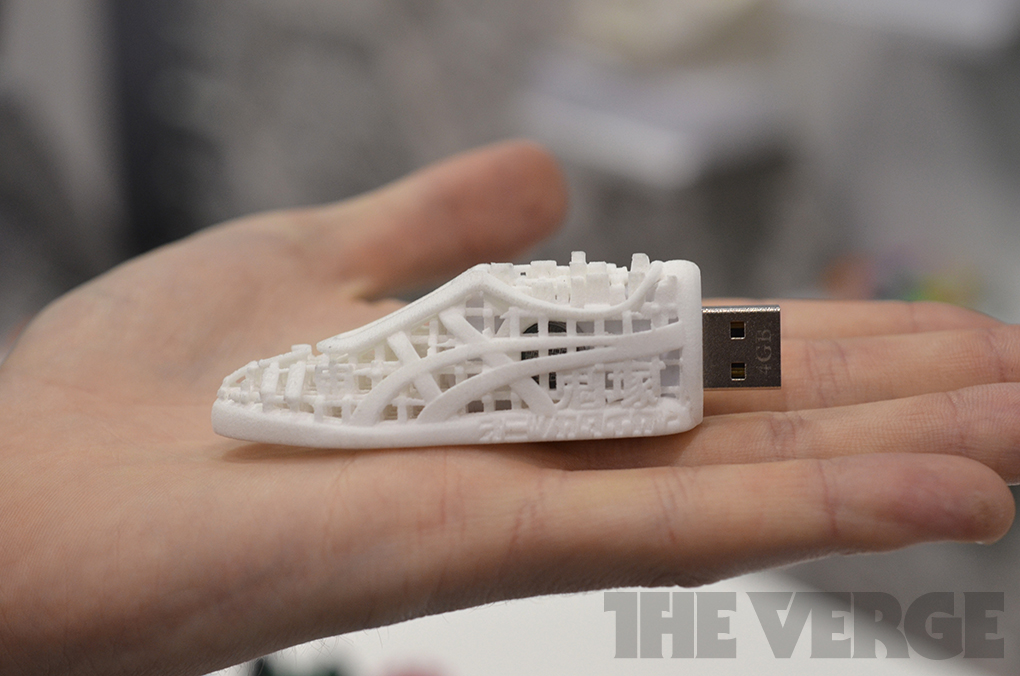 75} // number of steps per mm
#define DEFAULT_MAX_FEEDRATE {300, 300, 300, 20} // maximum speed
#define DEFAULT_MAX_ACCELERATION {1000,1000,100,10000} // maximum acceleration
Next, I configured the Repetier Host to work correctly with the printer. The settings are located in the "Configuration" tab, "Printer settings" item.
In the "Connection" tab, I selected the desired port and its speed.
In the “Printer” tab, I changed the speed of movement along the Z axis to 1500 mm / min, and changed the value of the parking position along the Z axis from 0 to 140 - it is with this value that you need to accurately calibrate the zero position if necessary before starting printing.
In the "Extruder" tab, I specified the nozzle diameter as 0.3 mm.
In the "Dimensions" tab, I specified the dimensions of the printable area. For this printer, it turns out exactly 140 mm in all axes.
After that, the printer worked fine even without tweaking the slicer. Slic3r in easy mode. True, the speed is not cosmic.
At the moment, in my free time, I'm figuring out how to fine-tune the slicer to get the best speed quality.
Thank you for your attention.
Home 3D printers from 3DSystems. Overview and specifications
Archive
Follow author
Follow
Don't want
What should I consider when choosing a 3D printer for my home? Professionals advise first of all to pay attention to the quality of the model, and then take into account the technical characteristics. What good is a "super-advanced" 3D printer if its extruder breaks after a month? And where will we repair it in Russia? Therefore, we suggest paying attention to printers from a reliable manufacturer - 3DSystems. We do not want to say that the devices that this company produces are the best in the world, but everyone who has ever encountered the 3D printing industry has heard of the Cube printer and the quality of this model. We offer to talk about home printers from this company.
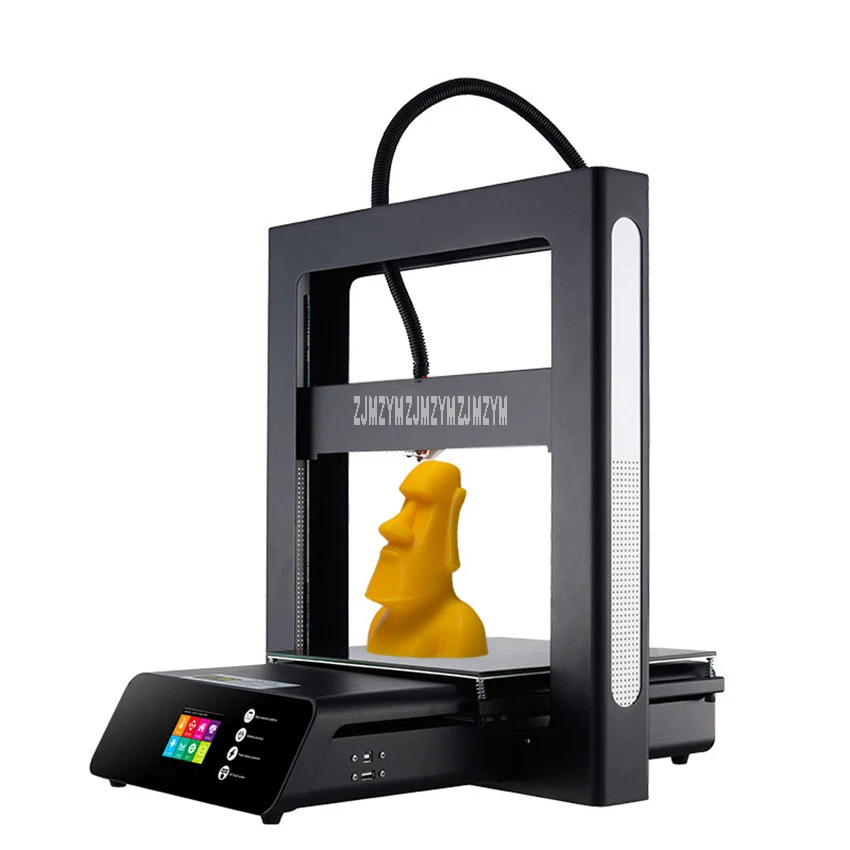
Cube Single Extruder 3D Printer
The Cube 3D printer is the so-called "genre classic" among home 3D printers. If you want a quality device for printing small plastic models 14x14x14 cm in size, then this is your option. For printing from CAD files, the Plastic Jet Printing PJP (same as FDM) printing method is used. ABS or PLA plastic is applied in layers, which ensures good quality and durability of the product. The device connects to a computer and its software is compatible with Windows and Mac OSX operating systems. Of course, you can also work offline using a flash drive with ready-made CAD files. Pay attention to the technical specifications of the 2nd generation device:
- One printhead
- ABS and PLA printing
- 16 colors per supply
- Printing area: : 139.7 x 139.7 x 139.7 mm
- Ease of use
- Intelligent Cartridge System
- One cartridge can print up to 15 cell phone cases or similar sized objects
- Improved print accuracy over 1st generation Cube printers
- Layer resolution: 250 µm (0.
 2 mm)
2 mm) - Wi-Fi and USB connectivity
- Comes with 25 free printable pattern files
- Software Cube
- Works on Mac OS and Windows (32/64 bit)
- Size (without cartridge): 26 x 26 x 34 cm, weight: 4.3 kg
- Box size: 41 x 38 x 48 cm, weight: 8.6 kg
Scope of supply:
- 3D printer
- 1 cartridge PLA neon green
- print platform
- platform adhesive
- power cable
- printing tubes
- USB flash drive (software, print models, instructions)
- 25 free print-ready models included
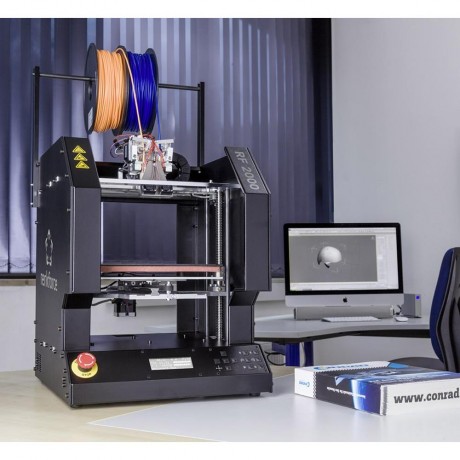
CubeX
The next budget home 3D printer is the popular CubeX, which comes in three flavors - CubeX, CubeX Duo and CubeX Trio. The main difference between the three models is the ability to print in multiple colors (one, two and three). The CubeX series printers are semi-professional printers suitable for both home and office use. It was the versatility of this model that ensured the popularity of CubeX. They are very easy to use and even a child can figure out the printing algorithm. The CubeX line uses ABS and PLA plastic for printing. For consumables, the CubeX also features a "smart cartridge" system that makes loading media extremely easy. The "smart cartridge" system prevents the material from tangling and protects it from moisture. One cartridge allows you to print 575 cubic centimeters, which is equivalent to about 50-70 iPhone cases. CubeX can print at a vertical resolution of 125 microns (0.125 mm). As we have already said, no special knowledge is required to connect the device - smart software will do everything for the CubeX owner. Let's move on to the technical characteristics:
Specifications for the entire CubeX range
- Printable area: 275 x 265 x 240 mm (1 color), 230 x 265 x 240 mm (2 colors), 185 x 265 x 240 mm (3 colors)
- Print up to 3 colors or materials at the same time
- Minimum layer thickness 0.
 125 mm
 - PLA and ABS printing:
- PLA: 18 colors (including 2 glow-in-the-dark materials)
- ABS: 17 colors (including 2 glow-in-the-dark materials) - Comes with 10 professional print models
- It is possible to pause printing and resume printing later
- Brownout sensor installed - you can continue printing after power surges
- File support (types): STL, Cubex (Cubex proprietary file format)
- Software:
- CubeX software for preparing files for printing
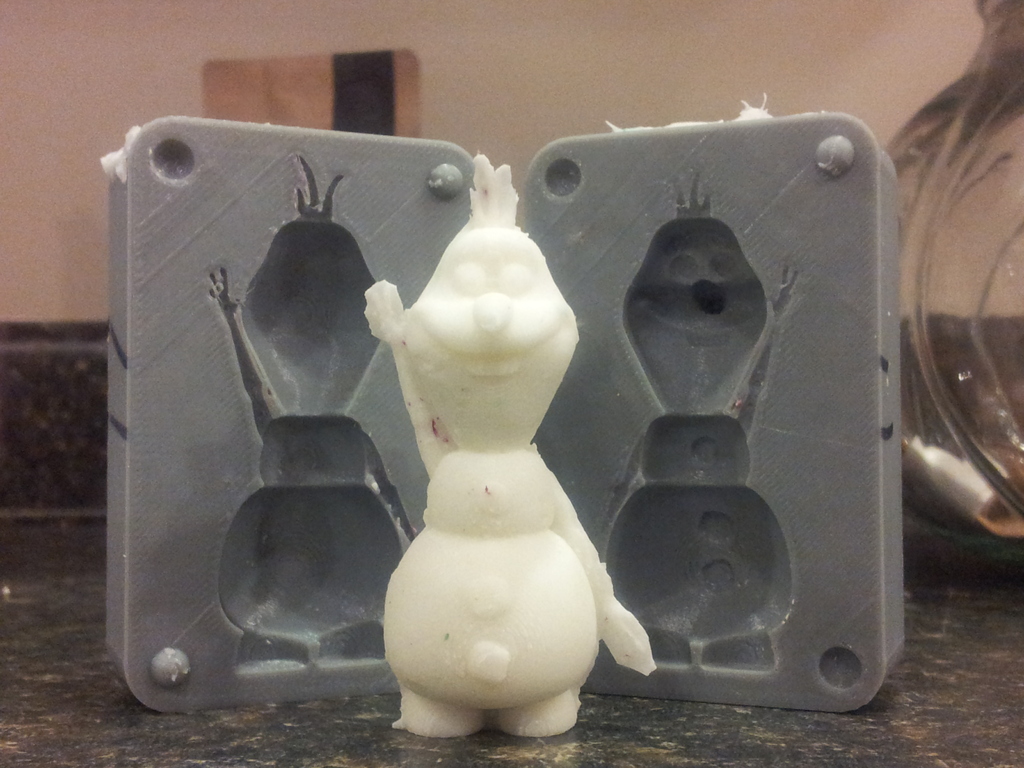
- Cubify Invent to create models - The printer automatically creates "break off" supports when printing the model, which can be removed with pliers or scrap materials.
- Three print resolutions:
- Standard definition (SD): 500 microns (0.500 mm)
- Medium resolution (CD): 250 microns (0.250 mm)
- High definition (HD): 125 microns (0. 125 mm)
 - Three print modes:
- light (Light) - creates hollow structures to save material
- strong (Strong) - creates stronger support structures
- solid (Solid) - creates solid parts for maximum strength - Dimensions: 515 x 515 x 598 mm
- Weight: 36 kg - one extruder, 27 kg - two extruders, 38 kg - three extruders
- Power requirements: 110 - 240V AC
CubeX Single Extruder 3D Printer
CubeX comes with one print head. The printable area of this printer is 275 x 265 x 240 mm.
CubeX delivery set:
- CubeX 3D printer
- Cartridge: 1 white PLA cartridge
- 10 professional models (printable files)
- Model creation software: Cubify Invent Design Software
- Printer software
- Power supply
CubeX Duo - Dual Extruder 3D Printer
CubeX Duo comes with a dual printhead. The printable area of this printer is 230 x 265 x 240 mm.
Scope of supply:
- CubeX Duo 3D printer
- Cartridges:
- 1 white PLA cartridge
- 1 red PLA cartridge - 10 professional models (printable files)
- Model creation software: Cubify Invent Design Software
- Printer software
- Power supply
CubeX Trio - 3D printer with three print heads
CubeX Trio comes with a triple print head. The printable area of this printer is 185 x 265 x 240 mm.
Scope of supply:
- CubeX Trio 3D printer
- Cartridges:
- 1 white PLA cartridge
- 1 red PLA cartridge
- 1 blue PLA cartridge - 10 professional models (printable files)
- Model creation software: Cubify Invent Design Software
- Printer software
- Power supply
ABS or PLA?
ABS - plastic is considered one of the most common materials for a 3D printer. ABS is made from a tough plastic commonly used in car bumpers due to its strength. The same plastic is used for LEGO™ blocks. This material is safe enough for children. ABS plastic is generally recommended for printing smaller parts.
PLA is great for small parts as well as large prints and support structures. PLA is probably the easiest 3D printer material to use. It is a biodegradable, thermoplastic material. PLA is made from renewable resources such as starch and sugar cane. All these advantages make PLA plastic environmentally friendly and very safe for work and for children. PLA also has a very fast curing time. This circumstance gives it the advantage of achieving a wider range of geometries in 3D printing than 3D printing with other plastics. This advantage also reduces the thermal load on the printed model - it is subjected to less deformation.