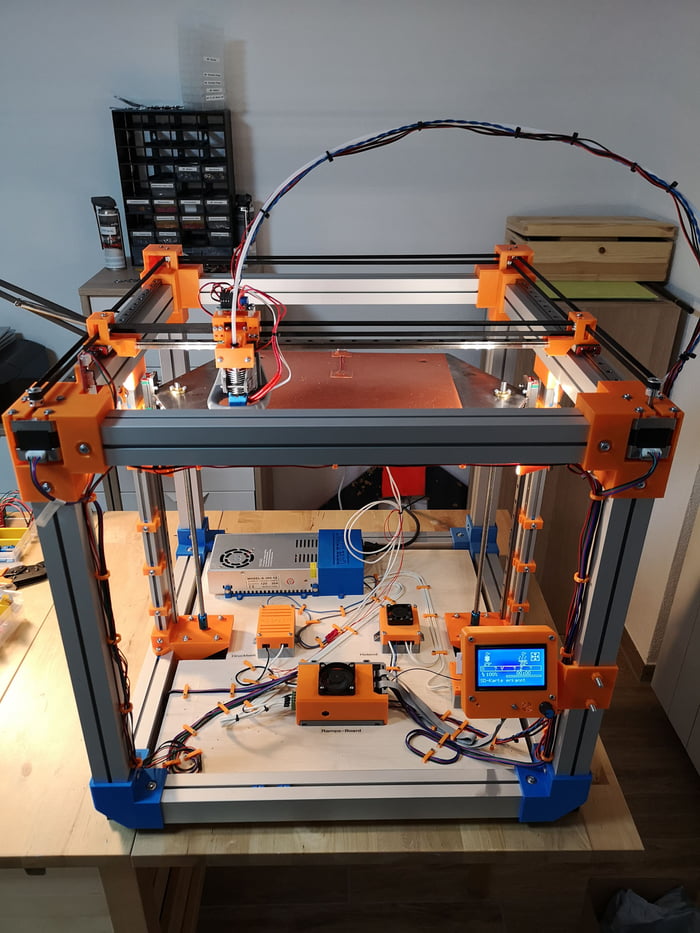
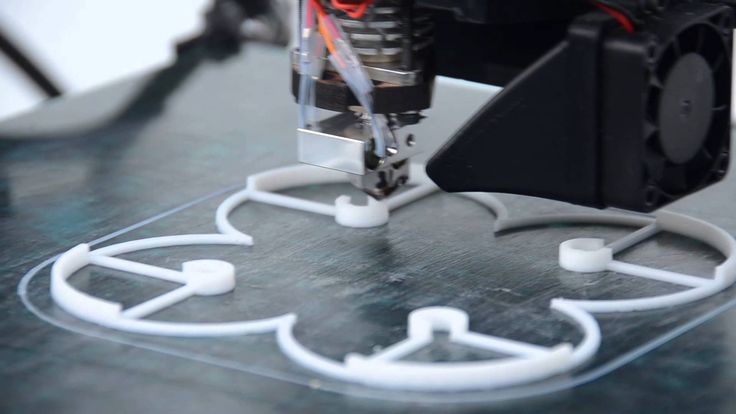
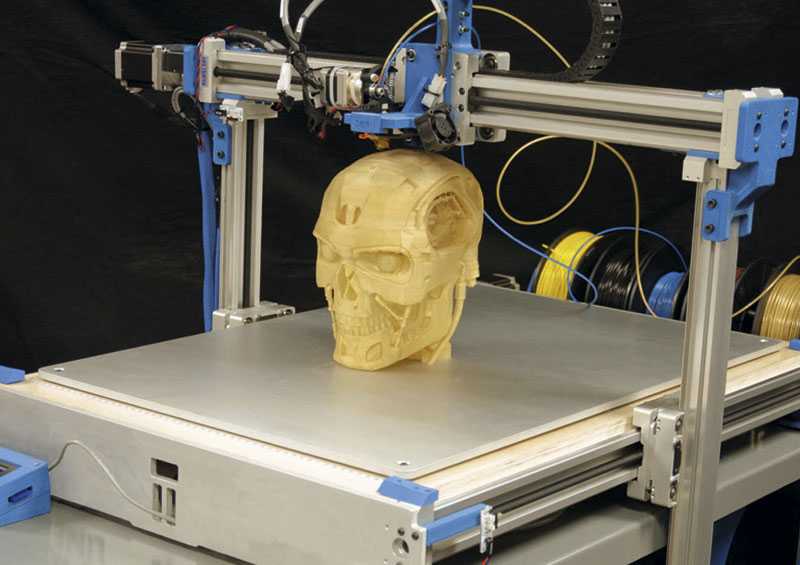
3D printing bed
LayerLock 3D Printer Build Surfaces
- Home
- Store
- 3D Printer Accessories
- Build Surfaces
- LayerLock Build Surfaces
LayerLock provides a variety of build surfaces and build plates designed for stronger bed adhesion for both advanced and standard materials. With LayerLock Garolite Build Surfaces, successfully printing warp-free parts out of NylonX, NylonG, and other nylon filaments will be a breeze. This type of surface also successfully prints standard filaments such as PLA, PETG, TPU and more for a plethora of material compatibility. With LayerLock Powder Coated PEI Build Plates, users have a reliable alternative bed surface for successfully printing standard filaments such as PLA, ABS, PETG and flexibles. Both types of bed surfaces are durable, dependable, and require little to no maintenance so strong bed adhesion is attainable without the huge hassle. Take your 3D printing to the next level with these advanced build surfaces that will help you successfully achieve warp-free projects for a lifetime.
LayerLock Build Surfaces Collections
All LayerLock Build Surfaces 3D Printer Build Surfaces
Technical Specifications
- Material Surfaces Available: Garolite, PEI, Surface for Polypropylene, Surface for SLA
- Available in various sizes—check individual products for guaranteed printer compatibility
- Material compatibility for Garolite: NylonX, NylonG, Nylon, PLA, PETG, TPU, and more
- Material compatibility for PEI: PLA, ABS, PETG, and flexibles such as TPU and TPE
- Material compatibility for Surface for Polypropylene: Polypropylene and OBC
- Material compatibility for Surface for SLA: Most LCD / MSLA, Laser, and DLP resins
LayerLock Build Surfaces
LayerLock Garolite Build Surfaces
Superior bed adhesion to Nylon based materials like NylonG
LayerLock Build Surfaces for Polypropylene
Get the best first layer with polypropylene and OBC filament
LayerLock Powder Coated PEI Build Plates
Great first layers and easy part removal with this flexible build plate
LayerLock SLA Resin 3D Printing Build Surface
Achieve strong bed adhesion in SLA printing with this surface
LayerLock MagBase
Easily add a magnetic base to your 3D printer for interchangeable surfaces
Guides & Articles
How to Succeed with Quantum Dichromatic PLA Filament
Follow this guide for tips and tricks on how to get the best results when 3D printing with Quantum Dichromatic PLA filament.
How To Succeed with LayerLock SLA Build Surfaces
Successfully achieve strong bed adhesion for Laser, DLP, and SLA resin prints using LayerLock SLA Resin 3D Printing Build Surfaces.
How To Build A Successful Makerspace
Find out the necessary components to create an effective space for your maker community.
How to Succeed When 3D Printing with Polypropylene
Successfully produce 3D printed parts out of polypropylene filament with these tips on achieving stronger bed adhesion and minimizing shrinkage.
Tech Breakdown and How to Succeed: Ionic Hybrid Support Material
Supporting engineering-grade filament has been difficult without a support material dedicated to higher temperature 3D printing. Ionic aims to solve that.
How To Succeed with OBC 3D Printing Filament
From Dow Chemical, OBC combines flexible and rigid into one unique material with properties of both.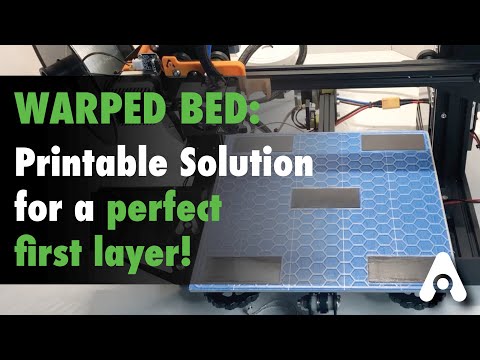
How To Succeed with LayerLock Garolite Build Surfaces
Successfully achieve strong bed adhesion for NylonX, NylonG, and standard filaments using LayerLock Garolite Build Surfaces.
How to Succeed with LayerLock Powder Coated PEI Build Plates
Powder coated PEI steel sheets are a great alternative build surface for strong bed adhesion. Here's how you can succeed using this durable build plate.
How To Succeed When 3D Printing With Nylon
Learn how to 3D print Nylon like a pro. Nylon is a stronger and more durable alternative to PLA or ABS and easy to 3D print with using these Tips and Tricks.
How To Succeed When 3D Printing With ASA Filament
Follow this step-by-step guide to learn how to print with ASA, the perfect material for any outdoor projects.
About LayerLock Build Surfaces
LayerLock 3D Printer Build Surfaces strengthen the bond between the print bed and both advanced and standard materials. LayerLock Garolite Build Surfaces are made out of linen-based phenolic sheets, allowing for just enough texture on the surface to provide a sturdy grip for prints to hold onto while still having a fairly smooth finishing surface. Alternatively, LayerLock Powder Coated PEI Build Plates have PEI powder coated onto a flexible spring steel sheet which leaves behind a bumpy surface on the plate and produces a charming, rugged finishing texture on the bottom of prints. Both types of bed surfaces are engineered for easy installation and to withstand thousands of print jobs. Successfully achieve warp-free prints with zero hassle using LayerLock 3D Printer Build Surfaces.
WHAT'S THE BEST 3D PRINTER BED SURFACE?
If you asked us 3 years ago what 3D printer plate would we recommend, we would say without a doubt the glass bed. Now, we are not so sure anymore. The progress in the development of 3D printers is truly astonishing. You can choose from PC spring steel sheet to PEI plate, carborundum glass, or the good old flexible magnetic build plate. So which one represents the best 3D printer bed surface?
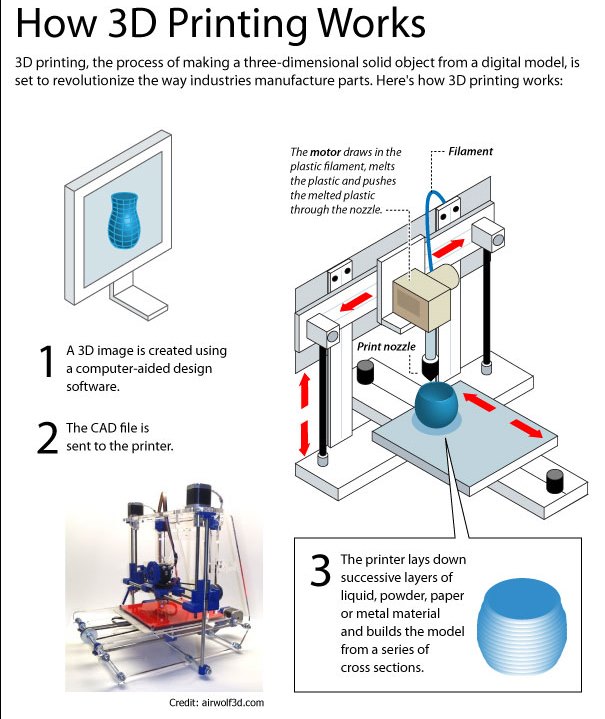
This article will present our results of different tests and a comparison of 3D printer bed options. The printer plate presents a very important part of a 3D printer. It can help you get the best 3D results or make your 3D model impossible to remove. A lot of makers also struggle with the first layer- to some, it is impossible to stick the filament to the build plate. One of the most challenging problems 3D makers have is when a 3D print warped.
3D print warping can happen when the 3D filament layers on the 3D printer plate cool down too quickly and consequently shrink. This reaction causes the filament to contract and pull away from the printer bed, resulting in warping/curling.
Everybody loves PLA filaments because are one of the easiest to print. They are especially popular because of the opinion that you don't have to heat the bed of the printer to get good results. Here we don't agree completely. For getting the best results you have to avoid warping. How do you avoid 3D print warping? Well by using a heated build plate. The heated printer plate keeps the filament at a temperature just below the point before it would solidify (the glass transition temperature), ensuring it stays flat and connected to it.
Now you see why a 3D printer bed is very important and can easily make your life complicated or affect your final result. This is why we decided to analyze and compare the most used 3D printer.
MAGNETIC BUILT PLATE
The magnetic plates were one of the most popular 3d printer beds. With the 3d printer magnetic build surface, you didn't need any clippers or additional accessories to make a great 3d print. Thanks to the magnets, the magnetic beds stick to the frame through magnetic force. Magnetic build plates have great adhesion, especially with PLA and SILK but we still recommend the use of Dimafix spray or 3dlac. These sprays help the first layers to stick firmly to the bed and when the 3D model cools down it is easier to remove it. You will probably need a spatula or just bend the plate and sometimes the model will detach.
Some makers have warned us that 3d model removal can damage the surface though, so be careful and gentle when popping off a print or banding the plate. Being too aggressive with print removal can cause the bed to get damaged.
One of the cons is its durability; the heat can degrade the magnetism of the platform. Also, the use of a spatula or any type of removal will damage the bed. Almost every use will leave a mark on the surface.
This magnetic platform can be easily cleaned with alcohol or acetone. Regarding the temperatures, this printer bed can heat up to 80 °C, while others can go up to as high as 150 °C.
CARBORUNDUM GLASS BED
When comparing the magnetic platform with the glass bed, we would recommend the glass platform because of its durability, and the stiff, dense, and cheap material. Carborundum Glass is smooth and flat and if the glass is thick around 3-4 mm you can easily heat it up to 150-400 degrees. It has a nano-molecular coating that appears super viscous after heating. We recommend the use of Dimafix or 3dlac so it will be easier to remove the 3d model. Because of its strength and firmness, the life span is longer compared to a magnetic platform. Besides the spray, you would need to use the bed clips and a spatula when removing the 3D model.
Pros:
- Low cost
- Long life span
- Compatible with almost all filaments
- Produces smooth bottom finish on prints
- It takes only 3 minutes for hotbed to cool
Cons:
- difficult removing bigger 3D models
- you need to use a spatula for removing 3d prints and can hurt yourself/cut on the edge of the spatula
REMOVABLE PC SPRING STEEL PRINT SHEET
The PC magnetic build plate is a lot stronger and more resistant than the old magnetic plate we get with Ender 3 PRO. This one resists higher temperatures and is more flexible, it is also removable and can stick to magnetics very well. It matches great with PLA, PETG, ABS, ASA, TPU, and other filaments. With this plate, you won't need any tape, spray, or shovel. It's easy to adhere to the printing surface, and it's easy to remove the prints, just flex slightly to pop your print right off.
PC is an excellent upgrade because it can withstand the numerous heat cycles that a 3D print bed goes through from print to print. Its life span is also longer than the old magnetic plate because you won't need any accessories to take off the 3d print, so you won't damage the plate.. You just pop and the model removes itself from the surface. You can get the PC spring sheet if you buy Ender 3 S1, Ender 3 V2 NEO, and Ender 3 S1 Plus.
PEI MAGNETIC BUILD PLATE
PEI stands for Polyetherimide, a surface that can be used for all types of filament on a heated or unheated print bed.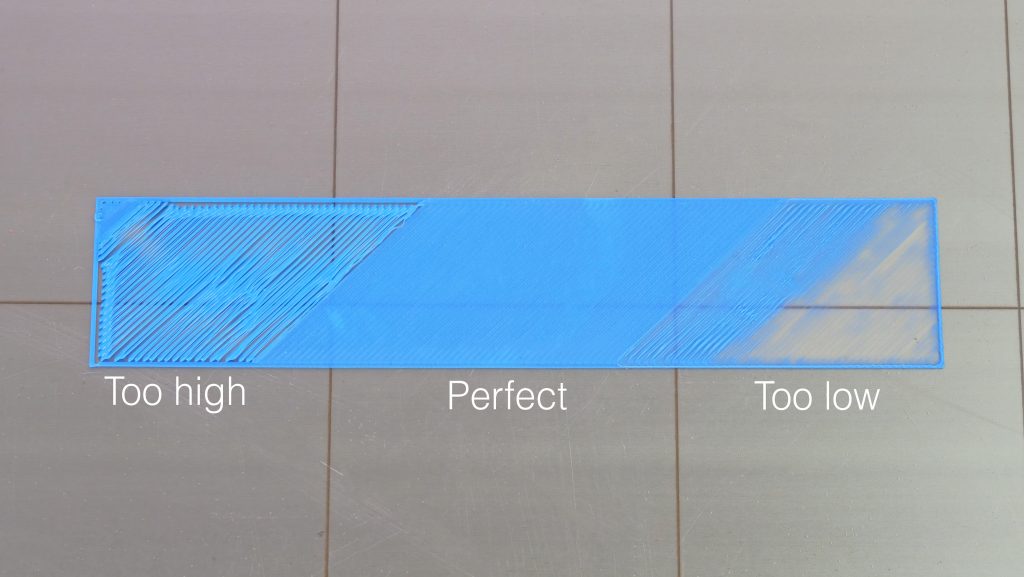 This platform doesn't need any additional clips, sprays, or spatulas. The removal of the 3d print has never been easier! There is also no need for surface preparation, so is the most convenient 3d printer platform to use.
PEI printing plate has excellent mechanical properties such as radiation resistance, high and low-temperature resistance, high-temperature stability, high wear resistance, good flame retardancy, chemical resistance, and electrical insulation characteristics.
The newest Creality printers such as CR-10 Smart Pro and Ender 3 S1 PRO have already the PEI plate
PROS
- excellent adhesion of the 3d model and an easy removal
- a smooth surface finish on the 3d model (while it remains undamaged)
- good thermal conductivity for a heated bed
- gold frosted surface (flame retardant and heat resistance)
CONS
- It’s relatively soft and can be damaged by a poorly adjusted print bed or excessive scraping.
- it cost more than the other 3d printer beds
Comparing the PEI and the classic magnetic sheet, we see the difference not only in the surface of the sheet but also in how the sheets are assembled; the magnetic plate has magnets on both sides, and the PEI sheet is made of 2 pieces; first you need to fix the sticky part on the aluminum bed and then put the PEI magnetic sheet on it and take of the protection foil.
CONCLUSION
When comparing different 3D printer beds it is important to use the same filament, for example, you can not compare the adhesion of PLA filament on a magnetic plate with the adhesion of PETG on carborundum glass.
Testing different 3D printer platforms using PLA and PETG we found out that the weakest adhesion has the removable magnetic plate which is not shocking since it is the oldest among all the printing plates and the most outdated. The carborundum glass has definitely better adhesion and also a longer life span. The glass is a great choice for beginners because is less sensitive to human errors like crashing the nozzle into the 3D print surface during the bed leveling. Crashing the nozzle in the magnetic sheets can leave permanent damage signs.
It is also very important to mention that the removal of 3d models from glass can be a little bit dangerous. You will need a spatula to take the model off and the edge of the spatula is very sharp, so you need to be careful you don't cut or injure yourself.
If we compare all the platforms the winner is definitely the PEI plate sheet. Its special gold frosted coat works like magic. It has great adhesion and the removal of 3d printed models has never been easier. Removing the bigger models is much easier to do it on a flexible bed than on any type of glass. A great printer platform is also the PC spring steel sheet, since it works similar to the PEI plate except it doesn't have the goledn coat, but if you bend it the 3d model will ''pop'' the same way 😊
Another thing important to mention is that you should never remove the 3D print while is not 100% cooled down, no matter what bed you have.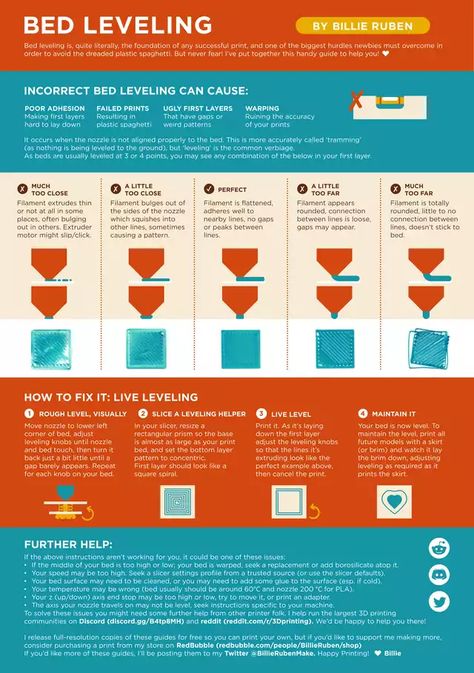
Scientists Develop Self-Assembly Furniture Using a 3D Printer / Sudo Null IT News
Israeli scientists have unveiled the next generation of flat-pack technology with self-assembly furniture. According to them, 3D-printed wooden parts can be adapted for self-assembly into complex shapes, such as beds and wardrobes.
Usually furniture parts are made by sawing, carving or pressing. However, scientists at the Hebrew University in Jerusalem took a different path. They used a process where the wood changes shape and texture as it dries.
A few years ago, researchers came up with an eco-friendly water-based ink made from microparticles of wood waste. "Wood flour" is mixed with cellulose nanocrystals and xyloglucan, which are vegetable binders. Scientists have started using ink in a 3D printer.
They recently discovered that how the ink is applied dictates how the product behaves as moisture evaporates. For example, a flat disc printed as a series of concentric circles dries and shrinks to form a saddle-shaped structure reminiscent of Pringles potato chips. The disc, printed as a series of rays emanating from a central point, turns into a domed or cone-shaped structure. The final shape can also be controlled by adjusting the print speed.
Shrinkage occurs perpendicular to the wood fibers in the ink, and the print speed changes the degree of their alignment. A slower speed leaves the particles more randomly oriented, so shrinkage occurs in all directions. Faster printing evens them out and the shrinkage becomes more directional.
Scientists have learned to program the speed of printing and its trajectory to obtain various final forms. So, if you add two rectangles printed in different orientations, after drying, you get a spiral.
Researchers have also shown that they can program the print path, speed, and stacking to control a particular direction of shape change, such as spiraling a rectangle clockwise or counterclockwise.
Further refinement will allow the team to combine seats, domes, spirals and other design items to create objects with complex final shapes, such as a chair.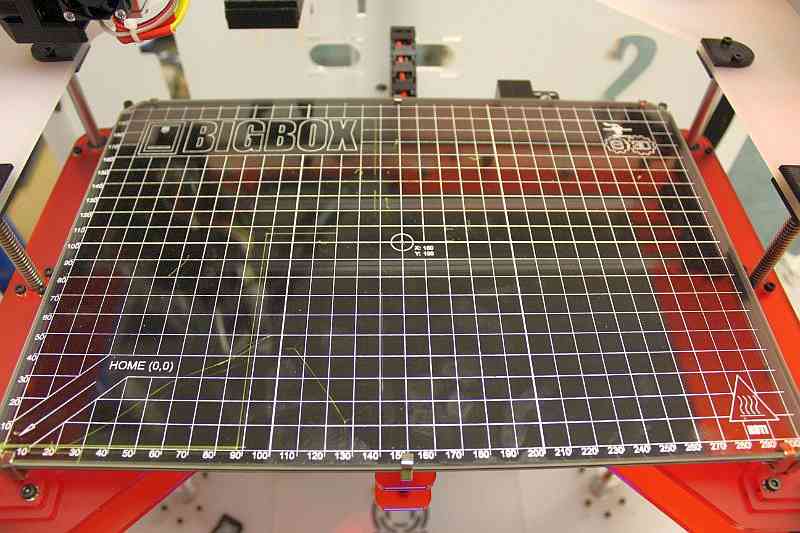
Ultimately, scientists believe, it will be possible to produce wood products that will be delivered to the end user in a flat form, and then "self-assemble" in the process of drying.
They also believe the technology could be licensed for home use so that consumers can design and print their own wooden objects using a conventional 3D printer.
Researchers are also exploring whether the morphing process can be made reversible to change the shape of the resulting object.
In early 2022, IKEA launched the first collection of 3D printed Flamträd products. When printing interior items, selective laser sintering was used to create complex lattice structures.
Cleaning the 3D printer table. Tips and Tricks.
3D printing is a very unstable process, I think everyone who is at least slightly familiar with plastic filament printing technology will agree with this. Unpleasant crashes in the 3D printer can occur for various reasons, and one of the most common reasons is the detachment of the model being grown from the desktop surface. And as a rule, this happens in the middle of printing, when you are already convinced of the stability of the press and are distracted by another activity. It is precisely for this reason that ensuring good adhesion of the first layer to the platform is very important for the successful completion of 3D printing.
Today there are many ways to improve the adhesion of the first layer to the bed. A lot of articles and recommendations have been written about this, so we will not talk about them. It is worth noting one of the simplest methods - is to keep the desktop of a 3D printer clean . Regular and thorough cleaning of the platform will not only improve adhesion, but will make printed models more beautiful and smooth.
In this article we will look at the best way to clean the 3D printer table, using the example of popular coatings:
Remember to be careful when using the following methods, as spilled liquid may damage the 3D printer. We recommend removing the bed from the printer before cleaning (if possible).
PEI sheet surface cleaning
Lately, PEI sheet has become a very popular material for improving adhesion in 3D printers. It provides excellent adhesion to various materials, and when it cools down, the printed model lags behind it very easily. The sheets are very simple and not fussy to use, and most often it does not require additional application of glue or adhesive tape.
Unfortunately, in order to achieve maximum efficiency, the PEI surface also requires regular and high-quality cleaning. If PEI is touched frequently, it can develop greasy spots that reduce adhesion to the material. Rough cleaning can also damage the surface and reduce sticking. Regular cleaning and maintenance of PEI will ensure that your models do not come off.
How to clean the surface of PEI
To clean this surface, we recommend using isopropyl alcohol (chemically pure, odorless) with a concentration of more than 70%. You can use it with a smell, but it is very caustic and unpleasant, the room will need to be ventilated.
Wait for the platform to cool, then liberally soak a dry cloth or paper towel with alcohol and wipe the surface. This will remove a significant portion of the fats and oils from the bed.
Acetone is also good at dissolving plastic residues on the surface. In the same way, liberally moisten the cloth with liquid, then gently wipe the surface of the 3D printer desktop. We strongly recommend doing this work in a well-ventilated area, as acetone is highly flammable and its vapors can penetrate the electronics of the device
If you have been using PEI sheet for quite a long time, and its resource is visually exhausted, we recommend using fine grit sandpaper (1500+). With gentle, circular motions, sand the surface until light scratches and depressions are removed.
When should I clean?
Most manufacturers recommend cleaning the surface with isopropyl alcohol every 2 to 3 prints.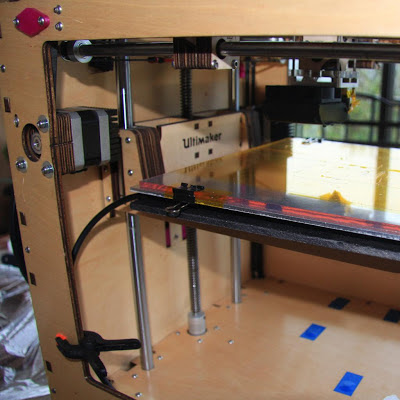 After a few months of use, sand the surface and wipe thoroughly with acetone. If it is no longer possible to restore the surface by the listed methods, then replace it with a new sheet from PEI. The lifespan of such material varies depending on the brand and frequency of use of the 3D printer.
Cleaning the glass surface
Glass is another very common 3D printer desktop material. Much more durable than PEI and similar surfaces. The glass plates provide a smooth and level surface at the bottom of the model.
This surface is usually used in combination with other aids (eg glue stick or hairspray) to improve the adhesion of the first coat. Such products are especially popular on tables that are not equipped with heating. Therefore, regular cleaning of the glass is necessary to prevent adhesive or varnish from sticking.
How to clean the glass platform
The easiest way to clean a glass plate is to use a scraper or a non-metal spatula. If the table is heated, then heat it until the material remains soft, after which they should be easily removed with a scraper.
Be careful when scraping. Depending on the scraper, the blade can be very sharp, so be careful not to scratch the surface. We recommend that you put your hand on the handle of the scraper, and with the other hand press down on its middle, so that the greatest force is directed downwards.
If this does not work, try wiping the glass with warm soapy water. Although simple, this method is very effective for removing hairspray, glue, and other adhesives. Keep in mind that this method is only recommended if the 3D printer allows you to remove the platform. Spilled water can seriously damage the heating element, power supply or other electronics of the device.
Dirt can also be removed with specialized cleaning agents. For example, wet alcohol wipes, window cleaner, isopropyl alcohol will also effectively wash away adhesive residue and restore the glass surface. However, do not take too strong cleaners. Such substances can severely damage the surface or even the 3D printer. In order to be sure to select a cleaning agent for your particular 3D printer, it is best to contact its manufacturer. Most often, they willingly make contact with users and willingly give advice.
When to clean the glass surface
Again, this will depend on how often you use the printer. We recommend cleaning the surface after each print to prevent buildup of glue or varnish. Such a procedure will not take much time, but the print will be more stable, and the resulting prints will have a beautiful and even surface. Once the models stop sticking (usually after a month), try washing the surface with soap and water. After about two to four months, you will have to resort to isopropyl alcohol or other specialty drugs. substances.
Cleaning adhesive tapes
Adhesive tape is another proven way to increase adhesion to the print platform. Today, this method is more common on 3D printers without the function of heating the desktop. Masking tape is the most common remedy, but so are Kapton and others.
One of the reasons for the popularity of such linens is their ease of use and relatively inexpensive cost. They are easy to stick to the surface and are available at almost any hardware store. However, there are also disadvantages: the tape quite often peels off when the printed model is removed, so it must be reapplied regularly.
How to clean?
Unfortunately masking tape is one of the most difficult to clean due to its fragility. however, we have found that gentle scraping is one of the most effective ways to clean it. With light pressure, evenly scrape off the remaining plastic thread from the surface, being careful not to tear it.
If the tape does break during cleaning, replace this area with a new strip. The main thing is not to overdo it and do not apply a thick layer, this can adversely affect the quality of the print.