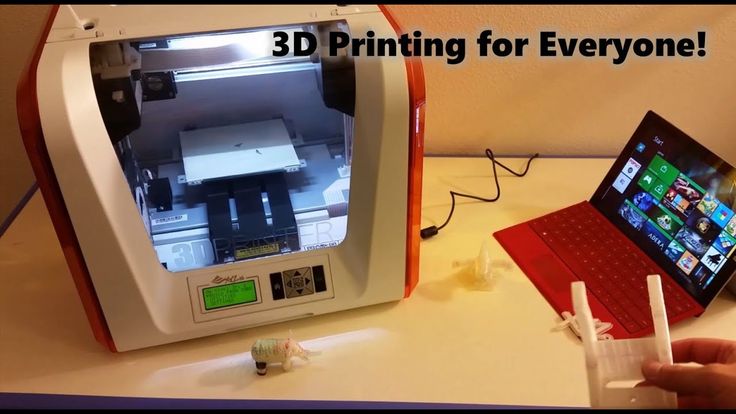
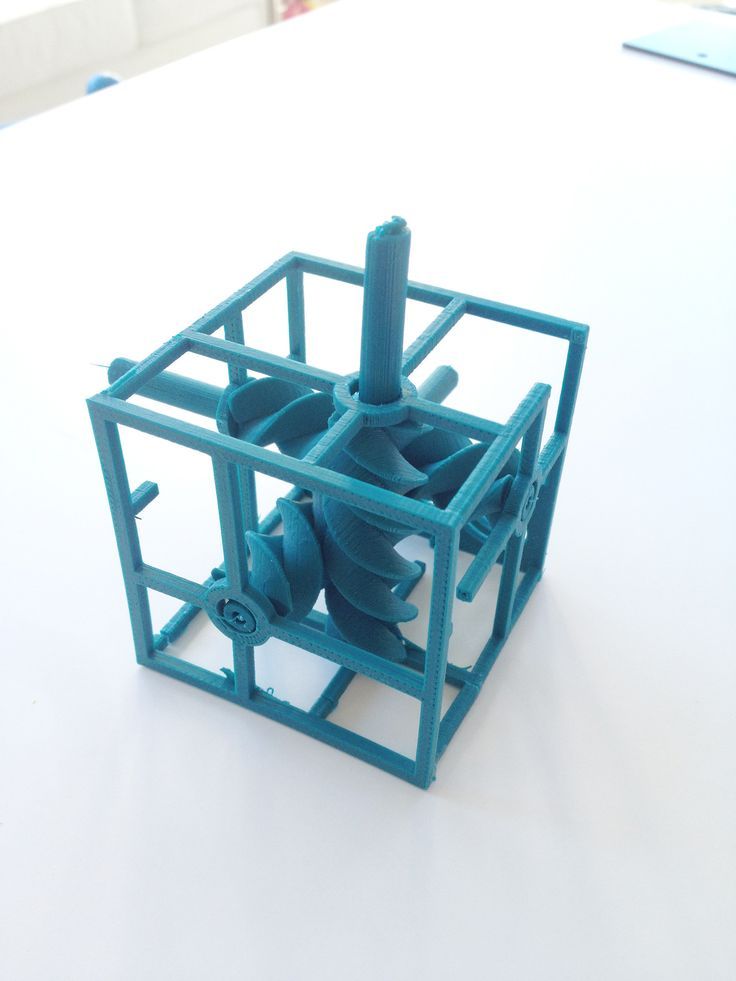
How to make 3d prints stronger
11 Ways How To Make 3D Printed Parts Stronger – A Simple Guide – 3D Printerly
3D prints have many functional uses which can require a good amount of strength to perform properly. Even if you have some aesthetic 3D prints, you’ll still want a certain level of strength so it can hold up well.
I decided to write an article detailing how you can make your 3D printed parts stronger, allowing you to have more confidence in the durability of objects you are making.
Keep on reading through to get some good tips on how to improve and strengthen your 3D prints.
Why Are Your 3D Prints Coming Out Soft, Weak & Brittle?The main cause of brittle or weak 3D prints is the accumulation of moisture in the filament. Some 3D filaments naturally tend to absorb moisture from the air due to overexposure. Trying to heat filament to a high temperature that has absorbed moisture can cause bubbles and popping, leading to weak extrusion.
What you want to do in this situation is dry your filament. There are a few ways to dry filament effective, the first method being to put your filament spool in an oven at low heat.
You first have to make sure your oven temperature is correctly calibrated with a thermometer because oven temperatures can be quite inaccurate, especially at lower temperatures.
Another more popular method is to use a specialized filament dryer like the SUNLU Filament Dryer from Amazon. Most people who use this are very happy with their results, being able to save filament they thought were no longer effective.
There have been a few mixed reviews though with people saying it doesn’t heat up enough, though these may be faulty units.
One user who 3D prints Nylon, which is notorious for absorbing moisture used the SUNLU Filament Dryer and said his prints are now coming out clean and beautiful.
I’d recommend that you use an extra layer of insulation like a large plastic bag or a cardboard box to retain the heat in.
Other factors that may contribute to a soft, weak, and brittle print is the infill density and wall thickness. I’ll take you through the idea methods to improve strength in your 3D prints below.
1. Use Stronger Materials
Instead of using materials that are known to be weak in some cases, you can choose to use materials that can hold up well with strong forces or impact.
I’d recommend going with something like Polycarbonate with Carbon Fiber Reinforcement from Amazon.
This filament is gaining plenty of traction in the 3D printing community for providing real strength in 3D prints. It has over 600 ratings and is currently at 4.4/5.0 at the time of writing.
The best thing about this is just how easy it is to print compared to ABS, which is another stronger material that people use.
Another widely used filament that people use for functional 3D prints or for strength in general is OVERTURE PETG 1.75mm Filament, known to be a little stronger than PLA, and still pretty easy to 3D print with.
2. Increase Wall Thickness
One of the best methods to strengthen and reinforce your 3D prints is to increase your wall thickness. The wall thickness is simply how thick the exterior wall of your 3D print is, measured by “Wall Line Count” and “Outer Line Width”.
You don’t want a wall thickness less than 1.2mm. I’d recommend having a minimum wall thickness of 1.6mm, but for more strength, you can definitely go higher.
Increasing wall thickness also has the benefits of improving overhangs as well as making 3D prints more watertight.
3. Increase Infill Density
The infill pattern is the internal structure of the object being printed. The amount of infill you need depends mainly on the object you are creating, but generally speaking, you want an infill of at least 20% for good strength.
If you want to go the extra mile, you can raise it up to 40%+, but there are diminishing returns to increasing infill density.
The more you increase it, the less improvement in strength you’ll get in your 3D printed part.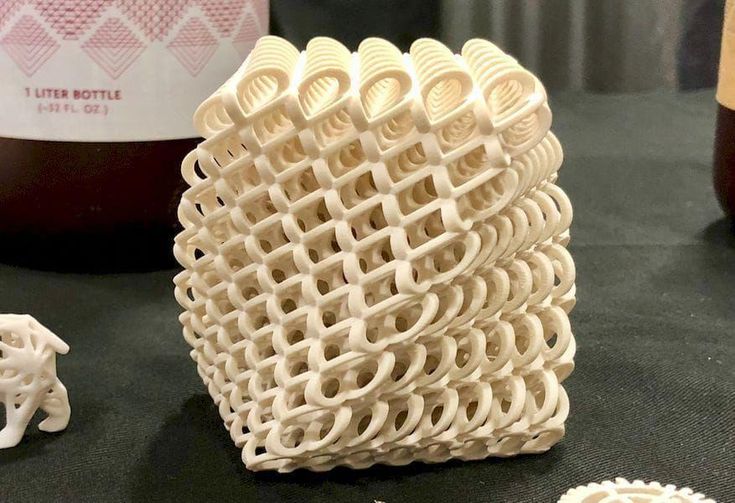 I’d recommend first increasing your wall thickness before increasing infill density so high.
Generally, 3D printer users don’t exceed 40% unless they need some real functionality and the print will be load-bearing.
In many cases, even 10% infill with a Cubic infill pattern works pretty well for strength.
4. Use a Strong Infill Pattern
Using an infill pattern built for strength is a good idea to reinforce your 3D prints and strengthen them. When it comes to strength, people tend to use Grid or the Cubic (Honeycomb) pattern.
The Triangle pattern is really good for strength too, but you will need to have a good top layer thickness to get an even top surface.
Infill patterns work closely with infill density, where some infill patterns at 10% infill density will be much stronger than others. Gyroid is known to perform well at low infill densities, but it isn’t a very strong infill pattern overall.
Gyroid is better for flexible filament and for when you might use dissolvable filament like HIPS.
While you slice your 3D print, you can check out how dense the infill actually is by checking the “Preview” tab.
5. Changing the Orientation (Extrusion Direction)
Simply placing the prints horizontally, diagonally, or vertically on your print bed can change the strength of the prints due to the direction that the 3D prints are created.
Some people have run tests on rectangular 3D prints that are oriented in different directions, and found significant changes in part strength.
It’s mainly to do with the build direction and how 3D prints are built through separate layers that bond together. When a 3D print breaks, it’s usually going to be from a separation of the layer lines.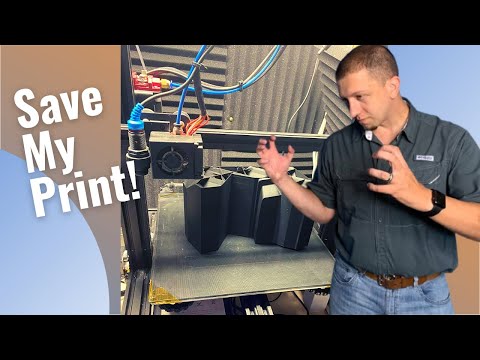
What you can do is figure out which direction your 3D printed part is going to have the most weight and force behind it, then orient the part to not have layer lines in that same direction, but opposite.
A simple example would be for a shelf bracket, where the force is going to be pointing downwards. 3D-Pros showed how they 3D printed a shelf bracket in two orientations. One failed miserably, while the other stood up strong.
Instead of having the orientation flat on the build plate, you should 3D print the shelf bracket on it’s side, so its layers are built across rather than along the part which has force on it and is more likely to break.
This can be confusing to understand at first, but you can get a better understanding by seeing it visually.
Check the video below for guidance on orienting your 3D prints.
6.
 Adjust Flow Rate
Adjusting your flow rate slightly is another way to reinforce and strengthen your 3D prints. If you choose to adjust this though, you want to make fairly small changes because you can end up causing under extrusion and over extrusion.
You can adjust the flow for specific parts of your 3D print such as the “Wall Flow” which includes the “Outer Wall Flow” & “Inner Wall Flow”, “Infill Flow”, “Support Flow”, and more.
Though, in most cases, adjusting the flow is a temporary fix for another issue so you would be better to directly increase line width rather than adjust flow rates.
7. Line Width
Cura, which is a popular slicer mentions that adjusting your line width to an even multiple of the layer height of your print can actually make your 3D printed objects stronger.
Try not to adjust Line Width too much, similar to the Flow Rate because it can lead to over and under extrusion again. It’s a good idea to adjust print speed to indirectly adjust the flow and line width to a certain extent.
8. Decrease Print Speed
Using a lower print speed, as mentioned above can increase the strength of 3D prints because it can leave more material behind to fill in any gaps that would occur if the speed was too high.
If you increase your Line Width, you want to also increase Print Speed to keep a more constant Flow Rate. This can also improve print quality when balanced correctly.
If you do decrease your print speed, you may have to decrease your printing temperature to account for the increased period of time your filament will be under heat.
9. Reduce Cooling
Cooling parts too quickly can lead to bad layer adhesion since the heated filament doesn’t have enough time to properly bond with the previous layer.
Depending on what material you are 3D printing, you can try to reduce your cooling fan rate, so your parts can bond together strongly during the printing process.
PLA works best with a fairly strong cooling fan, but can try to balance this with printing temperature, print speed, and flow rate.
10. Use Thicker Layers (Increase Layer Height)
The use of thicker layers leads to better adhesion between layers. Thicker layers will present more gaps between the adjacent parts of the layers. Tests have show that larger layer heights have been observed to produce 3D prints that are stronger.
A layer height of 0.3mm has been shown to out-perform a layer height of 0.1mm in the strength category. Try using a larger layer height if print quality is not essential for the specific 3D print. It is also beneficial because it speeds up printing times.
Check the video below for more details about strength testing for different layer heights.
11. Increase Nozzle Size
Not only can you decrease the printing time of your 3D prints, but you can also increase the strength of your parts by using a larger nozzle diameter like 0.6mm or 0.8mm.
The video below by ModBot goes through the process of just how much faster he could print, as well as the increased strength he got from the increase in layer height.
It’s related to the increased flow rate and increased layer width, leading to a more rigid part. It also improves how smoothly filament can extrude and create better layer adhesion.
Other Things to Try to Strengthen 3D PrintsAnnealing 3D Prints
Annealing 3D prints is a heat treatment process of putting 3D printed objects under an increased temperature to strengthen its integrity. With some testing, people have shown increases in strength of 40% according to Fargo 3D Printing’s testing.
You can check out Josef Prusa’s video on annealing, where he tests 4 different materials – PLA, ABS, PETG, ASA to see just what kind of differences occur by annealing.
Electroplating 3D Prints
This practice is becoming more popular because it is practical and affordable. This involves immersing the printing part in a water and metal salt solution. Electric current is then passed through it, thus causing metal cat-ions, like a thin coating, to form around it.
The result is durable and long-lasting 3D prints. The only downside is that many layers may be required if you want a stronger print. Some plating materials include Zinc, Chrome, and Nickel. These three have the most industrial applications.
What this does is simple, to orient the model such that the weakest point, which is the layer boundary is not so exposed. The result is stronger 3D prints.
For more on electroplating 3D prints, check out the video below.
Check out another great video on electroplating, with simple instructions on how to get great finishes on your models.
How To Strengthen Finished 3D Prints: Use of Epoxy Coating
When you are done printing the model, an Epoxy can be applied correctly to strengthen the model after printing. Epoxy, also known as polyepoxide is a functional hardener, used to make your read-made model stronger.
With the aid of a brush, gently apply the epoxy coating to the 3D prints in a way that the epoxy will not drip down. Use smaller brushes for crevices and hard to reach corners so that every part of the exterior is well covered.
A very popular 3D printing epoxy coating that tons of people have had success with is the XTC-3D High Performance Print Coating from Amazon.
It works with all sorts of 3D printed materials like PLA, ABS, SLA prints, as well as even wood, paper and other materials.
A kit of this epoxy is very long-lasting because you don’t need to use much at all to get good results.
Many people say “a little goes a long way”. After the epoxy cures, you get some extra strength and a lovely clear and shiny surface that looks great.
It is a simple thing to do, but if you would like to know more about applying an epoxy coating to 3D prints, check out the video by Matter Hackers.
How to Strengthen Resin 3D Prints
To strengthen resin 3D prints, increase the wall thickness of the model if it’s hollowed out to around 3mm. You can increase durability by adding around 25% flexible resin to the resin vat so it has some flexible strength. Make sure not to over cure the model which can make resin brittle.
5 Tips to Strengthen 3D Printed Parts
Structural integrity in 3D printing is important as 3D prints must not collapse while functioning. 3D printing is a popular manufacturing process with wide acceptance because of the quality it delivers. In terms of improving the strength of 3D printed parts, there are many things that come to play.
This article will provide details on how to make strong 3D prints and it is helpful for those either having a personal 3D printer or want to outsource to rapid prototyping services. If you have a personal 3D printer, you will learn how to tweak the settings to achieve the best results. If you want to outsource your projects, you will get information about different materials and recent post-processing technologies that will give you an idea of how to communicate to the prototyping service better. Go through a simplified version of how to make 3D printed parts strong.
Having a 3D printer for your personal works is more efficient and effective in personal product manufacture. However, unless you are deeply into 3D printing with knowledge surrounding its use, you might have a little trouble making a strong 3D print. There are many settings on your 3D printer that you can tweak for a high-quality and strong print. Below are how to make strong 3D prints using them.
Increase Infill DensityOne way of increasing the strength of a 3D print is by increasing the interior density. The interior density ranges from 0% to 100%, with zero means totally hollow while 100 means totally solid.
Theoretically, having a 100 infill density should make your 3D print very strong. However, practically most designers have noticed that anything beyond 70% has a lesser impact on strengthening the 3D print. Instead, there is a tremendous increase in filament use, printing time, cost, and burden on the 3D printer.
Note: Have at least a 20% infill density for strength and, if possible, tweak the wall thickness (explained below) before increasing the infill density.
Increase Wall ThicknessThe wall thickness of a 3D printed material is measured by “Wall Line Count” and “Outer Line Width.” It shows how thick the wall and increasing it is a critical way to make strong 3D prints. Increasing wall thickness will increase strength as 3D printed parts have more strain on the outside than the inside.
Not only does increasing the wall thickness strengthen the printed material, but it also improves overhangs (geometry shapes in 3D models that are difficult to print) and water tightness.
Note: For a regular product, at least have a wall thickness ≥ 1.2mm. You can then increase it for more strength.
Use Thinner LayersUsing a thin layer will lead to better adhesion and density between subsequent layers, which strengthens 3D printed parts. Designers have said that going as low as 0.1mm (100 microns) will maximize strength. However, there is also a complementary increase in printing time.
Use a Strong Infill PatternAnother way of reinforcing 3D prints is by using the right infill pattern. Infill patterns work with infill density, and they serve as an internal support structure for 3D prints. They also add some stiffness to the part and prevent wall deformation. On how to make strong 3D prints using infill patterns, you should use a dense infill pattern ranging from 30-50%.
The type of infill pattern you use also determines how strong the 3D print will be. Three infills you can try are listed below:
· Triangular Infill PatternTriangular infill patterns are strong as they have a lesser chance of deforming, and they provide the best support structure. Most 3D enthusiasts attribute this to triangles being the strongest shape.
Using a triangular infill also improves print speed due to the straight-line movement of the printhead. Consequently, strength and speed make triangular infills the best choice among many 3D enthusiasts.
· Rectangular Infill PatternRectangular infills can achieve 100% infill density due to their grid of parallel and perpendicular extrusions. Like the triangular infill, it also has a high print speed due to the print head’s straight-line movement.
· Hexagonal Infill PatternThey have tessellated hexagons and the highest strength to weight ratio. Unlike the previous two infill patterns, printing is slow due to the printhead constantly changing direction, but they are also effective in reinforcing 3D prints.
Adjust Flow RateAdjusting the flow rate can also be an ideal method to make 3D printed parts strong. However, using this method, you must be careful such that you do not cause under and over extrusion. Therefore, most designers make sure they only make small changes.
You can adjust the flow rate for the following:
- Wall Flow (Outer Wall Flow & Inner Wall Flow)
- Infill Flow
- Support Flow
You can adjust the flow rate to strengthen 3D prints. However, most people adjust the flow rate to fix other 3D printing issues such as the inability to achieve volumetric flow and to improve accuracy.
Modify the Line WidthAccording to Cura, a popular slicer, you can strengthen your 3D prints by adjusting the line width to an even multiple of the layer height. However, you must be careful as this setting is directly related to extrusion, i.e., a massive change in line width can lead to over and under extrusion.
Reduce CoolingCooling is an important process in 3D printing which affects the adhesion of layers after setting. Quick cooling can reduce the adhesion due to a subsequent layer’s inability to bond with another. However, cooling also depends on the material you are using. For example, PLA works best under the action of a strong cooling fan. Therefore, you should reduce the cooling rate based on the material you are working with.
In 3D printing, there are some materials that are known to be weak. Therefore, making a strong 3D print can be about using strong 3D printing materials. There are three major materials with properties synonymous with strength.
ABSABS is a great 3D printing material for making strong 3D prints that are not suitable for heavy use. It is a thermoplastic with tough and light properties, which makes it a top plastic polymer in 3D printing.
PLAPLA is an expensive 3D printing material suitable for prints with heavy use and high resolution.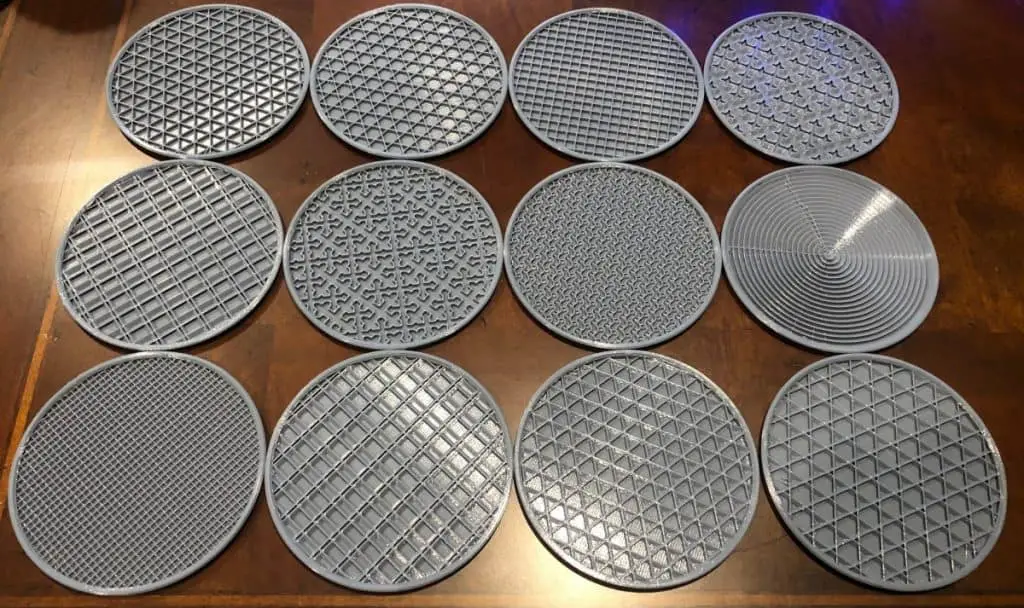 It has a tensile strength of 7250 psi but will degrade on exposure to light.
This is a new filament recently gaining popularity due to its strength. It has a tensile strength of about 4100-8500 psi which makes it stronger than PLA and weaker than ABS. However, it is less flexible than PLA and more than ABS.
Choosing the Right MaterialTo choose the right material of the three, you have to consider the resistive force, bonding between later, bending forces, rigidity, and ability to resist impacts. Below is a comparison of the three in terms of each:
- Resistive force: PETG > PLA > ABS
- Bonding between layers: PETG > ABS and PLA
- Bending force: ABS > PETG > PLA
- Impact resistance: ABS = PETG > PLA
To learn more about the differences between PLA vs ABS, check out the article on RapidDirect.
Determine Part OrientationAnother way of reinforcing 3D prints is using part orientation. Part orientation is the positioning of a part on the 3D printer. 3D printers work by depositing thin layers of melted materials at a gradually increasing height. The gradual increase in height is what forms the 3-dimensional parts. On the deposition of a layer, it bonds with the previous layer. However, the interface between the two layers is a weak point, and 3D prints break at these interfaces.
A good way to understand this is by making a bracket used for a shelf. The thing you will notice is that the largest force will act downward where the bracket attaches to the shelf. Therefore, it is better to print on a side with an interface that is opposite the force.
If the part orientation is challenging, you should use materials that have a better bonding tendency, for example, PETG. Also, note that part orientation will affect the smoothest of the print surface and the print cost due to the requirement for many materials.
Applying Epoxy Coating to 3D PrintsThis is not a direct way of making strong 3D prints as it occurs after printing. It involves using epoxy/polyepoxide to strengthen 3D prints. Epoxy coating is an insoluble surface coating made from a hardener and epoxy coating. It is solvent resistance, durable and tough, making it a suitable way to coat materials such as PLA, ABS, and SLA.
Applying an epoxy coating to 3D prints is an easy task. Follow the steps below on how you could go about it:
- 3D prints the product according to the product design
- Let it cool and clean the surface.
- Pour a little part in a cup and warm it to achieve a viscous fluid
- Using a brush, apply the epoxy coating using a brush on the model without allowing the coating to drip down its side. Also, use small brushes to get access to crevices and corners.
- Allow the 3D print to dry.
You do not need to use much as a little of the hardener can coat and strengthen the print. Applying epoxy coating on the 3D print makes it stronger and provides it with a clear and shiny surface.
Other Considerations to Make 3D Printed Parts StrongTweaking the 3D printer settings is not the only way to make a 3D print strong. Aside from the epoxy coating, which is a post-processing method, there are other methods you can use. Below are two important methods popular recent.
Annealing is a method that subjects 3D prints to an increase in temperature for strengthening purposes. According to the test, annealing is said to cause about a 40% increase in strength after use. It is compatible with materials such as PLA, ABS, PETG, and ASA.
Annealing is important in strengthening 3D prints as the structure of plastic makes it prone to failure. Before 3D printing, plastics have an amorphous/unorganized microstructure. However, when you heat the 3D prints, the amorphous structure reorganizes itself to a crystalline form which makes such 3D prints prone to failure.
Annealing is essential here as it changes 3D prints’ crystalline structures from large to small crystals. You can anneal the plastic polymer or the finished 3D printed product. To anneal the plastic polymer or 3D printed parts, heat it at a temperature above its glass transition point and below its melting point.
Electroplating is a popular method due to it being practical and affordable. It involves putting the 3D print in an electrolyte and a plating metal (popular industrial metals are zinc, chrome, and nickel. On passing an electric current through the electrolyte, the metallic ion forms a coating around the 3D print. This leads to the formation of durable and long-lasting 3D prints.
While suitable for the purpose, its disadvantage is that it would need many layers for making better 3D parts with high strength.
ConclusionA strong 3D print is one that does not collapse on use, which makes knowing how to make strong 3D prints. Very important. There are three ways of strengthening 3D prints. One is during the process itself (by tweaking the 3D printer’s Settings), using the right materials, and after-process treatments. Using any of the methods, you have a chance of making strong 3D prints or talking to or communicating with the prototyping service on how to strengthen 3D printed parts.
3D printing is a popular method used for its quality, efficiency, and effectiveness, and its ability to make complex parts. However, improving strengthening a 3D print comes with advanced knowledge on how a 3D printer works, the right material to use, and post-processing techniques.
If you desire a 3D print with the right attributes in the form of strength, durability, aesthetics, and quality, partnering with RapidDirect, one of the best rapid prototyping services in China, is a great choice. We provide custom 3D printing services, and you can get an instant quote for custom machined parts and full-dimensional reports inspection reports. For anything related to 3D printing, contact us today.
Get an Instant Quote For 3D Printed Parts
FAQsHow do you reinforce PLA 3D prints?
PLA is one of the most frequently used materials in 3D printing. It has a huge tensile strength making it suitable for making structural parts. While strong, you can also reinforce PLA 3D prints using the methods highlighted above. Common methods of strengthening the 3D prints include applying epoxy, annealing, or electroplating.
What is the strongest 3D printable material?
Among all the printable materials used in 3D printing, polycarbonate is the strongest. It was dubbed the true king of desktop printing due to its strength (tensile strength of 9800 psi) and heat resistance. The heat resistance makes it require extraordinarily high temperature (bed should be at about 1450 while the head should be at about 2900. You will also need to enclose the material due to it warping in an open environment. Polycarbonate is suitable for making high-strength functional components.
How do I make prints stronger?
There are many ways you can use to make prints stronger. You can tweak your 3D printer’s setting, you can change the materials to stronger materials, and you can use after-processing methods such as coating with epoxy materials, annealing, and electroplating.
how to make it? How to make your own plaster hand for copying
The memory of unforgettable moments of childhood can be left not only by photography, but also by modeling gel for casts , used to create precise outlines of your baby's legs or arms.
Not only parents buy today, but also godparents, grandparents, who want the imprint of unique little children's hands to remain not only on paper.
With the help of the gel, you can create an impression that conveys the smallest details of the child's hand.
Modeling gel is also used to create an exact shape that conveys lines, curves and other minute subtleties of the body.
You can order the work of a master for making impressions. Some of them also work in the creation of cast paintings - this is a beautiful creation that will be interesting to you and the child when he grows up.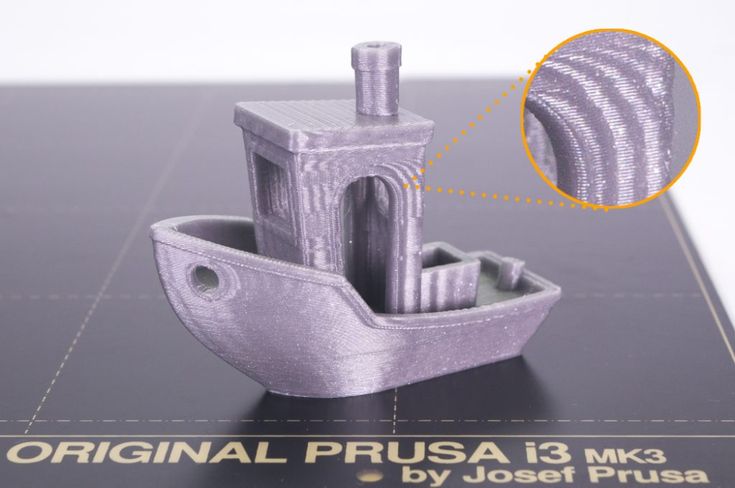
If necessary, you can purchase your own impression gel and perform the entire procedure yourself.
Instructions for use are usually included with the packaging. The most common modeling gel is offered by many companies, including Arms and Legs and Socrates.
To create a 3D cast, you no longer need to look for a sculptor or other master in this direction, as you can purchase a special model gel designed for a certain age of the child and create a unique painting or sculpture reminiscent of the child's childhood.
It will take no more than half an hour to create an impression, if you carefully follow the instructions in the instructions.
Some sets also include postcards, on which you can later place the created impression. Or you can pre-buy a frame in which the photo of the child will be placed.
The step-by-step process for making impressions is quite simple and clear:
- Initially, you need to dip the arm or leg into the modeling gel, which sets quickly.
 Creating a form in this case will take about 2 minutes. Moreover, do not worry that the consistency can cause allergies, as it is completely safe even for the smallest. The unique gel preserves not only the original size of the palm, but also repeats all the subtleties of lines, nails, and folds.
 - After that, a high-precision modeling plaster must be poured into the resulting mold.
- After approximately two hours, the sculpture must be freed from the model material and thus an absolutely exact copy of a small handle or leg should be obtained. If desired, such a sculpture can be decorated in any way: coated with varnish or other coating, make an inscription, decorate with some decorative elements.
Recently, many couples in love have also become interested in this gel.
Such a surprise will surely please everyone, even not an avid romantic.
You can buy 3D gel for casts in a wide range in many chain stores or on Internet portals. A set consisting of gel and plaster must be certified, like any other product.
The presence of instructions is also important, although they may not offer it - they sell only gel bags that have a lower cost compared to the full set.
When purchasing a model gel, do not forget to provide the amount of material, which can be calculated by the website consultants.
Naturally, it is advisable to buy 3D gel for casts from trusted companies, especially if you want to make a cast of a child's hand, since everyone can guarantee the safety of the composition, but how it actually exists is not known.
Do not miss the opportunity to get a unique family heirloom, the unusualness of which will attract and constantly remind you of a certain moment in your life. In addition, the cost of model gel for casts is loyal, so anyone can buy it.
To make a trace of the arms or legs of your baby, that is, the first trace of the crumbs, you must read this instruction.
All materials intended for making impressions do not cause any harm and cannot cause .
For their manufacture, a small amount is required, this will not disturb the child, because the technology by which the casts are made is innovative, and the composition from which the cast will be made is hypoallergenic.
Specialists have specially developed kits so that parents can create children's casts on their own.
Often the parents of children bought kits in stores, but there was not enough molding mass for a sufficient number of casts. But there are kits with which parents have several attempts before the real start. They train and begin to sculpt something really beautiful and neat. It turns out a quality cast. They can create it not only for themselves, but also as a gift to grandparents, godparents of their little one, make casts of children of close friends as a gift to them.
In addition to making casts of the tiny limbs of your little one, you can create a cast of the hands of two lovers or newlyweds, a cast of your own hand.
Today there is a great abundance of such things on sale, with the help of which it is easy to create your own design of casts.
And on the Internet there are many samples for making casts.
If you want to put the resulting cast on a table or shelf, you need to fill a plastic mold, for example, from under sweets, with plaster, paint it with any paint, then glue the resulting cast of a leg or handle with a good glue.
3d impression kits
Watch a video on how to create a cast correctly:
Now let's take a closer look at this video: mix the dry gel in the required proportion, beat with a mixer until a homogeneous mass is formed, convenient for use. After that, we lower the child's leg into the mass, take it out. We fill the form with special plaster, after a while we take out the resulting sculpture.
Pretty easy, isn't it?
And now let's take a closer look at the proportions by which you need to mix water with the impression gel.
Take 100 grams of dry gel, also 400 milliliters of water. Well, to create the hand of an adult, instead of a mayonnaise bucket, they take a two-liter bottle of plastic, cut off her throat. Take 250 grams of gel per liter of water.
For children aged between and above, you need to calculate the proportions yourself. To do this, measure the amount of water required to completely immerse the child's arm or leg in the container.
In order to pour the mold, take a special plaster. To pour one cast, take ten to five tablespoons of gypsum and 0.05 liters of water.
In order to pour one cast of an adult's hand, you will need 20 tablespoons of gypsum and 0.18 liters of water.
2d impression kits
Making a convex cast of some part of your little one's tiny limbs.
This technology assumes a plastic material for reusable use.
It is quite plastic and soft, able to convey every fold and line of the skin, keeps its shape perfectly.
But this material can be used almost unlimitedly.
The main condition for storage is the obligatory presence of the material in a jar, the absence of contact with water, talc and oil.
This kit will help you make casts of baby feet and hands every month. You will compare how the baby has grown.
And now the video instruction for making impressions 2 d:
When analyzing this video, we want to clarify again that the convex layer of the handle is made using the finished impression mass manually, filled with special plaster. Then everything dries up, the cast is pulled out, the mass is again kneaded. A new cast is created from it.
After this procedure, the impression mass is kneaded again, it is placed in a bag into which air will not enter, in order to take out the mass next time and create a sculpture again.
Casts can be stained in any color you like. This can be done using watercolor, gouache, acrylic. Glue what you got to the photo frame. At the same time, use any decor that you like, some collages, booties, a tag, a dummy, an ultrasound scan, a bodysuit, a vest, a hat. The main thing is to use your imagination.
Available to everyone. A casting made in accordance with all the rules and in compliance with the proportions when mixing the working solution will turn out to be very realistic.
The appearance of the finished product and its strength characteristics will depend on the quality of the gypsum. To achieve maximum similarity, a quality form is needed. For its manufacture, special materials are used.
Idea
For those who are in love, a plaster cast of a pair of hands intertwined together can serve as a gift for a significant date. Often such a composition is ordered by newlyweds on their wedding day.
Children's casts of hands and feet are ordered by parents as a keepsake in addition to photos and videos with their babies. Such a souvenir, decorated in an elegant frame, can be presented to relatives and friends as a memory of a memorable date: the first or anniversary birthday, baptism, the first independent step of a child, etc.
You can create a whole collection of such casts made in different periods of active child's growth. Later, holding them in their palms, children may remember the happy moments of their childhood.
An elegant plaster hand, made and decorated with your own hands, can also serve as a detail of the original composition. Such a decoration, for example, can also be used as a mannequin for storing rings.
Gypsum
There are many different materials for mold casting. These are paraffin, wax, concrete, silicone, metals, even chocolate can be poured into a food form. Compounds of plastics, resins have now become available. All of them have their own specific casting features. To answer the question of how to make a plaster hand, you first need to understand what kind of material it is. It is also important to understand the technology of its casting.
Gypsum powder is a natural material. It has a white or grayish color, fine grinding, quickly absorbs moisture when water is added. It is obtained by firing gypsum stone and is distinguished by its purpose: for medical purposes, for molding, for plastering and the production of plates.
Construction gypsum has a coarser grinding, medical gypsum is the purest, molding gypsum sets more slowly. A useful property for sculptures is an increase (up to 1%) of the working composition in volume. This extension makes it possible to fill in a small drawing of a form. When preparing the mortar, after a few minutes it begins to harden and completely seizes within 20 minutes.
Technology features
Gypsum powder must be stored in a dry place. Soaked or damp material is not suitable for casting, it does not set. Its characteristics also deteriorate from long-term storage. The working solution of gypsum is prepared quickly. From prolonged mixing, it “rejuvenates” and seizes weaker, which ultimately leads to a loss of strength of the finished product.
If the working solution has hardened before the completion of pouring, it is no longer suitable for work. Adding water and re-mixing it will not fix the situation. Liquid glue can help slow down the setting of the solution. It (3-4 tablespoons per bucket of water) is added beforehand and mixed well.
It is necessary to dry the casting at a temperature of up to 60 degrees. It is not desirable to exceed this limit - the material loses its strength and begins to decompose. Do-it-yourself gypsum hand is made taking into account all these nuances. To make the finished product stronger, the solution is kneaded with milk of lime.
Moisture and dampness adversely affect plaster products, so they must be used and stored indoors, especially if they do not have a protective coating.
Preparatory operations
Making a plaster hand on your own is possible at home without the use of any special technologies and special equipment. However, for the casting process to go smoothly, you need to carefully prepare. Different batches of gypsum (especially building gypsum) may have different setting times.
To know it exactly, it is best to test mix and pour a small amount of mortar into any simple mold. This will allow you to accurately calculate the proportions of gypsum and water, determine the time period within which the solution retains its casting properties. As a result, this will help save material, time and nerves.
At the preparation stage, they determine the container for the mold, as well as select a suitable vessel for mixing the gypsum mortar. For a one-time filling, you can take disposable dishes. If you plan to continue casting, it is best to purchase a rubber plaster to mix the working solution.
Half of an old children's ball is suitable for this purpose. Dried gypsum from the walls is easily peeled off when the rubber is deformed. The skin of the hand that will be immersed in the molding mass can be lubricated with a thin layer of castor oil or petroleum jelly.
Simple clay mold
A test plaster cast of a hand can be successfully cast into a clay mold. This will not be a full-fledged volumetric copy, but it will provide an opportunity to get the first practical experience. Clay is an affordable material that can be reused many times after failed attempts, which is just right for beginners.
We need two pieces of board or plywood 5 cm larger than the palm of our hand. They and the hand are smeared with vegetable oil or vaseline. This is necessary so that the clay does not stick. They put a hand on the board with the palm of their hand, press it tightly and begin to apply clay moistened with water and kneaded to a thick dough, kneading it well and compacting it.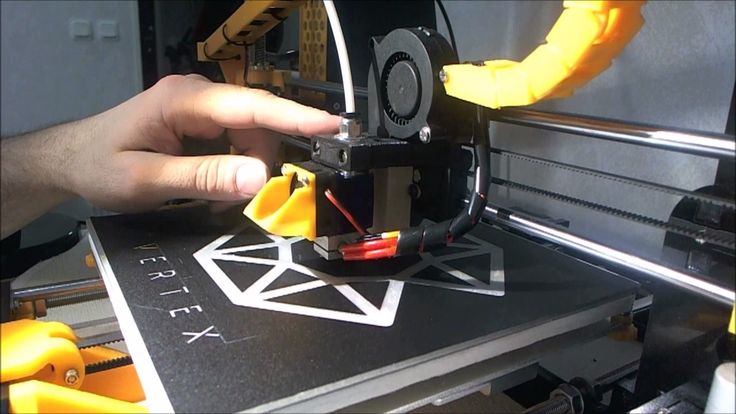
The total layer should be at least 5 cm. Its top is leveled on a plane and covered with another board. The whole structure, together with the hand, is carefully turned over. The bottom board is removed and the palm is carefully released. The form for filling is ready. To obtain ideal castings, plastic molding masses are used.
Impression alginate
Special formulations are used to make complex molds. One of the most affordable options is alginate mass. Its main purpose is the production of casts in dental practice. But such material is quite suitable for sculptural castings.
Alginate is a raw material from seaweed. Its dry powder, mixed with water in exact proportions, quickly thickens and acquires the properties of a dense jelly. If, before the start of the setting process, a hand is placed in such a mass, and then, after reaching the optimum density, it is carefully removed, then a cavity is formed in the mold. If a plaster solution is poured into it, then after hardening it forms an exact copy of the hand.
Casting cannot be removed without breaking the mold. The alginate mass is in a state of plasticity for a short time, it begins to lose moisture, becomes brittle and collapses from deformation. Therefore, filling with a working composition should be done immediately after removing the hand. In this case, you can expect a high quality cast copy.
Some grades of alginate masses change color as they cure. When kneading, they have one shade, in the initial phase of setting (the optimal moment for immersing the hand) - another, after reaching density (when you can remove the limb) - the third. The process of making a plaster hand with the help of such a molding material is within the power of anyone.
Mortar preparation
Do-it-yourself plaster hand is cast in a pre-prepared mold. Pure cold water is collected in the mixing container in the required amount. Dry gypsum powder is evenly poured into it. Ideally, it should form a hill above the surface.
Gypsum begins to absorb water intensively. At this time, it must be well stirred. This should not be done too intensively, as air bubbles form. They remain in the solution, get into the mold, and after it hardens, they form shells and cavities. Therefore, you can use a drill with a kneading nozzle only at low speeds. It is better to do everything by hand, using a spoon or a wooden stirrer. The goal is to get a homogeneous mass without lumps, resembling sour cream in density.
The proportions of water/gypsum (approximately one to two) are determined experimentally in advance. After mixing, the container is lightly tapped to release air bubbles to the surface. The resulting foam is collected with a spoon. The prepared working solution is immediately poured into the mold. The time from the beginning of mixing to pouring is no more than a minute and a half.
Casting into a mold
Do-it-yourself plaster hand is made by casting into a prepared mold. The solution is added in portions. If they fill out a complex form at once, then air sacs can form in it. The gypsum mortar does not fall into such voids; as a result, the finished model will have defects.
To avoid this, the mold is rotated in all directions after pouring the first small part of the working solution. So it spreads over the inner surface and falls into all the recesses. The air inside does not accumulate and is gradually forced out.
With the next portion, the gypsum mortar is deposited on the walls more and more, its layer becomes thicker. When complex undercuts are completely filled, you can pour the rest of the gypsum.
The process of making an impression of a child's hand is slightly different from the workflow with adults. The fact is that the child, as a rule, cannot keep his hand in a constant position until the molding mass seizes. Finger movements during molding spoil everything. Therefore, it is best to carry out this procedure during sleep in its deep phase.
Alginate molding material is used. It is kneaded in a bowl of a suitable size. All components are prepared in advance according to the instructions. Alginate powder is poured into the water and stirred with a spoon until smooth for about one minute.
Adults use cold water. But so that the child does not wake up during sleep from contact with a cool mass, it is better to warm it up. Warm water for mixing significantly reduces the time of use of the molding material, so everything must be done quickly.
When the formula is ready, it is poured into a suitable glass, matched to the child's arm, and the child's limb is placed there. The hardening time of the mass is 1-2 minutes. During this period, you need to keep the form at rest in order to get a quality print.
After the allotted time, the infant's arm is gently removed. As a rule, this happens without problems, since the mold is plastic and does not deform from light loading.
Immediately after this, the working solution is prepared and poured. Gypsum is kept in the mold for no more than 30 minutes.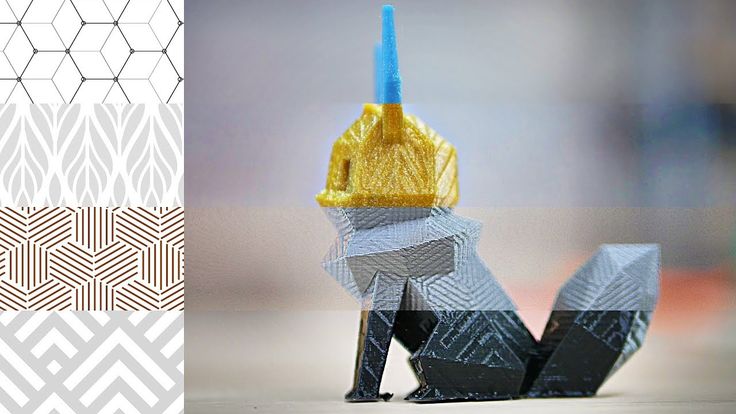 Later, the alginate mass begins to give up water, which will adversely affect the casting. The form is removed from the glass, cut into pieces, the plaster handprint of the child is released. It is cleaned and left to dry.
The same principle is used to cast the hand of an adult or a child who can keep the hand still during the molding.
DIY kits for making 2D and 3D casts
Recently, a copied souvenir plaster hand has been popular with the townsfolk. How to make it with your own hands is described in detail in the instructions for ready-made kits for modeling. Such a kit is ideal for those who want to try their hand at volumetric casting, but do not have the opportunity or do not want to understand the brands of molding masses and gypsum.
The kit will cost more than separately purchased components. But manufacturers are focusing on the convenience of such a configuration. In addition, they give a guarantee of the quality of their materials. The kit includes a dry hypoallergenic mass for forms, it is easy to prepare it by filling it with water in the required ratio. There is also a model cleaned gypsum of increased strength.
Casting kit for simple hand or foot impressions includes reusable plastic molding compound. Before use, it is kneaded, an impression is made and plaster is poured into it. After solidification, the casting is removed. If re-filling is not expected, the mold is again kneaded to a soft state and set aside for storage, packed in a plastic bag.
Finishing
How to make a plaster cast of a hand into a finished composition? To do this, it must be painted. For some, the ideal option would be toning with gold or bronze paint. Another will choose a skin tone or white.
Acrylic emulsion is suitable for decorative coating, but its layer, although thin, can smooth out fine lines and wrinkles on the impression. Although, if the copy turned out to be imperfect, then this option is quite suitable. If you need to preserve the smallest details, it is better to use spray paint.
Before finishing, the cast is inspected, all irregularities are polished, defects are corrected.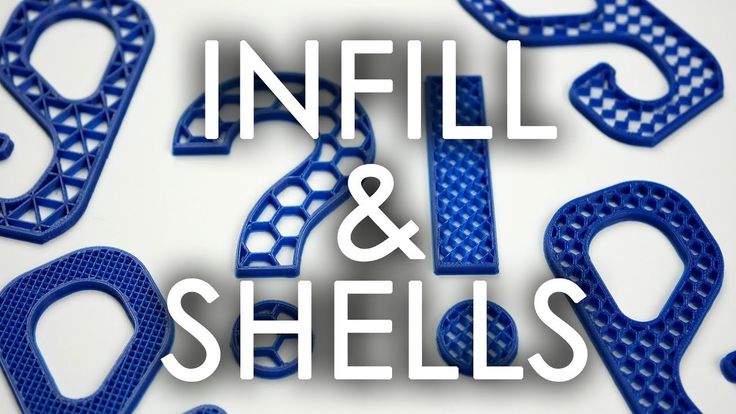 In order for the paint to lay down in an even layer, the workpiece can be pre-primed, allowed to dry and then sanded again with fine sandpaper.
For installation, select a decorative base of your choice and mount a copy of the hand or a composition with it on glue. After drying, the souvenir can be varnished for greater effect.
How to make your own plaster hand for copying?
Having mastered the technology of casting and making molds, you can try to expand the range of products. A copied plaster hand, made with your own hands, can serve as a detail of the original composition.
For example, if molded in the holding position, it can serve as a phone holder. In another case, it may be the base of a candlestick or table lamp. A decorative glass can be placed in a plaster hand and such a composition will turn into a pen holder or an original flower vase.
It is not practical to produce disposable forms for mass copying. In this case, elastic silicone is better. Forms from this material can be used repeatedly. To remove the casting, they are cut on one side and a copy is carefully removed.
The silicone is placed in the container in which it was poured during manufacture, and the process is repeated. For the convenience of extracting castings, you can use release agents. In such forms, you can pour not only gypsum, but also paraffin, tin or chocolate. The imagination of the authors is limitless - the main thing is not to be afraid to experiment!
Nowadays, many parents make casts of children's hands and feet with their own hands. Such a commemorative imprint looks very cute and will allow you to remember the wonderful moments of early childhood for many years.
Do-it-yourself casts of children's hands and feet
- Step 1. Mix mold powder with water. You will get a paste, which must be transferred to the container where the impression will be made. Place an arm or a leg into the mass. The paste will begin to harden and take on a white color.
 Then, you must wait for about one minute for the mass to completely harden if water is used at room temperature;
 - Step 2. Move your arm or leg to slide it out of the mold;
- Step 3. Mix plaster with water, making sure there are no lumps. Pour the mixture into the mold. Leave the imprint for a while so that the gypsum hardens;
- Step 4. Tear off or cut pieces of the mold to free the impression;
- Step 5. After drying, paint the impression in the chosen color or varnish. If you purchased a set with a frame or stand, glue it in place.
To make casts of arms and legs with your own hands, you do not need experience, you just need to carefully read the instructions. As a rule, kits contain all the necessary materials and tools. In addition, they often provide the opportunity to make several casts, because working with a child is completely unpredictable, and whether a perfect outline is obtained depends largely on our small models.
How to prepare for a do-it-yourself 3D impression of arms and legs:
- make your little model feel good;
- you can use sleep time;
- Mixture leftovers after making can be hard to wash off, so wear clothes you don't mind getting dirty;
- requires the participation of two adults - one to take care of mixing the ingredients, the second - to hold the baby and distract him;
- if you have touched the sides or bottom of the mold, you can pour plaster into it and then smooth out any imperfections with sandpaper;
- the time for which the form will completely harden depends on the temperature of the water used - the colder the water, the longer it will harden, the warmer the water - the faster the material will harden, room temperature of water is optimal;
- make sure the containers are the right size for your baby's feet or hands.
How to prepare a child to make a mold of children's hands and feet with their own hands
Take advantage of the moment when the little models are calm, it can be a moment of sleep or watching a cartoon. Some dormouse can oversleep all the fun and do not even notice what is happening around them.
However, if the child is sensitive to cold, it is important to pre-moisten the hands or feet with water to allow the child to get used to the temperature of the mass.
If this does not help, you can add warm water, but keep in mind that the higher the temperature, the faster the mass will set.
In this case, you can add a little more water than indicated in the instructions or fill up not all the contents of the bag.
If you want to make a casting mold while your baby is awake, you should definitely find a moment when the baby is in a good mood, calm, full and well-rested. Prepare an attractive toy, book, or other entertainment to distract your baby.
Don't worry if your little one wiggles his toes a little, this will have a positive effect on the final result, allowing air bubbles to escape and the mass to get into the gaps between the fingers. If the child has moved their hand, try gently moving the container behind the hand. Of course, you can gently hold the handle, but remember to remain calm and not force the baby. Otherwise, the baby will receive unnecessary stress, and the quality of the print will be reduced. The mass hardens quickly, so just wait a little and everything will be ready.
Some children do not like having their leg or arm immobilized, then less water can be added to speed up the setting time. If the child does not respond well to the moment the arm or leg is immersed in the mass, it is recommended to wait a while. eg 2 weeks and try again.
How to prepare molds for making casts for children with your own hands
To make an impression with your own hands, mix the mold powder with water in any container and pour into a closed plastic container, you can mix the mixture directly in the same container. Be sure to measure the ingredients accurately as a poor ratio can affect the final result. You can use the test sample, which is sometimes included with the kit, to have information about the curing process.
Thoroughly wet the skin of children's feet or hands so that they easily slide out of the hardened mold.
Thanks to this manipulation, your child will be able to get used to the mass temperature, in addition, we will minimize the risk of air bubbles that impair the quality of the product. Guide the baby's hand so that it slides accurately and gently into the prepared paste.
Don't worry if your child moves the handle. The beginning of the hardening process will show a change in the color of the paste, and this is the point at which the child should not make very sudden movements. After hardening (about 1-1.5 minutes), remove the handle. To avoid holes in the hardened form, guide the child's hand without touching the bottom or sides of the container.
How to prepare and pour plaster
Plaster casting should not last longer than 5-6 minutes.
- Prepare a plastic bowl, measure out the required amount of water and gypsum in the appropriate proportions. Always add powder to water, not the other way around;
- Pour the gypsum into the water slowly, with constant stirring, until the mass reaches the consistency of a very thin yoghurt. Too intensive and long mixing can lead to the fact that the mass begins to harden already during pouring into the mold. Also, too much agitation can cause bubbles to form. If you see bubbles on the surface, tap the container a few times to get them out;
- The plaster is initially very watery, but after a while it gently begins to thicken. Gypsum is ready when it reaches the consistency of pancake dough. Then, pour a small amount of gypsum into the mold and carefully move the container in different directions so that the mass fills exactly each hole;
- After filling the form 1/3, tap the container on the table surface;
- Pour the remainder of the mass in batches;
- Leave the container to harden for several hours.
How to avoid air bubbles in plaster?
Air bubbles spoil bulk impressions, as a result, the plaster does not reach the fingertips, and the impression will not completely repeat the child's hand. This problem mostly occurs with pen impressions, as the fingers are longer on them than on the toes, and the plaster does not always flow well into these holes.
You can use the following methods to avoid this:
- do not stir the gypsum mixture too long;
- Tap the plaster container hard and repeatedly on the table;
- prick large blisters that appear on the surface;
- first pour a small amount of plaster and move it in different directions so that it spreads evenly throughout the mold;
- Pour the mass along the walls, holding the container with the mold at an angle - if the mold is in a vertical position and you pour from above, there is a risk that the mass will not fill the holes to the fingertips;
- in the case of legs, if you fill half the mold, you can take a brush and spread the mass with it;
- for handles, tilt the mold with your fingers down so that the mass flows there.

In what position is it most convenient to make 3D impressions
0-5 months. For the smallest children, it is necessary to carry out the procedure in a supine position, as for feeding.
Friends, a small introduction!
Before reading the news, let me invite you to the largest community of 3D printer owners. Yes, yes, it already exists, on the pages of our project!
20 years ago, law enforcement used fingerprints to identify criminals. Today they are used in a wide variety of civil and commercial areas of life.
2D synthetic fingerprint generators produce fingerprint patterns based on mathematical and statistical models. To improve a fingerprint scanning system, researchers must compare millions of images of known fingerprints. However, their actions are limited by the amount of data available. Also, 2D synthetic generators make mistakes when testing non-contact fingerprint recognition technologies, which are increasingly being used as an alternative to traditional touch screen fingerprint systems.
To solve this problem, a team of programmers from Michigan State University led by Enil Jain, a graduate of the Indian Institute of Technology (IIT) Kanpur, created the world's first 3D printed fingerprint.
The use of such 3D printed fingerprints could help sensor manufacturers and algorithm developers improve hardware and software for fingerprint matching systems, says Anil Jain. Ultimately, it can lead to security improvements.
Jain, emeritus professor of computer engineering, and his team have succeeded in developing a method for transferring a 2D fingerprint image onto a 3D surface.
A 3D printed print with all the bumps and indentations of a normal human fingerprint is printed on a 3D printer. Jane's team called him a "phantom".
Such phantoms are very common in the world of medical imaging. For example, to make sure that an MRI or CT machine is working correctly, you first need to take data from an object whose parameters and properties are well known. “You can 3D print a heart or a kidney,” Jane says. “Since the parameters are already known, they can be loaded into the scanner and the imaging system can be set up.”
In this case, the main goal is to obtain an accurate fingerprint model with known properties and pattern, which can be used in customizing the existing technology that is used in fingerprint matching.
“When I see this 3D printed fingerprint phantom in front of me, I know its exact dimensions,” Jane explains. “And since I know its exact parameters, I can better set up the fingerprint reader.”
Although the 3D printed model does not yet have the exact texture or surface of a real finger, it may well advance the technology of reading and matching fingerprints.
"Tools like these will help improve the overall accuracy of fingerprint matching systems, which in turn will improve security in everything from law enforcement to mobile phone unlocking," says Jane. For example, iPhone 5s can be unlocked using Touch ID.
Jane holds six US patents for fingerprint matching. He also wrote a number of books on biometrics and person identification by face and fingerprints.
3D Printing Post Processing Tips and Tricks
While designers often use desktop 3D printers to iterate and test their designs, sometimes the function of 3D printing isn't so much testing form, fit, or function, but rather looking really good. for presentation. However, anyone familiar with the use of desktop 3D printers knows that there are some drawbacks to the look and feel of typical FDM 3D prints. The aesthetic concerns of 3D printing often boil down to one issue: surface quality.
Two of the most common surface quality issues in desktop 3D printers are layer streaks and matte appearance.
This raises some questions when approaching the post-processing of 3D prints. How can we safely (without using very nasty chemicals or acetone) smooth out the banding of a layer? How do you make a 3D print look like a real injection mold or plastic part?
At Make Mode, our creative 3D printing studio in Brooklyn, we scoured Amazon and bought just about every product we could find to test how to make PLA/ABS 3D prints smooth and glossy. We really didn't want to spoil the fun of heating up nasty chemicals like acetone. The products we use to smooth prints fall into two categories: brush application and spray application.
Here are some of the techniques and products we have been successful with:
This two-component epoxy grout method is recommended for ABS and PLA prints. One part is the resin and the other part is the hardener. One epoxy marketed specifically for 3D printing is XTC-3D, which at least has a great name. However, other two-component epoxy grouts will also work.
Clear gloss epoxy fills the gaps between the ridges of the coat, giving the surface a very smooth and glossy finish.
How to apply:
- Prepare your work area. Create a foil tray by folding 2 pieces of foil together and folding the edges over. This is where you will be pouring the mixed product to ensure a longer run time.
- Measure details. This epoxy uses a 1:2 ratio of Part A to Part B.
- Mix Part B with Part A.
 Pour entire contents into a plastic container and mix vigorously until smooth. Pour the solution onto the aluminum plate.
 - Using a brush, apply a thin coat of epoxy (about 0.04 cm thick). After application to the object, the mixture self-levels.
- Leave the object to harden at room temperature for approximately 3.5 hours. To speed up the drying process, you can use a light heat source such as a hair dryer at a low temperature.
- This will make your prints smooth and very shiny, as well as making them extremely strong and durable. Be careful not to run and don't apply too much product.
By mixing metallic powder with clear, high-gloss epoxy, a convincing metallic finish can be given to the print surface. It is a fast and cost-effective alternative to leveling and then metalizing plastic 3D printing.
- Prepare your work area - Place wax paper under your work area to make it easier to clean. Create a foil tray by folding 2 pieces of foil together and folding the edges over.
 This is where you will be pouring the mixed product to ensure a longer run time.
 - Mix 2 parts A with 1 part metal powder. Stir well with a wooden popsicle stick until the powder is completely dissolved in part A.
- Mix 1 part Solution A with 2 parts Solution B. Pour the entire contents into a plastic container and mix vigorously until smooth. There should be no bubbles or lumps of powder left. Pour the solution onto the aluminum plate.
- Cure in the same way as regular epoxy.
- After curing is complete, polish the object with steel wool. You can vary the polishing time to achieve the optimum metallic sheen.
- This method creates a smooth, shiny, metallic surface on your object. The powder is completely miscible with the epoxy mixture, making it easy to apply.
If too much powder is added to the mixture, the result will be a rough texture and the appearance of gold foil.
Once the XTC-3D powder has been applied and the object has set, shoe polish can be used to create an antique look.
How to apply:
- Dip a rag in regular black or brown shoe polish and rub over the object in small, circular motions.
- Let dry for several hours.
- Wipe the object with a clean microfibre cloth...
Polyurethane is basically a plastic that stays in a liquid state until it dries. It is commonly found in furniture and wood products as a top coat that gives the wood a protective layer and shine. Using a water-based 3D printing polyurethane coating will help give the print a sheen and glossy finish. In our tests, water-based polyurethane performed better than oil-based polyurethane, but a polyurethane coating may not be ideal for functional parts that must withstand heat. If you do use it, it's only for presentation items or prints where looks are more important than durability or functionality.
How to apply:
You can choose from two application methods:
1) Spray
Polyurethane is sold in cans. Like any other glossy spray, this one should be applied in 2-3 coats in a well-ventilated area, allowing time to dry between coats.
2) Sponge
Polyurethane gloss can also be applied with a sponge. This provides better control than spraying and can make it difficult to access certain parts of the 3D print.
Full color 3D porcelain stoneware prints typically have a matte finish and a sand/gravel look.
In our tests this product works very well for coating parts printed on Zcorp or ProJet presses. The material I'm talking about is commonly referred to as "full color sandstone printing".
How to apply:
The application of this principle is quite simple. Apply evenly (not too close!) to avoid streaks. Let dry. Apply 2 to 3 coats. If you're interested in making your porcelain stoneware prints durable and shiny, you can brush on a two-component epoxy that will make your pieces virtually unbreakable.
If you don't have a spray booth these can be easily purchased from amazon and will really help you get a nice even coat.
These are Make Mode tips. While we believe there are other ways to successfully use fingerprints, we would like to share the results of our research.