3D print slide
3D Printed Joinery: Simplifying Assembly
Joinery is a term usually found in woodworking, referring to the practice of joining two pieces of wood together by geometrically constraining them. Good joinery provides strong connections with little-to-no help from fasteners like nails or screws. Joinery is useful because it ensures a strong connection with a less complicated assembly process. However, it usually involves complicated shapes that take time to design and create, while bolts and screws just require a hole and a mass-manufactured fastener.
A classic T-bridle joint, printed in Onyx
3D printing is in an interesting position as a fabrication method because printing complicated geometry is often no more expensive than printing a block. Instead, FDM printing is limited by material properties and the process of building in layers. Thus designing for 3D printing requires a new mindset, and part of that mindset is leveraging the geometric freedom of a 3D printer to reduce the complexity and cost of the final assembly. One way to do that is to look at joinery invented for wood working and injection molding and apply that to the constraints of 3D printing. In this blog, I discuss leveraging simple joints like dovetails and snap fits to improve your 3D printed joint designs, supplemented by some examples.
Dovetails
A classic dovetail joint
When it comes to constraining two parts, many people think in right angles. And this is efficient, especially when thinking about machining; right angles are generally much easier and faster to make than odd angles, requiring fewer setups and no special bits or indexing tables. To a 3D printer, however, dovetails and straight walls are all the same. With no extra effort, you can constrain another degree of freedom. This comes in handy everywhere, whether you want a sliding assembly or a fastener-less T-joint.
Sliding dovetail box, disassembled
The flared walls and tight tolerances allow this box to slide smoothly
When thinking in angles, bear in mind that the established dovetail shape isn’t the only application. The two-part sliding box shown above accomplishes the same restraint as a dovetail, but looks more like a plate with angled sides. This allows it to slide together with the other half of the box easily, and even includes a little detent at the end to snap it shut. This shape would be very hard to manufacture by most other means, but the Mark Two was able to 3D print joints without supporting materials and achieve a great fit.
Check out our Composites Design Guide
Exploring even further, angled geometry in general can help in 3D printing. For instance, printing a sideways V profile, shown below on the left, can create a constraint that would be difficult to machine, but is trivial to print. Meanwhile, a classic tongue and groove joint, as shown on the right, is hard for most printers to make because of the overhang it creates. This overhang results in a poorly supported bottom face with bad dimensional accuracy, and should be avoided if possible.
Profiles of a sideways V wall (left) and a tongue-and-groove joint (right)
Snap Fits
Snap fits are a commonly used method for cheaply joining injection molded parts. These are good shapes for plastics because they stay within the geometric constraints of mold making and use plastic’s ability to elastically deform and then snap back into shape. Because snap fits are designed for plastic, they are easily adopted for 3D printing…on the XY plane. Most 3D printer users know that objects printed on desktop FDM printers are significantly more susceptible to failure in tension along the Z axis (pointing out of the build plate) than in X and Y, because of the inter-layer boundaries. Since snap fits usually have thin cross-sections (to reduce bending moment of the clip), 3D printed snap fits must be printed “laying down” on the build plate, lest they risk shearing after repeated use.
Diagram of cantilever snap joint, printed in three possible orientations
This diagram shows an exaggerated visualization of the layers of a printed snap fit. When printed upright (pictured at left), the forces that deflect the snap fit also put tension between the layers, making it significantly more likely to break. Printed on its back (pictured at center), a snap fit will definitely be stronger, but still has a shear plane running between the tooth and the arm. Printed laying down on its side (pictured at right), however, the snap fit has no layer boundaries within its cross-section, giving it more predictable strength. And, if the snap fit is big enough, printing it on its side would allow fiber to be routed into the tooth, thereby utilizing the full strength of a Markforged part. This same rule applies for gear teeth, ratchet teeth, and any other protrusion that needs to hold significant load.
Request a free sample part
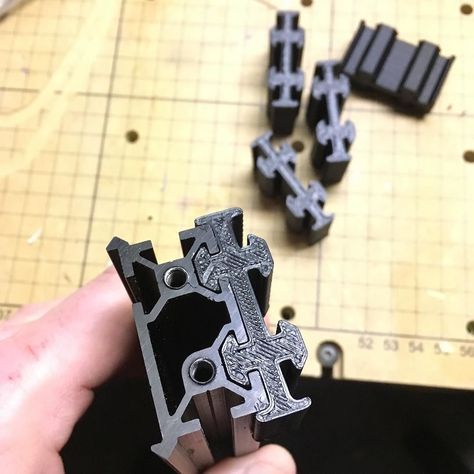
Bear in mind also that snap fits can take many forms based on application, and that the design and orientation of the snap fit may change based on your project. In particular, snap fits coming out of 3D printer are not constrained by thicknesses or mold shapes, so you can get creative with where you put them (see below). Printers make it quick and easy to prototype, so try a few geometries before settling on the final shape.
A flush snap fit mortise a ndtenon joint
Cross section of flush snap fit mortise and tenon
Putting it Together: Phone Holder
To exhibit sliding fits and snap mechanisms, I designed this cell phone holder that hooks over the hood of the Mark Two and holds any cell phone between 2.5 and 4 inches wide, so that an operator could take a time lapse video or monitor a sensitive print.
The phone holder with a phone in its grasp
This phone holder has just three parts, two interfaces. One of those interfaces is a twisting joint that acts as a hinge. Though it doesn’t look much like a dovetail, it serves the same purpose: it allows for an easily printable sliding fit, thanks to complementary angles.
Disassembled phone holder (left) and hook (right)
Rotating joint locking into place
The other interface works like a linear ratchet with angled walls (to keep them from slipping apart) and teeth to set the width of the holder. This would be a very difficult interface to machine make by most other means, but it was quite easy and quick to print!
The teeth of the linear ratchet with the corresponding face (right)
The linear ratchet for adjusting to phone width, engaged
The phone case in use, watching a Mark Two print
A Note on Tolerances
As with anything, joinery requires designing in your tolerances.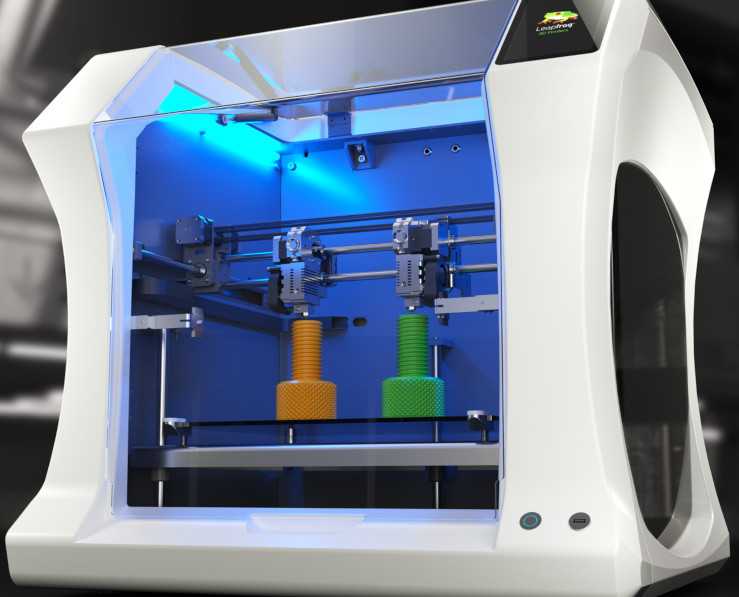 On the Mark Two composite 3D printer, for most general purposes, a .08mm gap between each wall (.16mm diametrically) is enough to allow two pieces to consistently achieve a sliding fit. If one of your surfaces is held up by support material, try bumping up the gap to .15mm or so. Of course, 3D printed parts tend to vary widely, so make sure to unit test and prototype to achieve the fit you want.
This is just one small example of how designing with joinery in mind can lead to designs that are simpler and better-fit for your 3D printer. As you find good joints for printing, tweet at us @MarkForged to share your designs!
3d Sliders - Etsy.de
Etsy is no longer supporting older versions of your web browser in order to ensure that user data remains secure. Please update to the latest version.
Take full advantage of our site features by enabling JavaScript.
Find something memorable, join a community doing good.
( 1,000+ relevant results, with Ads Sellers looking to grow their business and reach more interested buyers can use Etsy’s advertising platform to promote their items. You’ll see ad results based on factors like relevancy, and the amount sellers pay per click. Learn more. )
3D printing and 3D printer presentation, report
3D printing and 3D printer
Presentation authors: Salatina E. A., Salatin S. A.
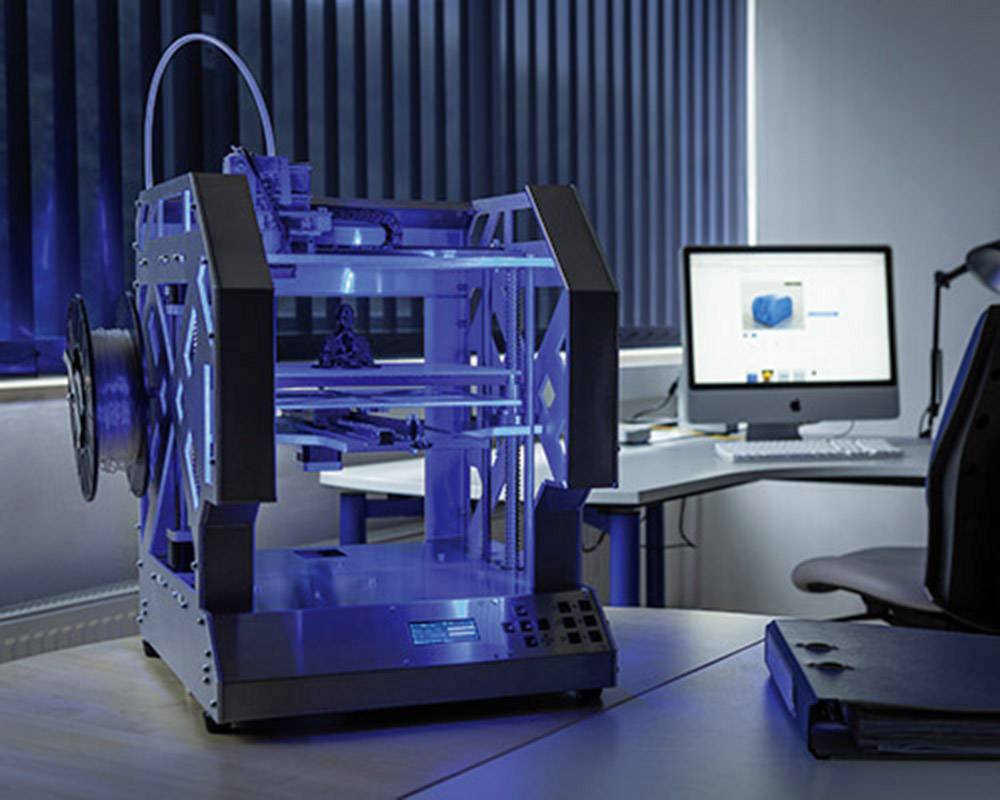
3D printer
is a peripheral device that uses the layer-by-layer method of creating a physical object from a digital 3D model. In foreign literature, this type of device is also called fabber, and the 3D printing process is called Rapid Prototyping.
What is a 3D printer?
The principle of operation of a 3d printer is based on the principle of gradual (layered) creation of a solid model, which, as it were, is “grown” from a certain material. The advantages of 3D printing over the usual, manual methods of building models are high speed, simplicity and relatively low cost.
Technologies
There are various technologies for 3D printing. The difference between them lies in the way the product layers are applied.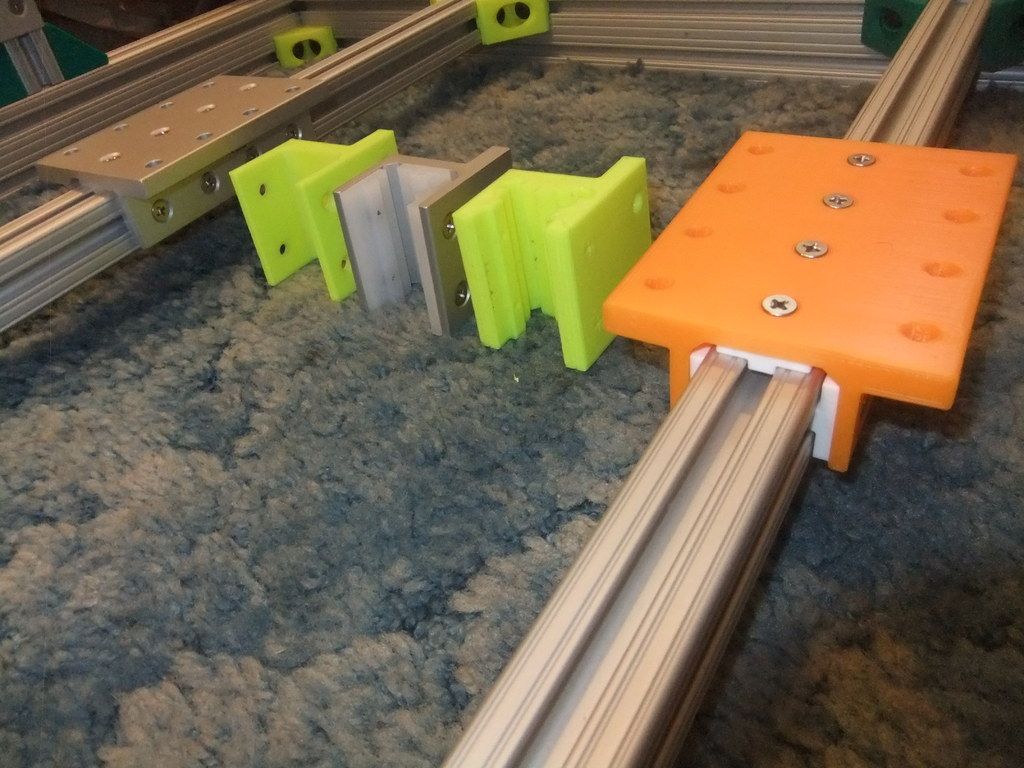
The most common are SLS (selective laser plexus), HPM (molten material overlay) and SLA (stereolithiography).
Stereolithography or SLA is the most widely used technology due to the high speed of building objects.
SLA technology
The technology works like this: a laser beam is directed at a photopolymer, after which the material hardens.
The photopolymer is a translucent material that deforms when exposed to atmospheric moisture.
Once cured, it can be easily bonded, machined and painted. The working table (elevator) is in a container with a photopolymer. After the laser beam passes through the polymer and the layer hardens, the working surface of the table moves down.
SLS technology
Laser beam sintering of powder reagents - aka SLS - is the only 3D printing technology that is used in the manufacture of molds for both metal and plastic casting.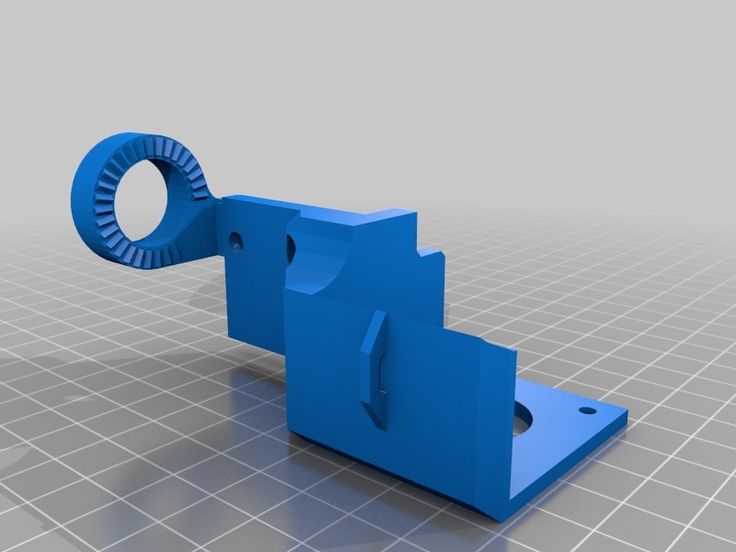
Plastic models have excellent mechanical properties, which make them suitable for making full-featured products. SLS technology uses materials that are similar in properties to the brands of the final product: ceramics, powdered plastic, metal.
The 3D printer device looks like this: powder substances are applied to the surface of the elevator and sintered under the action of a laser beam into a solid layer that corresponds to the parameters of the model and determines its shape.
DLP technology
DLP technology is new to the 3D printing market. Stereolithographic printers are positioned today as the main alternative to FDM equipment. This type of printer uses digital light processing technology. Many people wonder what the 3d printer of this sample prints with?
Instead of a plastic filament and a heating head, photopolymer resins and a DLP projector are used to create three-dimensional figures.
Despite the intricate name, the device is almost indistinguishable from other desktop printers. Its developers, represented by
QSQM Technology Corporation, have already launched the first samples of high-tech equipment into a series. It looks like this:
HPM technology (FDM) HPM
Allows you to create not only models, but also final parts from standard, structural and high-performance thermoplastics. It is the only technology that uses production grade thermoplastics to provide unparalleled mechanical, thermal and chemical strength to parts.
HPM printing stands out for its cleanliness, ease of use and suitability for office use. Thermoplastic parts are resistant to high temperatures, mechanical stress, various chemicals, wet or dry environments.
Soluble auxiliary materials allow the creation of complex multi-level shapes, cavities and holes that would be problematic to obtain with conventional methods. HPM 3D printers create parts layer by layer by heating the material to a semi-liquid state and extruding it according to computer-generated paths.
When the 3D printer completes the creation of the part, it remains to separate the auxiliary material mechanically, or dissolve it with detergent, after which the product is ready for use.
3D pens
Hand-printing pens are also popular these days. Moreover, it would be correct to call them not printing devices, but pens for drawing three-dimensional objects.
The pens are made in the same way as fusing printers. The plastic thread is fed into the pen, where it melts to the desired consistency and is immediately squeezed out through a miniature nozzle.
Applications of 3D printing
3D printing has opened up great opportunities for experimentation in areas such as architecture, construction, medicine, education, fashion design, small-scale production, jewelry, and even in the food industry. In architecture, for example, 3D printing allows you to create three-dimensional models of buildings, or even entire microdistricts with all the infrastructure - squares, parks, roads and street lighting.
Thanks to the cheap gypsum composite used, the cost of finished models is low. And more than 390 thousand CMYK shades make it possible to embody any, even the most daring, imagination of an architect in color.
3D printer: application in the field of construction
In construction, there is every reason to believe that in the near future the process of erecting buildings will be much faster and easier. Californian engineers have created a 3D printing system for large objects. It works on the principle of a construction crane, erecting walls from layers of concrete. Such a printer can build a two-story house in just 20 hours. After that, the workers will only have to carry out finishing work.
Medical Applications
In medicine, thanks to 3D printing technologies, doctors have been able to recreate copies of the human skeleton, which allows them to more accurately practice techniques that increase the guarantees of successful operations.
3D printers are increasingly being used in the field of prosthetics in dentistry, as these technologies allow much faster production of prostheses than traditional manufacturing.
Not so long ago, German scientists developed a technology for obtaining human skin. In its manufacture, a gel obtained from donor cells is used. And in 2011, scientists managed to reproduce a living human kidney.
3D printers presentation, report
3D PRINTERS
0008
3D printing can be done in many ways and using various materials, but any of them is based on the principle of layer-by-layer creation (growing) of a solid object.
How does the
3D printer work?
The principle of operation of 3D printers is similar to that of a conventional inkjet printer. The main difference is that instead of applying ink from the print head to the next sheet of paper in a 3D printer, the binder is applied through the print head to the next thin (about 0.1 mm) layer of powder, creating one section of the object. In those places where the binder is applied, the powder hardens. The next section is "glued" to the previous one, and so on, until a fully solid body is formed.
After the end of the 3D printer, the product is removed from the powder mass. Where no binder has been applied, the powder remains crumbly and can be reused.
NANOPRINTERS
The difference between nanoprinters and conventional ones is that the diameter of the ink nozzle of a nanoprinter has a resolution of less than a micrometer. Thus, the size of a paint drop of just one cell or even a DNA fragment allows you to apply an image on different surfaces (metal, wood, plastic, and even water). A conventional printer can only print on paper, and even then a certain density.
OTHER TYPES OF PRINTERS
The world does not stand still, and the types of printers are no longer limited to dot matrix, inkjet and laser printers. In addition to them, there are a lot of devices that do not fit into the standard classification: for example, printers that print with coffee grounds, pencil rods or food products.
The iMo Foto Frame Printer is an eight-inch (diagonal) photo frame with a built-in printer, USB connector and card reader. The iMo Foto Frame Printer has a resolution of 800 by 600 dots and prints 10x15 cm photos. The device costs only $200.
The Coffee Printer concept is made by RITI and actually uses dormant coffee as an environmentally friendly ink. You simply pour coffee grounds into it and print.
Trak Concept created by designer Wang Hung Chih, his innovative idea is to place the printer on the lid of a laptop. This compact gadget is powered by USB.
The Embossing Braille Printer Concept by designer Danni Luo is designed to be an aid to blind and visually impaired people. It allows you to print embossed labels for vital items such as medicine bottles.
OTHER TYPES OF PRINTERS
In addition, bioprinters have recently appeared that print human organs for transplantation, printers that print with water, paint nails, and even print food!
Organovo and Invitech, based in San Diego (USA), have developed an unusual 3D printer for printing human organs. The dimensions of the device are very compact and this printer consists of two printheads: the first sprays the gel, forming the shape of the printed organ, the second fills this shape with cells grown on the basis of the original ones.