How to 3d print with blender
How to Make 3D Printables in Blender
Blender is a 3D creation suite used by beginners, professionals, and enthusiasts alike for 3D modeling, animation, motion graphics, illustration, and more. While Blender was initially designed for animation, it is still possible to make your models 3D printable. If this is something you want to do, follow this tutorial.
1. Enable the 3D Print Toolbox Add-On
Before we begin, make sure you have the latest version of Blender installed, and take a look at the Blender 3.0 keyboard shortcuts.
Here are some of the handiest shortcuts in Blender that you should know:
- Tab: Hit this when you need to enter Edit mode.
- G: Lets you move the vertices or model.
- Shift + F: Lets you fill a space between vertices you've selected.
- S or S + X, Y, or Z: Scales the object on the X, Y, or Z-axis accordingly.
To enable the 3D print toolbox add-on, follow these steps:
- Navigate to Edit > Preferences.
- Click on the Add-Ons tab.
- Search for the 3D Print Toolbox.
These will add a useful tool we need to get your model ready for a smooth and successful 3D printing process.
2. Prepare Your 3D Model
Perhaps you already have a pre-existing 3D model in mind. If not, there are plenty of free models available on sites such as Thingiverse or Cults 3D. However, not all of them are designed for 3D printing. That said, you may want to create your own 3D model in Blender.
If you are new to Blender, be sure to check out our guides on how to group objects and merge objects, as well as simple 3D models for Blender beginners.
3. Manifold the 3D Model
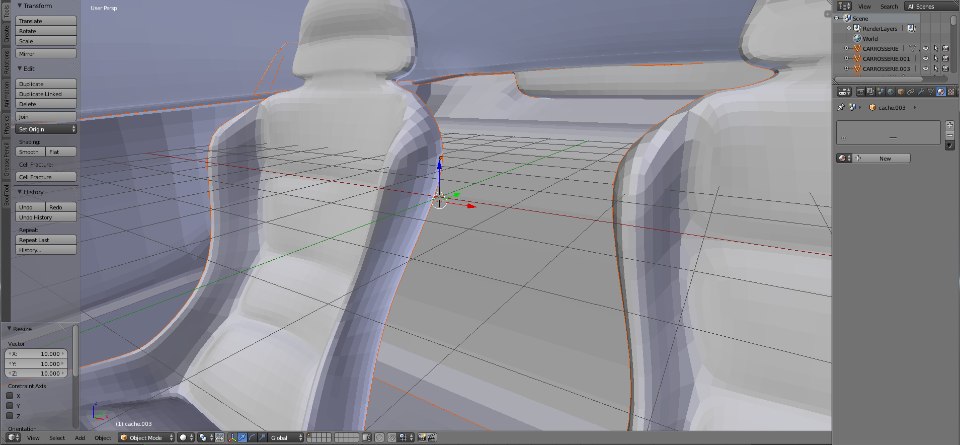
Once you have a model ready, there is one very important thing to keep in mind now. Your model needs to be one, solid, filled object. This means no missing vertices or holes exist on your model.
In other words, this 3D model needs to be manifold. For a model to be manifold, it needs to be enclosed in a space that can exist in real life. This is to say the outside geometry is something that can actually be 3D printed.
So, depending on your model, it may need some final touch-ups. This process is fairly simple, keep following along.
If your object is complex, there could be a chance that it isn't perfectly manifold. Let's check for that; follow these steps:
- Select the object you want to check.
- Press the N key to make the toolbar visible.
- Select the 3D Printing Toolbox section.
- Click on the Check All button.
- Take a look at the results, making sure that the Non-Manifold Edge displays a 0.
If so, then your model is ready to be exported as an STL file for your slicer software. But it may show a number above 0. Read on to fix this issue...
Fixing a Non-Manifold Model: Method 1
Let's start with the simplest way to fix a non-manifold model. We can use Blender's built-in cleanup tool. You can find it right next to the Check All button as seen in the previous section. There you will find a Clean Up section. Follow the below steps:
- Select your model.
- Open up the Clean Up section.
- Select Make Manifold.
This should also work on older versions of Blender. There is a slight disadvantage to this approach, in that it could possibly mess up your 3D model. If so, there is another method...
Fixing a Non-Manifold Model: Method 2
Instead of using Blender, we can use an external app called 3D Builder by Microsoft. It is available on Windows 8 and 10. After downloading and installing 3D Builder, open the program and import your model.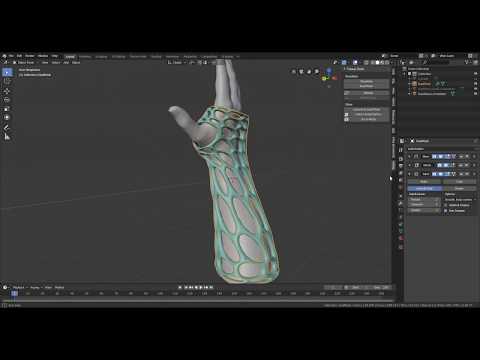 Then, follow the below steps:
- Navigate to Open > Open Object.
- Navigate to your 3D Model wherever it is saved on your computer.
- Click on Import Model.
The 3D Builder software will tell you whether there are errors, with pop-up box notifications suggesting how you can fix them. After completing the prompted steps, the 3D model should now be manifold.
As a side note, when using 3D Builder, the model's shape may be changed in order to make it manifold. However, it is still much cleaner and these changes are normal to make it more printable.
4. Import Your Model to a Slicer
For the final step, we will need to export the model from Blender and import it into a slicer. A slicer is software that will convert the model into printing instructions for a 3D printer; this set of instructions is called Gcode. Specifically, it contains G and M commands, each with an assigned action.
In other words, it is the language used to tell the machine how to move parts or what pattern to follow in order to create the print. These instructions can also contain user-chosen parameters such as print speed and support structure; all this can be done in slicer software.
Before we can import the model into a slicer, we need to export it as an STL file. STL stands for "Standard Tessellation Language" or "Standard Triangle Language", and it describes the surface geometry of a 3D object. They cannot be printed in and of themselves. So let's go ahead and export the object as an STL file by navigating to File > Export > Stl (.stl) in Blender.
Then, import it into a slicing software, such as Cura. In Cura, you can simply drag and drop your model into it and the model will show up as seen in the above image.
Once you have your model in a slicer, you can go ahead and 3D print it. Be sure to check out our guide on the top Cura plugins that will make 3D printing more reliable and convenient.
Create Your Own 3D Printable Models in Blender
In this article, we've looked at how you can prepare your 3D model for printing in Blender. We also showed you a few ways to make your 3D model manifold, and then import it into a slicer program. Refer back to this guide if you want to make a model for 3D printing.
Blender Tutorials - Learn Blender
Have you been thinking about learning how to use Blender, but you open the window and see all this and get really confused? Well I’m here to help with that. My name’s Kevin, founder of Inventimark and I hope you enjoy these tutorials.
Blender Introduction Tutorial #001 The Basics
This tutorial is where you want to start when learning 3D modeling with Blender for 3D printing. Here you are shown the basics of Blender and the basic workings of the program. It’s a small step into the vast possibilities of the computer 3D world.
Introduction Tutorial #002 The Basics part 2
In this second part of this tutorial, you will learn about the different camera views and how each of them work. You will also be shown the most common keyboard shortcuts that are very helpful in creating a fast work flow to 3D Modeling.
Tutorial #003 Making a Simple Glass
In this modeling practice, you are taught how to make a simple glass. There is also an explanation of some of Blenders other features, showing you how to render your model to get a good picture of it.
Tutorial #004 Making an Action Cam Clamp
This modeling practice lesson will teach you some of the basic modeling techniques and uses, to make a practical design that can be used in the real world when printed.
Tutorial #005 3D Printing Functions
This tutorial demonstrates Blenders 3D printing specific features. Non-Manifold objects are also explained and why they are important to avoid.
Tutorial #006 More Basics of the UI
This lesson explains in more detail some of the user interface to get you more familiar with using it. Also shown is the sculpting features and some abstract modeling is made to demonstrate its uses.
Tutorial #007 : Loop tool and Proportional Editing
This tutorial shows you how the edge cut tool works. Also shown is how proportional editing works to make object re-shaping smoother.
Tutorial #008 : Pivots and Startups
In this tutorial, the pivot point/origin is shown, as well as how to save the startup files to keep your settings.
Tutorial #009 : Project box
In this tutorial, is another practicing session on practical 3D modeling. Shown is a project box for a solar powered automatic watering system using several different components.
Tutorial #010 Nurbs Curves and Surfaces
In this video, examples of using curves to model are shown. Also featured is how to make solid objects and how to mirror objects.
Tutorial #011: Text Basics
This tutorial shows the text features in Blender, and how to integrate text into your models.
Tutorial #012 : Measurements
This video explains the different measurements in Blender that can be used. Examples are show with Unity, Unreal Engine 4, and Repetier-Host. This video also explains that Blender units as 1mm are the best to use for 3D modeling.
Tutorial #013 : Background Image + Bonus
This video demonstrates how to use a background image to get a precise model from an image. Shown as example is an E3D-V6 hot-end heat sink. The image used was acquired from http://wiki.e3d-online.com/.
Tutorial #014 : Practical Modeling Practice
This is a longer practical modeling practice showing how to make a linear bearing with 3x8x4mm bearings and M3 bolts and nuts. There are errors and troubleshooting to show how to deal with that as well.
Tutorial #015 : How to Make Gears
This video demonstrates how to make gears for a 3D printer extruder. This process can be used whenever any 2 gears are used.
Tutorial #016 : Loop Tools
This video demonstrates all of the Loop Tools and how they are used. Some of these tools are great for 3D printing, others are rarely used.
Tutorial #017 : Splitting Model for 3D print
This video demonstrates a crudely made model and how to split the model up into different parts for easier printing. This will for for any size model.
Tutorial #018 : Knife Tool
This video shows a model of a Bowie knife the author made. What is taught in this tutorial, is how to use the knife tool and shows what it does as well as other knife features.
Tutorial #019 : Torture Calibration
This video is another practical modeling practice that shows you how to make a calibration/torture test for your 3D printer to get the dimensions correct.
Preparing files for 3D printing in Blender
Share on Facebook Share on Twitter Share on Vkontakte
Look for open edges
If your 3D model consists of several objects or polygon meshes, the first thing you need to do is make sure that the edges of each part are closed, in other words, waterproof. To do this, you need to enter edit mode by pressing A (once to select any faces, twice to deselect), then you need to press the key combination ctrl-alt-shift-M (on Mac computers - ctrl-opt-shift- M).
After you press this key combination, all open faces will be selected. Often, to fix this error, you need to create a new surface with 3-4 faces (F key). Sometimes there are wandering edges that are either not attached to anything, or connected to only one edge vertex. Often they can be safely removed, unless they were specially made. For example, these faces can be used to shape the model using the Subsurf modifier. In this case, you will need to apply this modifier first, and only then remove the unnecessary edges. In addition, do not forget about those open faces that are part of the intersecting surfaces.
If your model has 3-4 polygons attached, which the program treats as open but says that a surface has been created, you need to delete that surface and try to recreate it. Moreover, inspect the edges of all those faces that were marked as open. Perhaps some of them are wrong: they do not belong to the polygon mesh or they are created in the wrong direction. In this case, you will have to delete this block and recreate it manually.
Tip: Hide the geometry to focus on the uncovered areas So, you can select not only open faces, but also the areas around them. Next press shift-H to hide the other faces. In this way, the closed parts of the model will be hidden, and it will be much easier for you to eliminate all the flaws.
Cleanup: Merge meshes using Booleans.
Once all the meshes are closed, make sure that each one represents a separate entity. You cannot apply boolean variables to polygon meshes that refer to the same object. At the same time, it is possible to split the meshes by selecting all its faces and pressing P. Next, select one vertex, then, holding ctrl, select all the others. To detach all polygon meshes of one object, press P and select the "All Loose Parts" option.
Once you've separated all the meshes into objects and made sure they're closed, save the project and save a copy of the blender file to create a printable version of it.
Open a copy of the file and select each object one at a time. In object mode, apply any modifiers you want. Next, go into edit mode by pressing the A key once or twice to select all the faces. Then press ctrl-T to triangulate all surfaces. It is not clear what this is connected with, but Blender works better with booleans if the meshes have been triangulated.
Return to object mode again, select 2 mutually intersecting meshes and press w. Then select the Union option, after which the meshes will be merged (this action does not delete the sources). The merging process may take some time. Once it completes, select the 2 original objects that were merged and either move them to another layer or delete them altogether.
Select the new merged object, switch to edit mode, deselect the edges (press the A key 1-2 times), then select the unclosed areas - ctrl-alt-shift-M. Fix these errors in edit mode, it will be pretty easy. Often, combining polygon meshes solves the problem of open areas, but not always. Therefore, we recommend that you still check your model. Otherwise, when further merging meshes that have open areas, you may have problems. Check it EVERY TIME. Then select all meshes and triangulate again. As a result, you will get a single mesh with closed faces that has been triangulated. Such a mesh is completely ready for further merging, if necessary.
If you have 2 polygon meshes with incommensurable face density, such as when a rounded mesh is merged with a cube that has 8 vertices, subdivide the part with the fewest vertices. The mesh is then triangulated. For some reason Blender doesn't handle this kind of joins well. The process can take several hours, and it is not always possible to obtain the desired result.
Save every time after merging and only then eliminate uncovered areas.
Finish: Set your model size and export the file.
Once you have dealt with all the intersecting meshes and solved the problem of open areas, set your model to the desired size. Please note: 1 unit of size in Blender is equal to 1 mm.
Check the status bar for the number of surfaces (should look something like this: Fa:123456 - the number next to the Fa index is what you need). If you have more than 500,000 triangles, use the Polygon Reducer Script tool found in the Mesh - Script menu. It will allow you to make the number of surfaces less than 500,000.
Then rotate the object 90° along the X axis. By the way, in Blender the top axis is Z. print !
3d modelingBlender
3D printing with Blender
3D printing with BlenderWhat is 3D printing?
3D printing is a way to create a specific object from scratch according to a given three-dimensional drawing using the layer-by-layer deposition method (if we talk about FDM technology).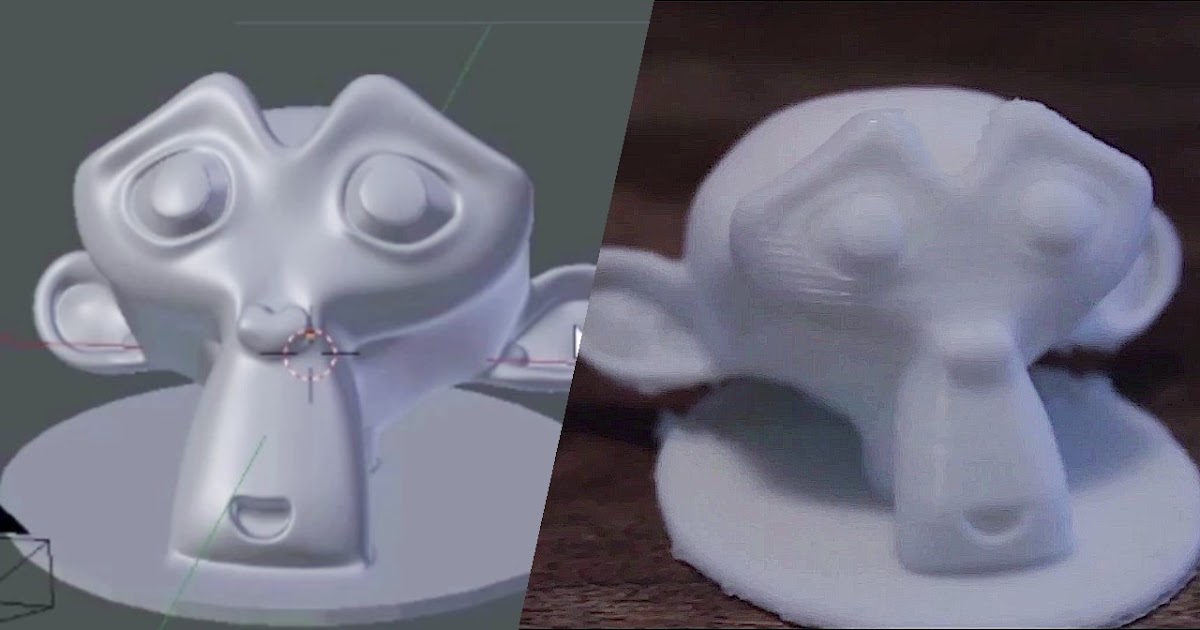 In metallurgy or mechanical engineering, parts are obtained by turning, using various cutters and cutters. With this approach, a significant part of the material is wasted. When using 3D printing, maximum material savings are achieved.
3D printing technology is far from new. It has existed for more than 30 years, but only recently has it made a significant leap forward and has become widespread. This happened mainly due to its significant reduction in price and in connection with the spread of home 3D printers. Along with this, a lot of services have appeared that provide 3D printing services, in case the capabilities of a home printer are not enough, or it does not exist at all.
List of lessons
- 1 Introduction
- 2 3D printing applications
- 3 Printer types and companies
- 4 3D printing technologies
- 5 Blender setup and units
- 6 Scale parameter
- 7 Basic model check (non-manifold)
- 8 Version overview 2.
 67
67 - 9Solid and bad contiguos edges checks
- 10Intersections
- 11 Bad edges and edges (Degenerate)
- 12Distorted
- 13Thickness
- 14Edge sharp
- 15 Overhang
- 16 Autocorrection
- 17 Model information and size
- 18Hollow models
- 19Export models
- 20Color model (vertex color)
- 21Model with texture (texture paint)
- 22Model with outer texture
- 23 Texture baking (bake)
- 24 Tiger model overview
- 25 Tour model overview
- 26 Pirate model overview
- 27 Factors affecting accuracy
- 28Myths
- 29Recommendations
- 30Conclusion
Excerpt from lesson
Blender Version
This course was written in Blender 2.73! The differences from Blender 2.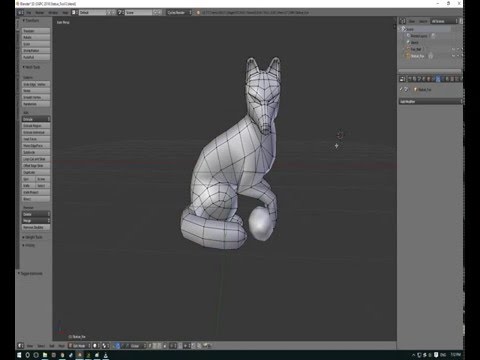 8+ are only in the location of the buttons, not their functionality. Therefore, the course is subject to a 33% discount (due to version differences).
Frequently Asked Questions (FAQ)
- 1 What level of knowledge is required to complete this course?
- 2 Where can I contact if I have problems with payment/download?
- 3 On which OS can I watch this course?
- 4 Is there a physical version of the course?
- 5 What payment options are available for this course?
- 6 Can I pay for the book with PayPal?
By and large, advanced knowledge of Blender is not required to successfully complete this course. All actions are explained in detail and difficulties should not arise. But I recommend that you before purchasing this course, take a free course on the basics of Blender. Information about it can be found at the very bottom of this page.
If you have any questions, please send an email describing the problem in as much detail as possible.
This course can be run on any OS (Windows, Linux, Mac).
No, the course is only distributed electronically. Course size ~ 2.4 GB.
You can pay for the course through a Visa/MasterCard bank card or from an electronic wallet in the Yandex.Money system. You can also pay for the goods using the 4 most popular cryptocurrencies, namely: Bitcoin, Ethereum, Bitcoin Cash and Litecoin.
Yes. Send me an email and I'll show you how to do it.
What you will learn from this course
The goal of this course is to teach you how to create printable 3D models with Blender. Most of the lessons are devoted to the topology of the created objects. This is the most important part when designing a model for 3D printing as not every model can be printed and certain rules must be followed. This will help to avoid errors in the work of slicers, additional costs and unpredictable results of the final models.
In addition, you will learn a little about what 3D printing is and in what areas it is used.