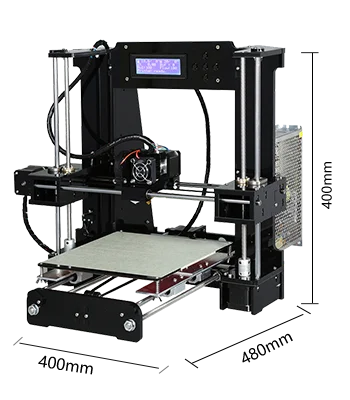
Dual extruder 3d printer ender 3
Creality Ender 3 Dual Extruder - All Your Best Options (& Pro/V2)
Creality’s Ender 3 series is one of the most popular budget 3D printer lines on the market today, and if you own one then you likely already know why. Beyond the unbeatable price, they’re easy to use, reliable, and quite powerful for their range.
Moreover, their open-source nature makes them highly modifiable, an ideal trait for today’s tinkerer. One of the most popular modifications for the Ender 3 is the upgrade to a dual extruder, as the line only comes with single extruders as standard.
It’s easy to see why Ender 3 dual extruder modifications are popular. The ability to print using more than one filament type or color at once makes for some excellent and unique-looking prints. Not to mention the use of a stronger filament alongside the main one creates more reliable projects with the lessened need for post-processing.
There’s also the cost difference to take into account. Adding a dual extruder to your Ender 3 is significantly cheaper than simply buying a similar printer with a dual extruder already installed.
3D printers with dual extruders as standard are normally around $600, over three times the price of a standard Ender 3.
So, how do you go about fitting your Ender 3 dual extruder? What should you take into account before getting started? And what options for dual extruders are out there for which Ender 3 models?
We’re going to answer all of these questions here.
Ender 3 Dual Extruder Options
The open-source community for the Ender 3 is huge, and there’s no shortage of people out there with cool ideas on how to modify and upgrade Ender 3 printers with laser engravers, improved frame guards, and even advanced touchscreens.
Because of this, it’s understandable to not know off the bat exactly which one is right for you. So here we’re going to look at some of the best and most reliable Ender 3 dual extruder upgrades you can check out today.
Mosaic Palette 3 / Pro
- Price: $599-$799 — Available at Matterhackers here
While technically more of an honorable mention than an actual Ender 3 dual extruder, the Mosaic Palette 3 and Palette 3 Pro are by far the simplest option to use your Ender 3 to make multicolored prints without needing to actively modify your printer.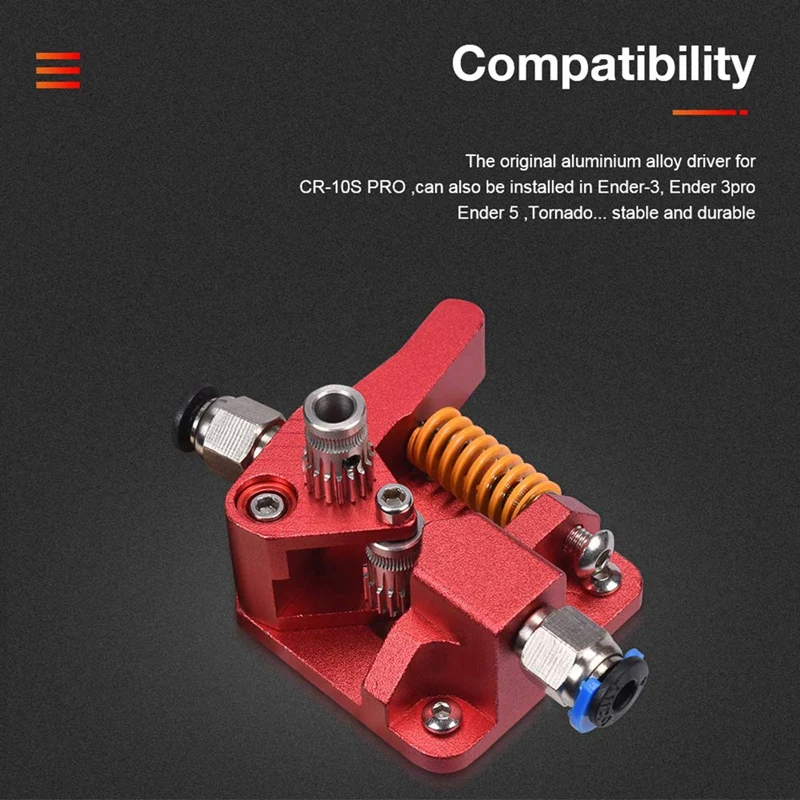
This is great news if you’re unconfident or otherwise unwilling when it comes to taking tools to your Ender 3, but still want to make prints using different colors and filaments.
The Mosaic Palette models act as automatic switchers, like changing the orientation of a railway line to divert specific trains or uncoupled carriages in different directions. The Mosaic Palettes act as changers that swap between up to eight different filaments per print and automatically manage each one.
The downside is the cost. At around $700, they are not cheap machines. But if you’re not very handy and have the money to spend, this is the most streamlined way to attach what could be described as a ‘multi extruder’ to your Ender 3.
Chimera Project
The Chimera Project, named after the Greek concept of an animal amalgamation rather than an ideological improbability, is the first great example of a DIY dual extruder that was designed for the Ender 4 but is still compatible with all Ender 3 models.
A standard dual extruder that’s quite cheap to produce, the Chimera Project sits on a mount that you will need to print out yourself. While that sounds like extra steps, don’t discount how cool it is to use your 3D printer to make its own modification parts.
The instructions and necessary parts are all included and linked to in very clear detail on the project’s Thingiverse page here.
Safety precautions and recommended hardware are all laid out so even the most humble of beginners will have an easy enough time getting to grips with how it all works.
Regardless of your experience with DIY, all you’ll need to get this Ender 3 and 4 dual extruder up and running so long as you maintain caution and follow the instructions.
Cyclops Hot End
The Cyclops Hot End is a spiritual sibling to the Chimera. The two are usable with the same printed mount, and both can alternate between different filament colors and types mid-print. The Cyclops gets its name by the fact that it looks like a single extruder but has all the capabilities of a dual extruder.
As well as standard multi-filament printing, it can also mix filaments together. While it does act like more of a ‘filament management system’ than a standard dual extruder, it still performs all the functions you’d expect.
The instructions and files, along with some hints for building and use, are all found for free here. This Cyclops seems to be a reliable and very simple way to convert your Ender 3 to have a dual extruder, unlike actual cyclopes, whose implied lack of depth perception would likely render them far less menacing than their mythology would have us believe.
Proper Printing’s Dual Extruder Ender 3 Mod
Proper Printing has developed a unique kind of dual extruder that doesn’t require a second servo. Instead, this very interesting and surprisingly clever design relies on a spring mechanism that allows the two extruders to switch use seamlessly by operating like a teeter-totter.
The extruders move in a sort of slanted V shape, with only the active extruder being parallel to the build while the other is slanted to the side while not in use.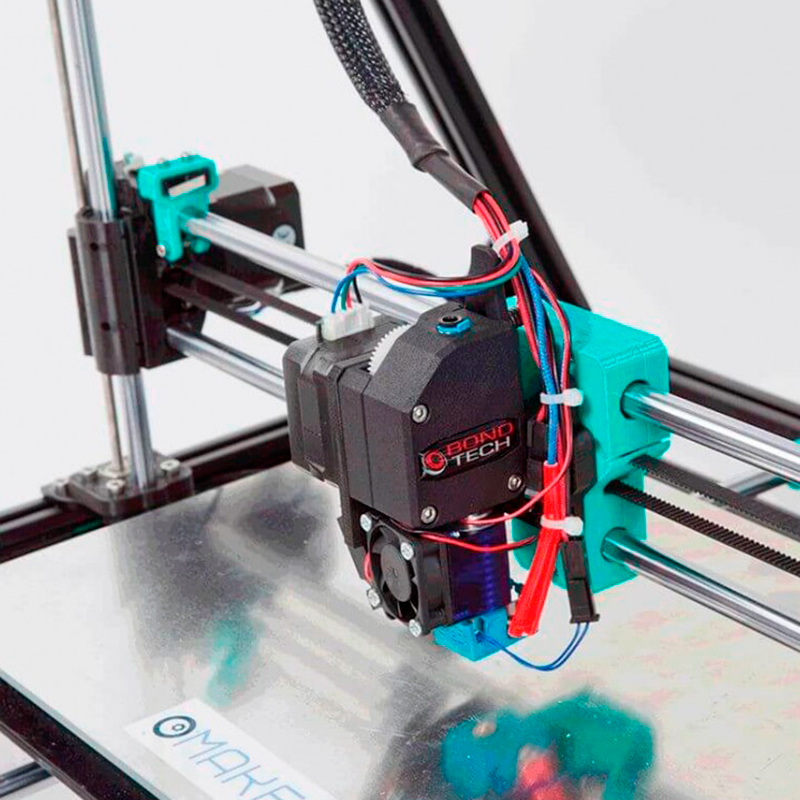 This allows extruders to be used with the same servo instead of either one spending any time-wasting space by simply waiting their turn.
This minimizes the amount of build volume lost by conserving space as well as parts in its design.
Known internally as ‘The Rocker’ and available as printable files for only $3 on their website here, it’s an absolute steal for something no Ender user should go without.
While it is said to work on any standard Ender 3 model (that is, out of the box and since unmodified) it’s unclear as to whether it will function well with other 3D printers or more modern Creality Ender models.
Though since the $3 is for the files and instructions, you’re free to experiment and tweak to see if The Rocker does work with other 3D printers provided you’re confident and techy enough to do so.
You can even modify the design yourself if it doesn’t work right away with the model you have in mind, such is the beauty of mods!
Upgrading Your Ender 3 To a Dual Extruder: Pros and Cons
Upgrading your Ender 3 with a dual extruder may seem like a no-brainer.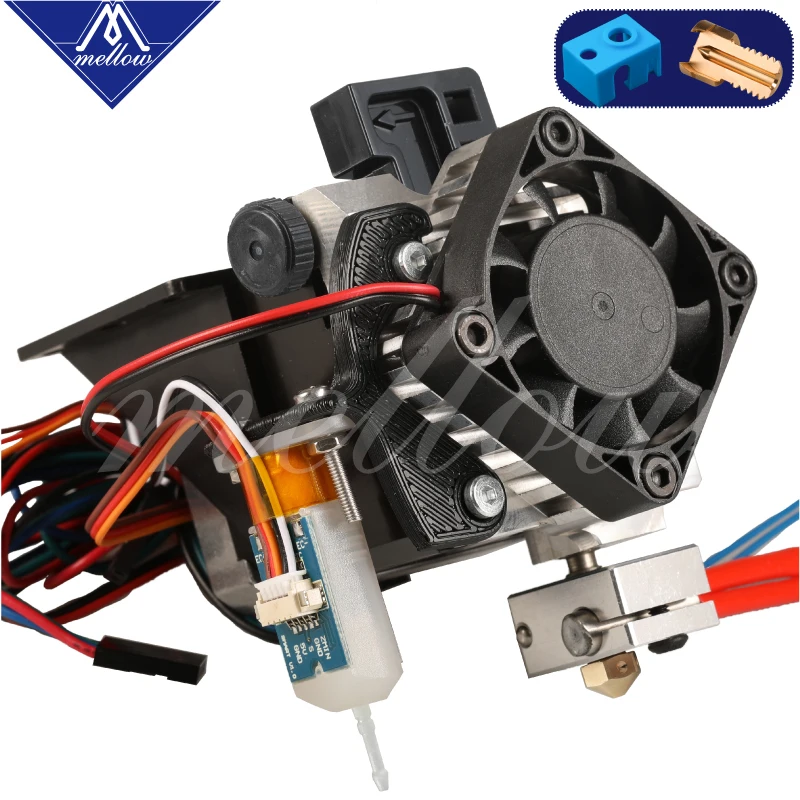 One is more than two, and therefore better. But, like most things relating to 3D printers, it’s not quite as simple as it appears.
Dual extruders come with a host of benefits, but that’s not to say there aren’t drawbacks. While not a one-way modification (meaning you can go back to a single extruder if you want), installing an Ender 3 dual extruder only to then realize it wasn’t worth the hassle will be a waste of time, money, and effort on your part.
Equipping your Ender 3 with a dual extruder comes with some negative effects that, depending on your desired uses, may not be worth the effort after all. So be sure to keep these points in mind before deciding whether or not to break out your toolbox.
Pros
- Print with more than one filament/filament type at once.
- Multicolored prints are far easier and take less time because you won’t need to constantly switch your filaments mid-print.
- You can reinforce your prints with dissolvable filaments like HIPS and PVA for better surface finishes.
- Upgrading/modifying single extruder printers is often cheaper than buying dual extruder printers.
Cons
- Dual extruders are unwieldy and difficult for beginners to handle and manage.
- Unnecessary if you’re happy enough printing in one color.
- Far more maintenance, care, and cleaning are required to keep a dual extruder clean and functioning properly.
- Lower build area volume due to the larger extruder requiring more space.
Essentially, a dual extruder requires a lot more work and maintenance to use reliably than a single extruder. If you’ve got your sights on fortified and/or multicolored prints, then upgrading your Ender 3 with a dual extruder is a fantastic idea.
On the other hand, if you’re happy with monochrome prints or are otherwise not confident you could handle the upkeep, it might be best to stay with a single extruder.
However, if you’re willing to put in the work and are still convinced you want a dual extruder on your Ender 3 despite these cons, then we’re here to help you move forward.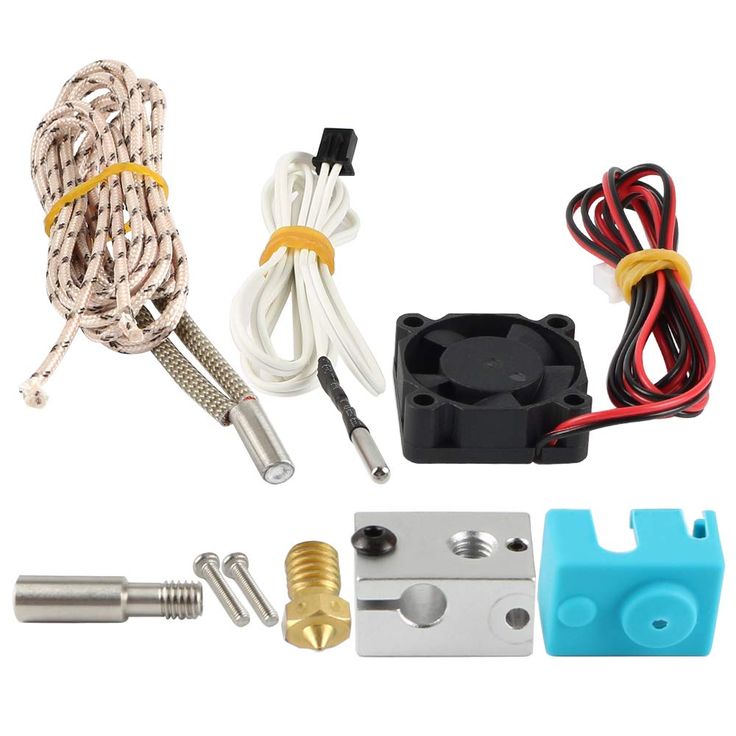
Before Installing a Dual Extruder on Your Ender 3
Ender 3 models are equipped with single extruders by default. However, as we’ve seen with your options for adding laser engravers, they are highly modifiable machines. This means that, with enough know-how and effort, you can upgrade your Ender 3 with a dual extruder.
Be Safe and Sure!
There is no official dual extruder extension for the Ender 3, so you’ll need to get your DIY cap on. Just remember that you’ll be dealing with mechanical parts that are designed to get extremely hot, so make sure everything is switched off and unplugged before you begin.
In addition, remember that you’re working with moving mechanical parts, and will be manipulating them in ways for which they weren’t designed, like adding an extender cable to a standard outlet. So take the greatest of care to protect yourself and your machine while you work. Always double-check your equipment and instructions before beginning so you can move forward as confidently and safely as possible.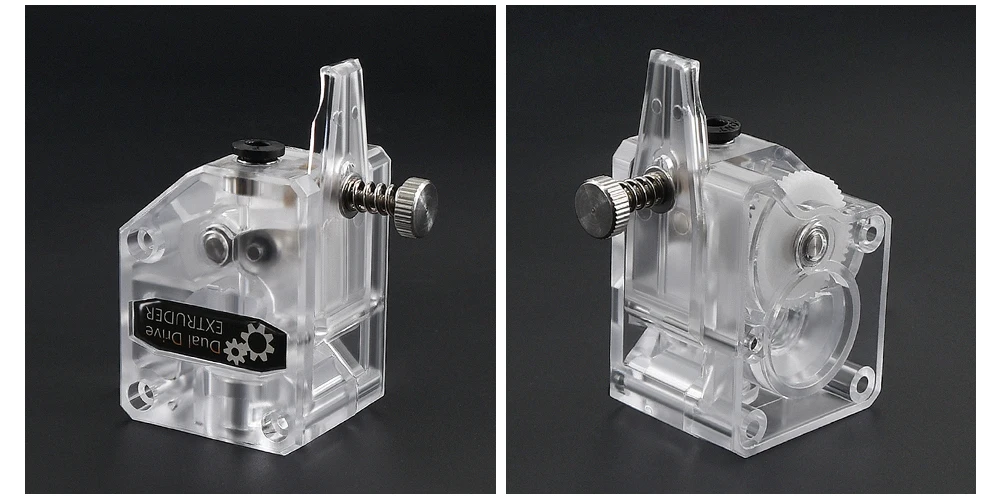
Modifiable as the Ender 3 is, be sure you take great care in upgrading yours. Removing and replacing parts must be done with care to ensure each piece functions correctly. An improperly installed extruder will back up or fail mid-print, which increases the risk of blockages, failures, and even fires.
Be Ready to Roll Up Your Sleeves
Any third-party modification to a device will require effort and know-how beyond what you’ll find instructions for in the box. User-guided, well-explained modifications will be much more reliable than selecting any old mod at random, but all will require at least some work on your end.
These upgrades are more often than not far more complicated than buying a new part and screwing it in, so be sure to read instructions carefully and carry out tests before you really put your new mod to use. Attention to detail and cautious handiwork are musts before you’re ready to plug in and get printing.
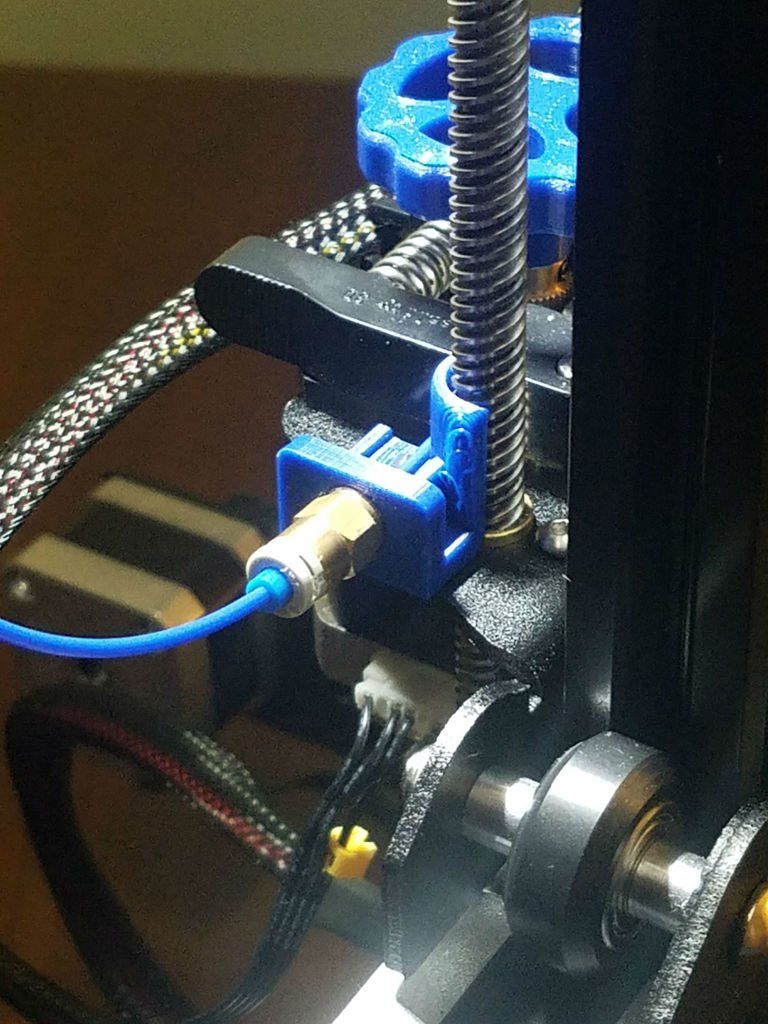
The main difficulty in installing your own dual extruder on an Ender 3 or any 3D printer is the requirement of an extra servo. While this isn’t the case for all dual extruders (we’ll get to that later) it is certainly the case for most, and the correct installation of said servo is very important and quite finicky.
FAQs
Can the Ender 3 Do Dual Extrusion?
Yes – while the Creality Ender 3 ships as a single extruder 3D printer, it can be upgraded via several open-source projects and a few simple modifications.
Does Creality Make a Dual Extruder?
Creality does not sell a standalone dual extruder for specific 3D printer upgrades, though they do sell other add-ons for their printers such as laser engravers. However, they have sold 3D printers with dual extruders as standard, which they started with the CR-X Pro in 2018.
Other articles you may be interested in:
- Ender 3 laser engravers
- The best dual extruder 3D printers
- The best Ender 3 upgrades
- Ender 3 vs Ender 3 V2 vs Ender 3 Pro vs Ender 3 Max: Compared
- Ender 3 vs Ender 5
How to Achieve This Amazing DIY Upgrade?
Dual Extruder on Creality Ender-3: How to Achieve This Amazing DIY Upgrade?
2020-08-03 11:30:55
“Can I make it a dual extruder printer?”
This must be the most popular upgrade question on the Creality Ender-3 3d printer.
Is It Possible to Upgrade a Dual Extruder on Ender?
Dual extrusion is making use of multiple filaments within a single print. One of the primary advantages of using dual extrusion is the capability to print with numerous materials. For example, using a soluble support material makes model cleaning much faster and easier.
Is it possible to add this benefit to Creality Ender-3's existing checklist? If you're willing to do a bit of work, the answer absolutely is “YES!”
As an example, it's crucial to keep in mind that any kind of dual extrusion upgrade to the Ender-3 FDM 3d printer will require a brand-new control board, as the stock version doesn't have dual extrusion abilities.
Along those same lines, the constraint of hardware is a vital aspect to take into consideration when presenting alternatives. A number of the following choices are either still in the R&D phase, or are open-source and also created by enthusiasts.
With that claimed, let's probe a little much deeper into what dual extrusion implies, and after that have a look at what alternatives exist for the Creality Ender-3 3d printer!
" True" Dual Extrusion
As it stands, there are no standard versions of the Ender-3 FDM 3d printer that will enable it to print with 2 or more nozzles (i. e. "true" dual extrusion).
Yet that's not to say that people have not come up with their own solutions.
Being an Ender-3 3d printer user means that you're a component of a massive innovative area that's frequently pushing to make brand-new modifications that help everybody and to make this printer so remarkable.
As time continues and modern technology revolutionizes, dual extrusion for the Creality Ender-3 may come true, however, you'll need to leave it to the un-professionals at this moment.
Dual Extrusion Option: DIY Chimera Project
One of the designs that will certainly enable true dual extrusion on Creality Ender-3 is the DIY option by Jonathan Holman (krestoverson).
This idea integrates 3D printed parts as well as the readily available E3D Chimera hot-end to make a functional dual extrusion system.
On the Thingiverse page publishes the detail parts listing and instructions, which is, however, was made for an Ender-4 3d printer, would be also supposed to work on your Creality Ender-3 since the X-gantry is essentially the same.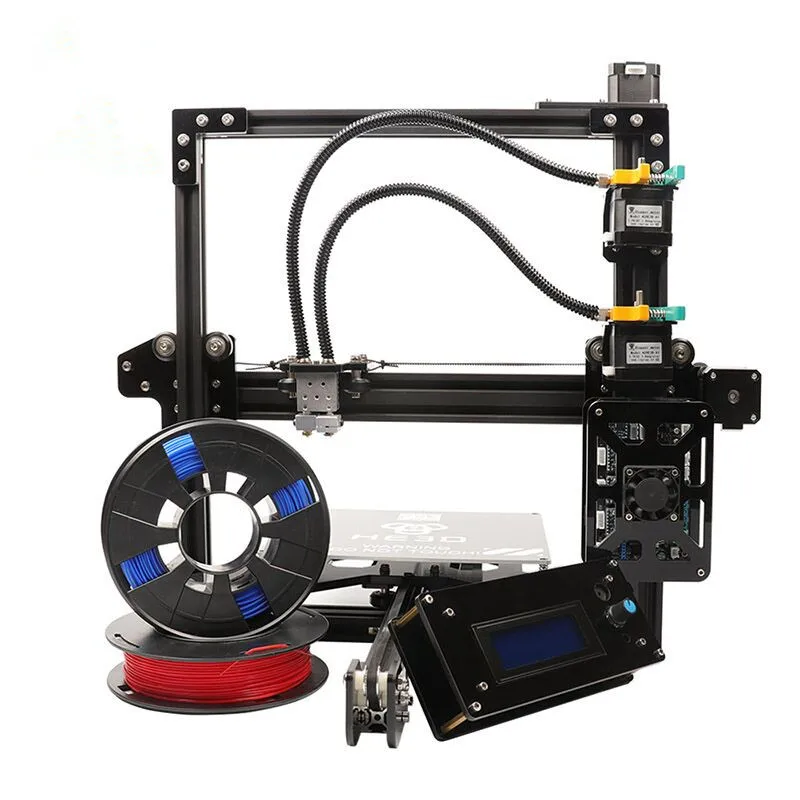
Multicolor Printing with a Single Nozzle
This is where points get fascinating. Multicolor printing is different from dual extrusion because it only makes use of one nozzle and changes filaments throughout a print. This enables you to make use of the hotend currently installed on the Creality Ender-3 3d printer!
The drawback to multicolor printing is that there's even more plastic waste, as you have to clean out (or "remove") the nozzle after each material adjustment.
Likewise, you can only utilize very comparable material during one print, as a result of distinctions in temperature and cooling requirements.
In complying with areas, you'll see a couple of various approaches for making multicolor printing a reality on the Ender-3 FDM 3d printer.
A few of the methods below are specialist "ready-to-run" systems that have actually been examined.
Others are made by hobbyists, but that doesn't indicate that they won't function! In fact, they may also be a better fit for you!
Multicolor Option 1: DIY Multi-Material Solution
If you're interested in making your own solutions, this is the most appealing one for you. YouTuber Zemistr has developed a system to transform the Ender-3 3d printer into a multi-material printer.
Integrating 3D printed parts and some commercially-available items, Zemistr will provide you the most detailed solution on how to set up this system.
The concept is to incorporate 2 Bowden tubes into one and pull back the filament that's not being used.
It's open to modification and will more than likely work even if you have a little various parts. The only point left to do is intend a weekend break for it!
Multicolor Option 2: Cyclops Hot End
Ender-3 3d printer customer Shaun Forgacs (zrxmopar) has actually achieved an upgrade that allows multicolor printing on an Ender-3 3d printer with a couple of commercially-available and 3D printed components.
This system utilizes an E3D Cyclops hotend, which can mix 2 filaments along with fundamental multi-material printing.
It ought to be compatible with a Chimera double nozzle hotend (which has the very same form factor as the Cyclops) for real dual extrusion, however, this hasn't yet been examined.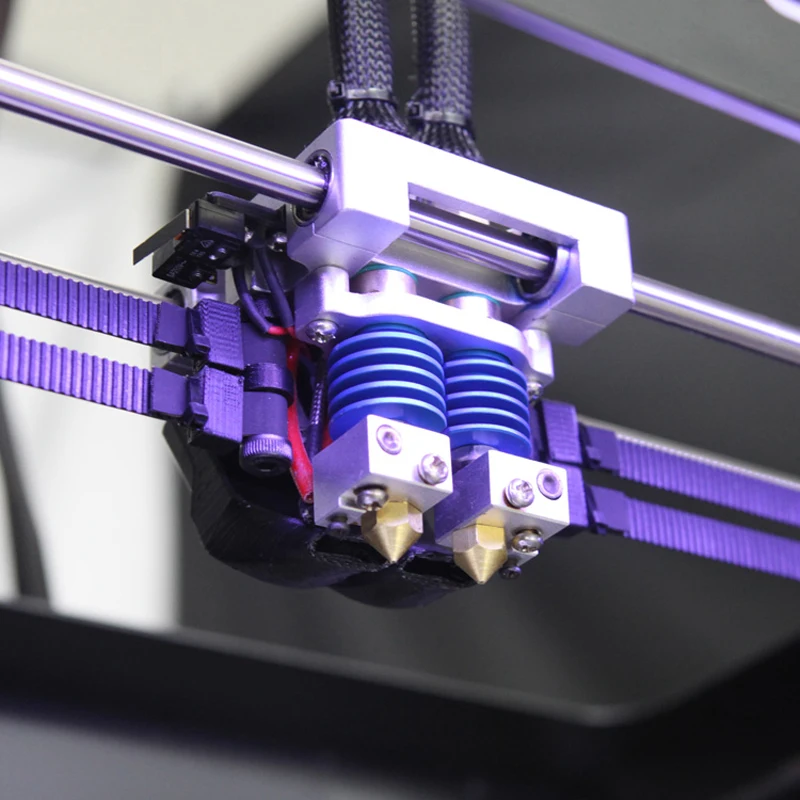
Dive into this well-documented upgrade and see what the limits are if you're up for a challenge! The data and components checklist are readily available on Thingiverse.
Multicolor Option 3: 3-into-1 Hot End
Though it's based upon the very same principles as other modifications, this project is slightly different.
Acquiring some parts from other creators in the open-source area, Kenneth Shotwell (shotsy) put together a practical system that generates multicolor components.
Utilizing a 3-into-1 hotend as well as a customized mount, and cooling system, it allows the Ender-3 3d printer to print (or mix) 3 separate shades in a single print!
While this variation might be somewhat extra included, it isn't any type of much less enjoyable. The parts list and also files are offered on Thingiverse.
Multicolor Option 4: Zero Physical Modifications
You might also want to take this service a shot if you've only got about 10 minutes to spare.
The most basic of all, this design of multicolor printing on the Creality Ender-3 3d printer is a breeze. Clarified by YouTuber CHEP, altering a few settings in the Cura Engine as well as a little patience can lead you to incredible outcomes.
With this tutorial, you will how to stop the Ender-3 FDM 3d printer at a certain height, change the filament, and afterward proceed to print right on top of your prior print.
There are many methods for you to take this as well as add it on, and then you'll have a good time seeing how far you can push the limit.
Multicolor Option 5: Mosaic Palette 2
The Mosaic Palette 2 is a commercially-available alternative for both professionals and makers seeking to print multicolor consistently.
Included with the Palette, you can splice as well as integrate up to four various colors of a single material.
The machine functions by reducing pre-measured sections of filament and also merging them right into one strand, so multi-material only functions if you have filaments that will fuse with each other. Numerous YouTube videos exist in detailing this procedure.
Dual Extruder on Creality Ender-3: How to Achieve This Amazing DIY Upgrade?
Subscribe to Our Newsletter
Creality is a leading 3D printer manufacturer dedicated to developing the FDM/resin 3D printer, 3D printer filament, and maker related products. Subscribe to learn more.
Thanks for subscribing
Social Media
Creality Ender 3 Dual Extruder - All Your Best Options (& Pro/V2)
Contents
- Creality Ender 3
- Ender 3 Dual Extruder Options
- Mosaic Palette 3 / Pro 9000 05 Project Chimera
- Proper Printing Mod for Ender 3 Dual Extruder
- Upgrading Ender 3 to Dual Extruder: Pros and Cons
- Before Installing Dual Extruder on Ender 3
- Be Confident and Safe!
- Get ready to roll up your sleeves
- Q&A
Creality Ender 3
Creality's Ender 3 series is one of the most popular budget 3D printer lines on the market today, and if you own one, chances are you already know why. In addition to being unbeatable in price, they are easy to use, reliable and powerful enough for their range.
What's more, their openness makes them easy to modify, an ideal feature for today's craftsmen. One of the most popular upgrades for the Ender 3 is the upgrade to a dual extruder as this line only comes with a single extruder as standard.
It's easy to see why dual-extruder versions of the Ender 3 are popular. The ability to print with more than one type or color of filament at the same time makes prints superior and unique. Not to mention, using a stronger filament along with the main filament creates more reliable projects with less post-processing required.
The cost difference must also be taken into account. Installing a dual extruder on your Ender 3 will cost significantly less than buying a similar printer with a dual extruder already installed.
Standard dual extruder 3D printers typically cost around $600, which is three times the price of a standard Ender 3.
So how do you install a dual extruder on an Ender 3? What should I pay attention to before starting work? And what are the dual extruder options for which Ender 3 models?
Ender 3 Dual Extruder Options
The Ender 3 open source community is huge, and there's no shortage of people with great ideas for modifying and upgrading Ender 3 printers with laser engravers, better bezels, and even advanced touch screens.
In this regard, it is quite understandable that you cannot immediately understand which printer is right for you. So here we take a look at some of the best and most reliable dual extruder Ender 3 mods you can check out today.
Mosaic Palette 3 / Pro
Price: $599-$799
While technically more of an honorable mention than a true Ender 3 dual extruder, the Mosaic Palette 3 and Palette 3 Pro are by far the easiest way to use the Ender 3 to create multi-color prints without the need for active modification of the printer.
This is great news if you're unsure or for some other reason don't want to pick up Ender 3 tools, but still want to make prints using different colors and filaments.
Mosaic Palette models act as automatic switches, similar to changing the orientation of a railroad line to direct certain trains or uncoupled cars in different directions. The Mosaic Palette models act as changers that swap up to eight different filaments per print and automatically manage each one.
Mosaic palette 3 1
The disadvantage is the cost. Priced around $700, these are not cheap machines. But if you're not very handy and have the money, this is the easiest way to hook up what you might call a "multi-extruder" to your Ender 3. Animal fusion, not ideological improbability, is the first great example of a DIY dual extruder that was designed for the Ender 4 but is still compatible with all Ender 3 models.0065 Modification of the Chimera Project Ender 3 dual extruder, originally designed for the Ender 4.
A standard dual extruder that is fairly cheap to manufacture, the Chimera Project sits on a mount that you will have to print yourself. While this sounds like an extra step, don't discount how great it is to use your 3D printer to make your own custom modification parts.
Precautions and recommended equipment are laid out so that even the most humble of beginners can easily figure out how it all works.
Regardless of your DIY experience, you will need everything to run this Ender 3 & 4 Dual Extruder if you are careful and follow the instructions.
Cyclops Hot End
Cyclops Hot End is the spiritual brother of Chimera. They can both be used with the same print fixture and both can alternate between different colors and filament types during the printing process. The Cyclops gets its name from the fact that it looks like a single extruder but has all the features of a dual extruder.
In addition to standard printing with multiple filaments, it can also mix filaments together. While it looks more like a "filament control system" than a standard dual extruder, it does all the features you'd expect.
Instructions and files as well as some assembly and usage tips can be found here for free. This Cyclops seems like a reliable and very easy way to convert your Ender 3 into a dual extruder, unlike true Cyclopes, whose implied lack of depth perception probably makes them a lot less formidable than the mythology would have it.
Proper Printing Ender 3 Dual Extruder Mod
Proper Printing has developed a unique dual extruder design that does not require a second servo. Instead, this very interesting and surprisingly clever design relies on a spring mechanism that allows the two extruders to switch smoothly, working like a dolly.
The extruders move in a slanted V-shape, with only the active extruder parallel to the assembly, while the other, unused, is tilted to the side. This allows you to use extruders with the same servo instead of each one wasting time just waiting for their turn.
This minimizes assembly volume loss by saving space and parts in the design.
Known as "The Rocker" and available as printable files for as little as $3 on their site here, this is an absolute steal for something no Ender user should be without.
While it claims to work on any stock Ender 3 model (i.e. out of the box and without modification), it's not clear if it will work well with other 3D printers or more modern Creality Ender models.
Though since the $3 price is just files and instructions, you are free to experiment and tweak to see if The Rocker works with other 3D printers if you are confident and tech savvy enough to do so.
You can even change the design yourself if it doesn't work right away with the model you have in mind - that's the beauty of modifications!
Upgrading an Ender 3 to a Dual Extruder: Pros and Cons
Upgrading an Ender 3 to a Dual Extruder may seem pointless. One is more than two, which means it's better. But like most things related to 3D printers, it's not as easy as it sounds.
Dual extruders have a lot of advantages, but that doesn't mean there aren't any disadvantages. While not a one-way modification (meaning you can go back to a single extruder if you want), installing an Ender 3 dual extruder only to find out later that it wasn't worth the hassle would be a waste of time, money, and effort on your part. sides.
Equipping your Ender 3 with a dual extruder comes with some downsides that, depending on your desired goals, may not be worth the effort. So keep these points in mind before deciding whether or not to take out your toolbox.
Printing with several types of threads/filaments at once.
Multi-color prints are much easier and take less time because you don't have to constantly change filaments during the printing process.
You can strengthen prints with dissolvable threads such as HIPS and PVA to improve the surface quality.
Upgrading/modifying single extruder printers is often cheaper than buying dual extruder printers.
Twin extruders are bulky and difficult to handle and operate for beginners.
Not necessary if printing in one color is enough for you.
A lot more maintenance, care and cleaning is required to keep the dual extruder clean and functioning well
Smaller build area due to the larger extruder requiring more space.
Basically, a dual extruder requires a lot more work and maintenance to be used reliably than a single extruder. If you're aiming for reinforced and/or multicolor prints, then upgrading your Ender 3 with a dual extruder is a fantastic idea.
On the other hand, if you're happy with monochrome prints or you're not sure you can handle maintenance, it's best to stick with one extruder.
However, if you're willing to put in the effort and still believe you need a dual extruder on your Ender 3 despite all these shortcomings, we'll help you move on.
Before installing a dual extruder on Ender 3
Ender 3 models are equipped with single extruders by default. However, as we have already seen with the options for adding laser engravers, these are highly modifiable machines. This means that with enough knowledge and effort, you can equip your Ender 3 with a dual extruder.
Be confident and safe!
There is no official dual extruder extension for the Ender 3, so you'll have to wear a DIY hat. Remember that you will be dealing with mechanical parts that can get very hot, so make sure everything is turned off and unplugged before starting work.
Also, remember that you are working with moving mechanical parts and will manipulate them in ways they are not designed for, such as adding an extension cable to a standard outlet. Therefore, take the utmost care to protect yourself and the machine during operation. Always double-check equipment and instructions before starting work to move forward as confidently and safely as possible.
Because the Ender 3 is a modded model, be sure to take great care when upgrading your model. Removal and replacement of parts must be done with care to ensure the correct operation of each element. An incorrectly installed extruder can fail or fail in the middle of printing, increasing the risk of clogging, failure, and even fire.
Get ready to roll up your sleeves
Any third party modification of the device will require effort and know-how beyond what you will find in the instructions on the box. Mods done with user guidance and good explanation will be much more reliable than random selection of any old mod, but they all require at least some work on your part.
These mods are often much more complicated than just buying a new part and screwing it in, so read the instructions carefully and test before you actually start using your new mod. Attention to detail and precision in operation are a must before you're ready to plug in and start printing.
The main difficulty when installing your own dual extruder on the Ender 3 or any other 3D printer is the need for an additional servo. While this doesn't apply to all dual extruders (we'll talk about that later), it certainly does for most, and getting the servo set up right is very important and quite tricky.
Q&A
Can Ender 3 work with two extruders?
Yes - although the Creality Ender 3 comes as a single extruder 3D printer, it can be upgraded with a few open source projects and a few simple modifications.
Does Creality manufacture a dual extruder?
Creality does not sell a separate dual extruder for a specific 3D printer upgrade, although it does sell other add-ons for its printers such as laser engravers. However, they do sell dual extruder 3D printers as standard, which they started doing with the CR-X Pro in 2018.
Buy Dual Extruder 3D Printer 3D Printer Replacement for Mk8 Anet A8 Cr-10 Prusa I3 Mk3 Ender 3 - Black/Left in China
Product description
Dual Extruder 3D Printer 3D Printer Replacement for MK8 Anet A8 CR-10 Prusa I3 Mk3 Ender 3 - Black/Left
-
3:1 transmission ratio SAN makes the extruder more powerful and easier to extrude consumables, reducing clogging and causing print failure
-
Whether you need high resolution printing with small nozzles or high flow printing with large nozzles, the optimized drive train delivers unrivaled traction and lightning retraction
-
This extruder can be used for both long and distance printing, and when used for short distance printing, it maintains low and high temperatures.
 All plastic filaments such as ABS, PLA, TPU, Nylon can be used
Specifications:
Package included:
- 1 X Extruder
Characteristics
| Brand | N/A |
|---|---|
| Colorstyle | A |
| Retail Pack | White paper box |
| Gross weight | 0.202kg |
| Bulk density | 0.242kg |
| Length | 15.000cm |
| Width | 18.000cm |
| Height | 4. |