Cinema 4d 3d printer
Cinema 4D 3D Printing Tutorial: 10 Essential Tips & Tricks | 3D Printing Blog
3D Printing with Cinema 4D: A Tutorial with 10 Essential Tips and Tricks
by Fabian | January 24, 2017
In this Cinema 4D 3D printing tutorial you will learn how to transform your Cinema 4D models into real, physical, 3D printed objects. We will take a look at 10 essential tips and tricks to create clean, smooth, watertight, high-quality models that are ready for 3D printing.
1: Size Settings and ScalingSome simple clicks before you get started will make your life much easier: you may want to set your Project Settings to millimeters. This way, you won’t need to re-scale the printing size of your model later. Go to Edit – Project Setting and set Project Scale to 1 millimeter.
Project scale of 1 millimeter.
It also makes sense to change your general preferences in Cinema 4D to millimeters. For doing so, go to General Preferences – Units – Change Unit Display and choose Millimeters
Cinema 4D uses Phong Shading to make an object look perfectly smooth on your screen. Even though circles, spheres or other round shapes might look perfectly smooth in Cinema 4D, they are actually made of square polygons. This is the “real” shape of the object that a printer will use. In order to see the polygons, you need to select all the Phong Tags on your objects and delete them.
Phong Shading on (top) vs. off (below).
3: Increase Segments – Smoothening Your ModelIn order to avoid a pixelated 3D print, it might make sense to increase the number of Segments. To do so, select your objects and adjust the Segments counter. In the example below, we increased it from 24 (left) to 96 (right). As you can see, the higher value leads to a much smoother surface. Finding the perfect value depends on the printing size and material you have in mind. Just a word of advice: you don’t need to go over the top with this. There is no need for polygons smaller than 0.01 millimeters because 3D printers currently cannot print beyond this level of detail.
24 segments (left) vs. 96 segments (right).
4: Section View – Looking Inside Your ModelWhile your 3D model might look stunning from the outside, the inside is a whole different story. Intersections and walls within your design can make your life difficult since your model needs to have one continuous ‘outer shell’ and no other internal structures.
The best way to get a better understanding of this is by looking into your model. Go to Edit – Project Settings and change the options for View Clipping. Increasing this setting and changing the zoom will give you the cross section view that suits your need best.
The screenshot below by Nick Lievendag shows that there is a problem with his model. Several objects were “connected” together, which led them to overlap in the interior of the model. Unfortunately, a 3D printer might process such a model incorrectly. But there’s a simple solution (see next step).
The objects are intersecting each other. Screenshot by Nick Lievendag
5: Merging Objects and Avoiding IntersectionsA 3D printer needs to know if and how you want to merge different objects together. As you saw in the previous step, things that look great from the outside might be a little messy inside the 3D model.
Luckily for us, there is a great free plugin for Cinema 4D that is really handy: Magic Merge. This plugin by Nitro4D can be downloaded here and should then be unzipped in the following folder: maxon/cinema4d/plugins. Save your design and restart Cinema 4D to continue. In case you “connected” parts before, make sure to disconnect them. Now select all separate objects, go to Plugins in the top menu and click on Magic Merge. This should give you a perfectly clean merged object!
Merging unprintable objects (left) together for 3D printing (right) with Magic Merge. Screenshot by Nick Lievendag.
6: Making your Model Watertight & ManifoldCreating a design for 3D printing means that your Cinema 4D model has to be able to exist in the real world. This is where key geometry issues come into play. For example, your model needs to be watertight. Ask yourself the question: if I were to put water inside my model, would it flow out? If that’s the case then you need to find those holes and close them.
The design below is an example of a model that is not watertight. You can clearly see that there is a big gap in its surface.
Luckily for us, Cinema 4D has a tool that shows us exactly where those holes are. You can identify issues with watertightness by using Mesh Checking. Open the Attribute Manager and then choose Mode – Modeling – Mesh Checking Tab. Enable “Mesh Check” and “Boundary Edges” and uncheck all other options. This will show you the “holes” in the mesh of your models, which keep them from being watertight.
Check if your model will be 3D printable.
Next thing you should do is check the “Non Manifold” box. This will highlight any unwanted extra faces or edges that might cause problems. Sometimes this extra geometry is hard to spot since it is located inside the model (see step 5 of this tutorial).
7: Wall Thickness – Making Sure Your Walls Are PrintableIn order to make your Cinema 4D model printable, you need to ensure that each and every surface of your model has a wall thickness. Without setting a wall thickness, a 3D printer has no information about how thick or how thin it is supposed to print your part.
The picture below shows a model with paper-thin surfaces (not printable, left) and a solid object with thick walls (printable, right). If you want to learn more about how thick your walls need to be exactly, make sure to read this blog post.
A quick and easy way to add wall thickness is to select the Extrude Tool, choose a Maximum Angle of 91° and check the “Preserve Groups” and “Create Caps” options.
If you have one enclosed object (let’s say a solid cube) without any holes, your ‘wall’ will simply be your entire model. In this case, you don’t need to assign any wall thicknesses as your entire 3D print will be solid inside.
8: Inverted Normals – Fixing Reversed FacesAnother problem that can occur are so-called inward-facing or reversed faces. This means that a surface of your model is facing in the wrong direction (towards the inside of the object instead of the outside).
To fix this, visualize the normals by selecting the faces in Cinema 4D. Normals facing outwards will be shown in orange, whereas inverted normals will be shown in purple. Another way to find inverted normals is by selecting Options – Backface Culling. Inverted normals will then simply disappear from your view.
Normals facing outwards (orange) and inverted normals (purple). Screenshot by Rick Barrett.
Fixing this couldn’t be easier. Select all faces and click on “Align Normals”. Alternatively, you can just select a specific face and choose “Reverse Normals”.
9: Exporting your Design as a 3D Printable FileYou made it! Now the last thing left for you to do is to save your model as a 3D printable file. Simply go to File – Export and choose STL (the standard file format used in 3D printing).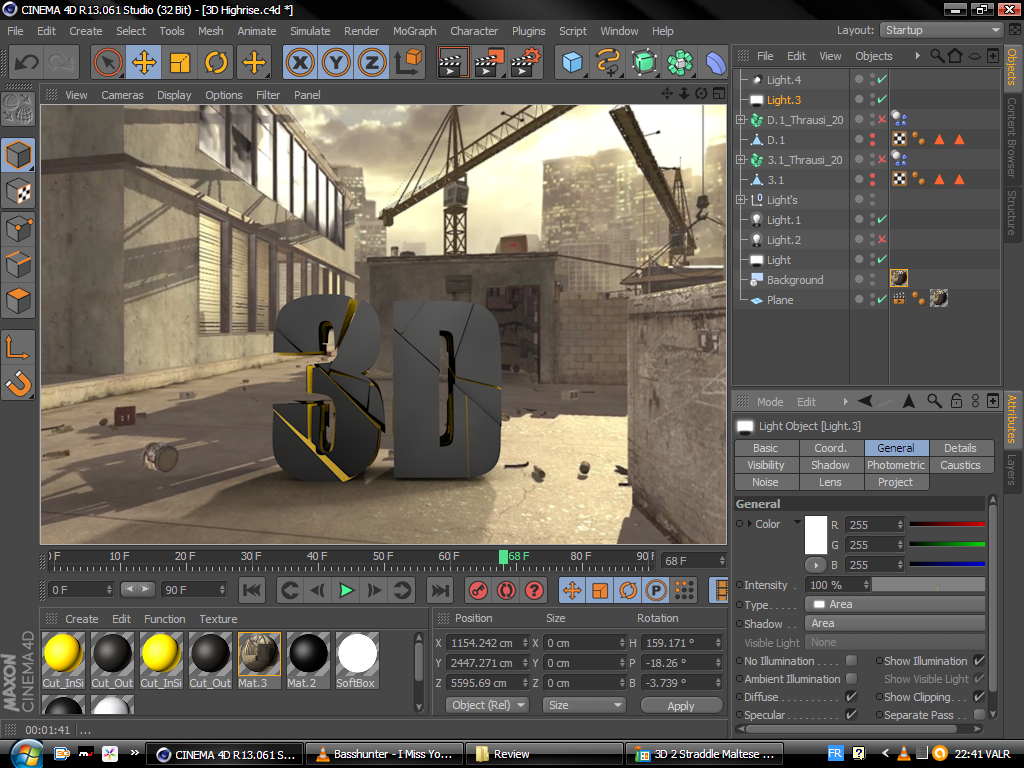 Select an export scale of 1 millimeter to ensure that your object has the same size as you determined in step 1 of this tutorial.
If you are interested in a multicolor 3D print, export your textured or painted model as a VRML 2 file.
10: 3D Print Your Model in High QualityDid you manage to follow our tips and tricks and create a printable Cinema 4D file? Then it’s about time to get your high-quality 3D print. Simply upload your model here and choose from hundreds of material options including metals, ceramics, or even wood. We’ll double-check your file, print your object on high-end industrial machines, and send it right to your doorstep.
It’s now time to turn your Cinema 4D design into a high-quality 3D print.
This tutorial took some inspiration from Rick Barrett’s how-to video and Nick Lievendag’s Cinema 4D tips.
Tutorial Tuesday 10: Modeling for 3D Printing with Cinema 4D
Cinema 4D is a powerful, professional modeling software program that can be used for 3D animations, motion graphics, and generating 3D effects. It’s also fairly intuitive, and can be used to create and export models suitable for 3D printing. Already using Cinema 4D? This post will help you figure out how to prepare your models for exporting to STL or VRML format for 3D printing. Or, if you’re new to Cinema 4D and want to learn the basics, we’ll start at the beginning with some beginner tutorials.
Getting Started with Cinema 4D
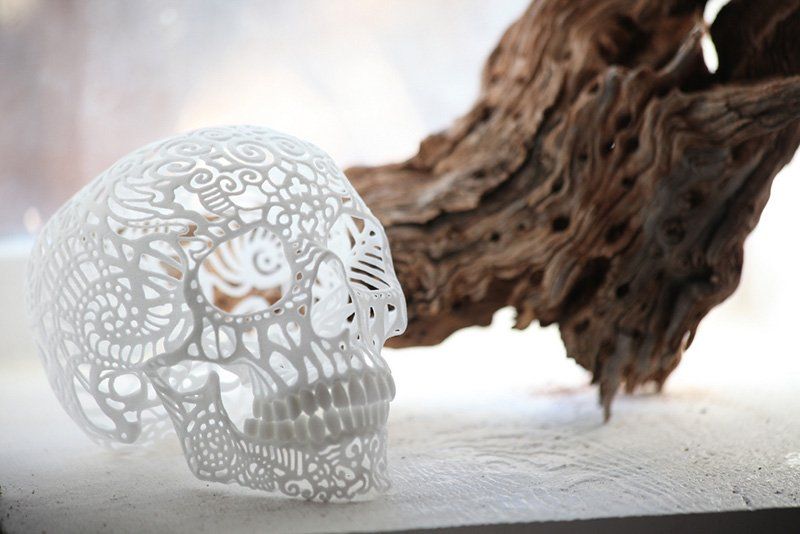
For a quick overview of how Cinema 4D works, check out the walkthough video Intro to 3D printing with Cinema 4D from The Hive. This screencast takes you quickly through the creation of a 3D-printable alien tentacle-skull design from scratch in Cinema 4D, and along the way shows you how to handle Boolean operations, work with NURBS modeling, import images from Illustrator, and prepare your model for exporting to STL.
If you’re a complete beginner to Cinema 4D, you can get started by learning along with the detailed video tutorial Cinema 4D For 3D Printing – Episode 1 – The Basics from the YouTube Print 3D Channel. This video walks through all the basics for placing, moving, and sizing objects, and for using layers to organize the elements of your design. One great thing about this particular video is that it focuses on using Cinema 4D specifically for 3D printing, and will show you how to set up your workspace, choose appropriate scale settings, and understand which Cinema 4D effects are intended for animation/visualization and which can be used to modify physical 3D models.
The video above is just one of many useful Cinema 4D video lessons from Print 3D Channel; another one worth watching is their walkthrough video Making The Print 3D Channel Maker Coin with Cinema 4D. For more information on exporting Cinema 4D creations to STL or VRML formats for 3D printing, check out the Modeling in Cinema 4d for Shapeways tutorial.
Diving Deeper
If you have access to the online learning portal Skillshare, then you can take their very in-depth, step-by-step course Spline Modeling for 3D Printing in Cinema 4D by John Burdock, which covers basic B-spline modeling as well as how to prepare your model for exporting to Shapeways for successful prints in specific materials. There are also many Cinema 4D courses on Lynda.com, but the Skillshare course is the only one that is specifically from the perspective of using Cinema 4D for 3D printing.
For those interested in 3D printing mathematical objects with Cinema 4D, check out the Mathematical Visualization website by Dr. Elizabeth Denne from the Department of Mathematics at Washington and Lee University:
These instructions walk you step-by-step through the process of importing Mathematica models into Cinema 4D and processing them for 3D printing. For example, check out these quadratic surfaces whose equations are embedded directly into their curves:
In addition to a lot of beautiful pictures of Dr. Denne’s creations, this site includes clear, written-out instructions for an Introduction to Cinema 4D, as well as how to use Cinema 4D to create models for Calculus classes, such as Volumes by Slices and Cylindrical Shells.
Cinema 4D models at Shapeways
Here are three awesome things that were created with Cinema 4D: First, a set of stylish 3D printed cufflinks by Stefan Hepner, designed in Cinema 4D and printed in Polished Nickel Steel, with orange epoxy added after printing.
Second, this rocking Burn heart with music pendant by Andl:shop:
And, finally, this adorable Realistic Cat Coccolino modeled and textured in Cinema4D by Julian Keller for printing in Full-Color Sandstone:
Do you use Cinema 4D? Are you just getting started? We’d love to hear from you. Use the comments section below for questions and answers, or head over to the Shapeways Forum.
3D design Cinema4D Design Apps design tutorials Education Software Tutorial Tuesday Tutorials
new materials that change characteristics and shape / Sudo Null IT News
Usually, 4D means a four-dimensional space in which there are four-dimensional objects - tesseract, icositetrachor (has no analogues in the three-dimensional world), and the like. A few years ago, the term 4D began to be used to refer to a special technology for printing objects that change their characteristics over time. Thus, in 4D printing, the “fourth” is not a measurement, but a parameter that is associated with the position (possibly also the function) of an object.
4D printer technology can hardly be called revolutionary compared to conventional 3D printing - the object is created layer by layer in the same way. The most interesting thing happens later, when the finished item begins to change. And here it all depends on what material is used in the printer. Special materials change under the influence of water, heat, light, mechanical stress, and can also be programmed for certain actions.
Let's see why 4D printing is needed and what a world looks like built on the basis of things that change their shape and behavior.
Cars of the future
Last year, BMW unveiled what the cars of the future will look like. The concept was not without the use of 4D. As conceived by engineers, the car body consists of movable triangular sections printed on a 4D printer. Such parts will have integrated functionality, which is now achieved by producing different parts and assembling one movement from them.
Thanks to the use of special materials similar in characteristics to carbon fiber, each section will have a programmed function from the moment of production. For example, most of the coverage will serve wheel arches designed for better aerodynamics. During the turn, the triangular sections stretch, and the tires do not rub against the arches.
Visual demonstration of the 4D printed concept car:
Shape change on contact with water
A team of scientists at Harvard University turned their attention to plants that react and change their shape in response to environmental stimuli. Hydrogel composite structures have been developed that change shape when immersed in water.
Orchid flower object printed with hydrogel composite inks containing specifically directed cellulose fibers. To give the wood fibers the desired direction, they were mixed with acrylamide hydrogel. When immersed in water, the resulting substance changes its geometric dimensions in a predetermined way.
Composite ink allows you to obtain products of different shapes. Moreover, it is possible to change the composition of the material to obtain certain properties, such as electrical conductivity or biocompatibility.
Researchers at MIT's Self-Assembly Lab have developed a 2D template that folds into a cube when submerged in water. Self-Assembly Lab prints using the Stratasys Objet260 Connex1 printer, which allows you to work using a variety of materials (including rubber-like and polypropylene).
The laboratory has created a wide variety of products that can independently take the desired shape or self-assemble. They showed laces that lace themselves up and pieces of furniture that unfold themselves.
Space Shield
NASA engineers 4D printed metal fabric to protect satellites from damage and radiation, and to make flexible antennas. The fabric is a kind of "mail", created from pieces of silver and other metals. The material can be repeatedly bent, unfolded, stretched and compressed. Each side of the fabric has its own properties, reflects or absorbs light and heat. Despite being flexible, the fabric is extremely difficult to tear. It is planned that satellites will be packed in protective material before they are launched into space, or spacesuits and habitable modules will be shielded with it.
Technology for the Military
Northwestern University's International Nanotechnology Institute received a five-year grant from the US Department of Defense to develop a 4D printer. The 4D printer will be used for research in chemistry, materials science and defense-related fields. It is assumed that 4D printing will allow the creation of new chemical and biological sensors, designs and materials for microchips.
Progress is currently hampered by the lack of low-cost equipment capable of printing at ultra-high resolution (about 1,000 times thinner than a human hair) from hard materials (metals and semiconductors) and soft materials (eg organics).
The 4D printer will form the basis of a new generation of tools for designing architectures in which the materials that form the functional components of electronics can be combined with biological objects.
Shape memory
4D printed resin model recovers after deformation.
Back in 2013, researchers at the University of Colorado developed a 4D printing technique by incorporating "shape memory" polymer fibers into composite materials used in traditional 3D printing. Examples of applications of the technology included solar panels that can fold and unfold for transport, vehicle coatings that adapt to the environment, and military uniforms that change camouflage patterns or better protect against gas or shrapnel.
Three years later, a collaborative team of scientists from the Singapore University of Technology and Design, MIT and the Georgia Institute of Technology developed a new 4D printing method based on exposing photosensitive materials to light. A new printing technique is able to create elements as thick as a human hair.
A solution of photosensitive polymer was poured into the printer and the desired object was projected layer by layer, processing the material with ultraviolet light.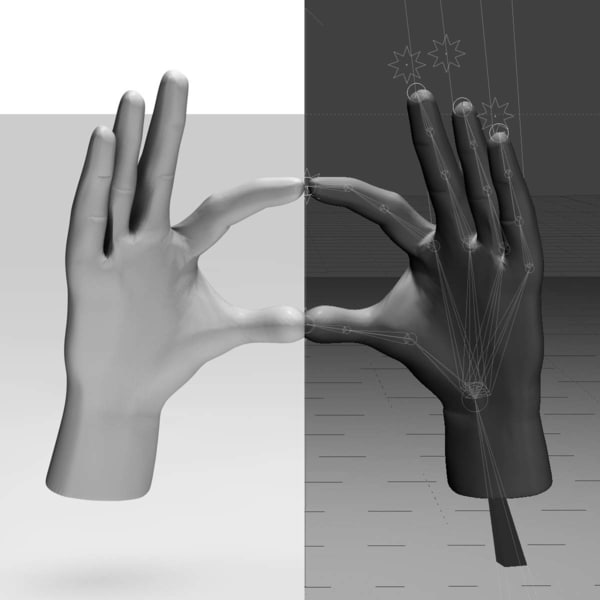 To test that the polymer is able to recover from deformation, the researchers printed a soft manipulator that is closed when free. With it, scientists were able to successfully capture small objects (such as screws).
Already at this stage, this technology can be adapted for real applications - for example, to create capsules that release substances when the body temperature rises.
Medical Printing
Doctors in northwest China's Shaanxi Province performed a successful and rare tracheal operation using 4D printing technology. Doctors inserted a tubular tracheal stent into the patient to keep her airway open. For the production of the stent, the biomaterial polycaprolactone was used, which dissolves over time - biodegradation in the human body occurs slowly, about 3 years. Doctors pre-determined the dissolution time of the printed stent, and the patient will not need to undergo another operation to remove it.
A similar incident occurred in the USA. Garrett Peterson was born with a malformation of the bronchi - bronchomalacia, when the cartilage is not hard enough. Bronchial ventilation was compromised, and the child spent his entire life in a hospital at the University of Utah on a life-sustaining ventilator.
Meanwhile, the University of Michigan developed a 3D printed splint that could break down inside the body over time without any consequences, but could still keep the airways open for two to three years - long enough to repair bronchial cartilage.
After creating the virtual model, the printer prints layers of polycaprolactone in the shape of a specific trachea. Although the process of creating custom stents may seem difficult, it only takes one day.
It is likely that 4D biomaterials will sooner or later go far beyond respiratory diseases. The problems of face reconstruction and ear restoration are already being studied.
* * *
In general, most scientists working in the field of four-dimensional printing predict an explosive growth of objects and materials for four-dimensional printing in the next five years.
Using 3D technology in the film industry using the example of MD Technology
The MD Technology LLC company develops and implements individual sound, video and lighting solutions and has been a leading player in the cinema, sound and lighting equipment market in Russia for more than fifteen years. Among her clients are the largest cinema chains in Russia, such as Cinema Park, Kinomax, KARO, Luxor, Cinema Star, and others, concert halls, hotels, sports clubs, restaurants and nightclubs, conference rooms. MD Technology can provide both a quiet background sound that creates a cozy atmosphere, and a powerful concert sound. And here it was not without the help of additive technologies or 3D printing. We asked in more detail about the production process of the company's technical director, Vladimir Makarov.
One of the company's largest projects to date is the work on the technical equipment of the renovated Khudozhestvenny cinema. We had objects comparable in complexity, for example, the Universal Hall of the Reception House of the Russian Federation on Sparrow Hills and a number of other objects. But "Artistic" is perhaps our most ambitious project. We have equipped the cinema with the world's best film projection, sound and light concert equipment, as it is supposed to host festivals, concerts, retrospectives, educational events, etc. The design was developed by German and Spanish designers. Due to the exceptional historical value of the object, a lot of contractors worked on its restoration and equipping: the authors and co-authors of the project, the authors of the restoration project, the authors of the design project, etc. The project was supervised by the Moscow Department of Cultural Heritage.
We immediately realized that the standard approach to creating Dolby Atmos halls does not apply here. Each step required coordination with restorers and designers. I even had to fly to London, to the central office of Dolby, to talk with the company's chief specialist, James Seddon. He dedicated a whole day to us, which is truly incredible considering his busy schedule. The equipment had to be built into the structure of the facility. The interior design provided for extremely strict requirements for the design of the walls, on which no extraneous elements were to hang. Therefore, in order to hide acoustics in the already existing niches in the walls, we had to customize each speaker. You will not believe, but I was so immersed in the search for a solution to the problem that I had a dream about it. We drew the radiation area of the speakers in 3D and adjusted the configuration of each speaker based on its location and directionality. Then we scanned standard high-frequency horns using a 3D scanner, calculated and 3D-drawn the horns we needed for each channel in terms of parameters, and printed them on a 3D printer! So we managed to achieve accurate directional radiation of high frequencies in the directions that were required. Due to the pandemic, we had to learn 3D printing technology on our own, but we succeeded. In 26 speakers hidden in the walls, we installed our custom horns in 20 of them - without this, we would not have been able to comply with Dolby's stringent requirements and provide an ideal sound “picture”.
In addition to the historical large hall, we have developed about ten different configuration options for the second, third and Chamber halls of the Artistic Hall. By analogy with a large hall, we customized the acoustics, designed and manufactured 59 high-frequency horns.
Speaker horns are not the only thing we 3D printed. There were a few other little things. For example, a standard Legrand hatch in the floor did not allow placing all the necessary connectors in it, and we designed and implemented using 3D printing our original “stuffing” for these hatches, of which there are 20 pieces in the main hall. Such hatches are used for various purposes, including for connecting concert sound and lighting equipment.
The step-by-step process of creating an original custom horn on a Raise3D 3D printer is as follows:
1. 3D scan of the original horn
In the photo: the process of 3D scanning of the original JBL AC25 horn. The original horn is coated with a special anti-reflective coating.
2. Converting a 3D scanned image into an AutoCAD "point cloud".
But since the point cloud is not actually subject to 3D editing, it was necessary to create a horn profile edited in AutoCAD into the “3D body” object using the profile of the original horn
In the screenshot, the creation of a profile of a 3D horn model in AutoCAD
3. Tilt and turn the horn 3D model at the required angle and align with the site. Further, from the combined elements of the platform and the horn, three ready-made models were obtained with the horn tilted relative to the AC plane at 10˚, 15 and 20˚.
In the screenshot, the creation of the final 3D models of horns with an inclination of 10˚, 15 and 20˚ in AutoCAD
4. Converting ready-made 3D drawings of horn models to STL format and slicing models (preparing 3D printing by creating a working G-code print file for a 3D printer)
Screenshot of slicing a 3D model of a 20˚ horn.
5. 3D Printing of ABS Prototypes
In the photo: Printing a 10˚ horn on a Raise3D Pro 2 3D printer
6. 3D printing of the finished batch with processing (grinding, priming, painting) of finished models.
The photo is not a complete edition. Below is a photo of the original horn
In the photo: from left to right: the original horn, 20˚, 15˚ and 10˚
Photo: left to right: original horn, 10˚, 15˚ and 20˚
In the photo: from left to right: "ready" 15˚ horn in AC
In the photo: from left to right: "ready" 15˚ horn in AC
Photo: Printing horns for JBL AC18 and AC28
* Cinema "Khudozhestvenny" Moscow Cinema , located at Arbat Square .
Learn more