Building a 3d printer
Should You Build Your Own 3D Printer? Worth It or Not? – 3D Printerly
3D printing has the nature of doing things yourself, but how far can that really stretch? Some people wonder whether they should buy a 3D printer kit, or just build one from scratch themselves.
If you don’t have prior experience, you should avoid building a 3D printer from scratch because it could get tricky, so I wouldn’t recommend it for beginners. For the people who are experienced, and like projects and exciting challenges, however, it can be a great idea to build a 3D printer.
This article will take a close look at the pros and cons of each possible pathway, so continue reading for a highly detailed explanation on this subject.
Can You Make/Build a 3D Printer at Home?
It is definitely possible to make or build a 3D printer from home, as long as you have all the relevant parts, tools and the guidance on how to do it properly. The process isn’t so easy, especially for beginners, so you need to closely follow a tutorial or try to gain more experience with a DIY 3D printer kit.
Putting together the frame itself isn’t too difficult to do because they are just metal aluminum extrusions that need a few screws in them. The difficult part is getting the perfect alignment, fixing together the hotend, extruder, fans, and other smaller parts properly.
There are great tutorials out there that can guide you on getting each step correct, so you’ll need to take your time and really understand the process. I’d definitely watch the full video a few times before starting the project so you know what to expect.
Many people have completed the task of building their own 3D printer at home, even beginners, so it’s more than possible, though you are likely to run into some kind of troubles along the way.
Having a good idea on how 3D printers work is essential in being successful in this project. It’s a great project for many out there, though it can get a little complicated when learning about the inner details of the process.
There are many things to learn so it’s quite a steep learning curve, which I experienced my self, but once you get there it’s very worth it.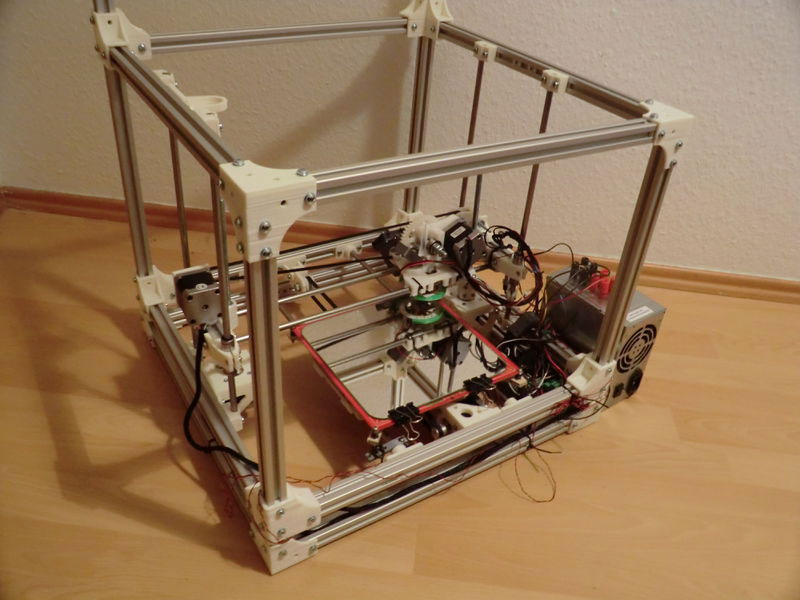
In addition to that, as you’re building a 3D printer, you’re also becoming continuously aware of possible modifications and how you could make your printer even better with custom parts.
There are essentially two ways to build a 3D printer at home:
- Build one from scratch
- Build a DIY 3D printer kit that can be bought online
The latter is highly recommended for people who have never owned a 3D printer before. This will give you a great start, and a bit of experience so you’re nicely prepared whenever you want to build your own printer from zero.
In addition, the task at hand could turn out to be very fun as well if you’re that type of person that likes a DIY challenge. People have found encouragement in difficult challenges and have worked hard to build their own 3D printers without buying any kits.
It makes the final product all the more rewarding.
There are many different kinds of 3D printers out there, so to begin in the right direction, you’ll have to do some thinking and map your plan out first.
Why should you do this? Because there are several variations in the four following factors that make up a 3D printer:
- Size of the printer
- Printer type (Cartesian or Delta if we’re talking about FDM 3D printers)
- Extrusion type
- Either a Single or Dual extruder
Please note that properly deciding on this will shape the experience of your 3D printer. Think critically about what you’re going to print with this self-made 3D printer and then act accordingly.
Size of the 3D Printer
The size of the 3D printer matters according to the use case, the budget, and the spare room of your workspace. Small-sized 3D printers cost less, keep the footprint to a minimal level, and are optimal for rapid prototyping.
On the same side, a big 3D printer with a large print bed may be the one for you if you intend on making sizeable and huge prints with it, especially projects like helmets, body suits, or big ornaments.
Type of 3D Printer
After that, then there’s the question of building either a Cartesian or a Delta-style 3D printer.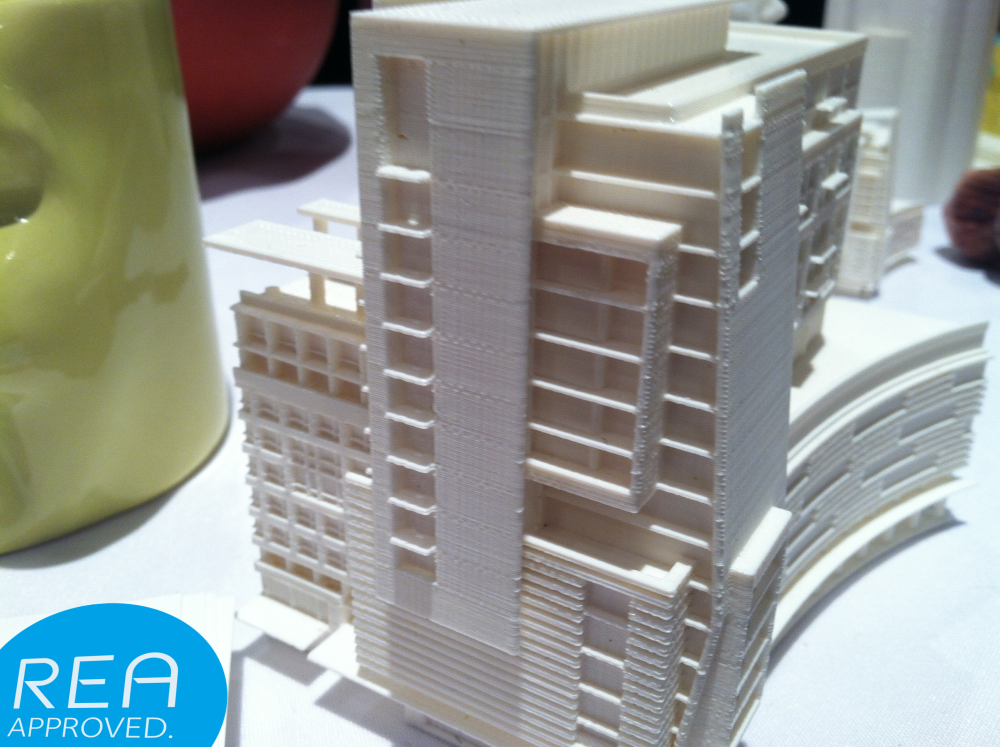 Both of these options have their own pros and cons.
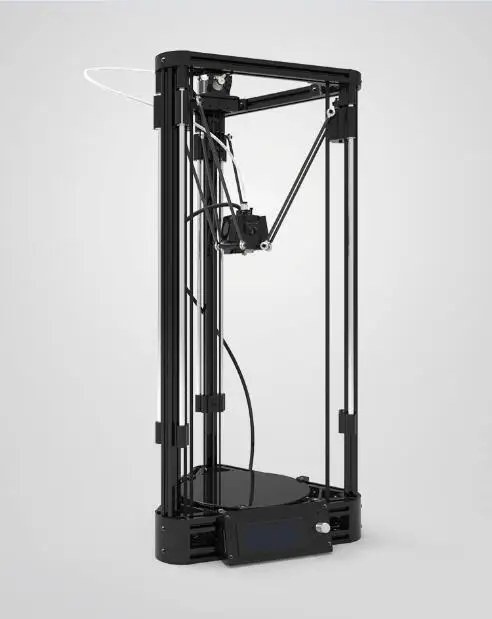
Delta 3D printers may not be the most precise type of printers out there, but they’re definitely the fastest. Go for building one of these if rapid prototyping with a room for less detail works for you. They do tend to have more complications I hear.
On the other hand, Cartesian-style 3D printers boast a far wider community, have greater part availability, and are also much more precise than their Delta counterparts.
If you want more information about these two types of 3D printers, you check out my article Delta Vs Cartesian 3D Printer – Which Should I Buy? Pros & Cons.
Type of Extrusion
Next, you’ll have to decide between a Direct Drive or Bowden-style extrusion system. This is also another important factor that you’ll have to look out for.
Bowden setups offer more speed, but aren’t quite up to the task when it comes to flexible filaments like TPU and TPE, though in recent times, we have definitely seen some improvements in their ability to print them.
A Direct Drive extrusion system might be heavy and may print slowly, but there’s flexibility in printing materials and lesser print-related issues like stringing and oozing.
An article I wrote going over this exact topic is the Bowden Feed Vs Direct Drive Extruder – A Quick Comparison article which goes into more detail.
Single or Dual Extruder
Lastly, you have either a dual extruder 3D printer or simply a single extruder machine to choose between. With two extruders, you can change filaments conveniently and print using two colors.
It really expands and opens up your limitations, though you can imagine it can be a little more challenging to put together. If you are a starter, it’s probably best to go that single extruder route.
On the other hand, the single extruder 3D printer is a lot easier to maintain and is going to have less issues in the long-run to deal with. Check out my article talking about both types of extruders – Single Vs Dual Extruder 3D Printer – Which One to Choose?
As 3D printing is an enormous field, and building a 3D printer yourself is very challenging, in-depth research is a must.
So once you’ve got all that penned down somewhere, your next step is equally crucial – getting all parts and sorting them out together.
For reference, the following is a comprehensive video that shows you how it’s done from A to Z, including what parts to choose, and what type of a 3D printer to build.
Building a DIY 3D Printer Kit Vs Building From Scratch – Pros & Cons
As there are two different options for building a 3D printer, let’s get into the pros and cons of both to see what can be our takeaway here.
Advantages & Disadvantages of Building a DIY 3D Printer Kit
Pros
- If you’re thinking of scratch-building a 3D printer, a DIY kit can be a great way to start first.

- Considering the ample learning curve, DIY kits can make you experienced and detail you with more information in the vast world of 3D printing.
- 3D printer DIY kits are less expensive than fully-assembled printers.
- It’s much less time-consuming than building a 3D printer from scratch.
- With famous 3D printing manufacturers, you’ve got vast communities to help you on your DIY journey.
- 3D printer kits usually come with an instruction manual to help you nail assembly.
Cons
- If compared to a fully-assembled 3D printer, you need to have some basic knowledge of putting parts together so there’s definitely effort and knowledge required here.
- You also have to put in more hours significantly versus a pre-assembled 3D printer.
- The complications involved might lead you to frustration and giving up half-way if you’re not up for it.
- Without buying more parts, you cannot customize your 3D printer as per your choice if you opt for a DIY kit.

- In terms of software upgrades and configuration, some 3D printer kits may have limitations.
- When put toe-to-toe against a printer built from scratch, you’re not going to get flexibility in terms of design and other modifications.
Advantages & Disadvantages of Building A 3D Printer From Scratch
Pros
- When scratch-building, you get to learn your machine inside out.
- The additional teachings of this method will allow you to make customizations of your own.
- This method might be cheaper if compared to assembled 3D printers or even 3D printer kits.
- If done and understood right, building from scratch can get quite fun and entertaining.
- You get more flexibility in choosing designs and can also implement much better safety protocols if building from scratch
- The end result, after all that hard work and endeavor, is genuinely satisfying.
- As you put your whole 3D printer together, you can also easily disassemble it.
 This will help you troubleshoot your machine with more efficiency.
Cons
- Building from scratch is not recommended if it’s your first time with a 3D printer.
- There are a lot of complications involved and without prior experience, mentally prepare yourself for an immense learning curve and lots of difficulties.
- Contrarily, you might end up paying a lot more than an assembled printer or a 3D printer kit if and only if you don’t have a basic understanding of how these machines work.
- When building from scratch, you’ll need all the help you can get online. Acknowledge the fact that some questions will have answers and many will not.
However, I’d like to address here about successful scratch-building is that not only will it heighten your sense for 3D printing and printers, but it will also develop your making abilities.
This will happen as you begin to understand the operation of your 3D printer. Subsequently, you will start to become constantly aware of factors that attribute to good quality prints.
You will then be able to better optimize your models to increase your print quality. Building from scratch may have its downsides, but it also has a multitude of benefits undeniably.
How Much Does it Cost to Build a 3D Printer?
From what I’ve read and researched, it turns out that you can build your very own 3D printer for somewhere in the $100-200 range.
Of course, better quality products will cost more and if you want better modifications, you’ll have to pay extra as well.
But as far as a decent, working 3D printer is concerned, you can cut the costs of the traditional approaches and get yourself your own custom-built printer very cheap.
Then again, time and effort weighs in, and this is something that might not appeal to many people at all and come off as a significant downside.
You need to get the following basic parts in order to build, well, a basic 3D printer that functions okay. Next to their names are their approximate prices as well so you could have an idea.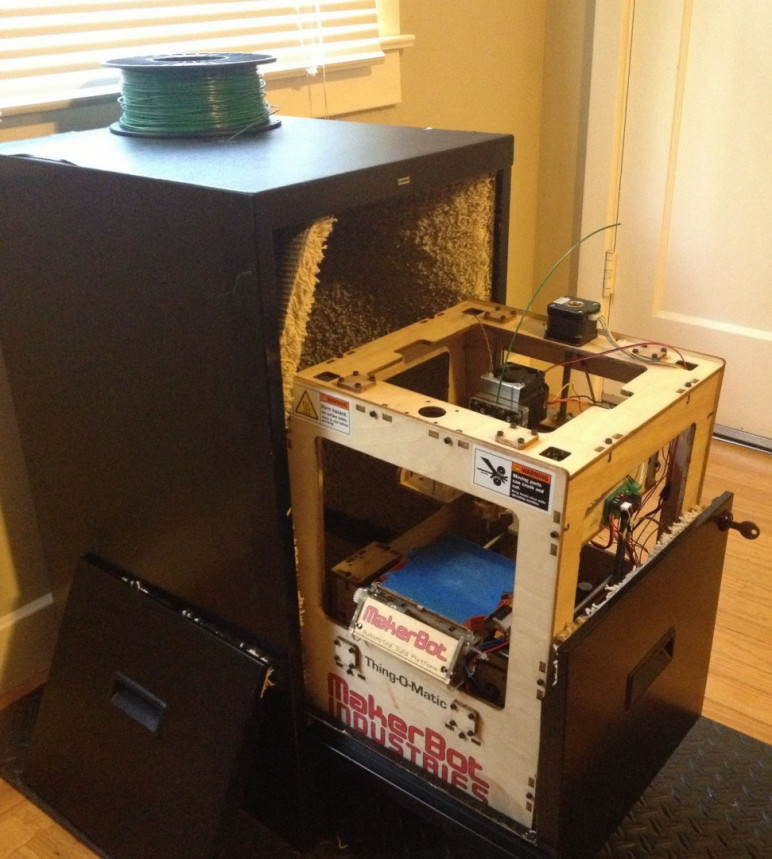
- Stepper Motors ($9)
- Bowden or Direct Drive Extrusion System ($24)
- Printer Frame (varies purely)
- Power Supply ($20)
- LCD Display Screen ($10-$20)
- A Control Board ($22)
- A Build Platform ($20)
- Wiring Components i.e. Conductors and Insulators ($10)
- Limit Switches ($5-$10)
- Stepper Drivers ($10)
- Linear Rails ($10)
- Linear Rods ($5)
- Linear Carriages ($5)
- Belts ($5)
- Threaded Rods ($2-$3)
- End Stops ($2-$3)
If you add all of that minus the cost of the printer frame, you get a total sum of something under $160. The next step relates to software – a fundamental component of a 3D printer.
It’s the software that controls your machine, and nothing else. Without it, your 3D printer is good as collecting dust.
Next up is a slicer that slices your design file and makes it understandable for the 3D printer – typically in the form of G-code.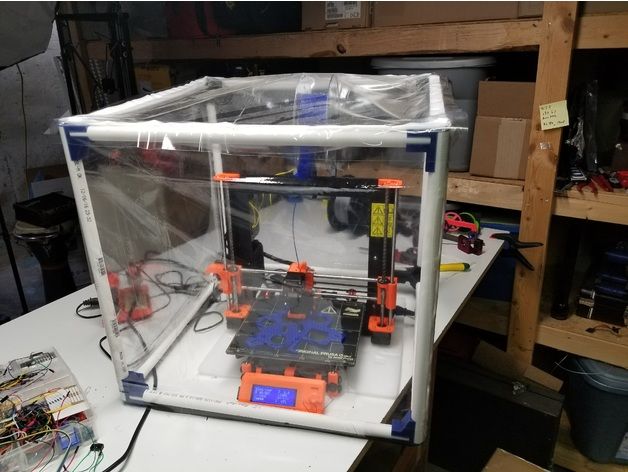
Moreover, the implementation of a slicer is followed by firmware – both of which can be commonly found at no additional expense.
So that’s that. Scratch-building isn’t going to cost you a lot, given that you’re taking your steps in the right direction. What it’s really going to cost you is time, and this decision, therefore, ultimately boils down on you.
Is It Cheaper to Build Your Own 3D Printer?
Technically speaking, yes. It’s definitely much cheaper to build your own 3D printer from scratch when compared to purchasing an assembled 3D printer or a DIY 3D printer kit.
Purchasing 3D printer parts as briefly described above aren’t very expensive. As a matter of fact, the sum of the cost is going to cost you lesser than a full-fledged 3D printer.
Now, if we look at the other option for building a 3D printer, we have the DIY kit.
DIY kits of 3D printers are relatively inexpensive because there’s a degree of mechanical effort allotted to them.
Some aren’t just cut out for doing anything related to building, let alone making a 3D printer from scratch or assembling a DIY kit.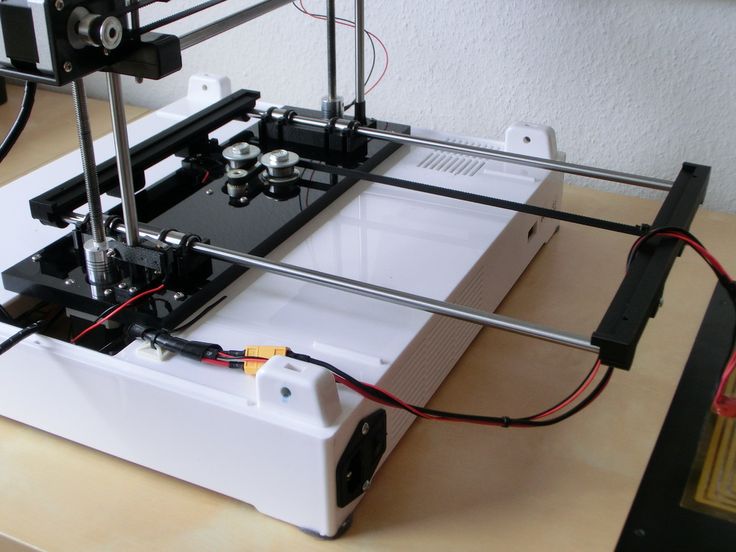
This is why they’d pay good money to get a fully-assembled 3D printer that requires no assembly. Manufactureres, therefore, sell DIY 3D printer kits and assembled ones alike.
If, for instance, we look at the DIY kit of the Prusa i3 MK3S and the assembled edition side by side, there’s a $150 difference between the two. See for yourself here.
Fully-assembled 3D printers or partially assembled ones are priced higher because they’re ready to print as soon as you take them out of the box.
When you factor in the fact that you can always replace your 3D printer parts on your custom built 3D printer, you’re actually saving a lot of money while getting much higher quality as a result.
However, you can also go very wrong with scratch-building, which in turn, will cause you to spend more money than buying a decent 3D printer.
This is why it’s imperative that you stay on the right track when building from scratch. Otherwise, don’t expect to cut down the total cost, rather watch out for dishing out even more.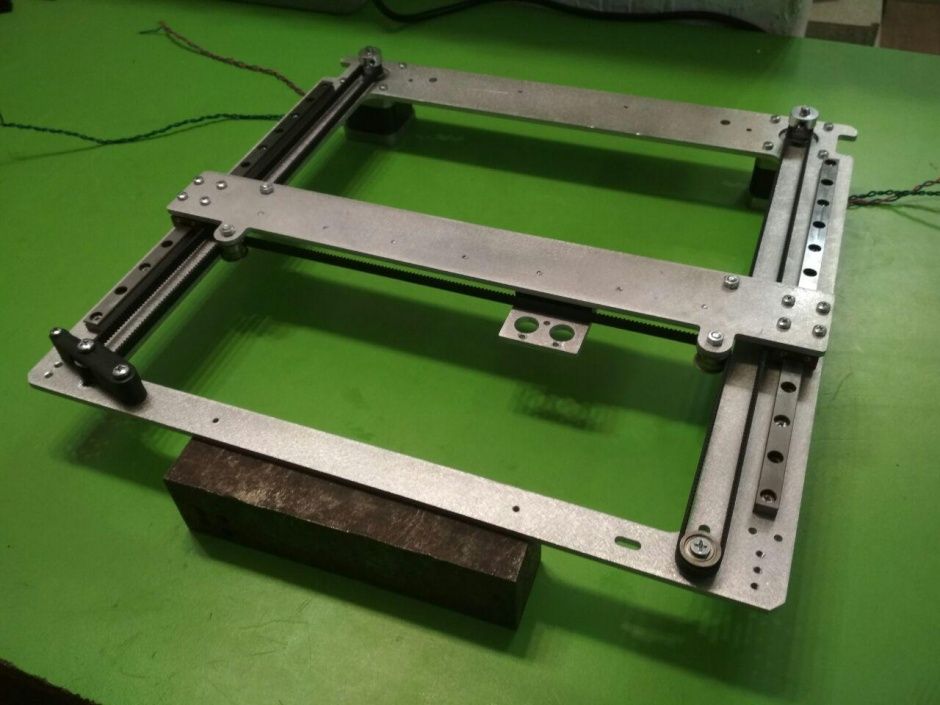
In conclusion, building your own 3D printer can get cheaper, but beware of quality and time-related risks.
How Cheap Can You Build a 3D Printer?
I was searching around and to my surprise, an article on Instructables claims that one user built a fully functional 3D printer for just $87, which is almost hard to believe.
Well, we suggest you give it a good read because the article also explains how you can build one for yourself in the same manner.
A point to note – prices of 3D printer parts may vary from country to country. The writer said that it had cost him the equivalent to $87 in his region.
So I think the bar of how cheap can you build a 3D printer has been set pretty high.
Do embrace that the user mentioned it took him more than 1 year to fine-tune, design, and build this 3D printer, though he has made it a lot shorter for everyone that is willing to follow the plan.
Anyways, coming back to the topic, given a serious amount of effort, experience, and energy, you can create a good 3D printer for around $100.
Go ahead and probe Amazon for good quality parts that also aren’t costly. To give you a headstart, I’ve gathered the following for you.
- Creality Glass Bed
- 360W Switching Power Supply
- SIMAX3D Bowden Extruder
- SIMAX3D 17 NEMA Stepper Motors
Is It Hard to Build a DIY 3D Printer?
For first-timers, building a 3D printer can get very frustrating, but if you’ve been in this business for some time and already have a decent amount of experience, you might not face as many problems as beginners.
That said, 3D printer kits from reputable manufacturers such as Creality, QIDI Tech, and Prusa come with truly precise and well-explained instruction manuals so even the most newbies of them all can proceed with the assembly easily.
However, when we talk about scratch-building, there are no manuals, no nothing. It’s just you, your heap of 3D printer parts, and the internet that might or might not have all the answers for your queries.
Considering all that, it again depends on your previous experiences in the 3D printing environment. If this magical realm has seasoned you enough, building a DIY 3D printer might not seem that hard at all.
But if it’s your first time, buying a quality machine upfront is probably your best bet. Some DIY 3D printer kits demand minimal work in assembly, while some may require more effort but have carefully detailed instructions.
You see, it’s not just about sorting parts together when building from scratch. You have to spend a decent amount of time planning beforehand on how you want your printer to turn out.
From what I’ve read, many people fail at this initial phase of building a 3D printer and often ending up mismatching components. This is why thorough and concise research is your best friend for this cause.
How Long Does it Take to Build a 3D Printer?
If we talk about DIY 3D printer kits, typical assembly time takes about 3-6 hours, but it’s possible that it could be done in less.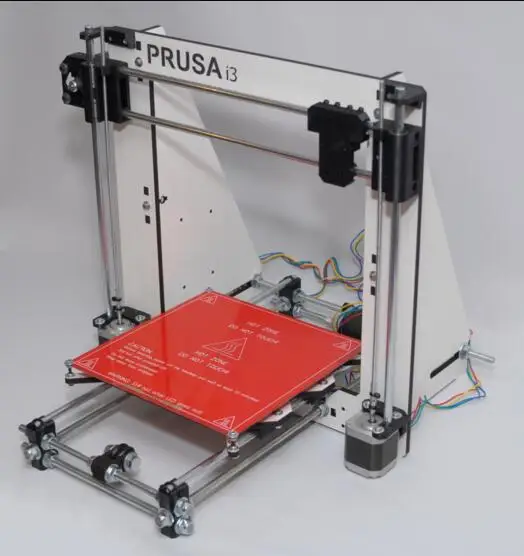 For scratch-building, the whole process can take days, and even months.
The fact of the matter is the average assembly time varies from one DIY kit to the other. Additionally, it also depends on the standard of the instruction manual that has been given along with the kit.
If it’s good quality, you’ll be quickly able to get through your DIY kit. Quite fortunately, before you make the purchase, instruction manuals can be checked out. Keep your eyes open for them.
On the other hand, building from scratch won’t ask much for money, but it’s going to consume your time, all of it.
Deciding on everything, searching for parts, assembling the 3D printer, and calibrating it to near-perfection – one can easily see the amount of struggle here.
But then again, if you know your stuff, have spent your hours tweaking and adjusting, and have immersed yourself in the practicality of 3D printing, scratch-building might be a lot easier than you think.
Now that you’ve read the facts and figures, we leave it up to you to decide what’s it going to be. The DIY kit or building from scratch? Whichever decision you choose whether to build a 3D printer from scratch or get a a DIY kit, I wish you best of luck either way
How to Build a 3D Printer From Scratch
If you are reading this article that means that you’ve probably decided to join the community of 3d printing enthusiasts and find out more about 3d printers, or maybe you have already got some experience in it and are ready to try to create your own 3d printer from scratch.
In this article you will find general understanding how 3D printers can be built as well as links to really useful resources where you can find more detailed information with step-by-step description.
Currently there is a big variety of 3d printers in the Internet that already assembled and are ready to print right after you unpack them from a box, of course you also need to buy a 3d printer filament for it. Do not forget that not all 3d printers can use the same filament types, so please read the instruction before you purchase it.
But for some people who love to make something new with their own hands can be more interesting to build their own 3d printer from scratch. Based on our research the 3D printing community is filled with many enthusiastic people so called DIY’ers (Do It Yourself’ers), who are fascinated with building 3d printers literally almost from scratch.
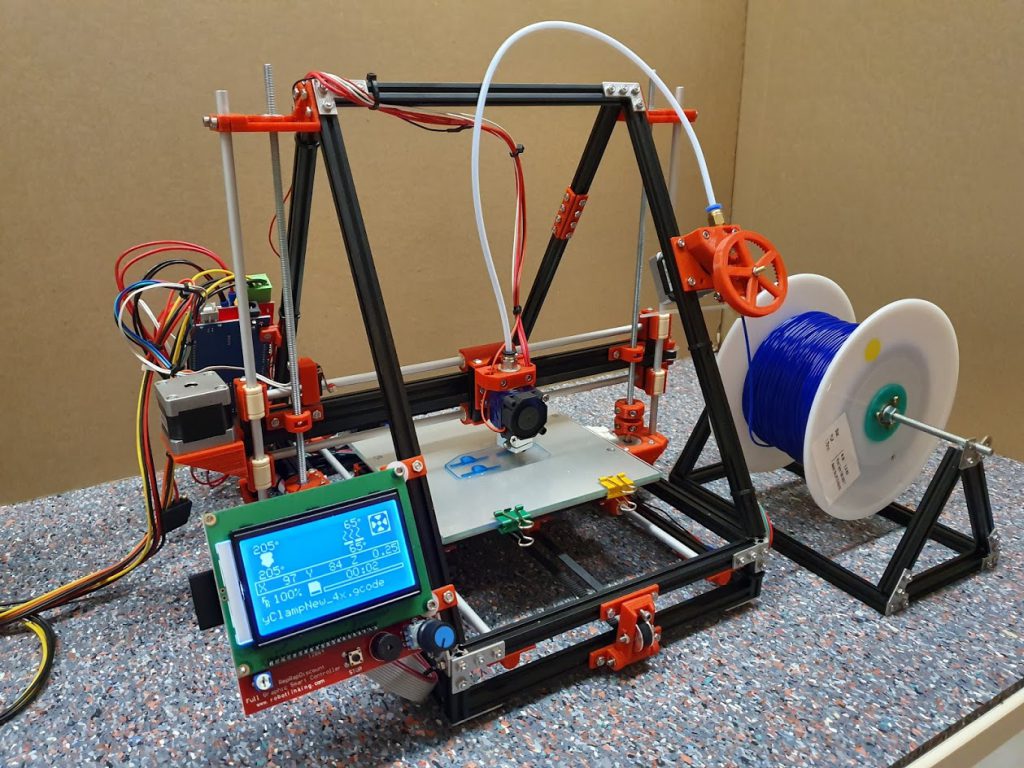
Good example of it is RepRap movement. RepRap is short for a Replicating Rapid-prototyper. In other words it is the self-replicating 3d printer. In fact most of today’s top consumer level 3D printers (picture above) are originated in one way or another from RepRap.
You can find a lot of examples on how to build a 3d printer from scratch on RepRap website, but we also want to describe some of more essential steps in order to give an overall understanding of what to expect if you really decide to make your own 3d printer.
The first step is to find and buy 3d printer DIY kit. Kits usually contain most of parts needed to assemble the printer and can be divided into two main types:
Scratch Built 3D Printer – This 3d printer DIY kit is for those who prefer to build thing from scratch, or in other words go to DIY RepRap route. Apart from some essential advantages this approach has also its disadvantages. In theory it can save you some money and since you build it from scratch you will know every nut and bolt in it by the time you can use it and successfully print your first object. Main disadvantage of this method is time. Literally it will take a lot of time to deal with all these hundreds of bolts, wires, belts and much other stuff. In the end you still need to select and purchase or build a controller board, but it depends on your skills level.
Kit Built 3D Printer – This type of kit is good if you want to save some money and at the same time not to deal with all challenges described in the 1st kit type. Many manufactures sell such kits with “easy-to-assemble” instructions included. I doubt that it will be as easy as assemble a chair from IKEA, so you still have to be mechanically inclined and able to understand basic geometry. Some of such kits contain not all parts and you may need to buy something in addition.
The next step will be to determine the design for your 3D printer. In my humble opinion most of DIY 3D printers have not very breathtaking and futuristic design in comparison with MakerBot and other brands. But it is also a matter of taste, for some people the design is not very important.
Once you have got your 3d print DIY kit and chosen the design you could go ahead and start the most fascinating and time consuming part – build your own 3d printer. Be prepared for sleepless nights and a lot of fun. Maybe you will make up something new and present your findings to RepRap community.
When the hardware part of the 3d printer is ready you also need to add a software component to it. It basically does the following things: allows you to view and alter 3d graphical objects, as well as converts the 3d images into instructions that 3d printer can understand.
Finally you can 3d print your first object! If you do not have anything to print, you can find a big variety of objects on specialized marketplaces such as Shapeways, Thingiverse and others. Before printing make sure that the object you want to 3d print has the right size and fit on the printer frame.
At the end there is a list of some links where you can find more information about how to build your own 3d printer from scratch:
- RepRap options
- 3D Printer DIY: How to Build Your Own 3D Printer from Scratch
- 3D Printing: Build Your Own 3D Printer and Print Your Own 3D Objects
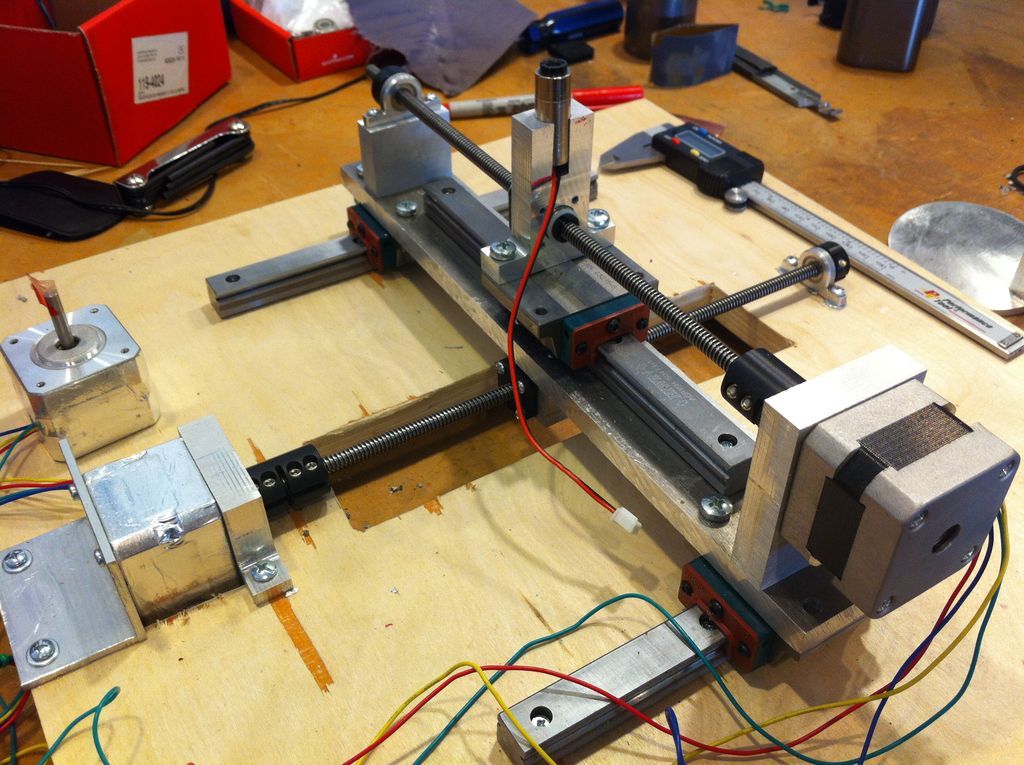
- Arduino Controlled CNC / 3D Printer Hybrid
- El34 World – 3D Printer Build using 1 inch T-Slot extrusions
- CNET 3D Printer Build Week
Also watch a video from Ben Heck in which he answers on some 3d printing related questions.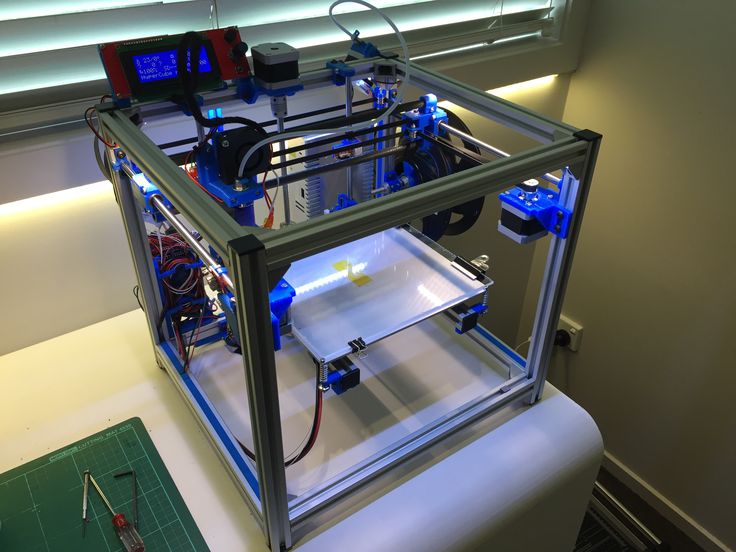
Related Articles:
- What is 3d printing – 3D printing technologies overview
- What is 3D Printing?
- History of 3D Printing
- Direct and Binder 3D Printing techniques
- Photopolymerization and Sintering
- 3D Printing Process
- 3D printing revolution
- 3D Printing Materials
- How to choose a right 3D printer filament type
- 3D Printer Filament Types Overview
- Types of 3D printers or 3D printing technologies overview
- How to find and buy a right 3D printer
- History of 3D printing in one picture
- Places to download 3D printer files and files formats overview
- 3D Printing Services Overview
- You Should Know These Important 3D Printing Concepts
Building a home 3D printer with your own hands: recommendations from personal experience
3D printing and assembly of 3D printers is my hobby and passion. Here I will not share detailed diagrams and drawings, there are more than enough of them on specialized resources. The main goal of this material is to tell you where to start, where to dig and how to avoid mistakes in the process of assembling a home 3D printer. Perhaps one of the readers will be inspired by applied engineering achievements.
Why do you need a 3D printer? Use cases
I first came across the idea of 3D printing back in the 90s when I was watching the Star Trek series. I remember how impressed I was by the moment when the heroes of the cult series printed the things they needed during their journey right on board their starship. They printed anything: from shoes to tools. I thought it would be great someday to have such a thing too. Then it all seemed something incredible. Outside the window are the gloomy 90s, and the Nokia with a monochrome screen was the pinnacle of progress, accessible only to a select few.
Years passed, everything changed. Around 2010, the first working models of 3D printers began to appear on sale. Yesterday's fantasy has become a reality. However, the cost of such solutions, to put it mildly, discouraged. But the IT industry would not be itself without an inquisitive community, where there is an active exchange of knowledge and experience and who just let them dig into the brains and giblets of new hardware and software. So, drawings and diagrams of printers began to surface more and more often on the Web. Today, the most informative and voluminous resource on the topic of assembling 3D printers is RepRap - this is a huge knowledge base that contains detailed guides for creating a wide variety of models of these machines.
I assembled the first printer about five years ago. My personal motivation to build my own device is quite prosaic and based on several factors. Firstly, there was an opportunity to try to realize the old dream of having your own device, inspired by a fantasy series. The second factor is that sometimes it was necessary to repair some household items (for example, a baby stroller, car elements, household appliances and other small things), but the necessary parts could not be found. Well, the third aspect of the application is "near-working". On the printer, I make cases for various IoT devices that I assemble at home.
Agree, it is better to place your device based on Raspberry Pi or Arduino in an aesthetically pleasing "body", which is not a shame to put in an apartment or take to the office, than to organize components, for example, in a plastic bowl for food. And yes, you can print parts to build other printers :)
There are a lot of scenarios for using 3D printers. I think everyone can find something of their own.
A complex part in terms of drawing that I printed on my printer. Yes, it's just a figurine, but it has many small elements
Ready solution vs custom assembly
When a technology has been tested, its value in the market decreases markedly. The same thing happened in the world of 3D printers. If earlier a ready-made solution cost simply sky-high money, then today acquiring such a machine is more humane for the wallet, but nevertheless not the most affordable for an enthusiast. There are a number of solutions already assembled and ready for home use on the market, their price range ranges from $500-700 (not the best options) to infinity (adequate solutions start from a price tag of about $1000). Yes, there are options for $150, but we, for understandable, I hope, reasons, will not dwell on them.
In short, there are three cases to consider a finished assembly:
- when you plan to print not much and rarely;
- when print accuracy is critical;
- you need to print molds for mass production of parts.
There are several obvious advantages to self-assembly. The first and most important is cost. Buying all the necessary components will cost you a maximum of a couple of hundred dollars. In return, you will receive a complete 3D printing solution with the quality of manufactured products acceptable for domestic needs. The second advantage is that by assembling the printer yourself, you will understand the principles of its design and operation. Believe me, this knowledge will be useful to you during the operation of even an expensive ready-made solution - any 3D printer needs to be serviced regularly, and it can be difficult to do this without understanding the basics.
The main disadvantage of assembly is the need for a large amount of time. I spent about 150 hours on my first build.
What you need to assemble the printer yourself
The most important thing here is the presence of desire. As for any special skills, then, by and large, in order to assemble your first printer, the ability to solder or write code is not critical. Of course, understanding the basics of radio electronics and basic skills in the field of mechanics (that is, "straight hands") will greatly simplify the task and reduce the amount of time that needs to be spent on assembly.
Also, to start we need a mandatory set of parts:
- Extruder is the element that is directly responsible for printing, the print head.
 There are many options on the market, but for a budget build, I recommend the MK8. Of the minuses: it will not be possible to print with plastics that require high temperatures, there is noticeable overheating during intensive work, which can damage the element. If the budget allows, then you can look at MK10 - all the minuses are taken into account there.
 - Processor board. The familiar Arduino Mega is well suited. I didn't notice any downsides to this solution, but you can spend a couple of dollars more and get something more powerful, with a reserve for the future.
- Control board. I'm using RAMPS 1.4 which works great with the Arduino Mega. A more expensive but more reliable board is Shield, which already combines a processor board and a control board. In modern realities, I recommend paying attention to it. In addition to it, you need to purchase at least 5 microstep stepper motor controllers, for example - A4988. And it's better to have a couple of these in stock for replacement.

- Heated table. This is the part where the printed element will be located. Heating is necessary due to the fact that most plastics will not adhere to a cold surface. For example, for printing with PLA plastic, the required surface temperature of the table is 60-80°C, for ABS - 110-130°C, and for polycarbonate it will be even higher
There are also two options for choosing a table - cheaper and more expensive. Cheaper options are essentially printed circuit boards with preheated wiring. To operate on this type of table, you will need to put borosilicate glass, which will scratch and crack during operation. Therefore, the best solution is an aluminum table. - Stepper motors. Most models, including the i2 and i3, use NEMA 17 size motors, two for the Z axis and one each for the X and Y axes. Finished extruders usually come with their own stepper motor. It is better to take powerful motors with a current in the motor winding of 1A or more, so that there is enough power to lift the extruder and print without skipping steps at high speed.
- Basic set of plastic fasteners.
- Belt and gears to drive it.
Examples of elements appearance: 1) MK8 extruder; 2) Arduino processor board; 3) RAMPS control board; 4) motor controllers; 5) aluminum heated table; 6) NEMA 17 stepper motor; 7) a set of plastic fasteners; 8) drive gears; 9) drive belt
This is a list of items to be purchased. Hardcore users can assemble some of them themselves, but for beginners, I strongly recommend purchasing ready-made solutions.
Yes, you will also need various small things (studs, bearings, nuts, bolts, washers ...) to assemble the case. In practice, it turned out that using a standard m8 stud leads to low printing accuracy on the Z axis. I would recommend immediately replacing it with a trapezoid of the same size.
M8 trapezoid stud for Z axis, which will save you a lot of time and nerves. Available for order on all major online platforms
You also need to purchase customized plastic parts for the X axis, such as these from the MendelMax retrofit kit.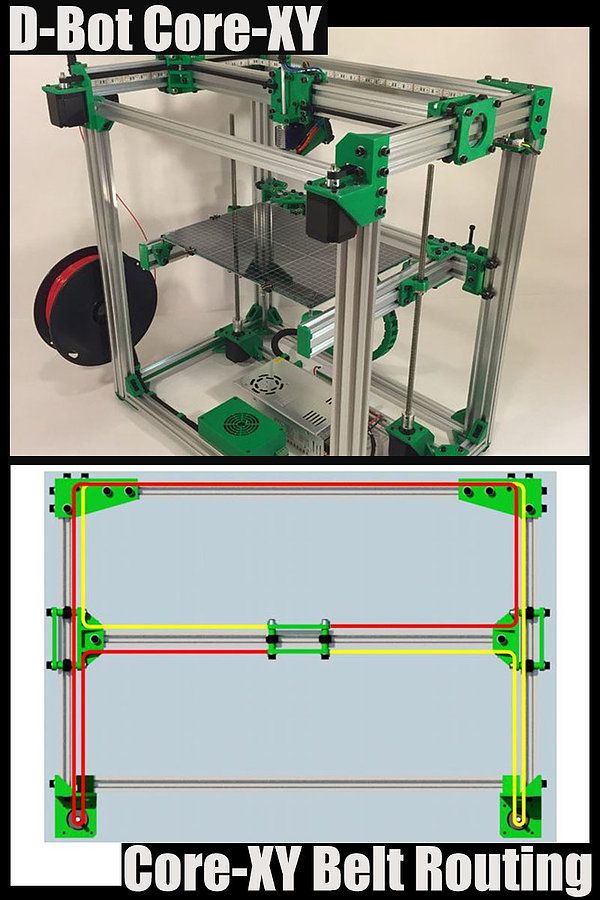
Most parts available at your local hardware store. On RepRap you can find a complete list of necessary little things with all sizes and patterns. The kit you need will depend on the choice of platform (we'll talk about platforms later).
What's the price
Before delving into some aspects of the assembly, let's figure out how much such entertainment will cost for your wallet. Below is a list of parts required for purchase with an average price.
Platform selection
The community has already developed a number of different platforms for assembling printers - the most optimal case designs and the location of the main elements, so you do not have to reinvent the wheel.
i2 and i3 are key platforms for self-assembly printer enclosures. There are also many modifications of them with various improvements, but for beginners, these two classic platforms should be considered, since they do not require special skills and fine-tuning.
Actually, illustration of platforms: 1) i2 platform; 2) i3 platform
On the plus side of i2: it has a more reliable and stable design, although it is a little more difficult to assemble; more opportunities for further customization.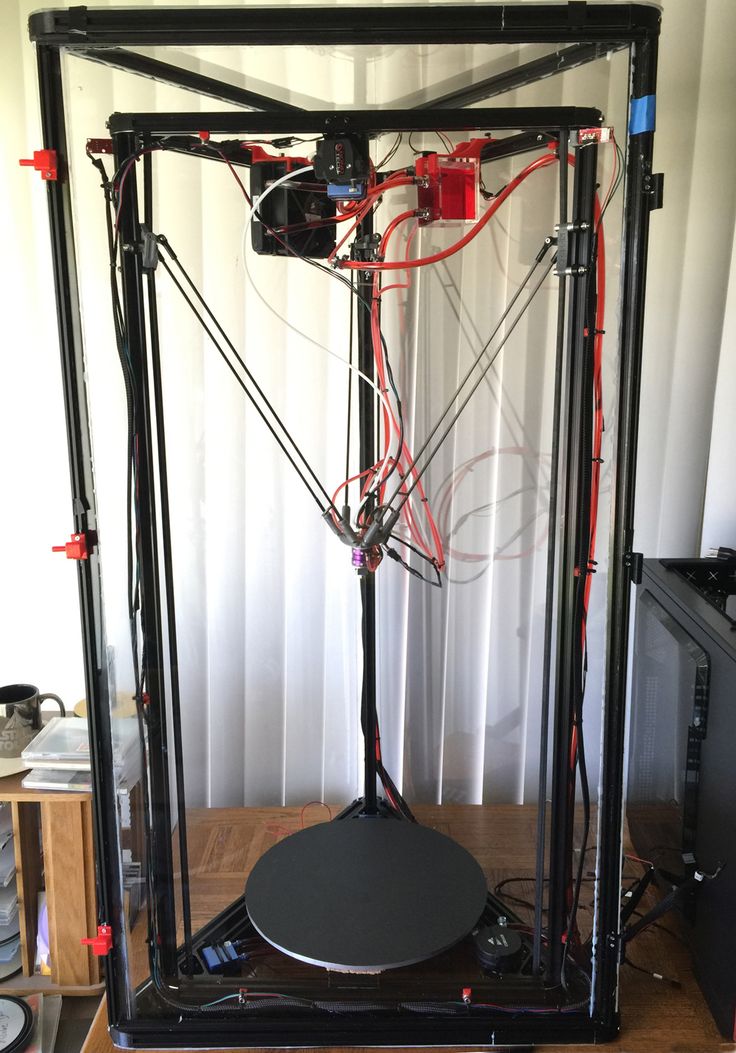
The i3 variant requires more special plastic parts to be purchased separately and has a slow print speed. However, it is easier to assemble and maintain, and has a more aesthetically pleasing appearance. You will have to pay for simplicity with the quality of printed parts - the body has less stability than i2, which can affect print accuracy.
Personally, I started my experiments in assembling printers from the i2 platform. She will be discussed further.
Assembly steps, challenges and improvements
In this block, I will only touch on the key assembly steps using the i2 platform as an example. Full step by step instructions can be found here.
The general scheme of all the main components looks something like this. There is nothing particularly complicated here:
I also recommend adding a display to your design. Yes, you can easily do without this element when performing operations on a PC, but it will be much more convenient to work with the printer this way.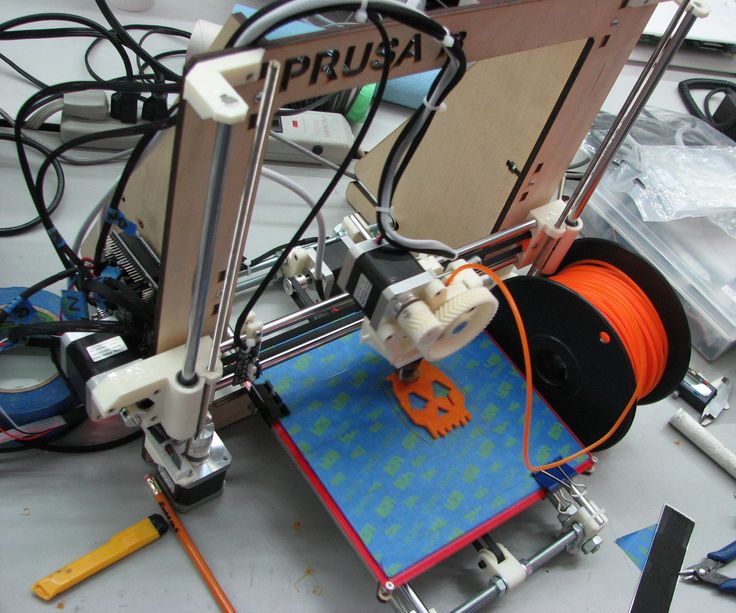
Understanding how all components will be connected, let's move on to the mechanical part, where we have two main elements - a frame and a coordinate machine.
Assembling the frame
Detailed frame assembly instructions are available on RepRap. Of the important nuances - you will need a set of plastic parts (I already talked about this above, but I'd better repeat it), which you can either purchase separately or ask your comrades who already have a 3D printer to print.
The frame of the i2 is quite stable thanks to its trapezoid shape.
This is how the frame looks like with parts already partially installed. For greater rigidity, I reinforced the structure with plywood sheets
Coordinate machine
An extruder is attached to this part. The stepper motors shown in the diagram above are responsible for its movement. After installation, calibration is required along all major axes.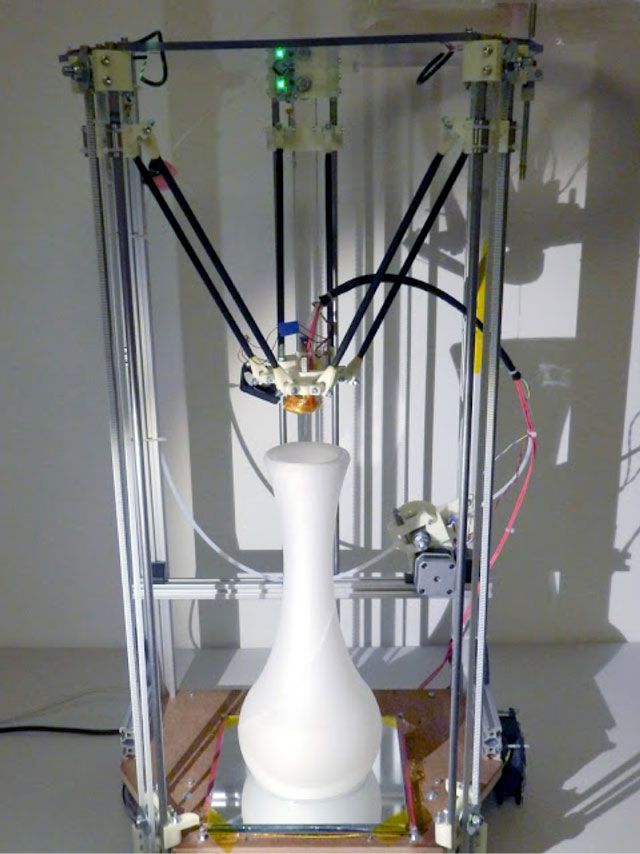
Important - you will need to purchase (or make your own) a carriage for moving the extruder and a mount for the drive belt. Drive belt I recommend GT2.
The carriage printed by the printer from the previous picture after it has been assembled. The part already has LM8UU bearings for guides and belt mount (top)
Calibration and adjustment
So, we completed the assembly process (as I said, it took me 150 hours) - the frame was assembled, the machine was installed. Now another important step is the calibration of this very machine and extruder. Here, too, there are small subtleties.
Setting up the machine
I recommend calibrating the machine with an electronic caliper. Do not be stingy with its purchase - you will save a lot of time and nerves in the process.
The screenshot below shows the correct constants for the Marlin firmware, which must be selected in order to set the correct number of steps per unit of measure. We calculate the coefficient, multiply it, substitute it into the firmware, and then upload it to the board.
Marlin 9 firmware constants0022
For high-quality calibration, I recommend relying on larger numbers in measurements - take not 1-1.5 cm, but about 10. So the error will be more noticeable, and it will become easier to correct it.
Calibrating the extruder
When the frame is assembled, the machine is calibrated, we start setting up the extruder. Here, too, everything is not so simple. The main task of this operation is to correctly adjust the supply of plastic.
If underfeeding, the printed test item will have noticeable gaps, like test die 1. Conversely, the result will look bloated if plastic is overfed (dice 2)
Getting Started Printing
It remains for us to run some CAD or download ready-made .stl, which describe the structure of the printed material. Next, this structure needs to be converted into a set of commands understandable to our printer. For this I use the Slicer program. It also needs to be set up correctly - specify the temperature, the size of the extruder nozzle. After that, the data can be sent to the printer.
Slicer interface
As a raw material for printing, I recommend starting with regular ABS plastic - it is quite strong, products made from it are durable, and it does not require high temperatures to work with. For comfortable printing with ABS plastic, the table must be heated to a temperature of 110-130 ° C, and the extruder nozzle - within 230-260 ° C.
Some important details. Before printing, calibrate the machine along the Z axis. The extruder nozzle should be approximately half a millimeter from the table and ride along it without distortion. For this calibration, a regular sheet of A4 paper inserted between the nozzle and the surface of the heated table is best suited. If the sheet can be moved with little effort, the calibration is correct.
Another thing to keep in mind is the surface treatment of the heated table. Usually, before printing, the surface of the table is covered with something that hot plastic sticks to well. For ABS plastic, this can be, for example, Kapton tape. The disadvantage of adhesive tape is the need to re-glue it after several printing cycles. In addition, you will have to literally tear off the adhering part from it. All this, believe me, takes a lot of time. Therefore, if it is possible to avoid this fuss, it is better to avoid it.
An alternative option that I use instead of scotch tape is to apply several layers of ordinary light beer, followed by heating the table to 80-100 ° C until the surface is completely dry and re-applying 7-12 layers. It is necessary to apply the liquid with a cloth moistened with a drink. Among the advantages of this solution: ABS plastic separates from the table on its own when it cools down to about 50 ° C and is removed without effort, the table does not have to be peeled off, and one bottle of beer will last you for several months (if you use the drink only for technical purposes :)).
After we have collected and configured everything, we can start printing. If you have an LCD screen, then the file can be transferred for printing using a regular SD card.
The first results may have bumps and other artifacts - do not worry, this is a normal process of "grinding" the printer elements, which will end after a few print cycles.
Tips to make life easier (and sometimes save money)
In addition to the small recommendations given in the text above, in this section I will also give a short list of tips that will greatly simplify the operation of a 3D printer and the life of its owner.
- Do not experiment with nozzles. If you plan to immediately print from materials that require high temperatures, then it is better to immediately take the MK10 extruder. On MK8, you can "hang" special nozzles that support high-temperature conditions. But such modifications often cause difficulties and require special experience.
 It is better to avoid this fuss on the shore by simply installing the right extruder for you.
 - Add starter relay for heated table. Improving the power supply system for this important printing part with a starter relay will help solve the known problem of RAMP 1.4 - overheating of the transistors that control the power of the table, which can lead to failure of the board. I made this upgrade after having to throw away a few RAMPS 1.4s.
- Select the correct filament diameter for printing. I recommend using 1.75mm plastic for MK8 and MK10. If we take plastic, for example, 3 mm, then the extruder simply does not have enough strength to push it at an acceptable speed - everything will be printed much longer, and the quality will drop. ABS plastic is ideal for MK8, MK10 will be able to produce products from polycarbonate.
- Use only new and precise X and Y guides. Print quality will be affected. It is difficult to count on good quality with bent or deformed guides along the axes.
- Take care of cooling. During my experiments with various extruders, the MK10 showed the best results - it prints quite accurately and quickly. The MK10 can also print plastics that require a higher print temperature than ABS, such as polycarbonate. Although it is not as prone to overheating as its younger brother MK8, I still recommend taking care of its cooling by adding a cooler to your design. It must be permanently enabled, this option can be configured in Slicer. You can also add coolers to keep the stepper motors at an acceptable temperature, however, make sure that their air flows do not fall on the printed part, as this can lead to its deformation due to too rapid cooling.
- Consider heat retention. Yes, on the one hand, we are struggling with overheating of the elements. On the other hand, a uniform temperature around the printer will contribute to high-quality printing (the plastic will be more pliable). To achieve a uniform temperature, you can put our printer, for example, in a cardboard box.
 The main thing is to connect and configure the coolers before that, as described above.
 - Consider insulating your desk. Heated table heats up to high temperatures. And if part of this heat leaves properly, heating the printed part, then the second part (from below) just goes down. To concentrate the heat from the table onto the part, you can perform an operation to insulate it. To do this, I simply attach a cork mouse pad to its bottom using stationery clips.
Pins
I am sure that during the assembly process you will encounter a number of difficulties specific to your project. Neither this text nor even the most detailed guides will insure against this.
As I wrote in the introductory part, the above does not claim the status of a detailed assembly manual. It is almost impossible to describe all the stages and their subtleties within the framework of one such text. First of all, this is an overview material that will help you prepare for the assembly process (both mentally and financially), understand whether you personally need to bother with self-assembly - or give up on everything and buy a ready-made solution.
For me, assembling printers has become an exciting hobby that helps me solve some issues in home and work affairs, take my mind off programming and do something interesting with my own hands. For my children - entertainment and the opportunity to get unusual and unique toys. By the way, if you have children whose age allows them to mess around with such things, such an activity can be a good help for entering the world of mechanics and technology.
For everyone, the vectors of using 3D printers will be very different and very individual. But, if you decide to devote your personal time to such a hobby, believe me, you will definitely find something to print :)
I will be glad to answer comments, remarks and questions.
What to read/see
- what can be printed;
- 3D printer forum;
- RepRap community site with model descriptions and assembly instructions;
- printer that prints electronics.
Subscribe to the Telegram channel "DOU #tech" so you don't miss new technical articles.
Topics: DIY, embedded, tech
Software for modeling and printing on a 3D printer
Content
- Programs for 3D modeling
- types of files for 3D printing
- Free programs
- Paid programs for 3D modeling
- Programs for 3D Models (Slisses)
- Free sliser
- Paid Slicers
- To summarize
The whole cycle of creating a part on a 3D printer can be fit into three stages: Creating / finding a model, cutting a model in a slicer, printing on a 3D printer. Each stage is tied to its own program. Models are created in special programs, then in the slicer the model is “cut” into steps that the printer will sequentially execute. The resulting list of steps (commands) is either placed on a memory card and run from the printer itself, or sent to the printer via a wired/wireless connection. As a result of all these actions, we get the product. Therefore, looking for a “3D printer program” is wrong: you need to look for a modeling program and a slicer.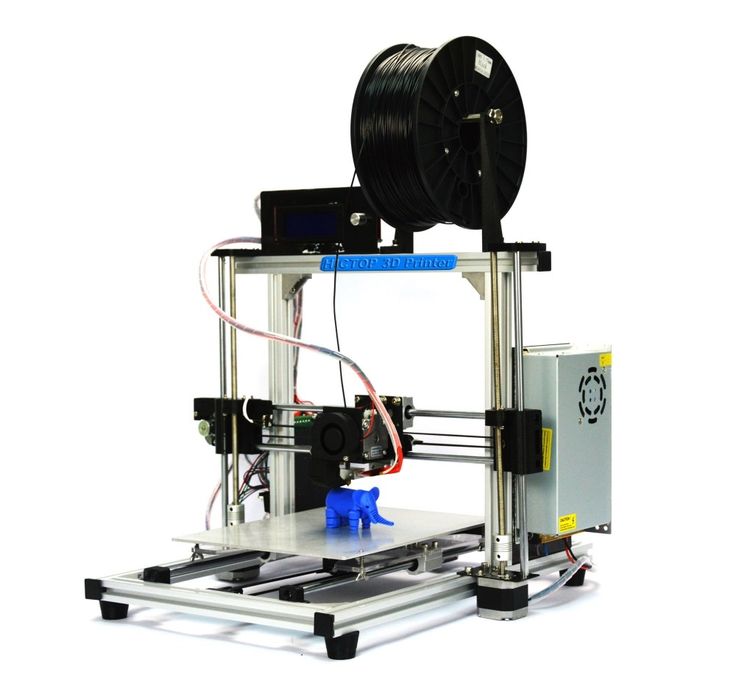
3D modeling software
Programs for 3D modeling are divided into two large groups:
Obviously, when creating a drawing, an engineer needs precise tools: a ruler, pencil, compass, etc. But the artist needs more free tools: brushes, pastels, palettes and others. Programs are divided according to the same principle: in engineering programs, there are all the tools that allow you to accurately specify the characteristics of each element of the part, and in art programs, tools are created to give smoother shapes so that the model looks as natural as possible. Of course, in art programs it is possible to model technical products, but this is comparable to drawing a drawing with pastel: it is inconvenient, difficult and inaccurate. Therefore, it is very important to determine why you need a simulation program.
Tip: It is best to learn one or two programs at a professional level, as this will allow you to create complex models.But you should also know the basics in other programs, since a large circle of knowledge allows you to more flexibly choose the approach to creating models.
File types for 3D printing
To begin with, it is worth understanding what types of files are involved in the manufacturing process of the part. The first step is to create a model. It can be saved in the format of the program itself (for example, KOMPAS-3D files have the .m3d extension, while 3ds Max has the .MAX file extension). Such files can only be opened in the programs in which they were created. But we need a universal format - STL. All programs can save models in this format. It stores the polygons that create the model.
All files are divided into 3 categories:
-
Files that store polygonal information (STL, OBJ, etc.). They are analogues of a raster image. It is possible to increase the quality of 3D models in this format only by smoothing, but in this case small details will be lost, and the file weight will increase greatly.
-
Files that store the steps for creating a part (STEP, STP, etc.). Here you can draw an analogy with vector images. Each element is specified either using simple dot connections (for example, as in a cube or pyramid), or using formulas (any curved, rounded objects). Models in this format can be scaled without loss of quality, while maintaining a relatively small file size.
-
Utility files that store steps for a 3D printer (GCODE, GCOD). These files store the commands that the printer executes and, in some cases, comments (for example, with what settings the model was cut). Some slicers can simulate the movements of the printer, thereby rendering the model, but it is impossible to convert a file from this format to a full-fledged model.
Be careful! If you are not sure that the GCODE file is intended for your printer, then you should not print it, because the print area for each printer is different.
On third-party firmware there is no limit on the maximum travel distance, some third-party software commands may lead to incorrect operation of the control board. If the printer tries to move the print head out of the printable area many times, then it can harm itself!
If the files are in the same category, then they can be easily converted from one format to another with almost no data loss. The formats indicated in brackets are a kind of “transits”. For example, Inventor has its own file format - itp, and Fusion 360 has its own - f3d. But if you save the file in Inventor in the generic STEP format, you can open it in any engineering program and then save it in that program's format.
Free programs
Usually, free programs are either limited in functionality or created by enthusiasts, which is why they have a very crooked interface and a lot of errors. But their functionality is enough to create simple models, and in some cases, such programs can completely replace paid software.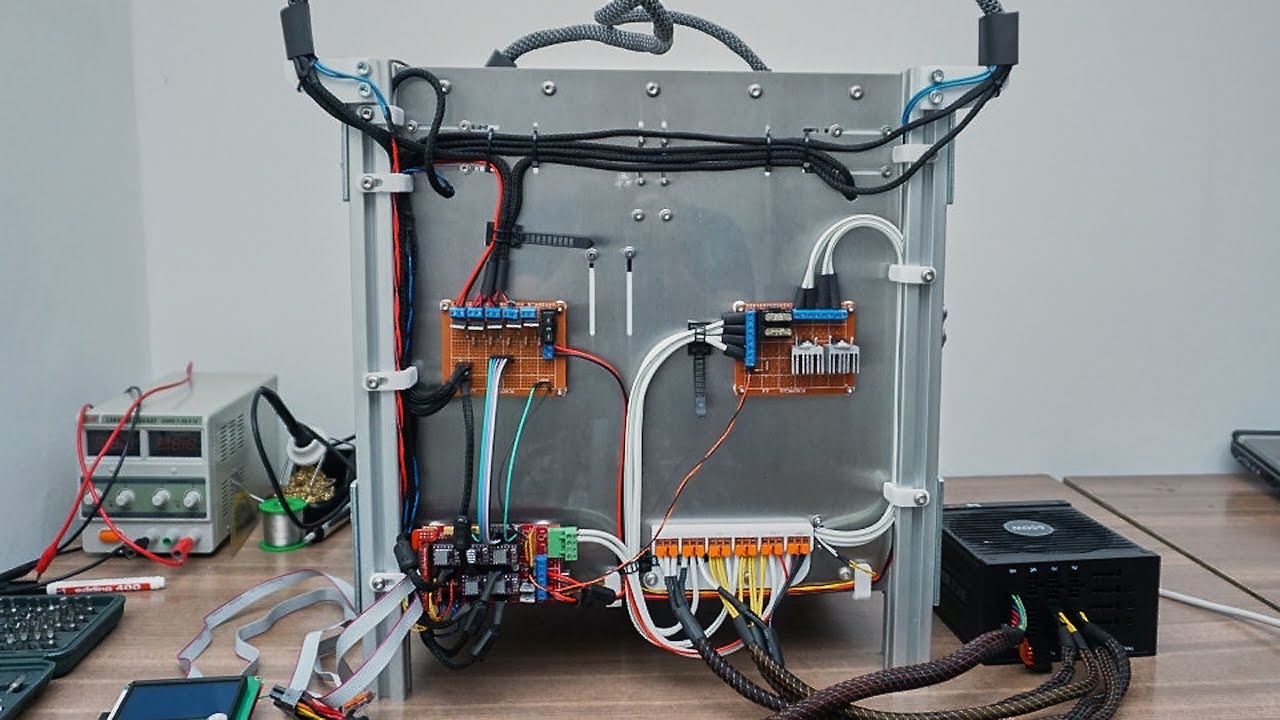
Tinkercad
In essence, this is not even a program, but a website, that is, it does not need to be installed on a computer and it opens from any device that has Internet access. But this is its main disadvantage - without Internet access, you will not be able to download any model for yourself, because each project is initially saved in the cloud. You also need to register to use this site. Initially, the site was created for children, so each tool is intuitive. The program is suitable for modeling simple products: gaskets, bushings, adapters, covers, boxes, etc.
Pros:
Cons:
-
Inability to work without the Internet
-
Each individual project needs to be downloaded
-
Limited number of tools
FreeCAD
This program is designed to create technical products: fasteners, bushings, hinges and more. Since this is an open source project, it is distributed free of charge. At the same time, it has all the necessary functionality for opening and editing files with the .step extension - a universal format for all engineering programs. It is also worth noting the ability to add addons - special subroutines that allow you to perform any actions in a fully automatic mode. For example, there is an addon that makes it easier to create various gears. In this program, you can create more complex products: mechanisms, gearboxes, hinges, etc.
Pros:
Cons:
OpenSCAD
This CAD is closer to programming languages than to modeling: each object or any action is specified as a code. This allows you to create universal models. For example, a coin sorter: once you write the “model code”, you can create a huge number of variants of this model for different countries, changing just a few parameters. This program, like the previous one, is an open source project, as a result of which it is regularly updated.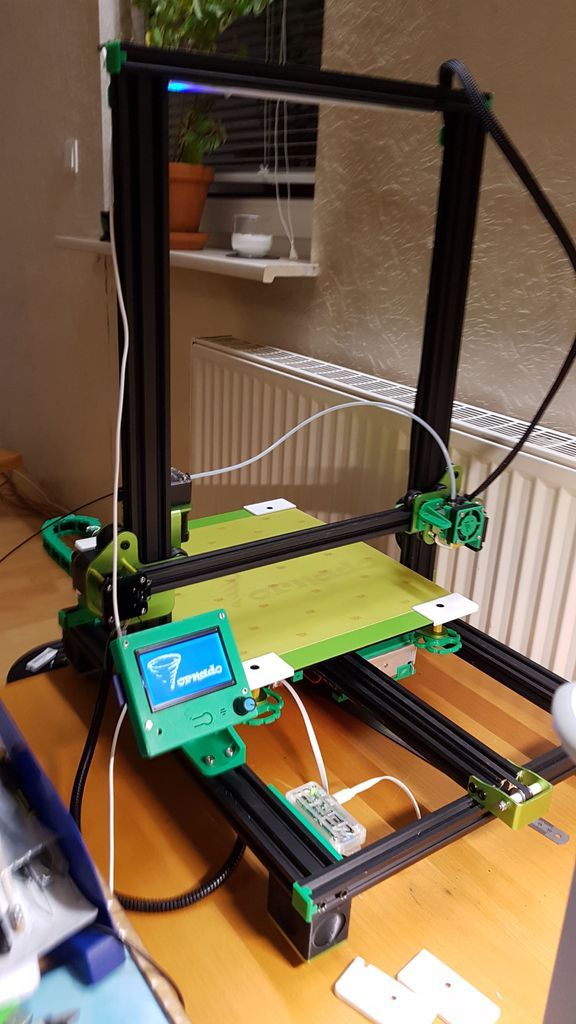
Pros:
-
Works on weak PCs
-
Ease of creating universal models
-
Easy to learn if you have programming experience
Cons:
-
No Russian interface
-
Is a programming language
-
Difficult to create curvilinear geometry
Free Shipping
Add to compare
Item added to compare Go
| Manufacturer | Anycubic |
Free shipping
Add to compare
Product added to compare Go
| Manufacturer | Phrozen |
Free Shipping
Add to compare
Product added to compare Go
| Manufacturer | Raise3D |
Free shipping
Add to compare
Product added to compare Go
| Manufacturer | Anycubic |
Meshmixer
Art program for entry-level 3D modeling. There are simple tools for processing STL files and functions for recovering “broken” files. Using Meshmixer, you can conveniently cut the model into several parts, as it is possible to set the size of the print area of your printer. And one of the most useful tools is the installation of tree supports. This function has already appeared in many slicers, but it is in meshmixer that they can be flexibly configured and installed manually. Despite the many tools, this program is rather auxiliary, as there are more suitable programs for creating a model from scratch.
Pros:
Cons:
-
Limited functionality for creating 3D models
-
Lack of Russian interface
-
Some operations require a powerful PC
Blender
A completely free program with huge possibilities not only for creating models, but also for animation, rendering, simulations and much more.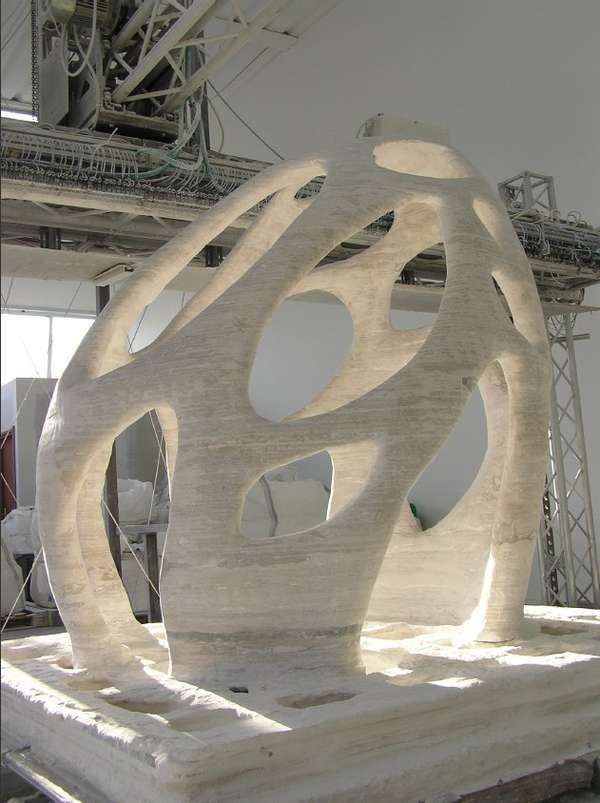 It is mainly used by multipliers, but due to the large number of extensions, this program covers a huge range of tasks. At first glance, Blender may seem too complicated, but everyone can master the basic functionality. Also worth noting are constant updates that improve performance and add new tools. A large community of people working in this program and developing it will help with the solution of many problems.
Paid 3D software
This category includes programs for professionals and enterprises, as well as their simplified versions for home use. Many companies have begun releasing a product at a low cost for home use, although initially the designs were intended only for enterprises and were priced accordingly. The common advantage of these programs is great functionality and constant support. For example, Autodesk Inventor was first released back in 1999 and is updated annually. Next, we will look at the most popular of them.
Fusion 360
The new product from Autodesk tried to combine several tasks at once: modeling, simulation and rendering. In many ways, it adopted the functionality of the previously mentioned Inventor, but supplemented it with a simple interface: many tools are similar to those that can be used in the previously mentioned Tinkercad. You can also edit STL files in it, albeit with a limited set of tools.
The main feature of this program is cloud data processing, such as simulations and renders. At the same time, almost all functions can be performed offline using the power of a PC. To process tasks in the cloud, you need to buy additional tokens, but when creating models, they are not necessary. It is worth considering that despite the presence of a native file format (f3d), all files are initially stored on Autodesk servers, and then they can be saved to your computer.
There is a version for schools and universities, but obtaining such a license requires the educational institution to register and issue you a personal license.
Pros:
Cons:
Price: from 7,123₽ to 25,721₽ for 1 year
Netfabb
The program is designed to prepare the model before slicing. In many ways, it is similar to meshmixer, but it does not have the tools to create a model from scratch. Merging several models in STL format can be called a distinctive function, but the most important tool is the “repair” of models. That is why everyone should install this program, even if you have another model editor or model repair built into the slicer. Also in Netfabb it is very convenient to cut the model into several parts for printing separately. At the moment, the Netfabb functionality is built into Fusion 360 and is not officially available separately, but can be found on third-party resources as a separate program.
Pros:
-
Great functionality for repairing the model
-
Convenient cutting into pieces
-
Easy to learn all the necessary tools
Cons:
Price: from 18 024₽ for 1 month
KOMPAS-3D
A professional program created by Russian developers for Russian enterprises. It has a huge functionality, but at the same time, each function has a description, and the main tools have explanatory animations, a huge database of standards and GOSTs is built in. The program is free for all students and does not require verification of documents. There is also a paid version of KOMPAS-3D HOME, which, although intended only for home use, retains all the functionality of the “professional” version. Because of this, and also because of the low price, this CAD system is the best choice as the first professional program for creating complex 3D models.
Pros:
-
Completely Russian interface
-
A large number of tools
-
Availability of a free student version
-
Very low price
Cons:
Price: from 1 490₽ for 1 year
SolidWorks
One of the oldest programs on the market that has become a standard.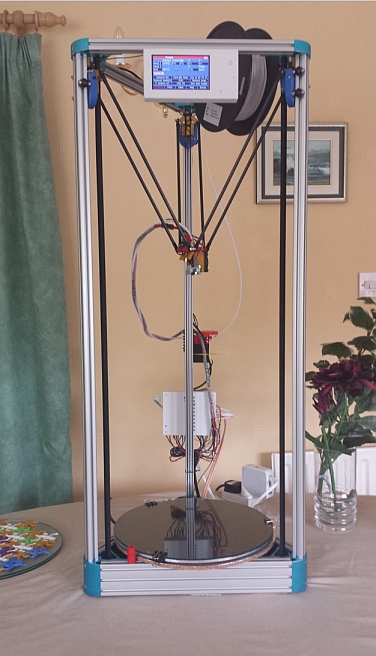 If you learn how to work in SolidWorks, then you can work in any CAD. It has a relatively simple interface, an average number of tools that are enough even for professionals, but since the program is designed for production, many functions will only interfere with work. It should be noted that this program is available in Russian, and this is one of the reasons for the prevalence of this program in Russia.
Pros:
-
Easy to learn
-
The presence of the Russian interface
-
Large community of people using SolidWorks
-
Widespread in Russia
Cons:
Price: from 8 431₽ to 292 560₽ for 1 year
Inventor
The main program at many enterprises, but due to the simplicity of the interface and the presence of the Russian language, it is easy to learn. In many ways, it is similar to SolidWorks, both in functionality and in purpose. The main distinguishing feature of this program is a large number of high-quality video tutorials and text courses. It is studied at many universities both around the world and in Russia.
Pros:
-
Prevalence among the Russian community
-
Lots of learning materials
-
Intuitive interface
-
Availability of student version
Cons:
Price: from 106 860₽ for 1 year
SelfCAD
It is the simplest program for technical modeling. As easy to learn as Tinkercad, but not for kids, but for professional 3D printing. This program is not CAD, so there is no editing history, which allows, for example, to change sketches without entering edit mode.
You can download this program for free, but this version will have limited functionality. There are also paid versions with monthly payment or a one-time purchase forever. Only paid versions have a simple slicer, but its functionality is extremely limited.
Pros:
Cons:
-
Small functionality
-
Big cost
Price: from 1160₽ ($14.99) for 1 month
3ds Max
The program is designed to create 3D models and render images. It has great functionality, but it is extremely difficult to learn due to the lack of the Russian language and a complex interface. This is due to the fact that 3ds Max was originally developed for 3D animation and video game studios. It was to create a simple and free analogue that the previously mentioned Blender was created. Due to the above reasons, this program is not suitable for creating 3D models for subsequent printing on a 3D printer, but nothing prevents you from doing this.
Pros:
Cons:
Price: from 9 791₽ for 1 month
Free Shipping
Add to compare
Product added to compare Go
| Manufacturer | Phrozen |
Free Shipping
Add to Compare
Product added to comparison Go
| Manufacturer | Anycubic |
Free Shipping
Add to compare
Product added to compare Go
| Manufacturer | PICASO 3D |
Free Shipping
Add to Compare
Product added to comparison Go
| Manufacturer | Phrozen |
3D cutting software (slicers)
Having any model in STL format, you cannot immediately place it in the printer and start printing, because the printer only executes commands, and these commands form a slicer.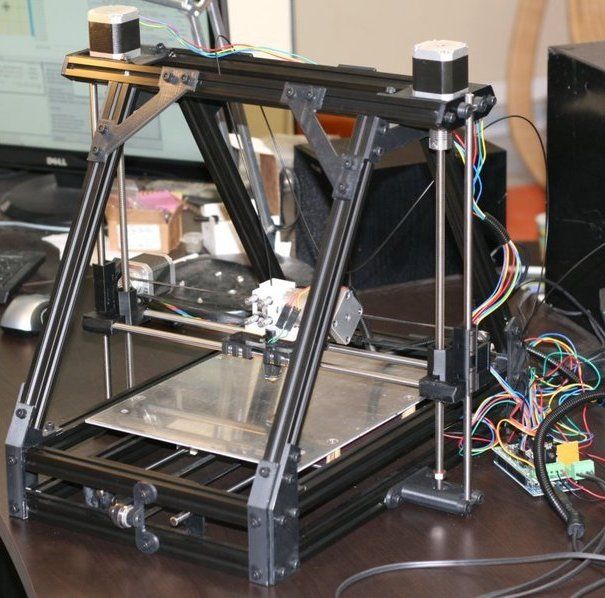 According to the etymology of the word, one can understand that the program cuts the model into layers, or rather into separate commands. But the number of cutting options for one model is almost endless. In this regard, a large number of programs have appeared that allow you to fully customize the operation of the slicer, or rather, how it will split the model into separate commands. The slicer itself consists of two parts: the core and the shell. The slicer core performs slicing based on the specified parameters, and the shell allows you to set these parameters and visually evaluate the slicing result before sending the model to print. In addition, many slicers have built-in functionality for direct access to the printer, which allows you to manually control the printer and carry out its settings and diagnostics. Next, we will consider the most popular slicers, which have their positive and negative sides.
Free slicers
The availability of free slicers is due to the fact that without them the printer becomes a useless machine that can only heat coffee and play a melody with the help of motors.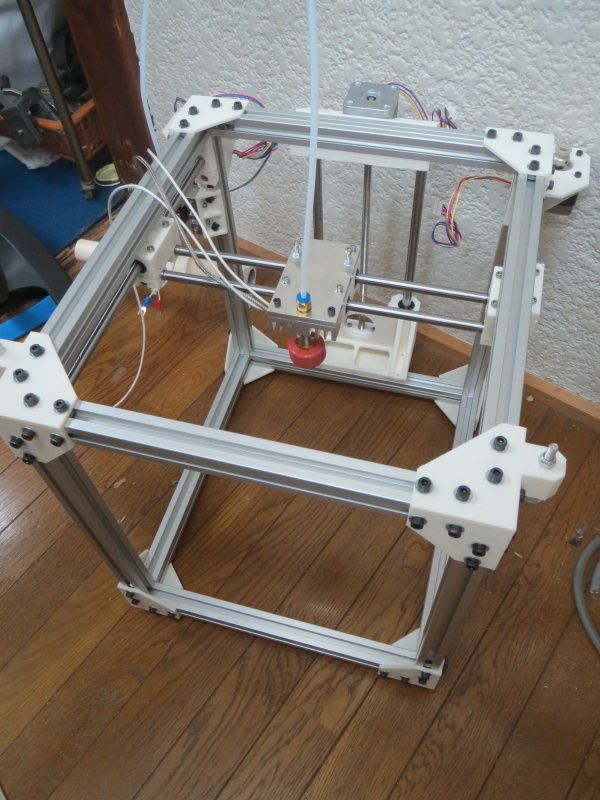 Therefore, many companies that create 3D printers supply slicers with them, while laying them out in the public domain. Often these are large companies such as Ultimaker, CraftUnique, Prusa, etc.
Ultimaker Cura
It was originally created only for Ultimaker 3D printers, but soon became an open-source project. Now in its library of profiles you can find a huge number of printers from various manufacturers. Uses its own core Cura, which has many settings and functions: tree support, wireframe printing, color printing, etc.
Frequent updates bring innovations and even more profiles for various 3D printers. It is a standard choice for beginners, as it has two control modes: simple and professional. Recently, support for add-ons has appeared that allows you to save backup copies of settings, repair the model directly in the slicer, integrate various programs for 3D modeling, and much more.
It is also possible to control the printer by sending commands directly from the computer.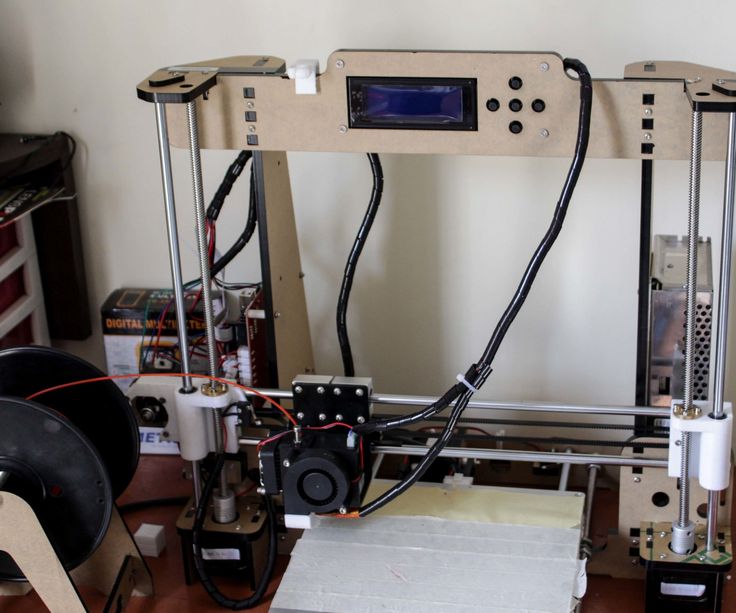 But there is no feedback from the printer, apart from receiving information about the temperature of the nozzle and table.
Pros:
Cons:
Prusa Slic3r
Sometimes you can find other names: Slic3r Prusa Edition or Slic3r PE. Prusa decided not to reinvent the wheel, and took the open-source Slic3r project, partially reworked it and began to actively develop it. Like Cura, Prusa Slic3r has many printer profiles, but Prusa's printer profiles are the most optimized. The core of the slicer of our own design, while the number of settings is less than that of the same Cura.
A distinctive feature is the flexible adjustment of the layer thickness and the support of a special extruder capable of printing 5 different plastics at once (again, produced by Prusa). The program will be extremely useful for people who have more than one 3D printer: all settings are divided into 3 tabs, each of which can be saved to separate profiles.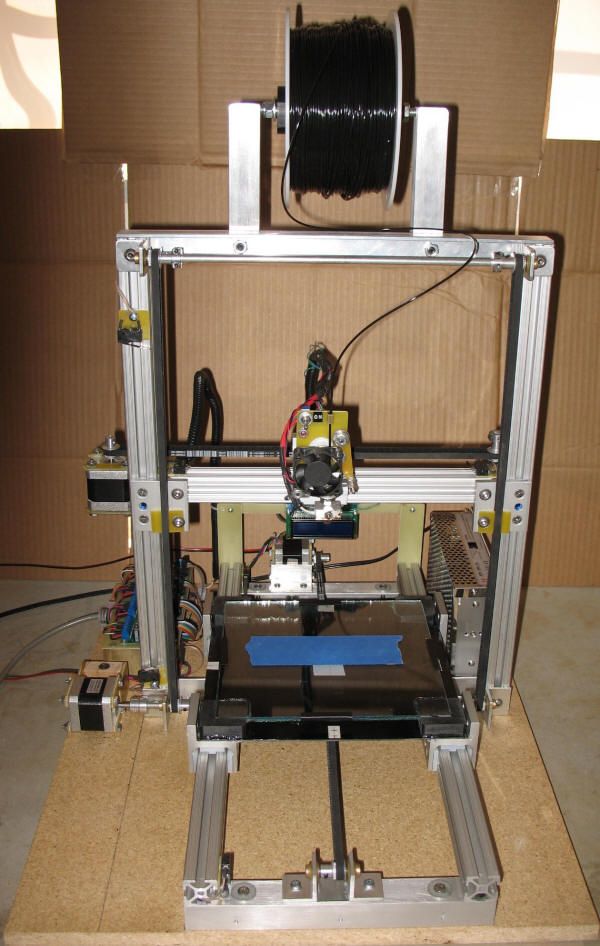 But the printer control console disappeared completely, only the send button for printing via wire remained. In general, this program will be a reliable and convenient slicer, especially if you have a large number of printers.
Pros:
Cons:
Repetier
This slicer was created more for remote control of the printer, but it can also cut models. One of the few programs where you can choose the slicing core: Cura, Sic3r, Prusa Slic3r. The number of settings for the slicing itself is extremely small, but they are enough to cut the test cube.
The most important plus of this slicer is the huge functionality for managing and configuring the printer. It is worth noting the convenient interface for sending commands, as well as customizable temperature graphs. This is extremely useful, for example, when tuning the PID or checking the movement of the axes. Even if you choose a different slicer, this program is handy to have in order to 3D print using GCODE from another slicer.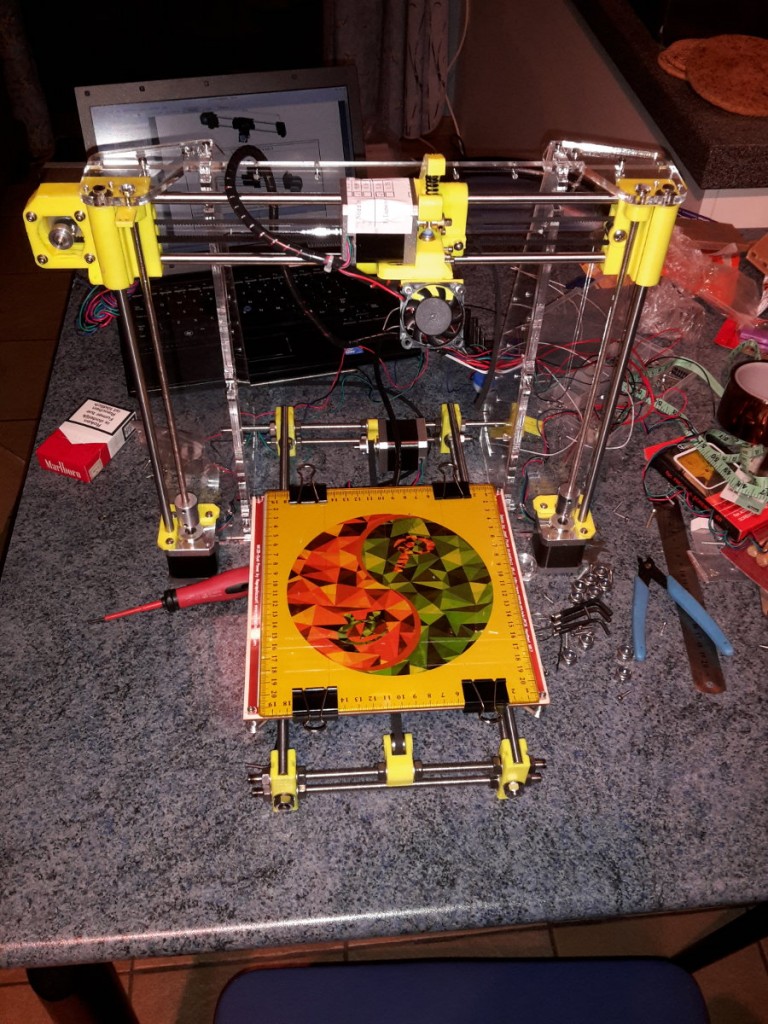
Pros:
Cons:
MatterControl 2.0
One of the few programs that combine functions for editing stl files and a slicer. You won't be able to create any serious model, but you can add text or cut out part of the model. The slicer has not so many settings, but they are enough for a beginner 3D printer. This slicer can be useful if you need to make art products with minor changes. Supports saving to the cloud.
Pros:
Cons:
3DprinterOS
This software is designed to remotely manage printers from anywhere in the world. All that is needed is to connect the printer to the computer and install this program on it. From now on, all printer management occurs through the web interface. In it, you can remotely change the model, cut it and put it on print. It is also possible to connect a camera and observe the printing process. There are very few slicing settings, some will not even be enough to calibrate the printer, not to mention serious printing.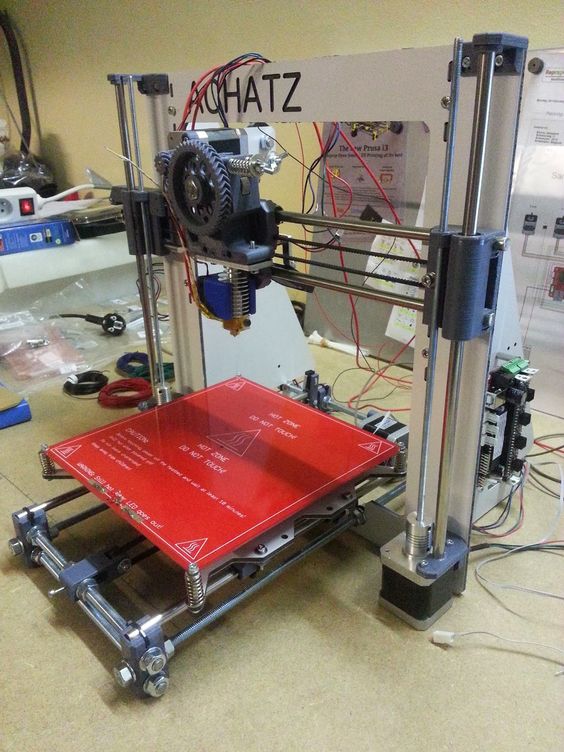
Carefully! It is not recommended to leave the printer unattended, especially if it is no longer new: at any time there may be a risk of fire due to wiring or mechanical problems.
Pros:
-
Simple interface
-
Start printing from anywhere in the world
-
Ability to monitor printing
-
Availability of tools for editing the model
Cons:
IceSL
It is a combination of OpenSCAD with its “modeling language” and slicer. In addition, models can be edited using a “brush”, like the one in Meshmixer. It has many small pluses that are not found in other slicers, but it is not suitable for everyday use due to an inconvenient interface and a small number of slicer functions. This program can be described in one phrase: interesting, but not recommended.
Pros:
Cons:
Octoprint
In many ways it is similar to 3DprinterOS, but is an open source project, as a result of which it has many additions. Designed for home use. It is the most popular way to remotely control a printer, and the user community is constantly growing. Therefore, it will be very easy to transfer your printer to remote control due to the large number of lessons and articles. The program itself does not have a slicer, but direct export of files from Slic3r is supported, which is already good in itself. Just like Repetier, it has an excellent printer management and monitoring console. But, unlike the aforementioned analogue, most of the functions will have to be configured manually.
Pros:
-
Large user base
-
Lots of tutorial articles
-
Ability to create a video broadcast of the printing process
Cons:
Paid Slicers
At the moment, many paid slicers are no longer used, as free ones have either caught up or overtaken them. But some of them are still unique.
Simplify3D
One of the first thundered paid slicers. At the time of its introduction, it was the most advanced due to the ability to change the print settings for one model at different layer heights and the functionality of printing with more than one extruder. But at the moment it has been replaced by Cura and Prusa Slic3r. Nevertheless, the convenience of setting up print settings and their number still remain the main advantage of this slicer. Also worth noting is the excellent printer management interface, second only to Repetier host.
Another difference is the ability to manually install supports and a large number of filling patterns. Viewing models also has several features: changing the way models are displayed, viewing in section, displaying normals to planes.
Pros:
-
Lots of print options
-
Convenient printer management interface
-
Manual installation of supports
-
Changing print settings at different heights
-
Easy print setup with two extruders
Cons:
Price: from 11499₽ ($149)
Read also: A detailed review of 3D printing slicers: Ultimaker Cura, Simplify3D, IdeaMaker, UP Studio, FlashPrint
Astroprint
Many believe that this particular software is a direct competitor to 3DPrinterOS.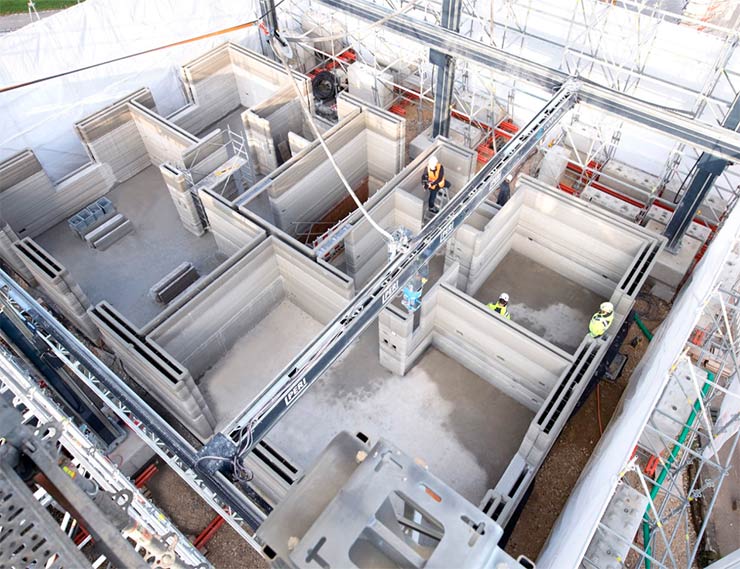 The most important difference is user friendliness, achieved through a user-friendly interface and easy installation. The program is based on Octoprint, essentially providing only a server, a modified interface and several add-ons that allow you to fully manage the printing process while away from the printer - from finding a model, to cutting and printing. At the same time, the program positions itself as a serious business solution, so the company also provides special PCs and management consoles that make it easy to connect the printer to the system. A trial plan is available where only 2 printers can be connected, but all basic features will be available.
Pros:
-
Easy connection and setup
-
Trial Availability
-
Interface specially designed for mobile devices
Cons:
Price: from 765₽ ($9.90) for 1 month
KISSlicer
This slicer is another representative of programs that failed to keep up with the times.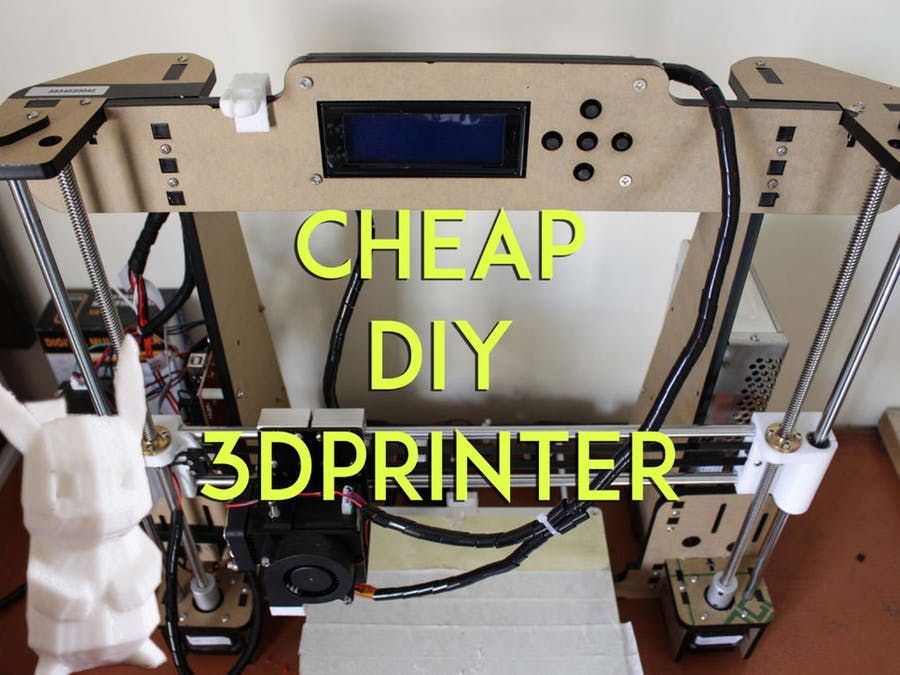 Previously, its functionality was a cut above the rest, but now the same Cura has all the same settings as KISSlicer, and also adds its own. Of the useful in this program, we can note the function of joint viewing of GCODE and model.
There were two versions: free and PRO. The only significant difference between them is that the paid version has support for printing in multiple colors. At the moment the project is dead, even the main site does not work, but the program can still be found on third-party sources.
Pros:
Cons:
Price: from 3240₽ (42$)
Summing up
After considering all the popular programs, we can highlight the clear favorites:
For beginners in 3D printing, Tinkercad is the best 3D modeling software because it combines simplicity with the necessary functionality. The best programs for professional-level 3D modeling are KOMPAS-3D, Fusion 360 and Blender, due to the huge number of tools and a large community that makes it easy to find lessons and guides.