3D printer wireless
Learn How to Make Your Ender 3 Wireless & Other 3D Printers – 3D Printerly
3D printing by itself is pretty cool, but you know what’s even cooler? 3D printing wirelessly.
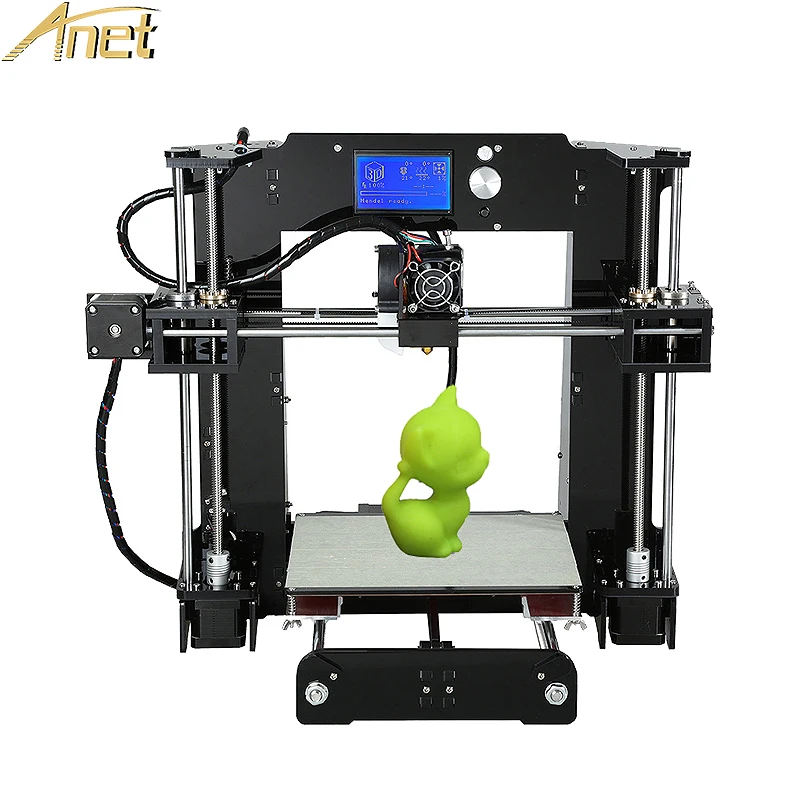
I think we all love some extra convenience, so why not add some when it comes to 3D printing? Some 3D printers come with wireless support built in, but the Ender 3 isn’t one of them, along with several other machines.
If you want to learn how to make your Ender 3 wireless and operate through Wi-Fi, you’ve come to the right place.
A combination of a Raspberry Pi and OctoPrint is the usual method to make an Ender 3 wireless. You can also use AstroBox for a more flexible Wi-Fi connection option since you can access your 3D printer from anywhere. A Wi-Fi SD card can only give you the ability to transfer files wirelessly.
There are upsides and downsides to each method, so keep reading to find out the steps to take and which choice is most common.
This article will detail how people get their Ender 3’s working wirelessly which makes their 3D printing journey that much better.
There are a few ways that Ender 3 users upgrade their machines to be able to print wirelessly. Some are really simple to do, while others take a little more of a walkthrough to get it right.
You also have differences in equipment and products to purchase to connect your Ender 3
- Wi-Fi SD card
- Raspberry Pi + OctoPrint
- Raspberry Pi + AstroBox
- Creality Wi-Fi Cloud Box
Wi-Fi SD Card
The first, but less used option is implementing a Wi-Fi SD card. All you need to do here is get yourself an adapter which inserts into your MicroSD slot into your Ender 3, then present a SD slot for the WiFi-SD card since they only come in the larger size.
You can get a pretty cheap one from Amazon, the LANMU Micro SD to SD Card Extension Cable Adapter is a great choice.
Once you’ve inserted the adapter and Wi-Fi SD card, you will be able to transfer your files wirelessly to your 3D printer, but there are limitations on this wireless strategy. You will still have to start off your prints manually and actually choose the print on your Ender 3.
It’s a fairly simple solution, but some people enjoy being able to send files straight to their 3D printer. This is also a much cheaper option than the other methods.
If you want more capabilities with your wireless 3D printing experience, I would choose the method below.
If you’ve never heard of a Raspberry Pi, welcome to a really cool gadget that has many technological possibilities. In basic terms, a Raspberry Pi is a mini computer that packs enough power to operate as its own device.
For 3D printing specifically, we can use this mini computer to expand our capabilities to 3D printer wirelessly, plus many other cool features along with that.
Now OctoPrint is a software that complements the Raspberry Pi enabling you to activate that Wi-Fi connection to connect to your 3D printer from anywhere. You can implement some basic commands and do even more with plugins.
There is a list of plugins on OctoPrint which give you many extra features, one example being the ‘Exclude Region’ plugin. This allows you to exclude a portion of your print area mid-print inside the G-Code tab.
This is perfect if you are printing multiple objects and one has a failure such as detatching from the bed or the support material fails, so you can exclude that part rather than stopping the print altogether.
Many people also connect cameras to their 3D printers using OctoPrint.
In this article, we take a look at how to set up OctoPrint for the Ender 3, a great candidate printer for remote operation.
The basic steps to follow are:
- Purchase a Raspberry Pi (with Wi-Fi embedded or add Wi-Fi dongle), Power Supply & SD Card
- Put OctoPi on your Raspberry Pi through an SD card
- Configure the Wi-Fi by going through your SD card
- Connect the Pi & SD card to your 3D printer using Putty & the IP address of the Pi
- Setup OctoPrint on your computer browser and you should be done
Here you will find a complete guided setup to connect your Ender 3 to the computer using OctoPrint. Below are the things that you will need.
- Ender 3 3D Printer
- Raspberry Pi (CanaKit Raspberry Pi 3 B+ from Amazon) – includes power adapter,
- Power Adapter for Raspberry Pi
- Micro SD Card – 16GB should be enough
- Micro SD Card Reader (comes with Ender 3 already)
- Mini USB Cable for Ender 3 Printer
- Male Female USB Cable Adapter
The video below goes through the whole process which you can follow along with easily.
Connecting Pi to Wi-Fi
- Download the latest updated version of the OctoPi operating system (OctoPi image)
- Download & use Win32 Disk Imager to create the image on the SD card
- Plug in fresh SD card
- Once your OctoPi image is downloaded, ‘Extract All’ and ‘Write’ the image to the SD card
- Open the SD file Directory and look for the file titled “octopi-wpa-supplicant.
 txt”.
txt”.
In this file, there will be code as:
##WPA/WPA2 secured
#network={
#ssid=“type SSID here”
#psk=“type Password here”
#}
- At first, remove the ‘#’ symbol from the code lines to make them uncommented.
- It will become like this:
##WPA/WPA2 secured
network={
ssid=“type SSID here”
psk=“type Password here”
}
- Then put your SSID and set a password in the quotes.
- After adding the password, insert another code line as scan_ssid=1, just below the password code line (psk=“ ”).
- Set up your country name correctly.
- Save all changes.
Connecting the Computer to Pi
- Now connect it with your printer using the USB cable and power it on using a power adapter
- Insert the SD card into the Pi
- Open the command prompt and check the IP address of your Pi
- Insert it in the Putty application on your computer
- Login to the Pi using “pi” as the username and “raspberry” as the password
- Now open a web browser and type the Pi’s IP address in the search bar
- The Setup Wizard will be opened
- Set up your printer profile
- Set Origin at “Lower Left”
- Set Width (X) at 220
- Set Depth (Y) at 220
- Set Height (Z) at 250
- Click Next and Finish
Fix Pi Camera and Device on the Ender 3
- Fix the Pi camera on the 3D printer
- Insert one end of the ribbon cable in the camera and the other one in the Raspberry Pi ribbon cable slot
- Now fix the Raspberry Pi device on Ender 3
- Make sure that the ribbon cable is not tangled or stuck in anything
- Connect Pi with the Ender 3 power supply using a USB cable
- Installation is done
I’d go for the LABISTS Raspberry Pi Camera Module 1080P 5MP from Amazon. It’s a good quality, yet cheap option to get a nice visual on your 3D prints.
You can 3D print yourself OctoPrint camera mounts by checking out the Howchoo collection on Thingiverse.
A more premium, yet simple option to print wirelessly from your Ender 3 is by using AstroBox. With this device, you can control your machine from any location when they are both connected to the internet.
There is a Raspberry Pi 3 AstroBox Kit which you can get directly from the AstroBox website and it includes the following:
- Raspberry Pi 3B+
- Wi-Fi dongle
- Pre-flashed 16 GB microSD Card with AstroBox Software
- Power Supply for the Pi 3
- Case for the Pi 3
The AstroBox simply plugs into your 3D printer and enables Wi-Fi along with a connection with the cloud. You can easily manage your 3D printer with your phone, tablet or any other device which has connection to a local network.
Along with a standard USB camera, you can also monitor your prints, real-time from anywhere.
AstroBox Features:
- Remote monitoring of your prints
- Ability to slice designs on the cloud
- Wireless Management of your 3D Printer (No pesky cables!)
- No more SD cards to load STL files
- Simple, Clean, Intuitive Interface
- Mobile friendly and works on any web enabled device or using the AstroPrint Mobile App
- No need for a laptop/computer to be connected to your printer
- Automatic updates
AstroBox Touch
The AstroBox also has another product which extends the capabilities to be able to have a touchscreen interface. The video below showcases how it looks and how it works.
It does have some capabilities that you don’t get with OctoPrint. One user described how his kids could fully control and Ender 3 using just a Chromebook. The touch interface is really good and modern, compared to many touchscreen UI out there.
The last option that you might want to use to make your Ender 3 wireless is the Creality Wi-Fi Cloud Box, which helps to remove the SD card and cables, allowing you to control your 3D printer remotely from anywhere.
This product is fairly new at time of writing, and really has the chance to transform many 3D printer users’ experience with FDM printing. One of the early testers of the Creality Wi-Fi Box described their experience in this post.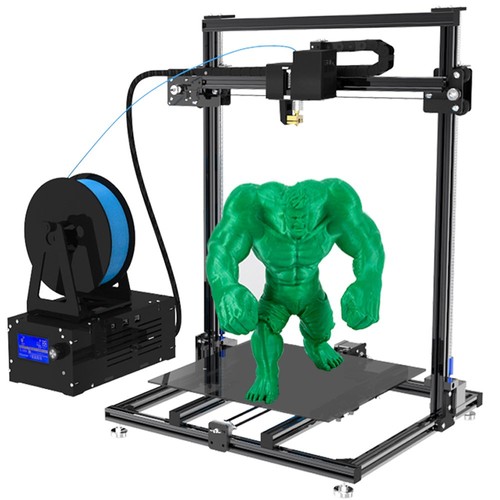
You can also get the Aibecy Creality Wi-Fi Box which is the same thing but just sold by another seller on Amazon.
3D printing directly from your machine will soon be a task that is out-of-date as we develop the technology to easily 3D print wirelessly, with little setup.
The benefits of the Creality Wi-Fi Box are as follows:
- Simplicity of printing – connecting your 3D printer via the Creality Cloud app – online slicing and printing
- A cheap solution for wireless 3D printing
- You’re getting a powerful performance and very stable archive of software and hardware
- Professional-looking aesthetic in a black matte shell, with a signal light in the middle & eight symmetrical cooling holes at the front
- Very small device, yet large enough for great performance
In the package, it comes with:
- Creality Wi-Fi Box
- 1 Micro USB Cable
- 1 Product Manual
- 12-Month Warranty
- Great Customer Service
OctoPrint Raspberry Pi 4B & 4K Webcam Installation
For the highest quality 3D printing experience using a Raspberry Pi, you can use the Raspberry Pi 4B along with a 4K webcam.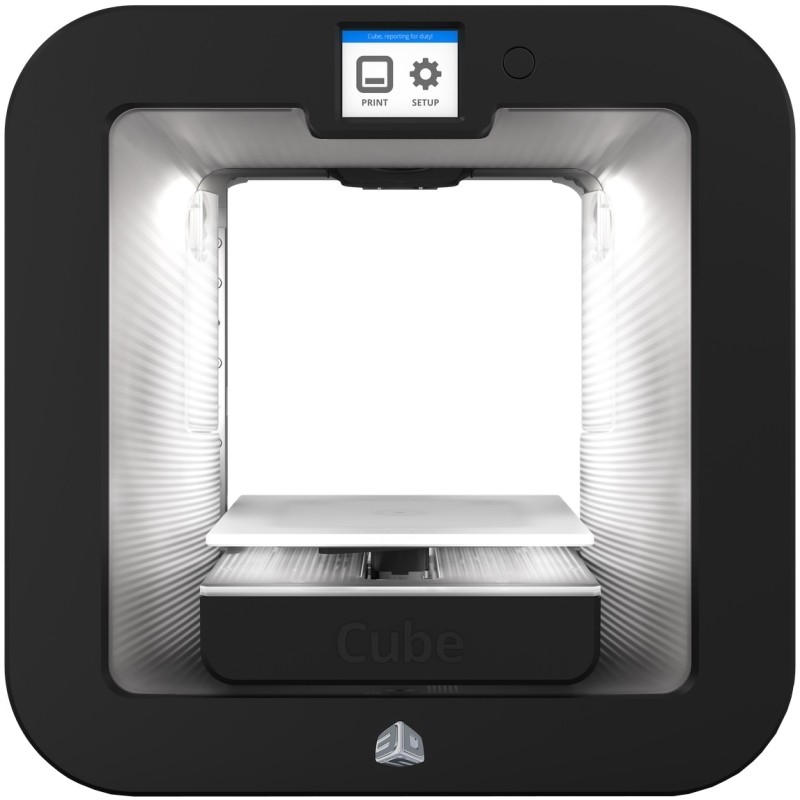 This will allow you to make some amazing videos of your 3D prints that you can share to your friends and family.
The video below by Michael at Teaching Tech goes through the process.
You can get yourself the Canakit Raspberry Pi 4B Kit from Amazon which gives you everything you need to get started without having to worry about the smaller parts. It also includes a premium clear Raspberry Pi case with an in-built fan mount.
A really good 4K webcam on Amazon is the Logitech BRIO Ultra HD Webcam. The video quality is definitely in the top-tier range for desktop cameras, an item that can really transform your visual displaying capabilities.
- It has a premium glass lens, 4K image sensor, high dynamic range (HDR), along with autofocus
- Looks great in many lights, and has a ring light to automatically adjust and contrast to compensate for the environment
- 4K streaming and recording with optical and infrared sensors
- HD 5X zoom
- Ready for your favorite video meeting apps such as Zoom and Facebook
You can really record some awesome 3D prints with the Logitech BRIO, so if you want to modernize your camera system, I’d definitely get it.
AstroPrint Vs OctoPrint for Wireless 3D Printing
AstroPrint is actually based on an earlier version of OctoPrint, being combined with new phone/tablet apps, along with a slicer that operates through a Cloud network. AstroPrint is a lot easier to setup compared to OctoPrint, but they do both run off a Raspberry Pi.
Practically speaking, AstroPrint is a software that carries fewer functions than OctoPrint, but has more emphasis on user-friendliness. You would want to go with AstroPrint if you just want basic wireless 3D printing capabilities without the extras.
If you think you’ll want to add more advanced features to your 3D printing, you probably should go for OctoPrint.
They have a larger community of contributors who are always developing new plugins and functions. It was built to thrive on customizations and unique features.
Duet 2 Wi-Fi
Duet 2 WiFi is an advanced and fully functional electronic controller specially used for 3D printers and CNC (Computer Numerical Control) devices.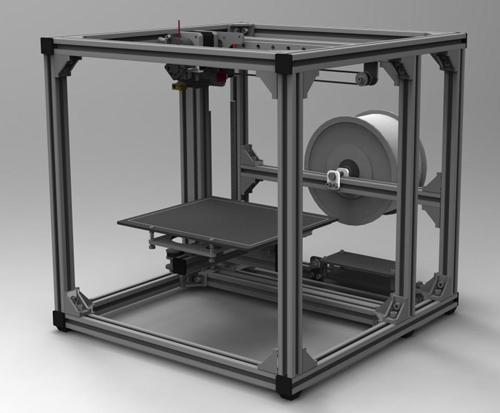
It is the same as its old version Duet 2 Ethernet but the upgraded version is 32-bit and offers Wi-Fi connectivity to work wirelessly.
Pronterface
Pronterface is a host software that is used to control your 3D printer functionalities. It is built from the open-source software suite Printrun which is licensed under GNU.
It provides the user with a GUI (Graphical User Interface) access. Because of its GUI, the user can easily configure the printer and can print the STL files just connecting it with a USB cable.
Does the Ender 3 Pro Come With Wi-Fi?
Unfortunately, the Ender 3 Pro doesn’t come with Wi-Fi, but we can enable a wireless connection by either using a Wi-Fi SD card, a Raspberry Pi & OctoPrint software combination, a Raspberry Pi & AstroBox combination, or by using the Creality Wi-Fi Cloud Box.
In order to keep prices down and let people make their own choices for upgrades, the Ender 3 Pro has kept functionality and extra features to a minimum, mainly focusing on the what you need to get some of the best printing quality right out the box.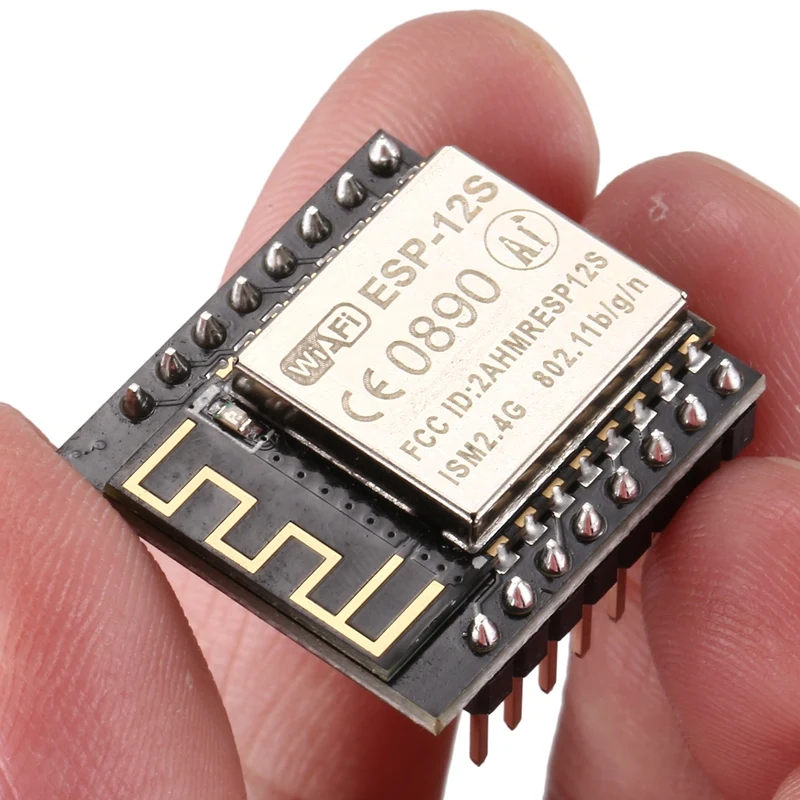
The Best Cheap 3D Printers for 2022
While we'd hesitate to call 3D printing a mature technology, you might say it has reached its teenage years. Through their first decade-and-change, 3D printers have come down in price, grown easier to set up and operate, and become more reliable. And you may pay less than you expect: Many once-high-end features have migrated down to inexpensive models.
PC Labs has been reviewing 3D printers since 2013. Today, the state of 3D printing is strong, but that wasn’t always the case. For the first several years, it was often an adventure getting one of these printers up and running, let alone successfully through our testing regimen. Issues with filament-based—aka fused filament fabrication (FFF) or fused deposition modeling (FDM)—printers were abundant.
Filament feeders had to be coaxed into delivering filament from the spool to the extruder. Print beds had to be manually aligned. The extruder or hot end had to be positioned just right to minimize the gap between the nozzle and the build plate (the flat surface on which the object is printed). Objects frequently stuck to the build plate, and required careful, sometimes unsuccessful, efforts to pry them off. These and other issues required painstaking effort to resolve, often combined with calls to tech support.
Not so much anymore. While they can still be rebellious at times, 3D printers have grown up a lot, and achieving the 3D printer basics has gotten a lot less likely to end in a shouting match over small things. And they've gotten a lot more affordable, too, for curious DIY-ers and hobbyists to try.
If you're in the market for a beginner or low-cost 3D printer, it's important to know how lower-end models differ. Read on for mini-reviews of the top budget 3D printers we've tested. After that, we go into more detail on understanding the 3D printer specs and tech relevant to beginning buyers. Ready to take the plunge? Read on.
More About Our Picks
Original Prusa Mini
4.5 Outstanding
Best Overall Budget 3D Printer
Bottom Line:
It requires assembly and calibration care (plus shipping from the Czech Republic), but the Original Prusa Mini is a compact, open-frame 3D printer that consistently produces superb-quality output for a great price.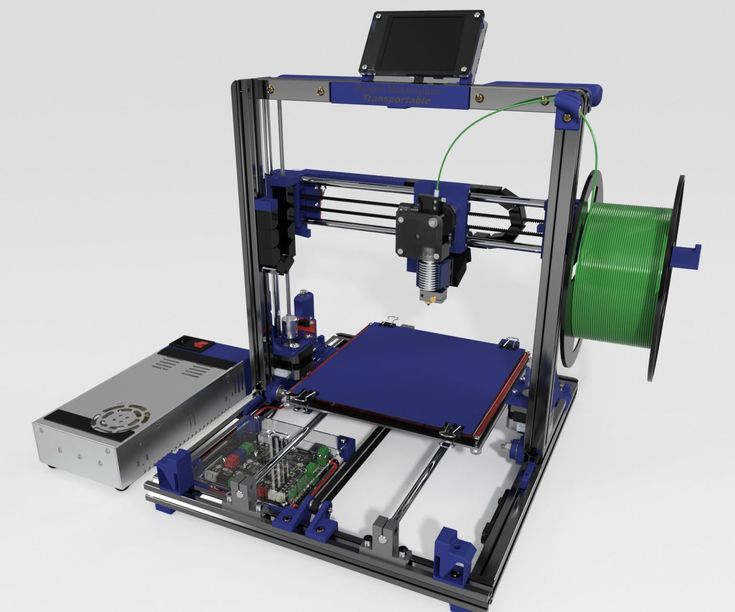
Pros
- Top-notch object quality
- Supports a variety of filament types
- Useful, professionally printed user guide
- Great support resources
- Versatile, user-friendly software
Cons
- First-layer calibration can be tricky
- Only includes starter packets of filament
- Requires monitoring if young children or pets are around
Read Our Original Prusa Mini Review
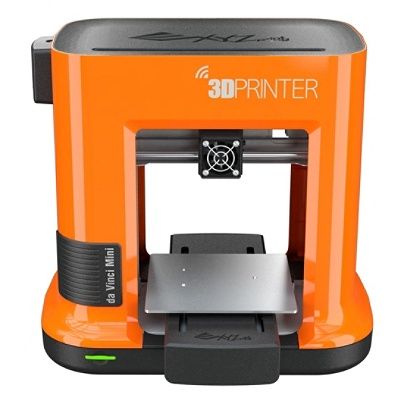
XYZprinting da Vinci Mini
4.0 Excellent
Best Budget 3D Printer for Schools, Community Centers
Bottom Line:
The XYZprinting da Vinci Mini is a consumer-oriented 3D printer that provides a winning combination of low price, ease of setup and use, solid print quality, and smooth, misprint-free operation.
Pros
- Very low price.
- Reasonably priced filament.
- Good print quality.
- No misprints in testing.
- Easy setup and operation.

- Quiet.
- Prints over a USB or Wi-Fi connection.
Cons
- Occasional problems in trying to launch prints.
- Removing printed objects from the print bed is sometimes tricky.
Read Our XYZprinting da Vinci Mini Review
Toybox 3D Printer
4.0 Excellent
Best Budget 3D Printer for Children
Bottom Line:
The Toybox 3D Printer works well as a model designed for children, offering reliable printing from a browser or mobile device and a few thousand toys to print, plus creative options to output drawings or photos. Just bear in mind the tiny build area.
Pros
- Reliable, misprint-free printing
- Easy setup
- One-touch operation
- Well-composed help resources
- Access to more than 2,000 printable toys and projects
- Lets you create your own printable designs
Cons
- Tiny build area
- Not ideal for importing 3D files created elsewhere
Read Our Toybox 3D Printer Review
Monoprice Mini Delta V2 3D Printer
4. 0 Excellent
Best Budget 3D Printer for Beginners, Non-Techies
Bottom Line:
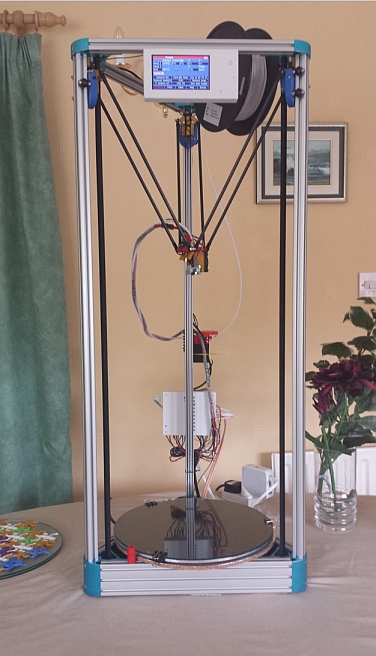
3D printing gurus will be intrigued by the Monoprice Mini Delta V2's use of the delta rather than Cartesian coordinate system, but beginners will just enjoy its low price, ease of use, and speedy printing.
Pros
- Sub-$200 price
- Quick, nearly misprint-free printing
- Easy setup and operation
- Sturdy steel-and-aluminum frame
- Supports multiple filament types
Cons
- Tiny build area
- So-so print quality
- Mere one-year warranty
Read Our Monoprice Mini Delta V2 3D Printer Review
Anycubic i3 Mega S
3.5 Good
Best Budget 3D Printer With an Open Design, Big Build Area
Bottom Line:
The Anycubic i3 Mega S, an inexpensive open-frame 3D printer, produced decent-quality prints in our testing. To get the most out of it, though, may require precise calibration.
Pros
- Modestly priced
- Large build area for an inexpensive printer
- Supports a variety of filament types
- Generally solid print quality
- Uses well-known Cura software
Cons
- Finicky print-platform alignment
- Supported coils of filament are small
- Poorly placed spool holder
Read Our Anycubic i3 Mega S Review
Anycubic Vyper
3.5 Good
Best Budget 3D Printer for the Biggest Build Area Possible
Bottom Line:
Anycubic's modestly priced Vyper whips up large 3D prints on its open-frame design, and provides automatic print-bed leveling. Just know that some minor assembly is required—and printed objects may require a bit of cleanup.
Pros
- Relatively large build area
- Automatic bed leveling
- Simple assembly
Cons
- Short (one-year) warranty
- Includes only a small starter filament coil
- Using Cura software with the Vyper requires tweaking a couple of settings
- Test prints showed some "hairy" filament residue
Read Our Anycubic Vyper Review
Creality Ender-3 V2
3. 5 Good
Best Budget 3D Printer for Tinkerers and DIY Types
Bottom Line:
Hands-on tweaking defines Creality's budget-price Ender-3 V2, an open-frame 3D printer that you build from a kit. It produces generally above-par prints, but its print bed can be tricky to keep leveled.
Pros
- Inexpensive
- Slightly above-average print quality
- Good-size build area for its price
- Supports several filament types
Cons
- Manual print-bed leveling can be tricky
- Setup instructions could be deeper, more legible
- Questionable quality control on some parts
Read Our Creality Ender-3 V2 Review
Flashforge Finder 3D Printer
3.5 Good
Best 3D Printer for the Very Tightest Budgets
Bottom Line:
The Flashforge Finder 3D Printer is moderately priced and offers good print quality, but it proved tricky to get up and running in our tests.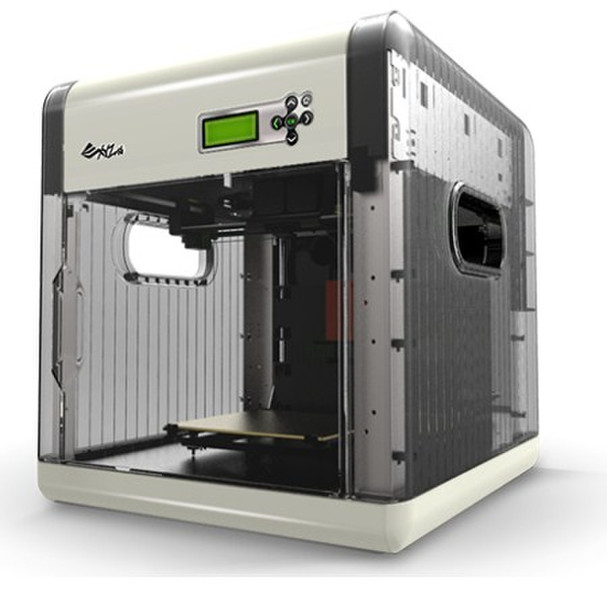
Pros
- Quiet.
- Good print quality.
- Connects via USB 2.0 cable, USB thumb drive, or Wi-Fi.
- Reasonably priced.
Cons
- Some objects pulled off the platform during testing.
- Poor documentation.
- Modest build volume.
- Limited to printing with polylactic acid filament (PLA).
Read Our Flashforge Finder 3D Printer Review
Polaroid PlaySmart 3D Printer
3.5 Good
Best Budget 3D Printer for Dabbling in Small Objects
Bottom Line:
The Polaroid PlaySmart 3D Printer is a compact, stylish 3D printer with above-par overall print quality, but, alas, a tiny build area for the money.
Pros
- Small, lightweight for a desktop 3D printer.
- Easy to set up and use.
- Supports PLA, PETG, and wood composite filaments.
- Multiple-color support.
- Wi-Fi camera monitors print jobs.
- Prints from USB drives, SD cards, or mobile devices.
Cons
- High price for its capabilities.
- Small build area.
- Too-brief warranty.
Read Our Polaroid PlaySmart 3D Printer Review
XYZprinting da Vinci Jr. 1.0 A Pro
3.5 Good
Best Budget 3D Printer With Closed Design, Roomy Build Area
Bottom Line:
The XYZprinting da Vinci Jr. 1.0 A Pro is a moderately priced closed-frame 3D printer with a large build volume and overall good performance, but a potentially balky filament-feeding system.
Pros
- Spacious build area
- Works with third-party filaments
- Self-leveling print bed
Cons
- Build plate is not heated
- Limited to PLA- and PETG-based filaments
- Guide tube is prone to detaching
Read Our XYZprinting da Vinci Jr. 1.0 A Pro Review
Monoprice Voxel 3D Printer
3. 0 Average
Best Budget 3D Printer for Cheap Filament
Bottom Line:
The Monoprice Voxel is an under-$400 3D printer that's easy to set up and use. It exhibits generally good print quality, but it was unable to print two of our test objects.
Pros
- Easy to set up and use.
- Budget price for printer and filament spools.
- Supports PLA, ABS, and several composite filament types.
- Versatile software.
- Prints over Ethernet or Wi-Fi, or from a USB thumb drive.
Cons
- Frequent misprints on certain test objects.
- Slightly balky touch screen.
Read Our Monoprice Voxel 3D Printer Review
How to Buy a Cheap 3D Printer
The biggest changes to 3D printers over the last few years have come to the cheaper models. Nowadays, many of those classic, ornery 3D-printing issues have been resolved (most of the time, anyway), even for consumer and bargain-priced 3D printers.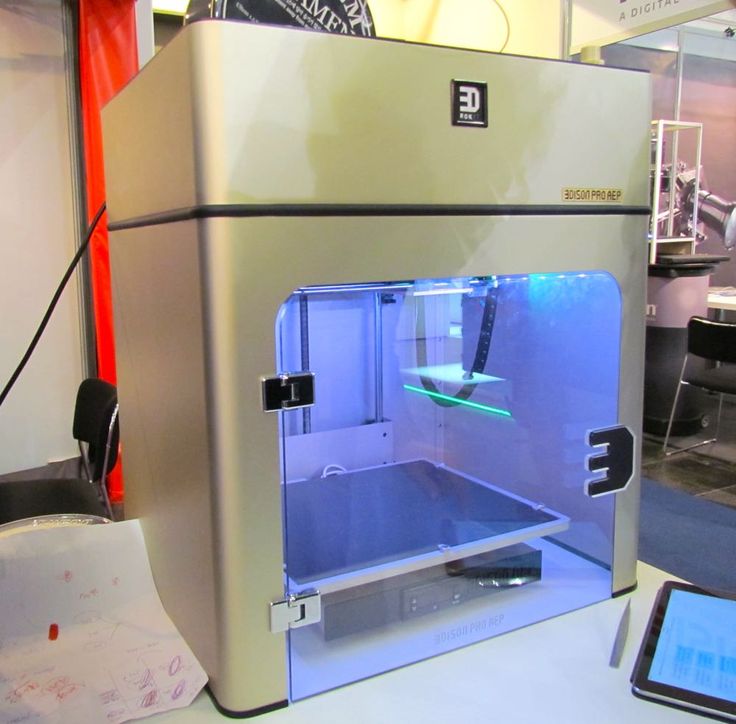 Automatic print-bed leveling is the norm, and you can usually remove 3D-printed objects from heated and/or flexible build plates with a minimum of coaxing. And most 3D printer manufacturers have either developed and refined their own software, or have adapted an open-source printing platform such as Cura(Opens in a new window).
(Credit: Zlata Ivleva)
What separates more expensive 3D printers from cheap ones ("cheap" defined as $500 or less, for the purposes of this article) is often a select group of features. These include the build volume, the type of frame, the varieties of supported filament, the software, and the connectivity mix. Let's run through those in turn.
What's the Right Build Volume for a 3D Printer?
A 3D printer’s build volume is the maximum dimensions (HWD) of a part that it can print. (We say “a part” because a 3D-printed object can consist of multiple parts that are printed, then glued or otherwise pieced together. ) While the smallest build volume of any 3D printer we have tested is 3.9 by 3.9 by 4.9 inches, we consider any build volume smaller than 6 by 6 by 6 inches to be small, any between that and 10 by 10 by 10 inches as medium, and any printer with at least one build dimension of more than 10 inches as having a large build volume.
(Credit: Molly Flores)
As a general rule, inexpensive 3D printers have small build volumes, while more expensive ones have larger build volumes. This depends in part on the type of printer. Closed-frame 3D printers—and most semi-open models, which have a rigid top, base, and sides but are open in front and, often, back—tend to have small build volumes, while open-frame printers, lacking as rigid a physical structure, often have relatively large build volumes for the price. You'll want to weigh the build volume against the kinds of objects you will print.
Should I Get an Open-Frame or Closed-Frame 3D Printer?
Which brings us to the frame "form factor" question: open-frame versus closed-frame. Closed-frame 3D printers are boxlike devices, with a rigid base, walls (with a see-through door in front), and top. Among their advantages? They muffle the operating noise, as well as reduce the odor from melted filament (which is potentially an issue with ABS plastic), and they provide some protection for people or pets who might inadvertently touch the hot extruder. A downside: They tend to have smaller build volumes than open-frame 3D printers, which have fewer (often, no) walls to constrict them.
(Credit: Zlata Ivleva)
Low-cost 3D printers include both open-frame and closed-frame models, as well as a few stereolithography printers. If a relatively large build volume is a priority, you’re likely to get more bang for the buck with an open-frame model. Open-frames do have some clear downsides by definition: They tend to be noisy, emit odors when certain plastics are melted, and provide little protection for someone who might touch the hot extruder.
(Credit: Molly Flores)
Also, recognize some potential negatives of open frames, depending on the model.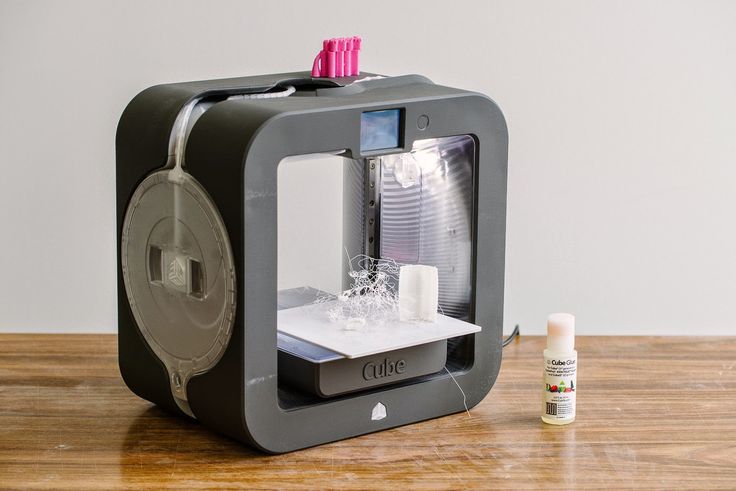 Some require assembly, being essentially kits, and most require more setup care than a closed-frame printer, plus more maintenance to keep them running smoothly. Still, these very traits should not deter—and may even appeal to—hobbyists and DIY folks.
What Should I Look for in 3D Printer Software and Connectivity?
Gone are the days when tinkerers had to cobble together several different programs to get a 3D printer to run. Manufacturers either include their own 3D printing program or modify an existing platform such as the open-source Cura.
3D printing software performs three main functions: processing an object file (resizing, moving, rotating, and in some cases duplicating it), slicing it (into virtual layers, based on your chosen resolution), and printing it. These are almost universally combined into a seamless process. Some high-end printers have software that supports a wider range of settings you can tweak, but even the basic suites work at least reasonably well.
More likely to vary among the cheaper set is the array of connection options from model to model. Nearly all have a USB Type-A port to fit a thumb drive for printing from document files. Most also have a USB Type-B port for connecting directly to a computer, and some offer Wi-Fi, too (or as an alternative), while a handful let you connect via Ethernet to share the printer across a local network.
Some printers support storing 3D files on an SD or microSD card (which may also contain the printer’s system files). Most 3D printer manufacturers (even the discount ones) have a mobile app to launch and monitor print jobs, and a few provide access to cloud services from which you can print.
While high-end 3D printers tend to have an abundance of connection choices, discount models vary widely in their choices. Some are generous and some are basic, so it pays to assess what a given model offers.
What Should I Look for in Filament Support?
Filament support tends to be a key area that separates the cheaper models from the higher-end ones. (See our guide to understanding 3D printing filaments for more particulars.) Inexpensive 3D printers tend to support a limited number of plastic filament types, some of them only PLA and/or ABS.
Recommended by Our Editors
3D Printing: What You Need to Know
3D Printer Filaments Explained
(Credit: Molly Flores)
PLA (polylactic acid) is a biodegradable, plant-based polymer, while ABS (acrylonitrile butadiene styrene) is the same tough plastic that Legos are made from. Objects printed from ABS are durable and nontoxic, though the material can be tricky to work with. ABS can emit an acrid, unpleasant odor during printing, and the bottom corners of objects being printed with it have a tendency to curl upward a bit, especially if you are using a non-heated print bed. This can lead to unsightly prints, and/or prints prematurely pulling off the build plate, ruining them.
Many entry-level and low-price 3D printers stick exclusively to PLA. If you want to experiment with a larger variety of filaments—which include water-soluble filament, wood- and metal-laced composites, and both tough and flexible varieties—you may have to pay more, although a few discount models support a wide range of materials.
Should I Consider a 3D Printing Pen Instead?
Although they aren’t printers per se, inexpensive 3D pens are close kin to 3D printers—using the same filament types and a similar extrusion system—and we include them in the 3D printing category. Rather than tracing out a programmed pattern, you use the 3D pen much like a normal pen, except that you draw with molten plastic. You can trace a pattern or draw freehand, and even draw in three dimensions as the plastic quickly solidifies and hardens once extruded.
(Credit: 3Doodler)
Most 3D pens cost less than $100, and some cost $50 or less. At a glance, 3D pens may appear to be toys, but some artists and craftspeople have taken to them, as it is possible to make quite complicated and beautiful objects with them. If your aim in 3D printing is something closer to freehand design and free expression than computer-centric, structured, and repeatable output, you might give one a try.
So, What Is the Best Cheap 3D Printer to Buy?
Buying a budget 3D printer needn’t mean a world of sacrifice. Plenty of capable and reliable models sell at less than $500, and while they may not be as feature-rich as their more expensive cousins, there's no sense in paying for things you don’t need.
Many casual 3D-printing experimenters will be fine with printing over a USB cable or from a thumb drive, and sticking to PLA may be the best choice for a starter 3D printer. If you focus just on the features you want, you may be pleasantly surprised at what you find. Below, check out a spec breakdown of the best under-$500 3D printers we have reviewed, paralleling our picks above. Also, for a look at the broader market, see our guide to our favorite 3D printers overall.
Using and setting up WiFi Sdcard in a 3D printer.
Miscellaneous
Follow author
Follow
Don't want
80
When I started looking for something simple to drop g-code files directly onto the printer card (without pulling it 'back and forth' from the printer to the card reader and back), I came across wireless memory cards.
And, finally, I received an SD card ordered a week ago with a built-in WiFi module.
I learned the basic principles of setting up to use such a drive in relation to a 3-D printer from this video: The card does not work in the 5GHz band (I had to enable the second band 2.4GHz in the router)
0003
3. The default transfer rate is not the highest (but I managed to increase it from 54 to at least 65Mbps).
I spent a little time looking for additional settings for the config of this map, and went to the developers website, where everything is described in detail:
FlashAir Developers the printer is not needed, but interferes with the printer menu)
And this is how it can be seen on the map:
As a result, I created my configuration settings file (and the final part - connecting a remote disk, practically repeated what was in the video above).
[Vendor]
Appmode = 6 (Automatic inclusion if there is a power in the Internet Pass-Thru mode
Upload = 1 (removal of remote entry)
appnaminTER APPNETWORKKEY=*********
VERSION=FA9CAW3AW3.00.02
CID=02544d535731364740d4fdd679010c01
PRODUCT=FlashAir
VENDOR=TOSHIBA
APPSSID=HOME3D
TIMEZONE=12
LOCK = 1
STA_RETRY_CT = 3
DNSMODE = 1 (receipt of DNS from the router)
Brgssid = Sweet Home (name of the Router Network)
BRGNETWRKEL ** (router network password)
APPAUTOTIME=60000 (WiFi module turn on delay after power on)
DHCP_Enabled=YES (DHCP enabled) (DHCP enabled) 0003
Noise_cancel = 2 ('Summary "(when there are many other devices)
Webdav = 2 (Web-interface for entering the browser)
Wlanapmode = 0x82 9003 (more inclusive more inclusive more fast mode WiFi 802. 11n/g)
P.S. Interestingly, now the card works in dual mode, being both an access point (a phone can connect to it) and a wireless network client, connecting to my router.
P.P.S. I'm not sure, but it's possible that APPNAME= and APPNETWORKKEY= are optional if you don't plan to access the card 'directly' from an external device.
Additional programs, I think, can also not be used (I only initially did a firmware update and tried Setup, and then everything was handled in the rules config).
Also important - after each change in the configuration file, the card must be pulled out and reinserted.
After everything described, I came across another thread on the Prusa 3D forum:
Flashair Toshiba Wifi SD Card?
Follow the author
Follow
Don't want
80
More interesting articles
2
Subscribe to the author
Subscribe
Don't want
Hello 3DToday!✌️
Today after 18:00 a new regular and popular video-...
Read more
one
Subscribe to the author
Subscribe
Don't want
Imprinta has been a partner of the championship for the second year and organizes assistance in holding it. The company...
Read more
levscha
Loading
07/16/2016
28747
128
Follow the author
Subscribe
Don't want
Good afternoon!
There was a need to change the color on the desired layer during the printing process.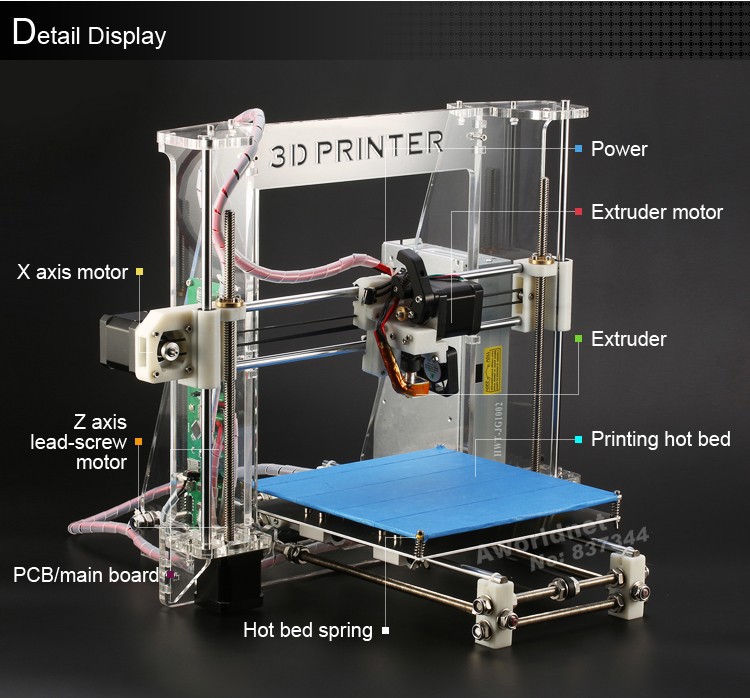 ...
...
Read more
10 reasons to use OctoPrint for 3D printing
3DPrintStory Reviews 10 Reasons to Use OctoPrint for 3D Printing
Surely everyone had problems with 3D printing, which was left overnight in the hope of getting a finished 3D model in the morning. Or it was simply not possible to constantly monitor the 3D printing process in order to stop it in time. e in case of an error. It is this problem - the problem of monitoring 3D printing - that is solved with the help of the wonderful free and open source software OctoPrint.
OctoPrint is a Raspberry Pi-based 3D printer application that allows you to remotely control your 3D printer. Created by Gina Heusge in 2012, the software is constantly being improved with new versions and new features (via plugins) coming out regularly.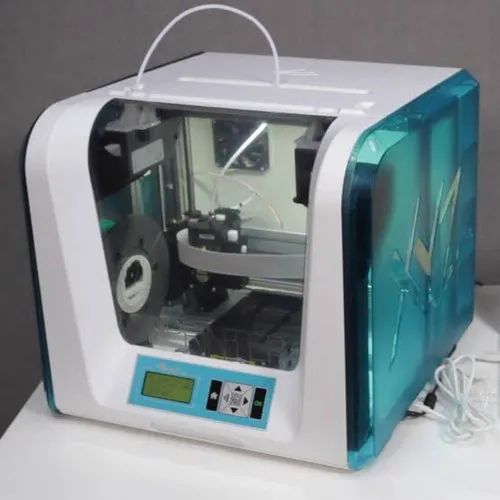
In this article, we highlight the top 10 reasons to use OctoPrint. Some of the problems in this list are solved with the help of additional plugins. By the end of this list, you'll probably want to try OctoPrint if you haven't already.
Wireless 3D printing
Many budget 3D printers do not provide the ability to control or monitor the 3D printer wirelessly. Models must either be downloaded to an SD card or transferred directly via cable. These connection options have their limitations. OctoPrint offers an excellent solution to this problem.
As we briefly mentioned earlier, OctoPrint provides software that is installed on the Raspberry Pi and then connected to the 3D printer. Thanks to the wireless capabilities provided by Raspberry Pi, you can control your 3D printer wirelessly via LAN.
OctoPrint allows you to remotely send G codes, control the temperature of the extruder and hot end, monitor the 3D printing process, and much more. Thanks to OctoPrint's wireless 3D printing capabilities, you can always control your 3D printer, even if you are not physically present.
3D printing from anywhere in the world
As you know, wireless 3D printing is convenient if you are at home and on the same network. But what if you left home and wanted to start printing and was finished when you got home? Or what if you want to keep an eye on the 3D printing process when you're not at home?
Plug-in OctoPrint Anywhere allows you to manage (start and stop) and control 3D printing from literally anywhere. This is a website that can be accessed from your computer or mobile device.
This plugin has a lot of fans, but keep in mind that the OctoPrint developers recently announced that it will eventually be replaced by a more elaborate and updated plugin called Spaghetti Detective.
View G-code
Typically, OctoPrint users monitor the 3D printing process via a webcam connected to their Raspberry Pi. However, if you don't have a webcam or just want to check your 3D print in a different way, the G-code viewer is a great tool.
This underrated OctoPrint feature shows nozzle position and layer number in real time. You can also find the status of your 3D print in the window just below the renderer, which shows the current G-code commands being sent to the 3D printer.
Commands from the terminal
The ability to send commands from the terminal is a great feature for more advanced users. You can view the codes sent to the 3D printer in real time.
One of the most useful features is sending custom G-code commands to your 3D printer. Instead of relying on another program to communicate with your printer, such as Pronterface, you can directly send commands to the OctoPrint terminal.
This feature can be useful in a number of scenarios. If you need to calibrate your 3D printer, you can view the existing system presets in a terminal command. Some commands also allow you to enter and save new calibrated values. This is a very handy feature for those who like to tinker with their 3D printer at a deeper level.
Slow motion
You know that 3D printing is a long process, it can take hours to print one model. Setting up a time-lapse video allows you to view the entire 3D printing process, which lasts several hours, in a matter of seconds.
With OctoPrint and with a camera connected to your Raspberry Pi, you can capture excellent 3D printing time-lapse video by setting the frame rate and interval between shots. For true enthusiasts, there are also more advanced customization options.
OctoPrint stores the timelapse locally on the Raspberry Pi and you can download it to your computer. Another useful feature of time-lapse video is the ability to determine the exact cause of a 3D print failure, or at least the point at which the failure occurred.
Octolapse is a plug-in that builds on the functionality of OctoPrint's Timelapse section to produce cleaner, crisper videos.
Slicing 3D Models in the Cloud
Cloud Slicing, as the name suggests, is a remote slicing feature that allows you to slice your 3D models without actually installing the slicing software on your computer. Model slicing is performed using a plugin installed on the Raspberry Pi.
Consider the scenario where your laptop is full of applications and you can't/don't want to install a new slicer. Or imagine not wanting a slicer for every computer you use. This is where the Cloud Slicing plugin fits in perfectly. This feature uses the Cura or Slic3r engine plugin.
Touch screen for user interface
Touch screen user interface has become the norm for many everyday devices. However, many 3D printers still lack this useful feature.
With the OctoPrint TouchUI plugin, you can add this feature and display the OctoPrint interface on the touch screen. This plugin will allow you to use OctoPrint without connecting a computer. The user interface on the touch screen is very similar to that in the browser, so the transition in terms of learning a new interface will not be difficult.
Installing a touch screen can seem like a tedious task, but there are plenty of tutorials and videos to help you through the process.
Open-source community
Individual developers have spent hours of their time improving 3D printing, including free and open source software such as Marlin, Cura, and OctoPrint itself.
OctoPrint's popularity is largely due to open source and free access. All source code is available on the GitHub page. Thanks to this, many users and developers have shared their ideas and brought them to life. User-developed plugins greatly extend the functionality of OctoPrint.
Manage multiple 3D printers
As you can imagine, this function is useful when you are working with more than one 3D printer. You can connect multiple webcams to one Raspberry Pi.
The video below shows instructions (in English) on how to install three printers on a Raspberry Pi:
Another option is to use OctoFarm, a free and open source service that allows you to control and monitor multiple 3D printers on a single Raspberry Pi. With it, you can monitor multiple 3D printers on the same screen, send files for 3D printing, and monitor the printing progress.
List of useful plugins for OctoPrint
In general, it is quite difficult to make the top 10 useful OctoPrint features, as the list is really huge. So below is a small selection of additional plugins that will help you simplify and secure the 3D printing process.
- Pushover: This plugin sends you push notifications when a print is completed or 3D print fails for some reason. A simple and very practical plugin.
- Heater timeout: this often happens, the 3D printer stays on and the extruder is still hot, which can cause a fire. This heater timeout plug-in disables hot end heating after a set amount of time. This will help you avoid potential fires and excessive electricity bills.
- Emergency stop: there is always the possibility that something might go wrong during 3D printing. This plugin adds a large red bar at the top of the OctoPrint user interface which, when clicked, will stop the 3D printer from working.
Learn more