3D printing drone frame
The Top 6 Frames to 3D Print for Your DIY Drone
On your way to building a DIY drone? Here are some of the best drone frames you can 3D print for free.
3D Printable Drone Frames
Making a sturdy and standard frame is a key part of the process of building your own DIY drone. Of course, you could also buy a frame, but that doesn't match the DIY spirit. Especially if you've already got access to a 3D printer.
One advantage of 3D printing your drone's frame is that you can do it again. This means that if you ever get in a flying accident and damage the frame, you won't have to go looking for spare parts as you can simply print them.
So if you plan on 3D printing a frame for your drone, there are plenty of models available for download and print online, and here are some of the best ones.
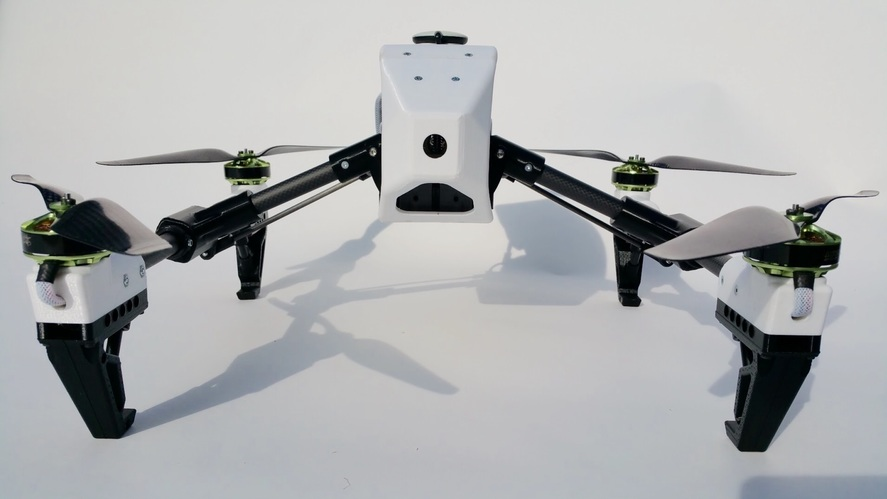
Building on the success of the original MHQ, the Hovership MHQ2 is a complete and functioning frame model designed for brushless rotors. This frame is designed to accommodate the rotors in an H shape, and the arms are foldable so that you can tuck them inside the body when you're not using the drone.
The MHQ2's design has room for plenty of auxiliary modules and sensors, though if you're planning on building your drone with Arduino, you're better off using a smaller board like the Arduino Nano.
The MHQ2 is easy and straightforward to print and doesn't have any tricky parts. It's best if you print the arms with an infill above 75% so that they don't snap in your first flying accident. You're going to need a handful of M3 bolts and nuts to put the frame together.
Related: What Is Arduino? What Can You Do With It? Explained
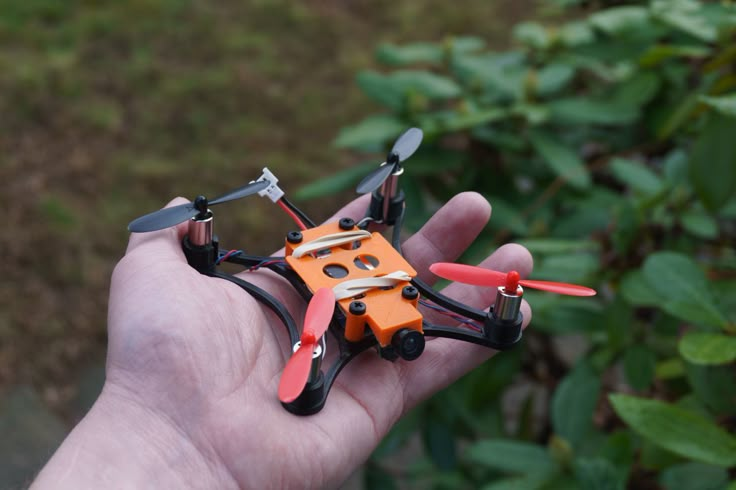
This Micro H-Quadcopter frame is designed for tiny brushed 8.5mm motors and is small enough to fit in the palm of your hand. The arms are attached in an H shape, and the frame houses a rubber band mount for a small 1S LiPo battery. It's also got a mount for attaching a tiny camera with double-sided tape.
The flight controller compartment is 30x37mm, so there isn't much room for extra modules, but you can easily fit a flight controller or a tiny Arduino board in there.
The Micro H-Quadcopter's frame model is easy to print and it's also a quick print as it's pretty small. Keep the infill above 60% to get a sturdy frame. You can put the frame parts together with M3 bolts, no glue required.
The Crossfire 2 might be the best true X-shape DIY frame out there. Sturdy and yet lightweight, and with a spacious three-story compartment to fit nearly every module you want, it’s a great choice for beginners and veterans alike.
This frame is large enough to house a 4S LiPo battery, a large flight controller (or Arduino Uno), and tons of modules. The electronic speed controllers are mounted on the arms and tightened with plastic clamps.
The entire frame weighs around 400 grams, which means the print will take quite some time, but it's a full package as it comes with numerous plates and even a GoPro cover. The Crossfire 2 has been standardized to work with M3 hardware and the designer MikeyB has included an extensive guide on how to print the frame and build a drone on it.
Related: The Best Cheap Drones With Cameras
Though most DIY drones show off their wirework, the PL1Q Vampire offers a different approach. The only visible parts in a drone with this frame are the motors and the propellers, and everything else is hidden inside the frame, or under the vampire's cloak if you will.
The model is designed to work with brushless motors, the arms are long enough to use 8" propellers, and the flight controller compartment is big enough for an Arduino Uno.
The PL1Q Vampire is harder to print than the other models in this list, and some parts will require supports to print properly. Use 100% infill on the motor mounts and 40% for the rest. Print the landing gear in 100% if you plan on making rough landings.
Yet another Micro-Quad, albeit this time with foldable arms. This Foldable Brushed Micro-Quad isn't as micro as you would expect, but it still fits in the palm of your hand if you tuck its arms inside. This frame is built in a stretched X shape which gives you more stability at high speeds.![]()
You can build this quadcopter with 8.5mm brushed motors and a 1S LiPo. You'll be skipping the speed controllers since this model works with brushed motors. The frame is a bit too heavy for doing acrobatics, but since it's got a nice camera mount it's perfect for FPV flying.
The print process for this foldable Micro-Quad is simple, as the parts are small and you don't need any rafts or supports. You can put the frame together with M2 and M3 bolts and nuts.
Related: Essential Drone Photography Apps and Guides for Beginners
The idea behind Nanolongrange was to make a long-range lightweight drone that's designed around a single lithium battery and it does a great job at that, as the entire drone, with a camera, weighs under 45 grams. Having built the drone around a single lithium battery gives the frame a unique structure shape, which is neither an X and nor an H.
This frame is designed for brushless motors. However, it cannot accommodate external electronic speed controls, so you should use an AIO flight control.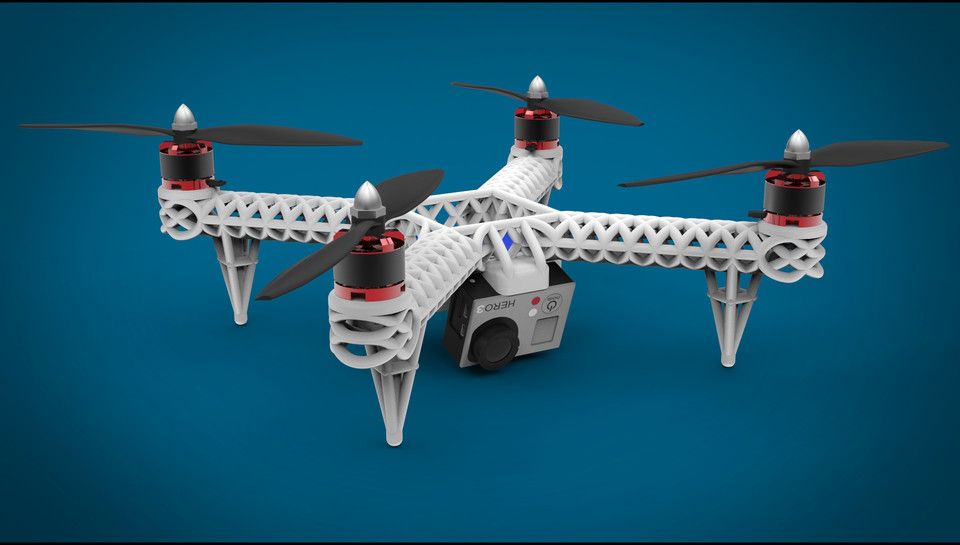 This makes building this drone with Arduino harder, compared to other frames.
The print is a single file that you can print at above 40% infill with PLA or ABS filaments. This design uses lithium-ion batteries instead of the go-to LiPo batteries that most brushless drones use.
Related: Unique Ways That Drones Are Being Used Today
Print Your Own Drone Frame
Now that you've got a good array of frames to pick from and print, you can further customize the frames by changing the size, the material, the color, and more to build a truly unique drone. Be it an X or H shape, with brushed motors or brushless motors, you can build just about any sort of drone if you've got the right frame.
If you've recently gotten yourself into drones and want to start learning more, then you should start with the first step and first learn how drones fly.
3D Printed Quadcopter Drone - How to Build your own Quadcopter Drone?
This is an introduction to building your own 3D printed quadcopter drone. You will learn some basic concepts and we’ll introduce you to several step-by-step guides. It’s a relatively easy endeavor cause the guides are so detailed.
What you need to get started
Besides a 3D printer you will need some non-printed parts like the motors to power it, the batteries, some electronics, the sensors, the remote control unit and some basic skills to put everything together.
Why 3D print a quadcopter drone?
That said, you can 3D print the frame and the housing structures. Sometimes you can also print the propellers. Why is this important? Well… drones crash and break. Specially if you are a novice pilot. This picture describes it perfectly:
The Anatomy of a Drone with things that usually break. Image source: the poke.co.ukWith 3D printed parts you have an infinite and quick supply of spare parts that will make your pilot training and everyday mishaps easier to handle. Besides easier repair, making a DIY drone will give you much more knowledge about the inner workings and mechanics of your flying machine.
Last but not least, 3D printing utilises the quick development of custom build parts. So let’s say you’ve bought a new camera for your quadcopter drone and you need a new connector. Just dive into your favourite 3D modeling software, print it out and test it. Make changes iterate et cetera.
What is a quadcopter drone?
A quadcopter is a multi-rotor helicopter that is lifted and propelled by four rotors and no tail rotor. It’s the most common form of hobby RC drones.
With their small size and maneuverability, these quadcopter drones can be flown indoors as well as outdoors. Besides that, at a small size, quadcopter drones are cheaper and more durable than conventional helicopters due to their mechanical simplicity.
Below you can see a more detailed overview of quadcopter drone parts of a commercially available top-tier drone used for aerial photography:
Almost everything that is not a motor or an electronic part can be 3D printed. The 3D printed version looks a little bit different:
Crossfire 3D printable quadcopter. Project link: http://www.thingiverse.com/thing:32281
Besides the visual and aesthetic differences, the 3D printed version is easily upgraded and modular. In the following video Dennis Baldwin explains his 3D printed quadcopter in detail:
If you want to get into building one yourself we have found several entry level projects. Here is a detailed construction guide for a 3D printed quadcopter:
http://www.instructables.com/id/3D-Printed-Quadcopter-with-Arduino/?ALLSTEPS
… and this is a build guide for a different type of H-frame drone with a smaller frame:
http://www.instructables.com/id/Make-an-H-Quadcopter-with-3D-printing/?ALLSTEPS
3D Print a remote control
If you want to 3D print the remote control unit housing and make your own joystick, you have to check out this project:
http://www. instructables.com/id/DIY-quadcopter-joystick-and-frame/
3D print an insectoid ornithopter
If you are interested in more exotic designs and experiments you could 3D print a small UAV insectoid Ornithopter which flies by wing flapping and not propellers:
Detailed Ornithopter guide: http://www.instructables.com/id/3D-Printed-Ornithopter-Micro-UAV-Drone/
Laws and regulations
Do keep in mind that there are some laws regulating operation of hobby RC UAVs and drones – consult your local regulations. Also stay safe! High flying objects with high speed propellers and inexperienced pilots can cause a lot of damage to people and property.
How to fly a quadcopter drone?
Youtube is filled with “how to fly a quadcopter” instructional videos, so that will be your starting point to figure out the basics.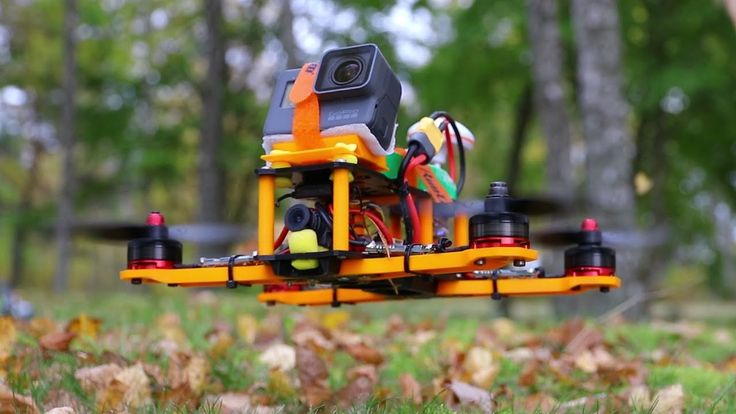 Once you get the basics you can do some amazing stuff like drone racing from point of view!
Enjoy flying!
90,000 everything you need to know before startingContent
- 1 Introduction
- 2 Fundamentals of 3D prints of drone details
- 2.1 advantages
- 2.2 The best materials
- 2.4 Applosability of materials 9000 2.5 Details of details
- 2.6 Functional Components
- 2.7 Security
Introduction
If you are looking to 3D print a drone from scratch or make related parts for an already finished quadcopter, then this guide is for you. Read on to learn all about how to make your printed components fly!
Fundamentals of 3D printing drone parts
5" mini quad with printed Hero 8 mount (Source: Rob Davey via All3DP) are vehicles capable of operating autonomously. In other words, a drone is not necessarily an aircraft; they can also include cars, boats and even hovercraft. However, the term is used to refer specifically to an aircraft that has three or more rotors to provide lift and thrust. They are also commonly referred to as multicopters, tricopters, quadcopters, and so on.
In general, UAVs are mechanically very simple and consist of a frame, flight controller, el. motors, propellers, speed controllers and possibly first person view (FPV) equipment.
3D printing has long been a great drone hobby. This technology allows the user to easily produce many different parts on their own. This can be anything from protective bumpers and action camera mounts to accessories that add functionality to the quad.
In this article, we'll talk about what to consider when 3D printing drone parts, the most relevant parts to print, and where to find models and resources. We'll then wrap things up with a few projects to get you started. But first, let's figure out why you even need to print parts on a 3D printer. Read on to find out more!
Benefits
Smartphone holder (Source: Digit Design and Prints via Facebook)
- The main advantage of 3D printed parts is that they can be completely customized. In addition, they are generally inexpensive (assuming you already have a printer and filament (3D printing filament)), and the design can be quickly iterated from initial to final version.
- The printed parts can be made from different materials and in different colors. This approach allows the use of a material with better mechanical properties for specific elements. For example, your GoPro mount might be blue TPU with nylon prop guards.
 Camera holders are best printed with TPU (Thermoplastic Polyurethane; TPU) as this material absorbs vibration from the frame and holds the GoPro tightly in place, while the durable nylon can absorb shock and protect both the propellers and the object/obstacle itself. Other durable materials such as reinforced nylon can even be used to create gliders, awnings and camera hangers.
 - Another plus when using printed parts is their relatively low density. With 3D printing, parameters such as the number of perimeters and infill percentage can be adjusted to significantly reduce weight, with the former more predetermined in the final result.
This photo shows the manufacturing sequence for an FPV drone canupee. For example, when designing a canupi, the first draft of the blank can be printed from an inexpensive material such as PLA, and after the fitting process, all required changes can be easily made into the next iteration. Once the model is considered complete, it can be printed in more expensive material such as carbon fiber, nylon, or even, if budget allows, PEEK carbon fiber. Do you need all these components? (Source: Rob Davey via All3DP) While 3D printing opens up a whole new world of possibilities in terms of additional features, the most important thing to keep in mind is the weight of your aircraft. Not everything that can be printed and installed is useful! It should be understood that every gram of a drone affects the flight time and flight characteristics, especially for rotorcraft. In other words, on a UAV whose primary purpose is long flight, the presence of components such as a GoPro mount, a head tracker, and a reset mechanism is not necessary. You may also notice that large companies such as DJI who sell UAVs and similar aircraft usually offer the necessary mounts and accessories; they are all printed, but their number is as limited as possible, because they simply add weight. In addition, in many countries, including the Russian Federation, the rules require registration of models weighing more than 250 grams. Accordingly, the demand for quadcopters weighing below this limit is much higher. Beam shield, GoPro mount and antenna mount all printed in TPU (Source: Digit Design and prints via Facebook) The most commonly used material for quads (especially for the mini niche) ) is TPU. This is because it is highly flexible and can deform on impact, absorbing energy and protecting important UAV components. Due to its flexibility, it can also absorb vibration, reducing visible artifacts in recorded video. Fortunately, this has become less of an issue with the introduction of in-camera stabilization. Another suitable material is nylon. It is stiffer than TPU, but still has some flexibility. The main parts printed on TPU are bumpers, camera mounts, antenna mounts and propeller guards. While TPU and nylon are versatile, they are not suitable for all parts. Where more rigidity and strength are required, such as in the manufacture of gliders, carbon-fiber-reinforced nylon (CFRPA6) is recommended. This approach will provide the benefits of standard nylon, coupled with the rigidity of carbon fiber. It's also easier to print on than regular nylon because it warps less and sticks better to the 3D printer's build plate. One way to protect the underside of the boat's frame, as well as the motor mounting bolts, is to add 3D-printed "stands or landing pads". They are especially useful when flying over concrete surfaces. The ideal material for this is CFRPA6. You can also print them in TPU, but the abrasion resistance won't be as good. 5" Racing Quadcopter with Turtle or Turtle Mode Tandem Fin (Source: Rob Davey via All3DP) If racing drones are your hobby, you should try using a fin. FPV transmitter antenna holder printed in TPU (Source: rapnit via Thingiverse) If you are flying in FPV mode, VTX antennas are vital. Thus, there are many mounting options for such components. If the device is intended for flights over long distances, then enclosing the active part of the antenna in a TPU is not a good idea, as this will adversely affect the video signal. For them, TPU is the preferred choice because it is very elastic and can deform without breaking for a long time. It is also possible to enable head tracking in FPV mode, when the FPV camera is mounted in a motorized drive, allowing it to move in two or three dimensions according to your FPV goggles. The 2-axis gimbal (to stabilize the camera) was printed in PLA (Source: turbi via Thingiverse). If FPV flying or racing isn't your thing, you can always print the parts to expand the functionality. Maybe it's a camera stabilizer for aerial photography or video shooting, or a mechanism for grabbing and dropping objects? For a gimbal, the moving parts must be printed on a non-flexible material to eliminate play. This stick protection was designed by Fusion 360 (Source: Motorpixiegimbals via Thingiverse) Finally, another good print option is parts to protect elements such as the control sticks of a remote control. GrabCAD search results for "Drones" (Source: GrabCAD) This site has an active user base and many helpful discussions (Source: DIYDrones) While many of the individual components can be downloaded from the sites listed above, there are also additional resources such as forums. The main forums for drone manufacturers are DIYDrones and RCGroups. A complete list of printable gliders on RCgroups can be found in one helpful thread, or similar listings can be found on DIYDrones. In addition, there is a subreddit for drones that discusses 3D printing topics, as well as a subreddit for do-it-yourself drones. Canupee model with custom molded GoPro holder (Source: basdelfos via Thingiverse). The only real limit to what you can print is your imagination! Before proceeding, it will be necessary to take into account the intended purpose of both the drone and the part, as well as the impact of any additional weight. Here are some ideas from Thingiverse for printing, whether it's an entire quadcopter or just parts of it: That's all for now. Thank you for your attention. We hope the presented material was useful for you. Stay with us! Visual process of printing rays for an FPV drone made of carbon fiber reinforced nylon (CFRPA6). 3D plastic printing for the development of quadrocopters Konstantin Innokentiev 3D scanning engineer, metrology expert Aerialtronics is a Dutch company that designs and manufactures civilian drones. Aerialtronics is a Dutch company that designs and manufactures civilian drones. It employs 35 people. The company specializes in the production of the most customized drones, made according to the requirements of the customer. This is a piece production, which requires an individual approach to the manufacture of parts. The company has developed a concept model that combines the basic platform and a set of elements that can change depending on the customer's tasks. This drone was named Altura Zenith. In addition to the basic characteristics, customers were offered various options to choose from: the number of motors and power, payload, flight time, supported software. To implement all these options, the company's engineers needed to make unique parts of the drone's body. Even minor changes in technical specifications required redesigning and changing individual parts of the device. The solution of such issues by traditional methods required large financial and time costs. To save time and money when developing new drone models, Aerialtronics decided to use plastic 3D printing. The choice fell on the Stratasys uPrint SE Plus 3D printer. Our engineers are thrilled with how quickly a CAD model is now turning into a physical prototype. The ABS plastic we use for printing provides excellent strength – and is ideal for the weight of flying prototypes. For example, our motors can get hot during operation, but this material easily withstands such loads and remains durable. The 3D printer has helped us take a step forward in design, reduce the overall cost and time of new product development. The company has developed a concept model that combines the basic platform and a set of elements that can change depending on the needs of the customer. This drone was named Altura Zenith. In addition to the basic characteristics, customers were offered various options to choose from: the number of motors and power, payload, flight time, supported software. To implement all these options, the company's engineers needed to make unique parts of the drone's body. Even minor changes in technical specifications required redesigning and changing individual parts of the device. The solution of such issues by traditional methods required large financial and time costs. To save time and money when developing new drone models, Aerialtronics decided to use plastic 3D printing. Our engineers are thrilled with how quickly a CAD model is now turning into a physical prototype. The ABS plastic we use for printing provides excellent strength – and is ideal for the weight of flying prototypes. For example, our motors can get hot during operation, but this material easily withstands such loads and remains durable. The 3D printer has helped us take a step forward in design, reduce the overall cost and time of new product development. Compared to traditional methods, this is a real breakthrough in work. Joost Hisimans, Chief Designer Aerialtronics Altura Zenith main frame is made of carbon. But the rest of the parts, the installation of which depends on the configuration of the drone, are created using the uPrint SE Plus 3D printer. These include: different-sized cases for sensors, video cameras, GPS systems, various tubes and containers for electronics, wires and other auxiliary elements. 3D printing has allowed Aerialtronics designers and engineers to spend more time improving individual components. They spend all day developing and rendering designs and construction, and turn on printing at night. With uPrint SE Plus, they have a finished physical sample of the part they need the very next morning. The part is tested, finalized and printed again. 3D printing allows you to try 8-10 different designs in a few days. The result is a product devoid of shortcomings and shortcomings. Using 3D printing, the Altura Zenith project was completed well ahead of schedule. In addition, it cost much less than it was planned. Aerialtronics believes that 3D printing is a great opportunity for small companies to break new ground, reduce costs and offer customers a great product at an attractive price. The use of the uPrint SE Plus 3D printer allowed Aerialtronics to expand production, today their products are used not only by private customers, but also by the police, army, emergency services and other organizations. Altura Zenith main frame is made of carbon. But the rest of the parts, the installation of which depends on the configuration of the drone, are created using the uPrint SE Plus 3D printer. These include: different-sized cases for sensors, video cameras, GPS systems, various tubes and containers for electronics, wires and other auxiliary elements. 3D printing has allowed Aerialtronics designers and engineers to spend more time improving individual components. They spend all day developing and rendering design and construction, and turn on printing at night. With uPrint SE Plus, they have a finished physical sample of the part they need the very next morning. The part is tested, finalized and printed again. 3D printing allows you to try 8-10 different designs in a few days. The result is a product devoid of shortcomings and shortcomings. Using 3D printing, the Altura Zenith project was completed well ahead of schedule.
Considerations

Best materials
Material Applicability
 Nylon can also be used to protect props, but is less common because it is harder to print.
 Variety of Parts
Fins
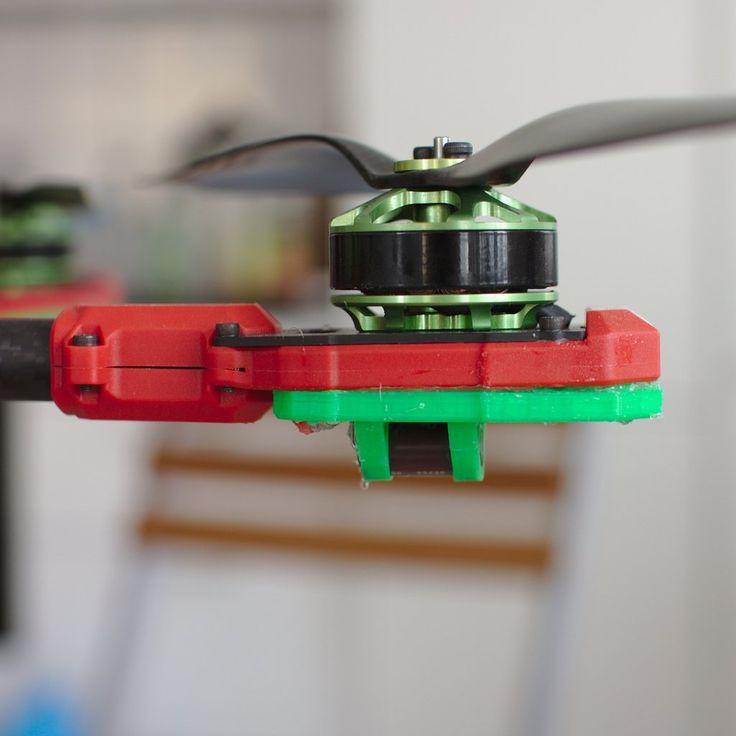
 This component is especially relevant in tandem with the mode known as "turtle or turtle". When the drone is flipped upside down, thanks to the fin, the two motors free from contact with the surface will be able to rotate freely, which will subsequently allow you to quickly flip the quad and continue the race. They are most often printed in TPU and sometimes in nylon.
 Antenna Mount
 Thus, the camera copies the movements of your head, contributing to greater immersion. For this, inflexible materials such as PETG, ABS, ASA or even PC should be used. Rigidity is needed to eliminate play in the components.
 Functional components
When installing the stabilizer on the drone, there must be a flexible part between it and the gimbal to isolate it from vibration. Protection
 They can be either flexible or non-flexible, depending on your preference.
 Model sources
If you download models from any repositories (including the websites listed above), be sure to check the license under which they are in order not to infringe copyright when selling.
 In this case, this approach will be most useful, because the likelihood that the part will match yours may be higher than if you use the data of a third-party website.
 Resources
Projects to get you started

video
3D plastic printing for the development of quadrocopters
 It employs 35 people. The company specializes in the production of the most customized drones, made according to the requirements of the customer. This is a piece production, which requires an individual approach to the manufacture of parts.
 Challenge: How to accelerate the development of new drones

Solution: uPrint SE Plus 3D Printer
Faster
 Compared to traditional methods, this is a real breakthrough in work. Joost Hisimans, Chief Designer Aerialtronics
 Challenge: How to accelerate the development of new drones
Solution: uPrint SE Plus 3D Printer
 The choice fell on the Stratasys uPrint SE Plus 3D printer.
 Faster

Better
Cheaper than
3D printing and technology business
Better
Cheaper
Learn more