Ender 5 plus 3d printer review
Simple Ender 5 Plus Review – Worth Buying or Not – 3D Printerly
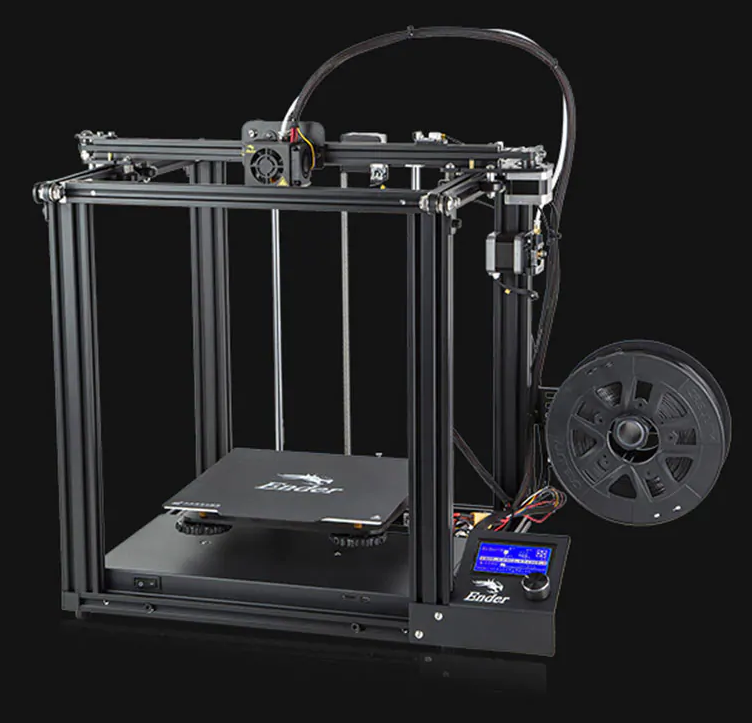
Creality is no stranger to top quality 3D printers, so looking at the Creality Ender 5 Plus is a serious contender for one of the best large-scale 3D printers on the market. It weighs in with a build volume of 350 x 350 x 400mm, which is massive!
It comes with a whole host of worthy features that provide Ender 5 Plus users with amazing quality 3D prints, although they are missing out on some other key aspects which you might want to upgrade.
Regardless of this, you can expect a great 3D printer when you have this machine by your side.
Let’s get into this review of the Ender 5 Plus. I’m going to be looking over the features, benefits, downsides, specifications, and what current customers are saying about this 3D printer, so you can choose whether this machine is the right one for you.
The price tag is sitting at around the $600 mark, which is very competitive for the build volume that you are getting!
If you want to check out the Amazon listing for the Ender 5 Plus, click here.
- Large Build Space
- BL Touch Auto Leveling Sensor
- Filament Run Out Detection
- Y Axis Dual Shaft Motor
- Strong Power Supply Unit
- Thermal Runaway Protection
- 4.3 Inch Color Touchscreen
- Creality V2.2 Motherboard
- Dual Z-Axis Lead Screws
- Tempered Glass Plate
- Partially Assembled Kit
Check the price of the Creality Ender 5 Plus at:
AmazonBanggoodComgrow
Large Build Space
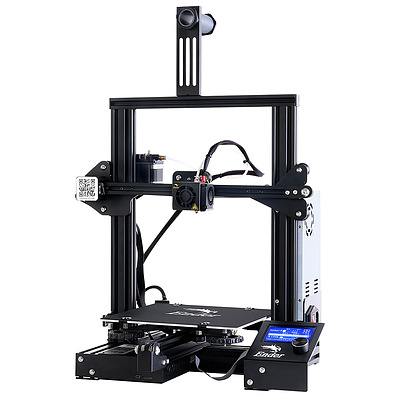
The most noticeable feature of the Ender 5 Plus (Amazon) has to be its enormous build size, especially when comparing it to the average 3D printer.
You will be blessed with a build volume of 350 x 350 x 400mm. Compared to a normal medium-sized 3D printer like the Ender 3, measuring up at 220 x 220 x 250mm, it out-competes the Ender 3 with ease.
For those users who have larger 3D printed projects in mind, you can be sure that you’ll be set up very nicely with the Ender 5 Plus. Larger projects are possible with smaller 3D printers, but it means you have to split models up into relatively small pieces.
With a big build volume, you can get a lot more bang for your buck and make your ideas into a reality with less restrictions.
BL Touch Auto Leveling Sensor
Following on from the large build space, we can look towards the printing aspect of your 3D printer, namely the automatic leveling sensor called the BL Touch.
Many 3D printer users have to deal with manual leveling, which isn’t usually too bad if you have a flat surface, but the printing process goes a lot smoother when you have an automatic leveling feature.
The Ender 5 Plus made sure to implement this auto-solution which starts when the printer is plugged in.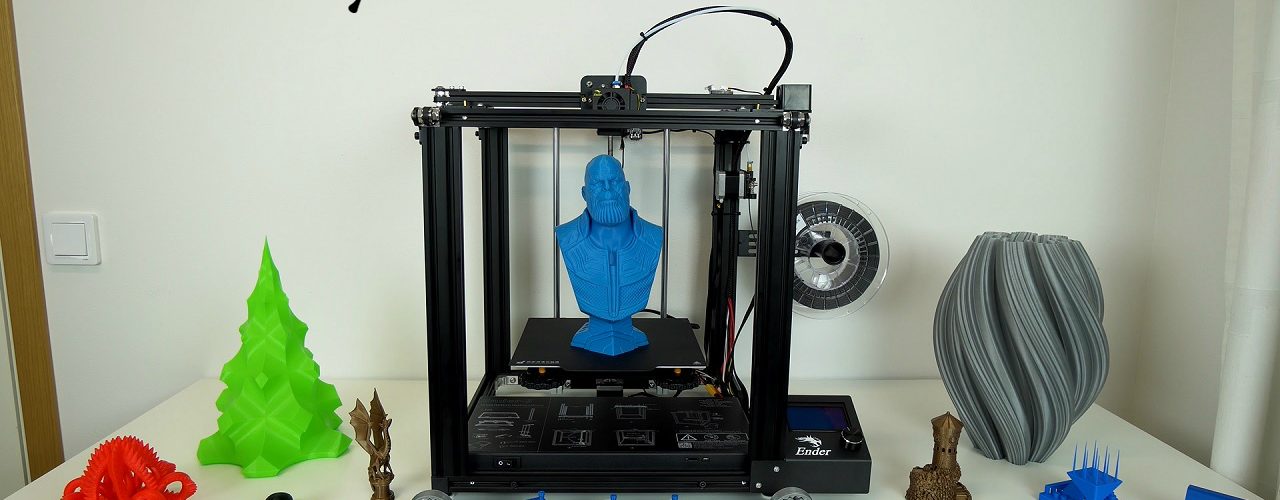
It can measure the print bed surface’s inclination precisely and can ensure the compensation of the Z-axis in case the platform is uneven.
This sensor plays an active role in avoiding errors that could occur due to the print surface’s unevenness. Apart from this, it offers a reliable operation of printing with all the build surfaces.
Filament Run Out Detection
With a larger 3D printer, you are going to printing through plenty of filament, so having filament run out detection is a very good idea. What it does is basically detect when filament stops flowing through a sensor.
The sensor plays an effective role in detecting and avoiding the occasional printing errors.
It works its magic when filament unexpectedly breaks or runs out altogether. Once filament stops flowing, the 3D printer will automatic pause and wait for you, the user, to replace or fix the flow of filament through the extruder.
You can then happily finish your print from the paused point.
Print Resume Function
Similar to the filament run out detection, the print resume function works as a fail-safe when your 3D printer shuts off due to having no power.
Rather than lose your 3D print altogether, your 3D printer keeps a memory of the last location, and using that, prompts you to resume your 3D print after turning the power back on.
This new feature has ended the tension of people as they do not have to set the printer’s setting if it gets stopped due to power problems. The resume printing feature helps in starting the printing process, where it was left before the power went out.
Y Axis Dual Shaft Motor
Printing movements are made smoother by using dual Y-axis shaft motors and couplings. It does a good job to ensure high precision 3D printing throughout the whole process, especially necessary for a larger 3D printer.
Strong Power Supply Unit
The power supply is one of the most important components of the printer, and the company has stressed a strong power supply. They made sure to use a power supply that has CE certification, ensuring top safety standards.
The power supply used in the printer contains 500W of power which can heat the hotbed very quickly, giving you a 100℃ within 10 minutes.
Thermal Runaway Protection
The printer comes with various security measures to protect you as a user. Thermal runaway protection is a firmware function that automatically shuts the heating element down if it detects irregularities in the heating process.
Some 3D printers without this protection can result in dire consequences of fires started, mainly due to the printer overheating since it is not accurately measuring the actual temperatures, thinking that it is at a lower temperature.
This can happen from a thermistor that comes loose, loose heater cartridge, faulty connectors, or from fault or broken wires.
4.3 Inch Color HD Touchscreen
The operation of your 3D printer is something that you want to be as easy as possible. With the built-in 4.3-inch touchscreen on the Ender 5 Plus (Amazon), you can seamlessly adjust settings, choose 3D prints, and plenty more.
It has a great HD display which shows the key information about your printer’s status, making it easy to operate for any user.
Dual Z-Axis Lead Screws
Similar to the dual Y-axis shaft motors, you also have dual Z-axis lead screws, enabling a smooth layer-by-layer movement for more accurate 3D prints. Again, this is very necessary for larger 3D printers because there is more weight to move overall.
If it were a single Z-axis lead screw design, you would fall short of high quality prints, mainly showing in very visible layer lines throughout your 3D prints.
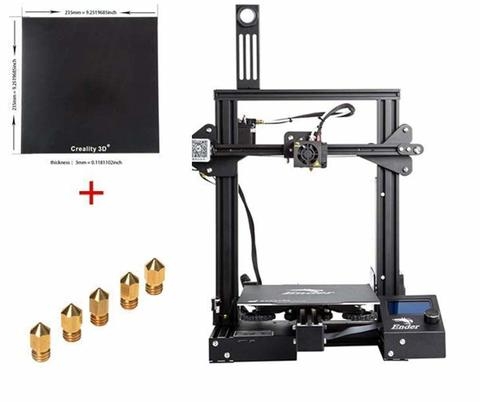
Tempered Glass Plate
The glass plate that comes with the Ender 5 Plus is a great addition that allows you to get a smooth bottom surface finish, as well as makes your models easier to remove.
It gives you a very flat surface to work with, reducing the instances of prints not getting proper adhesion to the build plate due to warping.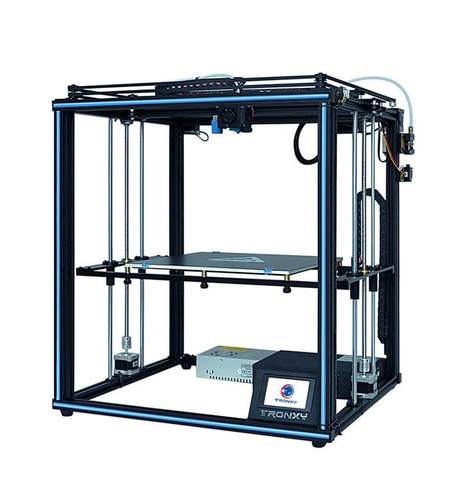
Glass plates are very popular in the 3D printing community, but you do have to watch out for possible ‘ghosting’ which is a print imperfection that arises from vibrations due to large weight moving around.
Though, with all the stability with the dual Y & Z axis, ghosting shouldn’t be a problem.
Partially Assembled Kit
Assembly becomes a lot easier when many of the parts are put together already, something that you benefit from with the Ender 5 Plus. You still get to learn how the components fit and work together to create your 3D prints, rather than having it all done for you.
Most users who purchased the Ender 5 Plus mention how easy the assembly process was, so I would recommend it for people who don’t want to have to take too much time to put it together.
- Assembling process of Ender 5 Plus is fast and easy for beginners
- The 3D printing process is made easier with the automated leveling process, saving you time
- Operating the Ender 5 Plus is easy with the 4.
 3-inch HD touchscreen
 - Dual Z-axis & dual Y shaft motors gives plenty of stability and stable movements for accurate prints
- Very large build volume allows for big projects with ease
- The tempered glass build plate is removable, making the print process more flexible
- The Ender 5 Plus offers excellent dimensional accuracy and precision in prints.
Downsides of the Ender 5 Plus
I think the first thing to talk about regarding the downsides of the Ender 5 Plus is the noise that it makes while printing. Unfortunately, it doesn’t have a silent motherboard, so you can expect it to be pretty loud.
If you want to reduce this noise, you do a few things.
The most recommended would be to get a silent motherboard and install it within the printer. I did this with my Ender 3 and it made a huge difference to the noise emitted, where I now just hear the fans.
The Creality Upgraded Ender 5 Plus Silent Mainboard is a great choice, as it comes with TMC2208 silent Drivers.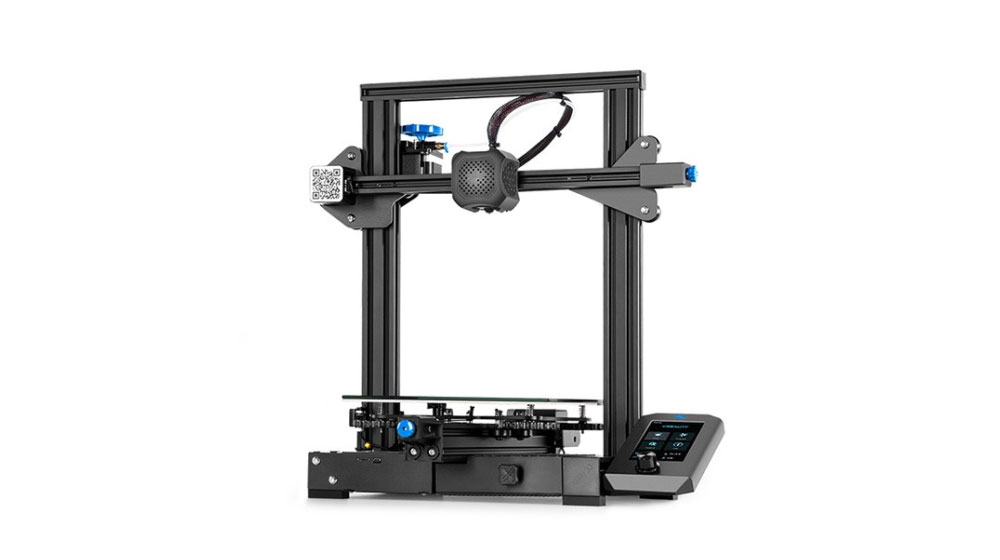
Adhesion can be a little difficult with a tempered glass bed, so I would recommend getting some adhesive substances such as Elmer’s Glue from Amazon.
You can also go with some specialized 3D Printer Adhesive Glue for more advanced filament like PVA, CPE, ABS or PETG, some of which are very prone to warping.
It doesn’t have a Meanwell power supply, although the power supply it comes with is CE certified and pretty strong!
Changing filament can be a hassle because the extruder is located in the back right corner.
It comes with the standard transparent PTFE tubing, not the premium Capricorn tubing. It also comes with the standard plastic extruder, so you may want to upgrade to the all-metal extruder after some time.
There are a few upgrades that you’d want to install, which isn’t the most ideal, especially after buying this pretty pricey 3D printer. From upgrading the motherboard, to changing the extruder and PTFE tubing.
Once you overcome these few downsides, the Ender 5 Plus is a 3D printer that is worthy of the price tag.
Specifications of the Ender 5 Plus
- Build Volume: 350 x 350 x 400mm
- Printing Technology: FDM (Fused Deposition Modeling)
- Display: 4.3-inch HD
- Print Resolution: ±0.1mm
- Nozzle Diameter: 0.4mm
- Nozzle Temperature: 260°C
- Hot Bed Temperature: 100°C
- Working Mode: MicroSD,
- File Format: STL, OBJ, AMF, G-Code
- Supporting Software: Cura, Simplify3D, Repetier-Host & many more
- Filament Compatibility: PLA, ABS, PETG, TPU
- Net Weight: 18.2Kg
There are a few listings on Amazon for the Ender 5 Plus, most of them having a rating of above 4.0/5.0 at time of writing. Many of the lower ratings for this 3D printer were due to manufacture errors in the early days, but it seems they have now gotten their act together.
One user who has plenty of experience in the 3D printing field, mentioned just how well-engineered and robust the Ender 5 Plus is.
His wife works for an engineering firm who make use of 3D printers that are a lot more premium than the Ender 5 Plus, and they said just how impressed they were with his 3D print quality.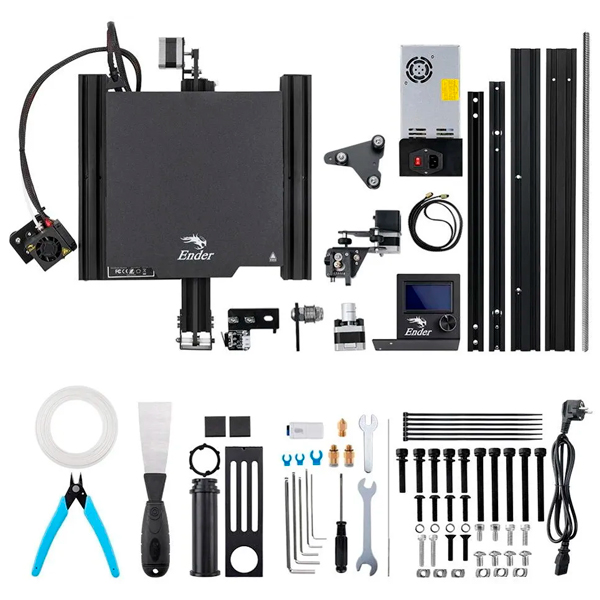
Whether you are a beginner or an expert, you can look forward to some amazing quality prints from this 3D printer. Not only that, the print size is larger than most, especially in the price range.
Even though some customers faced issues, Comgrow (a seller of the Ender 5 Plus) went above and beyond in their customer service to ensure that issues were rectified as soon as possible.
They had an issue of the stock extruder not working properly at full-capacity, requiring an upgrade to a better extruder.
Another issue was with a bent tensioning plate, arising from a badly placed screw which collides with the t-nut sitting on the X-axis extrusion rod. If you tighten the screw too tightly, it can actually bend the plate.
Comgrow worked with the user closely to help replace many parts of the 3D printer, so although the customer service was great, it would be better to not have needed so many fixes in the first place.
One of the customers said after giving five stars rating that he found the printer very stable.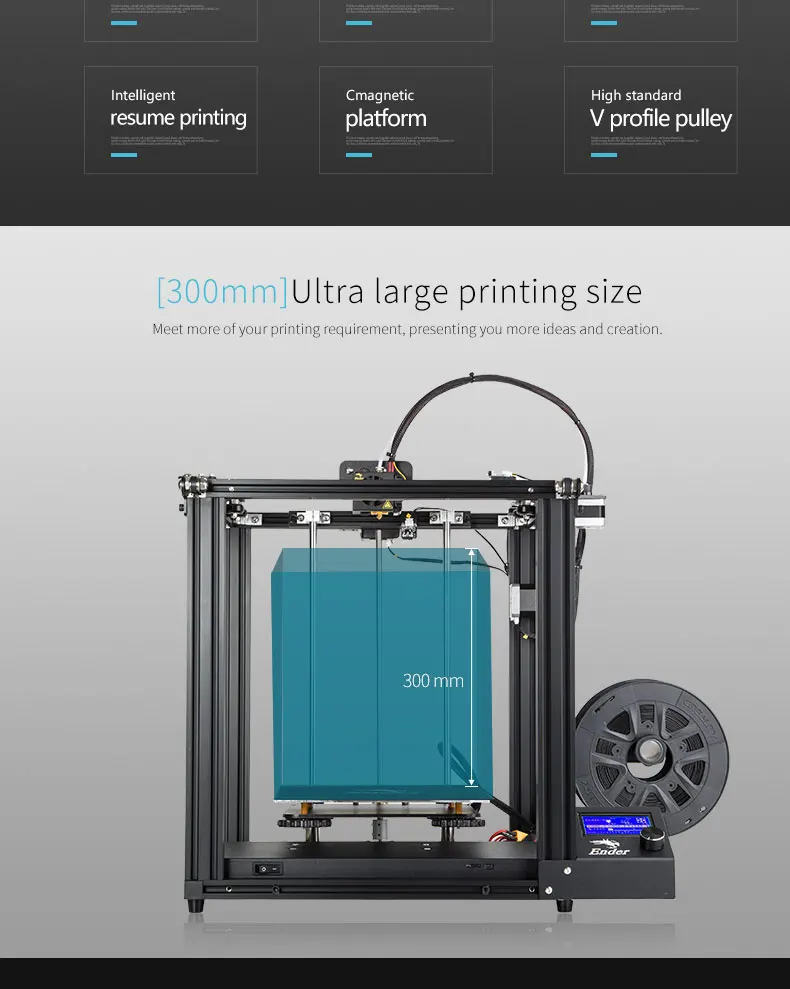
According to him, the build plate sensor allows him to stay alert about the adjustment of the build plate so that the print model comes out fine.
Moreover, he said that the Ender 5 Plus is superior to many printers of its range and highly recommends it to anyone who wants to get into 3D printing.
One of the customers who were new to 3D printing said that it was to assemble the whole printer; though he had trouble with the filament at the start, he is satisfied with everything now.
He said that the large build is provided to print bigger objects with ease, and he was impressed by the printer’s print quality.
Another customer who has been in the 3D printing business for quite some time said that this is a lot of printer with this kind of price.
He mentioned how the printing speed of the Ender 5 Plus is good, and has a large volume to print. He is more than satisfied with the purchase.
Verdict – Is the Ender 5 Plus Worth Buying?
After all is said and done, I would have to say that the Ender 5 Plus is a worthy purchase, especially if you are looking to do larger build projects.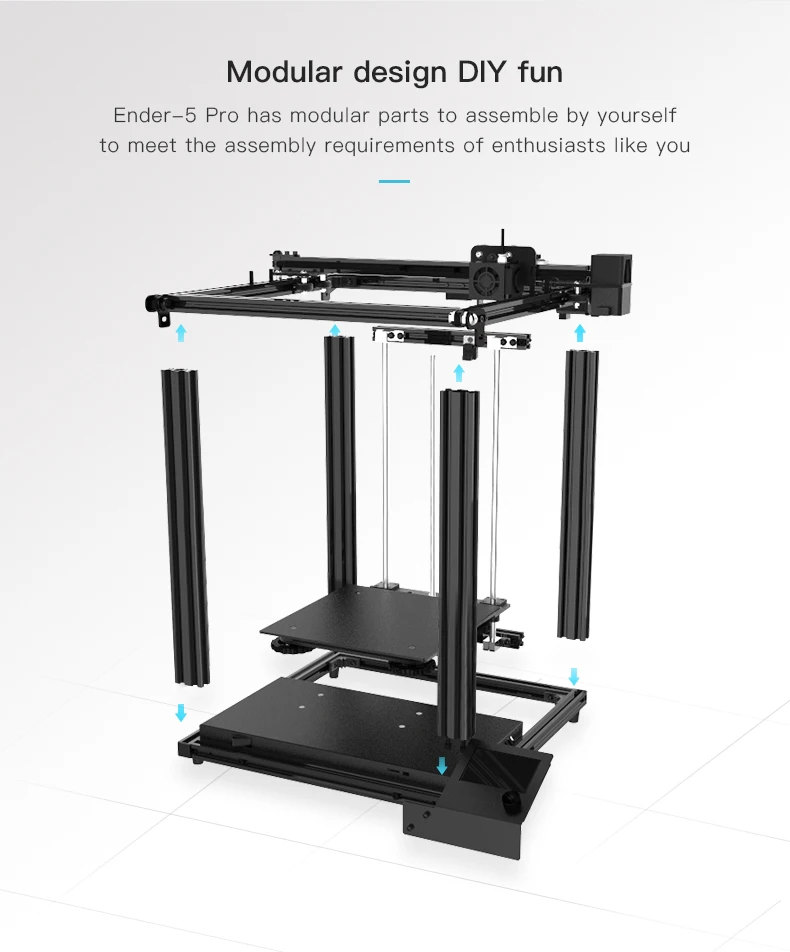 This fully open source, stable, durable 3D printer is one that thousands of users love to have beside them.
Check the price of the Creality Ender 5 Plus at:
AmazonBanggoodComgrow
When you get past the issues and downsides mentioned, you can expect a smooth printing experience, although it might not be the best for a first time user. You would usually want to start with a simple build like an Ender 3 then work your way up.
Though, there are a few tutorials that a beginner can follow closely to get the most out of this 3D printer.
The quality and output of 3D prints from the Ender 5 Plus is top-level, so you can be sure that you are receiving a great 3D printer.
Get the Ender 5 Plus from Amazon today.
Creality Ender 5 Plus Review - Print Big!
The Ender 5 Plus is one of the biggest printers you can buy from Creality. This was made specifically for people looking to do big prints, without breaking the bank. Let’s see if the Creality Ender 5 Plus is worth your money.
Why choose the Creality Ender 5 Plus?
The Ender 5 Plus from Creality was designed for people looking to do big prints. The main selling point of the printer is the big 350×350 mm build plate and a 400 mm build height.
Creality Ender 5 Plus Shipping and Packaging
The Ender 5 Plus comes in a huge cardboard box with ample protection. Ordered from Banggood, shipped from the UK warehouse and arrived in about a week. Delivery was fast, considering the Covid slowdowns.
In the package we get the usual Creality goodies: screws for assembly, power cable, spare nozzle and bowden coupler, wire management clips, and a USB card reader.
Assembly of the Ender 5 Plus
The Ender 5 Plus comes partially assembled and it takes around 30 minutes to finish. When assembling the printer, it’s important to make sure the extrusions are properly squared to get the best print results. The Ender 5 Plus uses plastic corner brackets to square the top and bottom frame. While this seems fine for now, I am thinking about adding some aluminum corner brackets in the future to further improve the rigidity of the frame.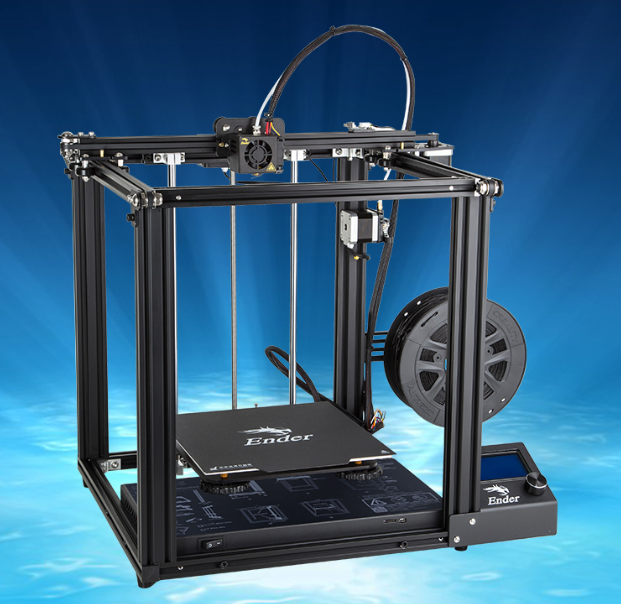
Considering the Ender 5 Pro comes with aluminum corner brackets, I don’t understand why Creality chose to use plastic.
After the assembly was complete, all I can say is that the Ender 5 Plus is HUGE! make sure you have enough space for it because you need about 1 meter cubed to fit it in your workspace. Compared with my BLV Cube which has a 300x300x365 print volume, the Ender 5 Plus is mostly the same size. The benefit is that on the Ender 5 Plus you have a bigger volume of 350x350x400 for your prints with the same overall size.
Creality Ender 5 Plus specs
| Specifications | |
| Brand | Creality |
| Model | Ender-5 Plus |
| Printing Method | FDM |
| Printing accuracy | ±0.1mm |
| Layer thickness | 0.1-0.4mm |
| Nozzle diameter | 0.4mm |
| XY axis positioning accuracy | 0.012mm |
| Z-axis positioning accuracy | 0.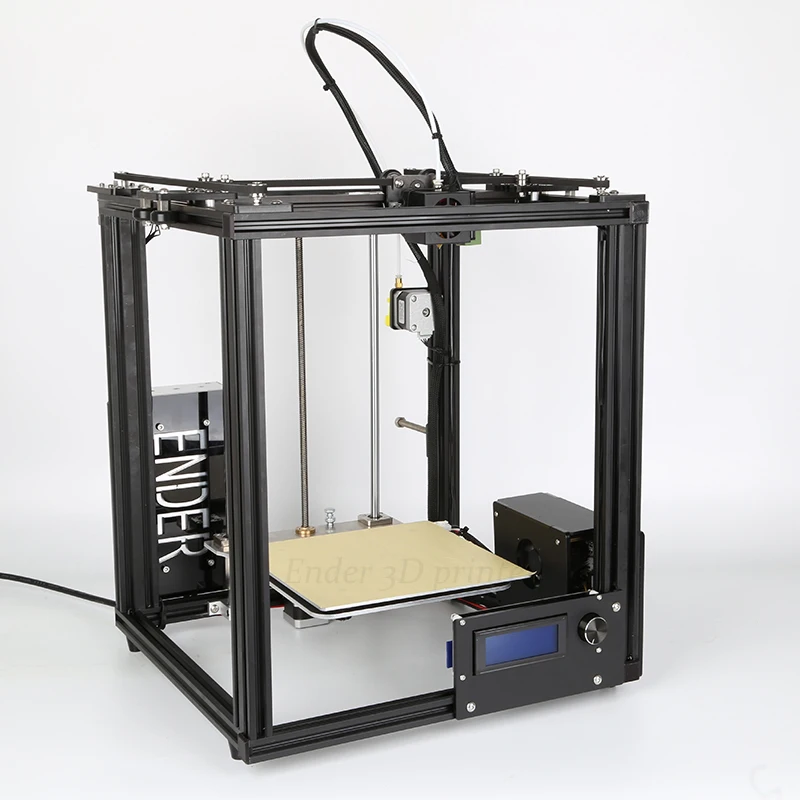 001mm 001mm |
| Number of nozzles | 1 |
| Nozzle temperature | ≤260℃ |
| Hot bed temperature | ≤110℃ |
| Operating mode | online or TF cards are printed offline |
| file format | STL, OBJ, AMF |
| Slicing software | Creality Slicer/Cura/Repetier-Host/Simplify3D |
| Power parameter | Input:100-240V AC; Output:DC 24V 21A; Max25A |
| Power Supply | Plug EU Standard |
| Machine power | 550W Max |
| Print material | PLA/ABS/Soft Glue/Wooden/ Copper Containing/Gradient filament, etc. |
| Consumable diameter | 1.75mm |
| Rated voltage | 115V/230V 50/60Hz |
| Power output voltage | 24V |
| Hot bed power | 460W |
| Control panel type | 2560 |
| Motor parameters | 42-40 stepper motor, 42-34 stepper motor, step angle 1. 8° 8° |
| motor driven | A4988 16 subdivision |
| Display | 4.3inch touch screen |
| Computer operating system | Windows XP/Vista/7/10 MAC Linux |
| Machine size | Length 632 width 666 height 619 |
| Package dimensions | Outer size L730*W740*h410 |
| Machine gross weight | 23.8KG |
| Machine net weight | 18.2KG |
| Power Supply | Plug EU Standard (Default) |
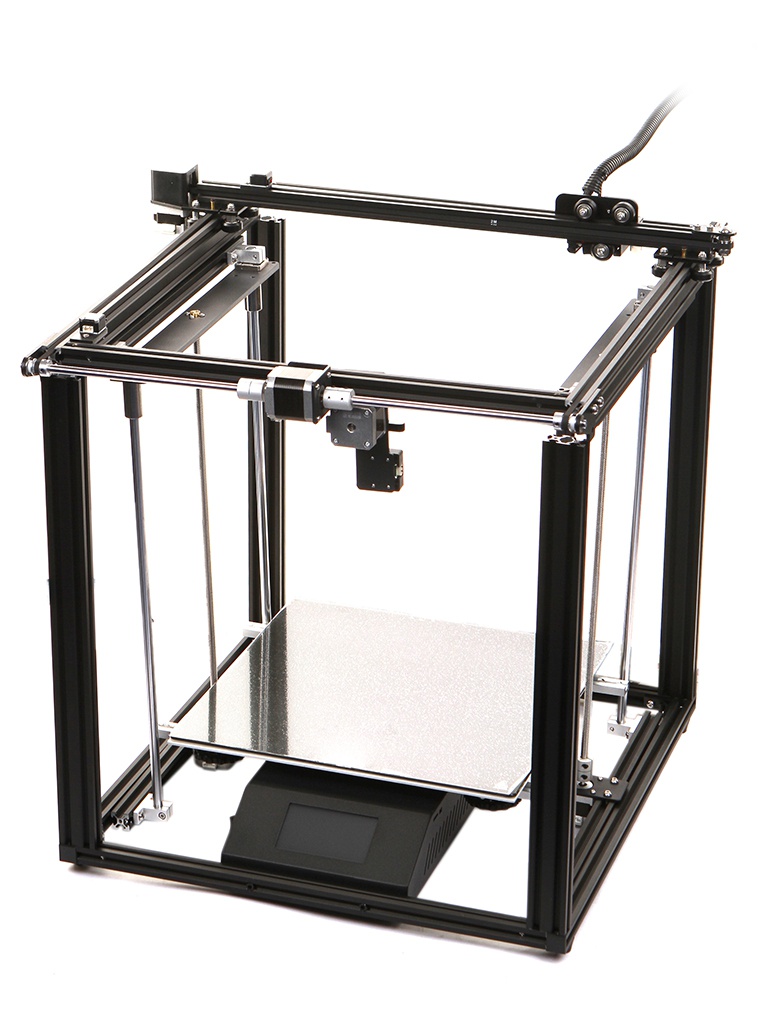
Cube Frame
When assembled, the Creality Ender 5 Plus is a big cube. It uses 2040 V-Slot extrusions for the Y and Z axis. For the X axis, Creality chose to use 2020 extrusion. To be honest, I would have liked to see the same 2040 extrusion throughout the printer for increased rigidity, but after assembling the printer I think it’s good enough.
The frame is rigid enough and considering the bed moves only on the Z axis, I can’t complain.
Extra rigidity is added from the Z linear rods which are mounted with aluminum holders.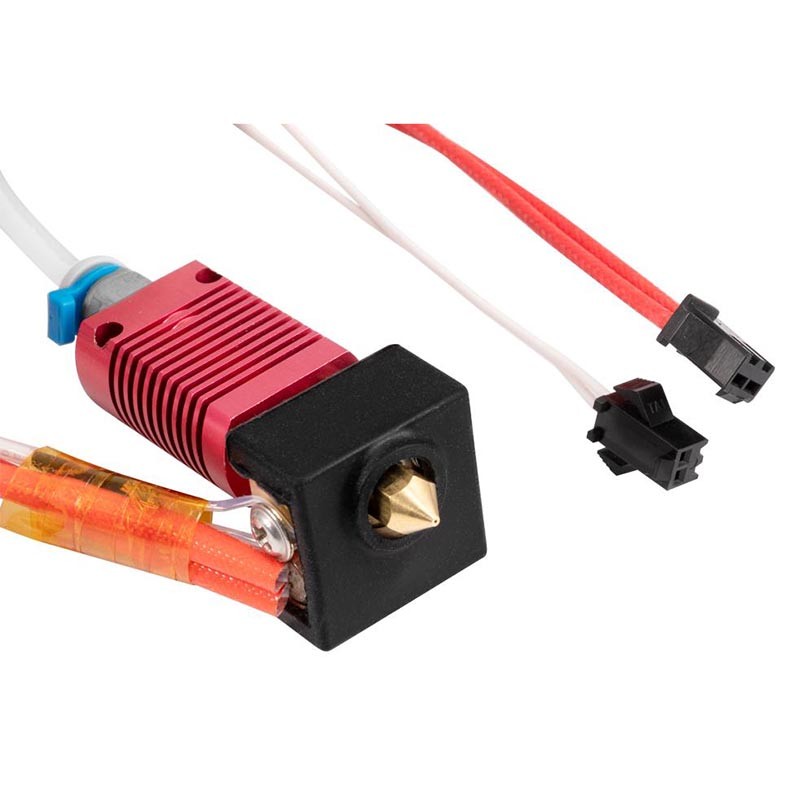
Please note that on my printer, the Z screws and linear rods were not properly greased, and they needed a bit of extra lubrication for smooth movement.
What I like the most on the Cube Ender 5 frame is the possibility of enclosing the printer with ease. After buying some plexiglass panels, you will easily be able to print ABS or other high temp materials without issues.
Dual Z Axis
Considering the huge bed used by the Ender 5 Plus, the dual-axis setup used is a no brainer. Dual Z stepper motors drive the heavy bed up and down with ease, and precision. After proper greasing, the bearings run smoothly and i can’t find any issue with the movement system on the Z axis.
Because the Ender 5 Plus uses four Z axis rods, Z wobble is not present. this translates in more accurate layers and less artifacts on the wall quality.
I would have loved to see some anti-backlash nuts or a sync belt to keep the motors in sync. But this can be an easy and cheap upgrade to do in the future.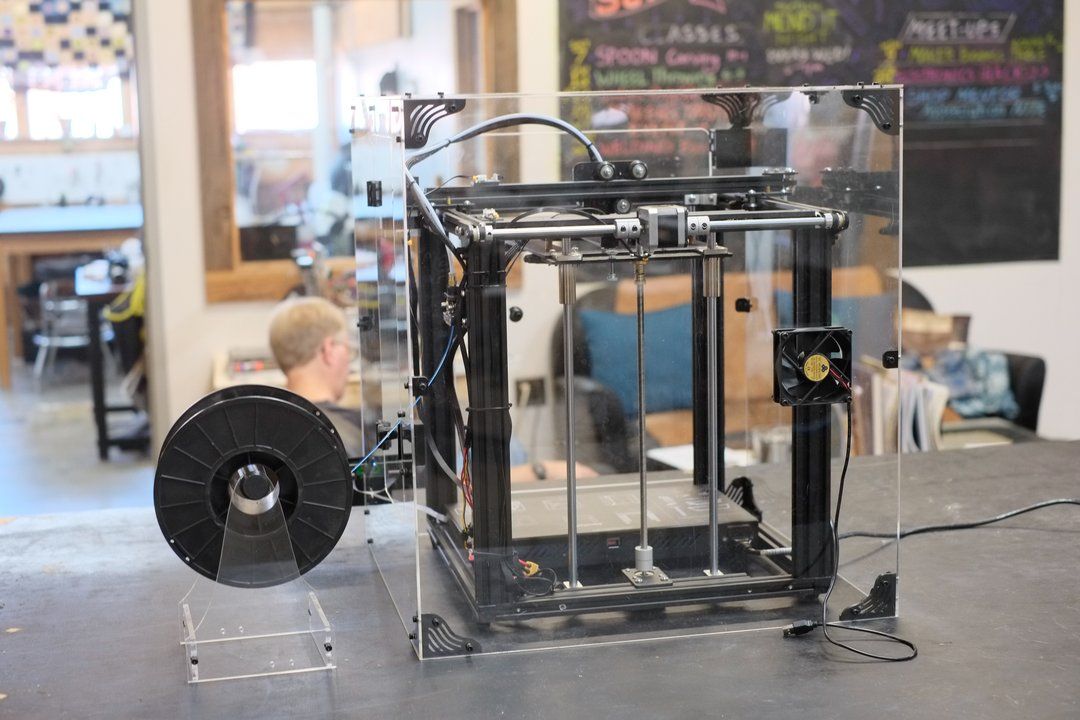
Regular Creality hotend
For the Ender 5 Plus, Creality chose to use the same hotend like in its other printers like the Ender 3, Ender 5 or CR 10. For regular prints with a 0.4 nozzle, this hotend is good enough. But if you buy a large format printer, you will probably want to use bigger nozzles for faster prints.
While you can still buy 0.6 or 0.8 nozzles for the Ender 5 Plus hotend, you will be limited by the capacity of the heatblock to melt filament efficiently. When using bigger nozzles, a Volcano heatblock is preferred because it is able to heat the filament more efficiently and allow you to print faster with bigger nozzles.
I know about this limitation since I started printing visors on the Sapphire Plus. The printer can do great when printing with the 0.4 nozzle but after I installed a 0.6 nozzle, I was held back by the similar heatblock used. With the 0.6 nozzle i needed to lower the speed in order to avoid skipped steps or bad layer adhesion. The same can be applied for the Ender 5 Plus.
For better reliability on the stock configuration, I recommend you install the L3D Hotend Fix. This improves the hotend by making sure the seal of the PTFE on the nozzle is good, and you will not encounter clogs.
If you want to print higher temperature materials, the Mellow all-metal hotend will be a direct-swap. The Micro Swiss All-Metal Hotend is also a popular upgrade option.
Plastic extruder in a bowden setup
I’ve previously mentioned I’m not a fan of bowden setups. It’s harder to properly tune a bowden setup because the extruder moves a long filament piece from a remote location. This translates in high retraction values, oozing and overall, less accuracy when extruding filament. Linear Advance benefits are almost nonexistent.
This is the best description of a bowden setup, from the Marlin Linear Advance page.
It’s like painting a picture: try to paint with a 1m long brush, grabbing the rear end of the handle which is made from rubber.
Another reason why I preffer a direct drive setup instead of bowden is because of the use of bowden fittings. I was not able to find quality fitting to use with the PTFE tube. Trianglelab recently added some metal fittings but i did not have the opotunity to test them. Creality sells its printer with low quality fittings that often break after a few prints. The PTFE can either start moving in the fitting or fail completely.
I had multiple issues with the bowden setup on my Creality CR10s Pro, and also the Sapphire Plus from Two Trees. Both machines are currently running direct drive setups, and I will probably upgrade the Ender 5 Plus. It’s just easier to calibrate, and less problems overall.
If you want to keep the stock setup, but want a better extruder, you can easily upgrade to a metal extruder with dual-gears. Or even better, a BMG extruder.
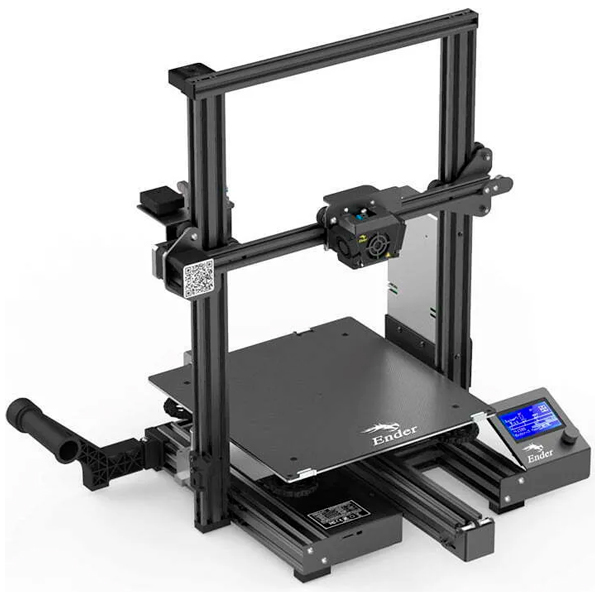
Odd movement setup
The Ender 5 Plus printer is NOT a Core XY printer. While the movement looks like a Core XY machine, the Ender 5 Plus uses the same cartesian movements. In order to have better stability, Creality chose to move the X gantry on the Y plane.
By doing this, they manage to minimize the weight moved when printing and (in theory) produce better prints.
8-bit board with noisy drivers
The Ender 5 Plus was launched in the summer of 2019. During that period, the 32-bit boards were just starting to emerge. While this aspect can be forgiven, the use of 4988 drivers ruins part of the printer’s appeal.
Ender 5 Plus uses the Creality 2.2 board which for 2020 is outdated. Most of the printers launched in 2020 are using TMC2208 drivers and some of them are already upgraded to 32-bit.
If you are using the printer in another room, where noise is not a problem this is not a big issue. But the benefits that come with the new Marlin 2.0 firmware can’t be used. The limited memory available and the limitations caused by the 8-bit CPU can hold the printer capabilities back. Another issue with this old board is the salmon skin effect it leaves on the prints. It’s not bad, but a newer board and drivers can help eliminate this issue.
The good news is that aftermarket 32-bit boards like the SKR Mini E3 are cheap. Creality also sells an upgraded silent board that can be purchased for an easy direct swap.
BLTouch for auto bed leveling
Considering the size of the heated bed, the inclusion of an original BLTouch from Antclabs was a good decision. In order to make sure prints adhere well on the build plate, the BLTouch is used for auto bed leveling.
The printer measures the bed in multiple points and generates a mesh that is used when printing, to make sure the nozzle sits at a constant distance from the bed.
Plastic Creality extruder
Another place where Creality saved cost is the plastic extruder. Newer printers from Creality come with a metal extruder, or even better, with dual-gear exturder. This plastic extruder is plain bad. The idler lever can crack and the tension cannot be controlled.
A dual-gear extruder like on the Creality CR-10s PRO would have solved any issues and the quality of the printer out of the box would be much better.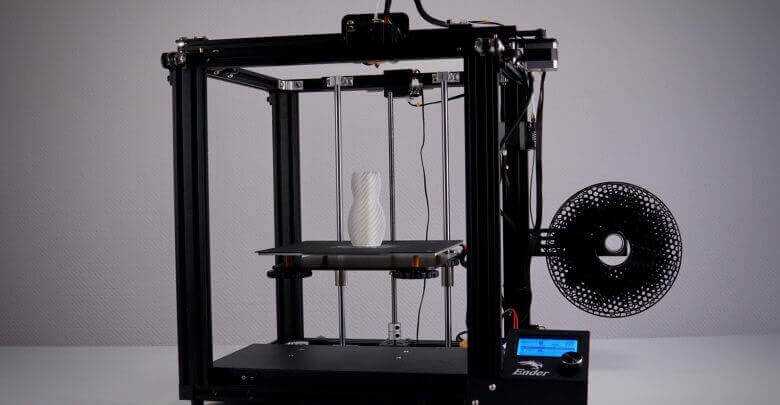
When buying the Ender 5 Plus, you should also order a cheap dual-gear extruder. If you can spare extra cash, a BMG extruder can improve the extrusion quality even further. In my case, I found that the stock extruder is not consistent enough. Because of this, the layers are not consistent enough even after extruder calibration.
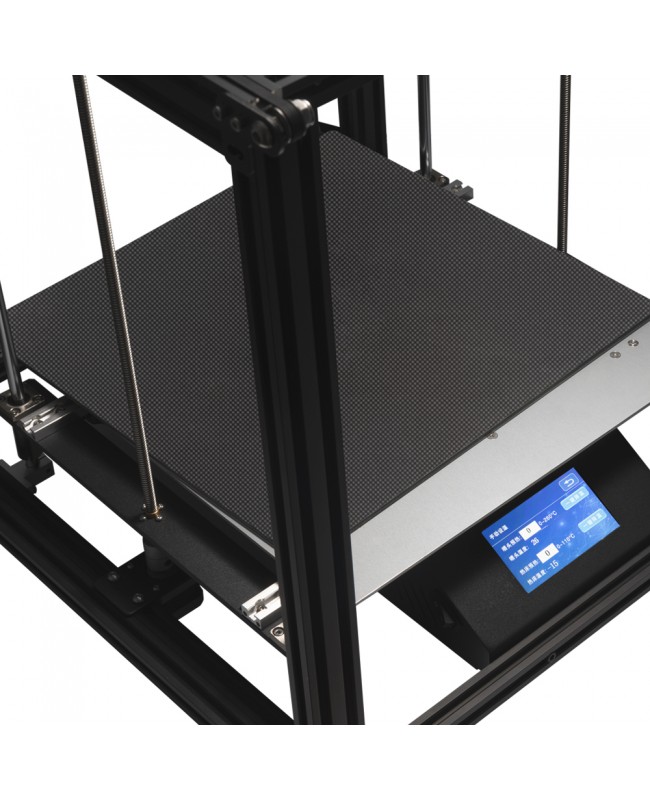
Huge build plate
This is the main selling point of the Ender 5 Plus. The 350×350 mm dimensions will satisfy most of the users. It allows you to do huge prints without splitting into pieces.
The heatbed uses an aluminum resistance and it’s being powered by the main power supply. It reaches 60C in about 5 minutes, and 100C in 15m.
On top of the aluminum heatbed, the Ender 5 Plus uses a tempered glass plate, with a textured top cover. This is a cheap way to ensure the bed is flat. Another benefit is really good adhesion when the bed is hot, while prints can be removed easily after the bed cools. The tempered glass plate is held in place with paper clips. The Ender 5 Plus heatbed has a bit of insulation material, but only on the middle of the bed. On the sides, there is no insulating material. This can cause inconsistent temperatures across the bed, where the external surface has a lower temperature.
To make things worse, Creality used some aluminum extrusions to reinforce the heatbed. This is a good idea if you are using some insulating material between the bed and the reinforcement. Unfortunately, in the Ender 5 Plus’ case, the aluminum reinforcements touch the heatbed directly and act like a heatsink drawing the heat out of the bed.
For a bed like this, I would have liked to see an AC powered heatbed. Creality could have easily use a lower power power supply and use the money for a SSR and AC heating element. This would translate in much faster heating times. But if you don’t mind waiting for a few minutes, this is not a problem.
In the future, I may buy a PEI Magnetic Spring Steel Sheet, which can be easily removed after a print, without having to wait for the heatbed to cool.
Not the best power supply
The huge heated bed included with the Ender 5 Plus draws a lot of power. When the printer is heating both the hotend and the heatbed, the power draw is over 480W (measured from a smart plug).
This causes the power supply to be right at the limit of its capabilities. Considering the included power supply is not a brand name, it’s probably barely handling this load.
There are multiple reports online where the stock power supply eventually dies. Creality now started to include better power supplies, specifically the Meanwell 500W power supply, like on the CR-10S Pro.
This issue could have been easily avoided by using an AC heater, but it is what it is.
Unfortunately, my printer is probably one of the earlier batches, and it uses the regular no-name PSU.
I did not have any issues yet, but I will update this review if something happens in the future.
Test Prints on Ender 5 Plus
As always, the first prints consist of a calibration cube and a 3D Benchy. As you can, the stock configuration works pretty well. In order to get better prints, I did the extruder calibration and flow calibration managing to improve print quality a bit.
Eevee Pokemon
After I did the calibration, first test print was the Eevee from MyMiniFactory, printed with Sunlu Gray PLA, with 0.15 mm layer height, 200C and 60mm/s.
Print quality is fine, with some bad overhangs caused by the part cooling fan. The airflow is not directed right under the nozzle. This issue can be fixed later on by using a better air duct.
Gary the Snail
Gary the Snail from Thingiverse was my next print. I used Gembird Marble PLA, with 0.15 mm layer height, 200C and 60mm/s. Marble filament does a good job on hiding the layer lines, but the inconsistent extrusion can still be seen on the external walls.
Lunael’s Dream
Next on the list is Lunael’s Dream by Jukka Seppanen, one of my favorite designers. The model does not need any kind of supports and can be printed as is.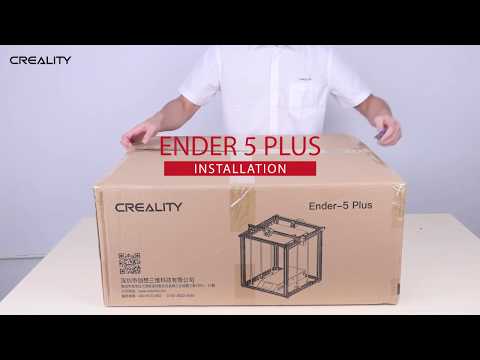
I used Copper PLA from Sunlu, with 0.15 mm layer height, 200C and 60mm/s.
This time, the finished print looks better, and I can’t really complain.
Young Tortollan
Finally, I printed the Young Tortollan from MyMiniFactory with Devil Design Azure Blue PLA with 0.2 mm layer height, 200C and 70mm/s.
Printed fine, but in this case the inconsistent extrusion issues show up the most. This was right before the board died.
Ender 5 board issue
Unfortunately, after the prints previously shared, my printer stopped working. The board released the “magic smoke” and the extruder stopped working, stopping my Ender 5 Plus review prints.
To be honest, from the start I was thinking that there has to be some sort of issues with the extruder, because the layers were not consistent enough. And on my Ender 3, I previously used the same driver and extruder combo with better results.
The burnt driver was the one which handled the extruder. I am thinking that somehow, the uneven extrusion issues were also caused by the bad stepper driver which eventually failed.
Fortunately, Banggood was really helpful and after I sent pictures with the burnt board, a replacement was sent the next day.
We need to understand that these things can happen. The stock boards are not the best boards when it comes to build quality, but it’s nice to see the seller is helpful. That’s why I recommend you always buy your printers from trustworthy sellers to get support if something like this happens.
Conclusions – Is the Ender 5 Plus worth it?
After this Ender 5 Plus review, here are my closing toughts. Overall, the Ender 5 Plus is a good machine, perfect for anybody who is looking for a big format 3D printer. It has a big print volume with a sturdy frame and the print quality is good even when stock. Unfortunately, in order to turn this printer into a workhorse some money need to be invested for a better extruder and a newer board.
The other upgrades proposed in this review only improve the printing experience. They are not needed right of the bat, and can be added over time.
Creality’s Ender 5 Plus is currently available for around ~500$. A bit expensive, if you ask me, considering that it uses and old 8-bit board and a bad quality extruder. If you are planning to buy one, consider you should invest an extra ~50$ and some of your time to upgrade the board and the extruder.
I will do a series of articles where I will show you how do these upgrades. I will add a new 32-bit board like the SKR Mini E3 V2.0 or the SKR 1.4, a BMG extruder in Direct Drive configuration and better insulation to the heatbed.
The Good
- Generous 350x350x400 build volume.
- Sturdy cube frame.
- Good print quality.
- Flat heatbed with good adhesion.
- Original BLTouch is included.
- The Ender 5 Plus can be easily enclosed to allow for easy ABS prints.
The Bad
- Extruder is bad, and should be replaced as soon as possible.
- The Ender 5 Plus uses an old 8-bit board with noisy drivers.
- Power supply is undersized.
The Ugly
- The hotend is not able to keep up with larger nozzles while maintaining the same speed.
- The bowden setup is not the most reliable (personal opinion that applies to any bowden setup).
- The power supply fans are noisy.
- Headbed insulation is not great and it needs some work.
- The board died after a few prints (probably just bad luck).
Where to buy the Ender 5 Plus?
The Ender 5 Plus from Creality can be bought from multiple stores. You can check the links below for the most up to date prices available:
Amazon
Aliexpress
Banggood
Comgrow
I recommend checking out the Discount Codes page before purchasing. I regularly update the article with discount codes for various online shops, and you might find one for this particular model.
The Ender 5 Plus was provided free of charge by Banggood for the purpose of this review, and all the opinions are my own. While the article includes affiliate links, all opinions are my own.
Nobody reviewed the article before it was posted, following the Review Guidelines.
Liked it?Consider supporting 3DPrintBeginner if this content helped. You can also join Patreon for exclusive perks! |
Creality Ender-5 Pro 3D Printer Review
Welcome to the Color World.
For the past few years, Creality has been the leader in the production of home budget FDM 3D printers. In particular, their most popular Creality Ender-3 printer.
At the moment, there are already several of its modifications. But in parallel with them there is another line of printers - Ender-5. And today we want to tell you about one of its versions. Creality Ender-5 Pro.
Unpacking
We will not delay the introduction and move on to unpacking and assembly. The printer comes in a fairly large box in a semi-disassembled state. On top is paper detailed assembly instructions and some more waste paper.
Mounted screen.
Extruder motor with feeder
Z-axis mechanism assembled.
Portal with X and Y axes, also completely finished, with a hot end and all belts.
A table with an already glued elastic magnetic substrate and a wire, at the end of which an XT60 connector is installed.
And at the very bottom of the box there are 4 vertical profiles 20x40 cm.
The lower part of the case with the control unit and all wires.
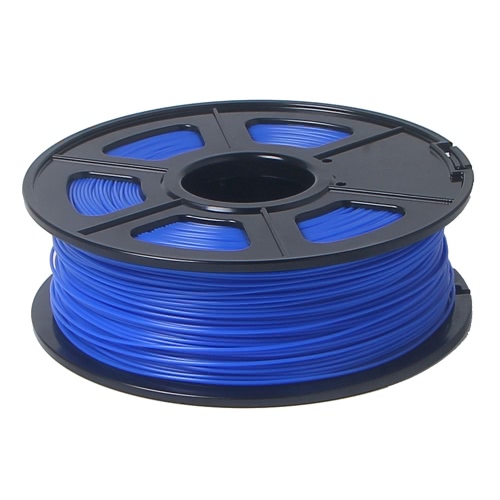
Also included is a 250g spool of white PLA plastic.
And a box with tools and fasteners.
In addition to assembly screws, a filament spool holder, and a power cable, the box contains: a bunch of zip ties, a nozzle cleaning needle, a set of hex keys, a wrench, a small screwdriver, the most common side cutters with soft blue handles, a spare nozzle, a Teflon tube fitting and several clamps for fittings.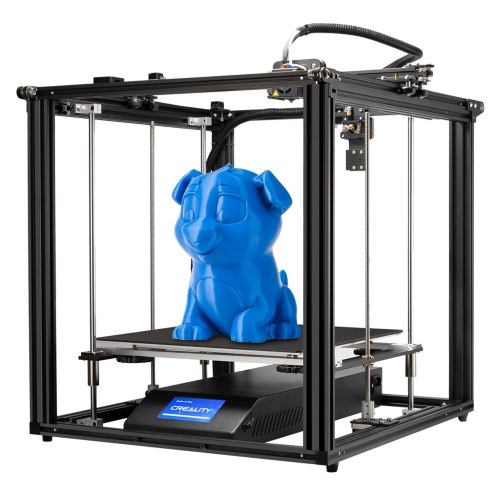 MicroSD card 8GB with card reader. And a simple metal spatula. The set is quite standard, only tweezers are missing.
Control unit
While the printer is not assembled, let's look at the control unit. It opens from the bottom, the cover is held on by 4 screws. There is also a power supply and a control board.
The power supply is quite standard for printers with such a printable area, 24 volts 350 watts in a low profile case. However, unlike the Ender-3 Pro printers, it is branded here, but not MeanWell. The logo says Lian Lida, what kind of company, we, unfortunately, do not know.
But the control board upset us a little. Despite the fact that Creality already has 32-bit boards on STM32 microcontrollers and they put them on the Ender-3. Here stands, one might say, an already outdated 8-bit board, also on a far from the most advanced Atmega1284 microcontroller.
I am glad that the drivers soldered on the board are not noisy A4988, but already quiet TMC2208, although they are also not the most modern, and also connected in the so-called Standalone mode. This means that it is not possible to fully use their functionality. Well, okay, at least something.
Assembly
Let's move on to assembly. It's not complicated here, especially if you follow the step-by-step instructions. We fasten 4 vertical racks to the bottom.
We install the portal from above and also fix it with screws.
We fasten the Z-axis mechanism to the back wall of the printer with 4 screws.
And already to this mechanism we attach the table itself with the frame.
On one of the vertical profiles we fix the extruder motor with a feeder on screws with T-shaped nuts.
We insert a Teflon tube into it and fix the fitting with a plastic bracket from the kit.
Install the holder for the spool of filament under the feeder
And the screen on the front of the printer.
After that, it remains only to connect and run all the wires so that they do not interfere with the movement of the printer nodes. All wires are marked and there should not be any difficulties with this.
Mechanical
So, the printer is assembled. Let's look at it in more detail. We have already seen electronics and electrics, so let's move on to mechanics. The declared print area is 220 x 220 x 300 mm.
The printer uses Cartesian kinematics, commonly referred to as MakerBot after the company that first started using it.
The kinematics are simple, fairly reliable, but far from the fastest, since when the Y-axis moves, the X-axis motor moves along with the extruder and the beam.
To move the X and Y axes, the OpenBuilds system is used, that is, rollers that roll on aluminum V-shaped profiles. 4 rollers on two Y-axis carriages and 3 rollers on the X-axis carriage.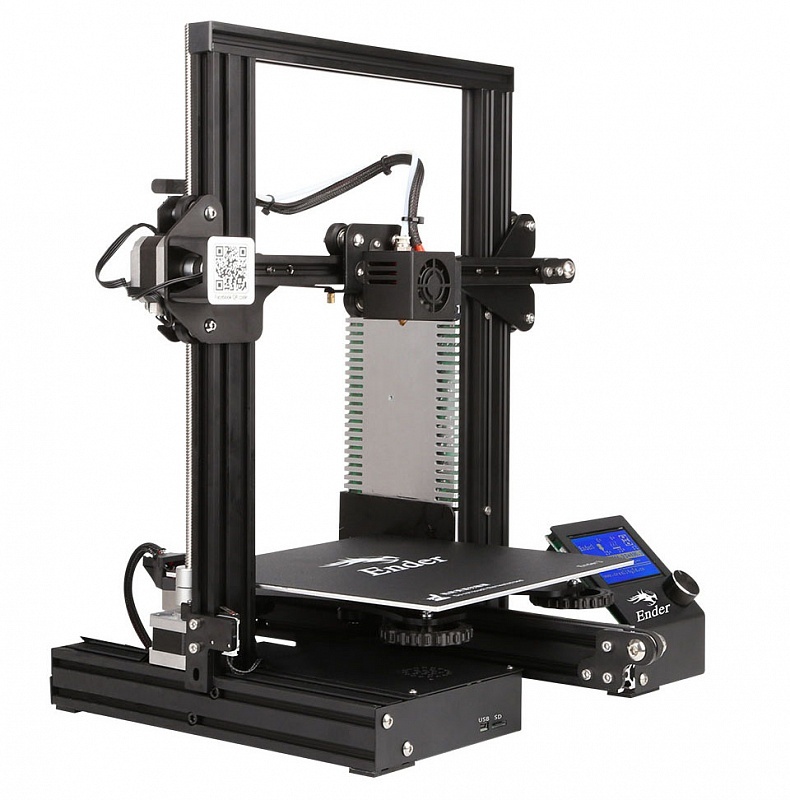
On all carriages, eccentrics are provided on one side, allowing you to adjust the pressure of the rollers.
On any printers with such a movement system, before the first start, you need to check if the rollers are set correctly and adjust them if necessary.
The rollers should be pressed so that nothing dangles, but at the same time it is not pinched. After all, this will directly affect the quality of printing and the durability of the rollers.
In our case, we only had to slightly loosen the rollers of the X-axis carriage.
It also makes sense to check the belt tension. The X axis has one, its tension is carried out by shifting the return roller on a small area.
The Y-axis has two belts, they are also tensioned, but it must be borne in mind that their tension should be as uniform as possible.
Both axles are driven by NEMA17 motors. At the X axis it is normal, and on the Y with a through shaft, the motor itself is fixed in the center.
The decision is quite logical.
The Z axis is implemented differently. It runs on two 10mm shafts with linear bearings and is driven by a NEMA17 motor through an 8mm 2-way screw.
The coupling connecting the motor with the screw is rigid split.
The brass nut is ordinary, fixed on the table platform.
The platform itself is made of 4 mm aluminum sheet.
There are no stiffeners, the platform is absolutely flat. At first glance, it doesn't look very reliable.
But, looking ahead, we can say that this does not affect the quality of printing and stacking layers. However, it will not be superfluous to strengthen it.
The heated table is made in exactly the same way as the Ender-3 Pro, 3 mm aluminum sheet with a glued magnetic surface.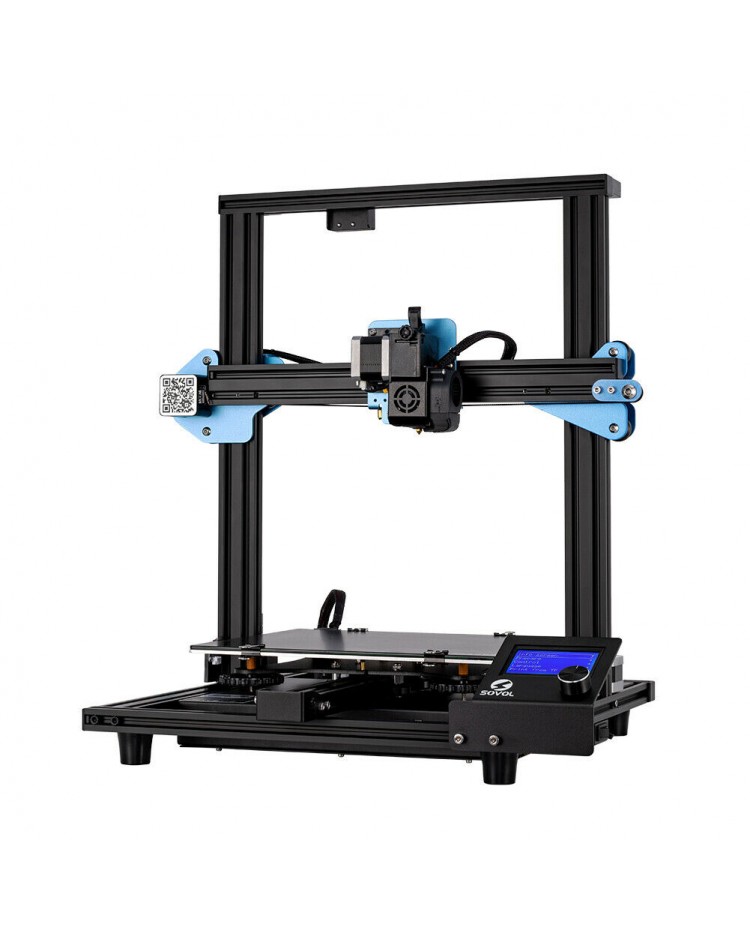 From above, a flexible substrate with an adhesive coating is “magnetized” to it.
The wires coming from the table are not fixed in any way.
Of course, with such kinematics, the table does not make constant fast movements, but it is still not safe.
Printer calibration
There is no auto-calibration of the table. We manually move the carriage around the corners and center of the table, placing a sheet of paper under the nozzle and twisting the large comfortable adjusting knobs until we achieve the same pressure over the entire surface. The leaf should move with little resistance.
In general, the standard procedure.
Construction
A bowden extruder is installed here, the feed mechanism is placed on the printer body, and the filament is fed to the hotend through a rather long Teflon tube.
The feeder can be called already outdated - aluminum MK8, most manufacturers try not to use them and have long since switched to geared feeders like Titan or BMG, not to mention more modern solutions.
MK8, of course, also works and performs its tasks, but has problems, for example, when printing with soft flex plastics. Adjustment of a pressing of the giving gear wheel to a counter roller is provided.
The hot end is the same as the Ender-3, it is called CR10.
Also not the most modern solution, however, this hotend showed itself normally on other models and, if used correctly, does not cause significant problems. The thermal barrier in the hot end is through, the Teflon tube goes straight to the nozzle.
By the way, on such hotends, before the first print, it is advisable to get a Teflon tube and check how it is cut off. The cut must be as even as possible, otherwise the tube will not be able to fit snugly against the nozzle, and plugs will occur.
Our tube was quite even, but just in case, we even trimmed it.
The top of the hot end is covered with a metal casing.
To cool the hot end radiator, a conventional 4010 axial fan is used, and a 4010 turbine fan is used to blow the model.
The casing is exactly the same as on the Ender-3. And it has a long-known minus, the radiator cooling fan blows down on the model and can cause difficulties when printing with plastics that are prone to shrinkage and do not require airflow.
On the other hand, there are many alternative Ender blowers on the internet, the only thing to consider is that the bottom bracket on the Ender-5 is longer than on the Ender-3, and many models of blowers are attached to the bottom bracket on the right.
You need to choose a model that is suitable for this particular printer.
As for the strength of the frame of the entire printer, everything is fine here. Due to the use of a 20 x 40 mm profile as vertical posts, the entire frame is very strong and does not wobble at all.
The printer is controlled using a simple non-touch screen 12864 with an encoder.
This may seem like a disadvantage to some, but practice shows that such screens work stably, do not affect printing in any way, and also have a fairly large functionality.
Seal
Turn on the printer and try to print. The power button, MicroSD card slot and MiniUSB port for connecting to a computer are located on the front side of the control unit, which is convenient.
We send all axes home and face the first oddity. The X and Y axis limit switches are on the right and rear, respectively.
In this case, clicking on them assigns zero coordinates to the axes. Zero points are usually located on the left front and all slicers are designed for this location. As a result, by exposing models in the default slicer, they will be printed backwards. A strange solution, even if it was not possible to install the limit switches in another place, it was possible to configure the firmware so that when you click on them, not the initial, but the final coordinates are assigned. In general, not very convenient, but not critical.
Test models
We calibrated the table, refilled the Tiger3D red PLA plastic and printed some routine tests. XYZ cube, Benchy boat, low poly fox and small vase in spiral mode. The models are standard, but from them you can immediately understand how well the printer can print. The speed was set to an average of 30 mm / s for the outer contours and 60 mm / s for everything else.
The result was very worthy. The cube is even, the corners do not protrude, the layers are laid quite evenly, there is no echo, the deviations in size are insignificant within one tenth.
Everything is fine with the benchy boat. There are no strings at all. Even the airflow was enough on a strong inclination in front, although it must be borne in mind that this side of the boat was turned directly towards the fan. The windows also turned out well, there are no hints of sagging.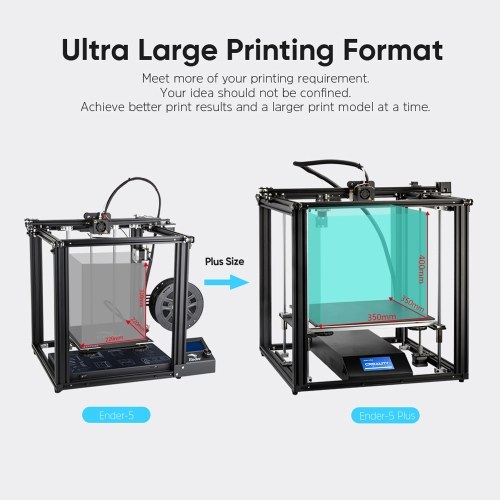
The fox was also printed with its muzzle turned towards the airflow, and it turned out perfectly. Everything is smooth, smooth. The seam of transitions between layers is almost invisible.
Yes, and there are no complaints about the vase, the layers are laid evenly, there is not a single flaw on all surfaces.
Printing models
Filled with gray PLA + Tiger3D and tried to print a more interesting model. This is an easter egg from blogger Makers Muse. It consists of three parts that are printed in each other and do not touch each other. And after printing, these parts should be able to rotate. True, we increased the model to 200%, therefore the gaps between the parts also increased, but in any case, this is a rather complicated model.
Most printed without any problems.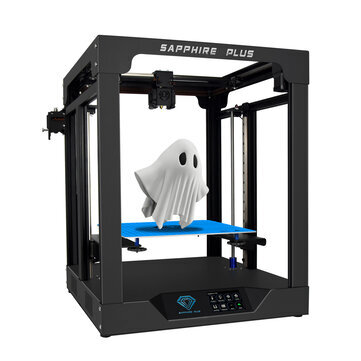 From above, where strong slopes begin, difficulties appeared, the edges were bent upwards, the nozzle touched them and the thin high parts swayed a little. Because of this, bulging layers are visible in some places. However, the model was printed to the end and when removed from the table it immediately started working. All parts are free to move.
The next model is also printed assembled. It is a folding box. Printed folded and has many moving joints. All parts are interconnected by small jumpers so that nothing falls during printing. Then they are removed from the printed model. There were no problems. Some of the layers that were in difficult areas are sticking out a little. But all the mechanisms work, nothing stuck together. The box unfolds and assembles as it should.
We tried to print with PETG plastic from Esun. And then the first difficulties began. No matter how hard we tried, plastic constantly leaked from the nozzle during transfers. Neither different retract settings, nor temperatures, nor combing, nor even a change in print speed could save me. The walls of the models turned out well, but the lids were constantly underextruded, and strings formed in the holes.
Having somehow picked up the settings, we ventured to print a larger model. Here is an elephant.
This is not just a figurine, you can store cutlery in it.
Its trunk is made to hang over the sink, and water from wet forks and spoons flows through it.
The elephant is printed with supports underneath and under the ears. And also by mistake, we left supports inside the trunk. During the printing process, it was already clear that it was not perfect. When transferring, there were small streaks of plastic everywhere, especially inside. But it was possible to get rid of underextrusion on the lids.
Supports from below and from the ears separated without problems. The trunk was more difficult. From below, the supports stuck quite strongly, and they had to be removed with side cutters. And it turned out to be very difficult to get support from the trunk in general. As a result, the elephant's trunk was accidentally broken and had to be glued back with super glue. I also had to remove plastic stains from the walls, although it was not difficult.
In the end, it turned out like this elephant. If you don't look closely, everything is fine with him. But on closer inspection, there are many small flaws. There are traces of sagging, the surfaces above the supports leave much to be desired. He can perform his tasks, but he looks so-so.
The next thing we wanted to test on this printer was flex plastic printing. After all, the feeder and the long Teflon tube, to put it mildly, are not very suitable for this.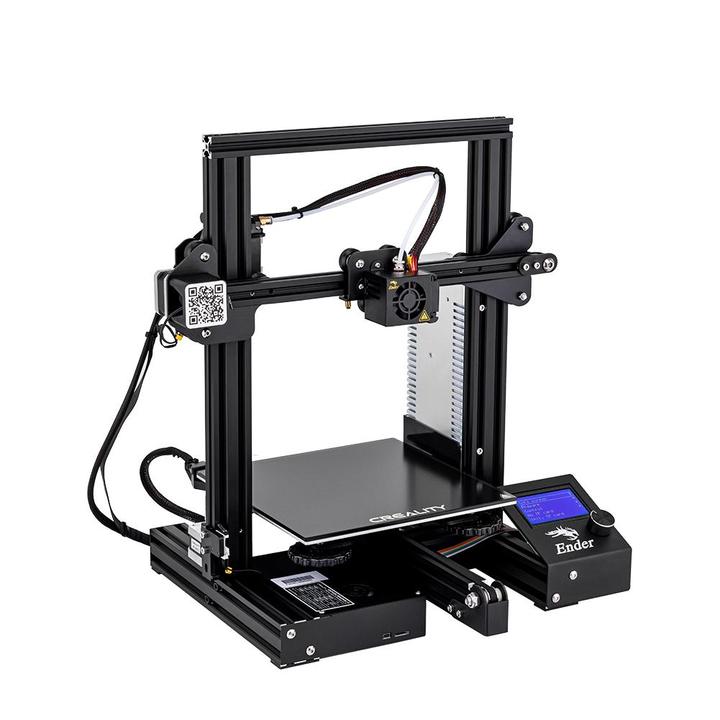
They took Esun eTPU 95A, it is not the softest and there was a hope that the printer could handle it. We printed a tire for a small typewriter. In the original, it is very small, so it was doubled. The speed was greatly reduced - 10 mm / s for external contours and 20 mm / s for everything else. Combing put up everywhere to avoid unnecessary transfers. And the printer coped with this task. Moreover, the tire turned out to be very high quality. Not a single gap, the layers are laid evenly, the lids closed normally. Even the seam is almost invisible.
We decided to take a chance and doubled the print speed. And, unfortunately, the printer has not coped with this. At first, everything went fine, but soon the plastic jammed in the feeder and the printing ended there.
It's a shame, though expected.
Uploaded Tiger3D pink ABS plastic. You need to understand that on an open printer, and even with a through thermal barrier with a Teflon tube, printing with ABS plastic is not desirable and difficult.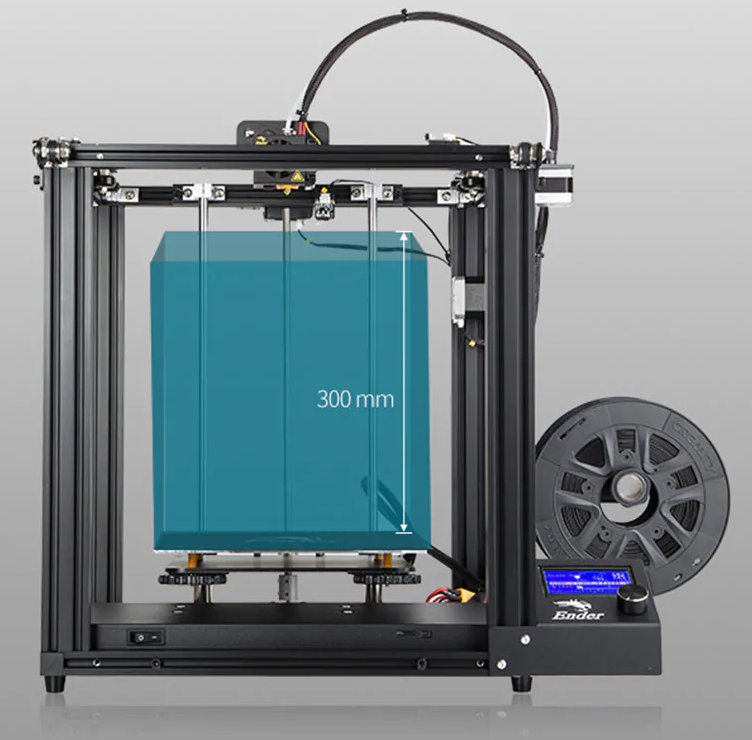 But it was necessary to try, besides, ABS from Tiger3D has a rather low print temperature, 235 degrees, like PETG. We decided to print some small modifications for the printer. The color is not very suitable, but at the moment it does not matter. The first is the mount for the table wires.
For every fireman, they printed on a raft and with supports, the airflow was turned off. The model turned out well, the support and raft separated without problems, although the surface above the raft was not beautiful.
The mount fits and holds the wires really well.
The second model is a screen cover. The modification is purely decorative. It was printed already without a raft on a clean table. The cover stuck well, and even the corners did not bend during printing.
The overall quality is very decent. Except that in some places there were small smudges of plastic during transfers, but they turned out to be easy to clean.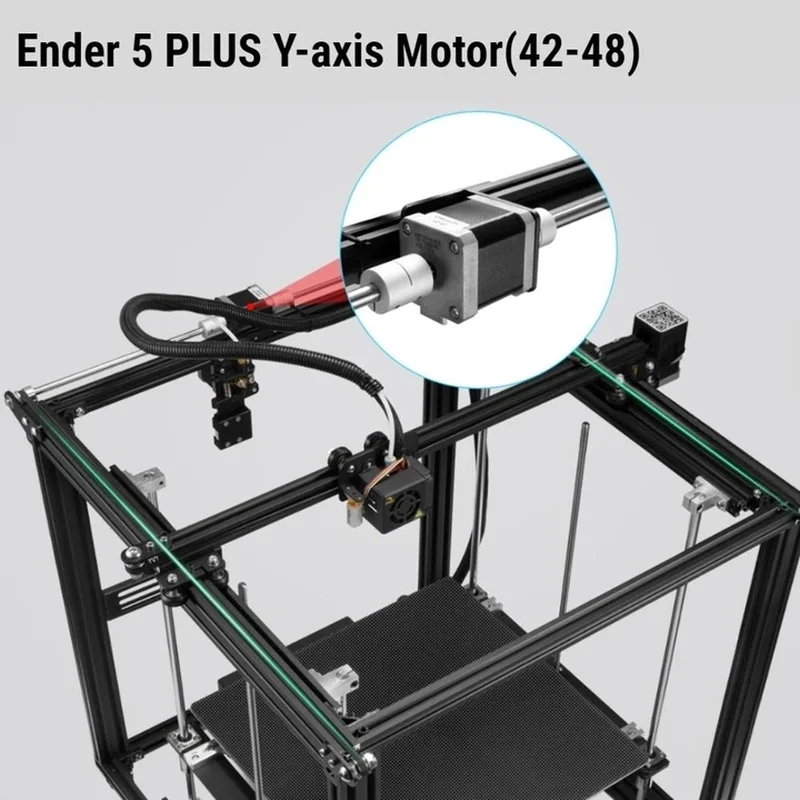
The cover is designed for the Ender-3 printer, and as it turns out, it does not quite fit the Ender-5 Pro. On the one hand, it protrudes a little.
The third model is unpretentious, this is a wheel for the feed mechanism, it makes it more convenient to manually push through the plastic, and during printing you can see how the feed takes place.
The wheel turned out well, fit normally, works as it should.
And the latest model is a slightly improved airflow.
It printed well, although during installation it turned out that it was a bit short and pressed against the heating block. It will work for a while, but will most likely melt quickly, especially if you print with the blower turned off.
And finally, we decided to print a detailed art model, Kratos from the game God of War, perhaps one of the most beautiful plastics that we came across. Esun eSilk copper color. The layer height was made 0.12mm. The model is printed without supports, in some places it has strong slopes, just check the effectiveness of the new airflow.
Kratos turned out just fine. On this plastic, in general, even the slightest flaws are very clearly visible due to the fact that it reflects light. And any protruding layer or gap immediately catches the eye. Here everything is smooth, the layers are almost invisible. It seems that the model is polished to a shine. The seam stands out a little, but you can't get away from it, especially with such a long Teflon tube.
Review summary
Okay, let's summarize. The printer is not perfect. Some solutions are very outdated, and the Creality Ender-5 Pro is just asking to be modified. The community of this printer is quite large and there will definitely not be a shortage of ready-made models. In addition, some models for modifications come from Ender-3. Even the control board of the printer has something to change, almost all companies producing control boards have already released versions specifically for Enders. Simply switch all the wires, install the new board in the old place and you're done.
Despite the simple extruder and feed mechanism, the Ender-5 Pro does a good job. We had difficulties only with PETG plastic. Even with medium hardness flex at low speeds, the printer can print normally.
The body of the printer is strong and durable. Any plastic is glued to the magnetic substrate without any problems, and it is easy to remove the models. The substrate itself does not peel off from the table, even when printing with ABS plastic and a temperature of 100 degrees. The printer is quite quiet thanks to the TMC2208 drivers.
In general, the Creality Ender-5 Pro did not cause any particular delight in us, but there was no complete disappointment either. The printer is like a printer. It prints quite well, although not fast.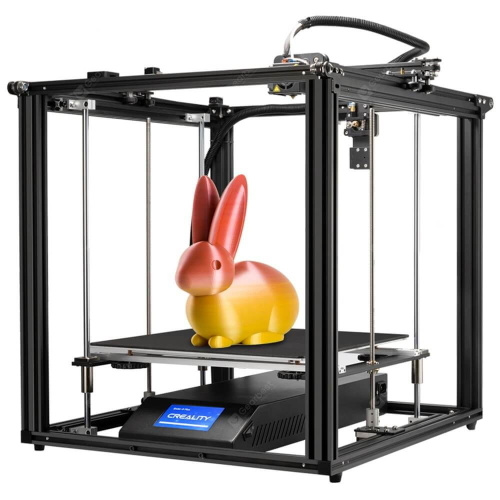
Watch the video version of the review on our Youtube channel !
Answers to questions about creality ender 5
For questions about the Creality Ender 5 3D printer family
The Ender 5 family of printers (currently 5, 5 PRO and 5 PLUS) is a low cost 3D printer that uses aluminum profiles (20 x 20 mm and 20 x 40 mm) to create a cubic printer frame. The series rooms are equipped with a heated worktable and a Bowden-style extruder. The assembly platform is lifted by one Z-axis stepper motor for the 5 and 5 PRO models, the 5 Plus model has two Z-axis stepper motors.
- Ender 5 Printing Questions I'm new to 3D printing. Just bought an Ender 5 Pro. After fiddling with table leveling for the past few days, I was finally able to get a consistent first level, everyone thought…
- Ender 5 SKR Mini E3-After heating, the hot end of the assembly crashes into the side of the printer So I got the SKR mini E3 for my Ender 5 after hearing all the positive feedback.
 When it arrives I plug everything in to make sure it's safe and check the axis... they all worked...
 - Printing is bumpy and curled around the edges I recently installed a BigTreeTech SKR E3 mini V2.0 on my Ender 5 and had some print quality issues even using the same settings as before the board was replaced. Edges…
- How to increase the spring tension on the trailing arm on Stock Ender 5 Pro < p>I was asked to increase the spring tension on the guide arm on the Stock Ender 5 Pro due to an issue with extruder filament warping during fast retraction. How do I do this…
- Firmware CR Touch NO Z axis Home Ender 5 Pro 4.2.7 I bought a new board 4.2.7 (256k) for my Ender 5 Pro and added CR Touch. I connected everything and flashed the board with the firmware "Ender-5 Pro-Marlin2.0.1 - V1.1.1 - ALT - TMC2235.bin" firmware from the creality website ...
- What are the potential possibilities for continuing printing when retraction is set to 0 in the slicer? I have a medium sized model consisting of 4 slender towers approximately 6″ tall as a finishing touch, each tower less than 1/4″ in diameter.
 These towers…
 - Flash motherboard on CR-5 Pro using USB port instead of microSD card? I had a big problem with my CR-5 Pro not reading the micro SD card. I was up and running but got a blue screen yesterday and reflashed the main board following the instructions I found on...
- Clogged from thermal creep, but only in the injector itself? I have a hot end all metal V6 clone that worked in the past but clogs up very easily lately. I tried to solve this problem like this: Clean/replace…
- How to intentionally maximize tension with PLA? I am using Ender 5 with standard PLA and Creality 4.8.2 slicer. How can I intentionally maximize the number of rows, and if possible, make them as consistent as possible. My goal is...
- Horizontal lines on object/geometry/density change I've had an Ender 5 plus for a few weeks now. It prints great and I have a pretty good setup at the moment. I noticed some horizontal inconsistencies corresponding to.
 ..
.. - Ender 5 Printing Problem for Large Models In all the large prints I print on my Ender 5 with PETG, I have problems with warping and raft tearing off during printing. I have a glass table and use standard...
- Ender 5 Plus manual screen temperature adjustment I want my Ender 5 plus to print at 300°C. So I edited the firmware and increased the HEAT_0_MAXTEMP temperature to 315°C. In my slicer I can slice and…
- Creality Ender-5 Pro heater cartridge operating resistance acceptable? I was asked to measure the resistance of the nozzle heater on my printer as I had some thermal runaway errors. The car is brand new. I did this by connecting a multimeter to two...
- Installing the Ender 5 BLTouch I just installed the BLTouch on my Ender 5, but I'm having trouble installing/editing the firmware. After watching a few videos on YouTube, I decided that the easiest way would be to go ...
- What is the type of Ender 5 propulsion system called? It's not CoreXY, it's not H-Bot, and it's definitely not bedding.
 What do you call this type of movement system?
 - Optimal fill style for printing a roughly spherical object on Ender 5? I'm about to print some fruits and vegetables on an Ender 5 with a maximum size of 6 inches. They are all roughly spherical in shape. Melons, pumpkin, etc. What is the best fill type to use...
- Can OctoPrint be used on an Ender 5 pro with stock firmware? Can OctoPrint be used with an Ender 5 Pro that is still using the factory default firmware (any version) from Creality, or is changing the firmware an absolute prerequisite even for…
- How do I clean up melted PLA from an Ender 5 Pro flex mold plate? I have an Ender 5 Pro with flexible build (factory default version). There are many extremely thin traces of melted PLA all over it. Too thin to peel off easily when…
- Ender 5 Plus doesn't go home (or zero) correctly I've been using Ender 5 Plus successfully for a month now.
 But all of a sudden the printer won't return to zero or "home" correctly. Whenever you press the home button or start printing, it should go and hit…
 - Ender 5 Plus - not aligned, Z axis goes down, always My Ender 5 Plus (original) does not align. After the self-leveling command, the Z-axis only goes down. I have already changed the BLTouch three times and the problem remains the same. I bought my E5P at…
- Ender 5 with 8-bit Creality 1.1.4 board - Issue with extruder motor speed too slow The problem I am having is that the extruder motor is not spinning fast enough. Therefore, the filament does not come out as quickly as I would like. In terms of…
- Z offset only for BLTouch? I'm having a hard time getting my Ender 5 Plus (I'm running stock firmware 1.70.2 BL) and in pursuit of that I decided to check the probe offset values. It seems that only the Z-offset is configured? Or M851 …
- Why do all Ender 5 Pro axis motors (X, Y and Z) stop moving (all at once)? I have a Creality Ender 5 Pro that has been working fine for some time.
 During my last print, the axle motors just suddenly stopped working while the motor…
 - How to check the table temperature on an Ender 5 I have an ender 5 and I'm not sure if the table is getting to the right temperature. Or maybe I don't understand what it must be like when the temperature rises. If I use infrared…
- What is the thickest reasonable layer height to print on the Ender 5? I'm going to 3D print a series of scaffolds and rebars that I'm going to use as a frame/structure for clay sculptures as an alternative to using twisted wire because...
- Why does the first layer only stick to the table if I increase the temperature 10°C and reduce speed by 75% I use the stock Ender 5 pro with the filament that came with it and use Creality Slicer 4.8.2 but I can only get reliable adhesion to the table if I increase the temperature …
- Strange printing after update So I just did a full update of my machine in a by no means newbie, but this question baffles me and a few other veterans I've asked.
 Steps taken: …
 - Ender 5 spool holder I switched my Ender 5 to a direct drive extruder and it works great, but I need a better place to put the filament coils; probably something elevated (or even just taller than…
- Ender 5 (Plus) - Portal non-square frame, how to fix it? How could the square of the portal be made in relation to the frame? Referring to the image below, distance A and distance B are not equal. Also does this explain the reason why when I...
- Ender 5 Plus Bowden tube pops out My new Ender 5 Plus Bowden tube keeps popping out of its socket on the extruder in the middle of printing, I have tried several times and it keeps doing this do, although each time securely fixed on ...
- Why does the print not stick after a perfect calibration print? I'm new to 3D printing and have an Ender 5 Pro. I manually leveled the table by setting the nozzle gap to 0.1mm (using feeler gauges) and then printed a calibration print and manually.
 .. BLTouch 3.1 I am new to 3D printing and have recently purchased an Ender 5 Pro. I came in and the 8 bit 1.15 board was broken (couldn't start the extruder). I upgraded to Creality 4.2.7 32-bit and also purchased…
 - How to solve the problem of the strange behavior of the Z-axis of Ender 5+? Before choosing whether automatic or manual alignment is required, the printer performs a procedure to determine the home Z axis at the center of the table. It starts fine, then the level goes to...
- Ender 5 starting problems I had Ender 5 for a while now and it worked phenomenally, but I recently installed a BigTreeTech SKR E3 mini and I also had to update the firmware, which resulted in to some problems that…
- What is this white layer on my 3D printer? I left the printer to print a round object, and when I came back, I saw that it had not printed anything, but left a layer of white on the surface. I can't take it off, I tried washing it and.
 ..
.. - Ender 5 hotend and table cooling with automatic table leveling I have an Ender 5 with automatic table leveling sensor (TRU-LEV 600). However, it works fine because the sensor probes the bed, the nozzle and bed cool down and don't stay hot,…
- How do I get the Ender 5 to use the BLTouch probe for Z-targeting? Background I set up the BLTouch module as described in the manual that came with it, which involved unplugging the Z axis switch and replacing it with a couple of wires from the BLTouch module. I…
- Ender 5 Pro print quality problem I received my 3D printer from Creality 1 day ago. My dog from the SD card came out perfect, Benchy was printed almost flawlessly too. I have used the default Benchy settings on all of my…
- Ender 5 radial fan screw size (part cooling fan) I had a problem with my old fan shroud that I printed out and when I went to install the new one, the small screws that hold it down fell on the carpet, which is a big degrees…
- The printed object is half the height it should be I'm having serious extrusion problems on an Ender 5.
 I've had near perfect quality since I got it about 2 years ago, but recently I replaced the board to Creality Silent Board 4.2.7,…
 - Ender 5 won't raise Z axis before printing I've had an Ender 5 for about a year with no problems. But more recently, the printer did not raise the Z axis before printing. It will look great, but when it moves to print the clear line, it…
- Creality 4.2.7 Windows connection problem I had Ender 5 for quite some time and it worked phenomenally, but recently I ran into a MIN_TEMP error, so I ordered a new board, hotend and Creality silent. Since this is Ender 5, I'm...
- Re-perform manual table leveling I have an Ender 5 Pro with a BLTouch Automatic Table Leveler running Th4D Marlin version: Th4D UFW 2.14. During my initial setup a few months...
- Why Ender 5 Pro table stops heating 10°C below set point After a long battle with SKR Mini v2, TFT35 and BLTouch and creating the correct firmware.
 I thought I was through with it all and ready to start printing again after finally being able to set the Z offset…0624
 - How to determine the table dimensions in Marlin for an arbitrary drive / hot end? How would I go about measuring my hotend / bottom bracket dimensions in Marlin so my hotend doesn't hit the frame? I see in Marlin the "table size detection" options #define Y_BED_SIZE 360 …
- Editing the CR-10S / Ender5+ LCD Touch Screen Firmware How do I edit the touch screen LCD menus? Oddly enough, ender5+ should be an upgrade, but ender5 (the regular one) has a lot more stuff that you can control from the LCD screen.…
- Ender 5+ stops during table leveling My Ender 5 Plus started to fail. The easiest way to fail: Power On Settings ▶ Leveling (wait for completion) Tap measurement The first zone will be...
- What do I do to remove rounded corners using connection deviation? I recently updated my Creality Ender 5 with SKR Mini E3 V2.
Learn more