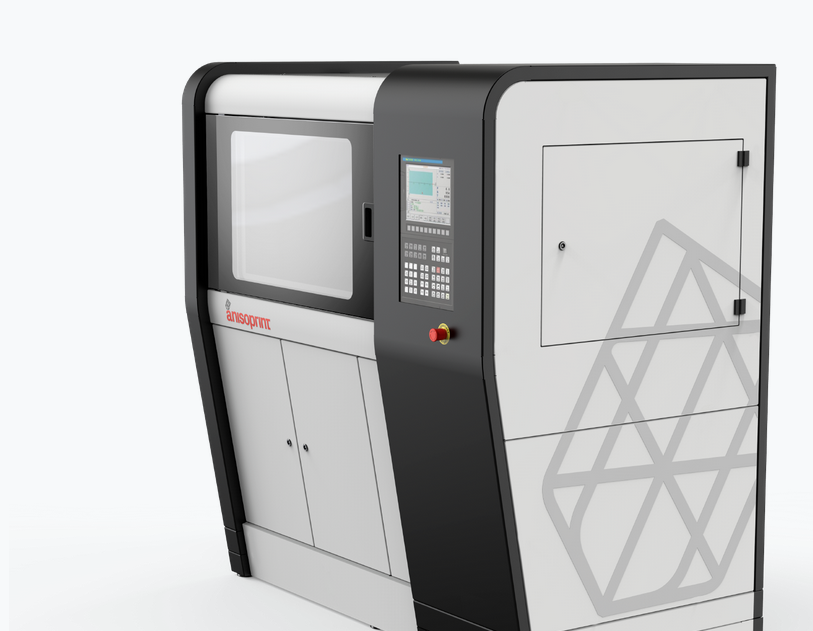
Atlas 3d scanner review
Murobo Atlas 3D Scanner In-Depth Review
8.1Expert Score
Murobo Atlas
Murobo Atlas’s features are more eccentric than general desktop 3D scanners that aren’t made from 3D printing. It's really like creating extremely functional out of nothing at all.
Affordability
10
Quality
7
Speed
7
Capability
7
Practicality
7
User Expectations
10
PROS
- Supports camera in still as well as video mode.
- Configurable image processing settings.
- Compatible and portable.
- Easy to set up and operate.
- Supports dual laser lines.
- Integrated with Raspberry Pi.
- Comes with open-source software.
- 5 megapixel camera sensor.
- Auto calibration.
- Complete standalone scanning.
CONS
- Like all other laser scanners, Atlas too has trouble with shiny, black, and furry surfaces.
- There is a risk while scanning components with low volume.
Table of Contents
Atlas is the first budget-friendly 3D printable scanner. It is purposely kept affordable and accessible for the mass. The machine delivers high-quality scans that can be used for building finished products.
The kit is available in two manners: 1) as BYOP i.e., Bring Your Own Pi-Kit: it includes all components except the Raspberry Pi parts, 2) the full kit that comprises all the electronics.
The scanner is equipped with a five-megapixel camera, the ability to drive lasers and motors as well as sufficient memory and CPU power for doing 3D scanning.
But, what makes this scanner compete for a similar scanner in the same price range? Does it offer value for the money it charges? Well, let’s get to know by looking at it in-depth.
Features
Murobo Atlas can be printed using ABS as well PLA. It comes with an optional acrylic enclosure that can be used while scanning parts in sunlight.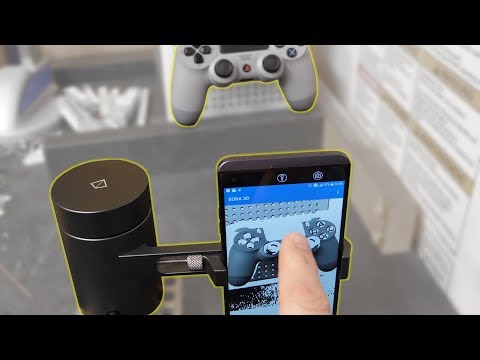 It is able to deliver up to 3200 samples per table revolution.
Equipped with a 5-megapixel camera sensor, the scanner supports capturing not only instill but also during video mode. Due to the auto-calibration feature, users do not need to undergo any sort of trouble before starting the scanning process on the machine.
Having stated so, let’s have a look at more such exciting features mentioned and explained below.
Compatible with Various Operating Systems
Atlas 3D’s software runs comfortably on the Raspberry Pi so the communication with the machine occurs through a normal web browser. Due to this, the scanner allows virtual control via any modern operating system including Windows, Linux, Mac, or most smartphones.
This feature gives the user a sort of flexibility as well as freedom. It does not limit them by any means either for operating or controlling the scanner.
Auto-calibration
Users of this scanner need not go through the tiring process of calibrating it before every scan. After installing the software, one can easily click on the software to start the calibration system of Murobo Atlas. This saves a lot of time and decreases the overall scanning time.
Supports dual laser lines
Like other desktop 3D scanners in the same price range, Atlas supports dual laser lines. So, you do have the option of installing a right and left laser line according to your need for scan accuracy. Remember, the more laser lines, the more measurement points, the more accurate a scan can be.
Persistent Storage of Previous Scans
Atlas stores all the previous scans that you’ve done using it. So, in case you wish to use any of your former works, you can do that easily. By having access to that, it becomes easy to manipulate your current objects with that geometry.
Manual Control of Lasers and Turntable
Operators can easily control the way lasers behave on Atlas. So, in case you wish more measurement points on a particular object, it is possible. Also, the turntable makes the overall work of capturing all the perspectives a lot easier as well as less time-consuming.
Because of the turntable, the part can rotate while the laser can project measurement points over it, whereas the camera can capture its images.
Simple Construction
Atlas 3D needs no technical knowledge at all. Neither in its setup nor during its operation. It is a minimalistic scanner that requires no soldering or electrical knowledge for its build-up. All of its components can simply be screwed together.
Specifications
Credit: murobo
Atlas supports color scans. It is able to deliver 0.25 mm detailed resolution in parts and functional prototypes scanned using the scanner.
The machine has up to 3200 steps per rotation and can scan objects in up to 12 minutes or more depending on the detailing. A single scan of an object typically consists of capturing 360 degrees of it.
The scan area limit on Atlas is 8 inches * 6 inches.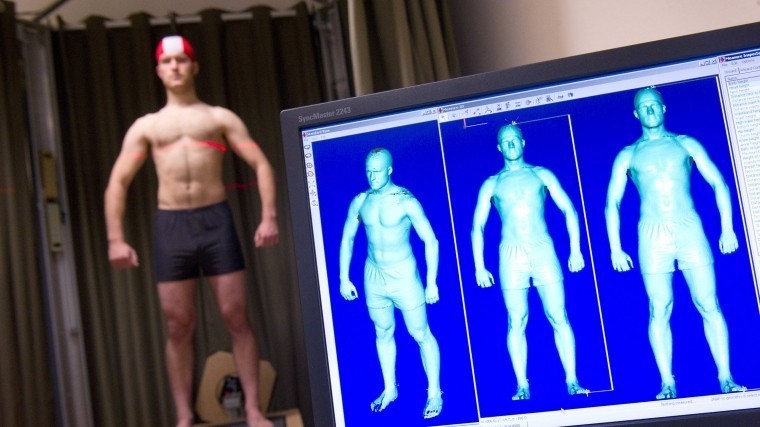 It is equipped with a 5-megapixel sensor and has auto-calibration features.
The scanner supports STL as well as PLY file formats. Users can get point cloud as well as triangle mesh exports using the machine.
Price
The BYOP kit of Murobo Atlas costs $149, whereas the complete kit costs $209.
First Impression
The scanner comes in a kit with:
- A Raspberry Pi 3 B with built-in WiFi and Bluetooth
- 5MP CMOS Camera
- 2 Laser Modules
- 8GB MicroSD Card preloaded and ready to scan
- Electronics Board
- Power supply
- Stepper Motor
- High Friction Turntable Liner
- Rubber Feet
The kit contains everything that typical full kits have, except for Raspberry Pi, camera, and Wifi adapter. It is to be noted that users require no soldering or electrical knowledge for building it./cdn.vox-cdn.com/uploads/chorus_asset/file/12803133/IMG_4902.1419979924.jpg)
Also, all of the components simply screw together and the user must print plastic parts with it.
Setup
Credit: murobo
The first iteration of the Atlas 3D scanner kit consists of all the electrical components that are needed for building the rotating 3D scanner.
Accompanied with it are all the STL files for 3D printing its parts, and an instructional video on how to assemble the scanner. Although not as full-proof as other scanners, Atlas is close to reality and replicating others.
Scan Type
Atlas 3D works by lightening up an object with laser light and then utilizing the 3D triangulation for the generation of a point cloud for each location where the laser hits the model.
The adjacent points are then joined with each other as triangles for the formation of a 3D model which can be used as it is for many purposes. Also, it can be processed in a software package like Meshlab for making water-tight and print-ready scans.
Scan Quality
Credit: murobo
The pictures of Orc Scan, Close up of the Orc triangle mesh, Skull scan, its 3D print, Santa scan, as well as screw scans depict parts to a great extent.
Software
The scanner can be integrated with FreeLSS Commercial. It is an open-source software based on Raspberry Pi, written in C++ and licensed under GPL.
It is self-contained in Raspberry Pi without any need of connecting the computer via USB. The application’s user interface is entirely web-based, exposed via Libmicrohttpd on the Pi.
Laser sensing in this software is performed using the official 5 MP Raspberry Pi camera which can be operated either in the video or still mode.
Customer Support
There is enough material available online to which can guide you not only through the process of setup, but also answer your queries faced during Atlas’ operation.
Parameters Influencing Buying Decision
Below mentioned are some of the chief factors that are good to know before buying Atlas.
3D Scanner Cost: The scanner is extremely cost-effective. With the complete kit costing just above $200, Atlas is available at a price of entry-level desktop 3D scanners which is great considering the amazing list of features it has to offer.
3D Scanner Speed: Although not extraordinary, the scanner doesn’t disappoint its users by not offering the average speed that is provided by other scanners in a similar price range.
3D Scan Quality: This is very Atlas exceeds its competitors. All of its scans whether in point cloud form or triangular mesh form are of high quality. In fact, costing around $200, it’s amazing how Atlas can manage to create such amazing quality scans that are very accurate.
3D Scanner Capability: The scanner is able to support the camera in still as well as video mode. Also, it supports dual laser lines which can increase the overall quality, Moreover, the 5-megapixel camera sensor works great while capturing images of the object for preparing scan.
3D Scanner Practicality: Atlas can be used for capturing scans at homes, offices, as well as for professional designing purposes up to an extent. It’s a delicate piece of art that manages to easily create scans of varied objects and geometries.
3D Scanner User Expectations: The scanner mainly targets beginner-level users for whom buying a 3D scanner is a very difficult task given its cost. By making Atlas extremely affordable and accessible to all, Murobo has hit the mark.
The Verdict
Overall, Murobo Atlas is something completely out of the box. Who would have imagined preparing a 3D scanner from 3D printing?
It’s like creating a part from a technique in which it can be beneficial for the future. Users will get help in experimenting with their ideas of 3D scanning parts with ease.
The scanner’s features are more eccentric than general desktop 3D scanners that aren’t made from 3D printing. It’s really like creating extremely functional out of nothing at all. All credits to 3D printing and the innovator of Atlas for such an innovation.
9 Accurate DIY 3D Scanners You Can 3D Print At Home (2023)
3D scanners can get really expensive. We’d know – we’ve tested and researched them in creating our ranking of the best 3D scanners .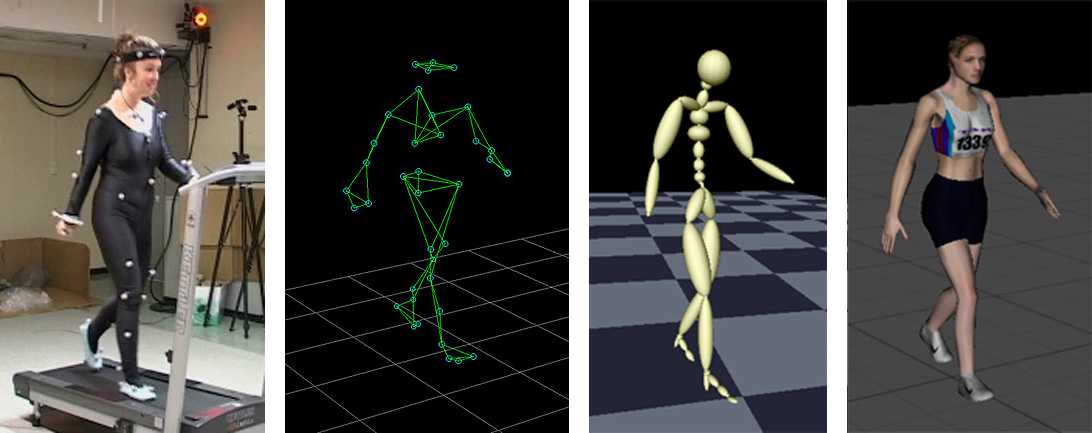 However, if you’re willing to be a little more thrifty you can save a lot of money building your own DIY 3D scanner — and have a cheap 3D scanner you can feel proud of building yourself!
DIY projects, especially in an area where precision is key, have an unfairly slap-dash reputation. In fact, there are some very accurate DIY 3D scanners on our list, you just need to assemble them yourself.
The best part: they’re almost free if you 3D print the parts — your only costs are the camera/parts.
However, don’t be fooled – you won’t get $20,000-quality scans from these kits.
And, it takes focus and skill to build such a technical piece of kit – hence we’ve included a couple of easy-assemble kits which cost more, but let you get right down to scanning.
Best DIY 3D Scanner Kit Under $200 | Best 3D Scanner Under $1000 |
$159.00 | $719. |
Amazon here | |
Amazon here |
 00
00Best DIY 3D Scanner Kit Under $200
$159.00
Amazon here
Best 3D Scanner Under $1000
$719.00
Amazon here
02/08/2023 03:49 pm GMT
Top Picks
Best DIY Scanners – Full Round-Up
- BQ Ciclop: Best 3D scanner kit overall
- Murobo Atlas: Good Ciclop DIY scanner alternative
- Cowtech Ciclop: Upgraded premium Ciclop scanner
- Openscan: Great open source 3D scanner
- AAScan: Great option for Android
- Revopoint POP 2: Best semi-assembled 3D scanner to save you time
For the DIY kits, we’ve included download links and links to documentation to get you started.
But first, let’s cover what to look for in a good homemade 3D scanner:
What Makes a Good DIY 3D Scanner?
- Price-performance ratio: for the price, how good are scans?
- Resolution: how crisp is scan quality
- Accessibility: you may be able to print most of the 3D scanner, but are the rest of the parts easy to buy?
- Ease of assembly and use: quick and easy builds are always better.
 The best 3D scanner projects can be built by anyone, newbie or expert.
The Best 3D Printable 3D Scanner Kits
Ciclop DIY 3D scanners
Many of the best DIY scanner kits are based on the original Ciclop open-source files. Massive companies like BQ have created their version, as well as tweaked versions such as CowTech Engineering’s take.
We’ve included them all here, as each option are some of the most DIY accurate 3D scanner options for this price range. For a pre-assembled scanner with the same quality, you’d likely need to spend double this.
3DSourced is reader-supported. When you buy through links on our site, we may earn an affiliate commission. Learn more
BQ Ciclop
- Resolution: 0.3-0.5mm
- DIY 3D scanner technology: laser triangulation
- Price: around $150 — Available on Amazon worldwide here
BQ are a Spanish technology giant who are well-known across Europe for their smartphones, tablets, and 3D printers. They’ve also developed their Ciclop DIY 3D scanner, which scans a volume up to 250 x 205 mm, based on laser triangulation technology.
An important feature of the BQ Ciclop is that it’s a completely open source 3D scanner. You’re free to modify it as you wish, following the RepRap philosophy. It’s easily accessible via USB or Bluetooth, and can 3D scan with a resolution of between 0.3-0.5mm.
- We also have a ranking of the best open source 3D printers.
Another great addition to this DIY 3D scanner is that it works with Horus open source 3D scanning suite which BQ also developed. This makes scanning much easier with the compatible program. You can buy just the electronics (includes an Arduino, webcam etc) and print the parts yourself for $115, or buy the whole kit for $240. Not bad.
However, it is worthy of note that the BQ Ciclop is difficult to assemble. Other DIY 3D scanners are quicker and simpler to build, though the Ciclop is still a fantastic DIY 3D digitizer.
Best DIY 3D Scanner Kit Under $200
HE3D Open Source Ciclop DIY 3D Systems Scanner Kit for 3D Printer
$159.00
Yes, you'll get better quality if you spend more on a scanner like the Revopoint POP range, but with this you get to build your own 3D scanner from the parts for several hundred dollars less.
Amazon here
We earn a commission if you make a purchase, at no additional cost to you.
02/08/2023 03:49 pm GMT
Murobo Atlas — Great Raspberry Pi 3D Scanner
- Resolution: 0.25mm
- DIY 3D scanner technology: laser triangulation technology
- Price: $200-250 — Available on Amazon worldwide here
Another homemade 3D scanner, the Atlas has the highest quality specs of any DIY 3D scanner we researched. It includes a 3D printed body made from PLA and ABS filaments, which can be purchased online. If you’re a serious DIY fanatic, you can print the parts yourself via the download link here.
Depending on if you already own a Raspberry Pi or not, you can save money on the build. This is because the Atlas DIY 3D scanner uses a Raspberry Pi camera to take detailed 3D scans with an accuracy of 0.25mm. Depending on your choice, the Atlas is likely to cost between $200 and $250, which is far less than most professional 3D scanners.
Moreover, Murobo has made considerable efforts to make sure that the Atlas DIY 3D scanner is convenient and simple to use. To achieve this, the Atlas comes with FreeLSS free 3D software which enables you to easily take 3D scans. In addition, you can access your Atlas via your computer’s browser through WiFi, as well as via SD card.
Overall, this DIY 3D scanner Raspberry Pi collaboration is a really interesting and creative way of combining several different innovative technologies to create a scanning device. If you’re an Arduino fan instead, you may be able to make it work for you too.
CowTech Ciclop
- Price: $119 – $159 (depending on whether you’re 3D printing the parts or not) — Available on Amazon here
- Resolution: 0.5 mm
- Maximum scan volume: 200 x 200 x 205 mm
BQ formed the foundations of the DIY 3D scanner kit, and remains one of the best DIY 3D scanner on tight budget options. Then back in 2015, CowTech Engineering used the foundations led by BQ, putting their unique spin on an updated model.
True to the open source movement, Cowtech started a Kickstarter campaign to raise money to put their version of the original, the CowTech Ciclop, into production. The team set the lofty goal to raise $10,000, and were met with surprise when the community rallies to raise $183,000. The CowTech Ciclop DIY 3D scanner kit was born.
So what are the differences between CowTech’s version and BQ’s DIY 3D scanner?
The CowTech Ciclop still uses the Horus 3D software program as it does a fantastic shop for 3D scanning objects. Differences however include a slightly different design, which the team spent days designing so that the parts could be 3D printed on any FDM 3D printer. Some desktop 3D printers only have a small build volume, so CowTech designed parts that can be printed on any printer with a build volume of 115 x 110 x 65 mm, which almost all 3D printers have.
Additionally, CowTech’s Ciclop has adjustable laser holders, and whereas the BQ Ciclop uses threaded rods, CowTech’s DIY 3D scanner uses laser-cut acrylic. This isn’t anything drastic and the scanners still look fairly similar, but CowTech only intended to improve the existing design, not reform it. CowTech sell the Ciclop, ready-to-scan, for $159 on their website. Overall, this is a great cheap DIY 3D scanner, and very effective for laser triangulation 3D scanning.
OpenScan Classic and OpenScan Mini
- Max Scan Volume: 180 x 180 x 180 mm / 80 x 80 x 80 mm
- Accuracy: Up to 50 microns
- DIY 3D scanner technology: Photogrammetry
- Price: Starting at $100.00 up to $200.00 for a complete kit with 3D printed parts and electronic
The Mini and Classic are two low-cost but high-quality 3D printed DIY scanner projects designed by German company OpenScan. In action, the OpenScan uses a stepper motor mounted to a 3D printed frame to rotate an object to capture images from various angles. These are then compiled into a high-quality 3D model using open-source software or OpenScanCloud, ready for 3D printing.
Where the OpenScan Classic and Mini differ from one another is max scan volume and camera/SBC options. The Mini features an 80 x 80 x 80 mm scan volume, while the Classic more than doubles the scan volume to a roomy 180 x 180 x 180 mm, perfect for scanning larger objects.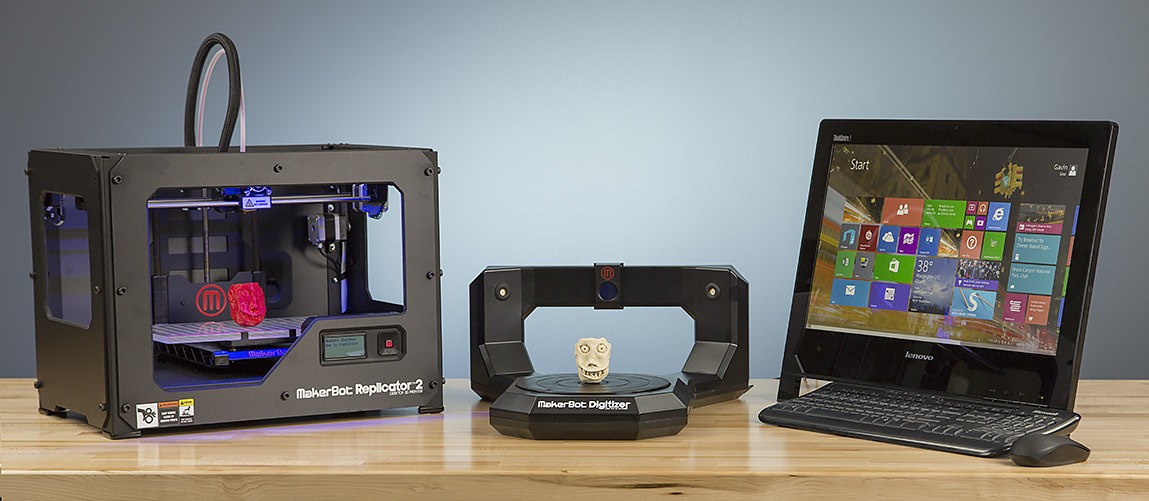 The Openscan Mini – the cheaper and smaller 3D printable 3D scanner.
The OpenScan Mini is tied to a Raspberry Pi and only works with either a Pi Camera or Arducam IMX 519 and includes one-click easy scanning. This allows the completed scanner to rotate not just the object but also the camera for a more detailed point cloud.
On the other hand, the OpenScan Classic is also compatible with Smartphones and DSLR cameras, which generally means better quality photos and, as a result, higher-quality models. It’s the tinkerer’s option and better suited for those that want to customize the scanner to their needs.
OpenScan offers a solution for all DIY skill levels and budgets, whichever model you decide on. You can customize kits based on your needs or order a complete kit that includes all the electronics and 3D printed parts.
The full assembly guide is here.
AAScan Open Source 3D Scanner Based on Arduino and Android
AAScan is a very recent (February 2020) DIY open source 3D scanner that’s fully automated in taking photos and moving the object around on the scan plate.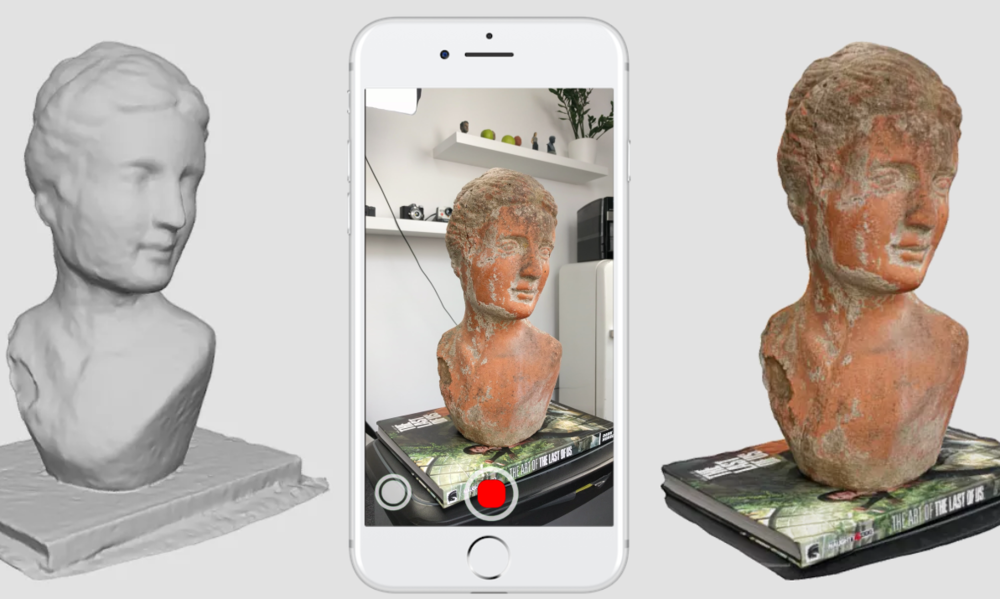 All the files are on Thingiverse, which we’ve linked below. Interestingly, the creator stresses that the AAScan is intended to be a purposefully minimalist machine, able to scan but not filled with extra features beyond this primary capacity.
All the instructions for how to build, print and assemble the AAScan are on the Thingiverse page, requiring an Arduino, some electronics, and either a 3D printer to print the plastic parts or someone else to print them for you — such as from a 3D printing service.
You can view the DIY scanner on Thingiverse here.
FabScan Pi
- DIY 3D scanner technology: laser triangulation
- Price: $100-200 depending on which version
The original FabScan was a DIY 3D scanner built by Francis Engelmann as part of his Bachelor’s thesis back in 2010. Since then, there have been numerous improvements made in new iterations up to the newest model, the FabScan Pi. This new model uses a Raspberry Pi camera along with the new design to offer higher quality 3D scans.
Based on laser triangulation technology, the FabScan Pi is one of the best DIY 3D scanner options for those who are into doing it themselves. Depending on if you go for one of the older models or the latest, the price can vary between $100 and around $200 to completely create the 3D scanner. Overall, it’s a really cool kit and thesis which you can make at home.
If you want to create your own FabScan, you can follow the assembly guide here.
DIY Standalone 3D Scanner by Jun Takeda
- DIY 3D scanner technology: Photogrammetry
- Price: $200.00
The DIY Standalone 3D Scanner is an excellent option for those that want a hands-on project that results in a reasonably accurate and easy-to-use stationary 3D scanner.
By combining a Mbed board with a camera and OpenCV libraries, the scanning process is largely automated with just a single button push. The scanner captures multiple images of an object to create a 3D model that’s then output as an STL file written to an SD Card.
To complete the project, you’ll need a GR-LYCHEE as a centerpiece sided by smaller electronic parts, plastic sheets to create the housing, and various nuts and wiring to piece it all together.
As the name implies, it’s very much a DIY project and, as such, would best suit those happy to troubleshoot any potential hurdles with little hand-holding. Though there are instructions, you’re responsible for designing the housing, wiring the board, and calibrating the camera.
Arduino-Controlled Photogrammetry 3D Scanner by Brian Brocken
- DIY 3D scanner technology: Photogrammetry
- Price: ~$100
The Arduino-Controlled Photogrammetry 3D Scanner is a 3D printable 3D scanner DIY project that leverages the camera on any run-of-the-mill Smartphone and a cheap Arduino UNO SBC to keep costs low.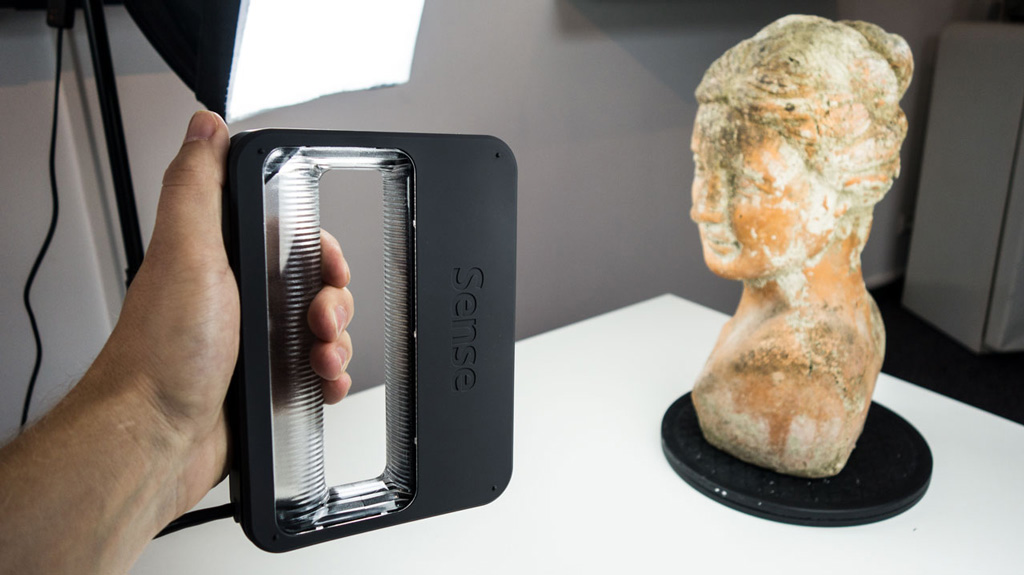
The core idea is to assemble a turntable consisting of 3D printed mechanical parts, including a print-in-place bearing. A Bluetooth-connected Smartphone does the actual scanning via the normal photogrammetry process. As for electronic components, you’ll need a servo motor, LCD screen, Arduino Uno, PCB, stepper motor, Bluetooth remote, regulator, and a small joystick module.
Once assembled, the Arduino-Controlled Photogrammetry 3D Scanner can capture anywhere from 2 to 200 photos in a single 360° rotation for reasonably detailed scans. The images are then sent to photogrammetry software such as AutoDesk Recap Photo to assemble a 3D model.
Aside from the cost of filament, expect to pay no more than $100 for all the parts and the STL files to 3D print the turntable.
Semi-assembled DIY scanners
Revopoint POP / POP 2
- Price: $500-700 — Available at Revopoint store here
- Accuracy: 0.3 mm
- Max Scan Volume: 200 x 300 x 300 mm
- Scan Speed: Up to 8 FPS
- DIY 3D scanner technology: Structured light
Though not technically a DIY scanner, we thought we’d slide in the Revopoint POP as a cheat option for those that want to save time and want largely better quality scans than you’d get with a homemade alternative.
It comes semi-assembled – you just need to attach the tripod, connect the USB and the turntable, add the sticker markers for better scan tracking, and optionally build and attach the larger turntable – so you can get started in just 5 minutes!
A basic mug scan we did on our Revopoint POP 2.The catch? At around $500, the Revopoint POP is considerably pricier than a DIY scanner. Still, it may be worth paying the premium for the convenience and reliability.
The Revopoint POP offers 0.3 mm accuracy (the POP 2 offers within 0.1 mm!) and automatic alignment technology, making for more detailed and smooth full-color 3D models than DIY scanners. It can capture 360° scans of objects up to 200 x 300 x 300 mm, besting most DIY options.
The main benefit of all this is high accuracy scans that are just about ready for 3D printing with very little post-processing needed to iron out imperfections and poor surface details.
A statue scan we did with our Revopoint POP 2.Ease of use also extends to the intuitive software, which works with Smartphones for on-the-go scanning and features exports to STL and OBJ formats. Alongside, it bundles in best-of both-worlds handheld and stationary modes. Five different scanning profiles allow you to tune the POP to each scan with face, body, feature, mark, and dark mode.
Read more: we tested and reviewed the Revopoint POP 2
Best 3D Scanner Under $1000
Revopoint POP 2 3D High-Precision Scanner with 0.05mm Accuracy
$719.00
You'll see just how accurate this scanner is when you try it (I've tested it to confirm a 0.07mm accuracy in my hands-on review) - there's nothing better for under $1000.
Revopoint hereAmazon here
We earn a commission if you make a purchase, at no additional cost to you.
Can You Make a 3D Scanner?
- Choose a DIY 3D scanner design.
- Source the non-3D printable parts such as the camera, stepper motor, single board computer (such as an Arduino), wiring, and other electronic parts.
- 3D print the housing, brackets, turntable, mounts, and other parts required for the 3D scanner project.
- Wire and assemble all the parts.
- Configure and set up the single board computer.
- Test and scan.
FAQs
Which is the Best DIY 3D Scanner?
This depends on how much DIY you want to take on yourself, and how much you are ready to spend.
One of the most cost-effective options is scanners based on the Ciclop open-source 3D scanner design. You can purchase a low-cost Ciclop scanner like the BQ Ciclop or CowTech Ciclop 3D scanner, then 3D print the parts from home and modify and tune the scanner to your liking.
Alternatively, the Revopoint POP is an excellent semi-assembled 3D scanner with great specifications and software at an affordable price for those that want to save time.
What is a DIY 3D Scanner?
A DIY 3D scanner is a cost-effective, home-made device constructed from manufactured or 3D printed parts designed to capture the characteristics of a specific object – such as size, surface details, and shape – by scanning it from multiple angles to create an equivalent point cloud that can be processed into a 3D model via software.
Other articles you may be interested in:
- The best 3D scanners
- The best low-cost 3D scanners
- Top 3D scanner apps for iOS and Android
- The best photogrammetry software
- Structured light 3D scanning vs laser scanning
- 3D body scanners: a guide
- Industrial 3D scanners
3D Scanners - Pre-Purchase Instructions
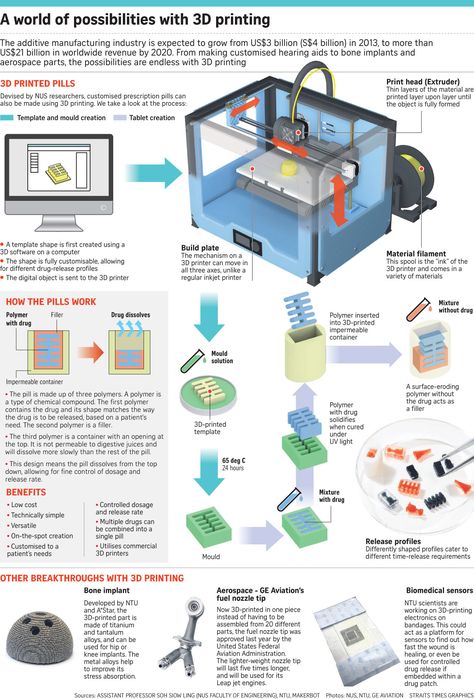
In industrial and commercial applications - for examining building structures and taking precise spatial measurements, for digitally capturing crime scenes and cataloging works of art or fossils - 3D scanning has been used for many years. Meanwhile, 3D printing was gaining more and more popularity, especially among craftsmen and enthusiasts, and people wanted to read real objects and convert them into printable 3D models.
The market has of course responded, and today there are more low and very low price 3D scanners on offer than ever before. Prices for 3D scanners range from a few hundred to several thousand dollars, which should suit just about any budget.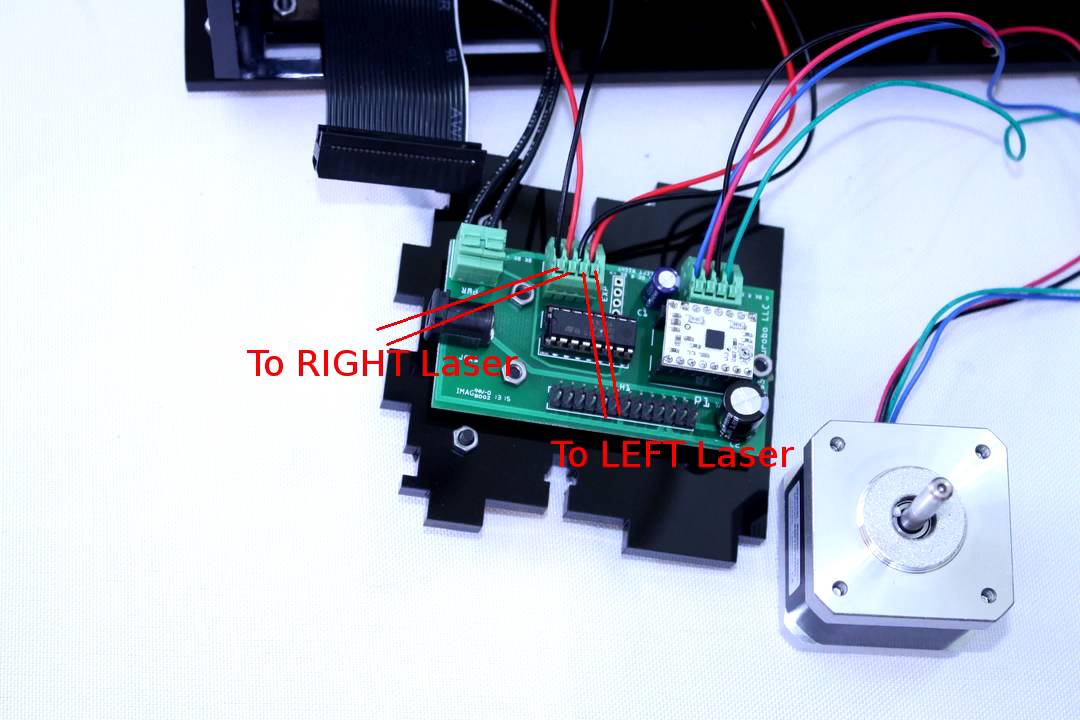 The decision on which 3D scanner to purchase depends entirely on what exactly it will be used for and how detailed you are going to scan objects.
Software Solutions
Depending on what you want to scan, you may not need to purchase a 3D scanner. It's possible that you already have the one tool you need to create 3D models, and this tool is in your pocket. There are several programs that take ordinary pictures, even taken on a smartphone, and then extrapolate the available data, creating a completely three-dimensional image.
This process is called 3D photogrammetry and starts by taking multiple pictures of the same object from different angles. The more images involved, the sharper and more detailed the final 3D model will be. This process may work on just three images, but for very detailed objects, dozens of them may be needed. Not only is this a less expensive option, it's also the best option for scanning 3D objects in public places or in the field where you don't want to carry additional 3D scanning equipment.
Autodesk 123D Catch
Price: Free (or $9.99/month for 123D Premium)
Technology: 3D Photogrammetry
Because 123D Catch2 is a great part of the cloud ecosystem, 123D Catch2 is a great part of the Autoskde cloud ecosystem, so it’s a great part of the Autoskde Catch2 cloud ecosystem work on a smartphone or tablet. This makes it ideal for digitally capturing objects in public spaces that cannot be scanned in a studio—museum pieces, large structures, and natural formations.
Resolution: N/A
Pros: No 3D scanner needed, objects of any size can be captured, most program options are free, easy to use
Cons: Limited functionality, quality depends on lighting and number of source images ; may take several minutes to digitally capture an object, does not work well on humans or animals
Agisoft PhotoScan
Technology: 3D Photogrammetry
Agisoft PhotoScan is a stand-alone software suite specifically designed to generate high-quality 3D models from 2D photographs. It was originally aimed at museums and libraries to work for the benefit of archiving collections of artifacts and works of art, so it is able to produce exceptionally detailed 3D models.
Resolution: N/A
Pros: Can create high resolution 3D models, one-time license is free, the program is easy to use, has many settings
Cons: Software needs to be installed on a computer, a high resolution camera is required
DIY options
If you can't afford to spend a few hundred dollars on a 3D scanner, there are also less expensive DIY options .
Xbox Kinect with ReconstructMe
Price: Kinect (various), ReconstructME (free)
Technology: RGB camera, depth sensor
It's practically do-it-yourself, as it ends up assembling an inexpensive 3D scanner. Kudos to Microsoft for releasing a peripheral with a really powerful depth sensor and an RGB camera and leaving it open for use in third party applications! In this case, the combination of Xbox Kinect and free software like ReconstructMe is all you need to 3D scan people and objects.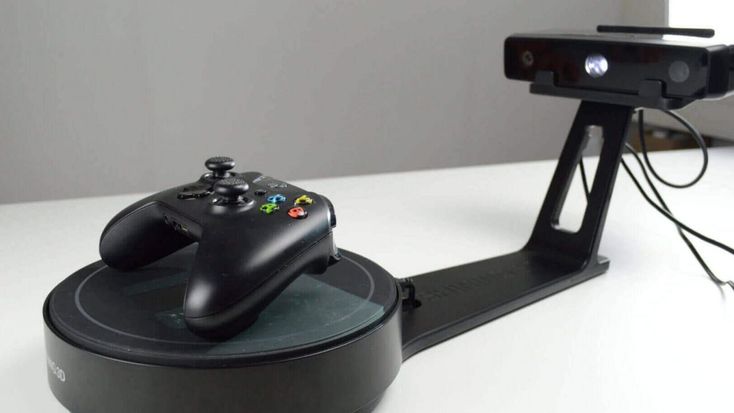
Resolution: When as
Pros: Cheap, flexible, free software
Cons: Windows only, limited resolution, unstable quality
BQ Ciclop
Technology: Laser triangulation
Ciclop is an open source desktop 3D laser scanner. The scanner uses printed components, so it can be made quickly and cheaply. This scanner can be purchased assembled or as a set of parts, and a parts list and free STL files are available online. Since the 3D scanner laser is a very delicate technique, self-assembly can be tricky and the results may vary depending on your skills.
Resolution: 0.5mm
Pros: Open source, build kit available, easy to modify and upgrade parts may not be as strong as traditionally made
Inexpensive 3D Handheld Scanners
A 3D handheld scanner, compared to a rotating 3D scanner, allows you to capture an object in a much wider range.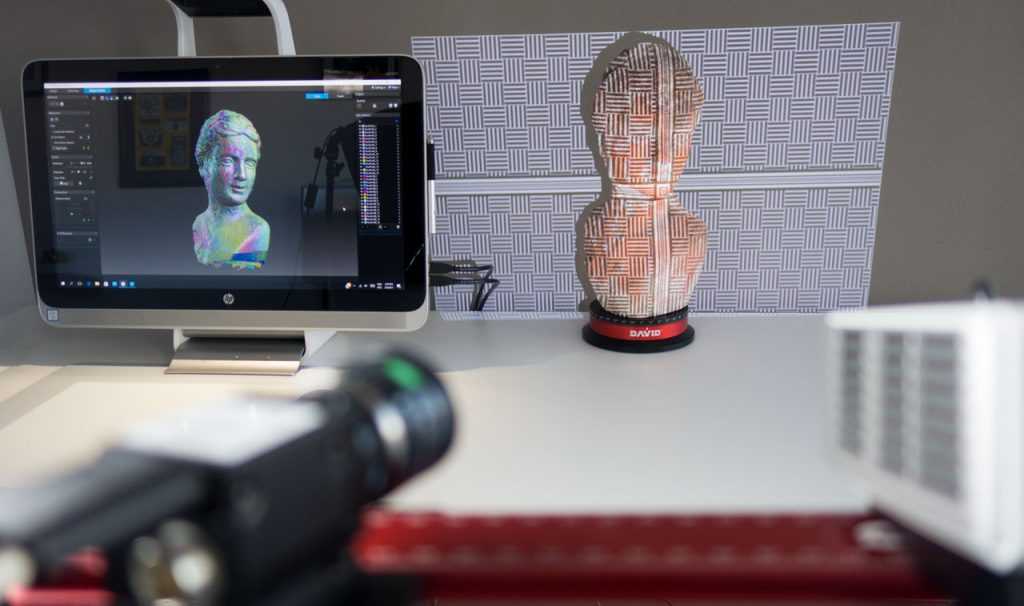 These types of devices are commonly used to scan people and large objects, and even low-cost models produce amazingly detailed results. Typically, it takes three to five minutes to scan an object the size of a person, and the more information you capture, the higher quality the final 3D scan will be. Such low-cost options may not be ideal for commercial applications, but for small businesses and individuals, this is the ability to quickly capture 3D data, including colors, patterns, and even texture.
XYZprinting 3D Scanner
Technology: Structured Illumination
XYZprinting's 3D scanner is one of the first devices to hit the market that uses the new Intel RealSense image capture algorithm. It is also the cheapest handheld spatial scanner on the market and is suitable for a wide range of applications.
Resolution: 1.5 mm
Pros: Low price, Intel RealSense technology, small size, portable
Cons: Windows only compatible, low resolution
Cubify Sense
Technology: Structured Lighting
Although the Cubify ecosystem is technically gone, 3D Systems continues to offer their 3D scanners. This handheld 3D scanner is easy to use, quickly converts scans into 3D printable files, and is backed by 3D Systems.
Resolution: 0.9mm
Pros: Small price, technical support, proven technology
disadvantages: Part of the non-working ecosystem Cubife, average scan, only under Windows
ISENSE 3D Scanner
9000 Technology: Structured lighting this 3000. the scanner from 3D Systems implies connection to the iPad and the presence of a powerful processor for obtaining 3D scans of quite good quality. A great option if you want maximum portability, because all you need is an iPad. Resolution: 0.9 mm
Pros: Affordable price, portable, battery powered, works with iPad
Cons: Part of broken Cubify ecosystem, average scan quality, requires iPad
Sensor
Technology: Structured Illumination
Structure Sensor was one of the first low cost 3D scanners on the market, a successful Kickstarter project. The same technology is used in 3D Systems' iSense 3D scanner, so the two devices are almost identical. The Structure Sensor is completely portable and only requires an iPad.
Resolution: 0.9 mm
Pros: Cheap price, portable, battery powered, works with iPad
Cons: Average scan quality, requires iPad
Desktop 3D scanners
3D scanners use laser triangulation to capture high-quality details of small objects. These 3D scanners usually don't read colors and patterns, but they are accurate enough for all sorts of textures and details. There are, however, several models that fully read color and pattern data using either structured lighting technology or software implementations of the inverse transformation of laser reflection into color.Zmorph 2.0
Technology: Laser triangulation
The Zmorph 2.0 3D scanner is one of the most popular desktop 3D scanners on the market, and it also has excellent software. The device can not only capture fine details and texture, it also reads colors. It takes about five minutes to completely scan an object.
Resolution: 0.43mm
Pros: Good value for the price, color capture, portability, multi-format export
Cons: Average scan quality, limited scan size, colors may be changed or inaccurate
MakerBot Digitizer
Technology: Laser triangulation and textures, but does not distinguish colors. The scanner integrates seamlessly into the MakerBot ecosystem and users have access to technical support and a MakerCare service plan.
Resolution: 0.5 mm
Pros: Part of the MakerBot ecosystem, lightweight
Cons: Doesn't understand colors, doesn't capture reflective or transparent objects, expensive for this scan quality, only exports to STL
EinScan- S
Technology: Structured Illumination
The EinScan-3 desktop 3D scanner is one of the best of its type on the market. It distinguishes very small details, patterns and produces realistic colors. Unlike most desktop models, it uses structured lighting technology, which gives higher quality scan results.
Resolution: 0.17 mm
Pros: High quality scans, color capture, export to different formats
Cons: Only works with very small objects, not compatible with Apple OS
These are top options
The best 3D scanners available in any category, if we are talking about $10,000-$30,000 industrial devices. These models are ideal for a wide range of tasks, including scanning people, large and very detailed objects. The best available technology is at work here, these scanners offer the highest performance. However, these devices are primarily for commercial use, they are too powerful for home tasks. RangeVision Smart
Technology: Structured Illumination
The RangeVision Smart 3D Scanner is the most portable desktop scanner available and can be set up outdoors to scan large objects such as cars with very fine scanning. It can also run on battery power, which is another plus for portability. The device has a flexibly adjustable tripod.
Resolution: 0.12 mm
Pros: Battery powered, high quality scans, color capture, export to various formats
Cons: Generates large files, expensive additional devices and accessories
DAVID SLS-3
Technology: Structured lighting
German David's 3D scanners are one of the best professional devices from David. They come with a host of accessories, including turntables, erection cranes and high-end software, making them very flexible. The SLS-3 is a scanner that ranks next to exceptionally high quality, powerful and modern industrial systems.
Resolution: 0.06mm
Pros: Very detailed scans, full color and textures, best in class, brilliant tech support and customer service, export to many formats
Cons: Too powerful for everyday needs , dear
3D Scanning in Brief - Artec Studio Documentation 12
Before you get started with the user manual, we would like to show you how easy 3D scanning can be. While this structured guide covers all aspects of Artec 3D scanners and software, it's a good idea to have a general diagram handy. This brief overview will help you get started without delay. But if you prefer to start with detailed and comprehensive information, skip this chapter.
Activation
The scanner comes with everything you need to get started, except for a personal computer. At a minimum, your computer must be running a 64-bit version of Windows 7 or 8 (version 10 is also supported). The more powerful the computer, the better. The most attention should be paid to RAM and video card (for details, see the FAQ page).
Warning
Do not connect the scanner to the computer yet! Read on for details.
-
Register an account on my.artec3d
-
Log in and download Artec Installation Center from the main page
-
Install Artec Installation Center. Enter your e-mail and password when prompted.
-
Connect the scanner to the mains and then to the computer using the USB cable
-
Wait while Windows detects the scanner.
Click Activate.
-
Click Install in section Applications to get Artec Studio
(See User Account, Scanner Activation and Offline Activation for details).
Preparation
Most items can be easily scanned. If you are going to scan black, transparent or mirrored objects, we recommend that you treat them with powder or a special anti-reflective spray.
Plain and simple geometric objects can be scanned:
-
By adding auxiliary objects (such as crumpled paper) to the scanned scene
-
Drawing the so-called. markers (e.g. X-shaped) on surrounding surfaces
Create good outdoor lighting. (For details, see Selecting and preparing objects for scanning).
Survey
-
Launch Artec Studio, then point the scanner at the object.
-
Press
F7on the keyboard or the button on the scanner body to start mode Preview .-
Geometry + Texture - Standard mode, suitable for most applications
-
For older computers, mode Geometry is a good alternative to
-
Mode Real-time Fusion creates a model in real time, allowing you to skip post-processing. Click Stop, then check the Real-time Fusion checkbox and click Preview.
-
-
Make sure the subject is clearly visible, then press the button again to start recording. If possible, scan the object from all sides in one pass by smoothly moving the scanner around the object as shown in the figure below.
Note
When scanning, pay more attention to the image of the object on the screen than to the actual object.
-
If you hear a beep and a red error message is displayed, gently aim the scanner at the area you just scanned. There are several reasons for the error "Path tracking aborted":
-
A simple geometric object is being scanned
-
Too small area of object scanned
-
You are moving the scanner too fast
-
-
Click to display the scan in the Workspace panel .
Rotate and scan (optional)
Note
This part is optional.
Rotate the object and scan any unscanned areas (press ). Capture in the current scan at least one area already captured in other scans, thereby facilitating the assembly operation.
(See Buttons and LED Indicators, Configuring Scan Settings, Scan Procedure, Positioning Modes, and Real-time Fusion Scan for more details).
Autopilot
For beginners, the easiest way to get the final model is to use Autopilot. Also, this mode saves time for experienced users. If you prefer to do all the steps manually, see Manual processing.
Autopilot is a special mode that helps users get the final model without learning all the basics of post-processing. It consists of two main parts: semi-automatic (editing and assembly) and automatic [1].
To get the model,
-
Press the Autopilot button in the left pane or press
F9. -
Familiarize yourself with the points that you have to go through in this step-by-step mode (listed in the welcome dialog).
-
On the Workspace panel , check all the scans you plan to work with and click Next.
-
Next, specify the input parameters for the model creation step and click Next. The basic settings include the following:
Note
It is recommended to use tooltips that can be opened by pressing the button next to the option name.
-
Scan quality (geometry) . Click to determine if your scan has a good geometry using hint images.
-
Scan quality (texture) . Click , view the images and decide if your object scan has enough texture.
-
Difficult-to-scan surfaces . Check the box if your object has such surfaces. Use the images that open by clicking on the button for reference.
-
Define Object size using example images.
-
In most cases, you can leave the default values for the rest of the options in this window. For more complex use cases, you can adjust the settings, as noted in the sidebar.
-
-
If necessary, remove any extraneous objects that might interfere with post-processing. Learn how to use the Eraser in the Removing Parts of a Scan (Eraser) section.
-
When finished, click Next. If the object was captured in several scans, Autopilot will combine them and show the result. You can accept it or assemble the scans manually (see Manual Rigid Assembly without Specifying Points).
-
Click Next.
-
The autopilot will start processing [1]. As soon as it completes, a message will appear stating that the model is ready. Click the OK button.
| [1] | (1, 2) Automatic steps can include:
|
Manual Processing
Cut Scene
When done, click File and select Save Project . Close panel Scan and pre-registration will start automatically. After that, you will be able to crop the scanned scene.
Purpose: to remove auxiliary surfaces (eg table or floor).
Actions: Open Editor → Eraser → Clipping plane . Follow the instructions.
(See Editing scans for details).
Assembly
Purpose: to assemble several scans together. You can skip this step if you have only one scan in the Workspace panel .
Actions:
-
Mark two or more scans with , click the Assemble button and select these scans in tab Hard while holding down the key
Ctrl. -
Click Auto Build.
-
If the assembly fails due to lack of texture or overlap areas, manually match the feature points on the scans and click the Align button.
(See Scan Assembly for more details.)
Global registration
Purpose: to optimize the arrangement of frames among all scans, thus preparing them for further processing.
Actions: mark the scans using the checkbox, then click Commands → Global Registration → Apply.
(See Global registration for details).
Removing polygonal noise
Purpose: to remove individual fragments and polygonal noise.
Actions: Open Commands → Delete polygon. noise → Apply.
(See Editing scans and Removing polygonal noise for details).
Fusion
Purpose: create a model (one surface, as opposed to the original scans, consisting of many surfaces).
Actions: select Commands → Smooth Fusion → Apply.
For sharper surfaces, select Clear bonding . For both modes resoltuion can be adjusted: the smaller the value, the more accurate the surface is.
(For details, see Creating Models (Glue)).
Remove unwanted parts (optional)
Purpose: to remove polygonal noise and poorly scanned areas.
Actions: click Editor → Detail removal brush. Follow the instructions.
(See Editing scans for details).
Simplify the polygon structure
Goal: reduce the file size by reducing the number of polygons and avoiding significant distortion of 3D geometry.
Actions: click Commands → Simplify polygon. structures → Apply.
(For details, see Simplify the polygon structure).
Texturing
Goal: get a textured model.
Actions:
-
Click Texture .
-
Select the model and the scan(s) from which it was created in the corresponding fields.
-
Select texturing for Export → Apply.
(See Texturing for details).
Measure, export, publish
-
Export model: open File → Export models... . Select the desired format, specify the destination folder and file name, then click OK.
-
Measure model: open Measure , then select one of the following options:
-
Linear for distance calculation (points connected by lines)
-
Geodesic for distance calculation (points are connected by curves running along the surface of the model)
-
Sections for calculating area and volume
-
-
Publish the model to viewshape.
Learn more