3D milk scanner
3D Scanning and Printing – Katerina Labrou
This weeks goal was experiment with various 3d scanning techniques and finally 3d print objects which cannot be produced by milling or cutting.
There are plenty of ways to produce a digital representation of an object.
Fluid / Milk scan is a cheap method for scanning. Putting an object into a container and recording a top view of the process of pouring milk into it can generate a 3d model of the object. Installing the mmpeg software on Linux we extract snapshots from the video in equal dt. Editing the images with Gimp, by applying filters like b/w or playing around with Brightness/Contrast, can result in distinguishing the object from its background. Each object slice represents a layer of the model. The more layers there are, the more detailed the scan.
By converting .gif to .stl using fabmodules we can generate the stl by setting the Z size and threshold (depending on the scan). Using blender or other mesh editors we can fix things on the geometry and prepare the file for further use.
A Roland Modela MDX-20 scan is another way to get a detailed digital representation of non-regular objects.
The modela can be turned into a 3D scanner by changing the milling piece by a sensor head with a needle. By collecting the coordinate values of the points on the object’s surface the software can create an .stl and a .pix (Alias image from PICZA software) file. This scanning method is preferred for small objects because it requires hours to complete rather small scale scans.
A typical way to scan bigger objects is with the kinect. A kinect scan can be very detailed by checking many different positions of the object. It’s easy to make the scan but it can take a lot of time to cross-check and put together the data to produce the final .stl file.
The are also some free tools based on photogrametry scanning technique such as Autodesk’s 123D Catch and ReCap 360 which are easy to use anytime with a smartphone.
By capturing images of the object from various angles, trying to keep the object at same distance from the camera, the applications process the data on the cloud to generate the 3D model. Processing can also take a lot of time, depending on the size of the data.
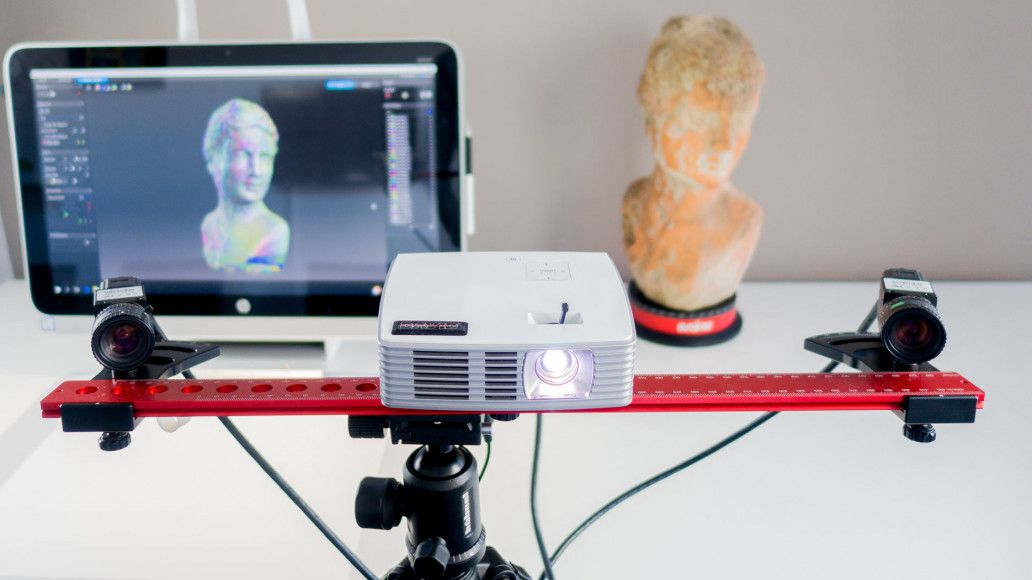
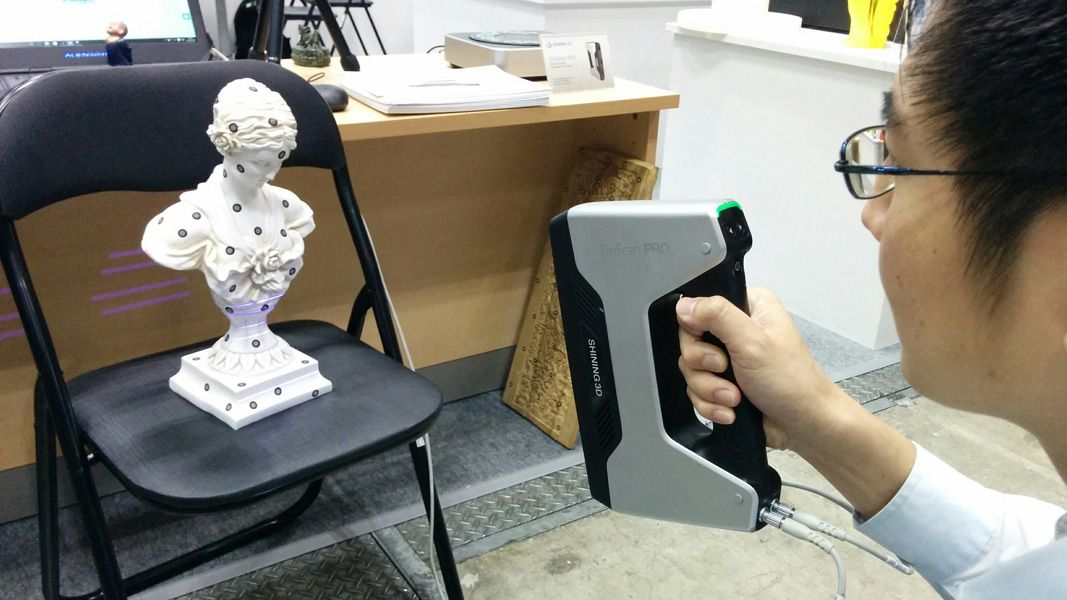
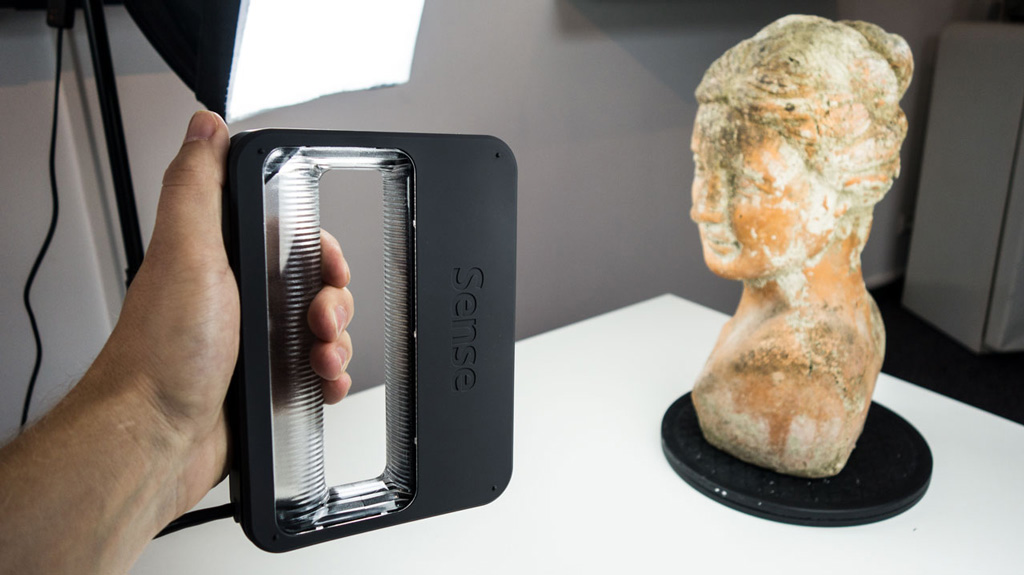
There are more ways to 3D scan, for exemple by using a structured-light 3D scanner to measure the 3D shape of an object using projected light patterns and a camera system.
Scanning with Modella
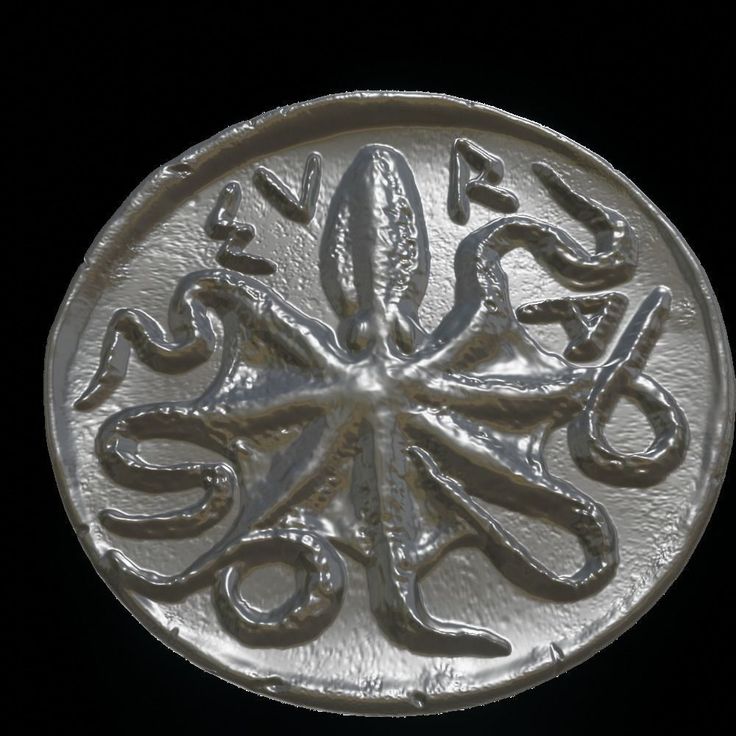
I wanted to start with scanning and object that it’s geometry would be hard to reproduce through modelling, therefore, I used the Modela to scan a seashell.
The geometry of a shell, a biostructure in it’s essence produced by the organism’s inherent algorithm – its DNA – and all the effects of the natural forces applied on it throughout its life – like the water, salt or air – would have been impossible to be accurately modelled on a CAD software. I wouldn’t have been able to print this exact shell if I didn’t go through the process of scanning it. Also, 3D printing is the best and most direct way to produce the detailed surface of a complex, chaotic geometry like this one.
The first thing to do is to place and stabilize the object on the scanner’s surface.
The next step was to set the parameters on PICZA to control the Scanning area, either by using the cursor or by setting x and y values, as well as the maximum height the machine would scan.
I adjusted the X,Y Scan Pitch to 0,3 to control the resolution of the scan.
Soon after it was all set for scanning. I clicked SCAN, the scan run overnight and the next morning an STL and a PIX file were prepared for further editing.
[Get the .stl and .pix file.]
3D printing the Seashell.
——————————————————
Testing the printer.
Before printing my own thing, we tried in the Fab LAb Barcelona the Formbytes 3D printers and in Green Fab Lab the Ultimaker 2. For both printers we used the Cure slicer and changed some settings according to the specifications of the filament, the nozzle and the printer settings.
For the Frombytes print, we loaded to Cura 14.02 the standard.ini profile from the Formbytes website and printed the trial print we downloaded from Thingiverse, suitable for checking the printer.
Printer Specifications:
Size : 4 x 60 x 60 mm (baseplate)
Holes (3/4/5mm) : Holes look good.
Letters / Numbers: Barely seen.
Details: pyramid, cone, all numbers : The shapes look nice and smooth.
Rounded print – wave, half sphere : No split polygons, rounds look nice and smooth.
Minimum distance between walls : Good distance between walls.
Overhang check (25°/30°/35°/40°/45°) : No overhang found on the test, maximum angle is 60°.
Flatness check : Some warping seen on the pyramid corner.
Noozle : 200 units.
Fan speed : 35 units.
Acceleration : 1000 units.
vxy-jerk: 15 units.
vz-jerk: +000.40 units.
ve-jerk: 5 units.
Print time: 53mins
——————————————————
The initial .stl file contained only a rep of the external surface of the shell as well as parts of the surroundings of the object scanned by Modela. Checking the file on Cura, the Ultimaker 3D printer control software, it was easy to figure out that in this case, the printer would build a solid base and infill the whole inside of the object.
In order to refine the surfaces and generate an actual shell, I imported the file on Rhino and edited the mesh.
1/ Mesh Repair + Routines
2/ Create a surface to intersect with mesh
3/ Create mesh outline (I didn’t need this at that point but saved it for later, to make more changes)
4/ Offset Mesh
Exporting an .stl file and loading it on Cura gave a lot better results.
In order to prin this object a substructure was needed, as shown on the layers’ menu. At the same time, the mesh seemed to be pretty nice for printing in Cura.
Saving GCode prepares the file for the Ultimaker. Then it’s quite easy to print if everything is set with the printer. I used pla filament of 2.85mm, which comes out of the nozzle of 0.4mm.
After removing the brim and the supports from the inner part of the shell, it looked like this. 🙂
Find here the files for the print.
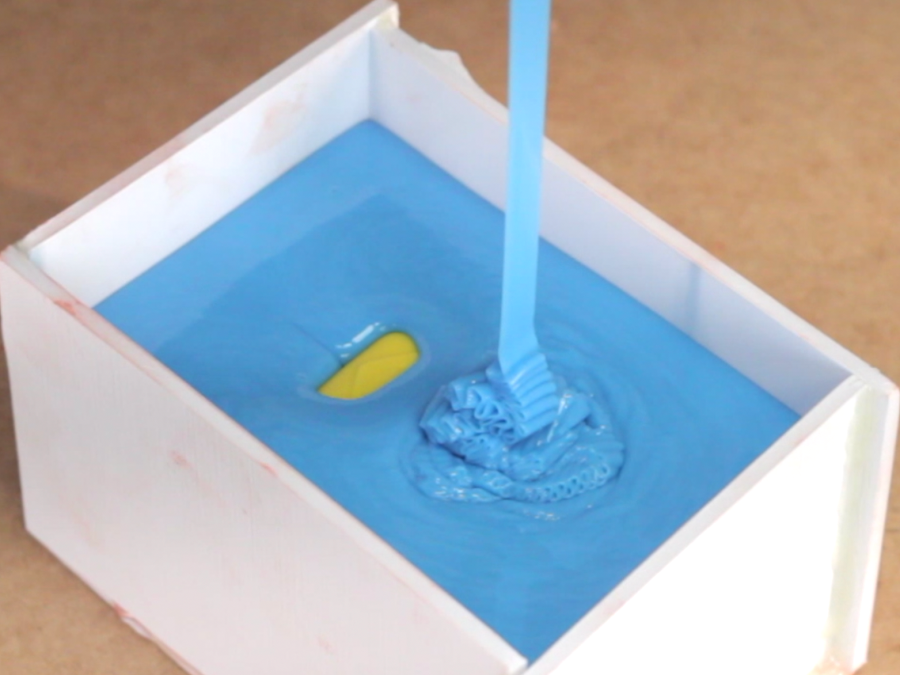
Making a Fluid / Milk Scan
The second scanning method I attempted to use was the milk scan.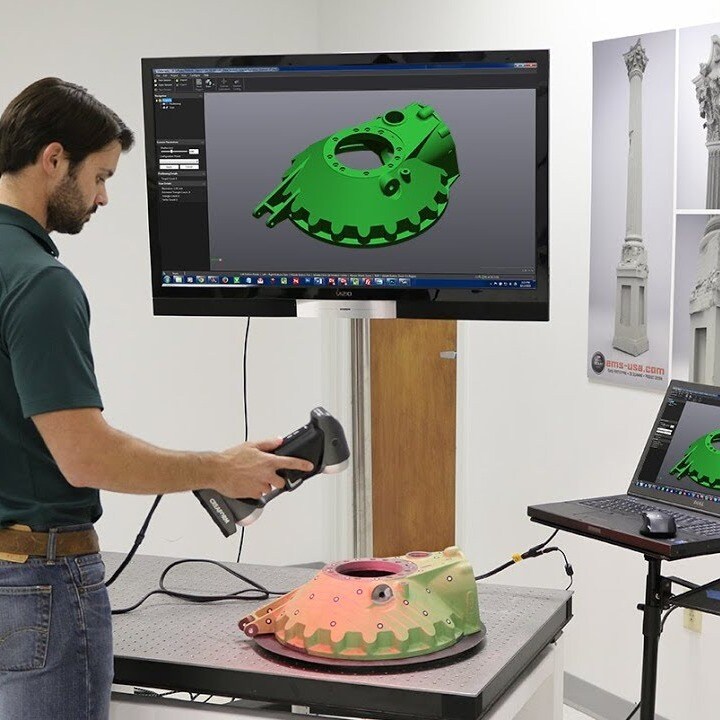 This method is based on achieving a high contrast between the object to capture and the surrounding fluid. By pouring the liquid in a quick and stable rythem in a basin in which the object to scan is placed and by recording on camera the process, the slices of the geometry can be captured in the sequence of the frames. The liquid gradually obstructs the volume of the object, allowing the shape and texture of the object to show in contrast to the emerging white background.
In order to complete the first part of a white fluid / milk scan you will need the following:
-
- a white basin, so that you have a white background for your scan
- a matte white fluid like milk, in a quantity that can cover the object while poured in the basin
- a black or dark coloured object
- something to stick the object to the bottom of the basin
- a camera to record video
- a tripod
First, stick the object in the middle of the basin and then set the camera on the tripod right on top of it, vertically.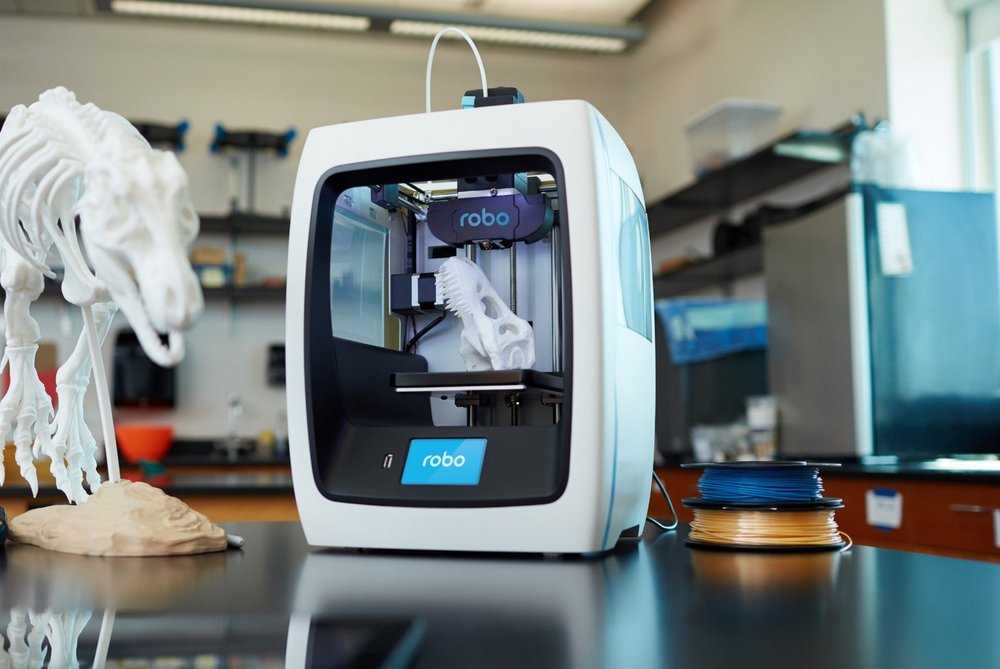 The process should be recorded on top view in order to get the most reliable scan possible. It’s important that the liquid can flow around the object while pouring it. You’ll be able to scan all geometries that can be filled with the fluid, so closed parts in which the liquid won’t be able to enter will not be captured.
In the beginning, I attempted to use a flour-water mixture that could provide a white surrounding instead of milk. While trying to find the right object to scan, I used a black piece of plastic but it was impossible to complete the scan. There were multiple causes of failure of these first attempts:
-
- my plastic object was thin and light that it proved to be challenging to stick it to the bottom of the basin
I used double sided tape to stabilize my object but 1.my object didn’t have a wide base to put the tape under it, so the outline of the tape interdered with the outline of my object and 2.it lost stability because the liquid affected the glue so it moved before finishing the scan.
- my plastic object was thin and light that it proved to be challenging to stick it to the bottom of the basin
-
- it was impossible to achieve a clean contrast between the object’s geometry and the fluid
The fact of using the flour-water mixture resulted in a background on which the figure of the black object was reflecting throught the process. Also, I was recording outside, on early evening hours, so the angle and the intensity of the sunlight were making it difficult to avoid shadows and capture smooth and clean images of the subject.
- it was impossible to achieve a clean contrast between the object’s geometry and the fluid
-
- the basin which I used was transparent, so eventhough I worked on a light-coloured surface, I couldn’t avoid shadows and visual noise from the surroundings.
- finally,the geometry of the plastic bit wouldn’t allow all sides to be captured throught this one-dimentional scanning process
While reflecting on the process in order to make it work, I wanted to insist on finding an object which could be scanned entirely.
In order to solve the above problems, I chose to work with black plasteline. The properties of the material solved multiple problems at once. I didn’t need to find a way to glue it to the bottom of my basin, at least for three scans – video recordings. Also, I could control the geometry of my object, so I worked more on the sirface, to experiment with the resolution of my scan, and avoided closed parts in which the fluid wouldn’t flow easily.
This time, I couldn’t avoid using milk, as its the thickness and reflexivity are perfect for the background. I blended one bottle of milk with a higher density flour-water mixture in order not to use more milk, but still be able to cover my object.
The video used as a basis for extracting the digital files is the following:
Extracting video frames with FFmpeg.
FFmpeg was used on Linux to extract the frames and convert them to the images needed for the creation of the 3D digital file of my object. The process and commands to create and name the .jpg files were the following:
- Create my images folder
- Locate it as a destination folder for the images
- use the command: ffmpeg -i file_name.MOV -r 1/1 $mmilkscan%03d.jpg to create a sequence of files from my milkscan-mov.mov video, with an 1fps step, numbering starting from 001
The next step was to run Gimp and use BIMP (Batch Image Manipulation Plugin) for color correction:
-
- File > Batch Image Manipulation
-
- +Add // Colour correction, convert to grayscale increase brightness, increase contrast
-
- Resize images to 600px
-
- +Add images // Add folder (images)
- +Add images // Add folder (images)
-
- Set output folder (images01)
- ☑ Apply to get the converted images
The next thing to do is to create an animation . gif file using these images.
-
- Select all files and drag to Gimp layer palette, so that they’re dragged as individual layers
-
- Image > Mode > Indexed…// Use black and white (1-bit) palette // Convert
-
- File > Export As.. // set your destination folder // GIF image
- Image as GIF // ☑ As animation // Export
Making a 3D .STL from .GIF
In order to convert the gif file to stl I used FabModules gif_stl program. The process goes as follows:
-
- Use /opt/fabmodules/bin command to access FabModules Binary
-
- Use gif_stl executing the command gif_stl ~/Documents/mydirectory/file_name.gif ~/Documents/mydirectory/file_name.stl 0.5 10 (or, command input.gif output.stl), where 0.5 is the threshold and 10 the hight of each layer.
- Look for the .
 stl file in your folder!
Editing in Blender.
Open Blender. I went through the following steps to edit my file.
-
- File > Import > .stl
-
- Scale (if needed) by hitting S on keyboard and scale factor (0.1)
-
- To clean the design from surrounding geometries:
-
- Click Tab for Edit Mode
-
- Select a pixel and hit L, hit P to separate the volumes
-
- Click Tab to leave Edit Mode.
- I ended up with a design of 82.464 vertices.
-
- To clean the design from surrounding geometries:
-
- Scale model in Z direction. While recording the process ther was a delay at the beginning and the end of action so I needed to scale my geometry on the Z axis. It would be betted if I had manually deleted some frames/img (around 10 from the beginning and another 10 from the end of my video) or, evenmore, cutting the video part when nothing is happening, before starting the whole editing process.
- Scale model in Z direction. While recording the process ther was a delay at the beginning and the end of action so I needed to scale my geometry on the Z axis. It would be betted if I had manually deleted some frames/img (around 10 from the beginning and another 10 from the end of my video) or, evenmore, cutting the video part when nothing is happening, before starting the whole editing process.
-
- Use Tools, apply a Mesh Tools > Deform | Smooth Vertex (twice) in order to make surfaces smoother.
The final step of this process is to fix the meshes of the geometry in order to make it 3d-printable. It’s really interesting to figure out the differences in the resolution of the surface
The files of the milk scan can be found here.
————————–
Here is the link to the folder containing all the files of this weeks assignment.
3ders.org - This $15 3D scanner consists of a tub of milk and a smartphone
Apr 23, 2016 | By Benedict
Here’s an article you can probably afford to skim-read: Instructables user yenfre has developed a low-cost (~$15) 3D scanner that can be assembled with a smartphone, two containers, and milk. The unusual contraption received the runner-up prize at Penn State’s 2016 HackPSU hackathon.
There are many ways to build a low-cost 3D scanner, whether using photogrammetry, infrared sensors, or dairy products.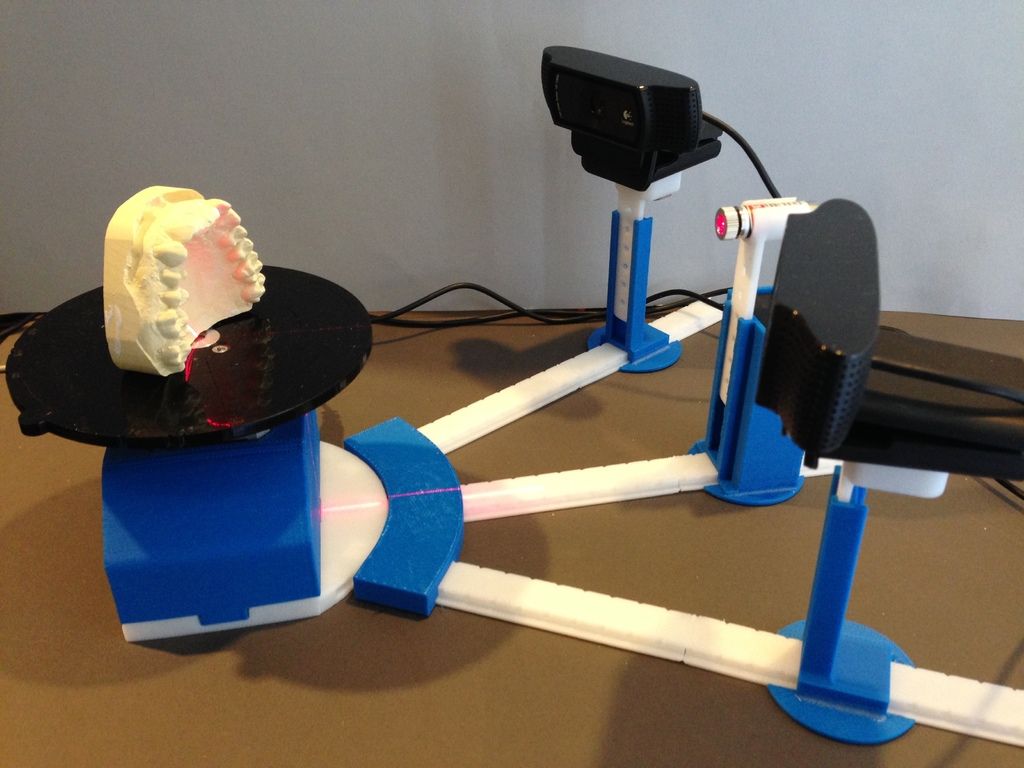 Wait a minute…what? That’s right: an Instructables user has used your favorite calcium-rich liquid to create a somewhat messy, ultra low-cost 3D scanner, which—much to everyone’s surprise—works! If the thought of using milk to create a 3D scanner sounds strange, that’s because it is. However, yenfre’s simple milk-based device, which has been entered into the 2016 Instructables 3D printing contest, actually demonstrates a remarkably effective method of 3D image capture, breaking a scanned object into “layers” which can then be captured by a camera.
“GotMesh” consists of two large containers, one on top of the other, with holes in the underside of the upper container and lid of the lower container. The object to be scanned is placed in the upper container, which is then filled with enough milk to fully cover the object. As the milk begins to slowly drain from the upper container to the lower container via the two holes, an image capture device such as a smartphone or DSLR is used to take pictures of the object at each stage of its reducing submersion. This effectively produced a 2D image of each “layer” of the 3D object, with the milk concealing lower layers. An OpenCV python script then converts the images into a 3D point cloud mesh which, if desired, can be converted into an STL file for 3D printing.
You’ve probably never seen a milk-based 3D scanner before, but the idea has actually been floating around for some time now. Although yenfre wrote the python script for the 3D scanner, the idea to use submersion as a 3D scanning aid is not the user’s own. In fact, the creator of GotMesh has acknowledged some debt to an earlier Milkscanner project, the work of Instructables user fiezi. “Our version is a lot simpler and is more automated and is geared towards 3D printing,” yenfre said of the newer 3D scanner.
GotMesh received second place at Penn State’s recent HackPSU 2016 hackathon, and has now been entered into the Instructables 3D Printing Contest 2016. Commenters on the Instructables page have been quick to offer their own tips for an improved GotMesh 3D scanner, such as using additional cameras and different opaque substances besides milk.
Posted in 3D Scanning
Maybe you also like:
- 3D scanning is made easy with this DIY 3D printed 3D scanner
- 3D scanner maker FARO launches BIM Scan Localizer and 'Early Adopter' Program
- 3Digify Kickstarter turns your home camera into a high-resolution 3D Scanner
- HPE unveils 3D scanning Avatar Platform for fashion, fitness and gaming industries
- Hasbro files patent application for iPhone 3D scanner that turns toys into 3D printable avatars
- 3D Robotics, Autodesk, Sony join forces on a 3D scanning drone that can map the world in 3D
- Chaos Group VRscans technology creates accurate 3D printable fabrics, leathers, woods etc.
- New Leica Absolute handheld 3D scanner LAS-20-8 features laser intensity auto-adjusts and haptic feedback
- CowTech to launch Kickstarter for $99 'CowTech Ciclop' 3D laser scanner
- U.S. Army to 3D scan 41-foot Coast Guard utility boat as part of ongoing quality control practices
- Student designs 'Curatio' 3D hand scanner equipped with 32x Raspberry Pi cameras
oldnews.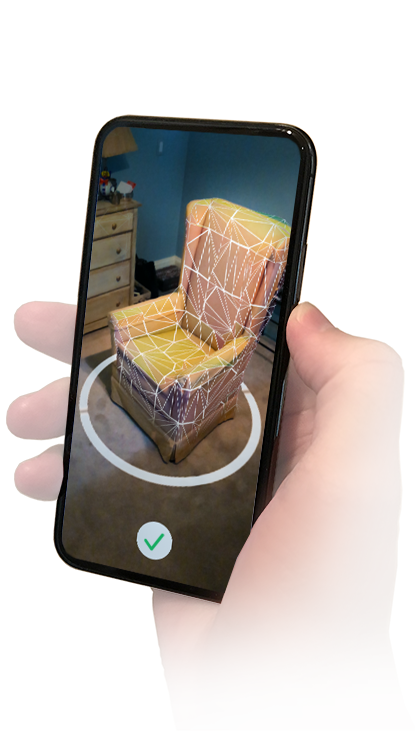 .. wrote at 4/24/2016 4:37:24 AM:
scanning by this method is a really old trick, why does the current generation never do any research? From 2007! https://www.youtube.com/watch?v=XSrW-wAWZe4
[email protected] wrote at 4/23/2016 7:09:58 PM:
http://www.wired.com/2007/06/milkscanner_3d_/ :D
(There is a solution) Open source 3D scanning
3d-design scanning open-source
I'm trying to make a 3D structured light scanner using one camera, a light projector and a turntable.
After a few days of googling, I didn't find any solid open source projects that I could get to work. SLStudio did seem like a good choice, but it didn't compile properly.
I was wondering if anyone knows of a good open source code that they used with the same setup? Any help would be greatly appreciated. I'm blocked here.
@Hamza Tasneem, iry
Discussion
7 answers
Best answer:
▲ 0
I have several truly useful resources, but I got rid of the structured light approach due to the smaller ones due resources.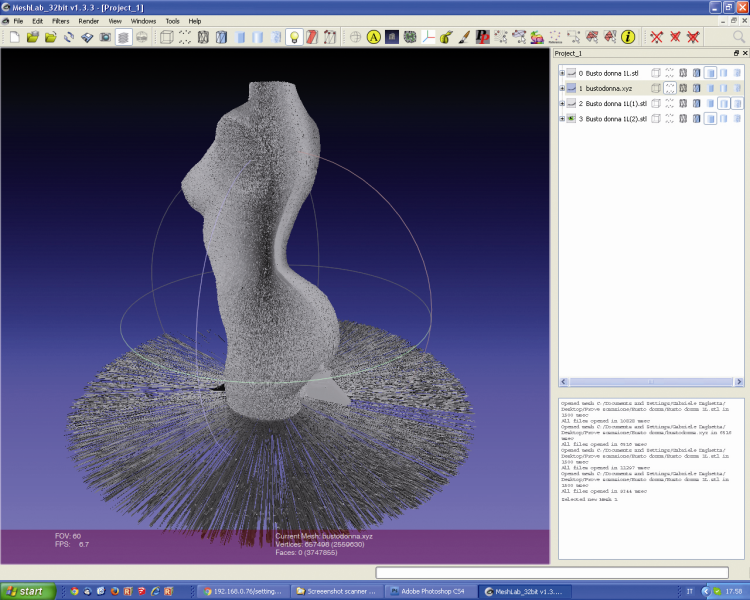
For this purpose I used VisualSFM(.exe) , VisualSFM(source) with turntable and got pretty neat results. Works well and is easy to use.
, @ Hamza Tasneem
▲ 1
Try Brown University School of Engineering: Projector and Camera Calibration / 3D Scanning Software.
I haven't tried it myself, but take a look.
, @ NccWarp9
▲ 1
This is not structured light. A laser is used for this:
https://hci.rwth-aachen.de/fabscan
But this is completely open source software / open source hardware.
See also here:
https://www.thingiverse.com/thing:14198
https://www.youtube.com/watch?v=hBueeqDJ6rQ
. @ Lars Pötter
▲ 2
I was also looking for some free or paid 3D scanning software and the closest I found to something that could work is http://wedidstuff. heavyimage.com/index.php/2013/07/12/open-source-photogrammetry-workflow/ But it is not a light structure (does not use a projector)
If you want to stick with structured light I would suggest looking into OpenCV (http://docs.opencv.org/trunk/d1/d90/group__structured__light.html#gsc.tab=0) looks like you could do something about it.
, @ user802599
▲ 12
I've only found one 3d scanner that uses structured light. There are many projects using a laser diode. And these systems are completely open source.
3D Structured Light Scanning by kylemcdonald
- http://www.instructables.com/id/Structured-Light-3D-Scanning/?ALLSTEPS
Sardauskan
- http://www.instructables.com/id/Build-a-30-laser/?ALLSTEPS
- https://github.com/Sardau/Sardauscan
- http://www.thingiverse.com/thing:702470
ATLAS 3D Scanner
- http://www.
 freelss.org
 - http://www.thingiverse.com/thing:1280901
- https://www.kickstarter.com/projects/1545315380/atlas-3d-the-3d-scanner-you-print-and-build-yourse/posts/1475722
Ciclop
- http://diwo.bq.com/en/tag/ciclop/
- https://github.com/bqlabs/ciclop
3D(ollar) scanner
- https://hackaday.io/project/2021-3dollar-scanner
- http://www.instructables.com/id/Lets-cook-3D-scanner-based-on-Arduino-and-Proces/?ALLSTEPS
"Super Do Anything" Tutorial on How to Make a Simple 3D Scanner
- https://www.youtube.com/watch?v=-qeD2__yK4c
- http://www.thingiverse.com/thing:1413891
- http://diy3dprinting.blogspot.de/2016/04/super-make-something-tutorial-on-how-to.html
$15 3D scanner consists of a milk bath and a smartphone
An interesting idea of using milk and a phone.
- http://www.
 instructables.com/id/GotMesh-the-Most-Cheap-and-Simplistic-3D-Scanner/
 - http://www.3ders.org/articles/20160423-this-3d-scanner-consists-of-a-tub-of-milk-and-a-smartphone.html
, @ amra
▲ -2
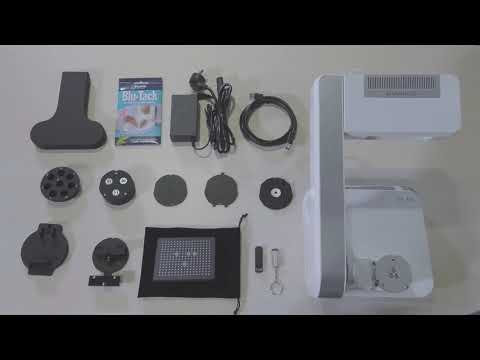
BQ Ciclop 3D Scanner
- Scan volume: Over 5 cm x 5 cm and under 20 cm x 20 cm
- Scanning accuracy: 0.5 mm
All necessary parts for the Ciclop are included in this DIY kit, which comes unassembled.
This Ciclop 3D Scanner Parts List:
- 1 x Plastic Parts( 1 set with 11 pcs)
- 1 x Arduino Uno R3 with USB cable
- 1 x ZUM Scan Shield
- 1 x Stepper driver A4988
- 1 x C270 HD camera
- 1 x Nema17 stepper motor
- 2 x Laser
- 1 x Power adapter
- 1 x 16014 ball bearing
- 1 x threaded rod M8 (9 pcs)
- 2 x Acrylic panel
- 1 x 8 mm spiral wrapping tape
- 1 x Set of screws and nuts
, @ Shawn Maker
▲ 2
You can use the Xbox 360 Kinect Sensor OR the Xbox One Kinect Sensor. This sensor allows you to get a real 3D surface using the SDK. You can connect these devices directly to your computer using USB (I have one).
Even the Xbox One model has an example in its SDK that allows you to export the captured mesh as STL files.
, @ Jairo Andres Velasco Romero
practice of introducing new products into production
— Anatoly Ivanovich, why did you decide to apply the milk pre-cooling technology? - As you know, freshly milked milk is characterized by the ability to delay the development of microorganisms only in the first 2-3 hours. Therefore, to maintain its quality for a longer period, rapid cooling after milking is necessary. When milk is cooled from 37 to 10 °C, the bactericidal period increases from 2 to 24 hours, and at 5 °C - up to 36 hours.
In Russia, cooling tanks with compressor refrigeration units are mainly used to cool milk on farms. But before such a tank begins to cool the milk, it must be filled to 10–20% of its full volume, otherwise the milk will freeze. For a 12 cc tank, this “portion” will be about 1.5 tons, which, depending on the performance of the milking system, will take from 1 to 2 hours to milk. That is, for quite a long time, part of the milk will be in an uncooled state, since these machines provide batch cooling, unlike cooling systems in the stream. In addition, a large amount of electricity is spent on cooling milk, which is supplied to farmers at higher rates.
In order to speed up the process and significantly reduce the cost of cooling milk, a pre-cooling system is used (unfortunately, rarely).
— What is the essence of this technology?
- Its essence is that milk, before entering the cooling tank, passes through a pre-cooler, which is a heat exchanger, milk is pumped through one cavity, and cold water is pumped through the adjacent one. At the same time, the milk is cooled, and the water is heated and used for technological purposes, including watering cows.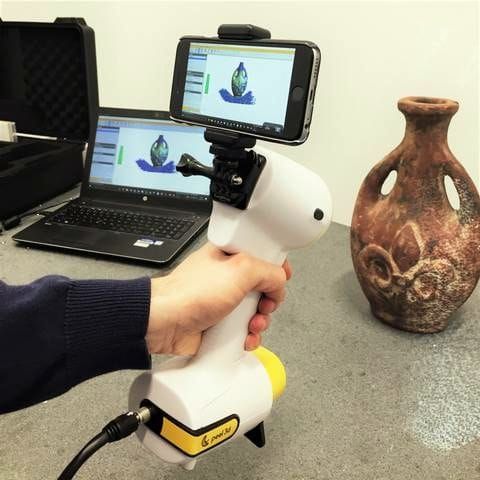
- Almost all farms have their own wells, why is this technology still not used everywhere?
— The technology is on the surface, and any enterprise can apply it. But often industrial installations are large in size and low efficiency, and they are not cheap. A few years ago, we purchased a serial tubular pre-cooler, but we were not satisfied with it due to low efficiency and productivity.
— How did you solve this problem?
— Our craftsmen, under the guidance of engineers S. Rovny and R. Khalimov, designed and manufactured a plate precooler with a capacity of up to 3 tons of milk per hour.
- What does it consist of?
— The pre-cooler consists of two plate heat exchangers taken from old Rifing milk coolers, a system for supplying and discharging milk and water, and temperature control sensors.
- How effective is the homemade pre-cooler?
— After starting the unit, we ourselves were surprised by the efficiency of its work.