Affordable 3d printer kit
The 10 Best DIY 3D Printer Kits 2022 (Starting at $150!)
Increasingly, makers are turning away from desktop FDM 3D printers, preferring to buy a cheap 3D printer kit and build their own DIY 3D printer from scratch. Some of these are RepRap 3D printer kits, and some are specially designed kits.
The 3D printer kit revolution has reduced prices, led to a number of key breakthroughs, and has made 3D printing more accessible than ever before.
Great Ender 3 Alternative
Amazon here
Best Budget 3D Printer
Amazon here
Best 3D Printer Kit Overall
Buy pre-assembled here
These 3D printer kits can take just a few minutes to assemble, or take hours or even days. They can also vary greatly in price, print accuracy, maximum build and print speed. Some even use technologies other than fused deposition modeling — you can now buy DIY SLS 3D printers and SLA 3D printers.
| 3D printer kit name and brand | Build Volume (mm) | Price | Where to purchase for best price | Alternative Purchase Option |
|---|---|---|---|---|
| Creality Ender 3 | 220 x 220 x 250 | $189 | Creality Store here | Amazon here |
| Prusa Mini | 180 x 180 x 180 | $399 | Prusa Store here | |
| Creality Ender 3 V2 | 220 x 220 x 250 | $279 | Creality Store here | Amazon here |
| Creality Ender 5 | 220 x 220 x 300 | $349 | Amazon here | |
| Flsun QQ-S | 255 x 255 x 360 | $369 | Amazon here | |
| Tronxy X5SA Pro | 330 x 330 x 400 | $399 | Amazon here | |
| Anycubic Vyper | 245 x 245 x 260 | $429 | Anycubic here | Amazon here |
| Creality CR-10 / V3 | 300 x 300 x 400 | $369 / $459 | Creality here | Amazon here |
| Prusa i3 MK3S | 250 x 210 x 210 | $749 / $999 | Kit available available on Prusa Store here | Fully assembled on Prusa Store here |
| Peopoly Moai | 130 x 130 x 180 | $1,295 | Matterhackers here |
Advantages of DIY 3D printers
- Open source: Most homemade 3D printers are also open source 3D printers, meaning they can be tinkered with, upgraded, and modded freely with the creators’ permission. Many Creality, Prusa and Anet printers are open source, as well as desktop 3D printers like BCN3D and Ultimaker printers.
- Open build areas: 3D printer kits rarely feature closed chambers or enclosures as standard. This would affect the printing of filaments like Nylon or PEEK, but is less of an issue for standard filaments like PLA or PETG.
- Easily upgradable parts: DIY 3D printer owners are frequently switching out parts, such as nozzles, hot ends and extruders for better quality parts.
- Lower price: For the quality and size, you get a better deal if you build your own 3D printer.
- Larger build volume: The open build area means that you can have a larger 3D printer build area for the same size, neglecting the need for an enclosing frame.
 Therefore, low cost kits like the Creality CR-10 can have huge build volumes.
Build your own 3D printer: what makes a good DIY 3D printer?
We used several criteria to determine which 3D printer kit made it into our ranking:
- Cheap DIY 3D printer kits: We only included FDM 3D printer kits under $1,500. The printers are listed in price order, cheapest first.
- Print quality
- It it easy to build your own 3D printer: Not everyone is a technology wizard. Therefore, any kit that can be assembled quickly, easily, and is simple to operate, is at an advantage.
The best 3D printer kits
3DSourced is reader-supported. When you buy through links on our site, we may earn an affiliate commission. Learn more
1. Creality Ender 3
- Price: $189 — Available on Creality Store here / Available on Amazon here
- Build volume: 220 x 220 x 250 mm
The original Ender 3 is still one of the most popular 3D printer kits in the world, more than three years after it was originally released.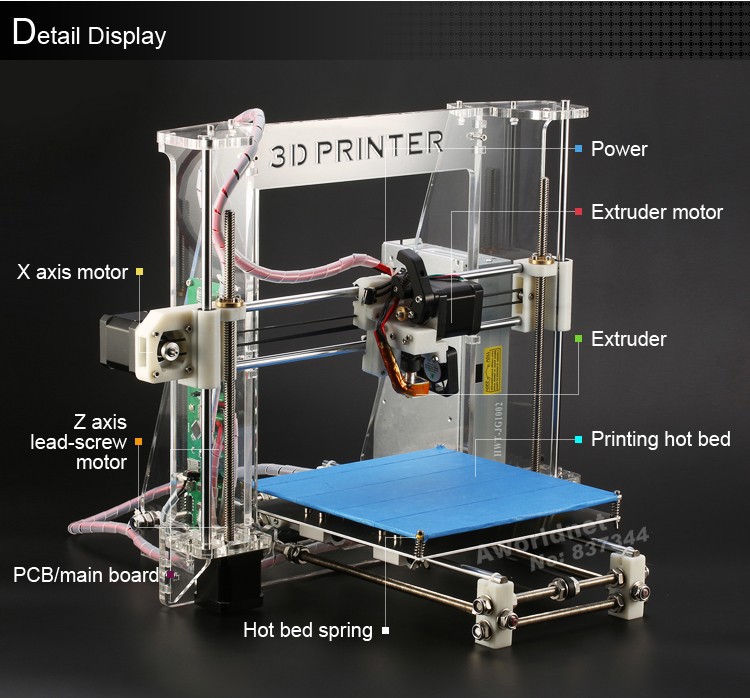 The low price, great build area, and reliability have cemented the Ender 3 as one of the best 3D printer kits around.
The reliability is a major selling point in such a cheap 3D printer kit. Whereas most DIY printers in this price range are plagued by issues caused by low-quality parts, the Ender 3 is dependable and consistent, partly due to its upgraded extruder to prevent clogging or poor extrusion.
The resume printing function is useful if you’re prone to power cuts or want to print for several days straight and don’t want to risk a huge ruined print, and the Ender 3 is fairly quick to assemble, and shouldn’t take more than an hour or so.
However, it doesn’t feature auto-leveling — you’ll need to install a BLTouch or similar kit for that.
Best Budget 3D Printer
Creality Ender 3 3D Printer
The best budget 3D printer kit around - and the best-selling, too. If you have the budget, pick up the V2 or V2 Neo version, or even the Ender 3 S1 if you prefer a direct drive extruder.
Creality hereAmazon here
We earn a commission if you make a purchase, at no additional cost to you.
2. Prusa Mini — Great Prusa 3D printer kit
- Price: $399 — Available on Prusa Store here
- Print volume: 180 x 180 x 180 mm
- Print speed: up to 200mm/s
The Mini 3D printer version of the wildly successful Prusa MK3S, the Mini retains the 0.05mm layer precision and can still calibrate itself, but costs less than half of the i3 MK3S. With the Mini, you can build your own 3D printer — and one with Prusa-level reliability! — for just $349.
It’s more compact, with a smaller build volume, and features removable spring steel sheets that make removing finished prints extremely easy — just flex the build plate and prints will come off with ease.
The extruder cannot reach the same temperatures during printing as the MK3S, though you can still print a number of tougher filaments like ABS, PETG, ASA and flexible filaments. The Mini retains the fast 200mm/s max printing speed, and can be upgraded to feature a filament sensor.
Overall, it’s another reliable 3D printer by the trusted Prusa brand who have proven over the years that their printers are some of the best 3D printer kits around. If you have the money, go for the MK3S, but for those on a budget, the Mini does a great job.
Best Mini 3D Printer Kit
3. Creality Ender 3 V2 — Best DIY 3D Printer Under $300
- Price: $279 — Available on Creality Store here / Available on Amazon here
- Build volume: 220 x 220 x 250 mm
Building on the success of the Ender 3 and improving and fixing its few flaws, the Ender 3 V2, while the same size build volume, is a much enhanced DIY 3D printer.
The upgraded motherboard makes the printer quieter than ever, and the extra power makes for a much more stable and precise printing experience.
Read more: the quiet 3D printer buyer’s guide
The upgraded extruder is also a great touch.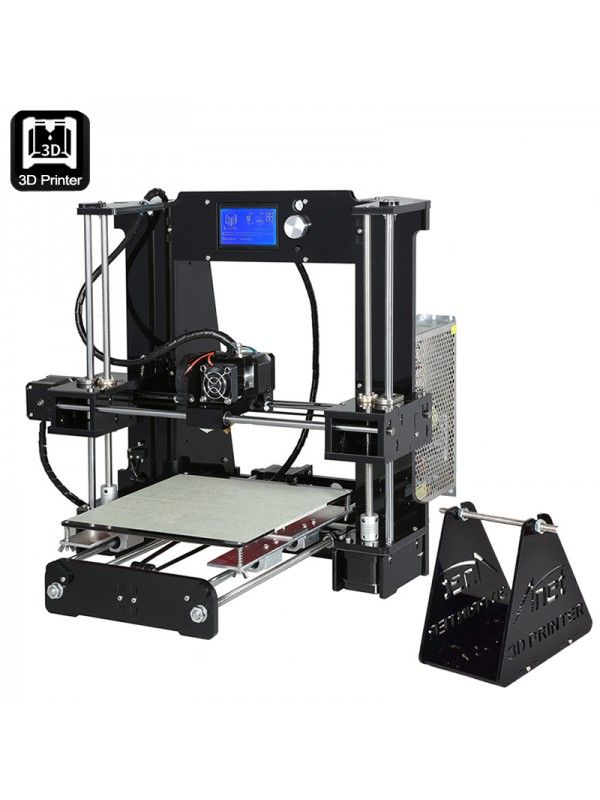 It’s easier to load and feed filament into via the rotary knob, ideal for PLA and flexible filaments. The large 4.3-inch screen makes the interface more intuitive, and the Ender 3 V2 is really easy to use overall.
Another extra is the carborundum glass platform, which can heat up faster than ever and improves adhesion so you can be sure of a great first layer. Overall, if you have the extra $100 to spare, consider going for the Ender 3 V2 over the original.
Top Pick
Creality Ender 3 V2
$279.99
Upgraded version of the original Ender 3 with a number of key quality-of-life improvements.
Creality Store hereAmazon here
We earn a commission if you make a purchase, at no additional cost to you.
4. Creality Ender 5 — The Best DIY 3D printer under $500
- Price: $349 — Available on Amazon here
- Print volume: 220 x 220 x 300 mm
Another Creality kit, the Ender 5 is another great 3D printer you can build at home. The Ender 5 is $100 more expensive, but boasts a number of improvements that make the extra money seem worth it.
Firstly, it can print taller prints than the Ender 3 — 300 mm high rather than 250 — important if you print tall structures like tall vases or monument 3D models. The structure is also stronger, having adopted a cube shape like the Tronxy X5SA which helps with stability, reducing vibrations or movements from external events, and improving part surface finish and quality.
Moreover, the minimum layer height of 50 microns is extraordinary for such a cheap machine. Review after review repeats how crisp the surface finish of their prints look with the Ender 5, so it’s fair to say the Ender 5 is a smash hit.
- For an extra $50 you can upgrade to the Ender 5 Pro printer kit, at $399. It’s available to buy here.
Note: while the Ender 5 can be tweaked to increase print speed without a noticeable loss in print quality, we recommend you don’t get too extravagant with this. Stick with 60 mm/s or below for models with intricate parts — it’s worth a bit of extra printing time to guarantee crisp prints.
5. FLSUN QQ-S — Great Delta DIY 3D printer
- Price: $369 — Available on Amazon worldwide here
- Print volume: 255 x 255 x 360 mm
- Print speed: up to 300mm/s
One of the best DIY delta 3D printer machines out there, the Flsun QQ-S features notable improvements on the original Flsun QQ. It comes 90% assembled, so though technically still a 3D printer kit it will take under an hour to get up and running.
- We were lucky enough to test the FLSUN QQ-S, make sure to also check out our FLSUN QQ-S review.
Not only does it have a fantastic build volume for the price — especially the ability to print tall parts! — but it also comes with an upgraded lattice glass print bed, allowing for faster heating up to 100C in under 5 minutes, less warping and better adhesion during 3D printing. This is perfect for materials such as ABS filament, which are known to warp significantly under the wrong conditions.
Another advantage that beginners will enjoy is that as delta 3D printers don’t move the print bed — the print head does all the moving — the printer only needs to be auto-leveled once. It comes with a titan extruder, and can print with common printing materials like PLA and ABS, PVA, and HIPS for supports, as well as wood-filled filaments and flexible filaments.
It’s accurate, too, able to print at up to 50 microns. Overall, it’s a fantastic delta 3D printer kit that prints accurately, and super fast — it even made it into our fastest 3D printer ranking. It’s also one of the easiest DIY 3D printers to build, coming almost fully assembled — you just need to attach the gears and rods to hold the structure up, and then attach the extruder and filament holder.
Best Delta 3D Printer Kit
FLSUN QQ-S-PRO Pre-assembled Delta 3D Printer
$399.00
Amazon here
We earn a commission if you make a purchase, at no additional cost to you.![]()
12/22/2022 08:35 am GMT
6. Tronxy X5SA Pro — Huge Self-Assemble 3D printer
- Price: $399 — Available on Amazon here
- Build volume: 330 x 330 x 400 mm
Kit 3D printer kings Tronxy showed humility and dedication to improve the X5SA Pro, fixing a number of small issues that affected the original. The X5SA Pro addresses the X-axis issues and has made it more stable, and upgraded the materials forming the printer kit’s structure. Now on the X5SA Pro, most of the printer is made from aluminum and is heavier and more stable, reducing vibrations and generally improving print performance.
As for the X5SA’s specs, it’s a large 3D printer DIY kit with similar printing sizes to the Creality CR-10, and boasts a 330 x 330 x 400 build volume. It claims increased precision vs the original Tronxy X5SA, and has a maximum accuracy of 125 microns. It’s impressive, reliable and one of the best cheap 3D printers you can get with such a large size — so those with big 3D printing ideas will enjoy both this and the Creality CR-10.
It’ll probably take you around four hours to build this printer kit, but it’ll be worth it once you start printing!
Big 3D Printer Kit
TRONXY X5SA PRO 3D Printer with Glass Bed Upgrade
$429.00
Amazon here
We earn a commission if you make a purchase, at no additional cost to you.
12/22/2022 05:00 pm GMT
7. Anycubic Vyper
- Price: $429 — Available on Anycubic store here / Available on Amazon here
- Build volume: 245 x 245 x 245 mm
A key feature on the Anycubic Vyper missing from many printers in this price range is that the Vyper self-levels. This is a huge relief for busy makers who would rather not re-level their printer every few prints, and who just want to get to the fun part — printing! The 16-point bed leveling process accounts for differences between the nozzle and bed and can be done in just one click.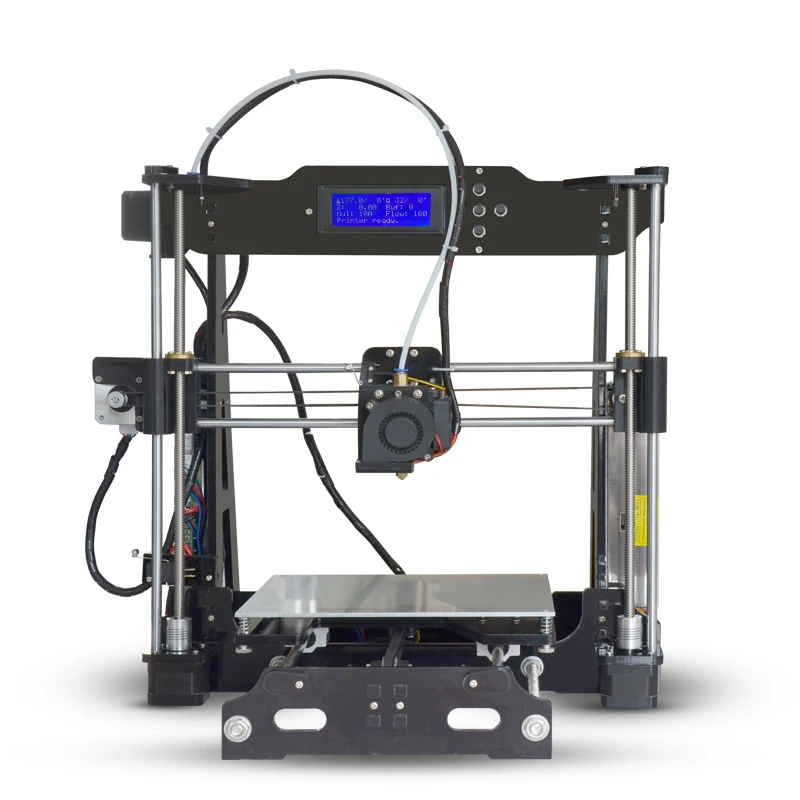
The 32-bit motherboard is beefed up compared to previous Anycubic 3D printer kits, offering silent printing and improved stability. We tested the Anycubic Vyper and found it to be consistent in printing, easy to operate with the 4.3-inch touchscreen, and it was incredibly easy to assemble — we built it in 10-15 minutes.
The new PEI spring steel magnetic print bed can be lifted off the platform easily for easy removal of your finished parts, and is designed to be scratch and heat resistant and to work well with standard filaments such as PLA, ABS, PETG, and TPU.
The Vyper also features an innovative new two-fan dual cooling system, cooling down parts quicker and enabling faster printing without causing errors — the Vyper can comfortably print at 100mm/s.
Great Ender 3 Alternative
8. Creality CR-10 / V3
- Price: $369 / $459 — Available on Amazon here / Available on Creality Store here
- Print volume: 300 x 300 x 400 mm
The Creality CR-10 has a passionate group of supporters who hail it as the best DIY 3D printer kit in its price range. Manufactured by Creality, the CR-10 is a fantastic 3D printer build kit that can be built within 45 minutes.
The Creality CR-10 has an accuracy and print volume which is competitive with printers 5 times more expensive. With it’s minimum layer thickness of 0.05mm and fantastic 300 x 300 x 400 mm build volume, the Creality CR-10 is a great printer for just $370. It’s easy to use, making it the perfect 3D printer for beginners.
9. Prusa i3 MK3S — best 3D printer kit
- Price: $749 as a kit — Available on the Prusa store here / $999 fully assembled — Available on the Prusa store here
- Build volume: 250 x 210 x 210 mm
The Prusa i3 is known as the undeniable king of DIY 3D printer kits. These RepRap kits are fantastic, sporting an impressive print volume of 250 x 210 x 210 mm, and being able to print at speeds up to 200mm/s! It’s also accurate, durable and a complete workhorse, with layer heights from 0.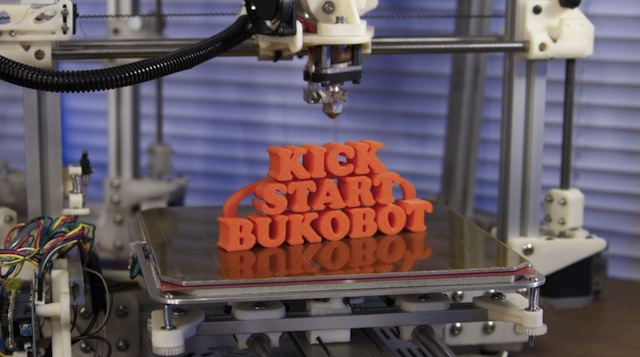 05 mm and a bendable print surface to make removing finished prints as easy as possible.
Accessible via USB stick or by SD card, the Prusa i3 MK3 kits are designed to be simple to use as well as effective. With layer resolutions up to 50 microns, the Prusa i3 homemade 3D printer is so effective that it outperforms far more expensive 3D printers. It can print tougher filaments than more expensive printers too, with a Bondtech extruder that can reach temperatures of up to 300C, making printing Polycarbonate, ABS, Nylon, and other difficult filaments no problem.
Additionally, you can print up to 5 colors simultaneously with your Prusa if you purchase their multi-material upgrade kit, costing $300. This makes colorful model printing a breeze, and opens up for far more extravagant printing projects.
The Prusa, with Multi Material Upgrade kit, allowing it to print multiple colors simultaneously. We explain this in our color 3D printer guide.- With a Multi Material Upgrade kit, it can also print multiple colors.
 We explain more in our color 3D printer buyer’s guide.
 - You can buy the Multi Material Upgrade Kit 2.0 here.
You can choose to either assemble the kit yourself or buy the printer pre-assembled, though this costs a few hundred dollars more. Overall, the Prusa remains the undisputed king of DIY 3D printer kits, with its competitors needing to do a lot of catching up to dethrone it.
Best 3D Printer Kit Overall
Original Prusa i3 MK3S+ kit
The best 3D printer kit of all time. If you have $1,000, this is some of the best value you can get.
Buy as a kit hereBuy pre-assembled here
We earn a commission if you make a purchase, at no additional cost to you.
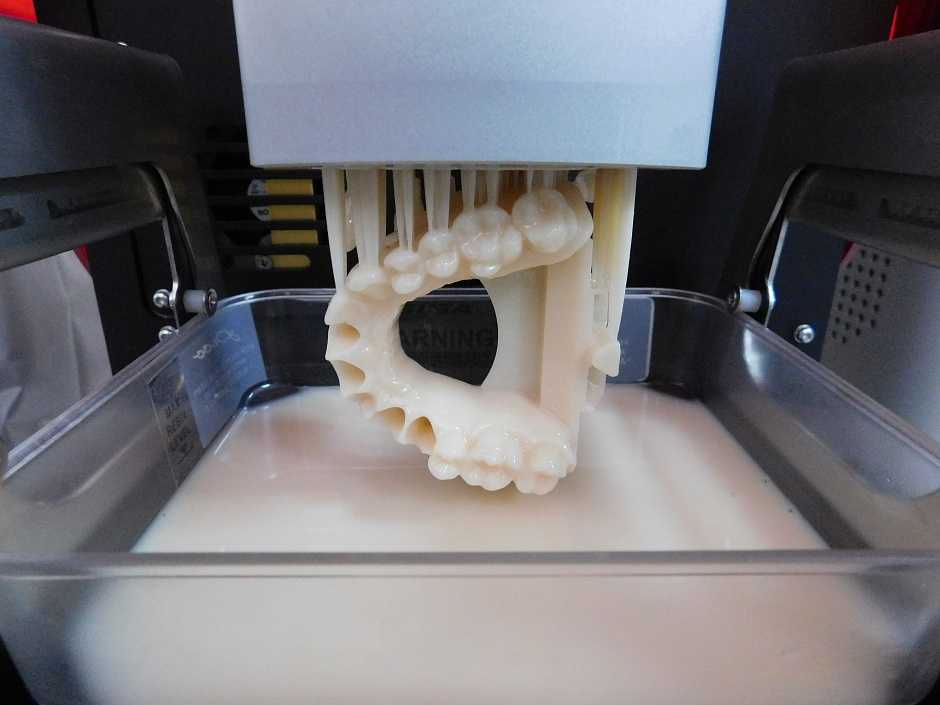
10. Peopoly Moai SLA Kit — Homemade resin 3D printer kit
- Price: $1,295 — Available on Matterhackers here
- Build volume: 130 x 130 x 180 mm
The only resin 3D printer featured in our 3D printer kit guide, the Peopoly Moai is an incredible feat of engineering. It’s huge, offers incredible accuracy and precision, and best of all, you can build your own 3D printer at home from scratch.
For those looking for an effective SLA 3D printer, and who do not want to pay full price, the Moai kit could be the perfect printer for you. It is so accurate that it can mechanically print up to an astonishing 5-micron layer height, according to Peopoly, though you’ll likely never reach this accuracy because you won’t need to, nor would most resins or models accommodate this.
Featuring a 70-micron laser spot size, once you’ve built this homemade 3D printer you’ll be ready to create resin molds for 3D printed jewelry, dental models, engineering pieces, as well as prototypes for rapid prototyping or fun characters if you use the Moai as a 3D printer for miniatures.
The Peopoly Moai is open to use third-party resins, for those who want to save money on lower-cost resins and are fine with the slight quality drop-off. The printer itself however does not come with any resin, so you’ll need to purchase that with the kit. It is only to be expected that the Moai will take some time to assemble, as resin 3D printers are more complex than their FDM 3D printer counterparts, but most makers will be able to build their own 3D printer within 4 hours.
Best DIY Resin Printer
Creality Ender 3 3D Printer sale
Home Collections Ender 3 DIY 3D Printers Kit | 8.66x8.66x9.84inch | Resume Printing Function$ USD
$ USD
35 Reviews Pricing Not Include Tax
Ship From
United StatesCanadaCzech RepublicAustraliaUnited KingdomChina
Model-1
Ender-3 NEOEnder-3
Ship to
It is expected to arrive within and will cost $ USD to ship
This item can't be shipped to this Country/Region
Bundles
Quantity
28 Available
Add To Cart Buy It Now
Continue To Shopping View Cart
People who bought this item also bought
Official Creality Ender 3 3D Printer Fully Open Source with Resume Printing
- Easy and Quick Assembly: It comes with several assembled parts, you only need about 2 hours to assemble 20 nuts well.
- Advanced Extruder Technology: Upgraded extruder greatly reduces plugging risk and bad extrusion; V-Shape with POM wheels makes it move noiseless, smoothly, and durable.
- Safety Protected Power Supply: Only needs 5 minutes for the hotbed to reach 110℃.
- It is a great project for middle school and high school-aged students. The perfect gift to spark a lifelong love for science and engineering, and provide a deeper understanding of machinery and robotics.
Creality Ender 3:Complete beginner's guide to 3D printing - Assembly, tour, slicing, levelling and first prints
CR Touch Install Guide - From 3D Printscape
Why Most People Choose Ender 3 3D Printer
From 2018 till now, the Ender-3 model has remained in the "Best Selling". Although we are launching new Ender-3V2, Ender-3S1. So why do many choose Ender 3?
1. In terms of price: the price is lower than 200, stable printing quality and 220*220 printing size, supports different filament materials
2. In terms of performance: support resume printing, 5mins rapid heating, reliable power supply
3. Upgrade convenience: ender 3 direct drive, cr touch auto leveling kit, touch screen , tempered glass bed and more. There's do much you can do with it
4. Who chose him: News for 3d printing, 3d printing enthusiast; for DIY makers, for education... Customer
Ender 3' S FAQ:
Filament did not stick on the hotbed?
For newcomers, this is the most common problem. Do not worry, you can solve it easily. Generally,the distance between the nozzle and platform is too far or near. So rotary the knob under the platform to adjust the distance between the nozzle and platform again,at a piece of A4 paper distance or less).
Creality Ender 3 Bed Leveling – All You Need to Know
Any structure needs a strong foundation. The same is true for 3D-printed objects. Leveling the bed on your Creality Ender 3 will ensure that that all-important first layer is solid...
How to level Creality Creality Ender 3?
Move the nozzle so that it’s positioned over the left corner of the bed. A half-inch or so from both sides is a good location.
Slide the paper between the nozzle and the bed. If it doesn’t fit, drop the corner until it does.
Once the paper is able to slide under the nozzle, very slowly raise the corner with the adjuster. Remember: Clockwise moves the bed up. As you do this, gently slide the paper back and forth. The moment you feel even the slightest resistance to your moving the paper, stop turning the knob. That corner is (almost) ready to go.
Do the same for the other three corners of the build plate. Always advance the hot end to a new corner slowly. This will prevent damage to the build plate in case the nozzle starts to drag.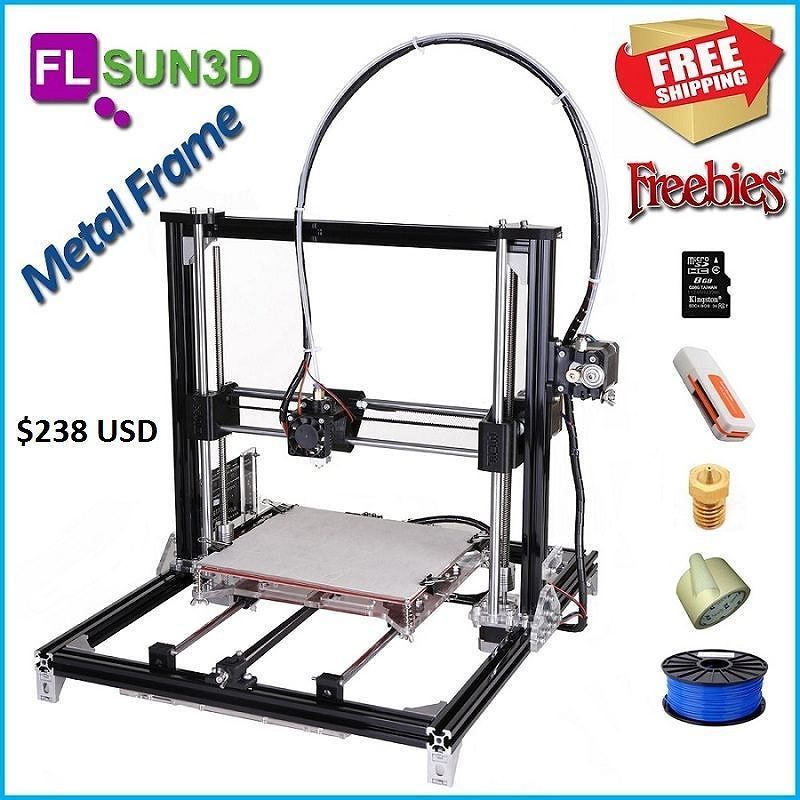 If this occurs, simply lower the next corner (before starting the leveling process) to make some room.
After you’ve adjusted each corner once, go back and check the four corners again. You may have to do further adjustments to get all four correct.
Article: Creality Ender 3 Bed Leveling – All You Need to Know.
Download
Download
Download
Download
Download
Download
Download
Download
Download
Customer Reviews
Based on 35 reviews
77%
(27)
17%
(6)
Write A Review
Ask A Question
Reviews (35) Questions (5)$ USD
$ USD
ADD TO CART BUY IT NOW
Write a review
Ask a Question
Anet A8 Review: The Most Popular 3D Printer
The Prusa i3 MK3 is currently the benchmark for 3D printer kits.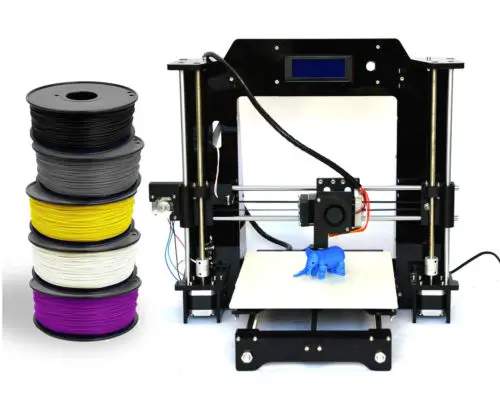 For those who want a cheaper alternative, there are plenty of options, but none are as popular as the Anet A8 which is in the Top Best Budget 3D Printers of 2020. There is a vibrant online community growing behind this sub-$200 3D printer kit. The low price and multi-material compatibility has made budget makers swoon over this 3D printer. nine0003
Pros
- Affordable 3D printer kit
- Possible 3D printer priced at
- Variable
- Tons of 3D printing upgrades available
- A great way to learn about FDM 3D printing
- Functionality improves with every print / setup
- A fun project to build
Cons
- Poor assembly instructions
- Can be difficult to build/use without basic knowledge of 3D printing
- Relatively steep learning curve
- UI lacks practicality
- Getting the perfect print takes time and patience
- Manual calibration can be a problem (auto bed leveling available but sold separately)
- Not the most aesthetic design
Once you've gone through the assembly and calibration process, using the Anet is a breeze. There have been a few hiccups along the way, but the best part about building a 3D printer from scratch is that potential problems are easily fixable. nine0003
However, setting up and running the A8 3D printer was not without some hurdles. But the sense of pride that comes when you discover and solve a problem yourself helps make up for a few mistakes. In our opinion, the Anet A8 is the perfect 3D printer kit for energetic and aspiring beginners, as well as manufacturers looking to print on a budget.
Some may think that the overall design of the printer is too simplistic, but we have personally found that a minimalistic design improves productivity. The open style makes it easy to set up and dig into every nook and cranny of the 3D printer. nine0003
For example, after assembly, we realized that the toothed belt was not fastened tight enough. Not only was there a limited amount of rubber strap material (meaning one screw would ruin the entire project), but you also needed to place the component in a limited space and provide enough tension.
The minimalist design of the Anet A8 made it easy to go back and solve this problem. This accessibility also made it possible to disassemble some elements, such as the extruder, when we encountered a clog. nine0003
However, there were some flaws in the design. For example, the 3D printed fan duct that came with the 3D printer did not fit the extruder and hung below the nozzle.
Other issues include lots of wires, no power switch (you have to unplug it to turn it off) and some rods under the print bed that would go off from time to time. One surprise came early in our experiments with printing. After cleaning the nozzle and reassembling the extruder, we noticed some smoke coming out of our test subject's nozzle. nine0003
As far as the user interface is concerned, the LCD screen was quite adequate, but at some points it seemed out of reach. The Anet A8 offers a lot of options in the user interface, but the clunky buttons make quick navigation difficult. However, you can change the nozzle and print bed temperature, fan speed, and monitor the reprint progress on the fly. The positioning function also allows for slight movement of each axis, which aids in calibration. nine0003
Print performance
Now that we've gone through the assembly process and finished designing, it's time to get to the fun part: print performance. Before we could start extrusion, our A8 needed to be calibrated. The first attempt at calibrating the Anet A8 was a little tricky and required some trial and error.
Although the Anet A8 took a bit of effort to optimize, the purple print showed surprisingly good quality. For a 3D printer that only costs about $220, the results have been stunning. After completing the 3DBenchy test, we decided it was time to improve our Anet A8 with some 3D printed modifications. nine0003
Overall, while the Anet A8 certainly had a few shortcomings, the 3D printer experience was one that all aspiring makers and crafters had to hit the ground running at some point. While this 3D printer is inferior to the famous Prusa i3 MK2, the lower price (and on-time delivery) makes the Anet A8 a viable option for those who want to spend less and print right away.
However, keep in mind that this is a 3D project printer that needs constant tweaking and updating to optimize performance. nine0003
Evgeniy N. https://hi-tech-obzor.ru
Page views: 190
instructions on how to work from scratch for beginners and dummies, what it looks like
Three-dimensional printing has become increasingly introduced into our daily lives. Thanks to new technologies, it has become possible to easily print from a small detail to a large building. The range of products is also pleasing - today you can find a lineup that includes both affordable devices and more expensive ones. But how to work with a 3D printer? This is a completely normal question that any beginner will have, it is for this reason that we will try to answer it as simply and accessible as possible. nine0003
What is a 3D printer and how does it work?
The 3D device consists of the printer itself and a computer that controls all processes. The principle of operation of such a design is to create 3D models by superimposing layers of liquid material. There are a large number of printer models - from large industrial ones to compact ones, but they all have the same principle of operation and component parts:
- Extruder - the print head through which the thread passes. The head heats the thread to a semi-liquid state and evenly supplies the material to the working surface. nine0008
- Work surface - a printing platform on which a 3D model is formed.
- Motors - mechanisms responsible for the accuracy of movement and speed of printing.
- Sensors are electronic devices that limit moving parts to specified coordinates.
- The frame is the structure that connects all parts of the printer.
How a 3D printer works: features
Work with the aim of building a three-dimensional model begins with a sketch, which is created in a special program. After that, the software independently generates a plan for the movement of the print head and a print sequence. The 3D model is reproduced by strongly heating the plastic and distributing it evenly.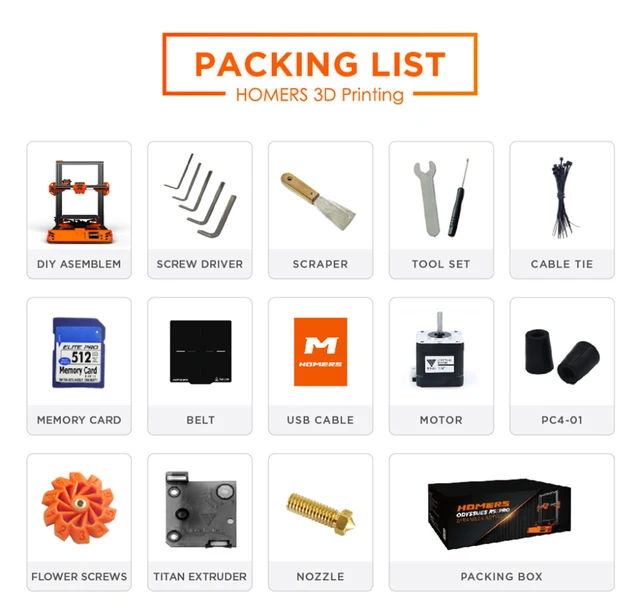 nine0003
3D printers are used in many areas. Let's list some of them:
- Architecture - creation of models of buildings.
- Medicine - dental prosthetics, making models of organs for study.
- Construction - production of houses using 3D printing technology.
- Education - a visual aid for learning 3D printing.
- Automotive - creation of tuning parts, prototype layouts and other products.
This is a small list of industries where 3D printing is actively used. Today, almost every entrepreneur and just an enthusiastic person can afford a printer. nine0003
The following printers are distinguished by design features:
- RepRap - self-reproducing printers that can create their own copies.
- DIY-kit - the device comes disassembled with instructions, the assembly of which will take a sufficient amount of time.
- Ready-Made - models are delivered assembled and ready to use.
- Commercial and industrial - devices capable of printing metal, concrete, polymers and other materials. nine0008
How to use a 3D printer: tips for beginners, where to start
Mastering the technique of 3D printing is not difficult if you follow the recommendations and tips. Especially for those who plan to learn the basics of 3D modeling, an up-to-date list of questions and detailed answers to them has been prepared.
Printer Installation
To begin, you will need to carefully unpack the box and remove any stops. The next step is to install the printer on the surface using the building level. This will allow you to place the device as evenly as possible, which will provide better printing. nine0003
Note. Some 3D printers come with a level for installation.
Next, you will need to connect the printer to your computer and install the necessary drivers. The software disc comes with the 3D device.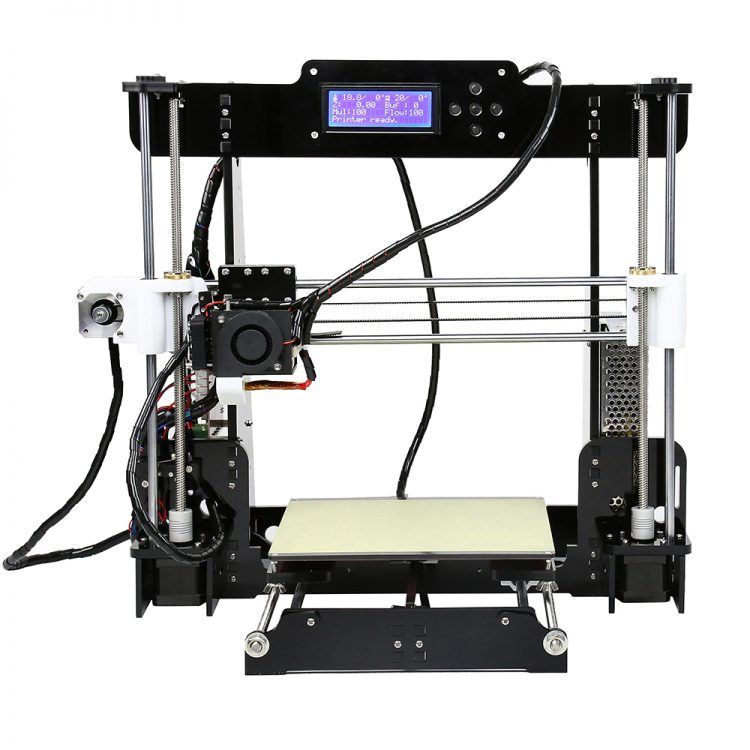
Preparing for work
To get started, you need to calibrate the working surface - without this, printing quality products is impossible. This process is carried out automatically or manually. The attached instructions have detailed information on how to perform manual calibration. nine0003
Extruder patency test
The next important step is setting up the extruder. First of all, you will need to check its nozzle. If the printer has already been used, the nozzle should be cleaned of solidified particles that will interfere with the throughput of the material. Refueling the 3D printer The thread is fed into the extruder directly from the spool. But there is one caveat - for this you must first warm it up. To thread the thread, you will have to make a small effort in order to loosen the presser mechanism. nine0003
Working with models
Models can be created using a variety of 3D modeling programs. The process of manufacturing three-dimensional parts is creative, requiring careful preparation. The better and more detailed the model is drawn, the better the 3D layout will be at the output.
Start printing
After creating the model in the program and preparing the printer for work, you need to send the file for printing and wait for the result. The print speed varies depending on the printer model and specifications, as well as the media used. nine0003
Processing the finished product
3D printed products usually do not please the user with an ideal appearance: the parts have an uneven surface. But this is typical for models of 3D printers on FDM, SLA and DLP devices, which are distinguished by higher print quality. Owners of FDM printers should not despair - a simple processing of products will give products an attractive appearance and make the surface smooth.
Several powerful ways to post-process 3D printed parts:
- Mechanical - carried out by sanding the surface with sandpaper or a special sponge for grinding.
- Chemical - surface treatment with aggressive solvents such as acetone and dichloroethane.
- Mixed - in this case, the above two processing methods are used.
What are the possible errors and how to avoid them?
3D printing technology can be mastered even by a beginner, but despite this, the production of the first products causes excitement for the user. Simple operation, detailed instructions and recommendations on the Internet will allow everyone to deal with almost any printer model. But there are a few useful life hacks, the knowledge of which will help you avoid typical beginner mistakes:
- Calibrate and test the 3D printer before starting work.
- Be sure to use the correct file extension for quality printing.
- Do not remove the finished product from the printer immediately after processing, as this may damage the part and cause defects.
- If you encounter errors during the 3D printing process, try restarting the device - this usually helps.
Learn more