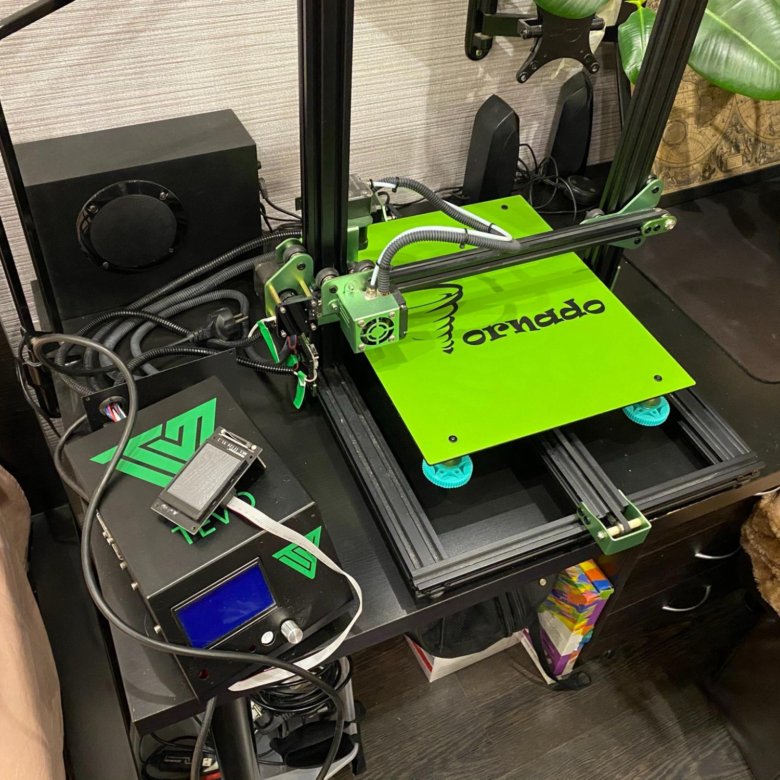
3D printer best support pattern
How to Get the Best Support Settings For Filament 3D Printing (Cura) – 3D Printerly
3D printing can get often complex, and you’re most likely to use support structures on your models from time to time. Whenever that happens, you need to make sure your support settings are calibrated appropriately. If not, your models can suffer a lot in terms of quality.
In this article, I’ll try to explain what support settings are and how you can get the best support settings for your 3D printer using the Cura software.
What Are Support Settings for 3D Printing in Cura?
Support settings in 3D printing are used to adjust how your supports are created. This can range from where supports will be created, to support density, support pattern, distances between the supports and the model, down to even support overhang angles. Default Cura settings work well mostly.
Supports are an important part of 3D printing especially for models that are complex, and have a lot of overarching parts. If you think of a 3D print in the shape of the letter “T”, the lines on the side would require support because it cannot print in midair.
A smart thing to do would be to change the orientation and have the extended overhangs flat on the build plate, leading to a situation where supports aren’t needed, but in many cases, you can’t avoid using supports.
When you do finally use supports on your models, there are plenty of support settings that you will find in your slicer, allowing you to make some useful changes to make your supports more practical.
One of these is creating your supports in a way that makes it easier to remove from the model afterwards. The specific setting that can help with this would be the “Support Interface Density” in Cura.
This setting basically changes how dense the top and bottom of the support structure will be.
If you decrease the Support Interface Density, your supports should be easier to remove, and vice versa.
We can also use a simpler setting that is not in the “Expert” category to make supports easier to remove which is the Support Z Distance which I’ll explain further in this article.
There are plenty of support settings in Cura that you’ll never have heard of, and usually won’t ever have to adjust, but some can be practical.
Many of these settings you won’t even see in Cura until you change your settings visibility view, ranging from Basic, Advanced, Expert, and Custom Selection. This is found by clicking the 3 lines on the right side of your Cura settings search box.
Here are some of the support settings that are in Cura for a better idea (settings visibility adjusted to “Advanced”):
- Support Structure – Choose between “Normal” supports or “Tree” supports (will explain “Tree” further in the article)
- Support Placement – Choose between supports created “Everywhere” or “Touching Buildplate”
- Support Overhang Angle – Minimum angle at which to create supports for overhanging parts
- Support Pattern – Pattern of the support structures
- Support Density – Determines how dense the support structures are
- Support Horizontal Expansion – Increases the width of supports
- Support Infill Layer Thickness – Layer height of infill within the supports (multiple of layer height)
- Gradual Support Infill Steps – Decreases density of supports along the bottom in steps
- Enable Support Interface – Enables several settings to adjust the layer directly between the support and the model (“Expert” visibility)
- Enable Support Roof – Produces a dense slab of material between the top of the support and the model
- Enable Support Floor – Produces a dense slab of material between the bottom of the support and the model
There are even more settings under the “Expert” visibility view in Cura.
Now that you see what support settings are and how they can be useful, let’s get into more detail about other support settings.
How Do I Get the Best Support Settings in Cura?
Here are some support settings in Cura that you may want to adjust if you want to get your support structures optimized.
- Support Structure
- Support Placement
- Support Overhang Angle
- Support Pattern
- Support Density
- Support Z Distance
- Enable Support Interface
- Gradual Support Infill Steps
Apart from these, you can usually leave the rest of the settings on default, and that will be just fine unless you have an advanced issue that needs to be addressed with your supports.
What is the Best Support Structure?
The first setting you get when viewing support settings in Cura is Support Structure, and you have either “Normal” or “Tree” to choose from here. This is the type of technique used to form support structures for your model.
For printing uncomplicated models that require standard overhangs, most people typically go with “Normal.” This is a setting where support structures are dropped straight down vertically and printed below the overhanging parts.
On the other hand, Tree supports are usually reserved for more complex models that have delicate/thin overhangs. I’ll explain Tree supports in more detail later on in this article.
Most people go with “Normal” since that’s pretty much the default setting for it and works fine for the majority of the models.
What is the Best Support Placement?
Support Placement is another essential setting where you can determine how support structures are placed. You can either select “Everywhere” or “Touching Buildplate.”
The difference between these two settings are pretty simple to understand.
When you choose “Touching Buildplate”, your supports will be produced on parts of the model where the support has a direct path to the build plate, without another part of the model getting in the way.
When you choose “Everywhere”, your supports will be produced all over the model, in line with what support settings you have set. It won’t matter if your part is complex and has twists and turns all around, your supports will be printed.
What is the Best Support Overhang Angle?
The Support Overhang Angle is the minimum angle that is needed for supported to be printed.
When you have an overhang of 0°, every single overhang will be created, while a Support Overhang Angle of 90° will won’t create anything in terms of supports.
The default value you’ll find in Cura is 45° which is right in the middle. The lower the angle, the more overhangs your printer will create, while the higher the angle, the fewer supports that will be made.
Depending on the performance and calibration of your 3D printer, you can successfully use a higher angle and still be fine with your 3D prints.
Many 3D printer hobbyists out there recommends a value around 50° for the Support Overhang Angle, to ensure your 3D prints still come out nicely and save a little material from less support structures.
I’d definitely test this out for your own 3D printer and see what works best for you.
A great way to test your 3D printer’s ability, as well as your overhang performance is to 3D print the Micro All-In-One 3D Printer Test (Thingiverse).
It doesn’t translate directly into what Support Overhang Angle you can use, but it does allow you to test your ability to increase it further.
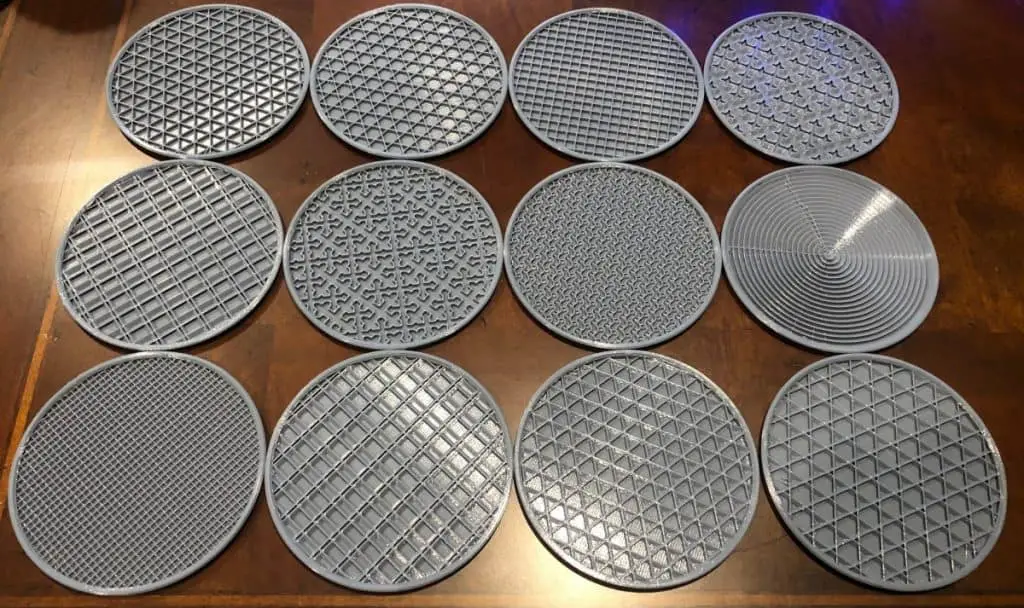
What is the Best Support Pattern?
There are many support patterns to choose from in Cura, which gives us the option to customize how our supports are built up. Depending on what you are looking for, there is a best support pattern for you.
If you want supports that are sturdy and can hold up well, you’ll do well with the Triangles pattern which is the sturdiest of all patterns, while Grid also holds up well.
The Zig Zag pattern is the best support pattern for overhangs, along with the Lines pattern.
If you are wondering which support pattern is easiest to remove, I’d go with the Zig Zag pattern because it bends inwards, and pulls off in strips.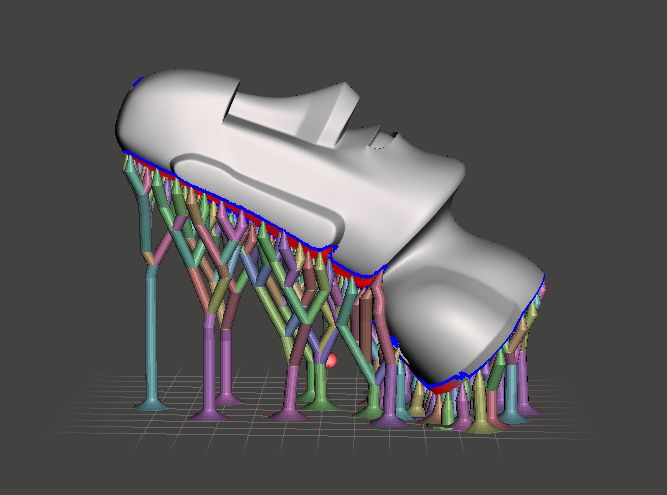 Cura supports that are too strong should use a support pattern that’s easy to remove.
I’ll talk about the other support patterns further down in this article, so you can understand them a little better.
Support Pattern and Support Density (the next support setting to be discussed) share a link together. One Support Pattern’s density could produce more or less material within a 3D print.
For instance, the Gyroid Support Pattern with 5% infill could prove sufficient for a model while the Lines Support Pattern with the same infill may not hold up as good.
What is the Best Support Density?
Support Density in Cura is the rate at which support structures are filled with material. At higher values, the lines in support structures will be held close to each other, making it appear dense.
At lower values, the supports will be further apart, making the support structure less dense.
The default support density in Cura is 20%, which is fairly good for providing a sturdy support to your model. This is what most people go with, and it works just fine.
What you can do is actually lower your support density to 5-10% and have good support interface settings to ensure your support works well.
You usually won’t have to increase your support density up too high to have good supports.
When you increase your support density, it does improve overhangs and decreases sagging since the supports are connected together densely. You are less likely to see your support fail if there is an issue during the printing process.
The opposite side of increasing your support density is that your supports will be harder to remove due to more of an adhesion surface. You’ll also be using more material for the supports and your prints will take longer.
However, a great place to start is usually around 20%. You can go lower and higher both depending on the situation, but 20% density is a good rule of thumb to keep using your support structures with.
The support pattern has a significant effect on how much support density is actually provided, in terms of how much material is used. A 20% support density with the Lines pattern won’t be the same as with the Gyroid pattern.
What is the Best Support Z Distance?
The Support Z Distance is simply the distance from the top and bottom of your support to the 3D print itself. It provides you with clearance so you can remove your supports easier.
Getting this setting right is fairly easy because it is rounded up to a multiple of your layer height. Your default value within Cura will simply be equal to your layer height, though if you need more clearance, you can 2x the value.
One user who tried this out found that supports were a lot easier to remove. He printed with a layer height of 0.2mm and a Support Z Distance of 0.4mm.
You usually won’t have to change this setting, but it’s nice to know that it’s there if you want to make supports easier to remove.
Cura likes to call this setting “the most influential factor in how well the support adheres to the model.”
A high value of this distance allows for a bigger gap between the model and the support. This translates to easier post-processing and creates a smoother model surface due to the reduced contact area with the supports.
A low value is useful when you’re trying to support complex overhangs which is making the support print closer to the support, but supports will get harder to remove.
Try playing around with different values of these distances to find the perfect figure that works for you.
What is Enable Support Interface?
The Support Interface is simply a layer of support material between the normal supports and the model, otherwise seen as the contacting point. It is made to be denser than the actual supports because it requires more contact with the surfaces.
Cura should have this turned on by default, along with the “Enable Support Roof” and “Enable Support Floor” to generate those denser surfaces at the top and bottom of your supports.
Within these settings in the “Expert” view, you’ll also find Support Interface Thickness & Support Interface Density. With these settings, you can control how thick and dense the top and bottom connection points of your supports are.
What are Gradual Support Infill Steps?
Gradual Support Infill Steps are the number of times to reduce the support infill density by half as the infill goes from top to bottom. The highest density of infill will be at the top surfaces of the model, all the way up to your Support Infill Density setting.
People tend to leave this setting at 0, but you should try this setting out to save filament without reducing the functionality of your model. A good value to set is 3 for normal prints, while larger prints could be raised higher.
In the sphere of 3D printing, experimentation is key. By tinkering around with different support settings but staying within logical boundaries, you’ll eventually find out values that get you going remarkably. Patience is a must.
What you can do is install the “Cura Settings Guide” plug-in from the app’s interface.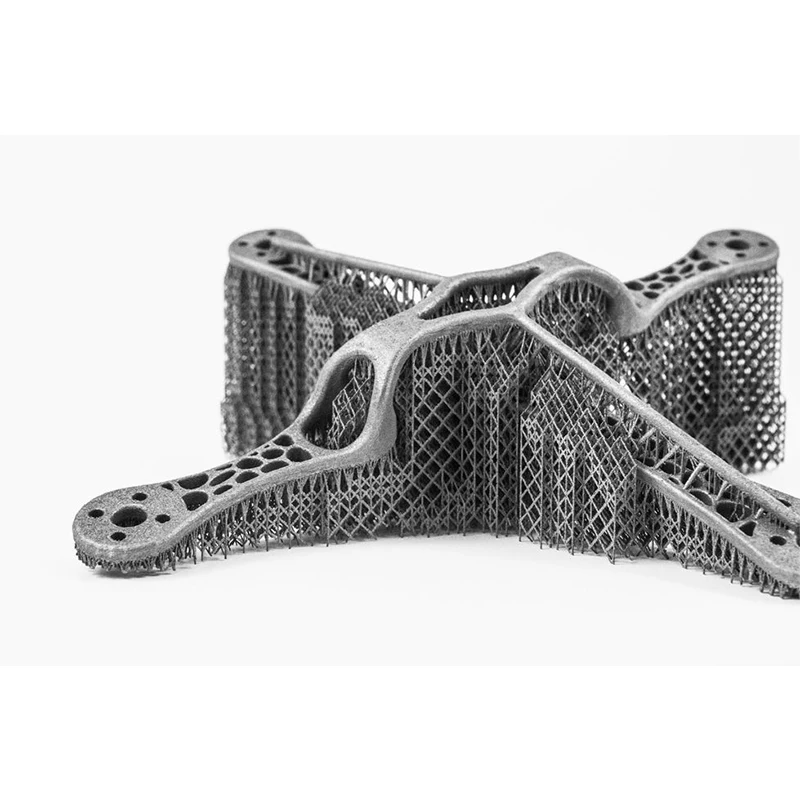 This is a great way for beginners to understand how the software works and what different settings actually stand for.
What is the Best Support Pattern for 3D Printing?
The best support pattern for 3D printing is the Zigzag pattern because it has a great balance of strength, speed, and ease of Removal.
When choosing the best support patterns for your 3D prints, I’d mostly stick to the Zigzag and the Lines pattern because of their balance of speed, strength, and ease of removal. Zigzag, in particular, is also the fastest to print versus other patterns.
The other Support Patterns include:
- Lines
Lines closely resembles Zigzag and is one of the best Support Patterns as well. It is, however, stronger than Zigzag and makes for support structures that will be a bit harder to remove. On the plus side, you get solid supports.
- Grid
The Grid Support Pattern forms support structures in the shape of two sets of straight lines perpendicular to each other. This is followed by consistent overlapping that goes on to form squares.
Grid produces average overhang quality but is highly recommended for strong, reliable supports. However, since there will be little flexibility, supports can get rather difficult to remove.
- Triangles
The Triangles pattern is the strongest of all support patterns. It forms an array of equilateral triangles that allow it to exhibit little to no flexibility.
It produces bad quality overhang angles and will be the most difficult support structures to remove from your prints.
- Concentric
The Concentric Support Pattern is great for cylindrical shapes and spheres. They are easy to remove and will bend towards the inside with minimal effort.
However, the Concentric pattern is known to mess up here and there, oftentimes leaving the support suspended in midair.
- Cross
The Cross Support Pattern is the easiest to remove out of all the Support Patterns in Cura. It exhibits cross-like shapes in your support structures and draws a fractional pattern in general.
Cross isn’t the one to use when you require sturdy and firm supports.
- Gyroid
The Gyroid pattern is strong and reliable. It features a wave-like pattern across the volume of the support structure and provides equal support to all the lines of the overhang.
Gyroid is highly recommended when printing with soluble support materials. The air comprising a single volume allows the solvent to quickly reach the internals of the support structure, allowing it to dissolve faster.
Different patterns have varying strengths and weaknesses.
Many people agree that Zigzag is the best Support Pattern that Cura has to offer. It’s fairly sturdy, reliable, and exceptionally easy to remove at the end of the print.
Lines is also another popular Support Pattern that many people choose to work with as well.
How to Get Custom Supports Settings Perfect in Cura
Cura has now provided access to custom supports, a feature which used to be reserved for Simplify3D which is a premium slicer.
We can access custom supports by downloading a plugin within the Cura software called Cylindrical Custom Supports, found in the Marketplace on the top right of the app.
Once you find the plugin and download it, you’ll be prompted to restart Cura where you’ll then have access to these very practical custom supports. I’ve used them successfully on many prints now, they work great.
One of the best things about it is how all you need is to click in one area, then click on another, and you’ll create a custom support between those two clicks.
You can easily customize the shape, size, max. size, type, and even setting on the Y direction. These aren’t just for show as you can really create some high level supports very quickly for your models.
For support shapes you can use the:
- Cylinder
- Cube
- Abutment
- Freeform
- Custom
Your standard support settings that you set will apply such as infill density and pattern.
Check out the video below to see a visual tutorial behind how these custom supports work.
Best Cura Tree Support Settings for Cura
For the best Tree support settings, most people recommend a Branch Angle of anywhere between 40-50°. For Branch Diameter, 2-3mm is a great place to start. Moreover, you want to make sure your Branch Distance is set to at least 6mm.
Here are the rest of the Tree support settings you can find under the “Experimental” tab in Cura.
- Tree Support Branch Diameter Angle – the angle of a branch’s diameter growing towards the bottom (defaults at 5°)
- Tree Support Collision Resolution – determines the accuracy of collision avoidance in branches (defaults same as Support Line Width)
I wrote an article called How to Use Cura Experimental Settings for 3D Printing which you can check out.
The video below by CHEP goes into some detail about Tree Supports.
For Branch Diameter Angle, many users have set it to 5°. We want this angle to be oriented in such a way so that the tree support can stand strong without wobbling or shaking.
For Tree Support Collision Resolution, 0.2mm is a good figure to start with. Increasing it further could make the tree branches appear low in quality, but you will be saving more time. Try experimenting to see what works for you.
Tree supports are Cura’s unique way of generating support structures for your model.
If normal supports are taking a long amount of time for a part that’s relatively small, you might want to consider Tree supports, but that’s not the only reason why you should do that.
These tend to use less filament and post-processing is undeniably the best part of Tree supports. What they do is envelop the model and form branches that collectively create a shell around the model.
Since those branches only support selected areas of the model and form a shell-like shape afterwards, they usually pop right off with little to no effort and increases the chance of a smoother surface quality.
However, I recommend using Tree supports for models that are complex. For simpler models like parts of a 3D printer with average overhangs, Tree supports won’t be ideal.
You’ll have to evaluate yourself whether what model is a good candidate for Cura’s distinct support generating technique.
Best Cura Support Settings for Miniatures
For printing miniatures, a 60° Support Overhang Angle is safe and effective. You’re also best off using the Lines Support Pattern for more details in your minis. Additionally, keep the Support Density to its default value (i. e. 20%) and that should get you off to a good start.
Using tree supports for miniatures is really popular because they tend to have more complex shapes and details, especially when there are swords, axes, extended limbs involved, and things of that nature.
One user mentioned how he takes the STL file of his miniatures, imports them into Meshmixer, then has the software generate some high quality tree supports. After that, you can simply export the updated file back into an STL and slice it in Cura.
Check out my article Best 3D Print Miniature Settings for Quality.
You can get mixed results with this. It’s worth a try, but for the most part, I’d stick with Cura. Depending on the model, selecting your Support Placement to Touching Buildplate can make sense, so they won’t build on top of your miniature.
Using normal supports can work, especially if you create your own custom supports, but tree supports do work really great for detailed minis. In some cases, tree supports can have difficulty coming into contact with the model.
If you experience this, try making your line width equal to your layer height.
Another thing to add is to make sure you are using a good orientation in order to minimize supports. The right rotation and angle for your 3D printed miniatures can make a significant difference in how it turns out.
The video below by 3D Printed Tabletop is great for dialing in your settings to print some amazing miniatures. It usually comes down to a small layer height and printing at a low speed.
If you can tune your 3D printer to successfully 3D print some good overhang angles, you can reduce the number of supports. As mentioned above, a good overhang angle is 50°, but if you can stretch to 60°, it will make for fewer supports.
The Support Z Distance is another important setting to be wary of when printing minis. Depending on your model and other settings, this can vary, but a value of 0.25mm seems to work as a general standard for many profiles I’ve seen while researching around.
High-quality minis require carefully optimized settings, and while it’s difficult to print them perfectly right from the get-go, trial-and-error will gradually get you there.
In addition, another setting called Support Line Width appearing under the “Quality” tab in Cura seems to play a role here. Decreasing its value would reduce the gap between your Tree support and model.
How Do I Fix Cura Support Settings That Are Too Strong?
To fix supports that are too strong, you should decrease your support density, as well as use the Zigzag support pattern. Increasing your Support Z Distance is a great method of making supports easier to remove. I’d also create your own custom supports, so they can be built as little as necessary.
The Support Z Distance can affect directly how hard or easy it is to remove supports from your model.
Found under “Expert” settings, Support Z Distance has two subsections – the Top Distance and the Bottom Distance. The values of these change in accordance with what you put under the main Support Z Distance setting.
You want the Z Distance value to be 2x your layer height so there is extra space between your model and the supports. This should make the supports a lot easier to remove, as well as being enough to properly support your model.
If you don’t want to use custom supports for any reason, like there are too many supports to add, you can use another feature in Cura called Support Blockers.
It is used to remove supports where you don’t want them to be created.
Whenever you slice a model on Cura, the software determines where support structures will be placed. However, if you see that support isn’t needed at a particular point, you could use the Support Blocker to remove unwanted supports.
It’s fairly simple, but you can get a better explanation by watching the video below.
Types, Structure, How to Add & Remove
You don’t always need to 3D print with supports to craft incredible 3D prints. Still, many fantastic projects require these additional structures. Thus, Gambody wants you to look at the main types of 3D printing supports you can use, especially if you are a beginner and wish your figurine or statue to look professional.
Knowing how to 3D print supports also helps to avoid many common problems with 3D printers. Besides, when you select the correct type of additional structures, your model will be smoother, more comfortable to make, and quicker to remove the extras. It will also require less additional filament to save your money.
Once you discover everything you need to know about 3D print supports and patterns, it is best to learn how to 3D print without supports, discover the 45-degree rule and overhang 3D print secrets.
Table of contents:
- 3D Printing Supports;
- 3D Printer Supports Hard to Remove;
- Dissolvable Supports;
- Support Structure 3D Printing Rules;
- 3D Print with Supports: Pros & Cons.
FAQ:
- How to remove supports from 3D prints?
- How to add supports to 3D prints?
- When to use supports while 3D printing?
- What is the best support pattern in 3D printing?
- Do all 3D prints require supports?
- Why do my 3D printing supports fail?
3D Printing Supports
If you have an affordable FDM 3D printer, you will see how it deposits layer over layer of filament while at work. Layers support each other. And if there is an overhand or a bridge that lacks support below, new structures are added to lead to a great-looking 3D printed model.
Some 3D printing tips for beginners can assure you that sticking to the default settings in your slicer software is a good thing. However, such a method does not guarantee a fantastic result.
When you are not using supports in 3D printing that correspond with your model, you can come across failed overhangs and other unpleasant 3D printer issues. Thus, it is better to understand which are the main 3D printing support patterns and how they can lead to a steady, nicely supported print or bad-looking model (if misused).
Read also: Free STL Editor 2022: How to Edit and Repair STL Files
1. Linear 3D Print Supports
Image source: UltimakerThis 3D print support type is also called “accordion” and sometimes “lattice.” Most 3D printer beginners and professionals rely on it in the most significant number of prints.
Linear supports touch the whole underside of an overhang. They are great for angular, steep, and flat overhangs. They look like columns that grow at the platform and up to the overhang’s bottom.
If you are using Cura software, the linear 3D printing supports will be set by default. Still, you can select between several “linear” patterns, including concentric for spheres, lines for simple shapes, zig-zag, grid, etc.
Their pros are:
- Reliable support for steep, flat, angular overhangs;
- Great support for bridges.
But they also have cons to mention. Firstly, the linear 3D printing support structures are often hard to remove because they touch the entire bottom of the bridge or overhang. Secondly, they can easily damage your 3D print surface during the removal process. Besides, they use much filament and take more time to print.
2. Tree-Like 3D Printer Supports
Tree-like supports. Maker: Krystian GranatowskiModels that have non-flat overhangs should use tree-like support structures. They do remind many of trees with branches. Their “trunk” grows at the print’s base, and their branches touch the overhang parts of the model at various points.
There are several pros to using tree-like supports in 3D printing:
- They are quicker and simpler to print and remove;
- They require less filament;
- They do not harm the overhangs’ underside that much.
Of course, there are also cons to consider. Tree-like structures are significant for 3D printing models that have non-flat overhangs.
If you are using Cura program, you will find tree-like structures in the “Experimental” menu. Please note that they take some time to generate, and it will be necessary to check the “tree support” box. They work great with printing fingertips, different parts of the human body that overhang, for making animals, organic shapes, etc. But they are not as reliable and stable when you use them with flat protrusions.
Here is a great video to understand the types of 3D printing support structures offered by Cura:
CHEP about Cura 3D printing supports3D Printer Supports Hard to Remove
Regular support structures you manage via your 3D modeling software or slicer are usually made from the same material as the rest of your model. Thus, it could be a pain to remove supports from a 3D print.
You can follow these tips to ease your task:
- Do your best to first gently remove all the support structures that ease under your fingers and move with no additional tools. Try not to break anything too hard.
- You can try to carefully remove, slice, or scrap the rest of supports with a knife or a plier. Move slowly trying to leave the surface unbroken.
- If you still see the light remains of supports and wish to make the model smooth, use sandpaper of different grits and gently polish the surface.

- Often, as you get rid of supports that are hard to remove, the model is left with scratches and little holes. You can use clay, putty, or nail polish varnish to cover those minor issues.
Read also: Best Tips on How to Store 3D Printer Filament
Dissolvable Supports
These 3D printing support patterns are not typical because they are used only in dual-extruder printers. They are not available for one-extruder machines.
If you have a dual-extruder printer, you can make one nozzle to build your project in PLA filament and the other nozzle to work on supports with PVA or water-soluble filament.
How PVA material dissolves in the waterSuch 3D printed models are elementary to clean from the additional structures. Just soak your project into the water, and wait until the water-soluble filament dissolves.
Support Structure 3D Printing Rules
Not all bridges and overhangs in your 3D printing project require supports. There are magnificent “degree” rules to remember. They can save you much filament, time, and nerves.
1. 45 Degree Rule for Overhangs
Image source: 3D HubsIf your model has no overhangs that are over 45 degrees, you might need no 3D printing supports at all. It happens because the layers stack on top of each other with a small offset. It is how your machine can work with many overhangs with a fantastic result.
It is best to look at the illustration with T, H, and Y letters. They all come with overhangs. However, T and H require you to 3D print supports, and Y can be printed without these structures because its angel is under 45 degrees to the vertical line.
2. 5 MM Rule for Bridges
Image source: All3DPThere is also an excellent rule for 3D printing bridges. It is known as the 5 mm or 0.2 inches trick. It is also simple to remember.
If your model has a tiny bridge with a length under 5 mm (0.2 inches), you can build it without adding any support structures. The modern 3D printers can stretch the hot filament for distances under 5 mm, and your project will have just a little sagging.
Of course, complex models with bridges that are 5 mm long or longer require using extra support patterns.
3. When to Use Supports in 3D Printing
No matter which 3D printer you are using, the software where you can see the model before it is actually built can show you which areas require support.
Those parts which need additional structures are usually highlighted in red. You can manually add and manage support patterns, rely on the default settings, or ask other 3D printing enthusiasts for advice.
3D Print with Supports: Pros & Cons
Even though many complicated and highly-detailed 3D models require you to 3D print them with supports, there are pros and cons to consider.
Pros of Using 3D Printing Support Patterns
Support for 3D printing can help you achieve a nicely built model with complex overhangs, holes, and bridges. Thanks to them, you can end up doing a professional-looking figurine or model you’ll be proud of.
Here are the main advantages of 3D printing with supports:
- You can bring to life a 3D model of any complexity, with bridges and severe overhangs;
- If you have a two-extruder 3D printer, you can enjoy using dissolvable supports that are fast to remove;
- Your 3D prints will look professional if you master support structure management.
Cons of Using 3D Supports
It is best to keep in mind all possible downsides of 3D printing supports. This way you can always rethink the way you position your 3D model on a bed or sculpt/model it.
These are the most common downsides of 3D printing with supports:
- Sometimes it is hard to remove supports from a 3D print;
- Adding support structure to your model makes you spend more on 3D printing material;
- It takes a long while to 3D print and remove supports from a figurine or model;
- You can damage the project while removing support structures;
- You should learn how to add and remove supports which takes time.

Gambody – Premium 3D printing marketplace, for example, recommends how to support a model before print. You can use these recommendations, or you can join Gambody community on Facebook to ask questions and get answers about the types of 3D printing supports you might need for your project.
FAQ:
How to remove supports from 3D prints?
There are two main types of 3D printing supports by how you remove them. They are break-away and dissolvable structures.
If you have a one-extruder printer, you might find 3D printing supports hard to remove because it is a must to break them away or use an additional tool (knife, plier, scraper) to cut off or scrape them.
If you have a machine with two extruders, you can use water-soluble 3D printing material for support. It could be PLA, HIPS, or something else. Such structures can be washed away in Limonene or water without issues.
How to add supports to 3D prints?
If you use Cura or another software to prepare your projects for 3D printing, you can let it generate the support patterns for you by default. Cura, for example, used to offer only linear supports until the 3.2 beta release. Starting from that version, you can choose either linear or tree-like support patterns for your models.
When to use supports while 3D printing?
Before adding support to a 3D print, evaluate it. If you see major overhangs and long bridges, you should choose 3D printing support patterns that meet your situation the best.
So, when there are unsupported areas and arches, rely on your 3D printing software and add 3D printer supports as suggested by the tool or manually.
What is the best support pattern in 3D printing?
If your project has too many non-flat overhangs, it is best to use tree-like support patterns while 3D printing. It is relatively easy to remove them and avoid damaging the well-visible surfaces of your model because such a pattern usually touches your overhangs from underneath.
If your model has many flat overhangs and severe bridges, you should use a linear support pattern. It provides good stability but is hard to remove and can damage the project’s surface.
Do all 3D prints require supports?
You don’t have to 3D print supports with every model you make. Many simple and quick projects require no support. Also, bridges shorter than 5 mm and most overhangs below 45 degrees need no support structures.
Still, a lot depends on how old and well-maintained your printer is. Some old machines fail to print overhangs at 35-40 degrees and make you always ensure you are 3D printing support structures.
Even though the 3D print supports add filament or resin costs to your project and require you to spend extra time removing the support structures, they can save your model, and make it professional-looking, and highly detailed. At the same time, supports might damage the project’s surface, so be careful when using them.
Why do my 3D printing supports fail?
Even when you follow the 45-degree and 5-mm bridge rules, your 3D printing supports may fail due numerous reasons. Your 3D model might have heavy bridges and grave overhangs, poor design, weak base. There could be issues with your 3D printer, slicer software, and 3D printing materials that warp, split, drop, curl, cause layer shifting, etc.
Sometimes it is best to test your 3D printer before working with complex projects. Find massive overhang testing models online and print them. You will learn if your machine works well with recreating 20-, 25-, 30-… 70-degree overhangs with no 3D printing supports or fails.
(Visited 8,567 times, 1 visits today)
Author
How to optimize the settings of supports (calipers) in Cura
3DPrintStory 3D printing process How to optimize support (caliper) settings in Cura
All Fused Deposition Modeling (FDM) 3D printers create objects by extruding thermoplastic material layer by layer. Therefore, each layer must be supported by the layer below it. When there is no layer under a part of the 3D model (as in the case of overhangs and bridges), support structures may be needed. They are printed with the main model and removed during post-processing. nine0005
You might be thinking, "That doesn't sound too scary." However, the word "support" horrifies many 3D printer users. Some even consider it almost profanity. After all, support structures not only require more material, but they are also known to negatively affect surface quality and are difficult to remove.
Unfortunately, some models simply need supports. But this does not mean that we cannot optimize them by changing the appropriate settings. nine0005
In this article, we will first talk about when you need support and when you don't. Then we'll look at some of the important caliper settings in Cura to tweak them for the best results.
Note . This article is written specifically for Ultimaker Cura users, but the basic principles behind the settings can be applied to various other slicers.
Do you need calipers?
To determine if you need support structures, there are a few things to consider:
- 45 degree rule (overhangs): if overhangs are more than 45 degrees (from vertical), they will need support. To test your 3D printer's capabilities in terms of maximum overhang angles, try printing this test 3D model. When your 3D printer stops printing adequately at a certain stick-out angle, that's the angle you need to use additional supports to reach.
- 5mm rule (bridges): if bridges are wider than 5mm, they may need support. Of course, not all 3D printers are the same. Some can print over long distances. Others can hardly print thinner ones. Try printing this test model to see if your 3D printer needs calipers. You'll know the maximum bridge length you need after which calipers are needed when you see that the bridges in the test model start to sag. nine0026
Once you've decided you need calipers, let's take a look at the Cura settings to get the most out of them.
Support Settings
Cura has several settings to help you optimize the support of your 3D models. Here's where to start:
When you first open Cura, click "Custom" in "Print Settings". Here you can adjust settings that are otherwise hidden in the "Recommended Settings" section. nine0005
Right click and select "Configure Setting Visibility"
Select "Check All".
You can now see all the settings that Ultimaker provides in Cura. Scroll down to support settings, click "Generate Support", and now we can start tweaking the support settings for your 3D model!
Support Placement
After you click "Generate Support", the first setting will be "Support Placement". Here you can select "Everywhere" or "Touching Buildplate". You probably guessed that this determines whether supports are printed everywhere (where necessary) or based only on the desktop. nine0005
In most cases, it's better to choose "Touching Buildplate" because supports all over the surface of your 3D model can cause nasty imperfections on the surface of the finished product.
However, sometimes supports are needed everywhere. This is the case with really complex models that cannot be printed without additional calipers.
Support Overhang Angle
With the "Support Overhang Angle" setting you can specify the maximum overhang angle above which you want to use the supports. As mentioned earlier, the default angle is usually 45 degrees. However, this angle may be different for your particular 3D printer. So you should first check this parameter using a test 3D model. nine0005
By the way, this angle may also differ depending on the features of a particular 3D model. 0 degrees is the generation of calipers for each minimum angle of overhang, 89 is the minimum of supports, respectively.
Support Patterns
Ultimaker Cura supports various "Support Pattern" patterns. Each of the templates balances strength and ease of removal.
Quick and easy
- Zig-zag (zigzag) - the fastest in execution and the easiest to remove.
- Lines is an evolution of the previous template. They are still great, easy-to-remove supports, but are slightly stronger than zig-zags and usually don't come off in one piece.
- Concentric - best for models that are close to spheres or cylinders. As a rule, it is slightly stronger than zigzags and lines.
Note that due to the unidirectionality of the above three patterns, they tend to be more vulnerable. For example, vibrations and thin support structures can cause the nozzle to not align perfectly with previous layers, which can cause problems in the long run.
What's more, if these patterns are even slightly caught by the moving nozzle, they can break away from the surface below and collapse like an accordion!
Robust
and grid (grid) and triangle (triangle) are excellent templates for obtaining strong supports. They are resistant to vibration, but increase 3D printing time and generally have better contact with supporting surfaces. This can make post-processing difficult.
Support Density
"Support density" is very similar to fill density in the sense that you choose a compromise between strength, speed and ease of removal. nine0005
High density support structures are generally more rigid and can withstand vibration. In addition, the increased contact with the lugs makes the high density supports ideal for intricate or detailed supports. With high densities, expect stronger support, but more material usage, longer print times, and more complex post-processing.
Low density bearings are ideal for general bearing surfaces that do not require many contact points. Low density calipers are more likely to react to vibration during 3D printing, but they reduce material cost, 3D printing time, and ease of removal. nine0005
Caliper density of 20% is a great value to start with, but feel free to change this value to suit the needs of your 3D model.
Z Distance
This important parameter determines the distance from the top and bottom of the supports to the 3D model. This parameter consists of two sections: upper distance and lower distance.
A high value for these distances allows for a larger clearance between the model and the support, which simplifies post-processing and creates a smoother 3D model surface due to fewer contact points. A low value is useful when you are trying to support complex protrusions that require high detail. However, with a low support value, it is more difficult to remove. nine0005
As with many settings, experiment with these distances to find the perfect fit for your 3D printer.
X/Y Distance
X/Y Distance is very similar to Z Distance. This setting adjusts the horizontal distance between the model and its support.
Again, the further the distance, the easier it is to remove the support. The shorter the distance, the stronger the support structure.
As a rule, a larger X/Y distance means a better surface quality in vertical sections. If the vertical parts on your models are uneven due to adjacent supports, try increasing the X/Y distance. nine0005
A smaller X/Y distance will result in better support for overhangs, namely those located near vertical surfaces. However, they can cause defects in vertical surfaces and complicate post-processing.
Support Distance Priority
Depending on the type of plumb line you are trying to print, the Z distance may conflict with the X/Y distance. In Cura, however, you can set the priority in these distances so that in the event of a conflict, the most important is preserved. nine0005
It's generally better to have Z override X/Y because the Z distance is what the model actually supports. However, you can always change this override setting if the specific 3D model requires it.
You can also set the minimum X/Y distance. Then, even when the Z distance takes precedence, the minimum X/Y distance is still kept.
Join Distance
The Join Distance allows you to set the maximum horizontal distance between support structures. When two support structures are closer together than this value, they will be printed as one structure.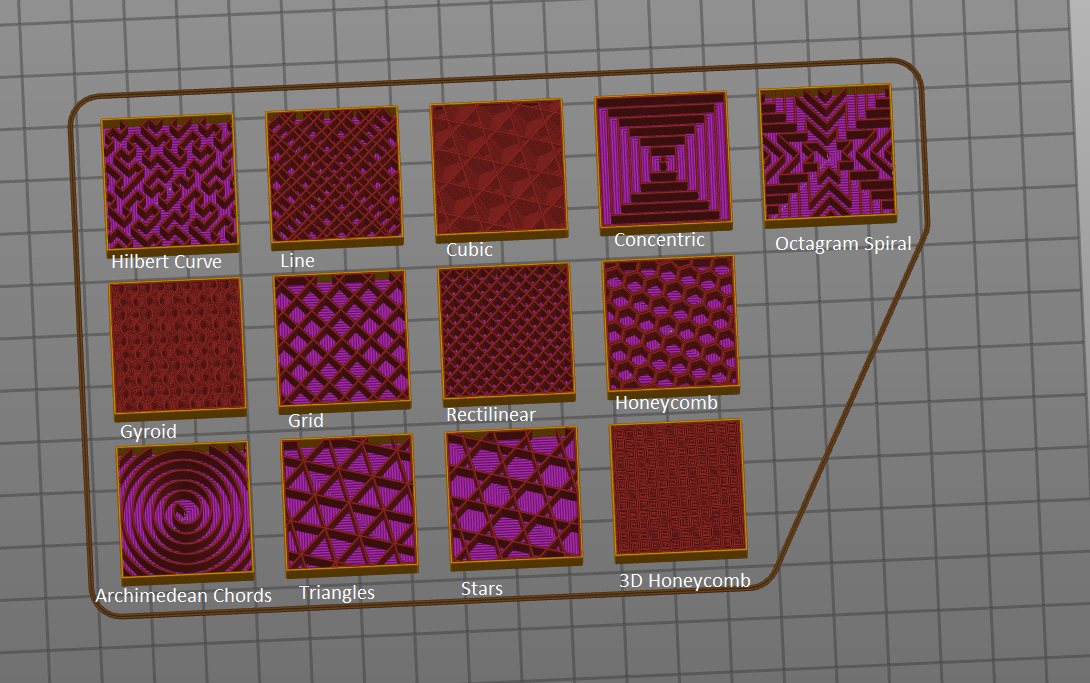 The higher the value of this distance, the faster the supports will connect. If the support structures are particularly thin, this can help provide more support for the 3D model. nine0005
However, if you set the value too high, the support structures can become tight and difficult to remove.
Horizontal Expansion
When the support surfaces are very thin, it is difficult for your 3D printer to create strong structures in a small area. The "Horizontal Expansion" option allows you to set the horizontal expansion so that even small anchor areas are adequately supported.
Entering a large value for this setting will always result in stronger supports, but this setting requires your 3D printer to use more material. nine0005
Towers
For very small protrusions, Cura allows you to print towers that taper at the top to support areas smaller than the minimum diameter you set (other areas will use regular support structures.)
the towers were not too weak, they had a larger diameter than the area they supported. You can always change this diameter in Cura. You can also adjust the angle at which your towers rise to a certain point to make the towers flatter or sharper. nine0005
💯 Best Unsupported STL Model Files for 3D Printing・Cults
💯 Best Unsupported Model STL Files for 3D Printing
Download Print in Place 3D Object Files Without Support
Large A trend in 3D printing for several years, "Print-in-Place" or unsupported in-place printing, has revolutionized 3D modeling for 3D printing. Indeed, 3D files are now easily printed without support and can be used and sometimes even articulated when printed. nine0005
SPRING BOX FOR FIELD PRINTING
Free
Articulated dragon
3.76 €
flexible turtle
Free
Field Print Engine Benchmark
Free
Cute mini octopus
Free
flexible puppy
Free
Articulated lizard v2
Free
flexible mammoth
Free
PRINT-IN-PLACE PHONE HOLDER - FOR SPACE?!
Free
nine0178 Articulated SharkFree
flexible bear
Free
Print-in-Place - Distance Measuring Roll Tool
Free
Predator Action Pliers
Free
FLEXI BEETLE
Free
nine0178 Cute frog with flexi print 1.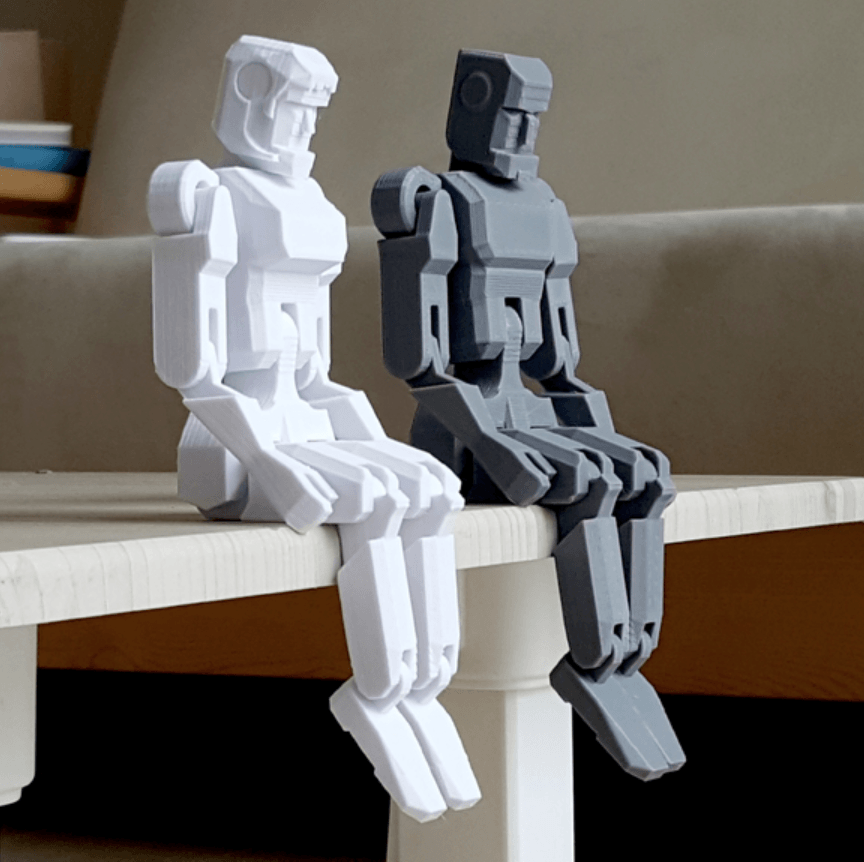 84 €
84 €
Cute skeleton with flexi print
2.78 €
CUTE CROCODILE WITH FLEXIBLE PRINT IN PLACE
2.78 €
Print In Place PCB-Holder / Gripper
Free
Flexi PRINT-IN-PLACE Hand
1.84 €
flexible zombie animals
Free
Jet Fighter with print stand and articulation
Free
Flexi-print "Fish"
1.84 €
Folding sword - Épée dépliable - Unsupported / Printed in place Version 1
Free
nine0178 Cute turtle with flexi print1.84 €
Cute Flexi Print-in-Place Ant
1. 84 €
84 €
Surprise Egg #4 - Tiny Excavator
Free
Cute spider with flexi print
1.84 €
Flexi Print-in-Place llamacorn
1.84 €
SD Card Toaster Print in Place
Free
CUTE FLEXI PRINT-IN-PLACE FISH - keychain
Free
Surprise Egg #1 - Tiny Truck
Free
Scorpion with flexi print
1.84 €
nine0178 Lazy Cat3.76 €
Fidget Gears Revolving V2 (printed in place!)
Free
Surprise Egg #3 - Tiny Wheel Loader Toy
Free
Skeletonized V-Twin!
Free
Surprise Egg #7 - Tiny Car Transporter
Free
Surprise Egg #5 - Tiny Fire Truck
Free
Lazy Dogs
4,70 €
Seal-in-place Fixing box - no assembly required!
Free
Articulated Fish Print in Place
Free
nine0178 Surprise Egg #2 - Tiny ForkliftFree
Swing-out calibration cube
Free
SCARAB 4WD Buggy - Print In Place
Free
Surprise Egg #8 - Tiny Racecar
Free
Predator Action Pliers Mk2
Free
Cute caterpillar with flexi print in place
1. 84 €
84 €
Print in Place Allen Key Holder Inspired by Wiha
Free
Scorpion with flexi print
HINGED FISH
Articulated Dragon
nine0002flexible turtle
Here is our selection of best STL files without printing support. They are all beautiful creations from the Cults 3D file library and are 3D printable without media . This means these creations can be used straight out of 3D printing, are articulated or flexible, and you don't even have to remove the print supports.
All 3D printing designers have this wish: create files that are easy to print and very pretty or practical . This has led to the trend "Print-in-Place no support" with files that are easy to print without the need to add print media.