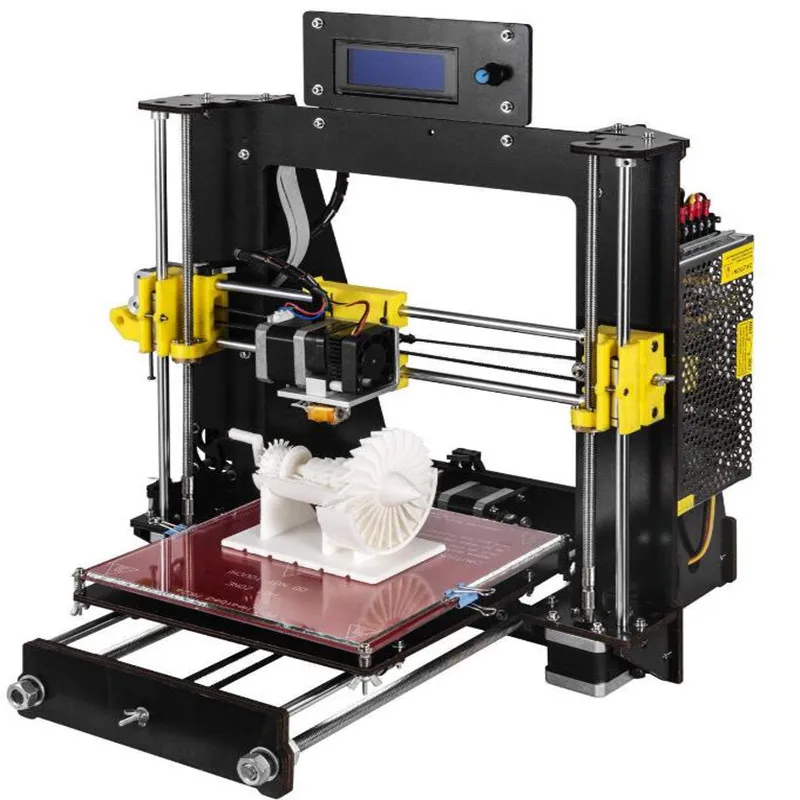
3D printing clear resin
Guide to Transparent 3D Printing
Clear materials, such as glass or acrylic, have a wide variety of applications in consumer products, industrial uses, healthcare, and more. However, prototyping or producing low volumes of clear parts can be expensive and inefficient with traditional methods, which raises the question: can you 3D print transparent parts? The answer is yes, with the right technology and materials.
Stereolithography (SLA) 3D printing can create transparent objects that, with some post-processing, can be made optically clear. Formlabs' latest SLA 3D printers, the compact Form 3+ and the large format Form 3L, take clarity one step further by using a flexible resin tank that reduces peel forces, resulting in clearer parts with smooth surface finish.
There are multiple materials for producing translucent and transparent 3D printed parts:
- Clear Resin is a rigid material that polishes to near optical transparency, making it ideal for fluidics, moldmaking, optics, lighting, showcasing internal features, and any parts requiring translucency.
- BioMed Clear Resin is a rigid, transparent material for biocompatible applications requiring long-term skin or mucosal membrane contact.
- Elastic 50A Resin is a soft and stretchy material that is semi-translucent. It is ideal for prototyping parts normally produced with silicone.
- Flexible 80A Resin is a more stiff soft-touch material that is also semi-translucent. It is ideal for simulating the flexibility of rubber or TPU.
In this guide, we walk you through various finishing methods to create transparent 3D printed parts for a variety of applications, from optics to light pipes to fluidics. Methods range from quick solutions for adequate transparency, to niche techniques for creating optically clear parts.
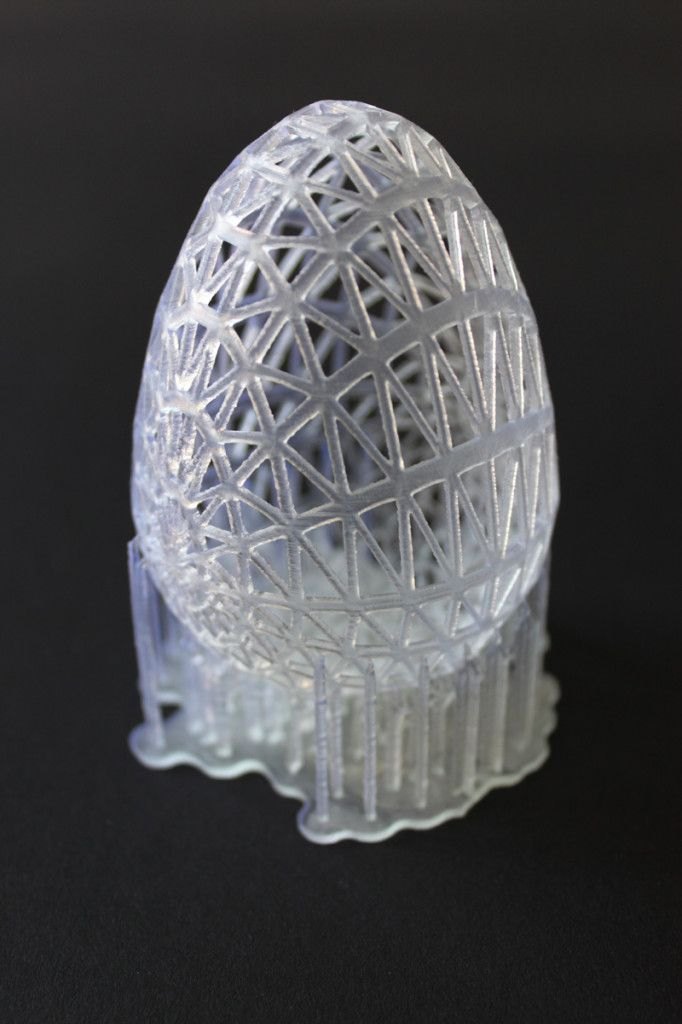
Clear and transparent 3D prints are ideal for creating clear prototype parts, showing internal cavities and details, housing LEDs, creating windows, or printing see though anatomical models and medical devices. Formlabs and our customers have used Clear Resin to create a completely optically clear lens for a fully 3D printed camera, tiles for a Fresnel lens installation in Times Square, light pipes, prisms, millifluidic devices, and more.
Formlabs applications engineer Amos Dudley designed and 3D printed a lens for a fully 3D printed camera.
Sample part
Curious to see how transparent 3D prints SLA 3D printing is capable of? We’ll ship a free clear 3D printed part to your office.
Request a Free Sample Part
Yes, but with caveats. Polymethylmethacrylate (PMMA), commonly known as acrylic, is a transparent thermoplastic that is commonly used as a more durable alternative to glass. While 3D printing acrylic is possible with fused deposition modeling (FDM) 3D printers, it's not really user-friendly as the material itself is toxic and prone to warping, while the 3D printed parts are only semi-translucent due to the lower resolution of FDM printers.
For a 3D printing acrylic-like fully transparent parts, we recommend printing on an SLA 3D printer with Clear Resin and then post-processing the 3D printed parts for full transparency using one of the methods mentioned in this article. Using an acrylic spray is one of the methods to ensure clarity.
We’ve tested several techniques for post-processing parts 3D printed in Clear Resin. In this post, we’ll cover manual sanding, clear coating, and resin dipping. Each finishing option requires varying levels of effort, depending on the degree of transparency and surface finish your part requires.
Applications: Manual sanding and polishing can be effective for simple shapes with few details, but are less suited to finishing complex models. It is very difficult to reach total optical transparency with this method.
You’ll have to sand to extremely fine grits to manually finish a transparent part, but with some effort, you can sand and polish parts to be as clear as a magnifying glass. It is, however, very challenging to completely eliminate all layer lines via manual finishing—you may notice micro-scratches when holding the part at a shallow angle to the light.
Instructions: Use a range of incremental sandpaper grits to smooth your surface, then polish the part with acrylic cleaner and a microfiber cloth.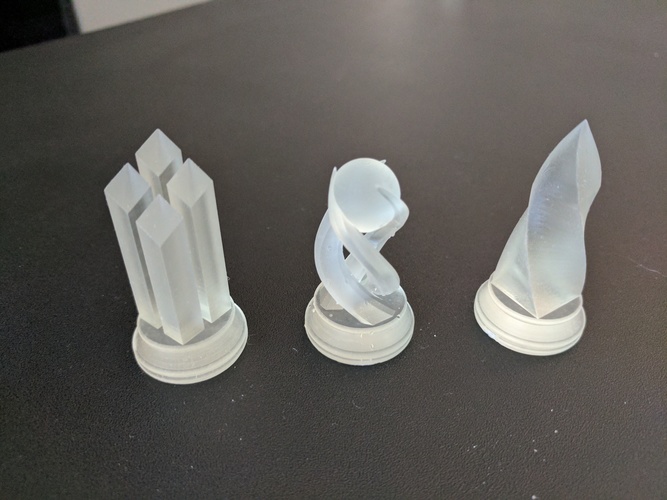
At around 3000 grit, transparent 3D printed parts become glossy and very smooth to the touch. By 12000 grit, they are reflective. Try using a range of sandpaper and micromesh pads with grits from 400 to 12000, in increments of 200, slowly and carefully to clean the parts between grit levels and to eliminate scratches from the previous level before moving on to the next.
Our support site offers a simple visual step-by-step guide for manual sanding, including an optional finish with acrylic spray.
Tip: If you only need semi-transparency, simply use mineral oil to create an even finish and hide any light spots on your part.
We’ve tested a variety of methods of polishing clear 3D prints, from hand sanding and spray coating to resin dipping.
Applications: Spray coating is an easy, fast way to improve the clarity of parts without much reduction in detail. This method is effective for all kinds of models, as it's able to coat complex details that may be hard to reach with regular sanding and polishing.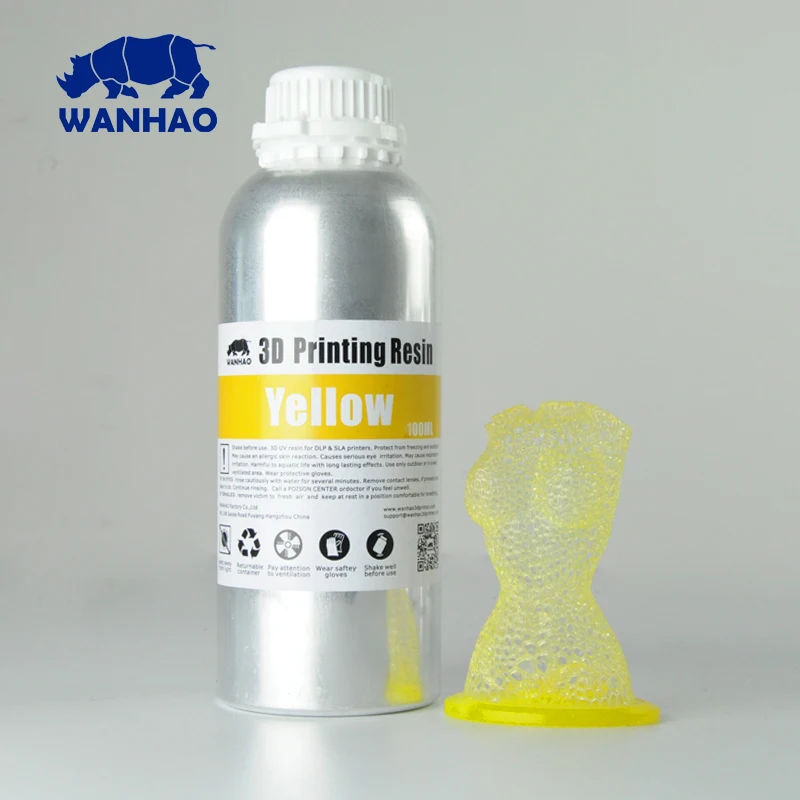
Clear coating alone helps to conceal layer lines and protect parts from UV exposure, which can cause yellowing and unintended post-curing. If you’re looking for a smooth, glass-like surface finish, perform the manual sanding and polishing technique prior to coating; the more sanding that comes before clear coating, the better the clarity. This additional step is great for post-processing prototypes that look like fully transparent plastic, e.g., packaging, bottles, and microfluidics.
Instructions: There are several options for clear coating 3D prints, from inexpensive sprays to products that require a dedicated room and tools.
- General purpose clear coat spray paints: There is a wide variety of high quality and affordable sprays. We recommend using a 2K clear coat.
- Automotive sprays: High-solids acrylic urethane clearcoats offer very high gloss and are designed for air-dry and baking conditions, but require a spray gun and dedicated space for spraying, as well as a base coat.
For spray coating, start with a clean, dry part already washed in isopropyl alcohol (IPA). Do not post-cure the part ahead of spraying, as this can cause yellowing. Let the part air dry. Once it’s completely dry, apply two to three spray coats in a dust-free environment.
Tip: For a fee, auto body shops may do the coating for you with a spray like Lesonal Universal Clear. In most cases, these shops will use a light solvent, like naptha to clean and prepare the part’s surface prior to painting.
For an installation in Times Square, Window to the Heart, the Formlabs and Aranda/Lasch teams worked with an auto body shop to spray coat each tile in Lesonal Universal Clear.
Applications: This method is best for when you need very transparent parts, and only works on flat or near-flat surfaces, such as a lens or a window into the interior of a part.
Resin dipping results in parts that are extremely smooth, with clear and sharp surface reflections.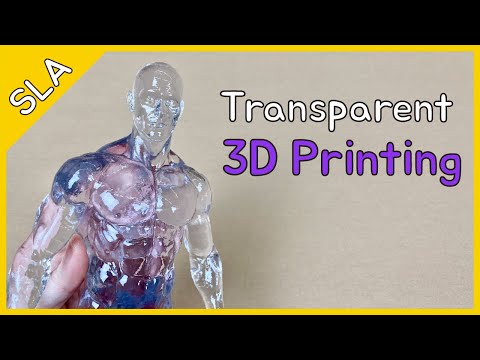
This technique can be used to create an even smoother finish for parts printed in other SLA materials, although it can reduce detail.
Instructions: Apply Clear Resin to the part with drops from a syringe, or by dipping the part as as desired. The viscous resin will fill layers and scratches on the part, forming a completely smooth surface.
The layer of resin should be as thin as possible, while still eliminating layer lines. Pull off any bubbles with a syringe. Completely post-cure the part using the appropriate settings, then repeat the process for the other side, both dipping and post-curing.
Three stages of resin-dipped lenses, with the final lens on the left.
Note: The dipping process alters focal length slightly for lenses. For our 3D printed camera lens, Formlabs applications engineer Amos Dudley designed and printed a lens testing device.
With the Form 3+ SLA 3D printer, you can create clear and fully transparent 3D prints affordably and with minimal post-processing.
Download our white paper for a detailed overview of SLA ecosystems and the step-by-step 3D printing workflow.
Curious to see the quality and clarity firsthand? Request a free transparent 3D printed sample part.
Request a Sample Printed in Clear Resin
Clear transparant & non-yellowing 3D-printing resin
Clear and transparent 3D prints are ideal for creating clear prototype parts, showing internal cavities and details. Applications like LED housings, prototyping lens parts and microfluidic devices are a few examples of application 3D-printed with clear resin. Learn how propmaker Campman Animatronics used Clear Impact to 3D-print a transparant transverse flute for the Dutch Queens 50th birthday.
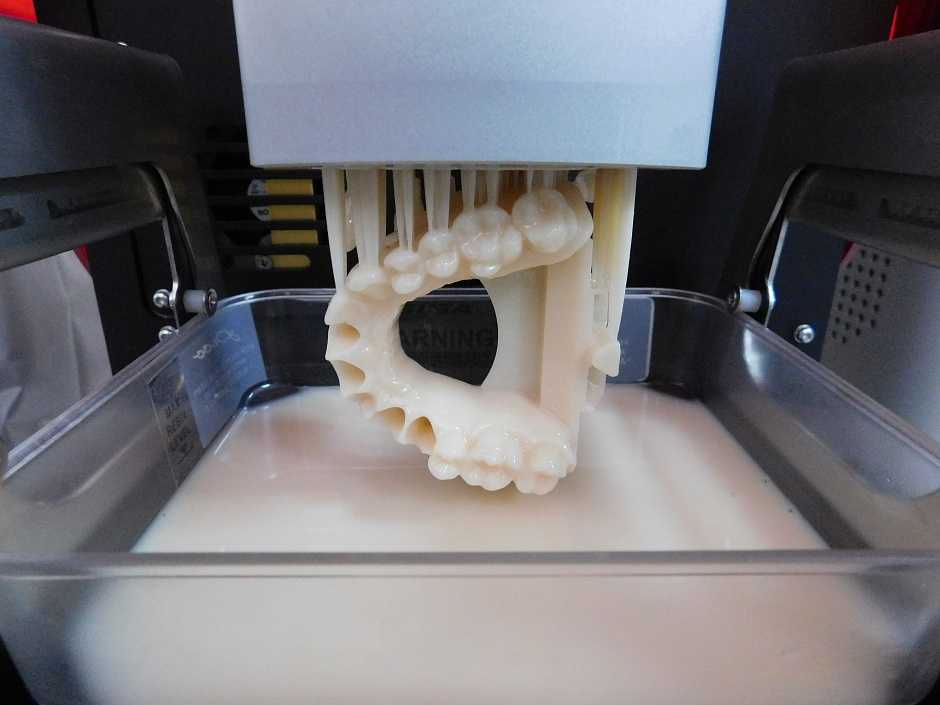
Resin 3D-printing is one of the only 3D-printing technologies that can create high resolution transparent plastic parts. One of the challenges in resin 3D-printing is to produce perfect transparent parts that will not yellow over time. Often, first-time-users are surprised by the transparency of parts fresh from the printer, as seen in the Coca-Cola bottle in the image below on the left side. After washing and drying, the transparency is lost and the part has a “frost” finish (middle bottle). A post-processing step is necessary to create long-lasting transparent plastic parts.
Figure 1: Parts 3D-printed with Liqcreate Clear Impact resin, on the left part fresh from the printer, middle after washing and drying, on the right after coating.
There are a wide range of clear resins available for 3D-printing. Not every resin is suitable for long lasting transparent parts. For instance epoxy resins, often used in large 355nm laser 3D-printers are notorious for their discoloration over time. Next to epoxides, acrylates and urethanes are used in LCD, DLP, desktop laser based and MSLA 3D-printers. Depending on the quality of the resin, some are better for clear, non-yellowing parts. There are a few factors that are important when it comes to transparent parts:
- – Resin formulation and quality
- – Post-processing
- – Post-curing
Resin formulation and type of 3D-printer
The basics of good transparent and low/non-yellowing parts is the resin itself.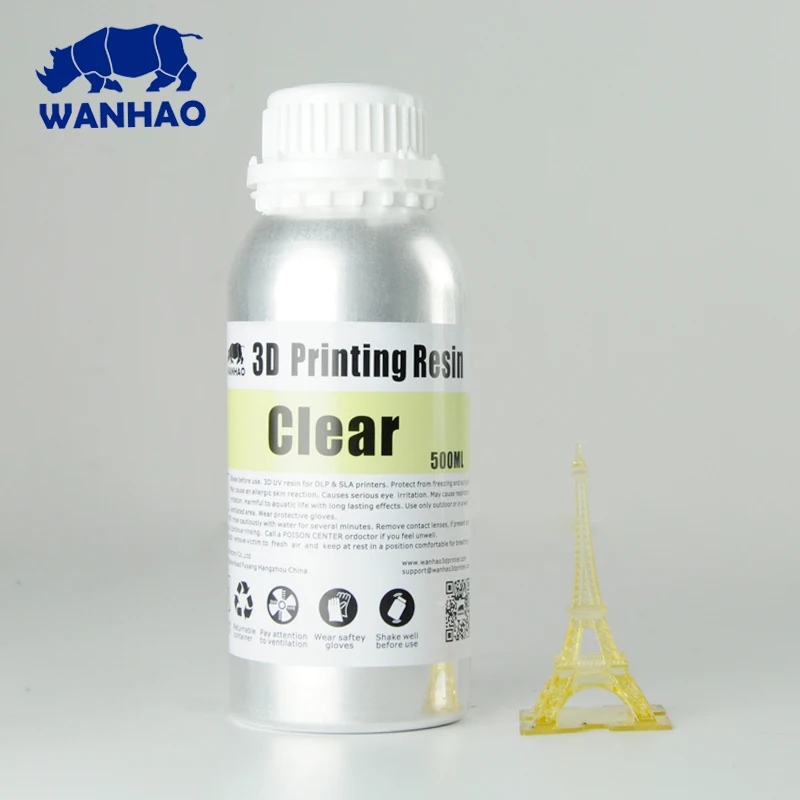 Low quality raw materials and impurities in the resin can cause extra yellowing over time. Next to selecting high quality raw materials, the resin technology and additives developed for Liqcreate Clear Impact will prevent extra yellowing over time.
Post-curing clear parts
Post-curing is an important step in resin 3D-printing. During printing, the resin does not fully cure and is often soft and bendable. With a proper post-cure, its final properties are achieved. Often a good dose of UV (365, 385 or 405nm) at a slightly increased temperature is required for near 100% conversion. To get the least yellowing for clear parts during post-processing and after, it is important to post-cure at room temperature, preferably in three steps of 5 minutes. At elevated temperatures, side products can cause extra yellowing.
Post-processing clear parts
After printing, clear parts often look amazing. They are 100% transparent, which change when the parts are washed. After washing in IPA or Ethanol, the parts slowly turn into a frost finish once the solvent is drying. To get back to a transparent finish, some post-processing steps are required.
There are a few possibilities to post-process clear parts to get a transparent surface finish. The mostly used techniques are:
- – Sanding and polishing
- – Resin dipping
- – Nitrogen UV-curing
- – Spray coating
Sanding and polishing
Manual sanding and polishing is an effective and affordable method for parts with simple shapes. Often solid parts like lenses, microfluidic devices or solid parts like prisms can be effectively turned into transparent parts. Start with a rough sandpaper grid and work towards a very smooth grid. Sand and polish all the layer lines and defects away and eventually with the finest grid, parts turn transparent. The final finish should be polished with a microfiber and special cleaner. A polishing wheel can make this job easier, as long as the parts are not too complex and difficult to reach by hand or wheel.
Resin dipping
Resin dipping was first proposed by Formlabs in their article on post-processing of clear parts.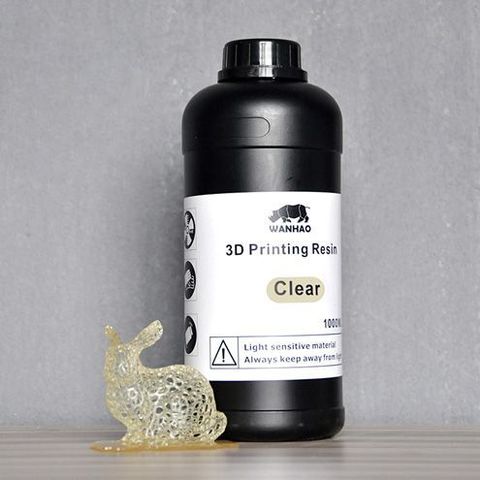 It works by dipping the part in 3D-printing resin and then post-cure it. After a few layers the parts turn transparent. It should be noted that 3D-printing resin is perhaps not the best type of resin to use as a coating. The viscosity and sticky surface finish will not be ideal for daily used parts and the details are partly faded away by the layer of the resin.
Nitrogen curing
Taking the best part of resin dipping and making it even better, you end-up with nitrogen curing your parts. When your parts are printed, don’t wash them and let most of the resin drip off the part. This way a thin resin coating is left on the part. Adding a bit of heat can make the resin layer thinner to preserve more details. When the layer is thin enough, cure the part in an UV-chamber with nitrogen. This will eliminate all the oxygen and give a non-sticky and transparent part.
Spray coating
Easiest of all is to wash your parts with IPA/ethanol, dry and UV-cure them, followed by a spray coating. If the part is simple, a sanding step can be executed before coating. This will increase the translucency and erases the pixel and printing layers. Use an acrylic spray and spray multiple layers to get good surface finish. The Coca Cola can in the picture above on the right side is made this way, without sanding. For an easy, affordable and fast process, this method is advised. The transparency can be boosted with adding more coating layers on top. After a few layers parts can look like the 3D-printed protective glass below.
Team Liqcreate wish you happy printing. If there are any questions or remarks, feel free to contact us at [email protected] any time.
Photopolymer 3D printer
3D printers can be sorted not only by the printing technologies used, but also by the consumables used. In this section, we will look at devices that use photopolymer resins to build models.
- 1 Consumables
- 2 Laser stereolithography (SLA)
- 3 Projector stereolithography (DLP)
- 4 Multi-jet (MJM and PolyJet)
- 5 3D pens
- 6 Additional illumination
Consumables
Photopolymer resins are liquid polymers that harden when exposed to light. As a rule, such materials are sensitive to the ultraviolet range, which determines the design of photopolymer printers. One of the common design elements is a transparent colored cap or housing made of a material that filters ultraviolet radiation. This is done both to protect the user's eyes and to protect the supplies inside the printer from exposure to sunlight and background lighting. nine0003
Photopolymer resin loaded into Form 1 3D printer
The physical properties of resins after polymerization vary widely. Both rigid and flexible options are available, transparent and matte. A wide selection of colors is also available. Resin consistency and exposure times also vary, so a range of compatible media should be considered when choosing a printer.
The last aspect to consider when choosing a material is its toxicity. There are both quite toxic options and biologically safe ones. nine0003
The cost of consumables can be considered the Achilles' heel of photopolymer printing.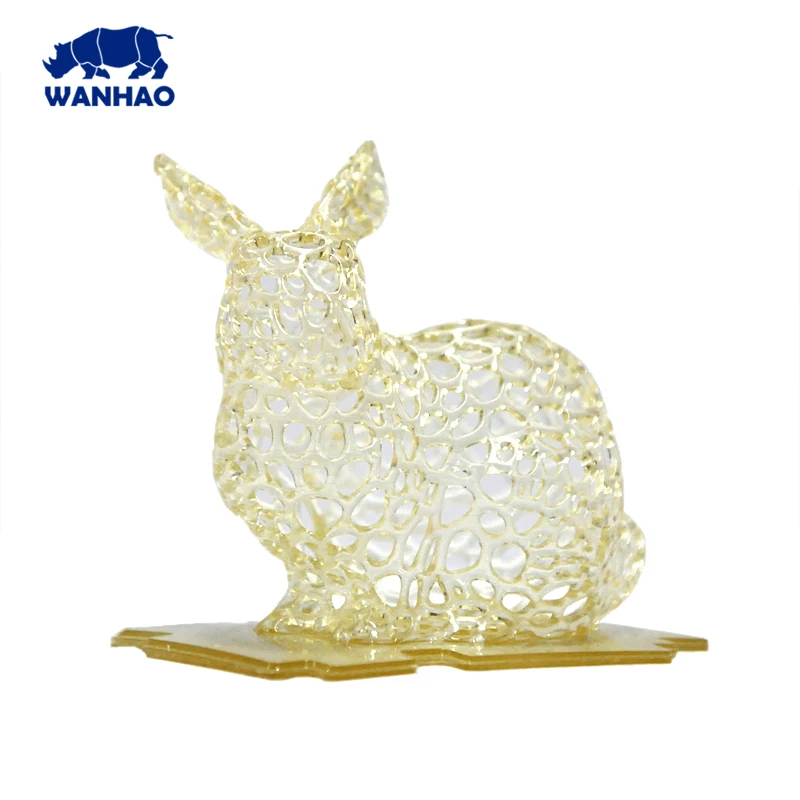 The plants themselves are already reaching quite acceptable price levels, but it is still quite difficult to find inexpensive photopolymer resins. It is hoped that the proliferation of inexpensive photopolymer printers will lead to an increase in the production of consumables and lower prices.
Laser Stereolithography (SLA)
SLA Model
The firstborn of photopolymer printing and modern 3D printing in general. The technology was developed in 1984 by Charles Hall, who later founded 3D Systems.
SLA printers use laser emitters to cure the photopolymer supply.
A typical SLA printer consists of a consumable tray sitting under a build platform driven vertically by a raise/lower mechanism.
Alternatively, the cuvette itself can be driven - what matters is the relative movement of the platform and the container. Above the cuvette is a laser emitter and a mirror system for deflecting the laser beam. nine0003
During the printing process, the platform is immersed in the consumable for the thickness of one layer of the digital model.
Since photopolymer resins can be quite thick, a leveling mechanism is often used to speed up the process.
SLA printer operation scheme
After leveling, the process of illumination of the material begins. Illumination is produced by laser irradiation. Most photopolymer resins are designed to cure (polymerize) when exposed to ultraviolet light, which determines the choice of laser frequency. The movement of the beam along the X and Y axes is determined by the operation of the deflecting mirrors. nine0003
After the drawing of the layer is completed, the platform is immersed in the material for the thickness of one more layer, and the process is repeated with the drawing of the next layer of the digital model.
Model building animation
SLA printing takes quite a long time, and printers using this method tend to have relatively small build areas.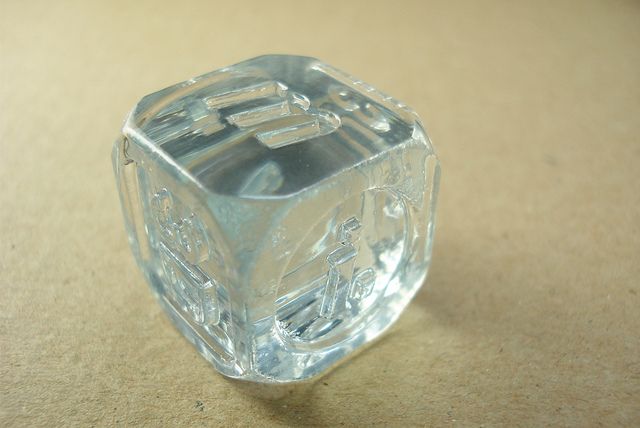
This is mainly due to the high cost of laser emitters: printing large objects with a single laser will take too much time, and installing additional emitters and mirrors will complicate the design, increase the dimensions of the installation and raise the price to an unacceptable level for most users. nine0003
Despite the success of this technology, projected stereolithography is considered to be a more promising, although very similar method.
Projector Stereolithography (DLP)
Formlabs Form 1 Desktop DLP Printer
A close relative of laser stereolithography, this method uses digital LED projectors instead of laser machines with mirror deflection systems. The method became popular due to the development of technology for the production of low-cost high-resolution digital projectors by Texas Instruments. nine0003
Layers are illuminated using a digital projector that highlights patterns of the entire layer, which distinguishes this method from SLA, where the "picture" emerges progressively using an ultraviolet laser.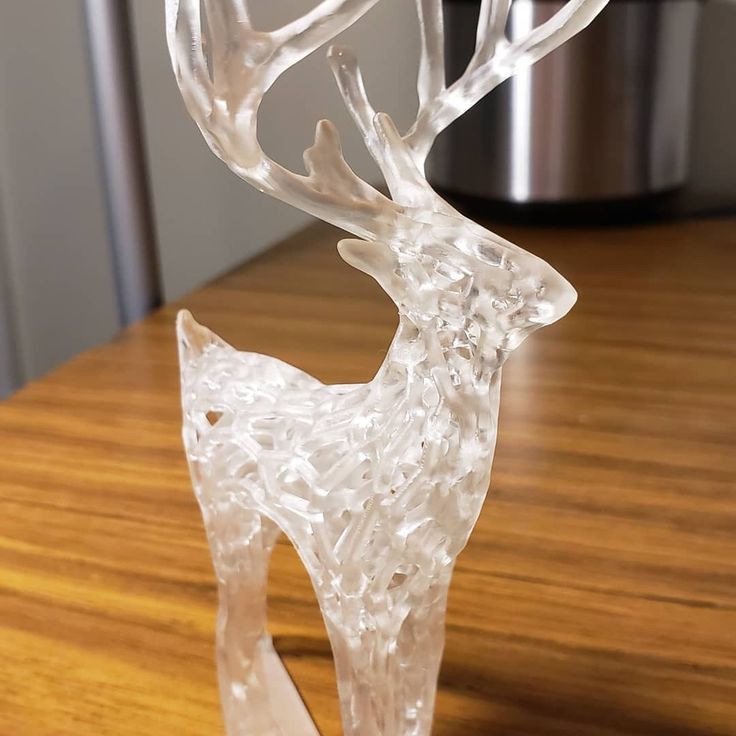
A similar approach has previously been used on SGC-type plants, but this technology used physical photomasks, making the process costly, time consuming, slow and noisy.
At the moment, the FTI technology continues to exist - the development of SGC, almost indistinguishable from DLP printing, since it also uses digital LED projectors. nine0003
DLP printer design
Simultaneous illumination of an entire layer using projectors can significantly speed up the printing process even compared to SLA printers that have a high scanning speed (ie beam movement).
In addition, these printers are less sensitive to rough physical impact due to the absence of delicate mirror systems.
The absence of mechanical mirror systems improves accuracy. Finally, the cost of projectors sets them apart from laser systems. nine0003
Projection size can be quite significant, reaching the average of popular FDM printers.
An interesting feature of DLP printers is the ability to "reverse" or "reverse" printing.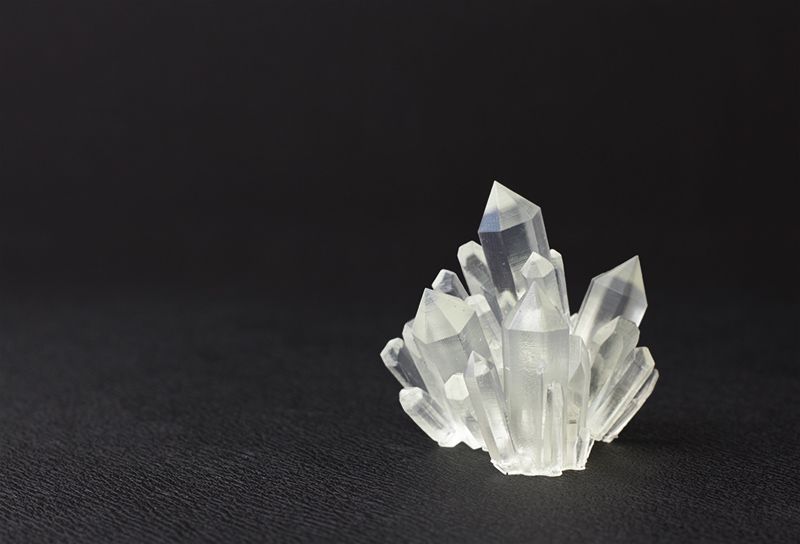
In this case, the projector is installed under a transparent (material choice for transparency in relation to ultraviolet light) cuvette, and the platform does not sink into the material, but gradually rises, pulling out the layers of exposed polymer. nine0003
This approach eliminates the alignment mechanism and achieves even higher Z resolution than SLA printers.
In addition, the size of models in height is not limited by the depth of the cuvette, which favorably affects the dimensions of the printer and the possibility of increasing the build area.
Multi-jet printing (MJM and PolyJet)
3D Systems ProJet 3500HDMax MJM printer
MJM and PolyJet technologies are practically indistinguishable from each other. The name difference comes from the respective patents: Multi Jet Modeling is owned by 3D Systems, while PolyJet is owned by rival Stratasys. nine0003
The very principle of multi-jet polymer printing was developed by the Israeli company Objet, which eventually became a division of Stratasys.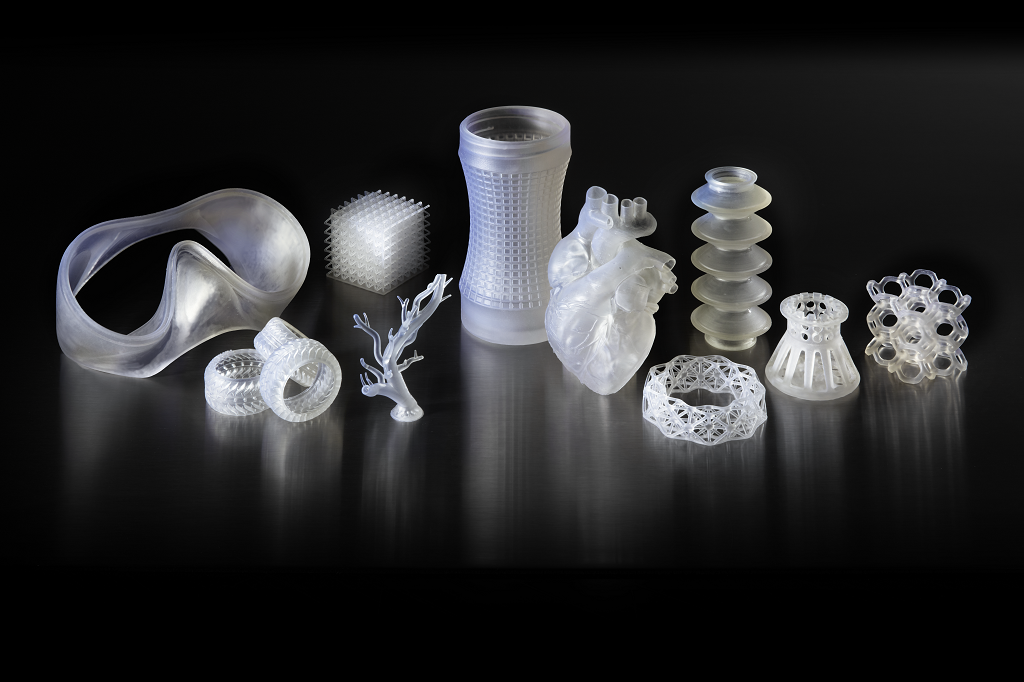
Multi-jet printing technology combines features of 3D inkjet printing (3DP) and projection stereolithography (DLP).
How the MJM PolyJet printer works
Models are built by spraying photopolymer using linear arrays consisting of multiple nozzles.
The applied layer is immediately exposed to ultraviolet lamps - as a rule, two processes occur simultaneously.
By the time the array reaches the end of the build chamber, the previously deposited material is hard enough to print a new layer.
Composite models created on the ProJet 3500 DP dental printer
This approach allows to achieve very high printing speed, but is characterized by high design complexity, which negatively affects the cost of such installations and limits their distribution to professional use. nine0003
One of the advantages of MJM and PolyJet technologies is the ability to create composite structures from photopolymer resins with different physical characteristics.
It is therefore possible to create models with easily removable supports, use multiple colors and use flexible and rigid materials in parallel within the same model.
3D Pens
CreoPop 3D Pen
Recently, there has been a craze for hand-held printing devices called 3D pens. At the moment, there are three main options for such devices: drip-jet pens (DOD), called BioPen and used in the development of new methods for treating damaged tissues, FDM 3D pens, which are manual extruders (essentially similar to the usual hot glue guns, but using thermoplastics) and developments in 3D-drawing with photopolymer resins.
CreoPop 3D pen was the first "handheld resin printer". The design of this device is quite simple, because the most complex function, positioning, is performed by the user himself. The pen only extrudes resin through the tip surrounded by LED emitters. nine0003
CreoPop 3D pen in action
This way the resin hardens immediately after application, allowing you to literally draw on air.
The advantage of such handles over FDM-analogues is the low operating temperature - there are no heating elements in the device. As a result, with such pens you can even draw on the skin.
In addition, a wide range of photopolymer resins with different physical properties can be used with such devices, which greatly expands the range of possible applications. At a minimum, this is a relatively inexpensive, but entertaining toy. nine0003
The only drawback is the relatively high cost of consumables, but such devices are unlikely to require large volumes of photopolymer resin when used in everyday life.
Additional Lighting
Final Lighting of Resin Models in a Homemade Camera
Full curing of models can take quite a long time, so models during SLA and DLP printing are only partially polymerized, sufficient to maintain the physical shape of the part. nine0003
After production, the models are usually placed in chambers equipped with ultraviolet lamps until fully cured. Of course, if possible, you can simply lay out the models in the sun - the effect will be the same.
Just keep in mind that ordinary glass practically does not transmit ultraviolet light, so exposure to sunlight must be direct.
If desired, a UV-transparent quartz glass container can be used. nine0003
Go to the main page of the Encyclopedia of 3D Printing
FunToDo Nano Clear - perfectly transparent photopolymer
Consumables
ZOBU 3D ARTEL Anycubic Photon Wanhao Duplicator 7 (D7)
In our assortment replenishment - Photopolymer FunToDo Nano Clear, transparent (1 kg)
Nano Clear is an ideally clear photopolymer for DLP/LCD printing with minimal shrinkage. Prints with resolution up to 2 microns (0.002 mm). There are many applications where high precision transparent resin is required: microfluidics (microfluidics), micro illumination, microscopic filters, etc.![]() This is a unique transparent resin that has no stray light! Nano Clear resin can be dyed. To obtain the desired shade of color, purchase a complete set of pigments (4 pieces of 20 ml) and mix in any proportion. nine0003
This is a unique transparent resin that has no stray light! Nano Clear resin can be dyed. To obtain the desired shade of color, purchase a complete set of pigments (4 pieces of 20 ml) and mix in any proportion. nine0003
The NanoClear resin model after polymerization is close in feel and properties to the molded plastic product. Nano Clear polymer has a Shore D hardness of 85. Viscosity 80 mPas.
Advantages of FunToDo resin:
- Reasonable price and high accuracy. Layer thickness from 10 µm
- For super fast printing. Cure time 0.5 s for 0.02 mm layer with 240W lamp power
- Wide illumination range 225-415nm Resin suitable for most DLP/LED and SLA printers
- Ultra-low shrinkage. What you see on the screen is what you get! Object shrinkage only 0.5%
- Safety. FunToDo resins are low odor
FunToDo's resin is one of the best resins on the professional 3D printing market. This photopolymer differs from competitors in uniform saturated color, as well as high speed 3D printing. The resin is compatible with almost all DLP/LED and SLA 3D printers on the market:
Anycubic Photon is one of the best-selling photopolymer printer models
Anycubic Photon S - a novelty with modernized mechanics and a diode matrix, which has a directional illumination
3D Artel Zobu (bestseller!) - the most budgetary, but very reliable and fast 3D printer, with an autonomous control unit and control in Russian
3D Artel Zobu 3.0 - minimal stray light and the most accurate printing thanks to a matrix with a focusing lens
Wanhao D7 - a universal photopolymer printer from the leader, Wanhao Wanhao D7 Plus - Offline 3D Printer with Commercial Slicer in Russian Wanhao Duplicator 8 is the largest printable area of a low cost printer
The combination of an affordable price, as well as a short exposure time, can significantly save your money, reduce the cost of 3D printing and lead time.![]()