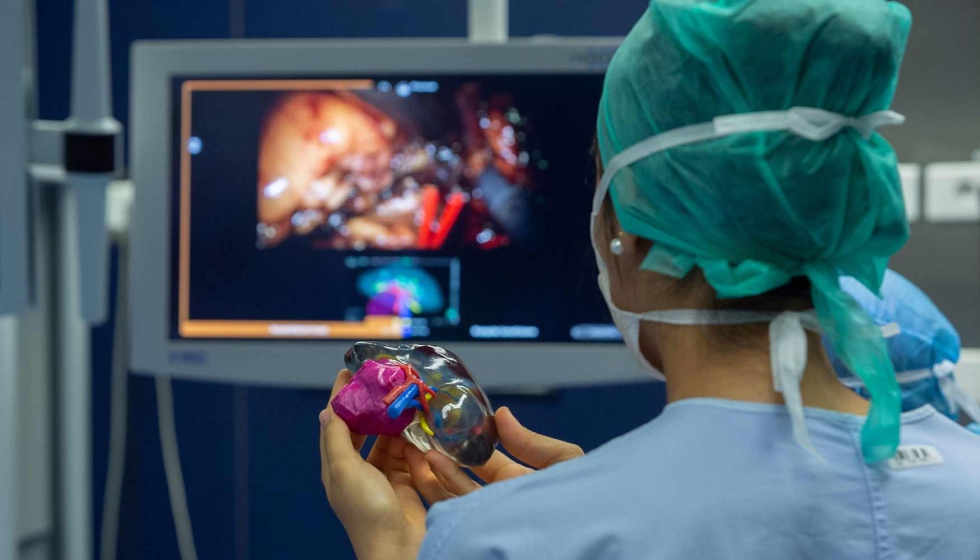
3D printers parts
3D Printing Concepts and 3D Printer Parts
3D Printer Parts
Extruders
Extruders are a crucial component in 3D printers. In simple terms, the extruder is the tool that holds the filament in place and controls the amount that is fed into a Hot-end. One key point is to highlight that hot-ends are not the same as an extruder, but rather they are attached to it and they are the main location that is tasked with the melting process.
Extruders come with a stepper motor that allows for the filament to be fed through. Additionally, some form of gearing and hobbed shaft to hold the filament in place, a fan in some cases, a heat sink for better temperature regulation and finally the hot end.
Extruders can come as a dual setup or a single extruder. Dual extruders give the option of printing with a support material that is used to hold up certain designs which may require it due to the complexity of the object. Additionally, a dual extruder system can be independent or dependent. This means that with a independent system, you have the additional option of being able to print with multiple materials within a single object and not just being able to print with support material which is only available with standard dual extrusion systems. There are two types of extruders that are used in the 3D printing industry. These are Direct Extruders and Bowden. The main difference between the two is that in Direct Extruders, the motor that drives the filament and the hot end are directly attached to the extruder body. Bowden on the other hand includes a separation tube between the extruder and hot end, where the extruder, including the motor and other components can be attached to the printer chassis.
Each type has its own drawbacks and benefits.
Direct Drive:
Advantage: Can print with a wider variety of materials because the hot end and extruder are close to each other.This leads to better control with the extrusion process.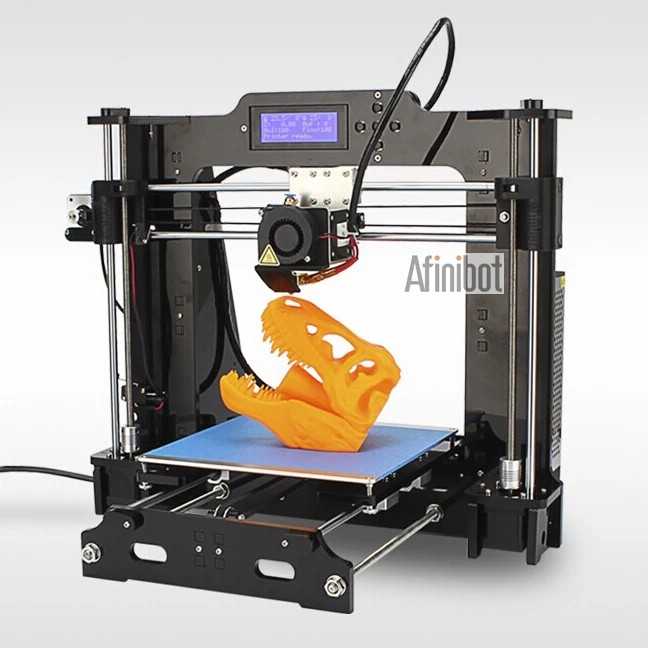
Disadvantage: Because both parts are attached, this leads to issues when printing at high speeds since the overall mass is higher.
Bowden A:
Advantage: Lower issues due to less mass needing to be moved.
Disadvantage: Problems with printing with certain filaments like flexible materials.
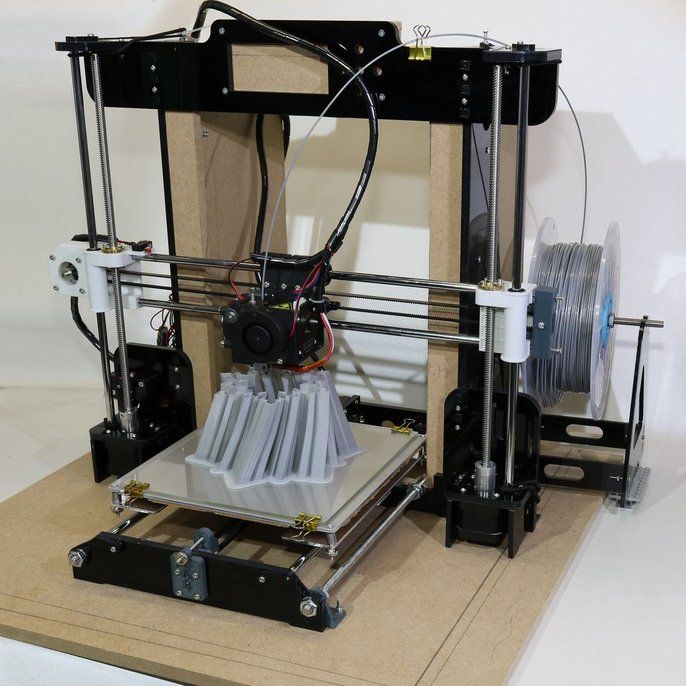
Print bed
A print bed is the part that the 3d printed object rests on during the printing process. As each layer is extruded, the print bed moves down to allow for the next layering step. Although being simple, a print bed is an important part of a 3D printer. Although a relatively easy process, 3d printing does require some careful calibration to ensure that you get a perfect print without deformities. Therefore, the most important step is to ensure that you print the first layer accurately.
The first layer is important because any mistakes in this layer will be magnified to the overall structure of the intended part.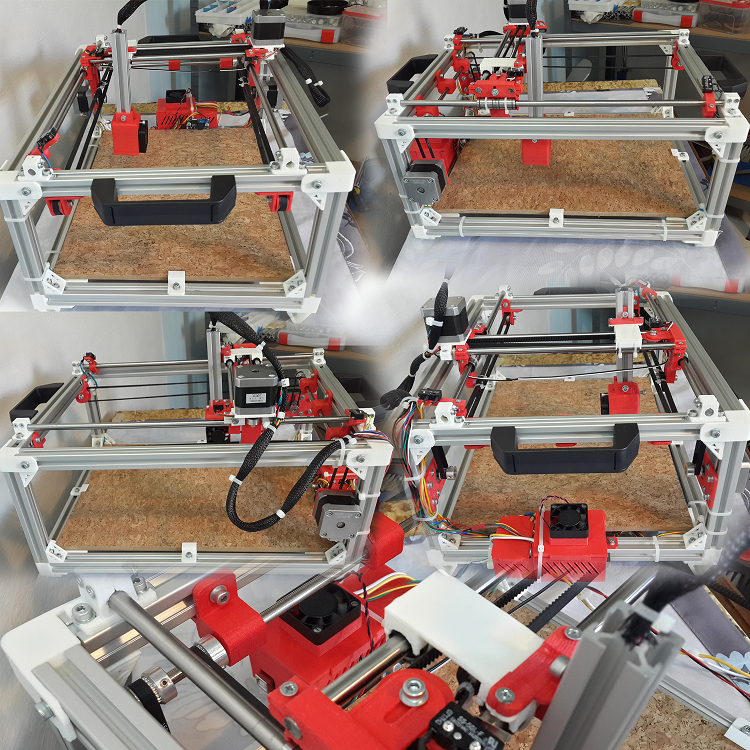 The first layer indicates if the print bed is levelled correctly, it indicates that you have the correct extrusion settings such as amount, temperature and more.
A print bed should provide sufficient adhesion to the molten material, ensuring the object adheres to the bed. This is key because the extruders are moving components and if the plastic doesn’t properly attach to the bed, the movement will create many issues to the first layer as it cools. Additionally, due to cooling, the plastic can deform which is known as warping, by peeling away from the bed floor.
Which type of print Bed?
Print beds can come in a number of materials but the two most common are aluminium and glass. These both offer a smooth surface for the object to rest on, however because of the surface, this can cause adhesion issues. To combat this, print beds can come heated or a user can apply a gluing agent to help with bed adhesion which is strong enough to hold the object, but also allow for easier removal once printed.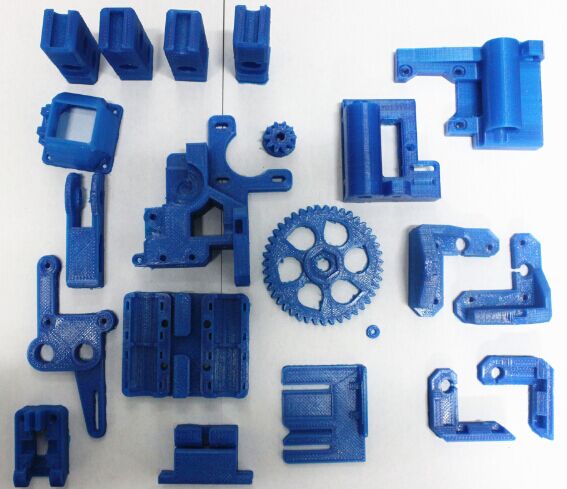
Gluing agents come in various forms, from a standard glue stick, hairspray and special sheets you attach on to the print bed. These options are all relatively cheap and it is recommended to always use some form of agent to reduce issues that can occur.
Heated print beds reduce the chance of the object warping since they provide heat to the first layer, ensuring no random pockets cool faster than others. Aluminium beds offer the most uniform heat distribution, but aluminium itself expands significantly as its temperature increases which can cause problems. Glass on the other hand doesn’t expand easily but it doesn’t offer the same temperature distribution meaning some areas are cooler than others. One way to circumvent these potential issues is to use a print bed with both materials, where the aluminium rests below the glass, providing uniform heat through out the glass plate, which doesn’t expand as much as the aluminium.
Hot Ends
A hot end is where the filament is melted then extruded through a nozzle. Hot ends come in many forms but the standard ones consist of a feed tube, a heatsink, thermal barrier tube with a heat-break, heat-block and the nozzle in that order.
The feed tube guides the filament from the extruder, down through the heatsink and thermal barrier tube. The purpose of the heat sink and thermal barrier tube is twofold. The top most part of the thermal barrier tube is located within the heatsink and feeds the filament through. The bottom section of the thermal barrier tube is connected to the heat block where the filament is melted. Just before it however, the thermal tube is thinner and this area is called the heat-break. This is all done to ensure that before the filament reaches the heat block, that the temperature is lower, prevent melting of the filament before it reaches the heat block by a process called heat creep. The heat-break creates a sudden change in temperature so as to better have control of the melting process.
Enclosure
An enclosure is having a sealed off printing environment for the 3D printing process. The reasoning for this is for safety but also to create better temperature management to ensure better printing results. Due to the nature of utilising high-temperature processes, issues with overheating plastics can create fumes on select printing materials, such as ABS. An enclosure ensures you have less particles in the air, but additionally, a printer can include a HEPA filter that can reduce these dangerous particles and allow the printer to be used safely in for example in an office environment.
Furthermore, an enclosure ensures that the internal ambient temperature of the printer is stable which plays a major roll in reducing printing issues such as warping and cracking.
Filament
A filament in the context of Filament Fused Fabrication (Fused Deposition Modelling) is a coil of thermoplastic or a composite that comes in various diameters. The filament is fed through the printer and then into the extruders where it is melted then extruded. Unlike other 3D printing techniques, the filament is solid and cost-effective for many organisations. Additionally, it is the safest printing 3d printing technique which is a major factor in its popularity.
Materials that are available are various plastics, like PLA, PETG and composites where plastic is mixed in with other materials like wood to allow for a variety of possible 3D printing parts. FFF has the largest selection of materials and each year, more materials are added to the roster. This gives FDM a greater edge than other 3D printing techniques in terms of versatility. However large the selection of materials, currently there isn’t a major metal filament available and the ones that are available require extra steps like sintering to finish a metal 3d printed part.
3D Printing Process
Layer height
Layer height is the thickness of each 3D printed layer of an object. This can also be called the Z Resolution which is referring to the process of creating each layer as the print bed moves down to allows for another layer.
A smaller layer height yields better quality objects with stronger strength properties. This is due to better interlayer adhesion, reducing gaps and creating a smoother overall finish for the object. This is most apparent when printing curves, where you can see the stepping of the edges.
Smaller layer heights however require more printing time, therefore the selection showed have careful thought before the printing process begins.
Print Speed
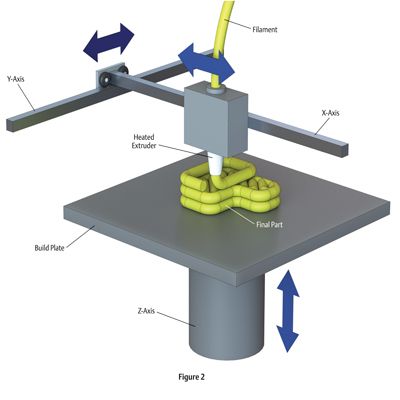
Print speed refers the traveling speed of the extruders as they travel during the printing process. It is express in mm/s and also determines the print quality of an object. A balance must be met in terms of print speed when making adjustment before the printing process because it does affect other settings. For example, faster speed will require more temperature awareness since increasing the speed will usually reduce the quality of the print. As a side note, we must not confuse print speed with travel speed, which is the speed at which the extruders when not directing printing.
Software Terms
Slicer
Slicing software is a category of 3D printing software that is used to convert a basic 3D computer object into something that the printer can understand and print accurately. There are various options of slicing software but they all work with the same output. They can take a 3D object, convert the surface into miniature triangles, that come together to make the object. The amount of these triangles also determines the accuracy and detail in the 3D object that can be printed. Within the application, you can get detail controls about the printer, how to print the object, orientation, material settings and all settings possible for the 3D printer.
After setting the desired parameters, the slicer software can then slice the 3D object into the desired layer height and visualized the printing process. When this is completed, the object file is then converted into G-code, which a data type used in many manufacturing processes that stores information about how to print or in the case of CNC machine, how to mill an object. This G-code is what drives the extruders in the 3D printer to accurately create the object.
Infill
Slicing software gives you the option to print a fully solid object, or a hollow one and everything in-between. This is accomplished through setting the infill amount. This is usually how the internal structure of an object is to be printed and the settings range from 5% infill to 100%. Furthermore, you get four main infill pattern types which are honeycomb, wiggle, rectangle and triangular.
Honeycomb offers the greatest strength with minimum material, triangle offers better lateral load strength, which gives the outer shell of the object better strength to handle horizontal forces applied to the object. Wiggle is mainly used for flexible materials and rectangular doesn’t have any specific advantages.
Skirts and Brims
Brims, skirts and rafts are parts that at are used to create better bed adhesion for the 3D printed object before the printing process and to check that everything is set-up correctly.
A skirt is an outline of the print area of the object, but doesn’t directly touch the object. It is used as a primer, to check whether there is excess material in the nozzles, that they are calibrated correctly and to ensure consistent material flow.
A brim is directly attached to the object, but goes a little further out and involves more outlines than the skirt. Its main purpose is to hold the object and to ensure the first layer is printed correctly.
Common Troubleshooting Terms
Warping
Warping can be described as the shrinkage of a 3D printed object at the corners of the base, mainly attributed to temperature changes. Warping is due to the process of non-uniform cooling where certain printing layers cool faster than the heated parts. When this occurs, the cooler layers end up distorting the objects geometry since cooling causes shrinkage and this action affects the immediate molten layers. As the areas cool and harden, they pull on other layers as cooling increases. The main reason for warping is heated thermoplastics need uniformed cooling after being extruded to allow an object to accurately settle while maintaining the desired geometry. If the printing bed is not heated or the ambient temperature of the print chamber is not modulated then this leads to different cooling rates. To prevent warping issues, ensure that the FFF 3d printer has a heated bed with a metal plate. This distributes the heat throughout the bed and means a more uniformed temperature distribution. This will minimize the effects of warping in the first layers of the object.
Cracking
Cracking is caused by the same issue as warping, being the non-uniform cooling of a printed object. The difference of cracking from warping is cracking occurs at different locations in the printed object. To offset the possibility of cracking, a printer with an enclosure allows to eliminate the ambient temperature fluctuations that may occur that could lead to cracking of a 3D printed object.
Experience the high 3d printing quality of the Bolt Pro. Request a print sample for FREE now!
Do you want to know how 3D printing can HELP you and your business? Talk to our experts about a FREE, PERSONALIZED solution suitable for your situation!
Request a Print Sample
3D Printer Spare Parts and Upgrades
Shop by category.
Build Surfaces
Nozzles
Hot-Ends
Extruders
Fans
Heatbreaks
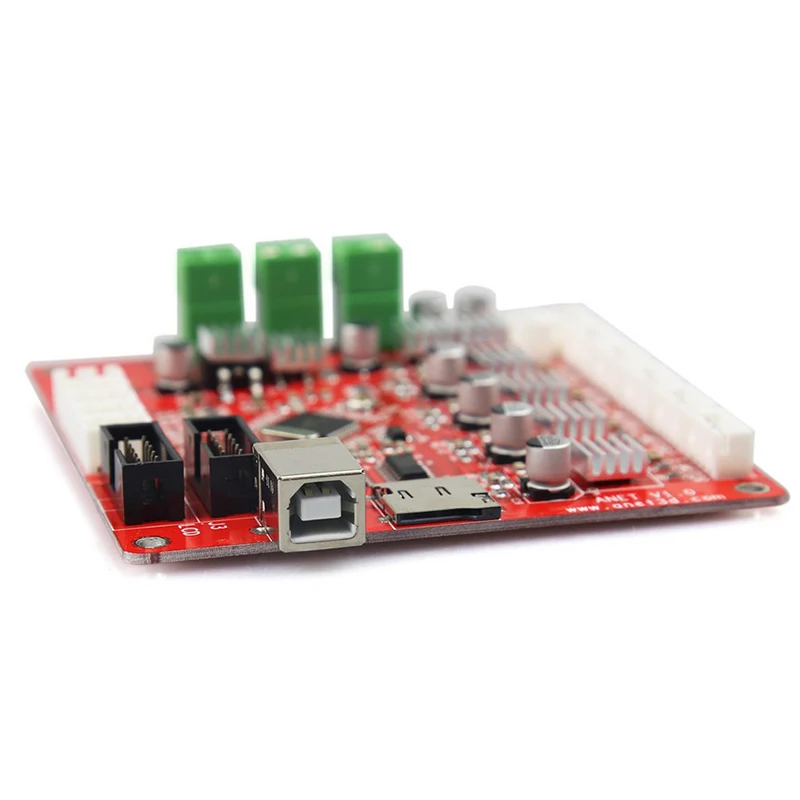
Mainboards
Heating Cartridges
Thermistors
PTFE Tubes
FEP Film
Stepper Motors
3D Printer Enclosures
Displays
Bearings
Others
Suitable for Specific Brands
Spare Parts & Upgrades: 884 products
Sort byRelevanceBestsellersCustomer ReviewsPrice, Low to HighPrice, High to LowNew arrivalsHighest Discount
-
BROZZL MK8 Brass Nozzle 5 diameters- Smooth finish
- Non-stick
- High precision
-
BROZZL MK8 Nozzle - Hardened Steel 4 diameters- Smooth finish
- Non-stick
- High precision
-
E3D Prusa Thermistor- Spare thermistor
- Especially for Prusa
-
Slice engineering Copperhead Heat Break 6 Model types- Made of stainless steel
- With copper alloy
- Up to 450 ° C
-
Phaetus Dragonfly Hotend BMS- Temperature resistance up to 500 ° C
- All-metal design
- Good heat dissipation
-
BondTech CHT MK8 Coated Nozzle 4 diameters- Nickel plated
- Higher melting capacity
- High hotend compatibility
-
BuildTak PEI film 32 sizes- First-class production
- Easy to apply
- Ideal with the FlexPlate system
-
BROZZL MK10 Nozzle - Hardened Steel 4 diameters- Smooth finish
- Non-stick
- High precision
-
E3D V6 Brass Nozzle - 1.75 mm 7 diameters- Smooth finish
- High performance
- Fine details
-
Verbatim MicroSD Including Adapter (Class 10)- Min. 10 MB / s data transfer speed
- Suitable for many devices
- Latest copyright management technologies
-
Micro-Swiss Direct Drive Extruder for Creality CR-10 & Ender 3 2 Model types- Dual drive gear
- Easy filament loading
- For flexible filaments
-
Antclabs BLTouch Levelling Sensor- High precision
- Works with all surfaces
- Easy installation
-
E3D V6 Nozzle X - 1.75 mm 7 diameters- Extremely hard
- Unique nano-coating
- Easy cleaning
-
BondTech Extruder BMG right- Dual-Drive
- Adjustable tension
- Versatile use
-
BuildTak FlexPlate System 26 sizes- Easy to use
- Variety of Different Sizes
- Complete System
-
BROZZL MK8 Nozzle - Copper Plated 4 diameters- Smooth finish
- Non-stick
- High precision
-
Capricorn XS Ultra Low Friction PTFE Bowden 4 Model types- Extremely low friction
- Ideal for flexible and brittle materials
- Different sizes available
-
Noctua NF-A4x10 Fan 2 Model types- Ultra-quiet
- Premium quality
- Excellent long-term stability
-
E3D Thermistor- Easy connection
- Cartridge style
- With extension cord
-
BondTech CHT Coated Nozzle M6 x 1.75 mm 7 diameters- Nickel plated
- Higher melting capacity
- High hotend compatibility
-
BondTech NEMA17 Pancake Stepper 25mm- Removable cable
- High torque
- Original Bond Tech
-
Creality PEI Flexible Build Plate 18 Model types- Powder-coated surface
- Good adhesion
- Flame retardant
-
BondTech Heatbreak Prusa Mini- No heat creep
- No blockages
- Made of stainless steel
-
Micro-Swiss All Metal Hotend Kit for CR-10- All metal
- Better heat dissipation
- No adjustments required
All prices incl. VAT.
VAT.
Industrial 3D printer CreatBot D600 for large parts. FDM 3D printing of car parts. Business Ideas 2020
Contents:
- 1. The choice of material and characteristics of the stand.
- 2. Selecting a 3D model for printing and setting up a slicer.
- 3. Filling the plastic and preparing the printer.
- 4. Calculation and sending for 3D printing of a BMW rim.
- 5. Printing process.
- 6. Part removal and post-processing.
- 7. Total.
Hello everyone, Friends! 3DTool is with you!
Quite often we are asked the question, is it possible to print a bumper for a car on a 3D printer? And this is not a common meme among 3D printers, or some kind of boring joke, for example, representatives of a tuning studio really ask such questions first of all when they are interested in additive technologies. Well, we decided to print something really impressive in one run and evaluate how suitable FDM 3D printers are for such tasks? 9 was chosen as a stand for the experiment. 0023 3D printer Creatbot D600 PRO is one of the most powerful and generally affordable printers. Let's see step by step what's what.
1. Selection of material and characteristics of the stand.
Let's pick the material first. It is not difficult to guess that this stage is characterized by the capabilities of the existing device. As a rule, large products are always printed from polymers with low shrinkage and not subject to delamination, such materials as PLA and its derivatives. However, this approach is only a tribute to the limitations of the first kinds of available models FDM 3D printers, for the most part, did not have closed chambers and even heated tables.
When it comes to professional devices, or even industrial ones, which is our bench Creatbot D600 PRO , such questions fade into the background.
A little about the printer.
You can find a detailed review of Creatbot D600 PRO on our website in the articles section on THIS link.![]() We will confine ourselves to quoting its characteristics.
We will confine ourselves to quoting its characteristics.
As you can see, Creatbot supports almost all materials available on the market, with the exception of very rare ones. So in the material we are not limited, but what if something goes wrong? It is better to choose the most affordable filament so that the cost of a mistake is not so painful. This means that we reject various composites and engineering thermoplastics.
Since the print is really voluminous, it is quite possible that we will need post-processing as well. So, based on the foregoing, our requirements are best suited to the beloved by domestic printers ABS .
Although this material is quite difficult for beginners, thanks to the chamber heating system, a powerful heating table and a productive all-metal extruder, printing this material on the CreatBot D600 PRO 3D printer should not cause any difficulties. In addition, we will use the well-proven adhesive from the company Picaso3D -
However, you can use the option that suits you best. For example, bundled with device PVA glue stick.
Well, we figured out the material, chose the adhesive, we have at our disposal 0.2 cubic meters of working chamber volume, two extruders and a choice of different nozzle diameters. What to print?
2. Selecting a 3D model for printing and setting up a slicer.
Let's start with the subject itself. Best of all, the dimensions of the print and clarity will be demonstrated by an ordinary rim of a car. And although it will be an impossible task to install it on the car due to the chosen material, it will be much easier to compare the dimensions with a real object.
Open Thingiverse and select a disk, for example from BMW.
Before us is a complete copy of the object with realistic proportions and thicknesses. Now it's time to load the program and scale the model according to the real prototype.
We will work in the slicer Ultimaker Cura 4.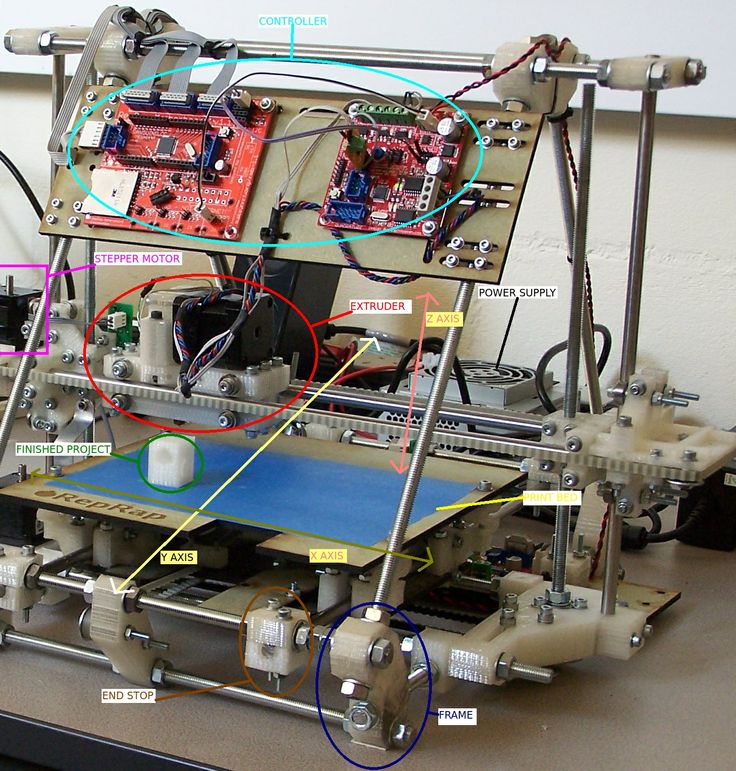 4 . Initially, CreatBot 3D printers are designed to work in their native software CreatWare , but we are often asked to show the configuration of alternative slicers for working with such devices and we decided to demonstrate it.
First, let's open the bundled CreatWare .
In the menu Machine -> Add New Machine select the source printer.
Now let's open its settings and fix them in memory, or write them in a notepad.
After that, open Cura 4.4
Initially, our device is not in this program and first we need to add it. We go at Settings -> add printer -> add a non net-worked printer
And in the drop-down menu, select the scroll Custom .
In order not to get confused, enter the real name of the device in the field Printer Name and click add .
After that, a new device will be added and we can proceed to its configuration.
By pressing Machine Settings we will open the printer settings menu and now it's up to the small. Transfer settings step by step from the parameters we saved to Create Ware , as well as enter a suitable starting G-code . In CreatWare, you can find it in the star/End-Gcode tab. It is fully syntactically compatible with Cura, since in fact both programs use a common engine.
After copying all the settings, you should get the following result:
Note that we have already set the diameter of the second nozzle to 0.6 mm because We are planning volume printing and productivity is critical for us.
The next step is to check whether we have configured everything correctly, and whether our printer is also calibrated.
We will not dwell on the settings of Cura 4.4 in detail, because this is a topic for a separate large article, just select advanced settings and specify the required minimum parameters for our printing.
Because we set the nozzle to 0.6 mm , layer thickness will be 0.3 mm , thread width 0.7 mm , infill approx. 20% and Overlap infill approx.
Cura 4.4 uses a profile system for the material, which means we will need to create a new profile for our plastic.
To do this, open Settings -> Extruder ½ -> Material -> Manage Materials
Select the base material and click Duplicate .
In the dubbed material, remember to change the name Display Name and temperature settings Print Settings
Now we can assign this material to our extruder.
Let's check whether everything turned out right and send a test file for printing.
Open the model and press Slice , we selected the print settings in advance. It is important to say that we will be testing printing with two extruders, but in the future we will need only one.
The resulting G-Code is saved to a USB flash drive and inserted into the printer.
3. Filling the plastic and preparing the printer.
Time to fill the plastic and calibrate the 3D printer .
First, install the plastic spool ABS from ESUN . The compartment for plastic in the CreatBot D600 PRO printer is located at the back in a special niche, for each coil separately.
We stretch the thread along the guides and catch it at the output of the printing unit. It is problematic to do this operation alone, so we will resort to the help of colleagues. So, the thread is in place.
We thread it into the hole of the broaching mechanism and select the menu Load Material 9 on the display0116 .
Don't forget to change the plastic temperature in menu Status as The default temperature may not be sufficient.
Excellent! We got through almost everything.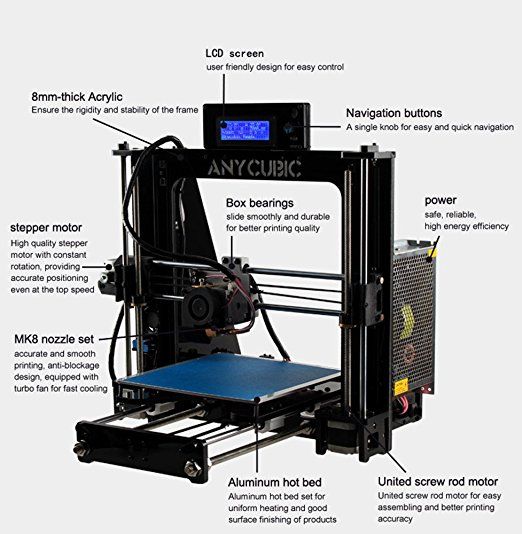
Let's calibrate the table and start printing.
Creatbot D600 PRO is equipped with a special sensor that allows you to adjust the level of the desktop in auto mode - BL Touch .
So our task is greatly simplified. Simply run Auto Leveling from the display menu and verify that the calibration is correct.
To do this, we print our test task and check the result.
Everything seems to work out, let's move on to the final part of the story.
4. Calculation and sending for 3D printing of the BMW rim.
We are almost ready to start our grand seal. It remains to do a couple of last steps.
First, let's determine the size of our disk. Let its diameter be 17 inches.
By simple calculations, we get the result:
Which is equal to ~ 431 millimeters. Let's scale our model in the program.
As you can see, the model fits perfectly in the workspace, but let's still compress it in height to get a more or less sane print time, because. we are limited in terms of the execution time of the experiment. Seems like 120 mm will be enough with prosperity.
We leave the print settings that we set at the beginning, however, we additionally include support:
We decided not to use the second support material, because the result was unpredictable and I did not want to spend the rather expensive Hips . In addition, it is a pleasure to remove support from a product of this size and we use only 1 extruder.
Press Slice we get a pretty good result:
After checking on Preview whether everything was cut as it should, we will send G-code to the printer.
5. Printing process.
So, after the printer has warmed up, it will automatically check the level of the table again and start printing. The most important thing now is to check the correctness and evenness of the printing of the first layer and periodically monitor the process in the future.
Never leave long-duration devices completely unattended. Though D600 PRO and has the necessary assistance and control systems, such as shutdown protection with the ability to start from the same place when printing was interrupted, you cannot leave the printer completely alone.
It is best to check the process every 5 - 10 hours , or install a webcam.
So. Let's follow our progress.
A little more and the disc will be ready ..
6. Part removal and post-processing.
After our part is ready, we remove it from the platform.
A fairly large layer of 300 microns is not very good quality, so we will use the acetone surface smoothing technique. To do this, we need a spatula and wire cutters to remove the supports, a brush and a bottle of acetone.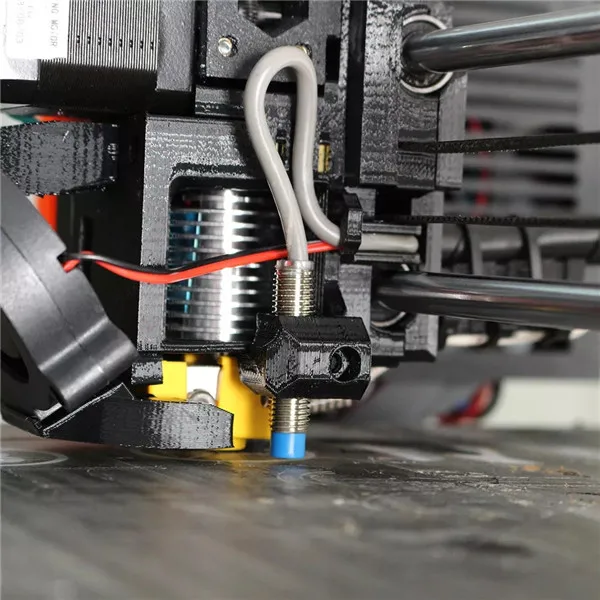
Pour acetone into a convenient container, dip the brush and gently smear the surface of the disc. The process should look something like this:
Also, you can combine this technique with sanding and further painting to achieve the perfect result.
You can read more about post-processing in THIS article of ours.
Well, as a result of our efforts, we got such a natural rim.
And here it is, but in comparison with the real one.
Let's summarize the process of our experiment.
7. Total.
For ourselves, we wanted to answer the main question - is it possible to print large objects made of complex plastics 3 D in almost the entire print area of the FDM 3 D printer?
Experience has shown that it is possible.
Is it possible to print bumper on 3 D printer?
- It is possible, but it will have to be done in parts, albeit large ones, and in any case, post-processing will be required. And also the material will have to be additionally reinforced, because. At this scale, ABS is still quite fragile.
Is 3 D printer Creatbot D600 PRO suitable for auto-tuning or printing parts?
- This is highly dependent on the specific task, however, everything indicates that the capabilities of this device are enough to solve many problems associated with 3D printing with refractory plastics in large sizes.
Well, personally, the result seems successful to us. What do you think?
Write your opinions below in the comments.
And that's all we have! See you soon!
You can purchase the Creatbot D600 PRO 3D printer from our company. We are the official distributor of the manufacturer's plant for the sale and service of CreatBot3D equipment in the Russian Federation.
Our contacts:
• By email: Sales@3dtool.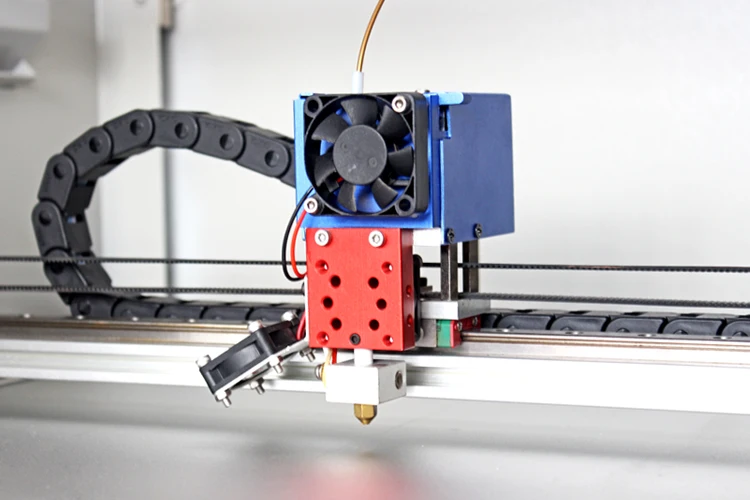 ru
ru
• By phone: 8(800)775-86-69
• Or on our website: http://3dtool.ru
Also, don't forget to subscribe to our YouTube channel:
Subscribe to our groups in social networks:
In contact with
3D printer parts, spare parts, electronics and mechanics
Parts for 3D printers, spare parts, electronics and mechanics3D printer parts, spare parts, electronics and mechanics
Phrozen wanhao picaso
Filter
Sort by:
default price by name
default price title
Show per:
33 66 99
Creality 4. 2.7 Motherboard for Ender 3, Ender 3 Pro, Ender 3 v2
5 500 ₽
Available
Original Creality Ender 3 and Ender 3 Pro Printer Control Motherboard (32bit). Stepper motors are silent.
Universal chip for Formlabs Form 2 and Form 3 cartridge
11 950 ₽
Available
Universal chip for Formlabs. With the universal chip, you can use any Formlabs-compatible resin ...
Optical glass for Formlabs Form 2 bathtub
4 550 ₽
Available
Cut-to-size optical glass with high scratch resistance. The use of this optical glass enhances ...
Universal Refillable Cartridge for Formlabs Form 2 and Form 3
19 450 ₽
Available
With the Universal Cartridge, you can use any third party Formlabs compatible photopolymer. ..
..
Extruder nozzle cleaning needle set
3 000 ₽
Set of 6 needles: from 0.15 to 0.4 mm. Not fragile, not broken. Also good to use for checking nozzle diameter.
Nozzles set 5 pcs.
Set of original nozzles for 3D printers Crality Ender 3, Ender 3 Pro, Ender 5. Outgoing diameter from 0.2 to 0.6. Incoming 1...
Lomond thermal film (10 sheets)
1 000 ₽
Good for printing large and small parts in ABS and PLA, also try it for other materials...
Fixpad
Good for printing large and small parts in ABS and PLA, also try it for other materials...
FEP film for Phrozen printers, A4 size
1 200 ₽
This FEP film is suitable for Phrozen printers. The film is transparent, 125 microns thick. Sufficient strength ensures...
Tray for Phrozen Shuffle XL/XL 2019 printer
21 000 ₽
Original container (bath) for 3D printer Phrozen Shuffle XL, 3D printer Phrozen Shuffle XL 2019 with very strong and rigid ...
Tray for Phrozen Shuffle 2019/Shuffle 4K/Sonic/Sonic Mini
printer10 750 ₽
Original tub for Phrozen Shuffle 2019/Shuffle 4K/Sonic/Sonic with very strong and rigid aluminum construction...
Tray Lid for Phrozen Shuffle 2019/Shuffle 4K/Sonic/Sonic Mini
3 400 ₽
Bath Lid is used for sealing photopolymer resin tanks. Resin tank cap allows...
5" IPS touchscreen display for Phrozen
printers7 260 ₽
LCD module for Phrozen Shuffle 4K 5. 5" (4K) printers.
QIDI X-Maker magnetic plate sticker
1 990 ₽
QIDI X-Maker magnetic plate sticker. You can remove the sticker and bend it, which is much more convenient when removing the model...
nFEP film for photopolymer printers, A4 size
4 600 ₽
Durable nFEP films for multiple printing, suitable for all photoresin printers. They are more durable than FEP...
Items: 15
Free education
Delivery across Russia
Customer Service
Warranty for all models
Any form of payment
Request a call back
Telephone
By clicking on the button, you agree to the privacy policy of
Item added to cart
Go to cart
Product added to comparison
Compare products
Cannot compare more than 4 products
Request CP
Organization name:
Your e-mail
Your phone number is
Name of contact person:
Legal address:
Comment:
By clicking on the button, you agree to the privacy policy of
Goods on the way, find out when delivery
Your name:
Your e-mail
Your phone number is
By clicking on the button, you agree to the privacy policy of
Frequently asked questions
How to call
By phone +7(495)155-45-19.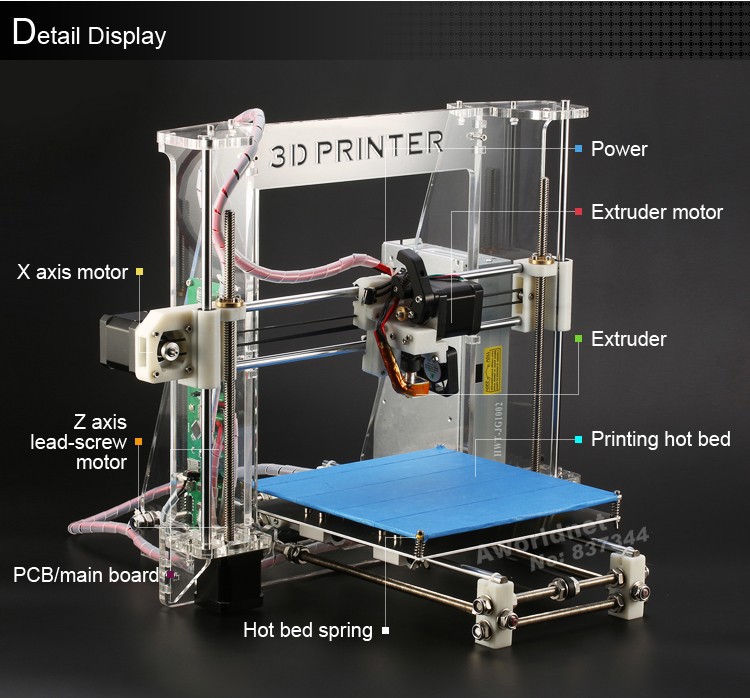 Your call will be answered by an answering machine. We won't call back if you don't speak up. Each request is processed, we contact clients in accordance with requests. Prepare the information you want to report, send it to the answering machine and we will call you back. We kindly request: do not be silent and do not hang up, this is just an answering machine. 🙂 Other most effective ways to get in touch:
- Write to Telegam @techno3dru
- Whatsapp +74951554519
- Write Email [email protected]
Is the product in stock
On the product page, under the product name, there are 3 statuses:
- In Stock - We have this item in stock. Make a purchase with the Buy button.
- Pre-order - goods on the way, delivery soon. Find out about delivery times by clicking on 'Delivery times' or make a purchase using the Buy button.
Learn more