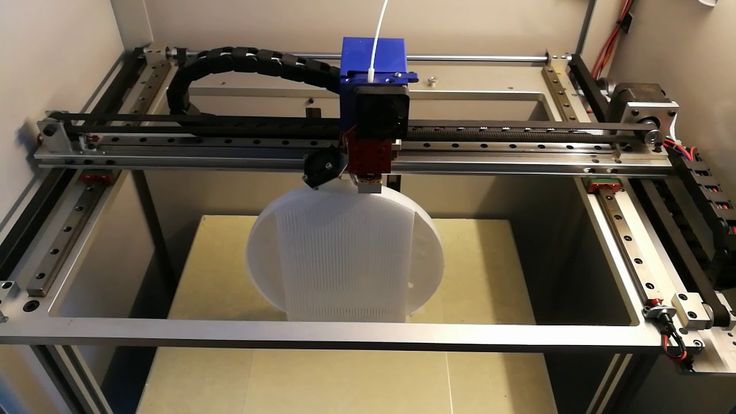
Building 3d printers
Ultimate guide to construction 3D printers in 2022 (concrete 3D printing)
What are the best house 3D printers?
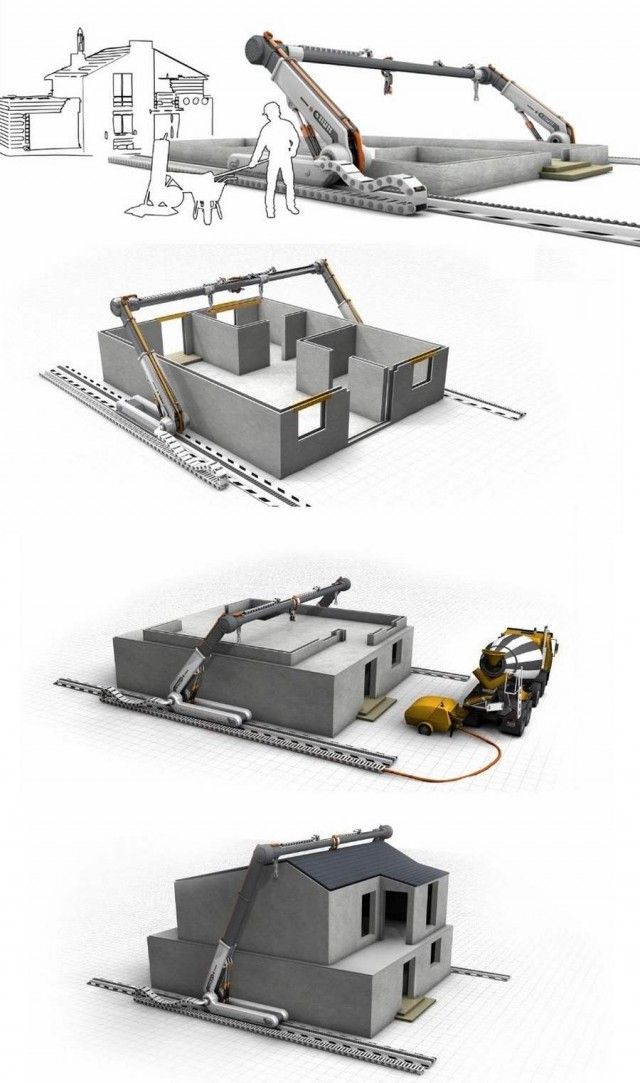
A construction 3D printer is a machine that can build houses by depositing a material (concrete for example) layer by layer. Concrete 3D printing – a.k.a. “Construction 4.0” – is a similar 3D printing technology to the one that FFF 3D printers use. Paste-type material, in this case, concrete or earth materials, is pushed through a nozzle in layers to print buildings in 3D.
Concrete 3D printing in the construction industry helps save time, effort, and material compared to traditional construction methods. It’s important to note, though, that 3D printers are not yet capable of creating a fully functional house.
Only the frame and walls of the house are built; other elements, such as windows, electricity, or plumbing, need to be installed separately. But concrete 3D printers can also be used to print bridges, benches, or simply outdoor decorations.
To provide a complete overview of the construction 3D printer market, we have listed 12 house 3D printing solutions. Some of them are 3D printers available for sale, while some are still at the start-up prototype stage or are external construction 3D printing services.
13 house construction 3D printers
| House 3D printer | Category* | Type** | Build size (m) | Country |
|---|---|---|---|---|
| BetAbram P1 | Available | Gantry system | 16 x 8.2 x 2.5 | Slovenia |
| COBOD BOD2 | Available | Gantry system | 14.62 x 50.52 x 8.14 | Denmark |
| MAXI PRINTER | Available | Robotic arm | 12.25 x 12.25 x 7 | France |
| CyBe Construction CyBe RC 3Dp | Available | Robotic arm | 2.75 x 2.75 x 2.75 | Netherlands |
| ICON Vulcan II | Available | Gantry system | 2.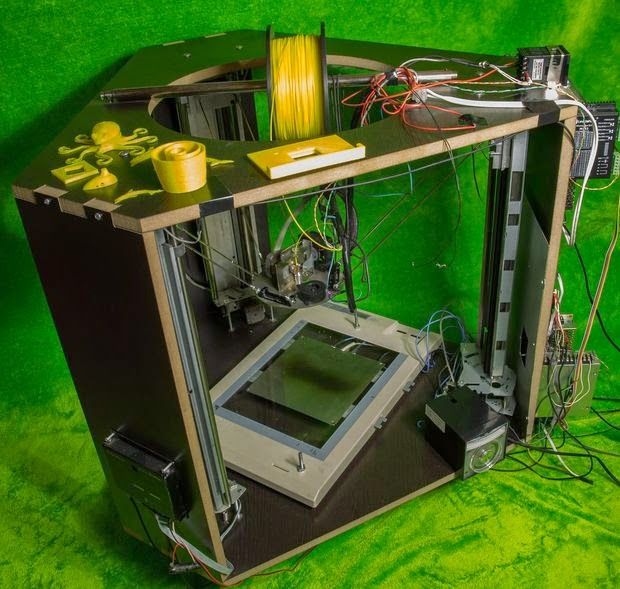 6 x 8.5 x ∞ 6 x 8.5 x ∞ | United States |
| MudBots 3D Concrete Printer | Available | Gantry system | 1.83 x 1.83 x 1.22 | United States |
| Total Kustom StroyBot 6.2 | Available | Gantry system | 10 x 15 x 6 | United States |
| WASP Crane WASP | Available | Delta system | Ø 6.3 x 3 | Italy |
| Apis Cor | Project | Robotic arm | 8.5 x 1.6 x 1.5 | Russia |
| Batiprint3D 3D printer | Project | Robotic arm | Up to 7m high | France |
| SQ4D – ARCS | Service | Gantry system | 9.1 x 4.4 x ∞ | United States |
| Contour Crafting | Service | Gantry system | – | United States |
| XtreeE | Service | Robotic arm | – | France |
Build volumes are indicative and may vary based on the specific configuration of the machine.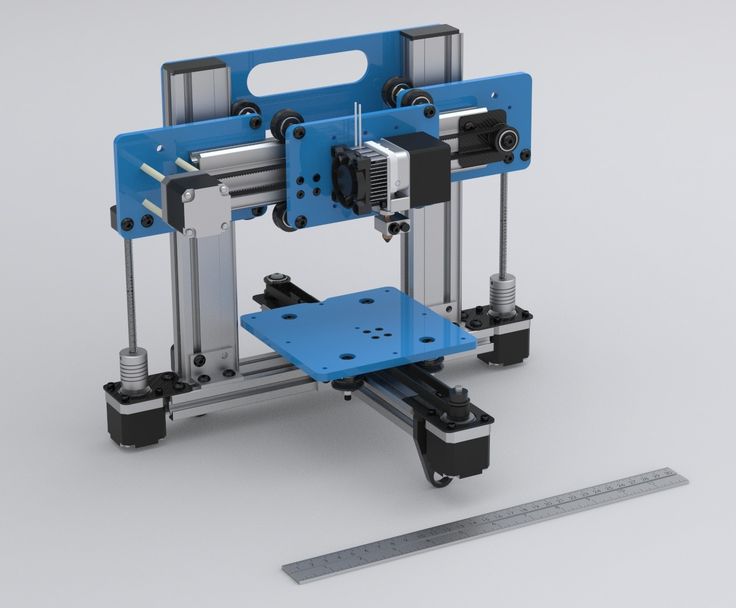
*Category: some 3D printers are available for sale, others are working projects, and some are only available via a rental service.
**Type: construction 3D printers either use a gantry system (like oversized desktop 3D printers with X, Y, and Z axes) or a mechanical, robotic arm.
How to build 3D printed houses?
Here we explain how 3D printers are able to print houses with paste extrusion.
House 3D printing technology
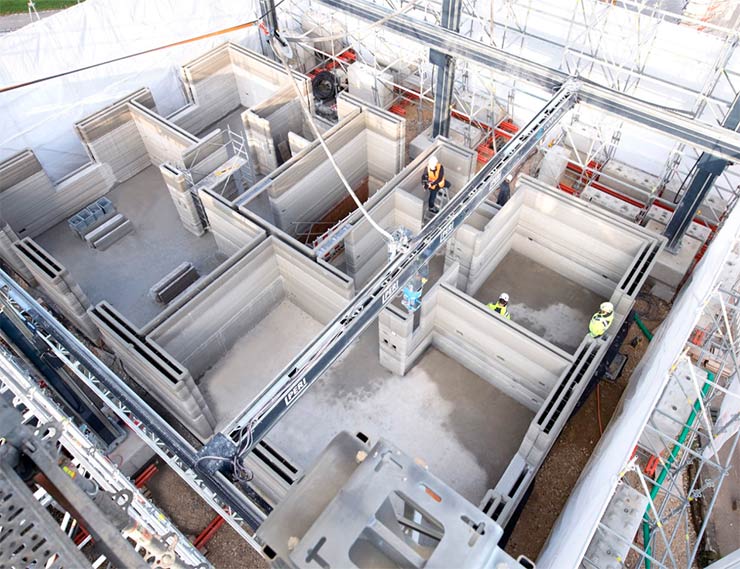
House 3D printers use extrusion technology. Some construction 3D printers look like super-sized desktop FFF/FDM 3D printers (gantry style), whereas others consist of a rotating mechanical arm.
In both cases, paste-type components such as concrete are used as filament. The material is pushed out of a special nozzle to form layers. To put it (very) simply, paste extrusion is similar to using a piping bag to spread frosting on a cake.
The printer creates the foundations and walls of the house or building, layer by layer. The ground is literally the printer’s build plate. Some concrete 3D printers, however, are used to 3D print brick molds. When molded, the bricks are then piled atop each other manually (or with a robotic arm).
WASP’s construction printer 3D printing with Earth materials (clay, soil). Source: WASPBenefits of house 3D printing
Eco-friendly
3D printed houses can be built with organic, eco-friendly materials. Moreover, some house 3D printers use solar energy and generate low CO2 emissions.
Affordable
House 3D printers can build affordable housing, being of great aid for people in poverty-stricken regions or after natural disasters.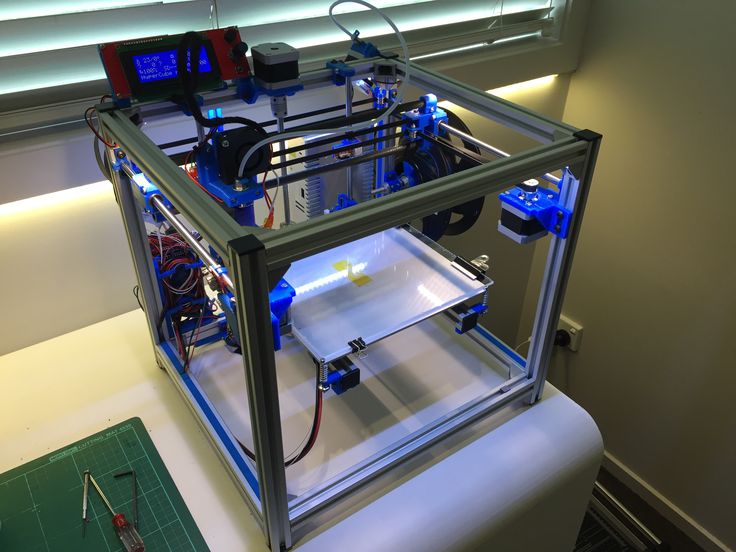
Scalable
Construction 3D printing reduces certain building costs. For example, the cost for 1 square meter of a wall using traditional construction methods is approximately $75, whereas with the Apis Cor house 3D printer it is only $27.
Efficient
Since the materials are 3D printed on-demand, the machines produce less waste. Also, construction 3D printers can finish a home’s foundations in less than a few days, while traditional construction methods take several weeks or even months.
Design flexibility
With a 3D construction printer, it’s possible to easily create curved walls and unique facades. (Good thing it’s possible to 3D print furniture to match the curves!)
Limits of 3D printing houses
Expensive initial investment
House 3D printers can sometimes cost up to one million dollars.
Partially-built houses
House 3D printers only build house frames. The 3D printing process is usually paused to manually settle plumbing, wiring, and rebars.
Rough exterior
Most 3D printed homes’ exteriors are not as smooth as traditionally-built houses.
Lack of certification
Construction sites are regulated by laws and there are important safety standards that need to be met, which can be challenging with 3D printing techniques (varying repeatability, dimensional stability, etc.).
Another downside that has been noted over the years is that house 3D printing can potentially harm local economies, especially in poverty-stricken regions or cities with high unemployment rates. Indeed, since construction 3D printers reduce the need for manual labor, they create much less employment for local workers.
Differences between 3D printed houses and traditional houses
Concrete 3D printing saves time, uses less material, and requires less manual labor. Even 3D printed houses have a rougher exterior, post-processing is an option just as it is for regular 3D printed objects. 3D printed houses tend to be smaller due to 3D printer build volume limits, but this is not always the case.
Construction 3D printers: overview
We break down construction 3D printers into three categories: house 3D printers that are available for sale, concrete printer prototypes, and 3D concrete printing services.
House 3D printers available for sale
BetAbram is a small Slovenian team that has been working on construction 3D printing hardware since 2012. Their flagship home 3D printer, the BetAbram P1, is currently in its second version and is available with optional print heads: basic, “Orto” for smoother layers, and rotating for more design possibilities.
Contact manufacturer Get a quote Add to comparison
This construction 3D printer is fast, reaching announced speeds of up to 60 meters per minute.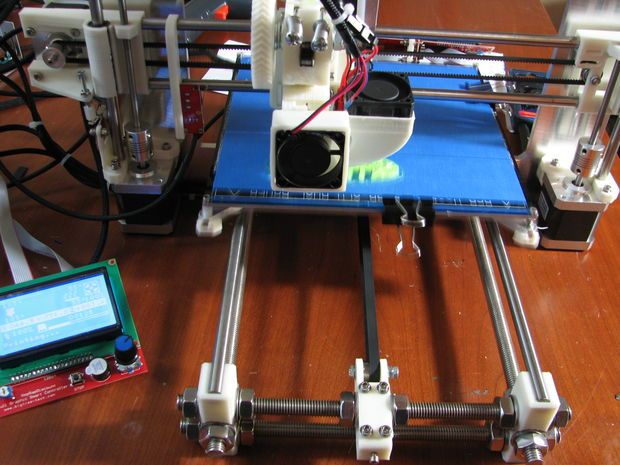 The BOD2 is modular and can be adapted is many different sizes. COBOD is a 3D Printhuset company.
Contact manufacturer Get a quote Add to comparison
Constructions-3D is a subsidiary of French 3D printer retailer Machines-3D.
Their MAXI PRINTER machine is mobile thanks to its caterpillar-style rubber tracks and fits into a 20-foot shipping container for easy transport from one construction site to another.
Contact manufacturer Get a quote Add to comparison
The CyBe RC 3Dp consists of a single robotic arm with a nozzle at its end.
This easy-to-move house 3D printer is capable of reaching up to 2.75 meters high and requires only two people to operate it.
Contact manufacturer Get a quote Add to comparison
ICON wishes to revolutionize the construction field with their Vulcan II printer. The whole process is designed to be user-friendly with a tablet-based interface, and ICON’s Lavacrete concrete mix is optimized to be easier to print.
Contact manufacturer Get a quote Add to comparison
MudBots is a concrete 3D printer manufacturer based in the United States.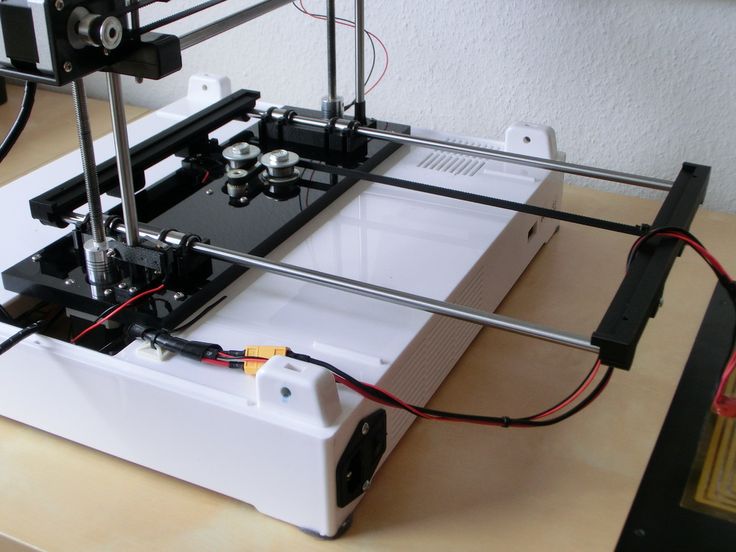 Their smallest model (1830 x 1830 x 1220 mm approx.) is available at the price of $35,000. Larger build sizes are available as well, reaching up to 30 meters long.
According to MudBots, their 3D printers can 3D print a small house in only 12 hours and can drive costs down 70% compared to traditional construction methods.
Contact manufacturer Get a quote Add to comparison
The StroyBot, also known as the Rudenko 3D construction printer (made by Andrey Rudenko), is an all-in-one mobile construction printing system delivered as a kit to be assembled by the user. On average, it is able to print a 100-square-meter house in 48 hours (walls only).
The Crane WASP is the evolution of WASP’s previous construction printer, the BigDeltaWASP 12MT. This open source construction printer is modular and multiple Crane printers can work together on one project, for theoretically infinite 3D printing possibilities.
Concrete printer working projects
Apis Cor, a 3D construction company, is based in San Francisco and claims to be able to 3D print a house in under 24 hours. Their Apis Cor printer is similar to a robotic arm and has won first place in NASA’s Phase 3 3D-Printed Habitat Competition.
Contact manufacturer Get a quote Add to comparison
Batiprint 3D made international headlines when completing their Yhnova 3D printed house in Nantes, France. Their 3D printer not only prints cement but also insulation foam, which makes it one of the most complete 3D construction solutions.
Construction printing services
This automated construction system is able to 3D print large buildings and tall infrastructures. Contour Crafting (a.k.a. CC Corp) aims to make disaster relief more efficient with their concrete additive manufacturing technology.
SQ4D – ARCS aims to provide quick, robust, eco-friendly, and affordable housing solutions for impoverished areas.
XtreeE develops specific 3D printing solutions for construction, engineering, and architectural design. This startup is based in France and has already completed a number of 3D construction projects.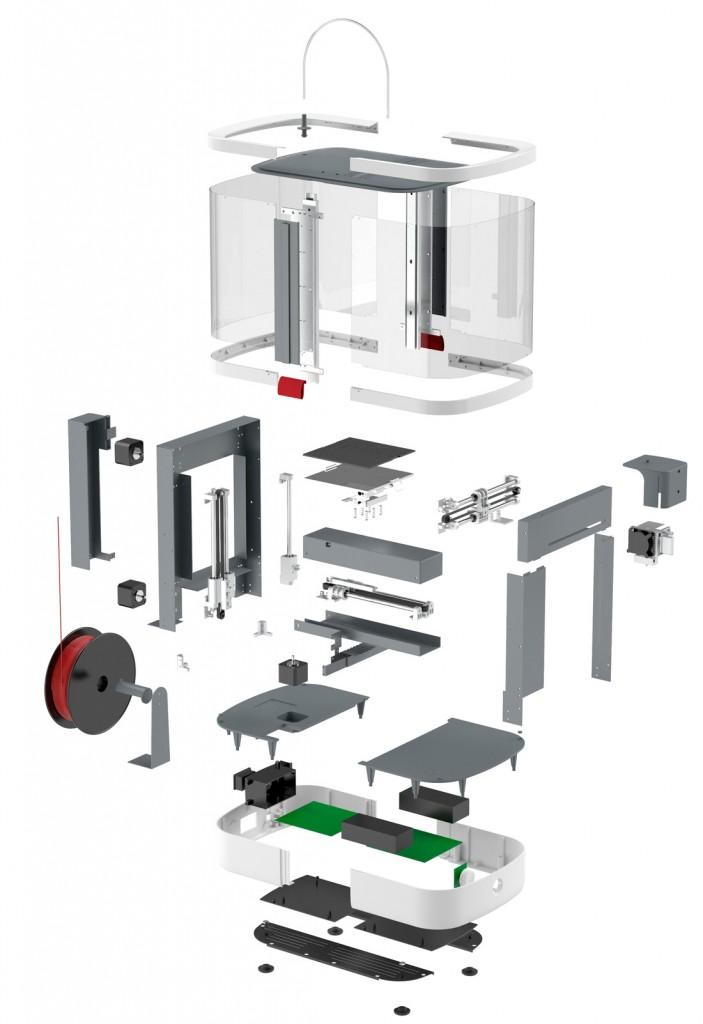
Special mentions: interesting 3D construction projects
DFAB HOUSE
This unique building was completed by a consortium of companies in early 2019 and is based in Switzerland. The 3-story DFAB building offers 200 square meters of space.
Branch Technology C-FAB and WATG’s Curve Appeal design
The WATG architectural design firm won the Branch Technology Freeform Home Design Challenge in 2016. In 2019, their project is set to be printed in Tennessee by Branch Technology’s C-FAB freeform construction 3D printing method.
DUS Architects XL 3D printer (KamerMaker)
The XL 3D printer was created by DUS Architects to build a prototype canal-house (simply dubbed “3D Print Canal House”) in Amsterdam using recycled materials.
Haus.me
This US-based company, previously known as PassivDom (dom.ai), 3D prints walls, floors, and roofs for their fully autonomous prefab houses.
Autodesk metal construction printer
Autodesk may or may not be working on a construction 3D printer that uses metal material. This 3D printer, which is more a pair of robotic arms than a printer, is able to make metal components for construction sites. We can’t wait to hear more about this!
CONCR3DE Armadillo stone 3D printer
CONCR3DE is a Dutch company that manufactures stone 3D printers. They are able to 3D print stone thanks to a special binder jetting process. Their two 3D printers, Armadillo Black and Armadillo White, aren’t able to print a house but can 3D print stone decorations or molds.
Discontinued projects and printers
Many startups have come and gone in the construction 3D printing industry.
D-Shape construction 3D printer
The D-Shape 3D printer is a multifunctional construction 3D printer that can 3D print very large objects, including houses and prototypes. D-Shape seems to be inactive since 2015.
Winsun house 3D printer
The Winsun 3D printer is a house 3D printer that was in the spotlight a few years ago. In 2015, however, Contour Crafting’s CEO accused Winsun of stealing their patented technology. Winsun’s website has since been taken down.
Cazza X1 3D printer
Cazza was founded in 2016 with its X1 construction 3D printer. However, it seems that one of the co-founders stole the company’s funding in 2018, and Cazza is now on standby.
HuaShang Tengda
HuaShang Tengda 3D printed a house capable of withstanding a base 8 earthquake on the Richter magnitude scale. Today, the company seems to be off the radar.
3D printed house time and cost
Construction 3D printing is faster and more affordable than traditional construction methods.
However, since construction 3D printing is still in its early years, it is difficult to provide definitive statements about how long it takes to 3D print a house and how much it costs to 3D print a house.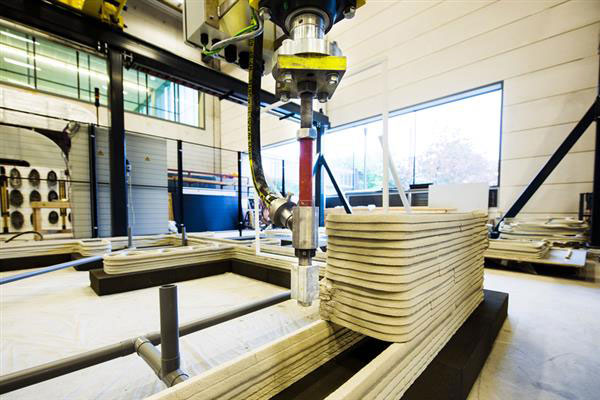
How long does it take to 3D print a house?
Various construction 3D printer manufacturers such as Apis Cor or ICON boast that they are able to 3D print a small house in 24 hours. As mentioned before though, print jobs generally only include laying down the house’s foundations and walls.
This does save whatever amount of time it usually takes for a standard team to build walls for a certain project. The rest of the timeframe for building a house remains equal.
3D printed house price
In general, it is estimated that a 3D printed house costs 30% to 55% less than a traditionally-built house.
For reference, Apis Cor’s small house cost less than $10,000 to produce, and ICON’s compact 3D printed home even cost less than $4,000.
Construction 3D printer price
A construction 3D printer can cost anywhere between around $180K to over $1M. Robotic arm systems tend to have higher price tags than gantry-type systems.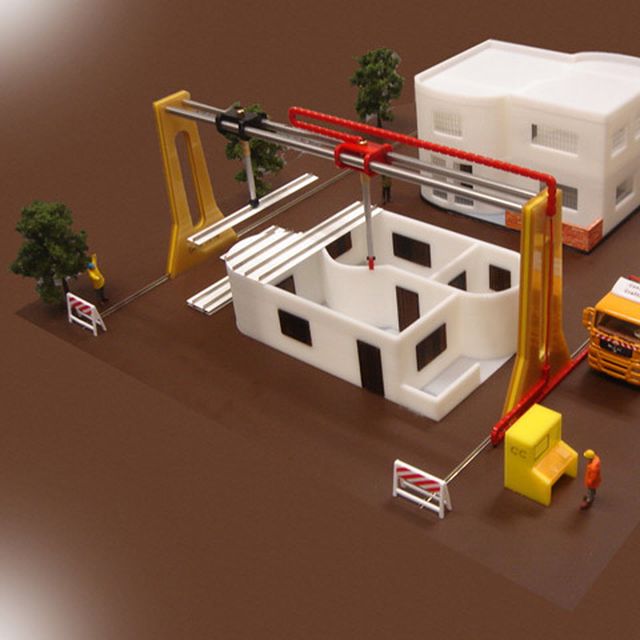
Other 3D printed infrastructures
Aside from housing or buildings, construction 3D printers are able to 3D print bridges and space-station infrastructures.
3D printed bridges
Construction 3D printers can also 3D print bridges. In 2015, the world’s first 3D printed steel bridge was 3D printed for testing in Amsterdam by MX3D. MX3D printed the final version of their stainless steel bridge in 2018 and installed it in Summer 2021.
In 2017, a 12-meter-long pedestrian bridge was 3D printed in Madrid, Spain. In the same year, the first 3D printed concrete bridge was built in the village of Gemert in the Netherlands.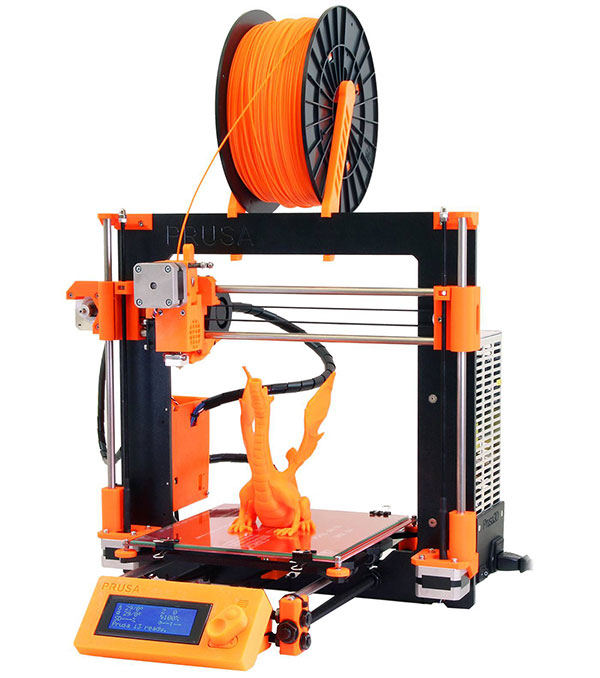
More recently, in 2019, Shanghai became home to the world’s longest concrete 3D printed bridge. It is 26.3-meters long and 2.6-meters wide, and was 3D printed in only 18 days.
3D printed infrastructures in space
NASA’s 3D-Printed Habitat Challenge has given life to a number of teams dedicated to bringing 3D printing to space. Apis Cor, namely, won the top prize for one of this project’s phases. The goal is to create sustainable and efficient 3D printed housing for deep space exploration.
Many other companies have been involved in space-building projects, including the European Space Agency and Elon Musk’s SpaceX. It is possible that we will see the first space house 3D printers in space sometime in the next couple of decades (!).
Apis Cor and SEArch+ team’s 3D printed space infrastructure (render) for the NASA 3D-Printed Habitat Challenge. Source: Apis Cor and SEArch+FAQ: construction 3D printing
What is a 3D-printed house?
A 3D printed house is a house composed of 3D printed elements, such as 3D printed walls, floors, or roofs.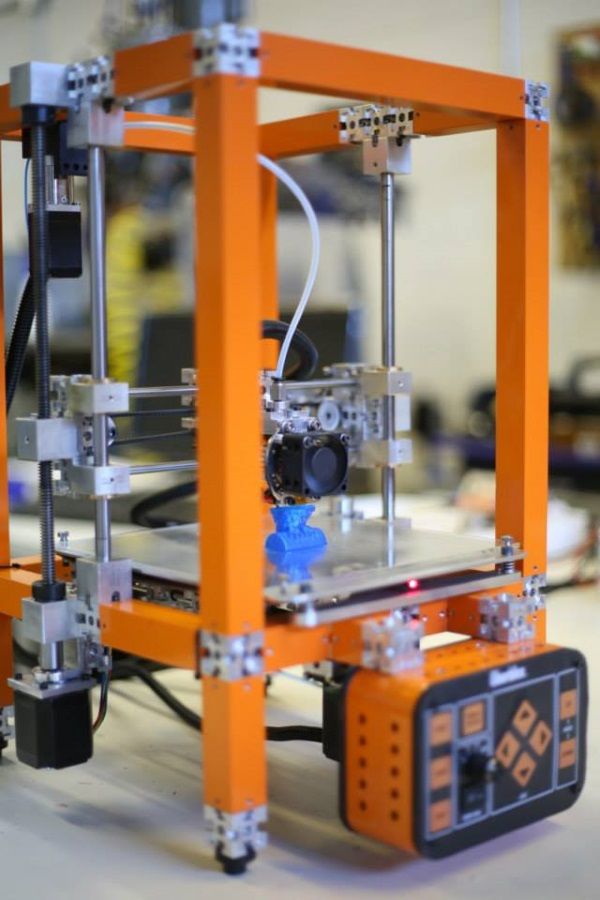 It is also possible to use the term “3D-printed home”.
How much does it cost to 3D print a home?
It can cost as low as $4,000 to 3D print a home. Prices vary greatly according to the material being used and the size of the home to be 3D printed.
What are the best 3D printed house companies?
See our selection of the best 3D printed house companies here.
Where are there 3D-printed houses for sale?
There are 3D printed houses for sale in the US (Los Angeles, San Francisco), China, France, Russia, UAE, and many other countries.
Is concrete 3D printing just for houses?
No, concrete 3D printing is also for infrastructures such as bridges.
MudBots 3D Concrete Printers - Print a House
Our printers come in a variety of sizes, from smaller 15'x15' up to 100'x50'
Shop Printers
Want to see how much you will save when 3D Printing a home versus traditional building? Check out our cost calculator.

Cost Calculator
Marketable Designs
We’ve been told that if the printer wasn’t any faster and wasn’t any cheaper to build with, it would still be the most significant tool ever, because it allows architects everywhere to begin offering designs that were cost prohibitive in the past.
Consumers are tired of the costs associated with conceptual designs. Traditional construction is limiting without astronomical costs. Architects have the ideas, but most consumers aren’t willing to pay for them. With a printer the cost between boring and amazing is the same.
Industries
Want to build one? Call us.
3D Print Walls
Want to build one? Call us.
3D Print Fireplace
Want to build one? Call us.
3D Print Monument Letters
Want to build one? Call us.
3D Print Benches
Want to build one? Call us.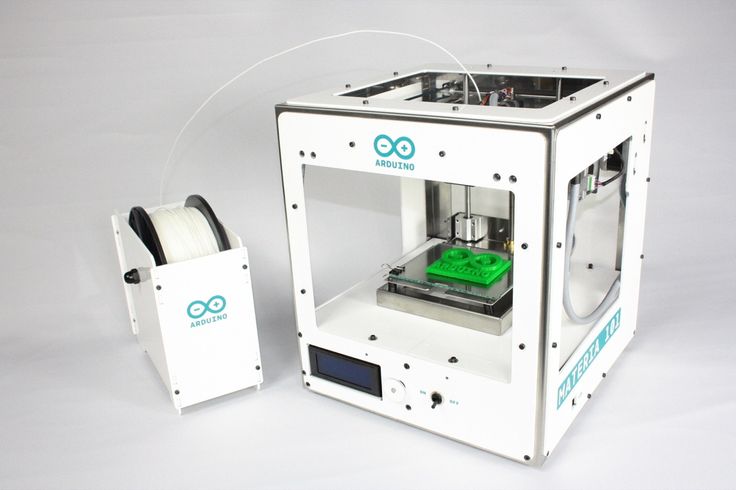
3D Print Fences and Walls
Want to build one? Call us.
3D Print Signs
Want to build one? Call us.
3D Print Monuments
Want to build one? Call us.
3D Print Fountains
Want to build one? Call us.
3D Print Retainer Blocks
Want to build one? Call us.
3d Print Monument and Waterfalls
Want to build one? Call us.
3D Print Planters
Want to build one? Call us.
3D Print Sheds
Want to build one? Call us.
3D Print Monument Boulders
Want to build one? Call us.
3D Print Drainage
Want to build one? Call us.
No More Forming
Want to build one? Call us.
3D Print Stairs
How It Works
1
Concrete printing is possible with the construction of a large 3D printer capable of printing large scale structures, from spas and barbeques to homes and larger commercial buildings, without the need of traditional framing, forming or blocks.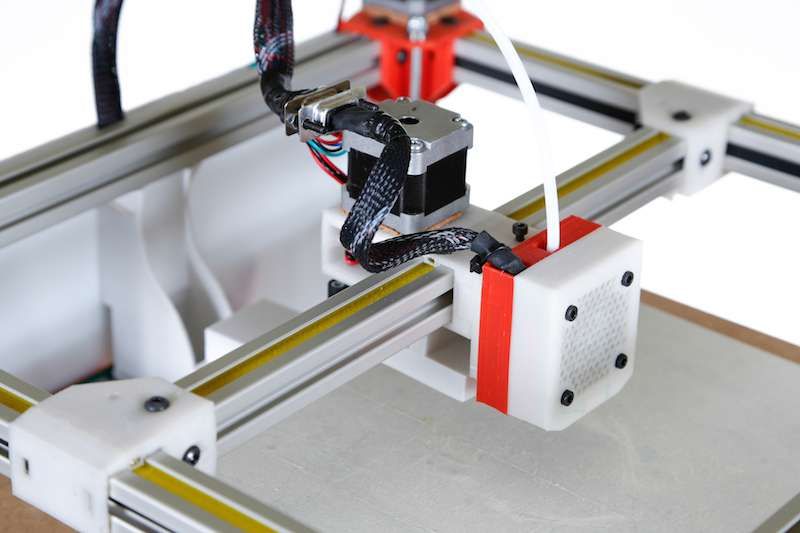 MudBots offers printers from 15' x 15' up to 100' x 100'.
2
There are hundreds of different mix formulas that closely resemble a mortar type mix. Each mix requires months of testing for different characteristics, such as fluidity, bonding, water impenetrability, Seismic resistance, as well as curing and strength. Mixes are designed for 1200 PSI up to 10,000 PSI, depending on the structure and engineered objectives.
3
First step is to decide what you want to print.
4
The next step is to conceptualize a 2D design using a CAD program, and then converting the design to a 3D model using any 3D software that can export an STL file.
5
Once the 3D model is ready, the STL file is imported into a slicing software, where the height of each printed pass is specified.
After slicing the model into individual print passes, the system exports the code which is interpreted into actual nozzle movement.
6
Electrical boxes and plumbing are added during the print leaving perfect finish without gaps.
7
The mix is batched on site after which, the liquid ingredients are added to the dry mixes and mixed for delivery to a computer-controlled pump, which works in unison with the printer to control nozzle speed, and the volume rate of material at the nozzle.
8
After printing the walls, windows and doors are cut out while the print is still green, leaving perfect openings for window/door casings.
9
The key to printing without stopping every 12" as seen by the rest of the world, is utilizing a batch plant that meters all the dry and liquid ingredients as the temperature, wind and humidity change. the mix formula being used at 5am is not the mix being used an hour later. MudBots provides a variety of mix formulas with differing strengths and cure times without being forced to buy proprietary mixes and paying 5 times as much when everything needed is already available at local batch plants.
Process
Step 1
Three men assembly in 3 hours without any lifting devices or need for heavy footings
Step 2
Print layout for footings with spray nozzle attachment
Step 3
Move printer for escavators in just 10 minutes
Step 4
Print forms for footings and flatwork
Step 5
Print walls up to 10' without stopping
Step 6
Add electrical boxes, rebar, and trowel walls while printing
Understanding What We Do & Don't Do
Here's how you can save.
Layout for Footings Dig
The first cost savings will be the elimination of 3 men, string lines, and marking paint. Simply add the airless attachment to the nozzle of the printer, and your entire layout for footing is done in minutes. Push the printer out of the way and start digging.
(The printer is able to print forms for footings)
Footing Forming
The layout and forming for footings and stem walls are very time-consuming. It takes a lot of lumber, diesel, stakes, and labor that is no longer necessary. Simply level the area, compact them, level the four corners of your printer, and PRINT.
(Forms do not need to be stripped when printed)
Footing Stripping
Perfect level and square forms are printed right from the computer. Grading is also easier, as the only real important level is the 4 corners of the printer.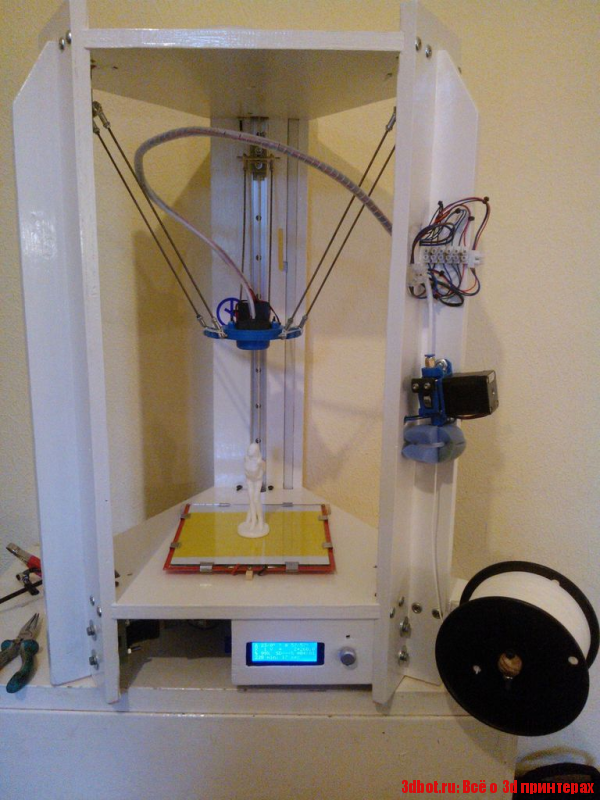 Printer can be set up for uneven grades.
(The printer can print the forms for slab)
Slab Forming
The slab layout and forming is critical to all other subs on the job. If a mistake is made at this point of the project, nothing else is square, and all other subs suffer. With the Concrete Printers, the house is square every time.
Slab Finishing
Not there yet, but our concrete printer will be finishing slabs within the next 6 to 12 months, and can be ordered as an option. If you’re waiting for all the options to be available before buying, you’ll never buy a printer, because we will never stop innovating. All upgrades will be available and are designed to be added to all of our printers.
(We can print basements)
Basements
Our printers easily print basement walls without the need of forming, backfilling, stripping forms, forming interior walls, drywall, insulation or taping.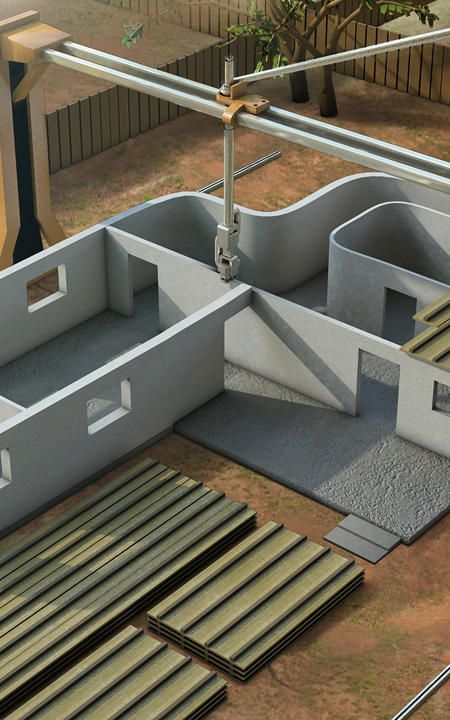 All of this is done by the printer.
(There is no need for the labor or time to do layout on slab)
Framing Layout
The printer knows where your wall is going to be. No chalk lines needed. Once the slab is poured, all you have to do is hit print.
(No need for framing)
Framing
No warped studs, better fire rating, no mildew. No matter how you look at it, printing a home is far better than framing a home. Concrete printing is faster, more accurate, just better all around.
(No need to drill studs for electrical)
Rough Electrical
This is not necessary as walls can be printed that are hollow. Depending on the mix that is used, there is also no need for rebar or solid pour exterior and bearing walls. We know the idea of exterior walls and bearing walls without rebar seems ridiculous, but it's time to learn something new. Look up 20,000 PSI concrete and geopolymer. It's real.
(No need to drill studs for plumbing)
Rough Plumbing
This isn’t necessary as walls can be printed hollow. Same as above. Your electrical and plumbing will be less expensive.
(Printed walls are finished without additive material during the print)
Drywall
You will still need to hang the lid, but not the walls. This goes for the basement. Just trowel the printed wall and when done, it's as smooth as a 3-coat drywall. Most countries do not wood frame at all. They build with bricks and then send a crew of mason finishers, and when it’s done, it’s smooth as anything.
(No need for taping as the walls are troweled smooth during printing)
Taping
Some print finishes may not need to be finished if acceptable to the customer.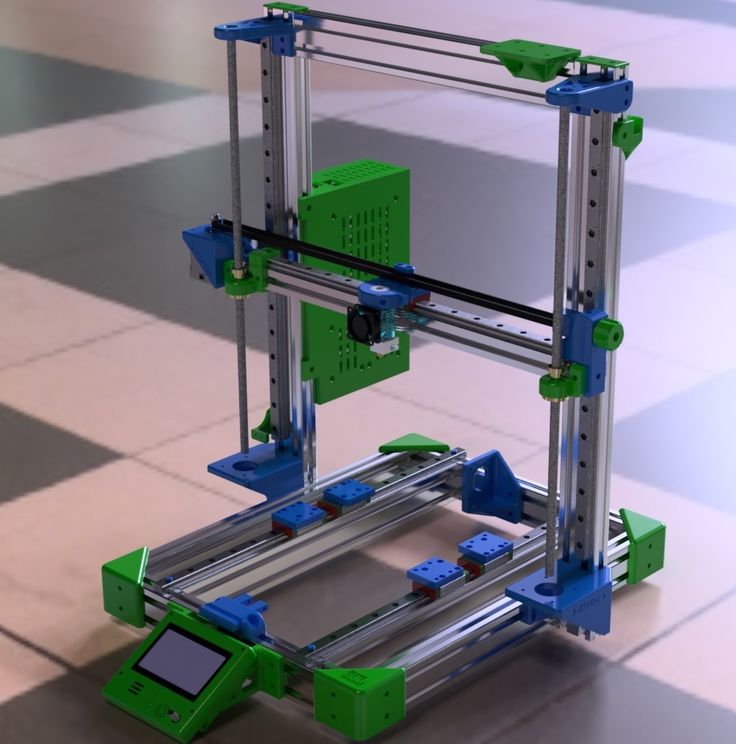 Taping takes days for each coat to dry. This is not the case with mason finishing. Within 3 hours of the walls being printed, the walls are already finished.
Finishes
If builders want to finish the smooth walls with a knock down broquet, orange peel or other finish, just come back the next day and spray with a hopper, top coat and trowel.
(Exterior walls are finished during the print)
Stucco / Siding
No paper, mesh or additive material is needed. This isn't a process that is done days after framing and sheeting. The finish is done real time as the wall is printing.
(Printers can be purchased with an insulation attatchment)
Insulation
You can have any R Factor you want depending on the density and material. A solid concrete wall has an R9 Value. If you print a hollow wall and back fill with fiberglass, polystyrene or cellulose, you can achieve any R value you desire.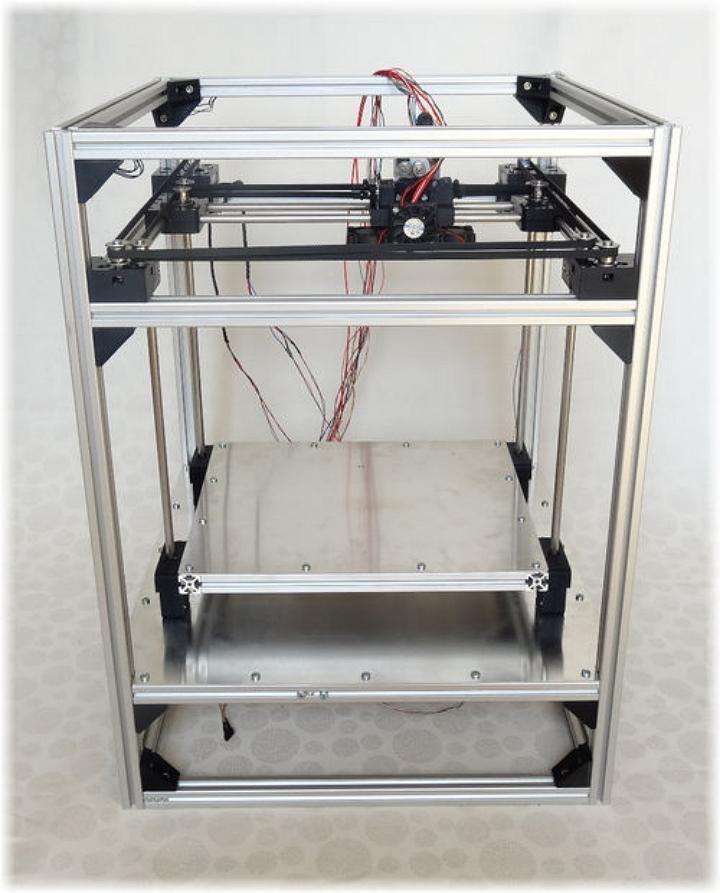
(Mudbots is working on a composite truss system that can be printed on site)
Trusses
Additionally, house plans can be modified to allow for dome roofing, which can also eliminate trussing and sheeting costs. The truss system utilizes the same printer, but with the use of a different mixer/pumping system. As new advances become available, they will be bolt-on solutions with your existing printer.
Underground
More and more customers are starting to experiment with additional uses. Underground is definitely something worth considering. The cost is high for underground but can be significantly reduced by printing on site.
Landscape and Hardscape
The 3D Concrete Printer is a landscaper’s dream. Never before could you have offered products at a fraction the cost of your competition while still earning profits. It is basically unheard of. Developers will rethink their offerings when they realize how affordable the little extras are.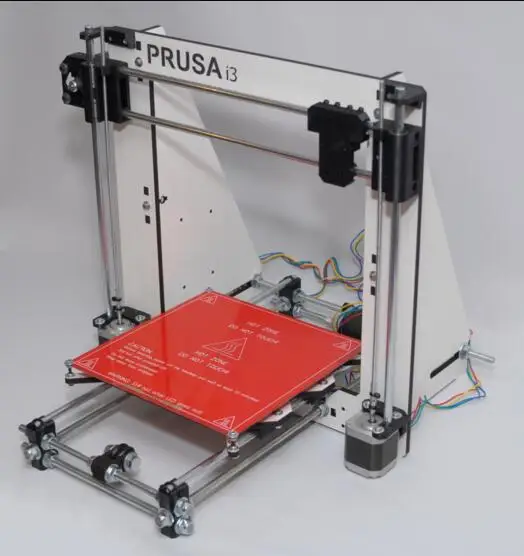 The extras will set them apart from all the others.
Pool and Spa
By now, you may be realizing how significantly concrete printing is about to change so many industries. Pool and spa is just another market that will benefit. The cost for traditional pool construction is about to change. Homes can be sold with included water features at a fractional cost.
Signage
Very seldom do we see breathtaking signage. Everyone is looking for ways to stand out, but it keeps getting back to budgets. Imagine the development entries that are possible now. These printers like to print and with everything they can do, it would be foolish to have any down time.
Registration is required to access our Cost Calculators. We provide online tools for calculating the cost for mix formulas and “side by side” project costs comparisons using 3D technology.
Apples Comparison Test New
Complete the worksheet to have a better idea of where you will save in terms of Materials and Labor.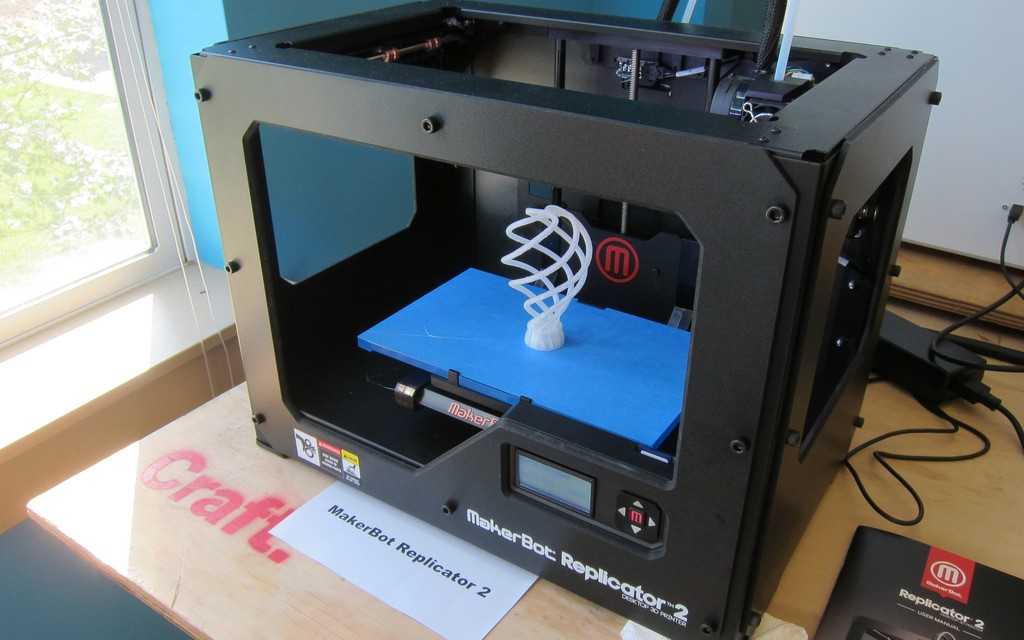
Bag Cost
Use this worksheet to determine the Cubic Inch Cost of the ingredients that will be used in the specialty mix for printing.
Mix Formula
This is a necessary first step to determine the material cost of any mix formula.
3D Printing Costs
Use this calculator to estimate costs to build using concrete printing over traditional construction methods.
Will It Pass Code?
First time callers don’t have any problem recognizing that concrete printing would be far faster and cheaper. They also don’t question the feasibility of learning the tech. The single most asked question relates to passing code. No fear of the tech, just fear of their building department.
Truth is concrete printers are already building homes and commercial buildings all around the world, so when considering the application in your backyard, here are a few things to consider.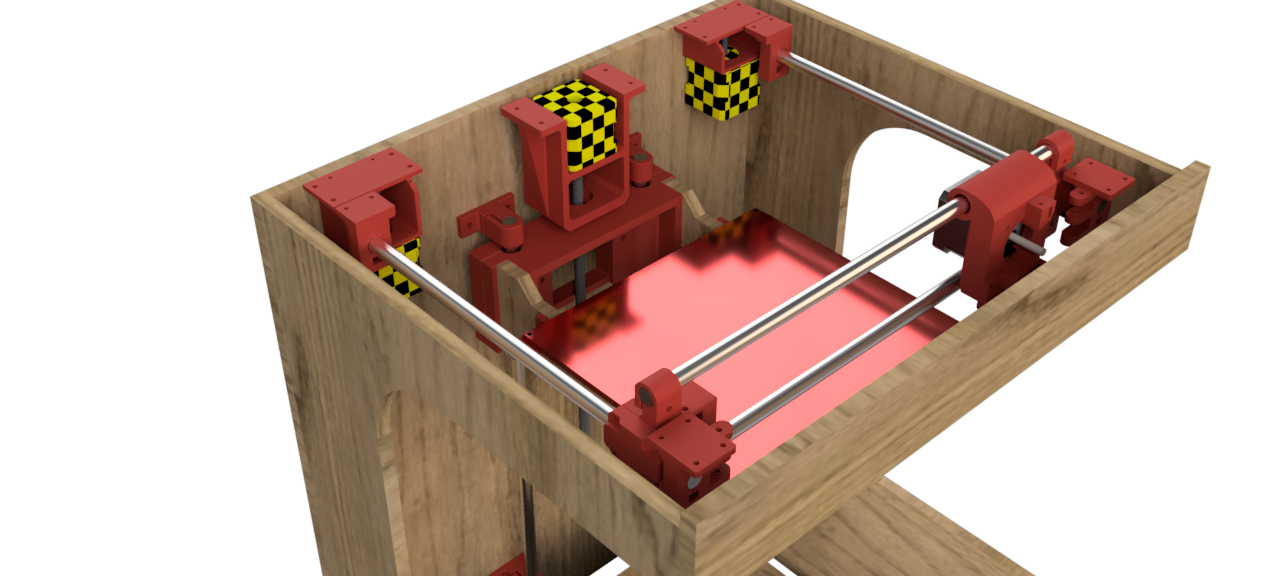
ICF Construction
The best way to wrap your head around concrete printing is to start with the basics, and there is no better way than to liken 3D Concrete Printing, or 3DCP, to Insulated Concrete Block construction. ICF code is accepted everywhere yet a foam block has virtually no structural strength at all. So when you are considering how you would pass code, keep ICF in mind. For the most part, a concrete printer is doing nothing more than printing a hollow wall shell that can be filled with rebar and concrete. The only difference is foam has no strength at all, compared to what we print in most cases, which is twice the strength of cinderblock.
CMU Construction
Now with that in mind, let's look at the similarities with CMU (Cinderblock). No one questions the ability to build with cinderblock. While we don’t encourage it, take into consideration the fact that you can print walls that are the exact dimension and design as cinderblock yet twice as much the strength, and without grouted joints that are susceptible to seismic cracking.
The advantage of concrete printing is the ability to print hollow walls which reduced costs for electrical, plumbing and insulation. Additionally, hollow walls can be insulated to almost an R factor with ease with the absence obstructive studs.
The challenge isn’t whether or not it's possible, as it's already being done everywhere. The challenge is whether or not you can find a structural engineer that makes it possible. It's all about math. The code already exists, all you have to do is exceed the code, and to do that, you need to start with the mix.
Testing and Math
We have developed and tested a myriad of different mixes with different characteristics, such as PSI, tensile strength, water impenetrability, fire resistance, as well as cold weather mixes, hot weather mixes, accelerated mixes, and retarded mixes. We provide the formulas and the lab results that your engineer will need to determine what the wall designs will be. Once they have the testing results, they can design a wall that exceeds any code anywhere.
Some choose to stay close to traditional methods by printing walls that resemble ICF and CMU, but others, who have more confidence, take it all the way by utilizing stronger mixes, so that they can capitalize on ALL the cost-saving benefits.
Plans and Details
As for the other considerations, we have plenty of videos that address common questions about headers, attaching hurricane straps, installing electrical boxes, securing plumbing, mounting top plates for trussing and methods for tying the wall to the foundation. Although, most engineers want to see the methods being used by others first before reinventing the wheel, as they learn more and more until there isn’t a question that they can’t offer up to 4 or 5 solutions when asked. Most of this is common sense, nevertheless, we have the plan details and math to share.
As we’re saying this, bear in mind that every state, and sometimes even cities, have different building codes. What we will share is determined by specific code and conditions that are not specific to your state. Far too many factors come into play, such as mix characteristics, code, water table, frost level, annual snow loads, wind, seismic, soil compaction for starters. We do not provide structural engineering, but we can point you in the right direction.
Deal Breakers?
Everyone who is considering the use of concrete printing has a lot of work to do before they can commit to a purchase. There is no shortcut. The investment of time is inevitable. As you start down the path to making a decision, it’s easy to get confused as to what’s most important, and where you should spend your time, but as you consider the options presented to you, there will be some paths that obviously are a waste of time. Everyone needs to know what their deal breakers are. They will be different for each person, but from speaking with others, we have a pretty good idea of what most consider their deal breakers.
Design
From the onset, our engineers understood the importance of creating a design that had all the same features but was also easily understood. A printer that is lightweight and easily assembled in the field. MudBots printers weigh 75% less than any printers in the industry, with an assembly time that is 80% faster. This is a printer that does it all, does it faster, and is half the price of anyone.
Basements and Second Story
In some parts of the world, the ability to print basements and a second story isn’t a big deal, but in North America, it’s essential. Look around and you will find that most printers in this marketplace don’t have the ability to do either without tremendous unnecessary excavation or back filling. If you’re going to invest in a printer, most agree that the ability to quickly set up for footings, basements and second story is a must.
Assembly
Look at any other printer and you will recognize right off that assembly is going to be an expensive challenge. Imagine the worst IKEA assembly ever. That’s about what you get. Think about parts that are heavy to manage without forklifts and cranes, imagine hundreds of nuts and bolts. In some cases, needles cosmetic plastics that serve no function, waste hours of assembly, and will undoubtedly be broken and expensive to replace. Most printer designs make sense to the engineers that built them, but not so much to the contractors that will need to assemble it in the field. A 20' x 20' MudBots printer can be assembled with 2 workers in two hours without any mechanical lifting. MudBots can also be moved from one lot to another without disassembly by simply adding wheels. Additionally, the printer can print entire structures without being moved multiple times.
Proprietary Mixes
If you think your printer cartridges are expensive, wait until you have to buy and ship proprietary concrete mixes from halfway around the world or even the USA. MudBots is the only ones that provide the mix formulas for your printer and allow you to use any mix without voiding your warranty.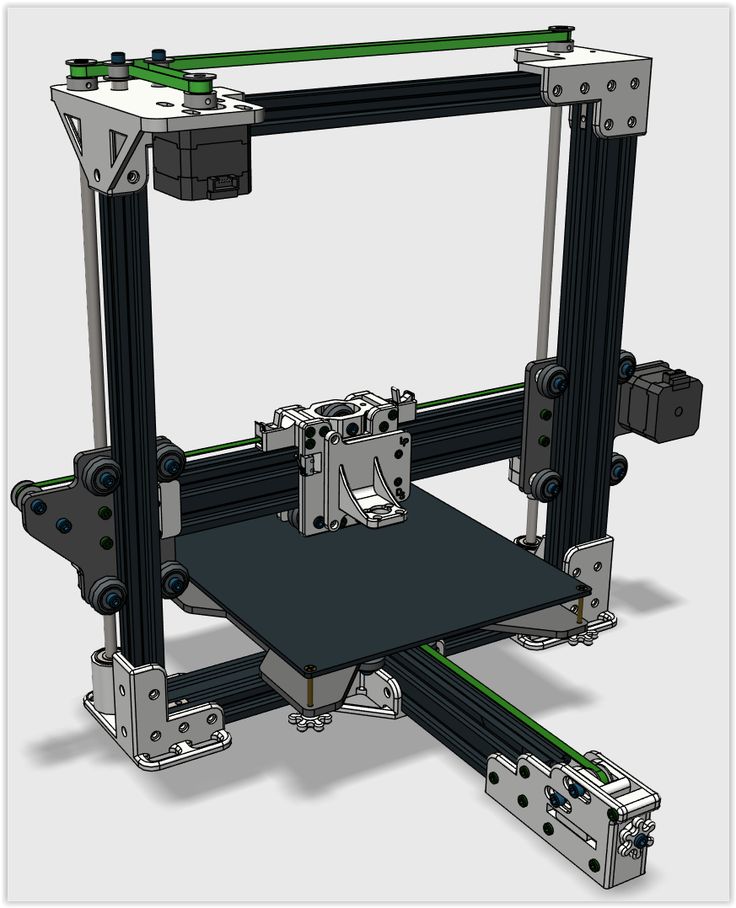 This should be a deal breaker for everyone as they begin to realize what they will be paying for are mixes that are (mostly) available at their local hardware store, not to mention the cost of and any delay in shipping.
Customer Service
Does it feel like the others are sleeping on the job? There is far more to consider when thinking who to buy from than a few online videos and website. This is a significant purchase for most, but as you're out knocking on doors, the one thing you should consider the most is customer service. Start calling around and you’ll discover that there’s no one to talk to. Phone numbers are hidden, and emails go unanswered for weeks. You have to ask yourself, if no one will talk to you now when you have the money on hand, what’s it going to be like when you need support.
Price
If you’ve been lucky enough to get this far with anyone, the first thing you will find is that MudBots isn’t just a little better in price.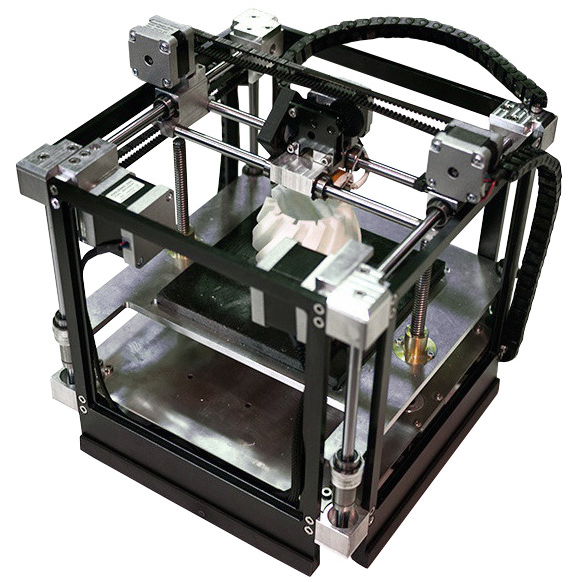 MudBots is 1/2 to 1/3 the price of other printers, with more features and options than anyone. Price is always a factor, as well as ROI. Do the numbers and you’ll find that within 60 days, you’ll have already paid for your printer in savings, and likely will be looking for your second purchase because of the advantages.
Franchise
Most of our customers contact us because they are excited about the income possibilities that our printers will offer them, but for this very reason, the greater opportunity is in securing the exclusive distribution rights for their state. By merely owning and using our printers, our customers will undoubtedly generate tremendous excitement as they begin printing unbelievable designs at a third the cost and a third the time. It would be impossible to keep such a tool a secret. As news of this innovation begins making its way to the public, demand will become unimaginable. Since our customers are creating the exposure and excitement, it’s only right that they share in the success and residual income opportunity.
Jurisdiction
Most contracts start off with optimism and the best intentions, but if you’ve been doing this a while, you have learned that in the event of any legal actions, jurisdiction is an issue. If you’ve ever had to litigate outside your state, you recognize the challenges, but litigating outside the country is altogether different. We take a lot for granted in America, but that is not the case intentionally. Imagine trying to hire legal counsel abroad and trying to interpret international laws. This does not certainly offer home court advantage, and asking anyone who has tried, you’ll see that this is problematic at best. But even if you prevail, collecting on a judgement with corporate assets abroad is nearly impossible.
RegionalMaster Dealer
We thought so!
Want more time with your family?
Want to earn over 100K a month?
Want to have your own company?
MudBots is looking for the best. If you have a background in construction, love new technology, and especially love business in general, you're in the right place. MudBots has developed the first line of 3D Concrete Printers available to the world. Media everywhere is saying that the new technology will change the construction industry forever. Seldom do opportunities come along with the huge market interest and untapped market. This is what business opportunist dream of.
Quality of Life
Success is measured in many ways, but true success is measured by the peace a person feels when they know they are doing something they love, their efforts are rewarded with increased gain, and they have the time to enjoy both with the ones they love. There are countless ways to make a living, but if you don’t enjoy what you’re doing or you don’t have the time to enjoy anything else, it’s hard to be satisfied. MudBots Master Dealers enjoy all three. They earn a remarkable living, they have the freedom to work when they want and because of their success, they get to focus on the more important things in life – their Family.
Job Description
The only way to manage a company that is growing as fast as MudBots is to have qualified individuals in every region of the country who can demonstrate products and serve their dealers. The Master Dealer program gives the company and its dealers the representation needed while offering a significant opportunity to those who embrace the call.
Exclusive Region
As an RMD, you will be given an exclusive license to represent and profit off of ALL the MudBots sales in your state/region. It is generally a full state, but in larger markets, a state may be divided to provide for better reachability and service.
Residual Income
There are many ways to profit as an RMD but the “residual commission” is by far the most enticing. Sell it once and continue earning for years to come. As an RMD you will earn up to 10% on every printer sold. With printers ranging from 284k to 1.3 million, it’s not hard to see how lucrative the venture can be. If RMDs sign up one new dealer every month who sells one printer a month within 12 months, depending on the profit sharing each RMD sets up with their dealers, earning after 12 months of work with 12 compliant dealers should be well over 100k a month. Why so much? Quite simply, we want to attract the best in the industry. An organization is only as good as its people. We want professionals, self-motivated individuals who are passionate about building their own business along ours.
Economy
One of the best thing about concrete printers is the recession-proof nature of products. If the economy slows, the need for faster and more affordable construction methods increases. Those trying to compete with traditional construction methods will quickly discover they can’t even come close, resulting in even more demand for MudBots products. Prospects can get on board now or wait until they are losing contracts without one.
Previous Next
Minimum Requirements
Training
Attend a 4-week training in Utah
Printers
Purchase two (2) demo printers equaling 500k or more
Truck
Must have a late model truck
Trailer
Must have an enclosed branded trailer
Demo Product
Demo product to 2 dealers each week
1 Dealer / Month
Sign one dealer each month
Work or Fun
The best thing about a career with MudBots is that it’s just plain fun.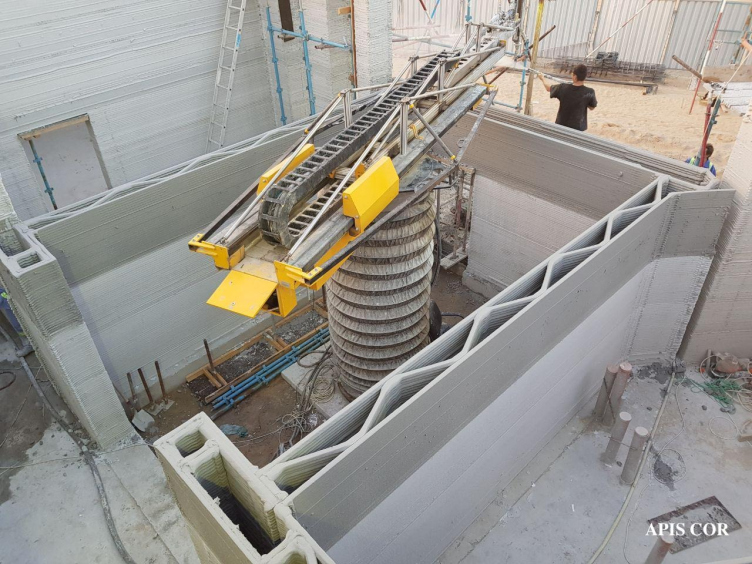 As more and more ways are discovered for utilizing 3D Concrete Printers, every day is an exciting adventure. It’s fun to make money doing what you love and this is definitely an exciting product that sells itself. Industry professional everywhere are in awe when they see products being printed without the need of straight lines and forms. This is a product that people will watch for hours in amazement. The longer they watch, the more they realize how valuable 3D Printing will be to their business.
Getting Started
To get started, call and request an NDA and RMD application. Once accepted, you may attend the next RMD training where you will spend three full days of training and Q&A. You will learn about the industry, the opportunity, printer operation, specific mixes, lab testing, structure engineering, potential markets & marketing strategies. By the time you return home, you will be confident in your ability to promote and service the dealers in your area.
Welcome to MudBots.
Connect The Dots
As companies begin down this road the process and solutions for building with 3DCP’s can seem daunting at first but it doesn’t take much looking around to realize that answers and solutions are not far away. Here are some videos that will help with connecting those dots.
Fiber Cement Siding to Block
Hardy Plank over Block
Hardy Plank Siding on Block
Architectural Foam Accents
Applying Architectural Foam Accents
Spraying Finish on Artictectural Foam & Finishes (1/2)
Cement Screws and Fasteners
Cement Board Screws
Faux Concrete Wall Panels
Wall Cladding Systems
Concrete Counter Tops 1
How To Layout like a PRO - NOT NEEDED ANYMORE
Engineering Footings
Soil and Footings
Tiny Home Village - Making a Difference
Affordable Housing in Detroit
Spec Mix Delivery
Site Tools and Methods
History of 3D printing
In this section, we wanted to trace the history of 3D printing from its inception to the present day, as well as give a forecast regarding the future development of technology.
The first 3d printer was invented by the American Charles Hull, he worked on the technology of stereolithography (SLA), a patent for the technology was issued in 1986. The printer was a fairly large industrial installation. The installation "grew" a three-dimensional model by applying a photopolymerizable material to a moving platform. The basis was a digital model pre-modeled on a computer (3D model). This 3d printer created three-dimensional objects, rising by 0.1-0.2 mm - the height of the layer.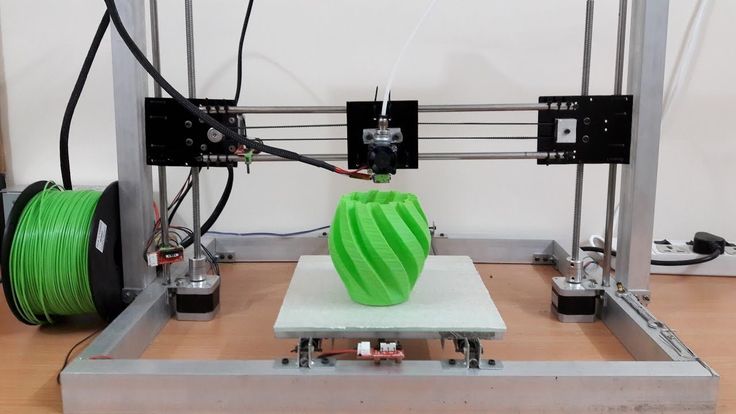 Despite the fact that the first device had many disadvantages, the technology has received its application. Charles Hull is also the co-founder of 3dsystems, one of the world's leading manufacturers of industrial 3D printers.
Charles Hull was not the only one to experiment with 3D printing technology, as in 1986 Carl Deckard invented Selective Laser Sintering (SLS). You can learn more about the method in another article, briefly: a laser beam sinters a powder (plastic, metal, etc.), while the mass of the powder is heated in the working chamber to a temperature close to the melting point. The basis is also a digital model pre-modeled on a computer (3D model). After the laser passes through the horizontal layer, the chamber is lowered to the layer height (usually 0.1-0.2 mm), the powder mass is leveled with a special device and a new layer is applied.
However, the most famous and widespread 3D printing method today is layer-by-layer direction (FDM). The idea of technology belongs to Scott Crump (Scott Crump), the patent dates back to 1988.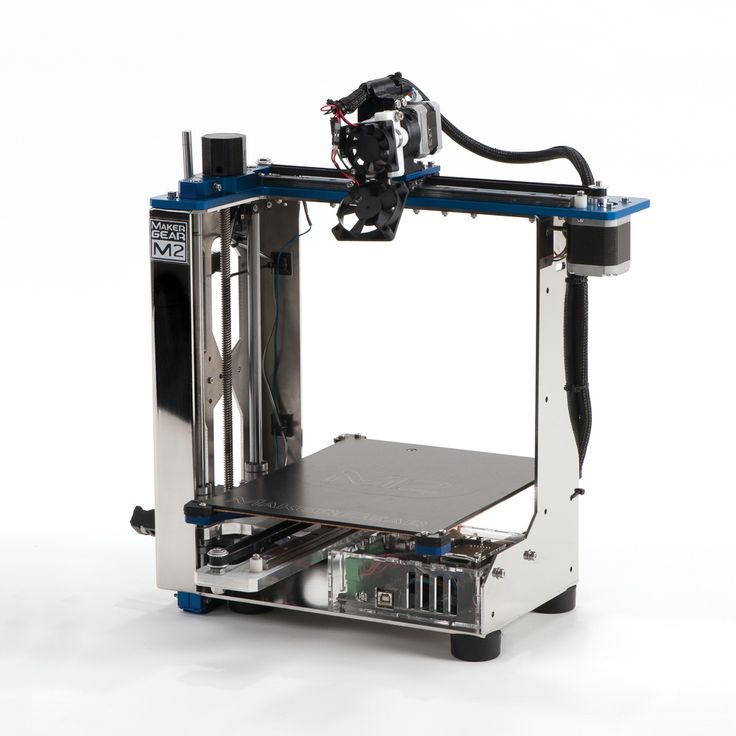 You can learn more about the method in another article, in short: material (usually plastic) is fed from the heated nozzle of the print head using a stepper motor, the print head moves on linear guides along 1 or two axes, and the platform moves along 1 or 2 axes . The basis of the movement is also a 3D model. The molten plastic is laid on the platform along the established contour, after which the head or platform is moved and a new layer is applied on top of the old one. Scott Crump is one of the founders of Stratasys, which is also one of the leaders in the production of industrial 3D printers.
All the devices described above belonged to the class of industrial devices and were quite expensive, so one of the first 3d Dimension printers from Stratasys in 1991 cost from 50 to 220 thousand US dollars (depending on the model and configuration). Printers based on the technologies described above cost even more and until very recently, only a narrow circle of interested specialists knew about these devices.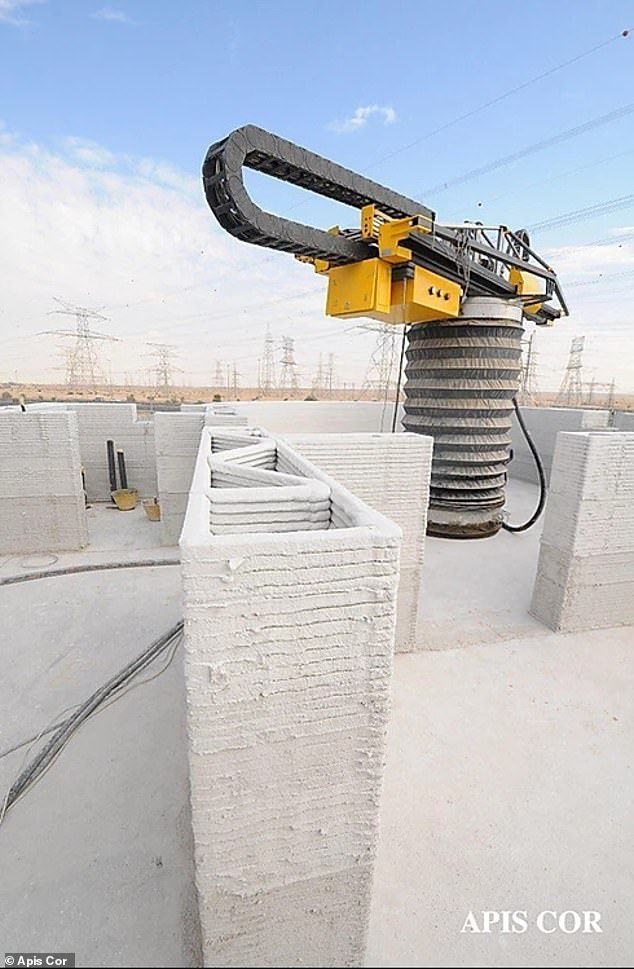
Everything began to change since 2006, when the RepRap project (from the English Replicating Rapid Prototyper - a self-replicating mechanism for rapid prototyping) was founded, with the goal of creating a self-copying device, which was a 3D printer working on technology FDM (layer by layer deposition). Only, unlike expensive industrial devices, it looked like a clumsy invention made from improvised means. Metal shafts serve as a frame, they also serve as guides for the print head. driven by simple stepper motors. The software is open source. Almost all connecting parts are printed from plastic on the 3D printer itself. This idea originated among English scientists and aimed at spreading available additive technologies so that users can download 3D models on the Internet and create the necessary products, thus minimizing the production chain.
Leaving aside the ideological component, the community (which exists and develops to this day) managed to create a 3d printer accessible to the "ordinary person".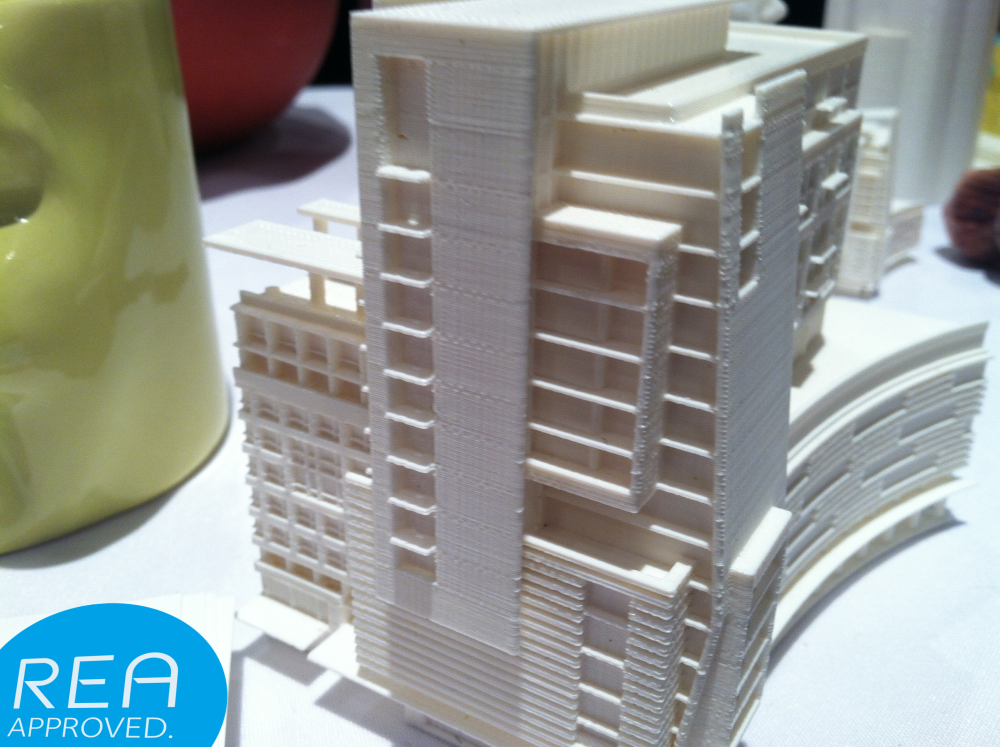 So a set of unprinted parts can cost around a couple of hundred US dollars and a finished device from $500. And even though these devices looked unsightly and were significantly inferior in quality to their industrial counterparts, all this was an incredible impetus for the development of 3D printing technology.
As the RepRap project developed, 3D printers began to appear, taking as a basis the base laid down by the movement in technical and, sometimes, ideological terms (for example, commitment to the concept of open source - OpenSource). The companies that made printers tried to make them better both in terms of performance, design and user experience. The first RepRap printers cannot be called a commercial product, since it is not so easy to manage (and even more so to assemble) and it is not always possible to achieve stable work results. Nevertheless, companies tried to close the more than significant gap in quality, leaving a significant gap in cost whenever possible.
First of all, it is worth mentioning the MakerBot company, which started as a startup, took RepRap ideas as a basis and gradually turned them into a product of a new quality.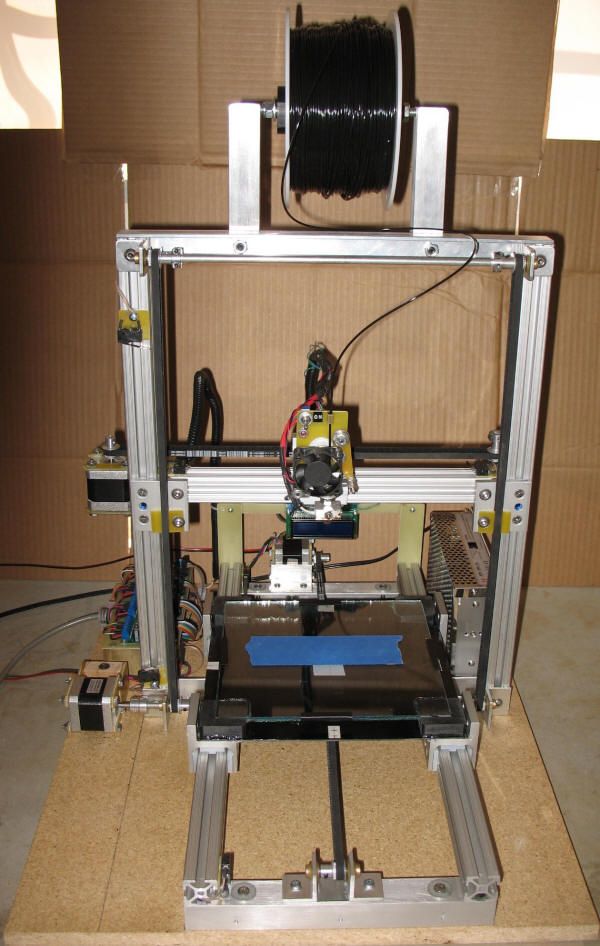
Their flagship product (and in our opinion the best to this day) remains the MakerBot Replicator 2 3D printer. The model was released in 2012 and later discontinued, but remains one of the most popular 3D printer models to this day " personal" segment (according to 3dhubs). The word "personal" is in brackets because this printer, which cost $2,200 at the time of release, was (and is) primarily used for business purposes, but falls into the personal segment due to its cost. This model differs from its progenitors (RepRap), being, in fact, a finished commercial product. Manufacturers abandoned the concept of OpenSource, closing all sources and software codes.
In parallel with the release of equipment, the company actively developed the Thingiverse resource, which contains many models for 3d printing, available for download for free. During the development of the first printer and beyond, the community has helped the company a lot, testing the product and offering various upgrades.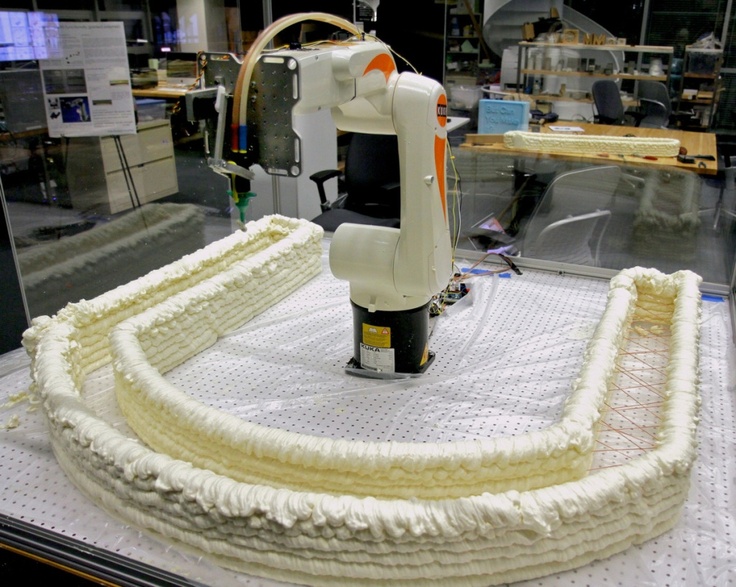 After the release of the Replicator 2 (and the closure of development), the situation has changed. You can learn more about the history of MakerBot and other companies and people associated with 3d printing by watching the film Print the legend.
This film also highlights the history of Formlabs, one of the first companies to launch an affordable 3D printer based on SLA (Strereolithography) technology. The company raised funds for the first FORM 1 model through crowdfunding, encountered production difficulties, but eventually released an affordable and productive 3D printer, closing the quality gap described above.
And although the 3D printers described above were far from perfect, they laid the foundation for the development of affordable 3D printing technology, which continues to this day. At the moment, the quality of FDM and SLA printers is increasing, but there is no significant price reduction, rather, on the contrary, it is growing slightly. Along with FDM and SLA, many companies are developing in the field of powder sintering (SLS), as well as metal printing.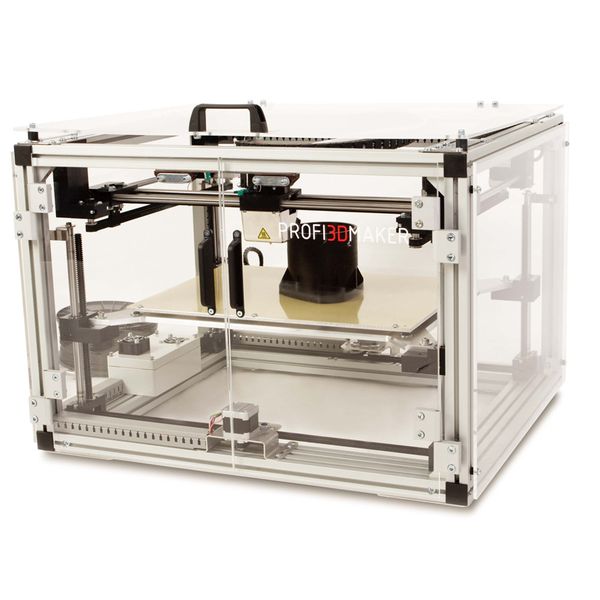 Despite the fact that such printers cannot be called affordable, their price is much lower in comparison with analogues from the professional segment. It is also worth noting the development of the line of materials, in addition to the standard ABS and PLA plastics, today many different materials are used, including nylon, carbon fiber and other durable and refractory materials.
Personal 3d printers of today are very close to professional devices, the development of which also does not stop. In addition to the "founders" of the technology (Stratasys, 3dsystems), many small companies specializing in industrial 3D printing technologies (metal in particular) have emerged. 3D printing is also attracting the attention of large corporations, which, with varying degrees of success, are striving to take their place in a growing market. Here it is worth highlighting HP, which recently released the HP Jet Fusion 3D 4200 model, which has gained popularity among 3d printing professionals (as of 2018, it is at the top of the ranking of professional 3D printers in the quarterly reports of the 3dhubs portal).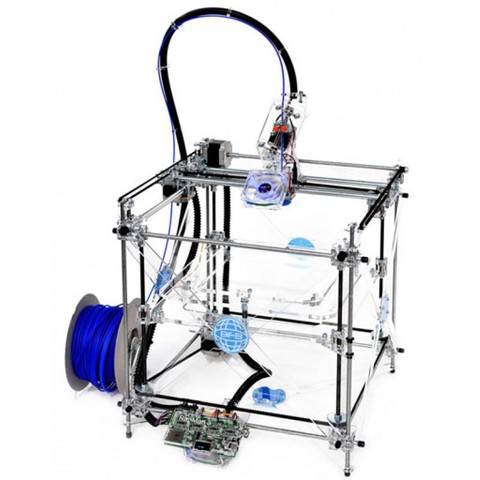
However, 3D printing technologies are developing not only in breadth, but also in depth. One of the main disadvantages of 3D printing, compared to other production methods, is the low speed of creating models. A significant advance in terms of accelerating 3D printing was the invention of CLIP technology by CARBON, printers operating on this technology can produce models 100 times faster than classic SLA technology.
There is also a constant expansion of the range, properties and quality of materials and post-processing of products. All this accelerates the transition to the use of 3d printers in production, and not just as prototyping devices. Today, many large and not only companies and organizations are closely using a 3D printer in their production chain: from consumer goods manufacturers NIKE and PUMA to BOEING and SPACE X (the latter prints engine parts for its rockets that could not be made in any other way) .
In addition to the "classic" scope of 3D printing, today you can increasingly see news about how a house or some organ (or rather, a small part of it) was printed on a 3D printer from bio-material. And this is true, several companies around the world are testing or already partially using 3D printing in the construction of buildings and structures. This mainly concerns the contour pouring of walls (similar to the FDM method) with a special composite concrete mixture. And in Amsterdam there is a 3D printed bridge project and this list will only expand over time, since the use of 3D printing in construction can significantly reduce costs and increase the speed of work at certain stages.
With regards to medicine, here 3D printing also finds application, but at the moment it is not printing organs, but rather the use of technology in prosthetics (of various kinds) and bone replacement. Also, 3D printing technology is widely used in dentistry (SLA technology). Regarding the printing of organs, this is still far in the future, at the moment bio-3D printers are experimental facilities in the early stages, the success of which is limited to printing a few limited-viable cells.
Looking to the future, it is safe to say that 3D printing technology will expand both in breadth and depth, improving technology, speeding up processes, improving quality and improving material properties.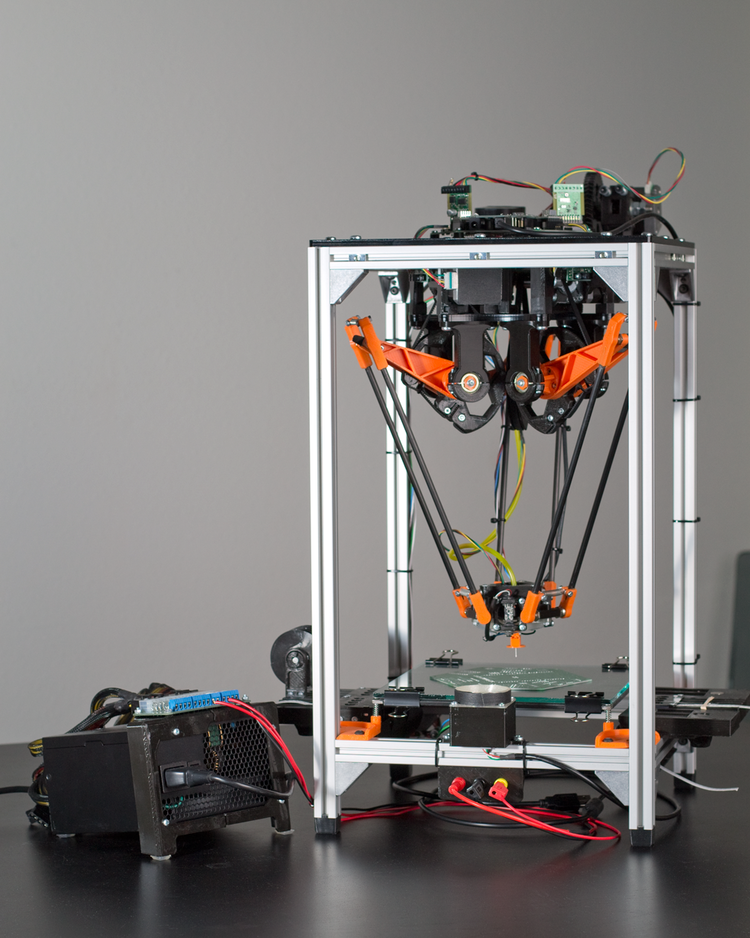 3D printers will increasingly replace old methods in production chains of various scales, and world production, due to this, will move towards the “on demand” scheme of work, increasing the degree of product customization. Perhaps someday, 3D printers will be widely used at the household level for the production of necessary things (the dream and goal of the RepRap movement), but this requires not only the development of technology, but also a paradigm shift in social thinking, as well as the development of a powerful design ecosystem ( 3d modeling) products (which is often forgotten).
3d printing of houses (and other structures) will no doubt also develop, reducing costs and production time, which, together with the development of new approaches in architecture and urban planning (such as modular construction and the prefabricated method), will give a tangible impetus to development the industry as a whole.
Biological 3D printers will be an important tool in scientific research.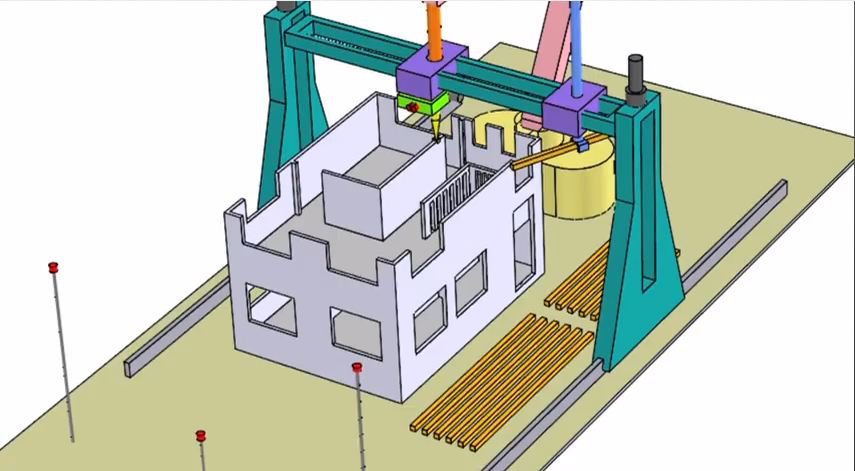 However, before they appear in hospitals and clinics, where they will print new organs, it is still very, very far away (in fact, this is science fiction).
How to build a home 3D printer: recommendations from personal experience
3D printing and assembly of 3D printers is my hobby and passion. Here I will not share detailed diagrams and drawings, there are more than enough of them on specialized resources. The main goal of this material is to tell you where to start, where to dig and how to avoid mistakes in the process of assembling a home 3D printer. Perhaps one of the readers will be inspired by applied engineering achievements.
Why do you need a 3D printer? Use cases for
I first came across the idea of 3D printing back in the 90s when I was watching the Star Trek series. I remember how impressed I was by the moment when the heroes of the cult series printed the things they needed during their journey right on board their starship. They printed anything: from shoes to tools. I thought it would be great someday to have such a thing too. Then it all seemed something incredible. Outside the window are the gloomy 90s, and the Nokia with a monochrome screen was the pinnacle of progress, accessible only to a select few.
Years passed, everything changed. Around 2010, the first working models of 3D printers began to appear on sale. Yesterday's fantasy has become a reality. However, the cost of such solutions, to put it mildly, discouraged. But the IT industry would not be itself without an inquisitive community, where there is an active exchange of knowledge and experience and who just let them dig into the brains and giblets of new hardware and software. So, drawings and diagrams of printers began to surface more and more often on the Web. Today, the most informative and voluminous resource on the topic of assembling 3D printers is RepRap - this is a huge knowledge base that contains detailed guides for creating a wide variety of models of these machines.
I assembled the first printer about five years ago. My personal motivation to build my own device is quite prosaic and based on several factors. Firstly, there was an opportunity to try to realize the old dream of having your own device, inspired by a fantasy series. The second factor is that sometimes it was necessary to repair some household items (for example, a baby stroller, car elements, household appliances and other small things), but the necessary parts could not be found. Well, the third aspect of the application is "near-working". On the printer, I make cases for various IoT devices that I assemble at home.
Agree, it is better to place your device based on Raspberry Pi or Arduino in an aesthetically pleasing "body", which is not a shame to put in an apartment or take to the office, than to organize components, for example, in a plastic bowl for food. And yes, you can print parts to build other printers :)
There are a lot of scenarios for using 3D printers. I think everyone can find something of their own.
A complex part in terms of drawing that I printed on my printer. Yes, it's just a figurine, but it has many small elements
Ready solution vs custom assembly
When a technology has been tested, its value in the market decreases markedly. The same thing happened in the world of 3D printers. If earlier a ready-made solution cost simply sky-high money, then today acquiring such a machine is more humane for the wallet, but nevertheless not the most affordable for an enthusiast. There are a number of solutions already assembled and ready for home use on the market, their price range ranges from $500-700 (not the best options) to infinity (adequate solutions start from a price tag of about $1000). Yes, there are options for $150, but we, for understandable, I hope, reasons, will not dwell on them.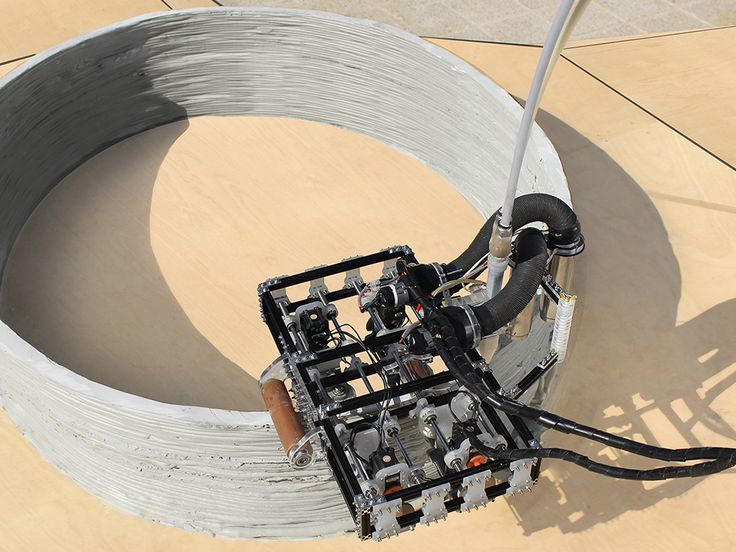
In short, there are three cases to consider a finished assembly:
- when you plan to print not much and rarely;
- when print accuracy is critical;
- you need to print molds for mass production of parts.
There are several obvious advantages to self-assembly. The first and most important is cost. Buying all the necessary components will cost you a maximum of a couple of hundred dollars. In return, you will receive a complete 3D printing solution with the quality of manufactured products acceptable for domestic needs. The second advantage is that by assembling the printer yourself, you will understand the principles of its design and operation. Believe me, this knowledge will be useful to you during the operation of even an expensive ready-made solution - any 3D printer needs to be serviced regularly, and it can be difficult to do this without understanding the basics.
The main disadvantage of assembly is the need for a large amount of time.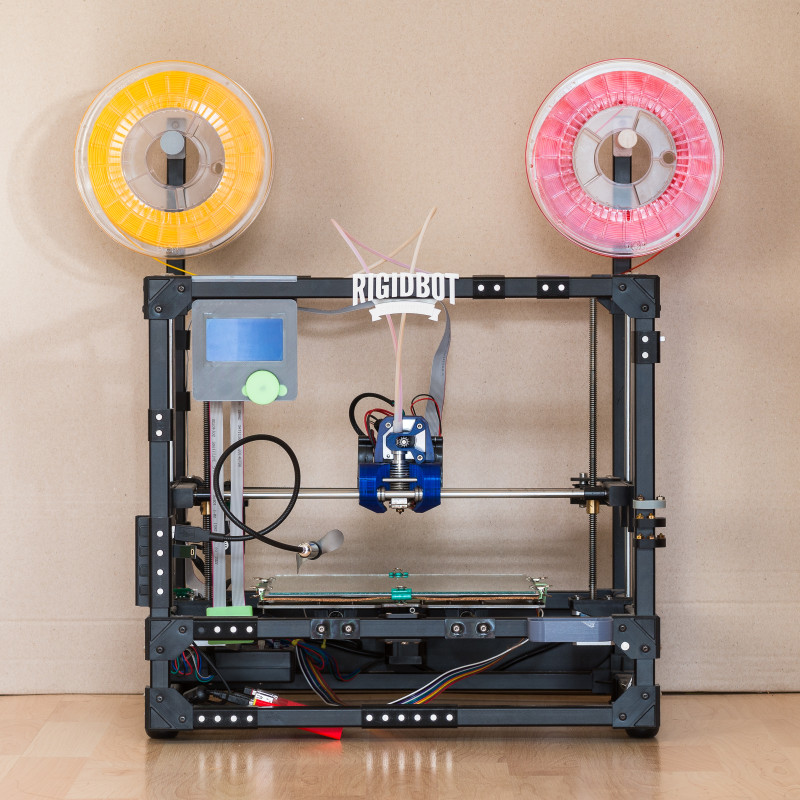 I spent about 150 hours on my first build.
What you need to assemble the printer yourself
The most important thing here is the presence of desire. As for any special skills, then, by and large, in order to assemble your first printer, the ability to solder or write code is not critical. Of course, understanding the basics of radio electronics and basic skills in the field of mechanics (that is, "straight hands") will greatly simplify the task and reduce the amount of time that needs to be spent on assembly.
Also, to start we need a mandatory set of parts:
- Extruder is the element that is directly responsible for printing, the print head. There are many options on the market, but for a budget build, I recommend the MK8. Of the minuses: it will not be possible to print with plastics that require high temperatures, there is noticeable overheating during intensive work, which can damage the element. If the budget allows, then you can look at MK10 - all the minuses are taken into account there.
- Processor board. Well known to many Arduino Mega. I didn't notice any downsides to this solution, but you can spend a couple of dollars more and get something more powerful, with a reserve for the future.
- Control board. I'm using RAMPS 1.4 which works great with the Arduino Mega. A more expensive but more reliable board is Shield, which already combines a processor board and a control board. In modern realities, I recommend paying attention to it. In addition to it, you need to purchase at least 5 microstep stepper motor controllers, for example - A4988. And it's better to have a couple of these in stock for replacement.
- Heated table. This is the part where the printed element will be located. Heating is necessary due to the fact that most plastics will not adhere to a cold surface. For example, for printing with PLA plastic, the required table surface temperature is 60-80°C, for ABS - 110-130°C, and for polycarbonate it will be even higher
There are also two options for choosing a table - cheaper and more expensive.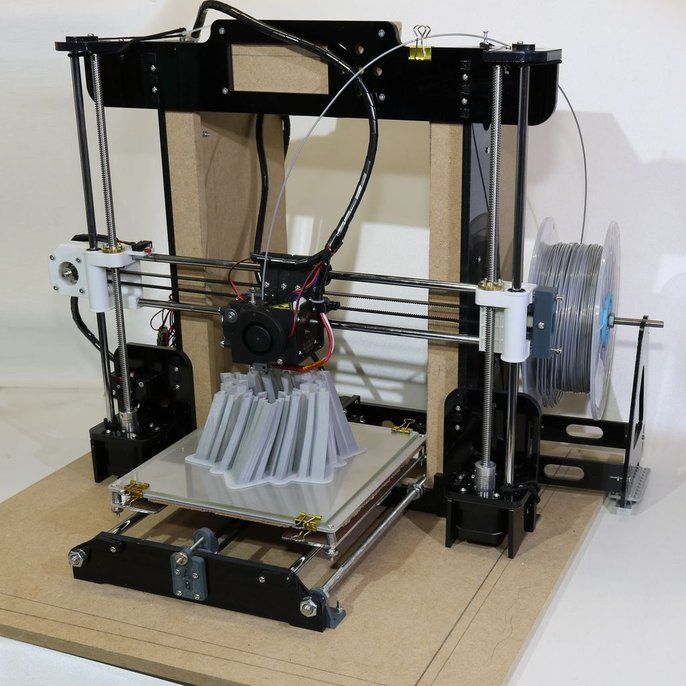 Cheaper options are essentially printed circuit boards with preheated wiring. To operate on this type of table, you will need to put borosilicate glass, which will scratch and crack during operation. Therefore, the best solution is an aluminum table.
 - Stepper motors. Most models, including the i2 and i3, use NEMA 17 size motors, two for the Z axis and one each for the X and Y axes. Finished extruders usually come with their own stepper motor. It is better to take powerful motors with a current in the motor winding of 1A or more, so that there is enough power to lift the extruder and print without skipping steps at high speed.
- Basic set of plastic fasteners.
- Belt and gears to drive it.
Examples of elements appearance: 1) MK8 extruder; 2) Arduino processor board; 3) RAMPS control board; 4) motor controllers; 5) aluminum heated table; 6) NEMA 17 stepper motor; 7) a set of plastic fasteners; 8) drive gears; 9) drive belt
This is a list of items to be purchased. Hardcore users can assemble some of them themselves, but for beginners, I strongly recommend purchasing ready-made solutions.
Yes, you will also need various small things (studs, bearings, nuts, bolts, washers ...) to assemble the case. In practice, it turned out that using a standard m8 stud leads to low printing accuracy on the Z axis. I would recommend immediately replacing it with a trapezoid of the same size.
M8 trapezoid stud for the Z axis, the use of which will save you a lot of time and nerves. Available for order on all major online platforms
You also need to purchase customized plastic parts for the X axis, such as these from the MendelMax retrofit kit.
Most parts available at your local hardware store. On RepRap you can find a complete list of necessary little things with all sizes and patterns. The kit you need will depend on the choice of platform (we'll talk about platforms later).
What's the price
Before delving into some aspects of the assembly, let's figure out how much such entertainment will cost for your wallet. Below is a list of parts required for purchase with an average price.
Platform selection
The community has already developed a number of different platforms for assembling printers - the most optimal case designs and the location of the main elements, so you do not have to reinvent the wheel.
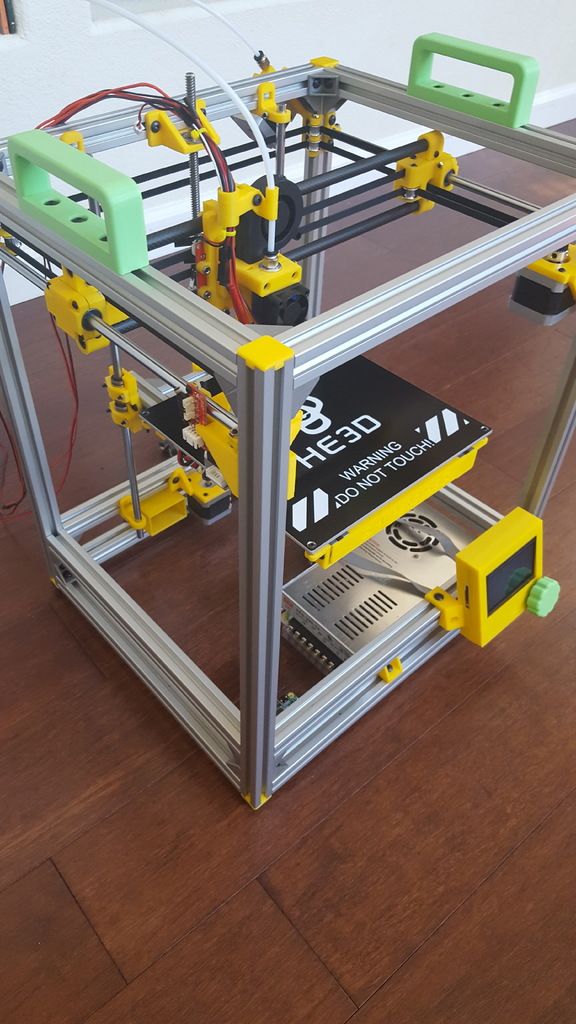
i2 and i3 are key platforms for self-assembly printer enclosures. There are also many modifications of them with various improvements, but for beginners, these two classic platforms should be considered, since they do not require special skills and fine-tuning.
Actually, illustration of platforms: 1) i2 platform; 2) i3 platform
On the plus side of i2: it has a more reliable and stable design, although it is a little more difficult to assemble; more opportunities for further customization.
The i3 variant requires more special plastic parts to be purchased separately and has a slow print speed. However, it is easier to assemble and maintain, and has a more aesthetically pleasing appearance. You will have to pay for simplicity with the quality of printed parts - the body has less stability than i2, which can affect print accuracy.
Personally, I started my experiments in assembling printers from the i2 platform. She will be discussed further.
Assembly steps, challenges and improvements
In this block, I will only touch on the key assembly steps using the i2 platform as an example. Full step by step instructions can be found here.
The general scheme of all the main components looks something like this. There is nothing particularly complicated here:
I also recommend adding a display to your design. Yes, you can easily do without this element when performing operations on a PC, but it will be much more convenient to work with the printer this way.
Understanding how all components will be connected, let's move on to the mechanical part, where we have two main elements - a frame and a coordinate machine.
Assembling the frame
Detailed frame assembly instructions are available on RepRap.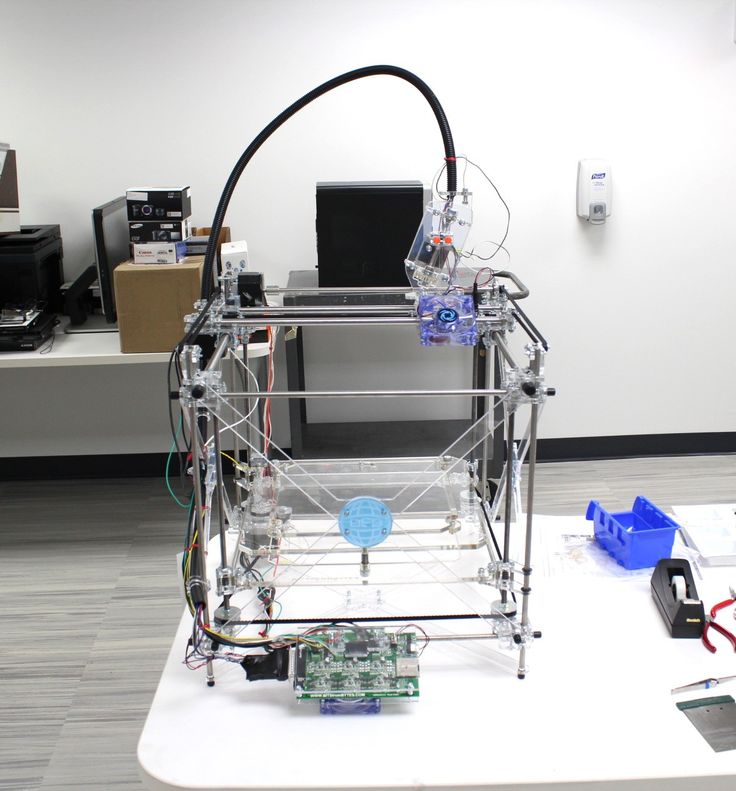 Of the important nuances - you will need a set of plastic parts (I already talked about this above, but I'd better repeat it), which you can either purchase separately or ask your comrades who already have a 3D printer to print.
The frame of the i2 is quite stable thanks to its trapezoid shape.
This is how the frame looks like with parts already partially installed. For greater rigidity, I reinforced the structure with plywood sheets
Coordinate machine
An extruder is attached to this part. The stepper motors shown in the diagram above are responsible for its movement. After installation, calibration is required along all major axes.
Important - you will need to purchase (or make your own) a carriage for moving the extruder and a mount for the drive belt. Drive belt I recommend GT2.
The carriage printed by the printer from the previous picture after it has been assembled.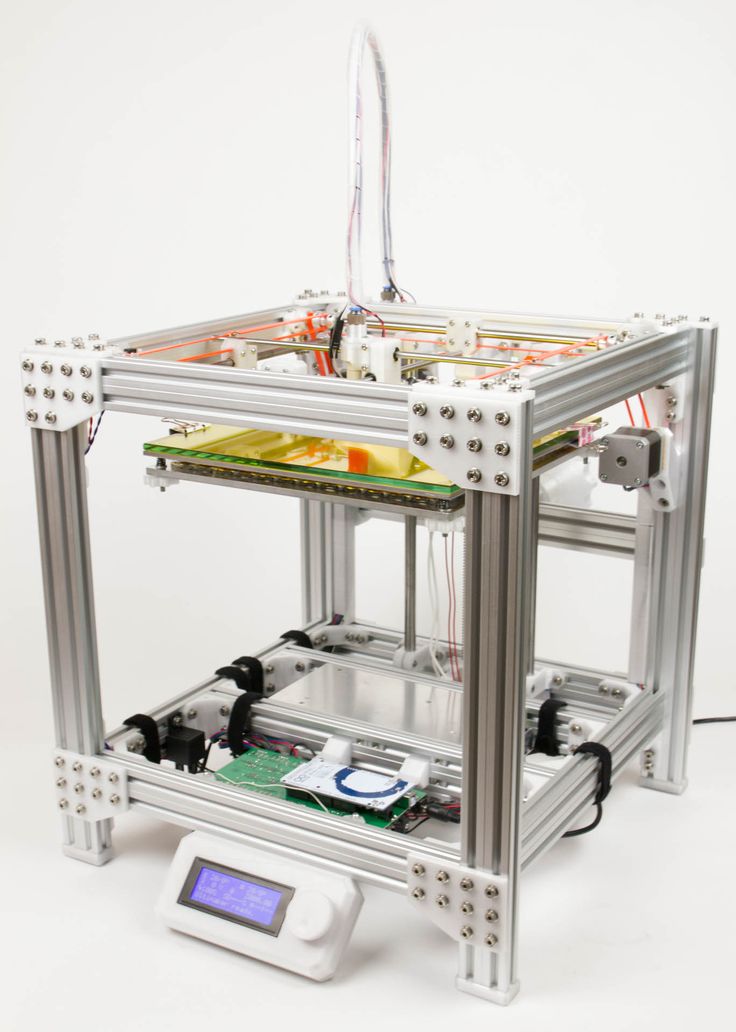 The part already has LM8UU bearings for guides and belt mount (top)
Calibration and adjustment
So, we completed the assembly process (as I said, it took me 150 hours) - the frame was assembled, the machine was installed. Now another important step is the calibration of this very machine and extruder. Here, too, there are small subtleties.
Setting up the machine
I recommend calibrating the machine with an electronic caliper. Do not be stingy with its purchase - you will save a lot of time and nerves in the process.
The screenshot below shows the correct constants for the Marlin firmware, which must be selected in order to set the correct number of steps per unit of measure. We calculate the coefficient, multiply it, substitute it into the firmware, and then upload it to the board.
Marlin 9 firmware constants0087
For high-quality calibration, I recommend relying on larger numbers in measurements - take not 1-1. 5 cm, but about 10. So the error will be more noticeable, and it will become easier to correct it.
Calibrating the extruder
When the frame is assembled, the machine is calibrated, we start setting up the extruder. Here, too, everything is not so simple. The main task of this operation is to correctly adjust the supply of plastic.
If underfeeding, the printed test item will have noticeable gaps, like test die 1. Conversely, the result will look bloated if plastic is overfed (dice 2)
Getting Started Printing
It remains for us to run some CAD or download ready-made .stl, which describe the structure of the printed material. Next, this structure needs to be converted into a set of commands understandable to our printer. For this I use the Slicer program. It also needs to be set up correctly - specify the temperature, the size of the extruder nozzle. After that, the data can be sent to the printer.
Slicer interface
As a raw material for printing, I recommend starting with regular ABS plastic - it is quite strong, products made from it are durable, and it does not require high temperatures to work with. For comfortable printing with ABS plastic, the table must be heated to a temperature of 110-130 ° C, and the extruder nozzle - within 230-260 ° C.
Some important details. Before printing, calibrate the machine along the Z axis. The extruder nozzle should be approximately half a millimeter from the table and ride along it without distortion. For this calibration, a regular sheet of A4 paper inserted between the nozzle and the surface of the heated table is best suited. If the sheet can be moved with little effort, the calibration is correct.
Another thing to keep in mind is the surface treatment of the heated table. Usually, before printing, the surface of the table is covered with something that hot plastic sticks to well. For ABS plastic, this can be, for example, Kapton tape. The disadvantage of adhesive tape is the need to re-glue it after several printing cycles. In addition, you will have to literally tear off the adhering part from it. All this, believe me, takes a lot of time.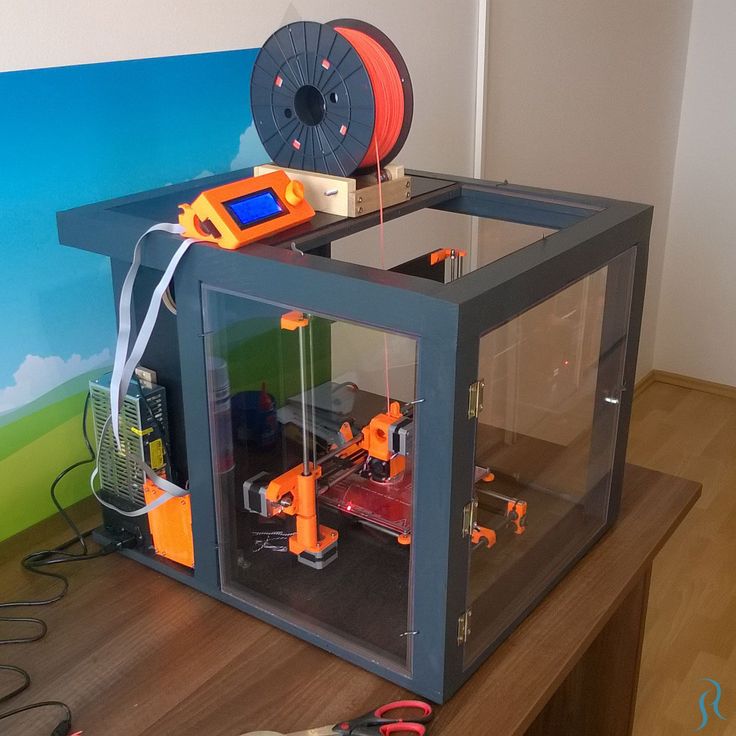 Therefore, if it is possible to avoid this fuss, it is better to avoid it.
An alternative option that I use instead of scotch tape is to apply several layers of ordinary light beer, followed by heating the table to 80-100 ° C until the surface is completely dry and re-applying 7-12 layers. It is necessary to apply the liquid with a cloth moistened with a drink. Among the advantages of this solution: ABS plastic separates from the table on its own when it cools down to about 50 ° C and is removed without effort, the table does not have to be peeled off, and one bottle of beer will last you for several months (if you use the drink only for technical purposes :)).
After we have collected and configured everything, we can start printing. If you have an LCD screen, then the file can be transferred for printing using a regular SD card.
The first results may have bumps and other artifacts - do not worry, this is a normal process of "grinding" the printer elements, which will end after a few print cycles.
Tips to make life easier (and sometimes save money)
In addition to the small recommendations given in the text above, in this section I will also give a short list of tips that will greatly simplify the operation of a 3D printer and the life of its owner.
- Do not experiment with nozzles. If you plan to immediately print from materials that require high temperatures, then it is better to immediately take the MK10 extruder. On MK8, you can "hang" special nozzles that support high-temperature conditions. But such modifications often cause difficulties and require special experience. It is better to avoid this fuss on the shore by simply installing the right extruder for you.
- Add starter relay for heated table. Improving the power supply system of this critical printable part with a starter relay will help solve the known problem of RAMP 1.4 - overheating of the transistors that control the power of the table, which can lead to failure of the board.
 I made this upgrade after having to throw away a few RAMPS 1.4s.
 - Select the correct media diameter for printing. I recommend using 1.75mm plastic for MK8 and MK10. If we take plastic, for example, 3 mm, then the extruder simply does not have enough strength to push it at an acceptable speed - everything will be printed much longer, and the quality will drop. ABS plastic is ideal for MK8, MK10 will be able to produce products from polycarbonate.
- Use only new and precise X and Y guides. Print quality will be affected. It is difficult to count on good quality with bent or deformed guides along the axes.
- Take care of cooling. In the course of my experiments with various extruders, the MK10 showed the best results - it prints quite accurately and quickly. The MK10 can also print plastics that require a higher print temperature than ABS, such as polycarbonate. Although it is not as prone to overheating as its younger brother MK8, I still recommend taking care of its cooling by adding a cooler to your design.
 It must be permanently enabled, this option can be configured in Slicer. You can also add coolers to keep the stepper motors at an acceptable temperature, however, make sure that their air flows do not fall on the printed part, as this can lead to its deformation due to too rapid cooling.
 - Consider heat retention. Yes, on the one hand, we are struggling with overheating of the elements. On the other hand, a uniform temperature around the printer will contribute to high-quality printing (the plastic will be more pliable). To achieve a uniform temperature, you can put our printer, for example, in a cardboard box. The main thing is to connect and configure the coolers before that, as described above.
- Consider insulating your desk. Heated table heats up to high temperatures. And if part of this heat leaves properly, heating the printed part, then the second part (from below) just goes down. To concentrate the heat from the table onto the part, you can perform an operation to insulate it.
 To do this, I simply attach a cork mouse pad to its bottom using stationery clips.
Pins
I am sure that during the assembly process you will encounter a number of difficulties specific to your project. Neither this text nor even the most detailed guides will insure against this.
As I wrote in the introductory part, the above does not claim the status of a detailed assembly manual. It is almost impossible to describe all the stages and their subtleties within the framework of one such text. First of all, this is an overview material that will help you prepare for the assembly process (both mentally and financially), understand whether you personally need to bother with self-assembly - or give up on everything and buy a ready-made solution.
For me, assembling printers has become an exciting hobby that helps me solve some issues in home and work affairs, take my mind off programming and do something interesting with my own hands. For my children - entertainment and the opportunity to get unusual and unique toys.