3D printer structure
Types of 3D Printers, Materials, and Applications
Skip to Main Content
3D printing or additive manufacturing (AM) technologies create three-dimensional parts from computer-aided design (CAD) models by successively adding material layer by layer until physical part is created.
While 3D printing technologies have been around since the 1980s, recent advances in machinery, materials, and software have made 3D printing accessible to a wider range of businesses, enabling more and more companies to use tools previously limited to a few high-tech industries.
Today, professional, low-cost desktop and benchtop 3D printers accelerate innovation and support businesses in various industries including engineering, manufacturing, dentistry, healthcare, education, entertainment, jewelry, and audiology.
All 3D printing processes start with a CAD model that is sent to software to prepare the design. Depending on the technology, the 3D printer might produce the part layer by layer by solidifying resin or sintering powder. The parts are then removed from the printer and post-processed for the specific application.
See how to go from design to 3D print with the Form 3 SLA 3D printer. This 5-minute video covers the basics of how to use the Form 3, from the software and materials to printing and post-processing.
3D printers create parts from three-dimensional models, the mathematical representations of any three-dimensional surface created using computer-aided design (CAD) software or developed from 3D scan data. The design is then exported as an STL or OBJ file readable by print preparation software.
3D printers include software to specify print settings and slice the digital model into layers that represent horizontal cross-sections of the part. Adjustable printing settings include orientation, support structures (if needed), layer height, and material. Once setup is complete, the software sends the instructions to the printer via a wireless or cable connection.
Some 3D printers use a laser to cure liquid resin into hardened plastic, others fuse small particles of polymer powder at high temperatures to build parts.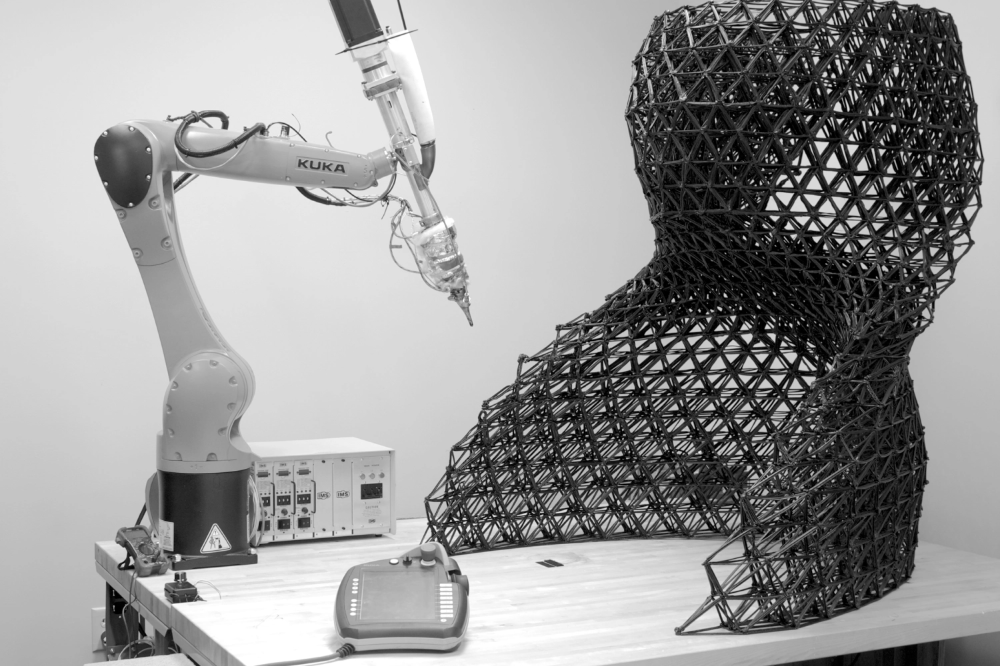 Most 3D printers can run unattended until the print is complete, and modern systems automatically refill the material required for the parts from cartridges.
With Formlabs 3D printers, an online Dashboard allows you to remotely manage printers, materials, and teams.
Depending on the technology and the material, the printed parts may require rinsing in isopropyl alcohol (IPA) to remove any uncured resin from their surface, post-curing to stabilize mechanical properties, manual work to remove support structures, or cleaning with compressed air or a media blaster to remove excess powder. Some of these processes can be automated with accessories.
3D printed parts can be used directly or post-processed for specific applications and the required finish by machining, priming, painting, fastening or joining. Often, 3D printing also serves as an intermediate step alongside conventional manufacturing methods, such as positives for investment casting jewelry and dental appliances, or molds for custom parts.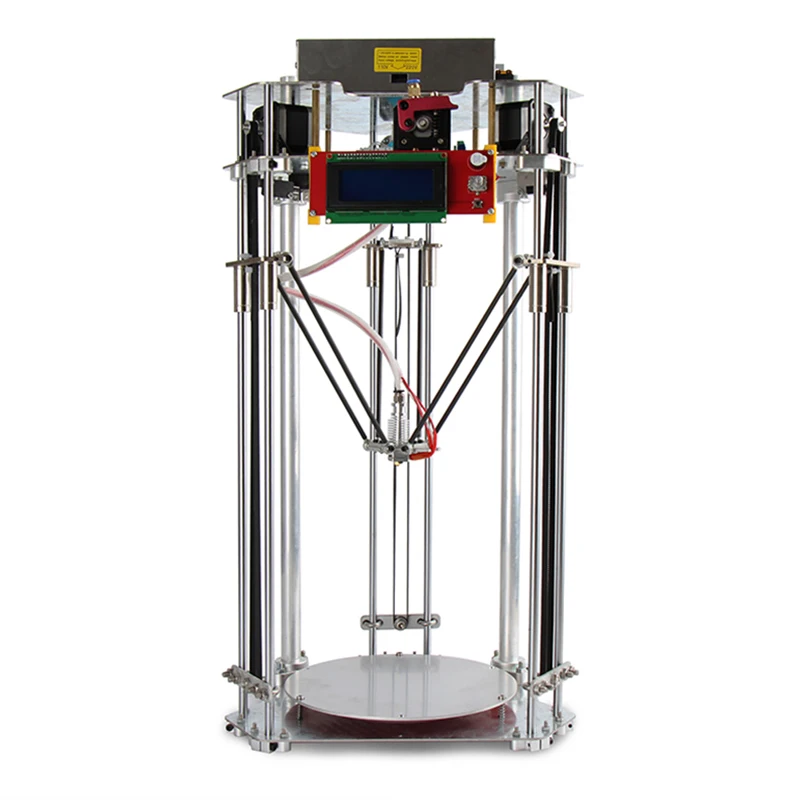
The three most established types of 3D printers for plastics parts are stereolithography (SLA), selective laser sintering (SLS), and fused deposition modeling (FDM). Formlabs offers two professional 3D printing technologies, SLA and SLS, bringing these powerful and accessible industrial fabrication tools into the creative hands of professionals around the world.
Stereolithography was the world’s first 3D printing technology, invented in the 1980s, and is still one of the most popular technologies for professionals. SLA 3D printers use a laser to cure liquid resin into hardened plastic in a process called photopolymerization.
SLA resin 3D printers have become vastly popular for their ability to produce high-accuracy, isotropic, and watertight prototypes and parts in a range of advanced materials with fine features and smooth surface finish. SLA resin formulations offer a wide range of optical, mechanical, and thermal properties to match those of standard, engineering, and industrial thermoplastics.
Resin 3D printing a great option for highly detailed prototypes requiring tight tolerances and smooth surfaces, such as molds, patterns, and functional parts. SLA 3D printers are widely used in a range of industries from engineering and product design to manufacturing, dentistry, jewelry, model making, and education.
- Rapid prototyping
- Functional prototyping
- Concept modeling
- Short-run production
- Dental applications
- Jewelry prototyping and casting
Learn More About SLA 3D Printers
Stereolithography (SLA) 3D printing uses a laser to cure liquid photopolymer resin into solid isotropic parts.
SLA parts have sharp edges, a smooth surface finish, and minimal visible layer lines.
Selective laser sintering (SLS) 3D printers use a high-power laser to sinter small particles of polymer powder into a solid structure. The unfused powder supports the part during printing and eliminates the need for dedicated support structures.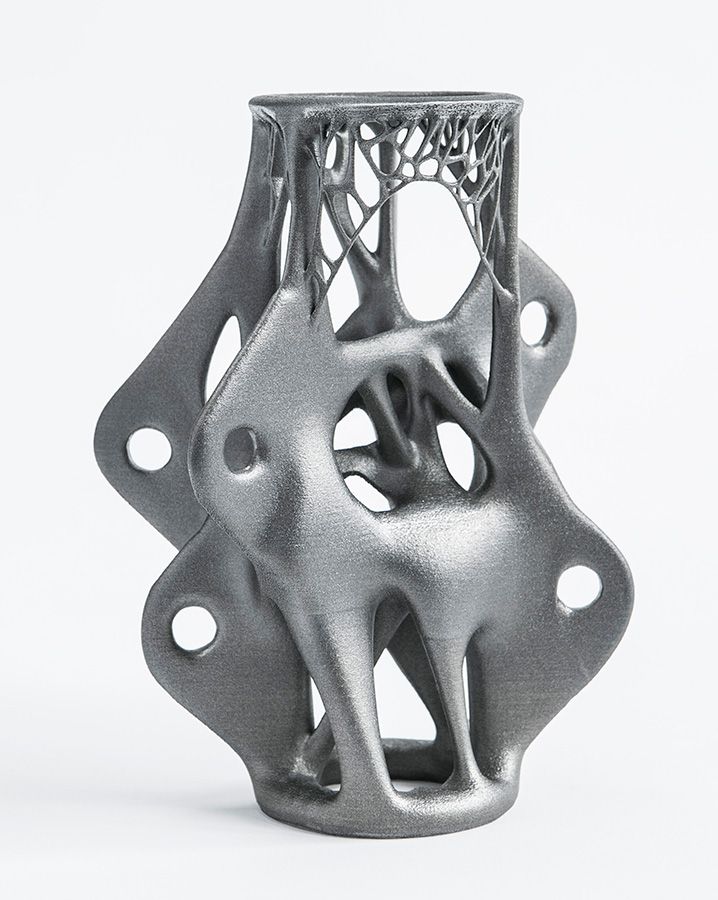 This makes SLS ideal for complex geometries, including interior features, undercuts, thin walls, and negative features. Parts produced with SLS printing have excellent mechanical characteristics, with strength resembling that of injection-molded parts.
The most common material for selective laser sintering is nylon, a popular engineering thermoplastic with excellent mechanical properties. Nylon is lightweight, strong, and flexible, as well as stable against impact, chemicals, heat, UV light, water, and dirt.
The combination of low cost per part, high productivity, and established materials make SLS a popular choice among engineers for functional prototyping, and a cost-effective alternative to injection molding for limited-run or bridge manufacturing.
- Functional prototyping
- End-use parts
- Short-run, bridge, or custom manufacturing
Learn More About SLS 3D Printers
SLS 3D printers use a high-powered laser to fuse small particles of polymer powder.
SLS parts have a slightly rough surface finish, but almost no visible layer lines.
Fused deposition modeling (FDM), also known as fused filament fabrication (FFF), is the most widely used type of 3D printing at the consumer level. FDM 3D printers work by extruding thermoplastic filaments, such as ABS (Acrylonitrile Butadiene Styrene), PLA (Polylactic Acid), through a heated nozzle, melting the material and applying the plastic layer by layer to a build platform. Each layer is laid down one at a time until the part is complete.
FDM 3D printers are well-suited for basic proof-of-concept models, as well as quick and low-cost prototyping of simple parts, such as parts that might typically be machined. However, FDM has the lowest resolution and accuracy when compared to SLA or SLS and is not the best option for printing complex designs or parts with intricate features. Higher-quality finishes may be obtained through chemical and mechanical polishing processes. Industrial FDM 3D printers use soluble supports to mitigate some of these issues and offer a wider range of engineering thermoplastics, but they also come at a steep price.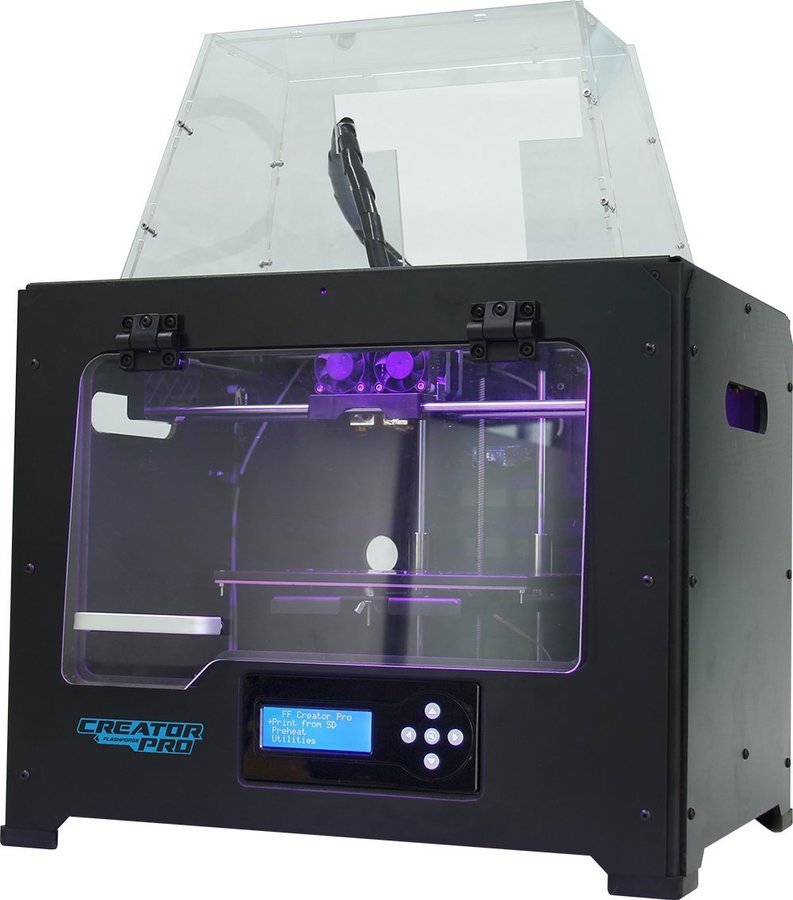
- Basic proof-of-concept models
- Simple prototyping
Learn More About FDM 3D Printers
FDM 3D printers build parts by melting and extruding thermoplastic filament, which a printer nozzle deposits layer by layer in the build area.
FDM parts tend to have visible layer lines and might show inaccuracies around complex features.
Having trouble finding the best 3D printing process for your needs? In this video guide, we compare FDM, SLA, and SLS technologies, the most popular types of 3D printers, across the most important buying considerations.
Each 3D printing process has its own benefits and limitations that make them more suitable for certain applications. This video compares the functional and visual characteristics of FDM, SLA, and SLS printers 3D printers to help you identify the solution that best matches your requirements.
Do you need custom parts or prototypes fast? Compared to outsourcing to service providers or using traditional tools like machining, having a 3D printer in-house can save weeks of lead time.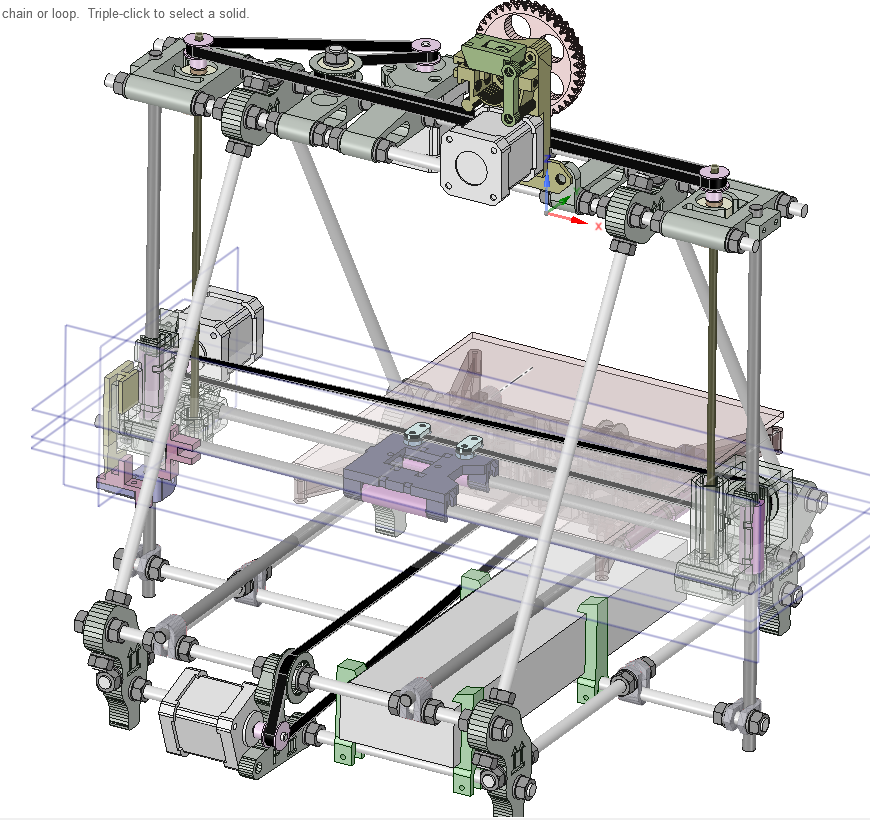 In this video, we compare the speed of FDM, SLA, and SLS 3D printing processes.
Comparing the cost of different 3D printers goes beyond sticker prices—these won’t tell you the full story of how much a 3D printed part will cost. Learn the three factors you need to consider for cost and how they compare across FDM, SLA, and SLS 3D printing technologies.
As additive manufacturing processes build objects by adding material layer by layer, they offer a unique set of advantages over traditional subtractive and formative manufacturing processes.
With traditional manufacturing processes, it can take weeks or months to receive a part. 3D printing turns CAD models into physical parts within a few hours, producing parts and assemblies from one-off concept models to functional prototypes and even small production runs for testing. This allows designers and engineers to develop ideas faster, and helps companies to bring products more quickly to the market.
Engineers at the AMRC turned to 3D printing to rapidly produce 500 high-precision drilling caps used in drilling trials for Airbus, cutting the lead time from weeks to only three days.
With 3D printing, there’s no need for the costly tooling and setup associated with injection molding or machining; the same equipment can be used from prototyping to production to create parts with different geometries. As 3D printing becomes increasingly capable of producing functional end-use parts, it can complement or replace traditional manufacturing methods for a growing range of applications in low- to mid-volumes.
Pankl Racing Systems substituted machined jigs and fixtures with 3D printed parts, decreasing costs by 80-90 percent that resulted in $150,000 in savings.
From shoes to clothes and bicycles, we’re surrounded by products made in limited, uniform sizes as businesses strive to standardize products to make them economical to manufacture. With 3D printing, only the digital design needs to be changed to tailor each product to the customer without additional tooling costs. This transformation first started to gain a foothold in industries where custom fit is essential, such medicine and dentistry, but as 3D printing becomes more affordable, it’s increasingly being used to mass customize consumer products.
Gillette's Razor Maker™ gives consumers the power to create and order customized 3D printed razor handles, with the choice of 48 different designs (and counting), a variety of colors, and the option to add custom text.
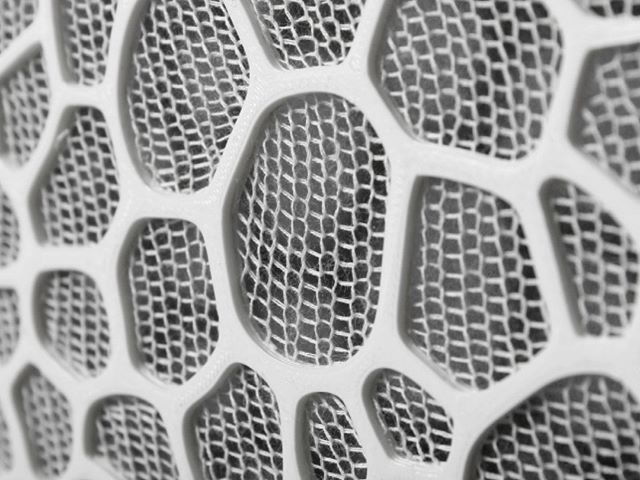
3D printing can create complex shapes and parts, such as overhangs, microchannels, and organic shapes, that would be costly or even impossible to produce with traditional manufacturing methods. This provides the opportunity to consolidate assemblies into less individual parts to reduce weight, alleviate weak joints, and cut down on assembly time, unleashing new possibilities for design and engineering.
Nervous System launched the first-ever 3D printed ceramic jewelry line, consisting of intricate designs that would be impossible to manufacture using any other ceramic technique.
Product development is an iterative process that requires multiple rounds of testing, evaluation, and refinement. Finding and fixing design flaws early can help companies avoid costly revisions and tooling changes down the road.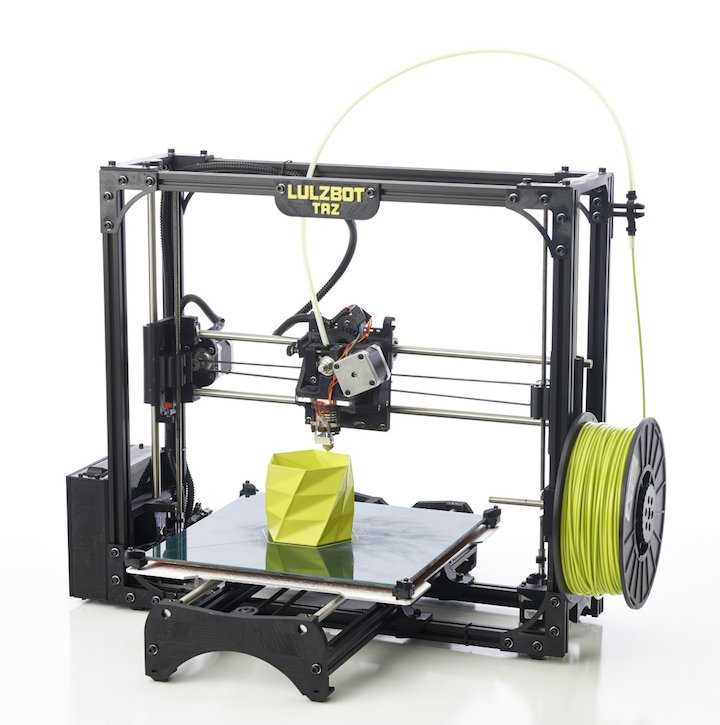 With 3D printing, engineers can thoroughly test prototypes that look and perform like final products, reducing the risks of usability and manufacturability issues before moving into production.
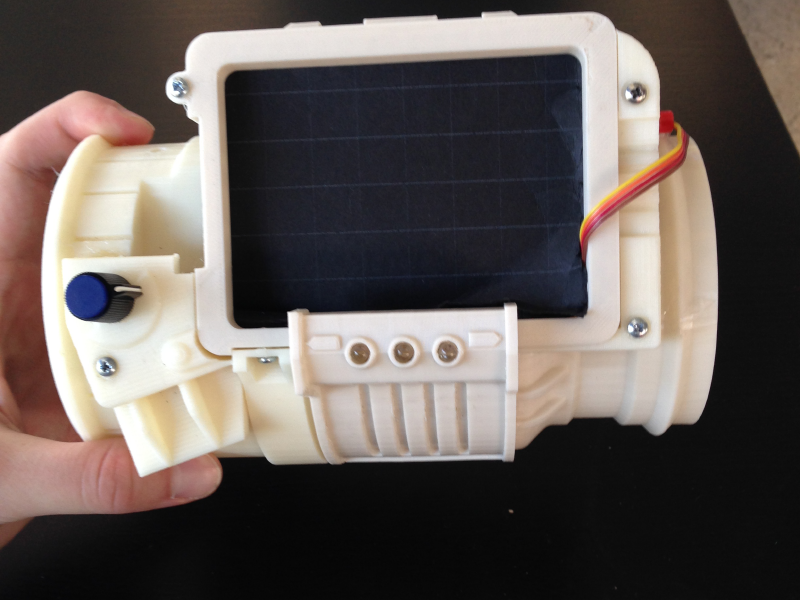
The developers of Plaato, an optically clear airlock for homebrewing, 3D printed 1,000 prototypes to fine tune their design before investing in expensive tooling.
3D printing accelerates innovation and supports businesses across a wide range of industries, including engineering, manufacturing, dentistry, healthcare, education, entertainment, jewelry, audiology, and more.
Rapid prototyping with 3D printing empowers engineers and product designers to turn ideas into realistic proofs of concept, advance these concepts to high-fidelity prototypes that look and work like final products, and guide products through a series of validation stages toward mass production.
Applications:
- Rapid prototyping
- Communication models
- Manufacturing validation
Learn More
Manufacturers automate production processes and streamline workflows by prototyping tooling and directly 3D printing custom tools, molds, and manufacturing aids at far lower costs and lead times than with traditional manufacturing.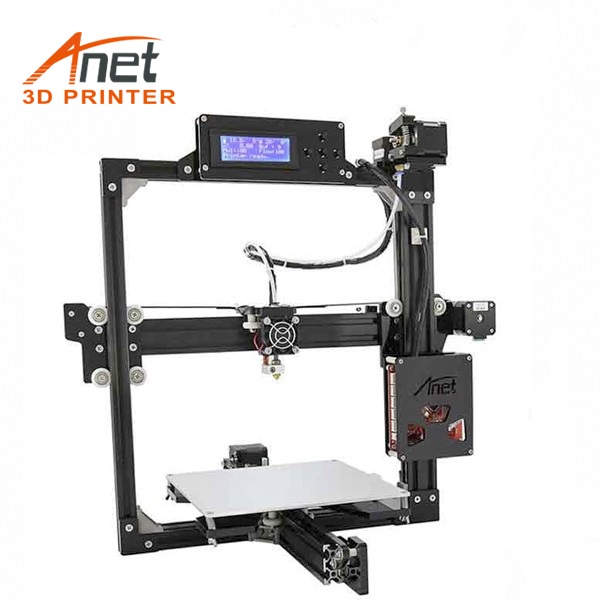 This reduces manufacturing costs and defects, increases quality, speeds up assembly, and maximizes labor effectiveness.
Applications:
- Jig and fixtures
- Tooling
- Molding (injection molding, thermoforming, silicone molding, overmolding)
- Metal casting
- Short run production
- Mass customization
Learn More
3D printers are multifunctional tools for immersive learning and advanced research. They can encourage creativity and expose students to professional-level technology while supporting STEAM curricula across science, engineering, art, and design.
Applications:
- Models for STEAM curricula
- Fab labs and makerspaces
- Custom research setups
Learn More
Affordable, professional-grade desktop 3D printing helps doctors deliver treatments and devices customized to better serve each unique individual, opening the door to high-impact medical applications while saving organizations significant time and costs from the lab to the operating room.
Applications:
- Anatomical models for surgical planning
- Medical devices and surgical instruments
- Insoles and orthotics
Learn More
High definition physical models are widely used in sculpting, character modeling, and prop making. 3D printed parts have starred in stop-motion films, video games, bespoke costumes, and even special effects for blockbuster movies.
Applications:
- Hyper-realistic sculptures
- Character models
- Props
Learn More
Jewelry professionals use CAD and 3D printing to rapidly prototype designs, fit clients, and produce large batches of ready-to-cast pieces. Digital tools allow for the creation of consistent, sharply detailed pieces without the tediousness and variability of wax carving.
Applications:
- Lost-wax casting (investment casting)
- Fitting pieces
- Master patterns for rubber molding
Learn More
Hearing specialists and ear mold labs use digital workflows and 3D printing to manufacture higher quality custom ear products more consistently, and at higher volumes for applications like behind-the-ear hearing aids, hearing protection, and custom earplugs and earbuds.
Applications:
- Soft silicone ear molds
- Custom earbuds
Learn More
The market for 3D printing materials is wide and ever-growing, with printers for everything from plastics to metals, and even food and live tissue in development. Formlabs offers the following range of photopolymer materials for the desktop.
Standard 3D printing materials provide high resolution, fine features, and a smooth surface finish ideal for rapid prototyping, product development, and general modeling applications.
These materials are available in Black, White, and Grey with a matte finish and opaque appearance, Clear for any parts requiring translucency, and as a Color Kit to match almost any custom color.
Explore Standard Materials
3D printing materials for engineering, manufacturing, and product design are formulated to provide advanced functionality, withstand extensive testing, perform under stress, and remain stable over time.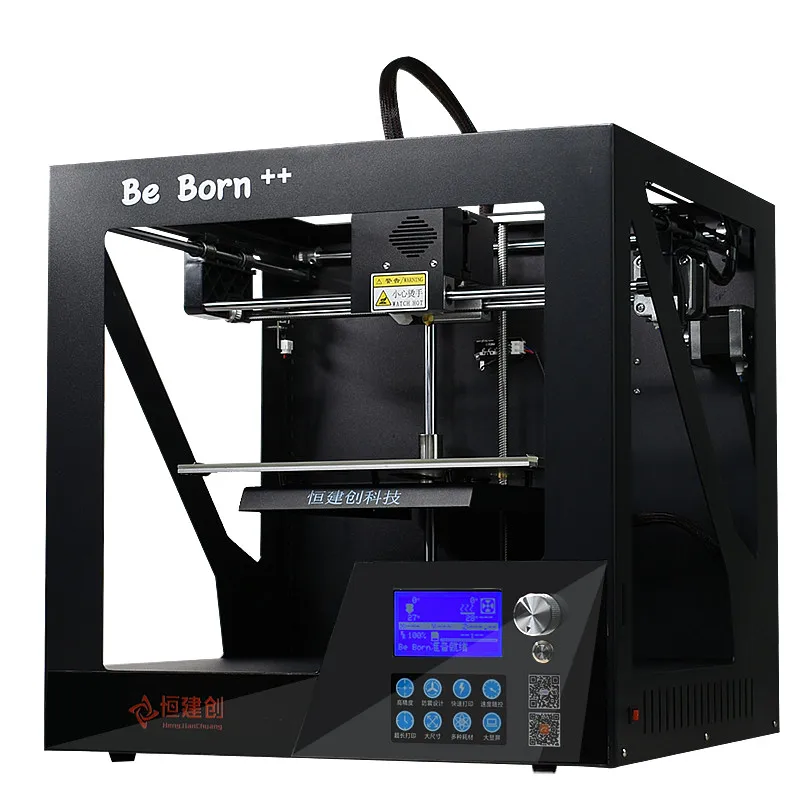
Engineering materials are ideal for 3D printing strong, precise concept models and prototypes to rapidly iterating through designs, assess form and fit, and optimize manufacturing processes.
Explore Engineering Materials
Medical resins empower hospitals to create patient-specific parts in a day at the point of care and support R&D for medical devices. These resins are formulated for 3D printing anatomical models, medical device and device components, and surgical planning and implant sizing tools.
Explore Jewelry Materials
Jewelry resins are formulated to capture breathtaking detail and create custom jewelry cost-effectively. These resins are ideal for jewelry prototyping and casting jewelry, as well as vulcanized rubber and RTV molding.
Explore Jewelry Materials
Specialty Resins push the limits of 3D printing, featuring advanced materials with unique mechanical properties that expand what’s possible with in-house fabrication on our stereolithography 3D printers.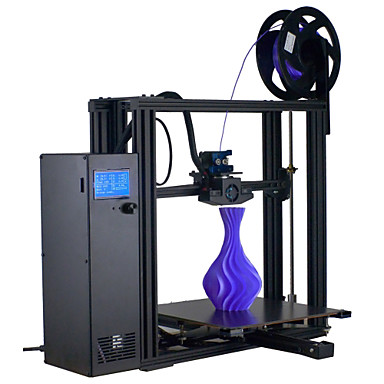
Explore Specialty Materials
In recent years, high-resolution industrial 3D printers have become more affordable, intuitive, and reliable. As a result, the technology is now accessible to more businesses. Read our in-depth guide about 3D printer costs, or try our interactive tool to see if this technology makes economic sense your business.
Calculate Your Savings
New to 3D printing? Explore our guides to learn about the key terms and specific characteristics of 3D printing to find the best solution for your business.
For further questions,
Explore 3D Printing Resources
The First Affordable Large SLA 3D Printer
Skip to Main Content
With a large build volume of 33.5 × 20 × 30 cm (13.2 × 7.9 × 11.8 in),
you can print full-scale bulky prototypes or detailed models.
Stop outsourcing large-scale prints.
Work faster with a large format 3D printer that’s versatile enough to bring large scale fabrication in-house.
Life-sized prints for larger-than-life ideas.
The Form 3L is large enough to print human-scale models, like a prototype of a helmet that’s ready to try on.
Perfectionism that scales.
Two precision Light Processing Units inside the printer achieve consistent accuracy and detail across the entire build platform.
Material
Print Time
Print Cost
Part By
Black Diamond Equipment is prototyping climbing helmets at 1:1 scale to test for form and fit, producing several iterations per week in-house and reducing costs. Read more about how Black Diamond uses the Form 3L.
Note: print time and cost will vary based on part geometry, material, layout, and orientation.
Get more done and work more efficiently with an end-to-end 3D printing workflow. From printing, to post-processing, each step of the process was designed with efficiency in mind.
Watch the Webinar
Choose from a wide range of advanced materials, developed specifically for Formlabs printers by in-house materials scientists.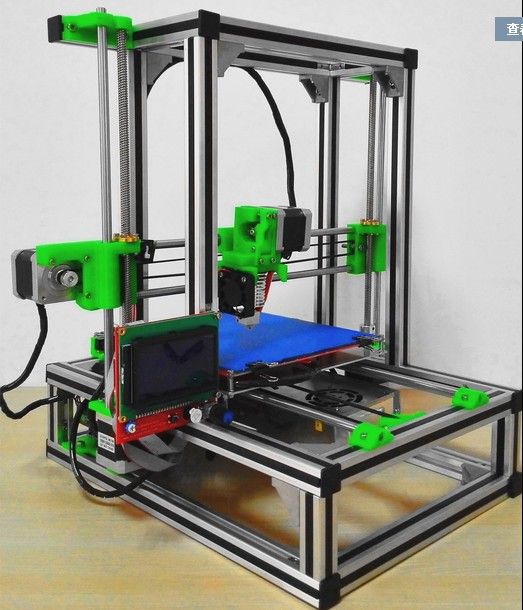 With simplified material switching and automatic resin dispensing, the Form 3L allows you to walk away and focus on other work once your print job starts.
Many applications, one printer.
Print in over 15 functional resins to support a wide range of workflows on a single platform.
Switch materials in minutes.
Avoid the hassle and mess of purging materials with our swappable cartridge system, cross-compatible with other Formlabs SLA printers.
Automatic resin dispensing.
Our automated resin system dispenses resin as parts print. The Form 3L holds two cartridges of resin to avoid mid-print interruptions.
Explore All Materials
Available layer thickness settings vary by material. Visit our material settings roadmap for more details.
Formlabs is known for designing end-to-end additive workflows you’ll be excited to use. The Form 3L brings the Formlabs experience to large format 3D printing.
Streamline your 3D printing workflow and consistently produce high-quality parts with our automated large-format post-processing solutions, Form Wash L and Form Cure L.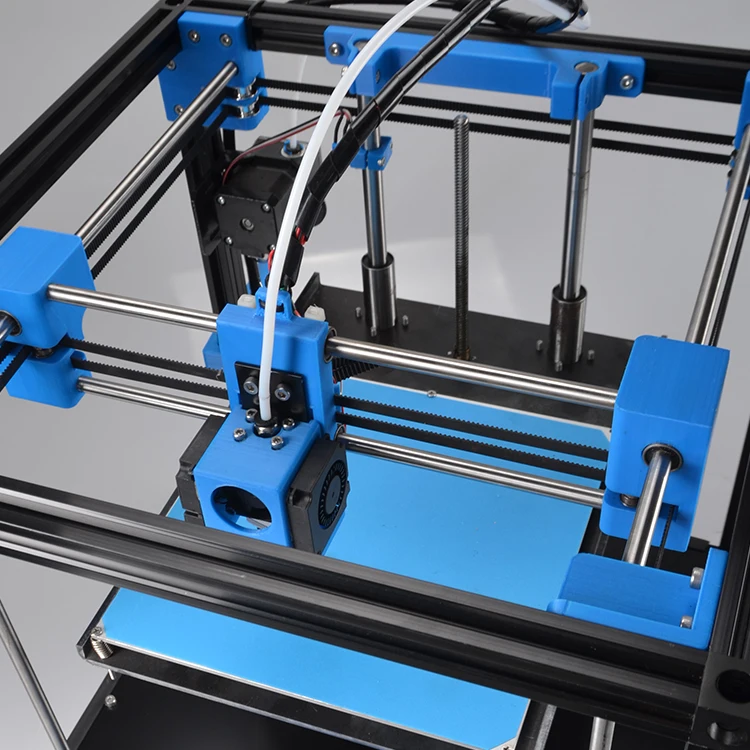
Learn More
Printer
Form 3
Form 3L
Build Volume (W × D × H)
14.5 × 14.5 × 18.5 cm
5.7 × 5.7 × 7.3 in
33.5 × 20 × 30 cm
13.2 × 7.9 × 11.8 in
33.5 × 20 × 30 cm
13.2 × 7.9 × 11.8 in
XY Resolution
25 microns
25 microns
25 microns
Biocompatible Materials
No
No
Yes
Laser Power
One 250 mW laser
Two 250 mW lasers
Two 250 mW lasers
Weight
17.5 kg
38.5 lb
54.4 kg
120 lb
54.4 kg
120 lb
Printer Dimensions (W × D × H)
40.5 × 37.5 × 53 cm
15.9 × 14.8 × 20.9 in
77 × 52 × 74 cm
30.3 × 20.5 × 29.1 in
77 × 52 × 74 cm
30.3 × 20.5 × 29.1 in
Explore Form 3
Buy Now
Buy the Form 3L
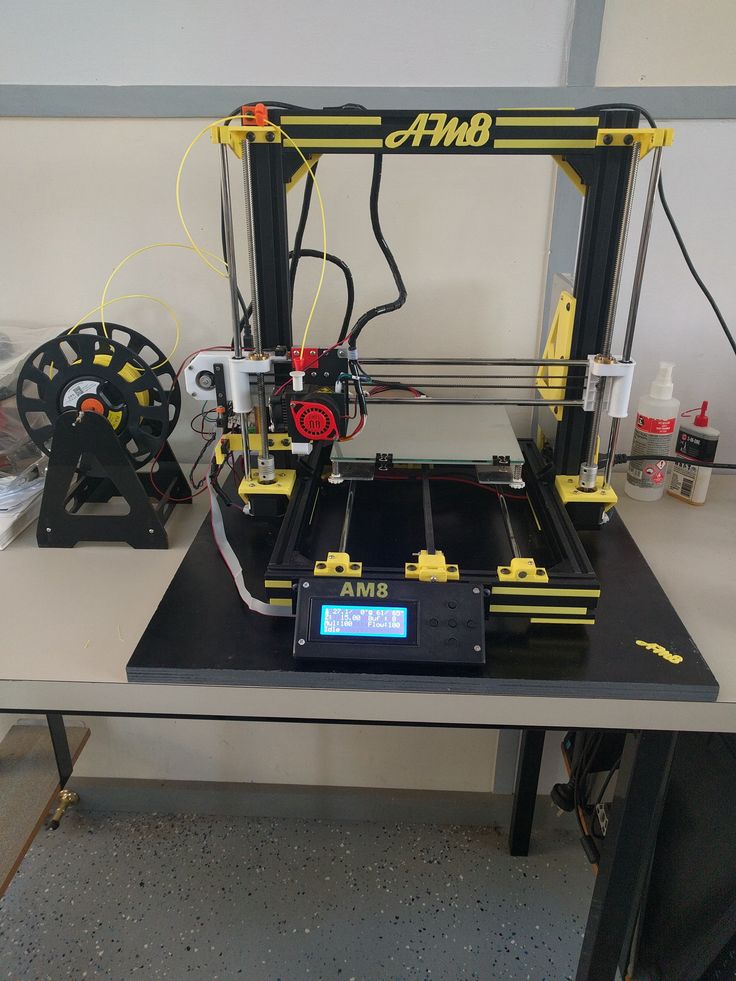
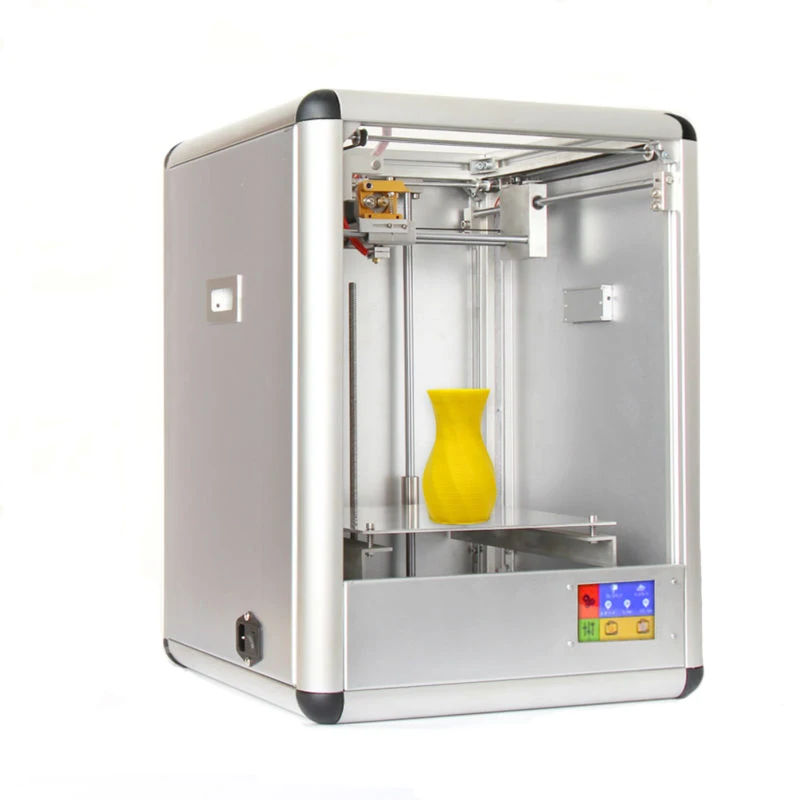
What a 3D printer for personal use consists of and how it works
Do you want to assemble a 3D printer with your own hands from separate components? It is not as difficult as it seems at first glance.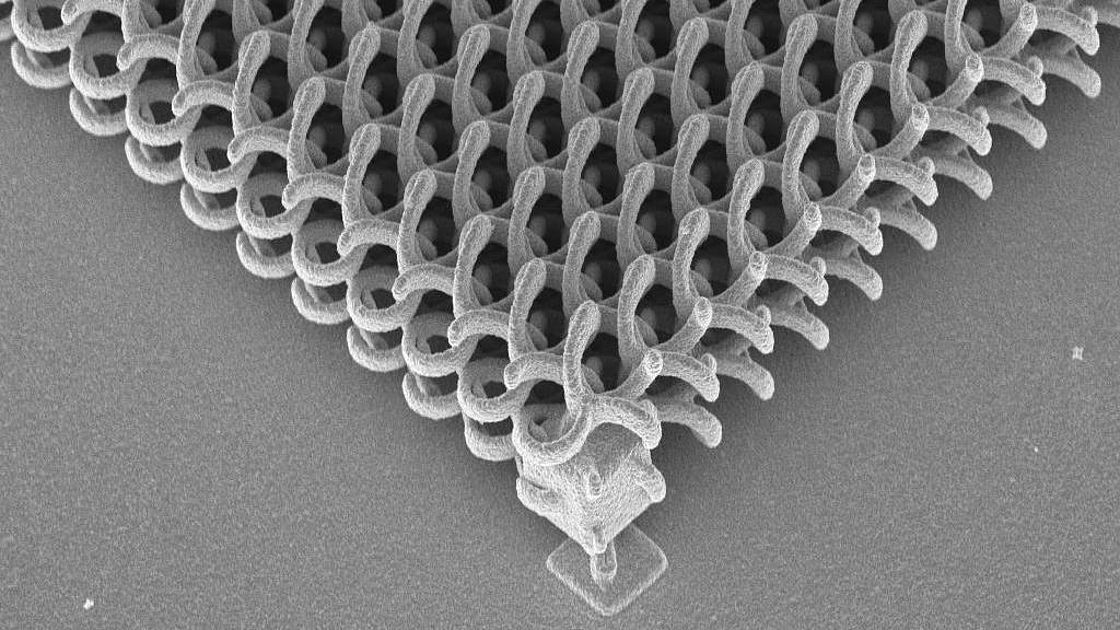 Almost all personal 3D printers use the same approach to 3D printing, differing in detail. Their design looks extremely simple: 4 or 5 stepper motors, an extruder with a heater and a temperature sensor, a heated platform, three end sensors at the zero mark of the axes. More sophisticated printers may have a second extruder with a heater and a temperature sensor, a fan to cool the head, and end sensors at the maximum axis marks.
It is impossible to connect actuators and sensors directly to a computer, so an intermediate link is used - a control controller, for which it is necessary to prepare a special G-code from a mathematical 3D model - a simple set of commands that determine the sequence of printer actions. Certain types of controllers have their own card reader with a slot for an SD memory card, from which G-codes can be read directly. In this case, a computer is not required, and a few buttons and an LCD display are enough to control the 3D printer. Control controllers are most often created under the Arduino IDE development environment.
The movement of the print head (extruder) occurs in three planes - along the axes X, Y and Z, for which stepper motors are used with a typical accuracy of 1.8 ° per step. Auxiliary elements are timing belts and rollers along the X and Y axes. Often, threaded metal rods or special screws are used for precise positioning along the Z axis. A controller-controlled 3D printer moves the print head, extruding molten plastic, thereby fusing the model layer by layer.
NEMA 17 Stepper Motors
NEMA 17 is the size reference for a standard footprint for various stepper motors, which measures 1.7x1.7 inches (43.2x43.2 mm). The smaller size is referred to as NEMA 14 (1.4x1.4 in. or 35.6x35.6 mm).
Stepper motors can have three modes of operation: full step, half step and micro stepping. During the full step mode, the stepper motor rotates its axis 360 degrees, making 200 steps, during the half step mode - 400, and in the microstep mode, each step is divided into 4, 8 or 16 parts. Motor control in microstepping is so complex that special stepper motor controllers are used for it. Stepper motors are available in 4V, 8V and 12V.
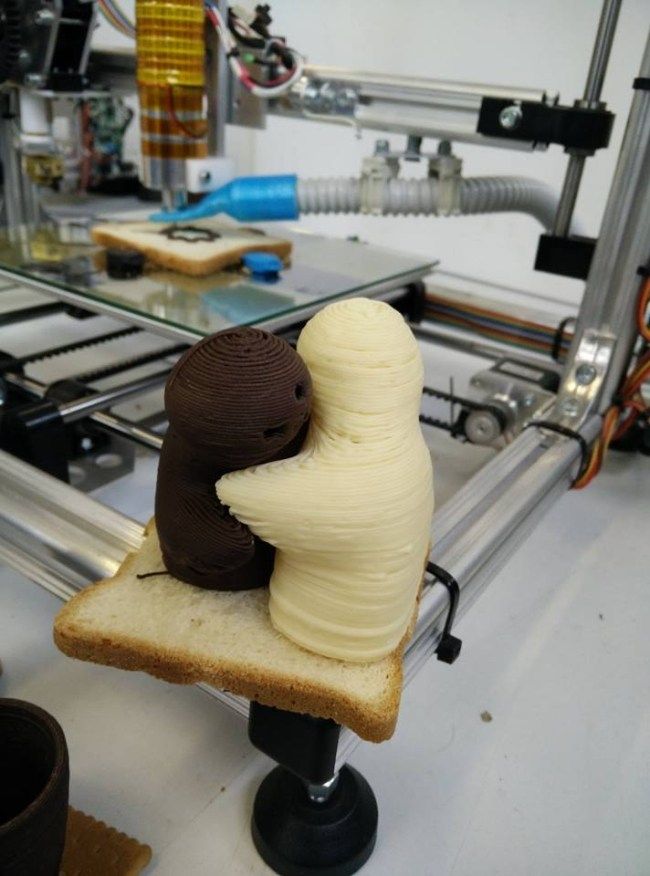
Extruder
The function of uniform distribution of plastic and other materials over the working surface is performed by the extruder, which melts and feeds thermoplastic (ABS or PLA) through the nozzle onto the surface of the table. Being the most complex part of a 3D printer, the extruder consists of a plastic feed drive and a thermal head.
The extruder drive, using a gear mechanism, pushes out a plastic thread with a diameter of 1.75 or 3 mm. Most modern drives use a stepper motor to better control the filament feed to the thermal head. The filament is fed into an aluminum thermal head with a built-in heater, where it is heated to a temperature of 170-260 ° C, depending on the type of plastic, and turning into a semi-liquid state, it is squeezed out of the print head, the hole diameter of which is usually in the range from 0.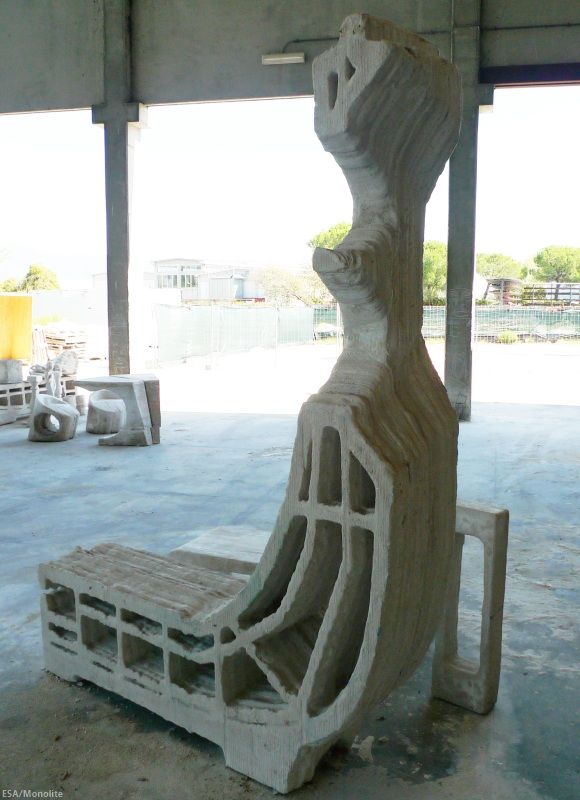 35 to 0, 5 mm.
Printable surface
The work surface on which 3D parts are formed is called a table or platform. Its dimensions vary depending on the printer model and are usually in the range from 150 to 200 mm 2 . Most manufacturers of 3D printers offer a heated platform already in the kit, or as an additional option. There is always the opportunity to make a heated platform yourself from improvised material. The task of the platform is to prevent breaks or cracks in the model, as well as to ensure reliable adhesion between the first layers of the printed part and the work surface.
The top of the platform is made of glass or aluminum for better heat distribution over the entire area and a smooth and even surface. Glass gives a more even surface, while aluminum distributes heat better in case of heating. To prevent the model from tearing off during printing, the surface of the platform is often covered with some kind of sticky mass or film.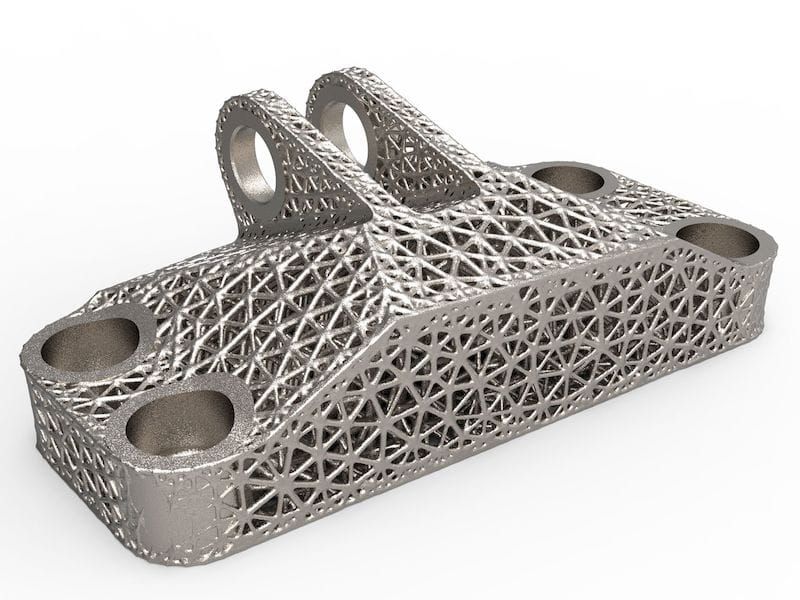 Such materials often consist of Kapton or polyamide tape, depending on the type of plastic.
Linear motor
The drive used (linear motor) largely determines the accuracy and speed of printing, as well as the frequency of maintenance of the 3D printer. Typically, smooth, high-precision metal rods are used for each axis, and plastic or bronze ball bearings are used to move over each rod. Linear ball bearings provide longer life and better performance, but they are noisier than bronze bearings, which in turn are more difficult to calibrate at the time of assembly.
End sensors
The range of motion of linear actuators is usually limited by mechanical or optical detents - the simplest end sensors (EndStop), which signal the approach of the printer head to the edge of the working surface in order to prevent it from going beyond the platform. Fixtures are also used to define the origin (0,0,0) in all three axes.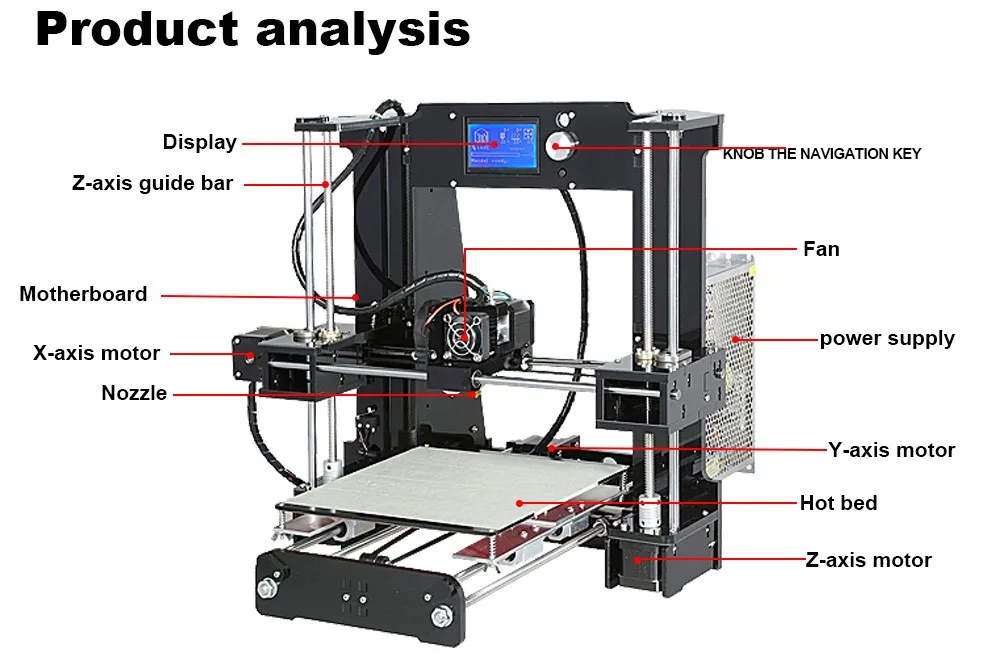
Strictly speaking, the presence of clamps is not mandatory in the operation of 3D printers, but their presence allows you to calibrate the printer before printing, which makes printing more accurate and accurate. End sensors are of two types: pressure and optical. Optical ones are more accurate, but to simplify (for example, along the X-Y axes), you can also use pressure ones.
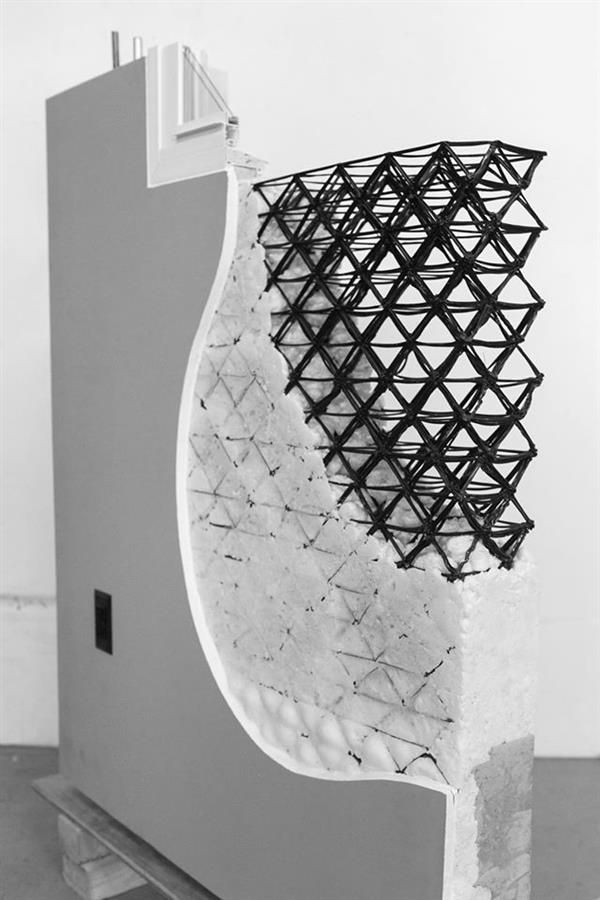
Printer frame
What connects all the elements described above into a single whole is called the frame. The shape of the frame, and especially the material from which it is made, quite strongly affect the accuracy and quality of the print. The frame design based on the slot principle, when plastic or even plywood sheets cut by a laser, are connected by combs into grooves and then twisted with bolts and nuts, greatly simplifies the assembly of a 3D printer and is more accurate for calibration, but does not contribute to noise suppression, and fasteners have to be tightened over time.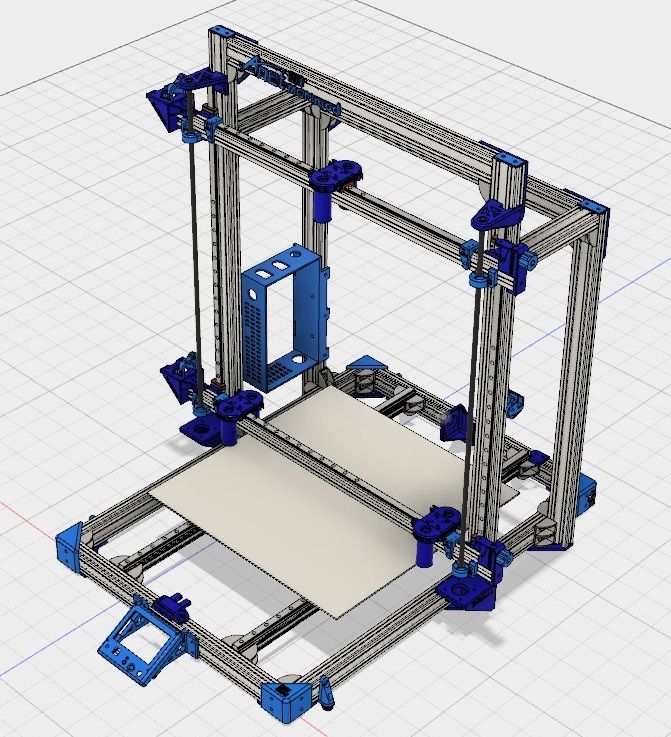 If the frame contains threaded metal rods, then the device turns out to be quieter, but the assembly and calibration process becomes more complicated.
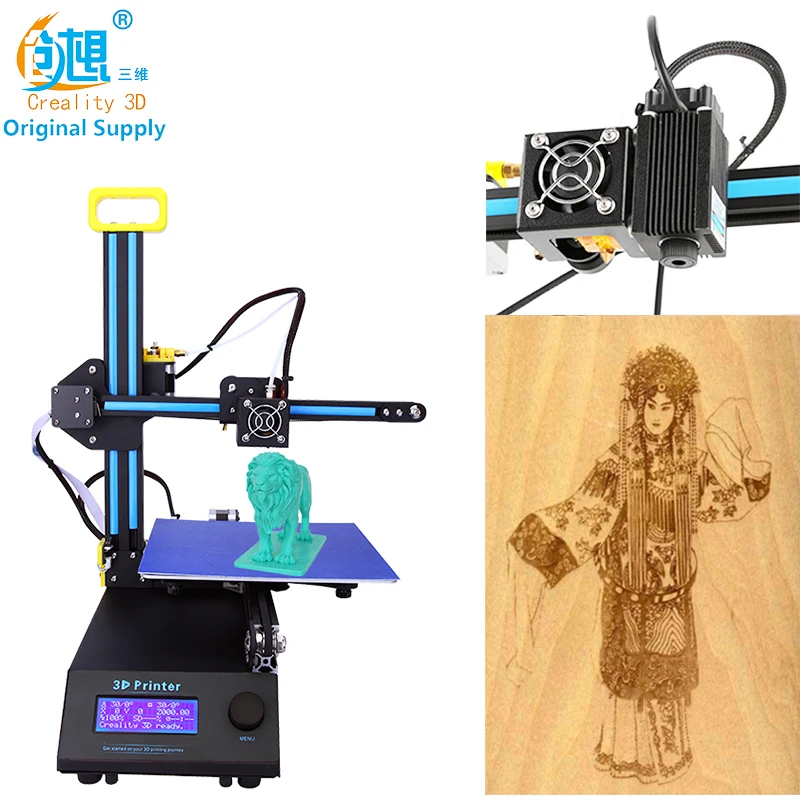
If you still prefer to purchase a ready-made 3D printer, then pay attention to the models that are currently popular on the market:
In addition, visiting our stores in Moscow and St. Petersburg, you can even touch some of them with your own hands.
Manufacturers: Mbot 3d
Published: 06/07/2014
How metal 3D printers work. Overview of SLM and DMLS technologies. additive manufacturing. 3D metal printing.
Metal 3D printing. Additive technologies.
SLM or DMLS: what's the difference?
Hello everyone, Friends! 3DTool is with you!
BLT metal 3D printer catalog
Selective laser melting ( SLM ) and direct metal laser sintering ( DMLS ) are two additive manufacturing processes that belong to the family of 3D printing , using the powder layering method.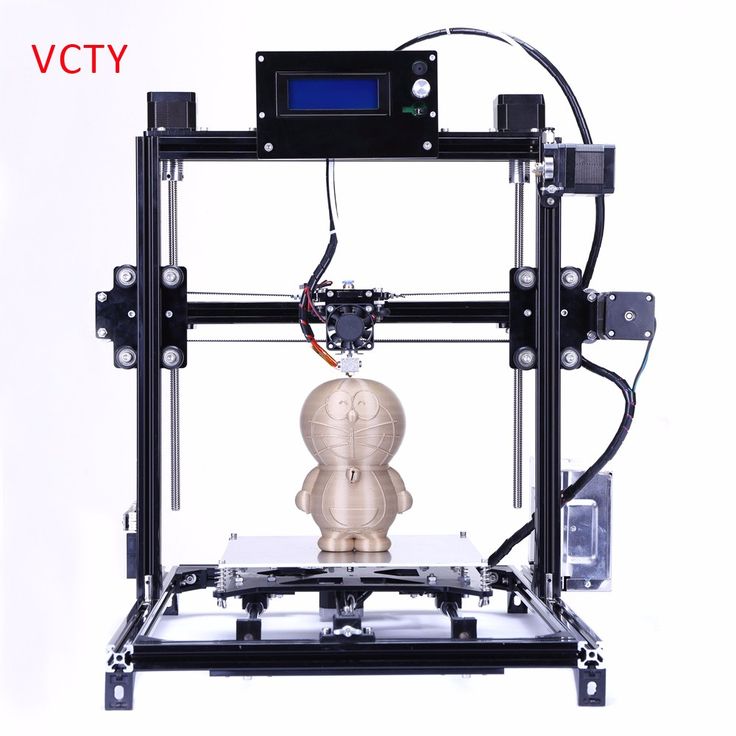 The two technologies have much in common: they both use a laser to selectively melt (or melt) metal powder particles, bonding them together and creating a pattern layer by layer. In addition, the materials used in both processes are metals in granular form.
The differences between SLM and DMLS come down to the basics of the particle bonding process: SLM uses metal powders with a single melting point and completely melts the particles, while in DMLS the powder consists of materials with variable melting points.
Specifically:
SLM produces single metal parts while DMLS produces metal alloy parts.
Both SLM and DMLS technologies are used in industry to create final engineering products.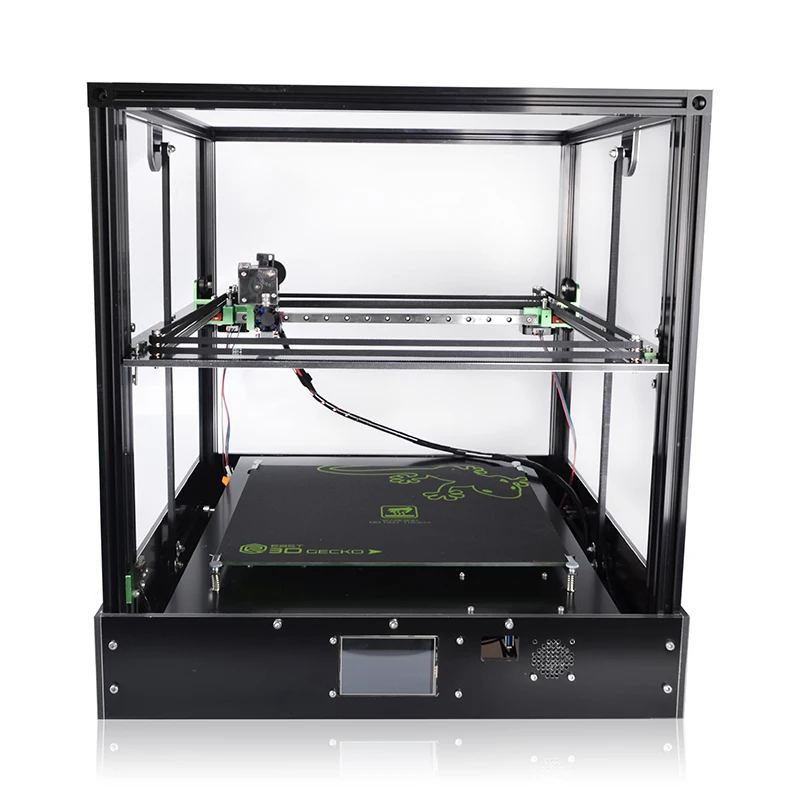 In this article, we will use the term "metal 3D printing" to summarize the 2 technologies. We will also describe the main mechanisms of the manufacturing process that are necessary for engineers to understand the advantages and disadvantages of these technologies.
There are other manufacturing processes for producing dense metal parts, such as electron beam melting (EBM) and ultrasonic additive manufacturing (UAM). Their availability and distribution is rather limited, so they will not be presented in this article.
How 3D printing with SLM or DMLS metal works.
How does metal 3D printing work? The basic manufacturing process for SLM and DMLS is very similar.
1. The printing chamber is first filled with an inert gas (such as argon) to minimize the oxidation of the metal powder. It then heats up to the optimum operating temperature.
2. A layer of powder is spread over the platform, a powerful laser makes passes along a predetermined path in the program, fusing the metal particles together and creating the next layer.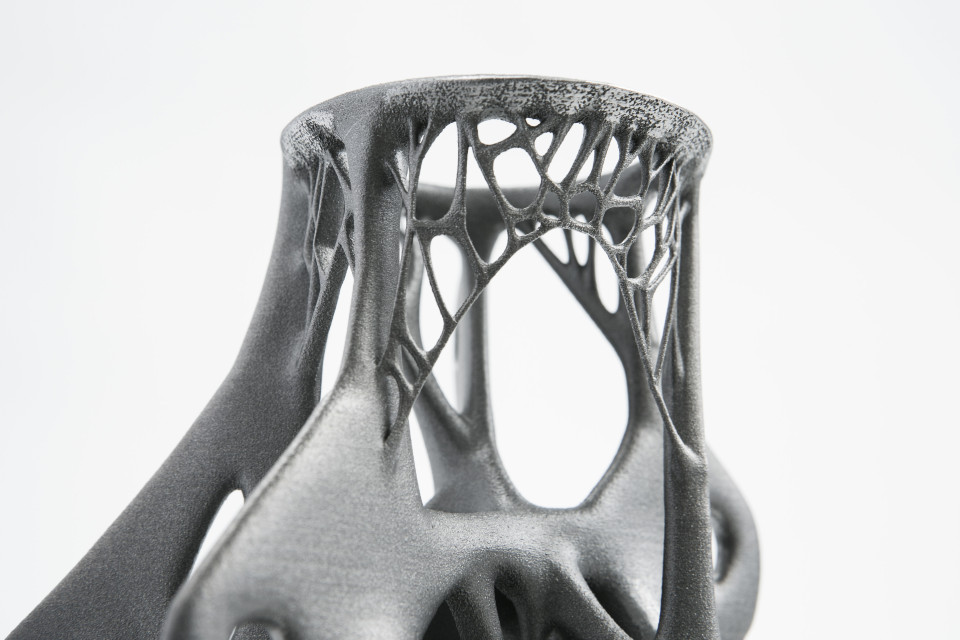
3. When the sintering process is completed, the platform moves down 1 layer. Next, another thin layer of metal powder is applied. The process is repeated until the entire model is printed.
When the printing process is completed, the metal powder already has strong bonds in the structure. Unlike the SLS process, parts are attached to the platform via support structures. The support in metal 3D printing is created from the same material as the base part. This condition is necessary to reduce deformations that may occur due to high processing temperatures.
When the 3D printer's chamber cools down to room temperature, excess powder is removed manually, such as with a brush. The parts are then typically heat treated while they are still attached to the platform. This is done to relieve any residual stresses.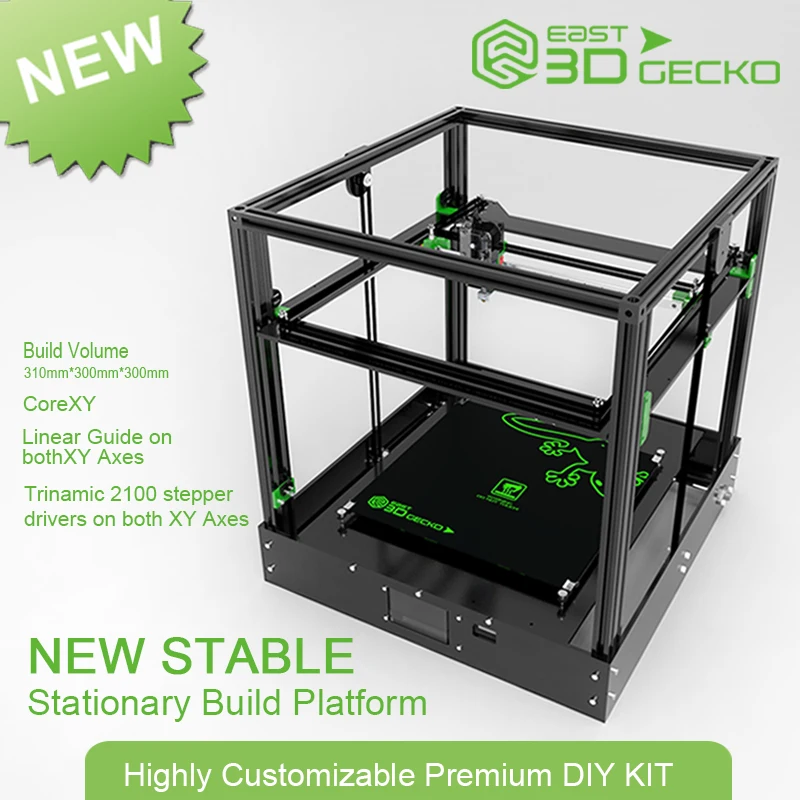 They can then be further processed. The removal of the part from the platform occurs by means of sawing.
Scheme of operation of a 3D printer for metal.
In SLM and DMLS, almost all process parameters are set by the manufacturer. The layer height used in metal 3D printing varies from 20 to 50 microns and depends on the properties of the metal powder (fluidity, particle size distribution, shape, etc.).
The basic size of the print area on metal 3D printers is 200 x 150 x 150 mm, but there are also larger sizes of the working area. Printing accuracy is from 50 - 100 microns. As of 2020, metal 3D printers start at $150,000. For example, our company offers 3D metal printers from BLT.
Metal 3D printers can be used for small batch production, but the 3D printing capabilities of such systems are more like those of mass production on FDM or SLA machines.
The metal powder in SLM and DMLS is recyclable: typically less than 5% is consumed. After each impression, the unused powder is collected and sieved, and then topped up with fresh material to the level required for the next production.
Waste in metal printing, are supports (support structures, without which it will not be possible to achieve a successful result). With too much support on the manufactured parts, the cost of the entire production will increase accordingly.
Adhesion between coats.
3D metal printing on BLT 3D printers
SLM and DMLS metal parts have almost isotropic mechanical and thermal properties. They are hard and have very little internal porosity (less than 0.2% in 3D printed condition and virtually non-existent after processing).
Metal printed parts have higher strength and hardness and are often more flexible than traditionally made parts. However, such metal becomes “tired” faster.
3D model support structure and part orientation on the work platform.
Support structures are always required when printing with metal, due to the very high processing temperatures. They are usually built using a lattice pattern.
Supports in metal 3D printing perform 3 functions:
• They form the basis for creating the first layer of the part.
• They secure the part to the platform and prevent it from deforming.
• They act as a heat sink, removing heat from the model.
Parts are often oriented at an angle. However, this will increase the amount of support required, the printing time, and ultimately the overall cost.
Deformation can also be minimized with laser sintering templates. This strategy prevents the accumulation of residual stresses in any particular direction and adds a characteristic surface texture to the part.
Since the cost of metal printing is very high, software simulations are often used to predict how a part will behave during processing.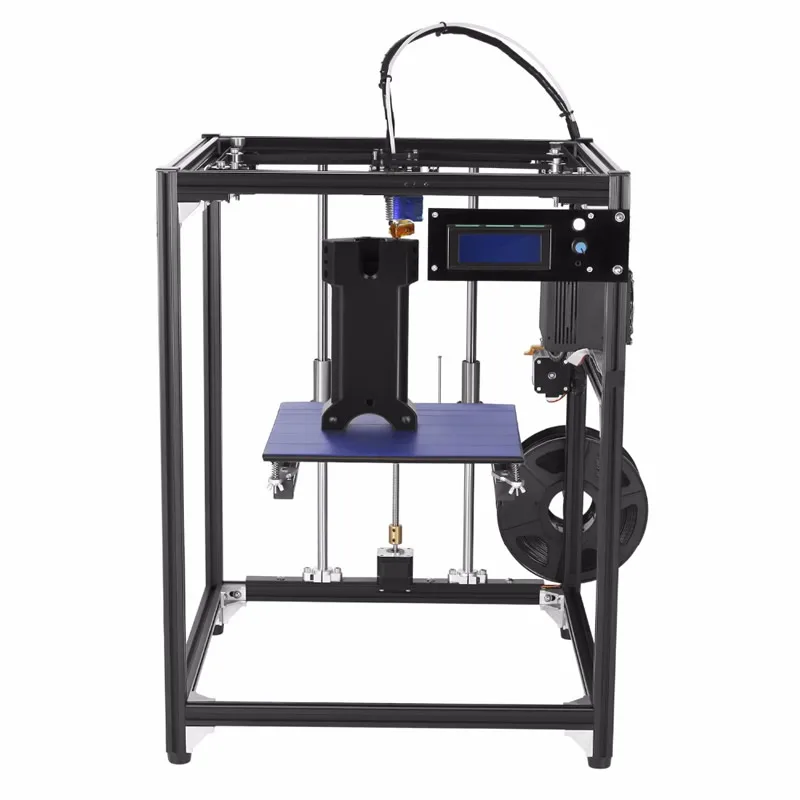 These topology optimization algorithms are otherwise used not only to increase mechanical performance and create lightweight parts, but also to minimize the need for supports and the likelihood of part distortion.
Hollow sections and lightweight structures.
An example of printing on a BLT 3D printer
Unlike polymer powder melt processes such as SLS, large hollow sections are not typically used in metal printing as the support would be very difficult to remove, if at all possible.
For internal channels larger than Ø 8 mm, it is recommended to use diamond or teardrop cross-sections instead of round ones, as they do not require the construction of supports. More detailed recommendations on the design of SLM and DMLS can be found in other articles on this topic.
As an alternative to hollow sections, parts can be made with sheath and cores, which in turn are machined using different laser power and pass speeds, resulting in different material properties.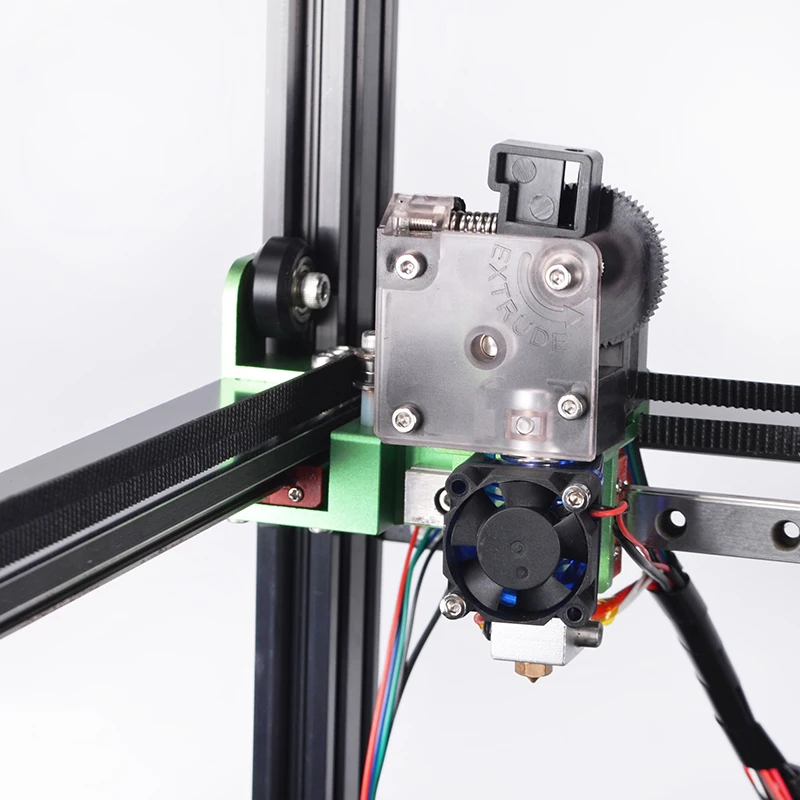 The use of sheath and cores is very useful when making parts with a large solid section, as it greatly reduces printing time and reduces the chance of warping.
The use of a lattice structure is a common strategy in metal 3D printing to reduce part weight. Topology optimization algorithms can also help design organic lightweight shapes.
Consumables for 3D metal printing.
SLM and DMLS technologies can produce parts from a wide range of metals and metal alloys, including aluminum, stainless steel, titanium, cobalt, chromium and inconel. These materials meet the needs of most industrial applications, from aerospace to medical applications. Precious metals such as gold, platinum, palladium and silver can also be processed, but their use is of a minor nature and is mainly limited to jewelry making.
The cost of metal powder is very high. For example, a kilogram of 316 stainless steel powder costs approximately $350-$450.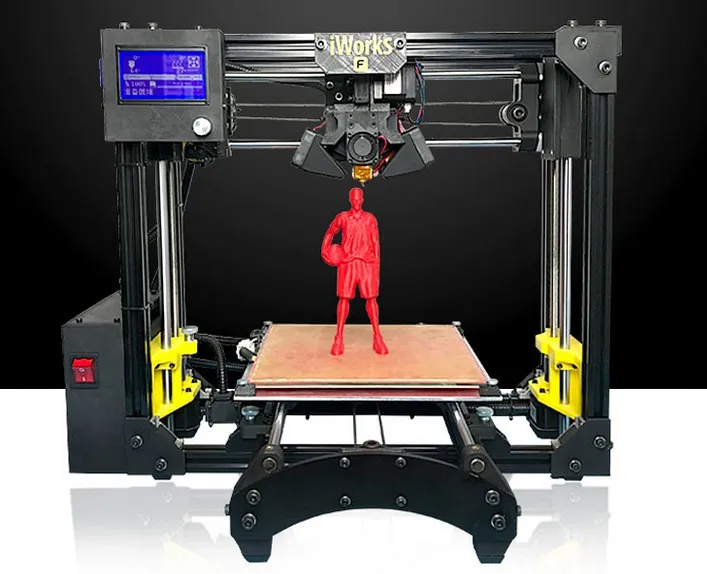 For this reason, minimizing part volume and the need for supports is key to maintaining optimal manufacturing cost.
The main advantage of metal 3D printing is its compatibility with high-strength materials such as nickel or cobalt-chromium superalloys, which are very difficult to machine with traditional methods. Significant cost and time savings can be achieved by using metal 3D printing to create a near-clean shape part. Subsequently, such a part can be processed to a very high surface quality.
Metal post-processing.
Various post methods. treatments are used to improve the mechanical properties, accuracy and appearance of metal printed products.
Mandatory post-processing steps include the removal of loose powder and support structures, while heat treatment (heat annealing) is typically used to relieve residual stresses and improve the mechanical properties of the part.
CNC machining can be used for critical features (such as holes or threads).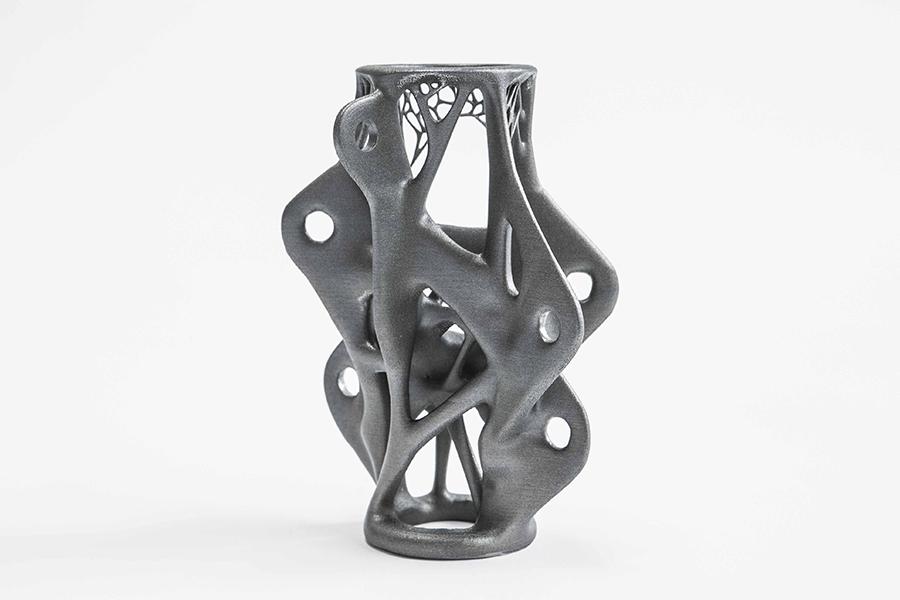 Sandblasting, plating, polishing, and micro-machining can improve the surface quality and fatigue strength of a metal printed part.
Advantages and disadvantages of metal 3D printing.
Pros:
1. Metal 3D printing can be used to produce complex custom parts, with geometries that traditional manufacturing methods cannot provide.
2. Metal 3D printed parts can be optimized to increase their performance with minimal weight.
3. Metal 3D printed parts have excellent physical properties, metal 3D printers can print a wide range of metals and alloys. Includes difficult-to-machine materials and metal superalloys.
Cons:
1. Manufacturing costs associated with metal 3D printing are high. The cost of consumables is from $ 500 per 1 kg.
2. The size of the working area in metal 3D printers is limited.
Conclusions.
• Metal 3D printing is most suitable for complex, one-piece parts that are difficult or very expensive to manufacture using traditional methods, such as CNC.