3D printer places
3D Printing in 3 Steps (Yes, Only 3!)
3D Printing in 3 Steps (Yes, Only 3!) | Staples.comby Kevin Ackerman, Staples® Contributing Writer
Since it gives computer users the ability to produce tangible objects in a variety of materials and colors right from their desktop, 3D printing seems as if it would be technically complicated (or just magical). But in reality, it’s not all that different from printing in two dimensions on paper.
To produce a printed page, all computer users need is a document, a computer and access to a printer — and, of course, ink and paper. Likewise, printing in 3D only requires three similar things. Sure, the technologies differ, but that’s the basic gist, as these three steps explain.
Step 1: Develop a Concept
If you were to open a document file on your computer, hit some random keys on your keyboard and press Print, you’d have a paper printout — though it wouldn’t make much sense. With 3D printing, you can’t make a shape that easily, not even a poor one, so it’s worth beginning the process by putting some thought into your object.
Start by knowing what you’d like to print in three dimensions. If you don’t have an idea or concept, there are plenty of free suggestions online to get you started. Web sites like Thingiverse.com offer a library of pre-designed objects that you can print with any 3D printer to gain experience. Or you can be inspired by people who are already using 3D printing technology.
Phoenix-based sculptor Kevin Caron uses 3D printing to refine his artwork before making full-sized versions. "Mostly what I'm doing is proof of concept designs. You know, will it stand up, does it look right and are the proportions correct on it?” he says.
And Chris Considine, CEO and founder of Los Angeles–based CXC Simulations, uses 3D printing to prototype custom-designed parts for racing simulators that are so realistic, they are used by professional race car drivers. "We need 3D orienting to see if the part feels exactly how we want it to feel,” he says.” We went through about 30 versions before we found the one that was perfect for us. Other than 3D printing, there’s truly no way you could have done that without building it over and over again."
Step 2: Hop on a Computer
Once you know what you want to produce, it’s time to sit down at a computer and make it happen. 3D prints are most commonly generated from an STL or .stl file. Standing for “stereolithography” (what 3D printing was named when it was first invented), this file format is to 3D printing what the .doc file is to document output.
To open and manipulate an STL file, you’ll need computer-aided design (CAD) software. For decades, these programs have been used by everyone from architects to product designers, so there are many kinds of CAD software available.
SketchUp is a free modeling program designed to be straightforward and allow anyone to create three-dimensional renderings, whether simple or complicated. Likewise, Tinkercad keeps the design process easy by providing just three simple tools. It also runs in a Web browser and offers step-by-step design lessons to demonstrate how easy 3D printing can be.
Meanwhile, programs like AutoCAD are favored by many experienced professionals, having been used in the design and prototyping of millions of products throughout the years.
To run these programs, you don’t need a particularly powerful computer. Caron uses an HP desktop machine to create his digital sculptures. "It's not a big screaming gaming computer by any means,” he says. "It's just a small office computer and it handles the CAD program just fine.”
Step 3: Get Access to a 3D Printer
Most people assume they need to own a 3D printer to produce digitally rendered objects, but that isn’t true. Sure, owning a desktop 3D printer can put your designs within arm’s reach. But driving across town to pick up your objects at a Staples 3D printing service location or having them delivered by mail can be just as convenient for some businesses.
For example, Caron owns a CubeX™ commercial 3D printer. With the ability to print objects up to the size of a basketball, this device produces designs in plastic and in more than 4,000 different colors. He’s also used print-on-demand services to produce sculptures that he couldn’t make on his office’s machine.
"They’re breathtaking when you see them,” he says of the two acrylic sculptures. "The detail that I could view on the computer came out in the print — it just blew me away.” Caron is planning to scale his designs down and turn them into jewelry to sell. "I've gotten one back in a polished glass and it's stunning. You can’t tell it from gold other than by the weight."
If you are interested in using 3D printing but need help with these steps, visit one of our stores that offers 3D printing services (currently in Los Angeles and New York City). There, we can help you with all the steps, from getting in touch with designers to actual 3D printing.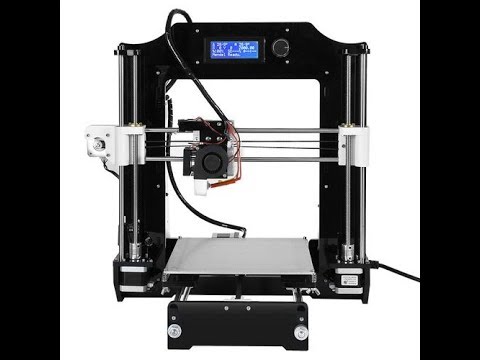 You can even get in our 3D printing photo booth and have your face put on a figurine.
Go from Concept to Reality
Some businesses would argue that 3D printing, whether it’s done in the office or at an outside service, is worth its weight in gold. "I can go from concept in my head to holding the part in sometimes as quickly as an hour,” says Considine. "It’s a very powerful thing for an engineer to have. It's liberating."
Related Articles
7 Things You Didn't Know About 3D Printing
In the ever-expanding universe of 3D printing, no one knows it all. Though the technology has been around since the 1980s, it’s only recently... Read more
8 Tips from MakerBot for Making Better 3D-Printed Objects for Your Small Business
Both an art and a science, 3D printing is actually easy to do, but difficult to master. The experts at MakerBot have seen... Read more
Carrie Mae Rose
Does mankind’s destiny lie in the stars? Artist Carrie Mae Rose thinks so. Her show... Read more
The 6 Best Places to Search for 3D Printing Models
As 3D printing patents expired, the industry exploded into the home.
An endless number of 3D models are now available on the internet, with everything from D&D characters to replacements parts for your washing machine.
With a host of design-sharing sites that exist, both paid and free, here’s what you need to know about where to look for the best models for 3D printing.
What to Look For: 3D Models, File Format, Slicers, and G-code
There are hundreds of thousands of 3D models online and it can get a little confusing.
Websites that cater to 3D printing models are particularly useful because the files available for download will be in the right format. Some sites will even check the designs of contributors, making sure that they are in fact printable.
As lots of these websites are community-based, you can read the comments or check out the photos of the completed project by other people.
Files need to be in the STL or OBJ format, so check this first before downloading. Once you have the files, use a ‘slicer’ software to convert your file to G-code.
Related link: The Ultimate Beginner’s Guide to 3D Printing
All you need to do then is copy the G-code file to your SD card and insert the card into your 3D printer. Good to go, right?
One thing to note is whether the 3D model has a creative license.
On the website Thingiverse, for example, the creative license is displayed under the heading License on the left-hand side of the model’s home page (below the tags), such as for the classic Benchy model.
Clicking on Creative Commons – Attribution – No Derivatives will open a link explaining what the condition of reproduction is, including for commercial use.
A lot of hours go into designing a 3D model. So making sure to attribute the designer, if you share your work publicly, is a good way to support them.
Depending on the site, the designer might include a link to where you can donate, or in some cases this option is built into the website. For sites that feature payment options, you can either pay directly for designs, or for a subscription to the website for further discounts.
Each site is different, so check the percentage of profits that go to the designer if you choose to support them.
Now that you have an overview of what you are looking for, delve into the websites below for some of the best 3D printing models out there.
A popular and well-established site, Thingiverse began as a companion site for a DIY 3D printer kit-making company.
What is awesome about this site is its education section. Here you can find 3D printing projects related to a class subject (think T-Rex skeleton or Lego Renaissance figures).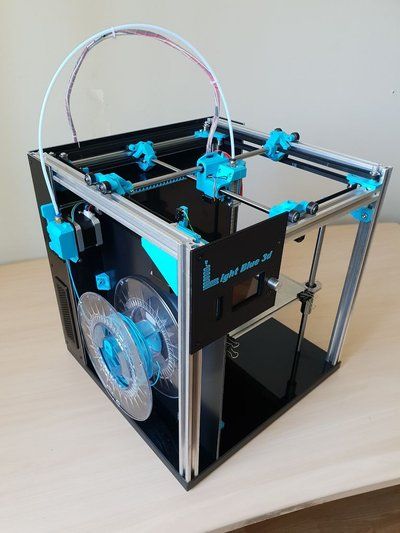
Under the model page, you can then find complete lesson plans, activities, and background information on the subject. If you are a classroom teacher, this could be a great way to introduce 3D printing technology to young people.
Besides manufacturing 3D printers, Prusa Printers also hosts a website for design sharing.
Under a section called Makes, people can submit photos when they have completed the project, which is very useful if you want to check the quality of the design first.
A unique feature of this site is a map that indicates where world events, workshops, or printing labs are located globally.
On YouMagine, designs can be gathered into collections, which is another way that you can search for new projects.
Collections range from 3D printing machine mods to models for medical masks.
Hitting the Download button is all you need to do to get a design. When you do, a popup will display giving you the option to donate to the designer if you choose.
Related link: Useful 3D Printing Ideas and Projects for Your Home
For something a little bit different, on Thangs you can search for models based on similar geometric shapes. To do this, upload a previous STL file you have to the search box, or simply type a shape into the search engine; e.g., cube.
On each model page, neat viewing options can be changed to display the model from different angles, and with render modes and colors, before downloading the files.
Interestingly, this website also allows you to limit your search for models only to the Thangs website, or else open the search to other sites on the internet.
Alongside a free STL file library, MyMiniFactory guarantees that each file is printable by checking it with software and making sure that it has been test-printed by its community.
In MyMiniFactory’s store, you can purchase designs to support artists, or opt for a paid subscription to the website to get discounts on designs, among other things like its in-house printing materials.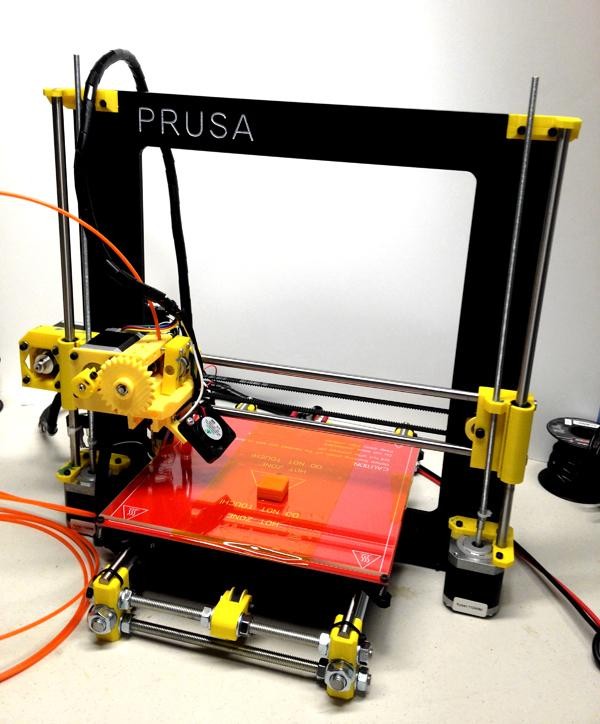
Another site that allows you to pay for designs is Cults. It has both free and paid designs with added functions for donating to designers.
When browsing through the community designs, you will notice a lot of people using GIFs to display the 3D object in the library, which will help you to get a quick overview of the 3D model.
Cults also claims that the files available on its site are guaranteed to print, so you can at the least expect the correct file format.
Did you know that NASA has a resource page dedicated to 3D printable models of space-related artifacts?
You can find models for famous robots like the Curiosity Rover and Perseverance, or detailed models of supernova remnants.
If you have a child who loves space, or you yourself want to combine two of your favorite hobbies, check out what’s in this NASA resource.
A Universe of 3D Models to Explore
Every design-sharing website is a little different from the next, but you are guaranteed to find a design you like on one of them.
Whether you find a model for free or paid, checking the creative license and uploading an image of your printed model will help to support the growing community of 3D printing enthusiasts.
And who knows, maybe one day you will be designing and uploading your own models? Competitions are becoming popular, so check your favorite website to see what you could win by building your own 3D model.
Helpful Tips for 3D Printing at Home
You, like many people around the world, may have had to quickly change from working in a workshop or office with many tools at hand to working at home where resources are more limited . During this difficult period, the ability to adapt to new circumstances and challenges helps to reduce production disruptions and avoid disruptions in the organization of the development cycle.
Formlabs desktop stereolithography (SLA) 3D printers are compact in size and can be used from home or outside the office environment. In addition, the ability to use over 30 different materials that mimic everything from silicone and polypropylene to ABS and more increases flexibility, expands the scope and makes it easy to adapt to new tasks as they arise.
Introducing 3D printing technology in-house will help you cut costs and keep your feet on the ground during times of uncertainty, especially if you have previously used or currently use third-party 3D printed models. Our customers are using home 3D printing to reduce costs, improve manufacturing process efficiency, continue developing critical products, and help overcome the COVID-19 crisis..
Dan Kirchgessner, Communications Specialist, and Jake Kapusta, Senior Maintenance Specialist share practical tips for printing at home.
Before the 3D printer is delivered to your home, you need to organize your space and workspace so that you can print, post-process, and finish everything you need. You will need space to house the printer(s), post-processing stations such as Form Wash and Form Cure, workspace to separate and finish parts, and short-term storage space for items such as spare wash solvent, resin reservoirs, cartridges for resins, gloves, post-processing tools, etc.
Alexis Hope, designer and researcher at MIT's Media Lab and MIT's Center for Social Interaction Tools, says that in setting up her home workshop, “getting the printer home was a great incentive to reorganize the workplace. Space is required for flushing and curing systems, as well as space for storing models, so proper organization of space is necessary for productive work. ”
Alexis Hope's home workshop.
Some of the most frequently asked questions about 3D printing at home have to do with environmental factors such as sounds and smells. To account for sensitivity to odors, we advise placing the post-processing station in a well-ventilated area or near an open window. Although the Form 3 is relatively quiet - it produces a noise comparable to that of a microwave oven - you may prefer to place it away from those areas of your home where you don't want to disturb the silence.
Woody Hedberg, Formlabs Print Process Engineer, recently hosted a Form 3L in his apartment for material testing purposes. “As a protective measure, I installed thick cardboard on the floor and walls of the room,” says Hedberg. In addition, for the workplace, he chose a space near an open window and behind a closed door to reduce the penetration of potential smells and sounds.
After preparing the workspace, lay out the items needed for 3D printing, such as wash containers, baskets and bottles, tweezers, spatula, detach tool, wire cutters, disposable nitrile gloves, and any additional tools that you may need during the work 3D printing process.
If you already have a 3D printer, the first thing you should consider is transporting it from your office or workplace to your home. When preparing your Formlabs 3D printer for shipping, first remove the resin cartridge, then remove and clean the platform, and finally remove the resin reservoir and close the lid before placing it in its storage case. Ensure that all accessories containing polymers are securely closed before transport.
Before shipping the Form 3 printer, secure the Light Processing Unit (LPU) with wing screws and latch.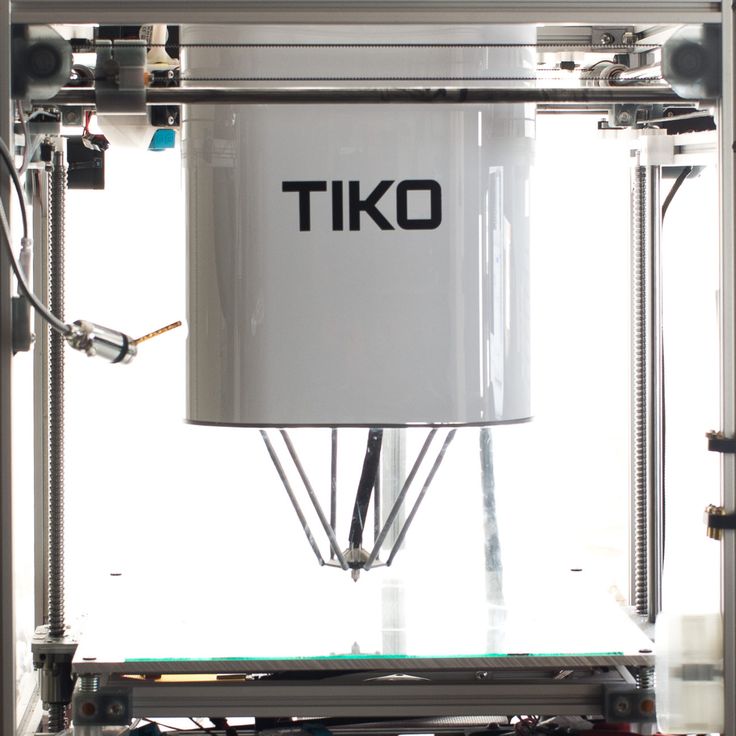 Failure to lock the LPU may damage the printer. Contact us if you can't find the screws.
Carefully wrap the printer in protective material and, if possible, place it in the original packaging. Be sure to pack all the accessories you may need for 3D printing and post-processing: Form Wash and Form Cure or post-processing kit and an alternative curing solution and consumables such as resin reservoirs and cartridges, gloves, tools for post-processing, isopropyl alcohol, etc.
After unpacking 3D printing supplies at home and before printing, be sure to check that the printer is level and stable in the new location.
Now that your printer is ready to use at home, there are several ways to improve and streamline your workflow.
Schedule the start and end times for printing to fit your work schedule. This way you can load the printer to the maximum. You can schedule the start of your next print using PreForm's Estimated Print Duration feature. Print time-consuming models while you're away from your workspace so you can print while you're away so you can start the next one when you get back.
Kevin Gauthier, Business Development Specialist at Formlabs, found that when working remotely, his team sent models to each other more often: "Never forget to print an instance of an object for yourself so you can refer to it later."
Kevin Gauthier's home workspace.
Continuing the same line, Hedberg suggests documenting and photographing every 3D printed model in detail, especially if your storage space is limited. “Now that we are working remotely, we need a proper documentation system. This does not mean that every 3D printed model should be saved, but carefully documenting the printed models and keeping records for my colleagues, yes,” he says.
Use the Dashboard to monitor the printing process in real time, as well as tank usage and resin usage. You'll also be able to track quality prints and scrap rates so you know which designs are the best and use them for future iterations.
“Do all the design work you can and prioritize critical physical prototyping tasks for different teams,” says Zach Frew, Formlabs Technical Specialist.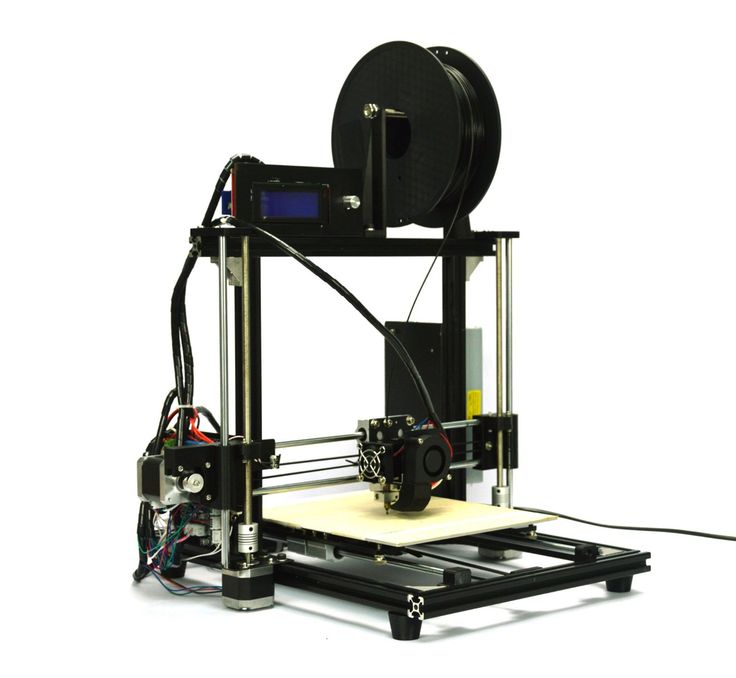 Frew says you need to prioritize these tasks, especially when work resources are limited, and share them with your team members.
Follow safety guidelines when using Formlabs products. Handle IPS with nitrile gloves in a well-ventilated area. Keep the IPS away from heat, sparks and open flames. Isopropyl alcohol evaporates quickly, so keep containers covered if possible. For detailed safety information, contact the manufacturer or supplier of this chemical.
As Formlabs Materials Expert Zak Zguris says, “You have to practice good chemical hygiene. Keep everything clean. Wipe up any drops or spilled liquids immediately. To avoid sticky residue, use acetone or isopropyl alcohol. When washing in the IRS, ventilation of the working space with fresh air should be provided. The cabinet is not at all suitable for the active use of a 3D printer or a washing station in an IRS.”
Always wear gloves to protect your skin when handling resin cartridges and containers. Store ink cartridges upright, out of direct sunlight, in a well-ventilated area. Close the cartridge outlet cap to prevent resin leakage.
Liquid or partially cured polymers must not be poured down the drain or disposed of with household waste. Do not pour isopropyl alcohol (IPA) with the polymer dissolved in it down the drain or dispose of it with household waste. All solvents and polymers should, as always, be disposed of in accordance with local regulations and the supplier's MSP. More information about security measures can be found on our technical support website.
Do you have any helpful tips or advice that you could share based on your experience of transitioning to working from home? We'd love to hear about them. We invite you to share them on social media with the tag @formlabs or #EngineeringFromHome or by commenting on our forums.
Types of tables for 3D printer
Home / Blog / Useful / Choosing a table for a 3D printer. Calibration and adjustment
04/21/2021
Contents
-
- Print platform materials
- Heated table
- Non-heated table.

- Table surface
- Calibration types
- Automatic calibration
- Manual calibration
- Cartesian kinematic 3D printer table calibration
- Calibration table delta printer
- Total
- Print platform materials
The correct calibration of the 3D printer bed, or as it is also called Hot Bed, is very important. The first layer is like a foundation for a house, if the foundation is fragile, then the house will not stand for a long time.
If the plane of the printed surface is uneven, then the model may be partially peeled off or deformed. The first layer may not stick to the printing platform at all, and the result of many hours of printing will not be a neat 3D model, but plastic noodles.
Print failure example
Therefore, it is very important to properly calibrate the table. Printing platforms can be conditionally divided into two types - adjustable and not.
The adjustable table is attached to the printer with spring-loaded screws. It is not rigidly fixed in height and with the help of screws it is possible to calibrate the plane and the gap between the 3D printer table and the nozzle.
Adjusting screw
Unregulated is a printing platform that is rigidly fixed to the printer body. This solution is used in delta printers. Calibrate them only programmatically.
Non-adjustable delta printer table
Print platform materials
The material from which the table is made may vary depending on whether the table is heated or not.
Heated table
There are several types of heating elements for a 3D printer platform - aluminum, textolite, silicone and kapton. Each of them has its pros and cons.
Textolite heater - inexpensive, but fragile and can be strongly bent when heated.
Silicone heater - can not be used alone.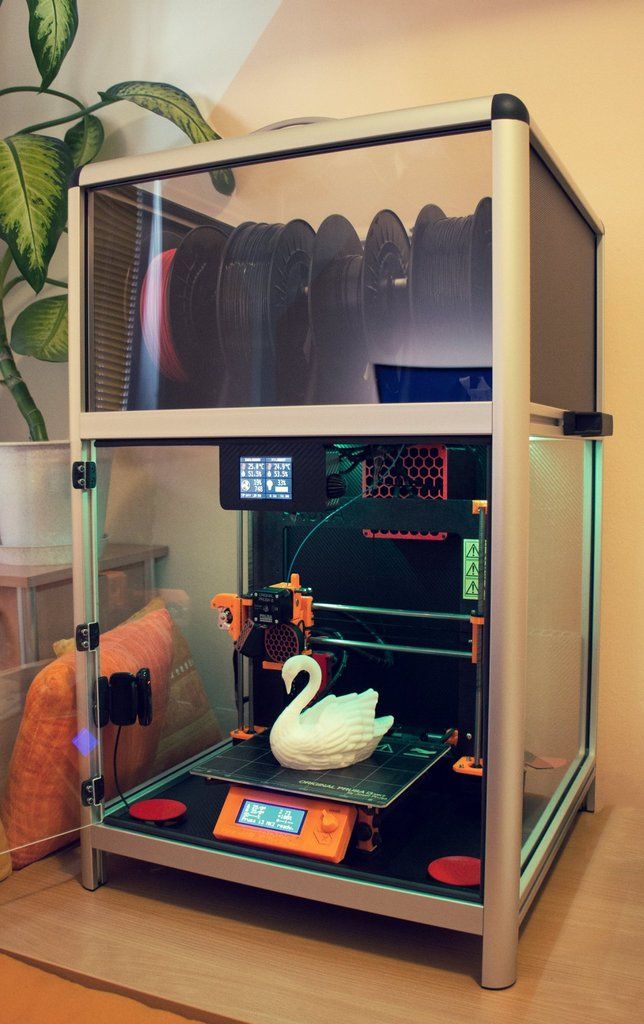 Usually used in conjunction with a metal base.
An aluminum table is expensive, but it heats up more evenly and is less subject to thermal deformation than other platforms.
The Kapton heater is very expensive and cannot be used on its own. Usually glued to a metal base. Can be heated up to 200 degrees.
Types of heated printing surfaces
Most often, an aluminum heating table or a silicone heating pad is used in conjunction with an aluminum plate. Low price, ease of processing and high thermal conductivity make aluminum the most popular material for the manufacture of heated printing tables.
The main advantage of heating the printed surface is to increase the adhesion (adhesion) of the first layer of plastic. If the printer is with a closed case and a heated platform, a “passive thermal chamber” is created inside. Due to this, plastics with high shrinkage do not crack in layers during printing, the adhesion of layers (interlayer adhesion) increases, and internal stress is more evenly distributed during cooling.
But there are also disadvantages - when heated, the metal table expands a little, and since it has nowhere to expand, it begins to bend. For a printing platform up to 200x200 in size, deformation will not be very critical, but for larger tables this becomes a tangible problem.
Each manufacturer of 3D printers with a large printable area solves the problem of deformation of the metal table in its own way. For example, in Raise 3D, the table is fixed along the entire plane with pins at 13 points.
Heated table fixing Raise 3D
Table without heating.
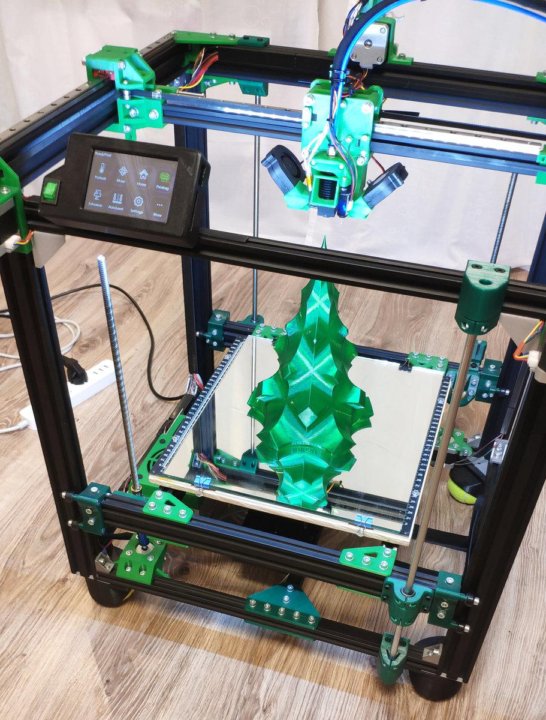
An unheated printable surface is often used in 3D printers designed to work only with PLA and other low temperature plastics. For example - printers for children or large printers with an open case.
An unheated printable surface is often used in 3D printers designed to work only with PLA and other low temperature plastics.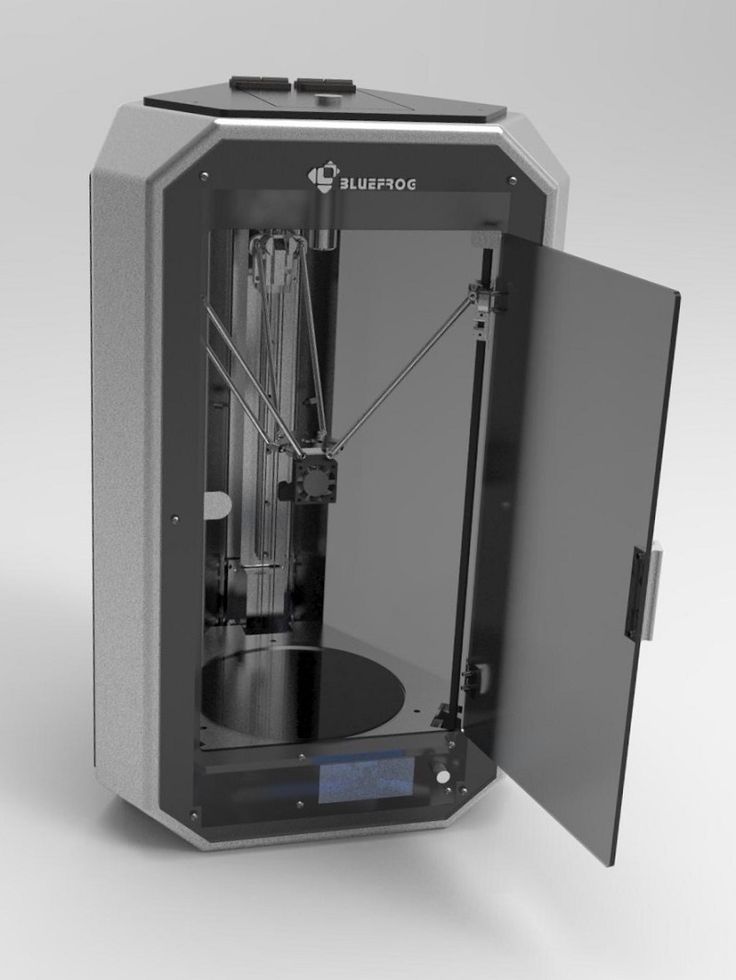 For example - printers for children or large printers with an open case.
Children's printer with acrylic print bed
Tables without heating are made of aluminum or acrylic. If the table is aluminum, then glass or any other coating should be used on top. Aluminum is a soft metal and even a brass nozzle can scratch or damage it if not properly adjusted.
Heating table with aluminum base and mirror
Acrylic tables are often used in inexpensive 3D printers designed for kids. Acrylic is difficult to damage or break. You can print on an acrylic table without glass or other coating.
Free Shipping
Add to compare
Product added to compare Go
| Manufacturer | Raise3D |
Add to compare
Product added to compare Go
| Manufacturer | Raise3D |
Add to compare
Product added to compare Go
| Manufacturer | Raise3D |
Free Shipping
Add to compare
Product added to compare Go
| Manufacturer | Flash Forge |
Table top
In order for the first layer to adhere to the table tightly, different surfaces are used that increase adhesion.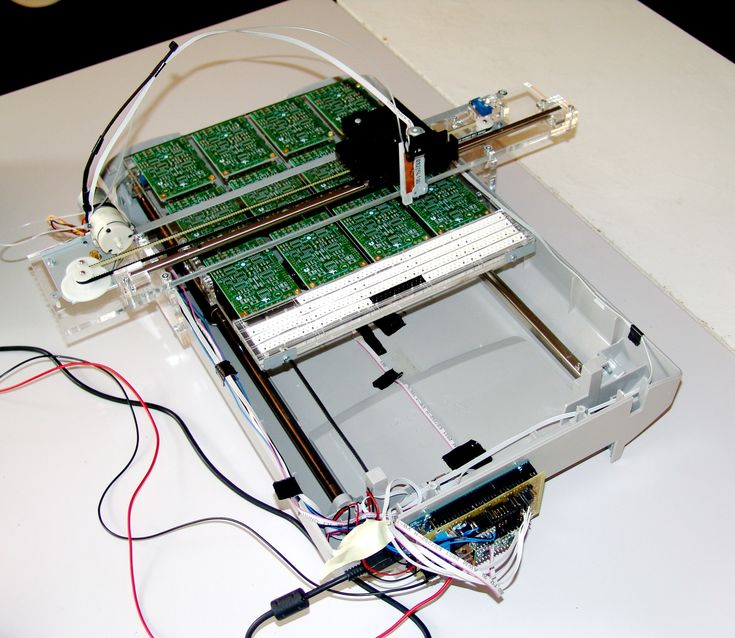 It is more convenient to remove the model from the removable surface. If you need to immediately start printing another model, you can simply quickly change from one removable surface to another.
The most popular table surface is the regular tempered glass or mirror. It is not expensive and available. It is believed that the accuracy class of the mirror is higher, but for small working areas (up to 200x200 mm), ordinary tempered glass is enough.
Glass itself does not hold the first layer well, so various adhesives or stickers are used to increase adhesion.
Ordinary glass can burst from a temperature difference or “crumble”, then the model comes off along with pieces of glass. Good thing it's easy to replace.
A piece of glass came off with model
Sitall glass - in fact, it is ordinary glass with the addition of boron oxide. This makes it stronger than ordinary glass and resistant to temperature changes. But the cost of such glass is much higher than ordinary or tempered glass.
Sitall glass
Perforated table - mainly used for printing ABS plastic. Thanks to the perforation, the plastic adheres firmly to the print platform. In order for the bottom of the model to turn out to be even in the slicer settings, you need to enable printing on a raft (substrate).
Perforated table used in UP printers!
Stickers - There is a huge variety of stickers for printing platforms. It can be either ordinary masking tape or a specialized surface (rough with an adhesive surface).
The finished model is easier to remove from a flexible substrate than, for example, from glass. With some substrates, the model can be easily removed after the printing platform has cooled down. For some, you need to heat the table and only then tear off the model.

Separately, you can select a variety of compositions that are applied to the surface of the printing platform to increase the adhesion of the first layers. 3D varnishes, 3D adhesives, etc. Probably every 3D maker has his own special recipe for the same composition that almost everything sticks to. It can be BF glue mixed with a solvent or alcohol, ABS diluted in acetone, kvass with sugar, glue stick, etc.
Do not spray varnish or other sprays inside the printer. Glue particles can settle on mechanisms, fans, and even get on electronics. This can lead to damage to the 3D printer. Simply remove the platen surface from the printer and apply the adhesive.
Add to compare
Product added to compare Go
| Manufacturer | Raise3D |
Add to compare
Product added to compare Go
| Manufacturer | Flash Forge |
Add to Compare
Product added to compare Go
| Manufacturer | Flash Forge |
Calibrations
In addition to choosing the surface of the print platform, it is important to correctly level the plane of the table and set the correct gap between the table and the nozzle. Calibration can be automatic or manual.
Printers with large print surfaces, such as the Raise 3D Pro 2 and Pro 2 Plus, are calibrated at the factory. The user only needs to check the gap between the table and the nozzle, because it may go astray during transportation.
Automatic calibration
Automatic calibration is performed using a sensor (optical or contact), which is mounted next to the extruder. The printer checks several points on the print platform one by one and remembers the values. The first layer will be printed correct for the curvature of the table.
You can meet the calibration using a conductive substrate that is placed instead of the printed surface. This method is rare, but still has a place to be. It is commonly used to calibrate 3D printers with delta or delta robot kinematics.
Automatic calibration allows you to quickly and effortlessly level the table. It becomes especially indispensable for printers with delta or delta robot kinematics. Optical sensors "do not see" glass, so for printers with an optical sensor, it is better to use other surfaces of the print platform.
Some printer models have a menu with hints to help you properly set the platform plane and gap. It is enough to launch the “assistant” and follow the instructions on the screen. This is not exactly automatic calibration, but with such help it becomes much easier for a beginner to correctly calibrate the table.
An example of a 3D printer with automatic calibration is Raise E2. The Raise E2 extruder has a contact sensor to determine the distance between the nozzle and the printed surface. The resulting values help to correct the print height of the first layer. You can calibrate not the entire table, but only the area on which the model will be located.
Manual calibration
Manual calibration is when the user sets the plane of the table and the gap between the table and the nozzle himself. To do this, under the printing platform there are screws or winglets with which you can adjust the height of the printing platform.
Calibration screws
The standard gap between the platform and the nozzle, for most printers, should be - 0.1-0.2mm. If there is no set of probes at hand, a standard A4 sheet folded in half can replace it. Before calibration, the print surface (if it is heated) and the nozzle must be heated.
Sometimes manufacturers of 3D printers recommend a gap between the table and the nozzle - 0. Therefore, read the instructions before calibrating.
We will consider the calibration of the two most common kinematics - Cartesian and delta.
Cartesian kinematics is based on the Cartesian coordinate system and the movement of the 3D printer's head along the x, y, z axes.
Cartesian kinematic printer example
In deltas, the extruder moves along 3 identical axes using carriages moving along vertical guides. The delta printer can be called a simplified delta robot, but these are still two different kinematics.
Example of a printer with delta kinematics
3D printer table calibration with Cartesian kinematics
Different manufacturers may have slightly different calibration instructions. We will consider here the calibration of the printer with standard kinematics.
-
Heat up the table and nozzle. When heated, the metal expands slightly, so the gap between the printing platform and the nozzle may differ between the “hot” and “cold” ones.
-
Through the printer menu, send the table and extruder to the "home" or zero position in all axes. Usually the zero point is the near left corner of the extruder and the top position of the print platform. Be sure to make sure that the 3D printer does not rest the nozzle on the table and does not damage it. If this is the first calibration, use the nuts to lower the table as low as possible.

-
Through the printer menu or manually (for this you need to turn off the motors through the menu), move the extruder so that the nozzle is above the adjusting screw.
-
Use a feeler gauge and adjusting screw to set the gap between the print bed and the nozzle.
-
Repeat all steps for all calibration screws. Usually there are 3 or 4 screws.
-
After aligning the plane above the screws, move the extruder to the center and check the gap. If the gap matches the feeler gauge, then the table plane and platform distance are correctly calibrated.
Delta printer table calibration
Calibrating a delta printer is a very large topic, so here we will only describe the general principles.
The delta printer does not have the x, y and z axes we are used to. Instead, the delta printer has 3 towers - A, B, C, on which the carriages move.
Since the delta table is static, it is calibrated programmatically.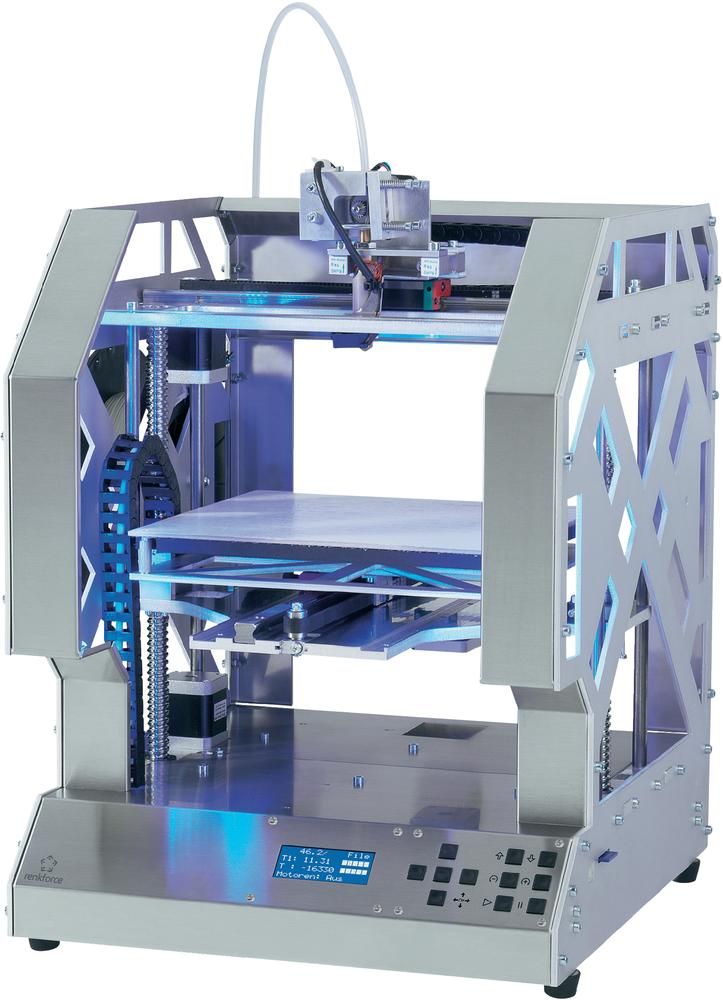 The gap is calibrated by 3 points (at the columns) and the lens (center) of the table. The lens can be concave or convex.
Before calibration, check the mechanics of the printer - the belts must be tensioned evenly, there must be no play in the carriages and the effector (the plate to which the extruder is attached). If the belts are loose or uneven, it will be problematic to calibrate the printer.
Some 3D makers check belt tension with a tuner. Evenly tensioned belts will sound the same, but the correct “note” is found empirically.
There are a huge number of programs for delta calibration, but one of two is usually used - Pronterface or Repetier-Host. Using them, you can directly access the printer using special commands and change the values in the firmware.
As auxiliary programs, you can use a virtual calculator and from there transfer the values \u200b\u200binto the firmware or download the finished GCode. They need to specify the parameters of your printer - firmware (usually Marlin or Repetier), diagonal length, circumference, etc. These parameters can be taken from the firmware or measured with a caliper. It is important to specify all the parameters as accurately as possible, otherwise the printer will not be able to calibrate.
First, 3 points are aligned at towers A, B, C, and only then the lens in the center of the table is corrected.
Manual delta calibration is tricky, but it doesn't have to be repeated often. Typically, the printer only needs to be recalibrated after some mechanical parts, belts, or print bed cover have been replaced.
Totals
The calibration process may seem tedious and complicated, but in fact, once you do it yourself, the process will no longer seem so intimidating. In addition, most manufacturers try to help novice users and equip their printers with auto-calibration sensors or try to simplify this process as much as possible with detailed menu prompts.