Plastic recycler for 3d printer
Filabot EX6 Filament Extruder - Standard Series
- Description
- Specs
- Videos
The Filabot EX6 extruder is our professional-level system, designed to be the best system for developing new polymers and for production of filament. The EX6 features a three-stage extrusion screw made from hardened and polished high-carbon stainless steel. The screw can be easily removed for cleaning and can be swapped out with the various other screw profiles to match the processing requirements of the polymer. With this new system, screws with different characteristics can be used as needed for each specific polymer, allowing screw designs to be tested and polymer output and consistency optimized. All screws have a 24:1 L/D ratio giving greater versatility and control compared to other extruders.
Click here to learn about the other available screws.
The EX6 features extrusion speed control and a 4 zone temperature control system. The speed control board includes an automatic, variable voltage control module that is engineered to regulate the precise RPM of the screw. The temperature zones are independently controlled allowing for a polymer specific heat profile.
The Filabot EX6 comes with a full one-year warranty on all parts.
Extrudable Plastics: 4043D PLA, 3D870 PLA, 3D850 PLA, Magnum 8391 ABS, and HIPS. Click here for EX6 Extrusion settings. The EX6 is also capable of processing ABS Flame Retardant, PC, PP, PS, ULTEM, PEEK, NYLON, HDPE, PETG, and WAX. Low to Higher Melt Flow Polymers. If you don't see a material listed send us a sample we can test. Click here to see our testing services.
Extrusion Rate: Over 10 pounds per hour (4.5kg per hour) - Dependant on polymer properties, filament output speed may be less. Output test is done with 4043D PLA for mass flow rate at the nozzle.
Filament Sizes: 1.75mm and 2.85mm
Material Input Size: 1/8in (3.18mm) pellets to powder
Material Capacity: Hopper - 195 cubic in (3195. 5 cubic cm)
Screw Void - 2.37cubic in (38.8 cubic cm)
Feed Port - 195 cubic in (3195.5 cubic cm)
Temperature Control: 4 Independently PID controlled heat zones, all with active fan cooling for consistent heating
Feed Screw and Drive:
0-100rpm Speed Control
24:1 L:D Ratio Screw
16.28" Length (45.31cm)
5/8” Diameter (16mm)
1/2” Pitch (13mm)
Removable and up-gradable screw
Stainless Steel and Hardened
Click here for Screw Specs.
EX6 Includes
1. Removable Screw
1. 2.85mm Nozzle
1. 1.75mm Nozzle
1. User Manual
1. Power Cord
1. Packet of Anti-Seize
2. Packages of Purge
1. Brass wire wheel,
1. Brass pipe cleaner,
1. 10’ of copper gauze and an extension rod for the pipe cleaner
1. Screw removal tool,
1. Pair of oven mittens.
Extrusion Pressure:
3D870 running 365 - 435 psi
Max (plugged nozzle) 765 psi
Universal Power Input: 110 VAC or 220 VAC - 50 to 60hz - 1550 watts MAXIMUM
Physical Characteristics: Weight 50lbs (23kg) and dimensions of 29. 7in x 9.1in x 8.4in (75.44cm x 23.11cm x 21.34cm)
Full 1 Year Warranty
Click Here for the EX6 Dimensions
Click Here for the EX6 G Dimensions
Click Here for the EX6 User Manual
Click Here for the Ink Bird Temperature Control Manual
Check out our YouTube channel to see our systems in action!
How to Recycle PET Plastic into 3D Printing Filament
Recycling PET is a great way to create 3D printing filament. PET, or Polyethylene Terephthalate, is a rigid and hard material with interlayer bonding. You might know this material by its common name, Polyester. This material is best known for its use in bottles for drinks and clothing items. The main advantages of PET are that it is light (compared to glass, tin or aluminum), it is safe to use for various food items, it is cheap, and it is recyclable. This guide will explain all you need to know about recycling a plastic that has been alarming the global community of climate activists for years.
PET is the most recycled plastic, having a recycling rate of 58.2% After it is recycled, it is called rPET, or recycled PET. Many companies thefefore are now aiming to reuse it and recycle it as new packaging. For example, some shoemakers have been turning rPET into sneakers.
VIVOBAREFOOT Recycled PET Shoe Collection
Sneakers and packaging aren’t the only products you can recycle PET into; by turning it into 3D printing filament and 3D printing, you can produce unique designs and new products!
We’ve been able to extrude rPET into filament and print with it successfully and have collected all the steps into the step-by-step guide below so that you can too!
PET Preparation Guide
Collect the Required Tools, Materials and Equipment
Below you’ll find everything that you need in order to recycle your own PET.
Tools
| Side Cutter |
| Scissor |
| 2.5 mm Allen Key (Hex Key) |
| Cleaning Cloth |
| Empty Spool |
Materials
| PET Bottles |
| Acetone |
| Dishwashing Soap |
| Water |
| 400g of Devoclean MidTemp |
Equipment
| A plastic shredder |
| Airid Polymer Dryer |
| Precision 350 Filament Maker |
| 3devo Feeder |
| 3D Printer |
We had our own equipment available for this project, but you can use what you have on hand. Just be mindful that different machines may require different settings.
Step 1 – Prepare the PET Bottles
The first step to recycling your bottles is to prepare them by cleaning and shredding them to the appropriate size. To get them ready for shredding we have to clean them from any residue, contamination and extra materials. The steps for this are:
- Unscrew the caps from the bottles and cut off the security rings using a cutter or knife. Be careful as the hard plastic might be challenging to cut with cutters.
- Remove the labels from the bottles using scissors or cutters. There might be residue glue leftover. We suggest removing it using a piece of cloth or cotton swab and Acetone. Acetone dissolves the glue, and thus it becomes easy to remove it.
- Clean the internal of the bottle using dishwasher soap (or any soap available at hand, we are generous here) and brush.
- Ensure that you have removed all the solid residue (in milk bottles), liquid, or any dust contamination. Contamination can cause inconsistencies and flaws in the recycled product.
- Dry the bottles by placing them upside down. You can put them in the sun for a speedy drying process but make sure the place is free from dust.
- Once dried, reduce the bottles in size. We advise you to do so using one of the following methods:
- Crushing the bottles flat by hand,
- Using a vacuum cleaner to shrink the bottles by removing the air,
- Using scissors to cut the bottles into small pieces (be careful as the sharp edges of the bottles can hurt you).
Step 2 – Shredding the Bottles
Now that the bottles are clean and cut into smaller pieces, they are ready to be placed into a plastic shredder. Our aim is to get them into smaller chunks no bigger than 4mm. When you’ve put them through your shredder, check the size of your pieces using Vernier Calipers or a ruler.
If after the first feeding the sizes are bigger than 4mm, feed the regrinds through the shredder once again.
Step 3 – Dehumidifying the Shredded PET
PET is hygroscopic, meaning that it absorbs water from the environment. This water can impact the quality and integrity of your final product. Thus, it is vital to remove this excess water.
The recommended method is to use a dryer such as the Airid Dryer. This dryer allows you to change settings which include: airflow, temperature, duration, and stirring speed. The process to dry the regrind of PET bottles consists of the following steps:
- Fill the hopper of your Airid Dryer with your regrind.
- Close the hopper by screwing it tightly.
- On the control panel, rotate the knob to set the ‘drying temperature’ to 140oC or (284oF) and duration to 5 hours.
If you do not have a designated dryer like Airid, you can use your conventional oven for drying the regrind. Be careful with your settings though, as too high of a temperature can melt the regrind.
Heads Up!
Once you have dried the regrind, use it for extrusion immediately to prevent it from reabsorbing moisture. If you plan to use it later, we recommend to store the regrind in an airtight container or using other filament storing methods to prevent moisture from ruining your regrind.
The top filament was extruded without drying the regrind and the bottom after drying the regrind.
Step 4 – Preheat the Filament Maker
Typically, new filament makers come preloaded with pellets of materials like PLA. If the filament maker is already in use, it can have previously used material in the machine. In either case, to obtain the pure extrusion of PET, it is necessary to remove that material. These materials can have the same or different melting points than PET. For example, our filament makers have PLA pellets by default.
PLA has a working temperature of 60-190oC, whereas PET’s temperature range is between 350 to 490oC. So, if PLA gets heated to the working temperature of PET, the PLA will degrade or decompose, both of which we do not want. That’s why a transition material which is workable between the temperature ranges of PLA and PET is used. In our case, we used Devoclean EZ MidTemp, which works for both the cleaning and transitioning process.
How Transitional Material Works.
To preheat and remove the existing material from the machine, follow these guidelines;
- If the current material in the filament maker is PLA, the recommended settings are:
- Heater Temperature to 200oC,
- Extruder speed to 15RPM,
- Filament fans to 30%.
- Start the machine and wait until the hopper gets emptied from all the existing material. To speed up the process, you can use a vacuum cleaner to remove the current PLA pellets from the hopper. (Usually, there is protection gauze on top. Unscrew the screws and slide to remove the gauze).
- Pour the Devoclean EZ MidTemp or HDPE Flush into the hopper. The recommended amount is 250g.
- Wait until all the Devoclean from the hopper has been extruded, the output of Devoclean is white, bubbly, and foamy.
- Once you observe the hopper becoming empty, change the machine settings for PET. We recommend:
- Heater Temperature to 270oC,
- Extruder speed to 7RPM,
- Filament fans to 30%.

- Continuously check for the hopper to prevent it from becoming empty. The machines have a built-in feature to turn them off if the hopper is empty for more than 10 minutes. However, you can turn this feature off in the settings.
- Observe the temperature of all the heaters; there are four of them. To reach 270oC, let all the pellets in the hopper get emptied.
- Now, feed in the PET regrind in the hopper. Use a small amount of PET at a time, as overloading can cause blockage and slow down the process.
- If you have already opened the safety grid, you can plug in the feeder and place it in the hopper. The feeder generates vibratory motions that help move the regrind through the extruder easily, as its sharp edges can make this difficult.
- During the extrusion, keep an eye on the contents of the hopper. Make sure that it stays filled to avoid any obstruction in the extrusion. Once the output is no longer foamy or bubbly, you’ll know that all the Devoclean has been extruded, and we are now extruding rPET.
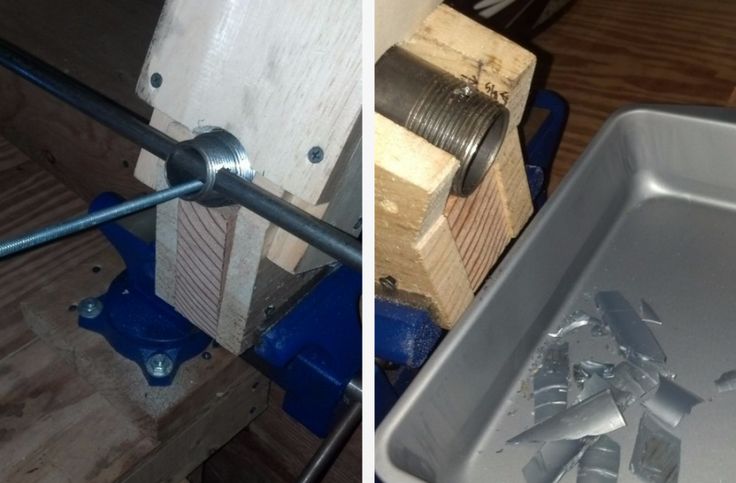
The next step is to tune the settings for getting the perfect extruded filament.
Step 5 – Tune the Settings for a Perfect Extrusion
Now that we are getting pure PET at the output, it is time to set the proper settings for the mixture. Every PET bottle is made from a different batch, and it is vital to fine-tune the settings to get a perfect filament as output. The aim is to achieve a round filament which has no air bubbles and has a consistent diameter. Below are the various settings which you are able to modify.
Temperatures of heaters
Try to change the temperature of each heater in the interval step of 5oC. Check the filament for the required product.
The RPM of Extruder
The RPM of the Extruder is essential. Usually, the key to quality is lower RPM. However, a much slower extruder can result in a slower process, product build-up at the nozzle, and premature hardening at the nozzle end. Therefore, the optimum value lies in the middle of the RPM range of the extrusion machine.
The speed of Filament Cooling Fan
The Filament Fan serves the purpose of cooling the filament/product coming out of the nozzle. A higher speed will cause speedy hardening blocking the process. A slower fan can cause the filament temperature to rise and thus forming a liquid-like form.
The recommended settings, during our experimentation, were:
- The Heater Temperature to 245oC,
- Extruder speed to 7 RPM,
- Filament fans to 15%.
But again, these are the settings well suited to our batch of PET and environmental conditions, and yours can vary accordingly.
Spool the Filament
After you begin to observe a continuous filament of desired quality, it is time to wind the filament on the spool.
- Take the empty spool and tighten the spool holder on this empty spool.
- Go to the settings, start the spooling wizard, and follow the instructions as indicated on the screen.
- Cut the filament off the product and attach it to the spool by guiding it through the positioner.

- Place the spool on the winder shaft, tighten the winder and start the winding.
- Close the safety door.
- During the process of spooling, keep an eye on the regrind quantity in the hopper. Fill the hopper with more regrind as needed.
- When the spool is wounded, cut the filament using scissors and remove the full spool by untightening the screw.
- As stated earlier, PET absorbs water. So, either uses the filament directly after spooling or store the spool in an airtight environment.
Purge the Filament Maker
Since there is molten material inside the Filament Maker, it is necessary to remove it before turning it off to prevent hardening in the Filament Maker and clogging the machine. You can do this by:
- Allowing the materials in the hopper to completely use or vacuuming the regrind out of the hopper.
- Add Devoclean EZ MidTemp in the hopper. We recommend using 50 grams of these pellets.
- Turn up the RPM to 15 to speed up the process.

- Remember, the output of Devoclean EZ MidTemp should be foamy and bubbly.
- Once all the Devoclean pellets are used, stop the extrusion, and turn off the machine.
Extrusion Trouble Shooting
During the extrusion, you may encounter several faults and product flaws. Below you’ll find the most common issues you may encounter and how to troubleshoot them.
1. Weak Flow Out of Nozzle
The possible causes of weak flow out of nozzles are ratholing or bridging the regrind, making it hard to pass from the hopper to the extruder.
Troubleshoot: The troubleshoot includes stirring the regrind in the hopper using the feeder or a spatula.
2. Solid Bumps Appearing in the Filament
Solid bumps in the filament indicate the presence of contamination or impurities in the regrind.
Troubleshoot: Make sure to clean your PET bottles properly and protect your regrind from dust (storing it in a container until use can help).
3. There is Build-up in the Nozzle
Nozzle build-up is due to the premature hardening of the product coming out of the nozzle. The possible reason for these faults can be the cold nozzle.
Troubleshoot: We recommend increasing the temperature settings of Heater h2, decreasing the filament cooling fan speed, lowering the fan orientation from the nozzle, or having proper insulation of the nozzle area through a magnetic plate.
4. The Molten Filament is Collapsing
Nozzle build-up is due to the premature hardening of the product coming out of the nozzle. The possible reason for these faults can be the cold nozzle.
Troubleshoot: The troubleshooting involves lowering the heating by decreasing the temperature of the heaters. In addition, we recommend reducing the fan cooling. During the troubleshooting, make sure that you do not reduce the temperatures too much, or nozzle build-up may occur.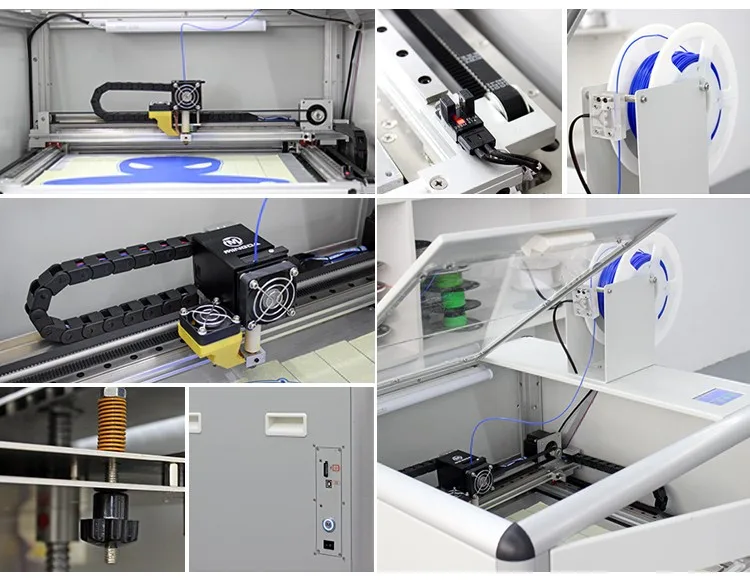
Tips for 3D Printing Your Dream Design
Now that you have your spool full of PET filament, you can use it to 3D print your dream design. These are the steps we took to make it happen:
- Open the slicer software on your computer. We used Cura, but you can use any of the ones you are comfortable with and upload the STL file.
- In the printing settings, set the settings to the following temperatures:
- Printing temperature to 255oC,
- Bed temperature to 70oC.
- For better adhesion between the subsequent layer, we suggest you turn print cooling off.
- You can decrease the print speed to compensate for the lack of cooling. We recommend the settings to be 20mm/s.
- Start the printing and be mesmerized by the process.
Recycling PET bottles is about science, but luckily, it’s not rocket science. With patience, the proper technique, and finding the correct settings for your PET bottles, you can turn your waste into valuable products.
Are you interested in learning more about this plastic? Then, head over to our Ultimate Guide to PET, where more details and information are available!
PET plastic recycling and how 3D printing can change the lives of each of us
Before we start, I draw your attention to the fact that several topics will be raised in the article, and for a convenient guide, I will indicate the name of the topics in BIG FONT)
WHERE IT ALL STARTED:
How can 3D printing change not only the lives of those around you, but also yours? Stupid question, but for me it is rather ironic.
It all started many years ago, when I became interested in tank modeling, while playing one well-known game, I accidentally stumbled upon the news about paper modeling, they offered to make a simple MC1 tank out of paper, I immediately liked the idea, because I liked to do it from childhood something with your own hands.
I won't go into details, but I can say that with time the quality of the work increased, the paper hobby ousted everything superfluous from my life, including computer games.
This hobby greatly developed thinking, ingenuity and fine motor skills, because it was necessary to create durable paper structures, to carry out fine work with small details, and this is not quite the same as buying a ready-made assembly kit. (The big challenge was assembling Bismarck out of paper)
Everything about it was perfect, except for one BUT! This time, for 1 tank model, it took from 5 to 9 months, over the years, time became less and less, work, study, family .. And I really wanted to do what I loved.
I found out about 3D printing by accident and immediately the idea appeared that many components and assemblies of tanks can simply be printed, while eliminating the routine, especially for tracks and rollers, making them out of paper is still a pleasure.
An obsessive idea firmly settled in my soul and did not give me rest, but the high cost of the printer cooled my hot ardor. And yet, with confidence, I continued to monitor prices and the situation in general.
After a couple of years, the decisive moment arrived! I decided to buy, spending all the accumulated money! at that time, 22 thousand was a rather large amount for me and many others around me, so when I spent it on such a toy, many condemned me.
This miracle was printer Pryusha ah 4, at that time the top model, but now, of course, it's not the best option.
Printing did not work right away, it took a lot of time to set up, understand the operation of the printer, slicer, and upgrade it. He printed all sorts of little things that were not quite necessary, and then he completely cooled off.
A year later I was asked an important question - You bought a printer for a hobby, but you print anything, but not the target product, Why?
I answered that there are no ready-made models, and to create your own, you need knowledge of 3D modeling.
My opponent said that everything can be learned if you are busy doing what you like and made me promise to make at least one model.
More than one year has passed since then, a lot of effort has been invested, a lot of trial and error, experience gave an understanding of what and how to model, what and how to print better, here are a few examples of printing
And there was one nuance in this whole story, it was plastic. At some point it was expensive, after that I found a place to buy a cheap one.
But walking along the street, and seeing bottles everywhere, thoughts involuntarily began to appear that all the material was underfoot.
In addition, the environmental situation with plastic in our cities, and throughout the world, is quite terrible, which, accordingly, also influenced my idea.
There were attempts to create an extruder for plastic recycling, but the ideas were in vain, the implementation failed.
However, the idea of recycling PEK bottles seemed to me very simple and feasible in practice. As a result, it turned out that I was very mistaken about this.
RECYCLING OF PET BOTTLES (5L BAGS)
I will try to briefly and concisely describe the essence of the work process, there are a lot of articles on this topic, but there is one BUT !!! In my implementation, they unfortunately almost did not help!
The bottom line is that everyone in the examples of videos and articles printed well, but all my attempts failed ...
There were many reasons for printing failure: plug formation, nozzle clogging, under-extrusion - the printer simply could not push the PET filament or the feed gear simply slid along the bar.
In addition, the length of the rod is always limited, it is necessary to constantly change the filament, but this problem was also solved.
Let's not pull the printer by the bar and start in order:
PREPARATION OF THE BOTTLE
It is very difficult to find an ideally even bottle, and it is not necessary.
First of all, we need:
Plastic plug - we make a hole in it for the valve, the valve is sold at any tire shop or can be ordered on Aliexpress
http://alli. pub/5s0hyt
we get the following: bottle or vial with a cork. Do not forget to add a couple of drops of water to the bottle, then pump it up. You need to pump up quite a bit, without fanaticism, a bicycle pump can do just fine.
Next is the most dangerous and important moment
Our goal is to level the bottle and not to blow it up, there is no need for a lot of pressure!
We heat the bottle on a gas burner or with a building hair dryer (there are a lot of videos on YouTube on this topic, I advise you to read it), do not forget to scroll it, water drops will give steam, which will further expand the walls.
Do not forget about safety, goggles are required!! Breaking a bottle can burn, cotton itself is not very dangerous, but you can get scared from surprise (remove children, old people and a mentally unhealthy cat from the house).
Again!!!! our goal is to align, to align the bottle a little, and not to explode, so without fanaticism!
Let's skip the irony and get down to business. Here is a good example:
And now it’s already dangerous, the bottom of the bottle began to fall out, an early sign of a rupture, but this is not a 100% danger indicator, do not forget about the cork, it may also not withstand, especially for bottles, the walls of the cork are very thin there , strength is low!
After heating, immediately release the pressure, gently press the valve, for example with a screwdriver, I warn you, a little steam will come out from there, take care of your eyes. And only after that we remove the cork.
Do not leave an inflated and heated bottle, after cooling it will collapse and lose its shape.
Well, we have passed the most dangerous section, let's move on! BOTTLE CUTTER
I must say right away that the bearing bottle cutter is by. Too confused, too complicated and incomprehensible, but the choice is yours.
Printing on a printer is also not an option! The PET tape will cut it like a knife through butter.
Our choice is only metal
or something similar
http://alli.pub/5s0i24
It's very easy to make, in the hardware store, buy a corner, M4 screws, nuts and washers for it. Well, do not forget about the clerical blade.
here is the result:
The number of washers adjusts the width of the PET strip, and the nuts clamp the knife blade. At the bottle, we cut off exactly the bottom, align it with scissors and make a small incision.
Slowly pull and cut, holding the bottle at an angle, keeping the width of the tape constant.
its width should be approximately 0.9 mm, but in the process of work you select individually.
The first time you most likely will not be able to cut as needed, be patient and bottles, everything will come with experience.
Here is the result:
AUTOMATIC FILAMING EXTRUDER
I will say right away that the engine, driver and generator are not the most important, I pulled the bar by hand, it is rather a moment of convenience and for the future. (links to relevant parts are below)
Most important node
example
https://youtu.be/BsdvdI-L3Vo
I think you recognized him, this is a fuser from a printer. We fix it on the corners, insert the heater.
http://alli.pub/5s0igw
I think they also recognized the nozzle, but it needs to be prepared.
At the exit, we drill through a hole with a 1.7-2 mm drill (this will give about 1.7 bars at the exit) , but to a shallower depth of 3 mm.
And at the very entrance 4-5 mm, to a depth even less
As a result, we will get a hole in the form of a cone, this is necessary so that the PET tape is better and easier to roll into a rod, at the entrance it is wide, but moving along the nozzle, it begins to roll up due to the heat shrink and the tapered shape of the nozzle.
If you have a drill, then I advise you to slightly smooth out all the irregularities based on the results of what we have drilled with a cone-shaped cutter.
The power supply regulates the heating temperature. (the blocks are just a super indispensable thing in the household, I advise you to take 2, 1-1 to adjust the heating of the nozzle, the 2nd will go to power the broach motor)
http://alli.pub/5s0ie6
We burn the end of the tape a little with a lighter, the tape will become stronger due to shrinkage, cut it with scissors and pull the rod at the exit with tweezers.
We pull manually or with the help of electronics, I’ll say right away that skill is needed here, it won’t work the first time
and here is the result
If you want to automate the work, then here are the necessary details:
Generator
http://alli.pub/5s0esv
TB6600 stepper motor driver
http://alli.pub/5s0i7k
EXTRUDER
What can I say, I tried the standard version, I tried the titanium extruder - and all in vain ... this does not mean that you will not succeed, it means that I very tired of dealing with the problem for 1 year and found the ideal.
Meet the perfect extruder that eliminated most of my problems! http://alli.pub/5s0i9w
Its advantage is that 2 gears rotate simultaneously and have notches, even a smooth and hard bar will not stand a chance. The same extruder is needed for pulling the filament, at the output the rod will turn out with notches, which will be well displayed during printing
FILEMENT TUBE
http://alli.pub/5s0f6v
The inner diameter must be as large as possible !!
In my case, the inner diameter is 3mm, the outer diameter is 4mm, otherwise the filament will get stuck, due to expansion and variable size
much more, as a result of which, when cooling, a cork forms in the fuser - as a result, a print failure
THERMAL BARRIER (THROAT)
must be taken as in example 1, with a through hole, for the reason described above,
Option 2 will not work - there will be a jam
RADIATOR
Here I advise you to take something larger, here is an example
http://alli. pub/5s0g80
If the heatsink is too small, there is a risk that there will be a filament crease as a result of overheating
COOLING
In my case with a large heatsink, cooling is not needed!
Explain:
The hot radiator dries the bar as it travels to the nozzle, in addition, the bar is already heated and easier to melt.
For the experiment, I decided to install a cooler and here the extruder clicks began, the printer did not have time to melt the bar, as a result - the bar was crumpled and printing failed.
In general - if you decide on cooling - take care of the possibility of its regulation!
NOZZLE
This is no less important moment!!!
We use any, but it needs to be drilled, as I described earlier, but you can immediately use a 3mm drill, not naturally through.
The bottom line is that the plastic will melt, as it were, in the nozzle chamber that you drill, and not in the thermal block, as it was provided for by the design, and there will be no plug during retraction, the molten mass will remain in the nozzle chamber.
PRINT SPEED AND PLASTIC FEED
Change the bar size from 1.7 to 1.4 or 1.5 in the slicer settings. This is due to the fact that the homemade bar inside will not be hollow, so its feed should be greater! Otherwise, the walls of the part will be thin.
The print speed, on the contrary, must be reduced, in addition, the print speed of the supports, and the fill must be equal to the print speed of the walls.
print example
https://youtu.be/jIWRY24LOf8
ALLOYING THE ROD INTO A SINGLE WHOLE
Experience and skill are needed here! Be patient !
Tried a lot of things, all without success. I give you a working method right away
https://www.youtube.com/watch?v=4-nrcfdk44Y
We set it on fire and melt it until it burns, carefully, I got a serious burn!
We extinguish, connect, blow (or better with some water).
I cut off the excess with wire cutters and clean it with sandpaper to the ideal.
Gently twist into a coil, the connection is not perfect and is destroyed when pressed hard, but in general it keeps its shape.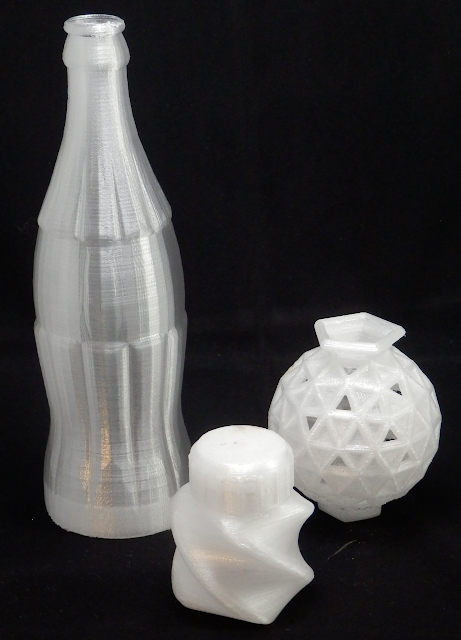
Total
I consider this processing method to be one of the best. Yes, it is not perfect, it is a little confused, there are flaws, not the whole bottle is recycled. But still, as an initial start, this method can and should be applied, just imagine how you can reduce the amount of plastic in the environment if every second person who has a printer uses a similar approach.
Here is an example of printing and here is a preview of the 3D model that I prepared for printing, so to speak - expectation and reality.
As you can see, I am still at the printing stage, I will print all the knots with a bottle as much as possible, I will finish off all the little things that the pryusha cannot handle with a photopolymer printer, and after priming and painting, everything will look no worse than a sketch.
See more photos, follow the complete assembly and my work at the link
https://vk.com/public_model_hends
It will also be important to say that parts made of such plastic are practically indestructible, it is difficult and sometimes impossible to break by hand.
It can be used to print durable parts or children's toys, which is in the plans.
Or collectible toys
You don't want to throw away such a thing, you can also give a toy to another child as you don't need it. (Nemesis does not count, not every child wants this, although I would be very happy about this as a child)
A lot of time has passed since I collected the first paper model and a lot of effort has been spent, since then I have mastered 3D modeling, painting, 3D printing.
Small hobby - gave direction and understanding to what I want to do in life and how to earn a living.
Mastering 3D modeling has opened up the prospects for developing models for Game Dev / but even here 3D printing does not stand apart, because I use the Hipoly model for printing, so to speak - waste-free production in everything.
Here is an example of a model I created for printing, which was ordered by a modeler from Rome
and here is the same model, but already Low Poly and for Game dev.
There is still a lot of work, there are no ideal models yet, but I am working on improving my skills every day.
This is how first paper modeling and then 3D printing changed and continues to change my life for the better.
I hope this story was interesting for you, please rate it with your like and write your thoughts on this in the comments, well, I will go on creating, because there are a lot of plans for the future, but so little has been done yet ... Appreciate the environment around you , recycle plastic, change your life and the lives of others for the better!
Appreciate your time, your hobby and your goals, good luck to everyone, bye everyone!
3D printing plastic recycling, PET.
Reviews
Follow author
Follow
Don't want
15
The article refers to Re-fill (recycled PET plastic for 3D printing).
This time we're looking at converting plastic into 3D printing filament.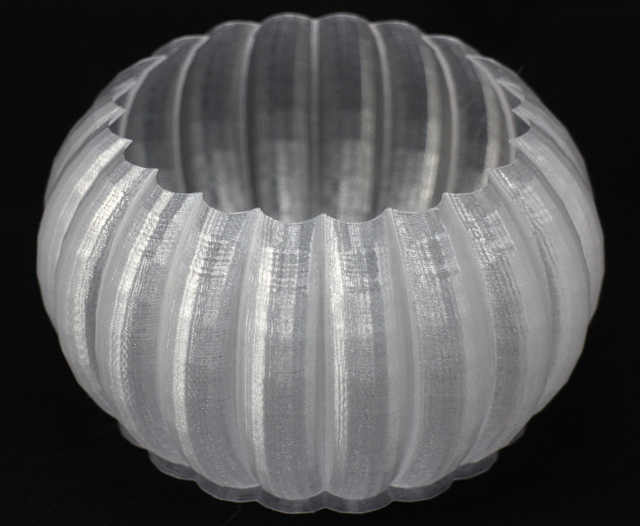
Recycling is not as easy as it sounds, and many companies have tried before and now to start using recycled filament for their 3D printers. Anyone who has tried to make their own filament on a small scale will understand how difficult it is, even with the newer plastic pellets.
Last year I was very lucky: I got 3DFilaprint and it was a big recycling project, it taught me that making quality filament is very, very difficult.
I produced several batches of recycled ABS for a local shop. I have even tried to recycle some polypropylene and PET, with limited success.
Of course, the easiest way is to use ready-made PET, PLA and WoodFill granules. Making my own colored WoodFill yarn was a lot of fun and exciting. Doing it professionally - for your home 3d printer, to make it from plastic scrap, having previously cleaned it, melted it and squeezed it out, is not at all an easy task.
I posted this photo of the failed print above - the print failed due to a mechanical printer error - it's not the fault of the bad filament.
I was very happy to win a Refil PET reel. It contains up to 90% recycled plastic bottles. The team has been working on this plastic for the last 3 years. How much you get is 750 grams of thread, while the total weight including packaging is about 900 grams. What it looks like -
I had a full roll of clear PET and a sample of black ABS filament, which is made from recycled car panels. PET is indeed very transparent. It's so transparent, in fact, that I'm even a little concerned that it's really recycled material and not new. I was expecting bubbles and maybe even a few slight color casts or a slight opacity.
PET plastic bottles and recycling symbol.
The most important aspect is dimensional accuracy. My spool was 1.75mm and I'm more picky about it than 2.85mm thread. I measured about 50 times at the beginning, middle and end. The whole spool was 1.76mm - almost negligible deviation. How do they print? I started printing at a normal PET temperature of 230 degrees C and printed a simple single layer vase for optical clarity testing.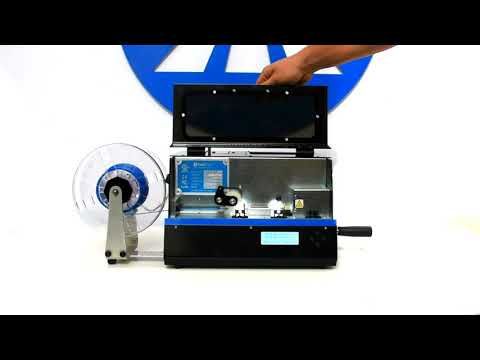
Singvers classic bottle.
Printed in actual size - for comparison - glass on the left, PET on the middle and white PLA on the right. It was once a PET bottle, and now, after being recycled and 3D printed, it's a PET bottle again :) But printing at 230 is not very good for this particular type of PET material -
Bubbles as far as I can tell not moisture content. Lowering the print temperature corrects this issue.
You won't get sharp prints even with good PET, the layering process causes a slightly translucent final print.
I love all types of PET and use Taulman t-glass and ColorfabbXT regularly. In the image above, you can see the same print with these different PET materials.
You can print whatever you want with PET, although it will be very slow.
Follow author
Follow
Don't want
15
More interesting articles
Fox
Loading
07.


