Immersion 3d printer
Types of 3D Printers, Materials, and Applications
Skip to Main Content
3D printing or additive manufacturing (AM) technologies create three-dimensional parts from computer-aided design (CAD) models by successively adding material layer by layer until physical part is created.
While 3D printing technologies have been around since the 1980s, recent advances in machinery, materials, and software have made 3D printing accessible to a wider range of businesses, enabling more and more companies to use tools previously limited to a few high-tech industries.
Today, professional, low-cost desktop and benchtop 3D printers accelerate innovation and support businesses in various industries including engineering, manufacturing, dentistry, healthcare, education, entertainment, jewelry, and audiology.
All 3D printing processes start with a CAD model that is sent to software to prepare the design. Depending on the technology, the 3D printer might produce the part layer by layer by solidifying resin or sintering powder. The parts are then removed from the printer and post-processed for the specific application.
See how to go from design to 3D print with the Form 3 SLA 3D printer. This 5-minute video covers the basics of how to use the Form 3, from the software and materials to printing and post-processing.
3D printers create parts from three-dimensional models, the mathematical representations of any three-dimensional surface created using computer-aided design (CAD) software or developed from 3D scan data. The design is then exported as an STL or OBJ file readable by print preparation software.
3D printers include software to specify print settings and slice the digital model into layers that represent horizontal cross-sections of the part. Adjustable printing settings include orientation, support structures (if needed), layer height, and material. Once setup is complete, the software sends the instructions to the printer via a wireless or cable connection.
Some 3D printers use a laser to cure liquid resin into hardened plastic, others fuse small particles of polymer powder at high temperatures to build parts.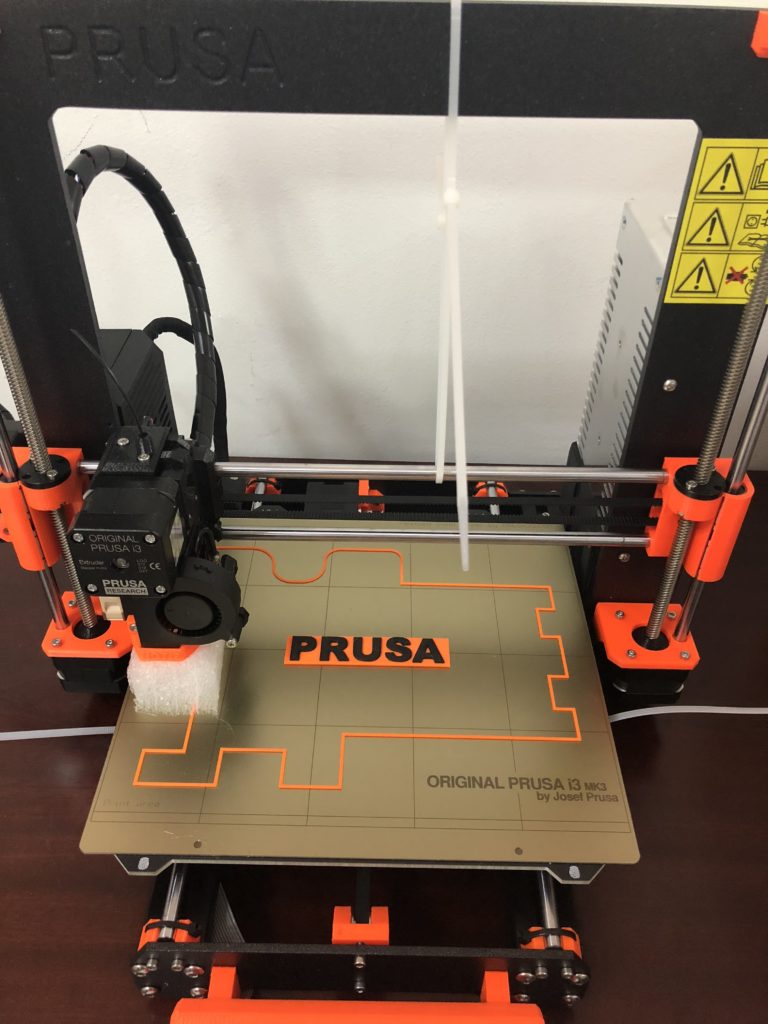 Most 3D printers can run unattended until the print is complete, and modern systems automatically refill the material required for the parts from cartridges.
With Formlabs 3D printers, an online Dashboard allows you to remotely manage printers, materials, and teams.
Depending on the technology and the material, the printed parts may require rinsing in isopropyl alcohol (IPA) to remove any uncured resin from their surface, post-curing to stabilize mechanical properties, manual work to remove support structures, or cleaning with compressed air or a media blaster to remove excess powder. Some of these processes can be automated with accessories.
3D printed parts can be used directly or post-processed for specific applications and the required finish by machining, priming, painting, fastening or joining. Often, 3D printing also serves as an intermediate step alongside conventional manufacturing methods, such as positives for investment casting jewelry and dental appliances, or molds for custom parts.
The three most established types of 3D printers for plastics parts are stereolithography (SLA), selective laser sintering (SLS), and fused deposition modeling (FDM). Formlabs offers two professional 3D printing technologies, SLA and SLS, bringing these powerful and accessible industrial fabrication tools into the creative hands of professionals around the world.
Stereolithography was the world’s first 3D printing technology, invented in the 1980s, and is still one of the most popular technologies for professionals. SLA 3D printers use a laser to cure liquid resin into hardened plastic in a process called photopolymerization.
SLA resin 3D printers have become vastly popular for their ability to produce high-accuracy, isotropic, and watertight prototypes and parts in a range of advanced materials with fine features and smooth surface finish. SLA resin formulations offer a wide range of optical, mechanical, and thermal properties to match those of standard, engineering, and industrial thermoplastics.
Resin 3D printing a great option for highly detailed prototypes requiring tight tolerances and smooth surfaces, such as molds, patterns, and functional parts. SLA 3D printers are widely used in a range of industries from engineering and product design to manufacturing, dentistry, jewelry, model making, and education.
- Rapid prototyping
- Functional prototyping
- Concept modeling
- Short-run production
- Dental applications
- Jewelry prototyping and casting
Learn More About SLA 3D Printers
Stereolithography (SLA) 3D printing uses a laser to cure liquid photopolymer resin into solid isotropic parts.
SLA parts have sharp edges, a smooth surface finish, and minimal visible layer lines.
Selective laser sintering (SLS) 3D printers use a high-power laser to sinter small particles of polymer powder into a solid structure. The unfused powder supports the part during printing and eliminates the need for dedicated support structures. This makes SLS ideal for complex geometries, including interior features, undercuts, thin walls, and negative features. Parts produced with SLS printing have excellent mechanical characteristics, with strength resembling that of injection-molded parts.
The most common material for selective laser sintering is nylon, a popular engineering thermoplastic with excellent mechanical properties. Nylon is lightweight, strong, and flexible, as well as stable against impact, chemicals, heat, UV light, water, and dirt.
The combination of low cost per part, high productivity, and established materials make SLS a popular choice among engineers for functional prototyping, and a cost-effective alternative to injection molding for limited-run or bridge manufacturing.
- Functional prototyping
- End-use parts
- Short-run, bridge, or custom manufacturing
Learn More About SLS 3D Printers
SLS 3D printers use a high-powered laser to fuse small particles of polymer powder.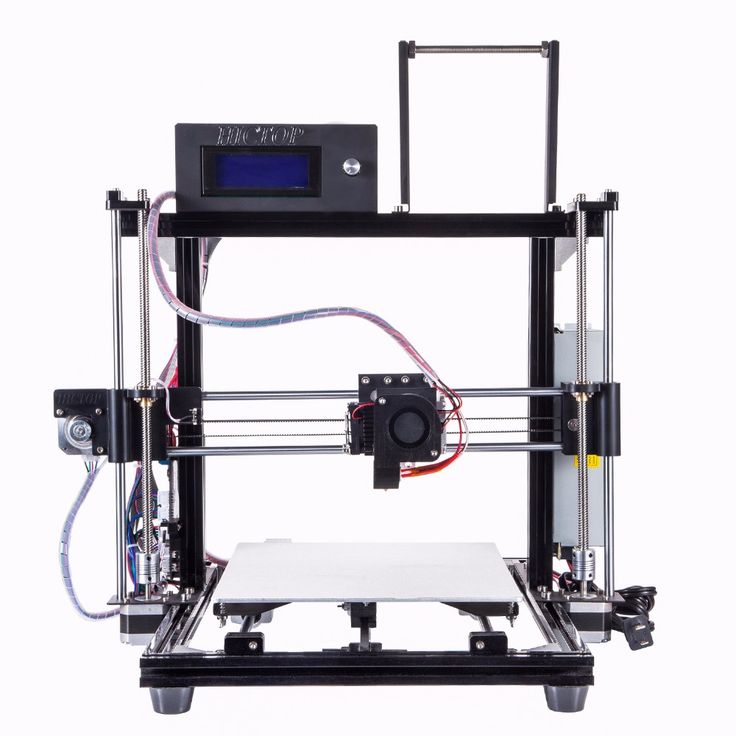
SLS parts have a slightly rough surface finish, but almost no visible layer lines.
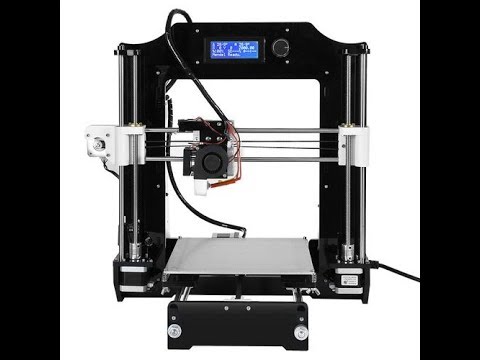
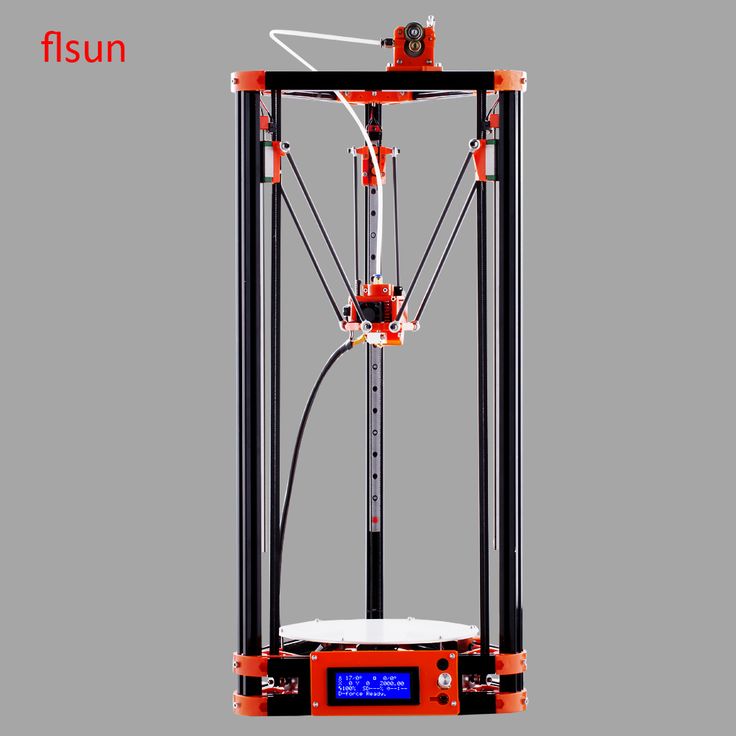
Fused deposition modeling (FDM), also known as fused filament fabrication (FFF), is the most widely used type of 3D printing at the consumer level. FDM 3D printers work by extruding thermoplastic filaments, such as ABS (Acrylonitrile Butadiene Styrene), PLA (Polylactic Acid), through a heated nozzle, melting the material and applying the plastic layer by layer to a build platform. Each layer is laid down one at a time until the part is complete.
FDM 3D printers are well-suited for basic proof-of-concept models, as well as quick and low-cost prototyping of simple parts, such as parts that might typically be machined. However, FDM has the lowest resolution and accuracy when compared to SLA or SLS and is not the best option for printing complex designs or parts with intricate features. Higher-quality finishes may be obtained through chemical and mechanical polishing processes. Industrial FDM 3D printers use soluble supports to mitigate some of these issues and offer a wider range of engineering thermoplastics, but they also come at a steep price.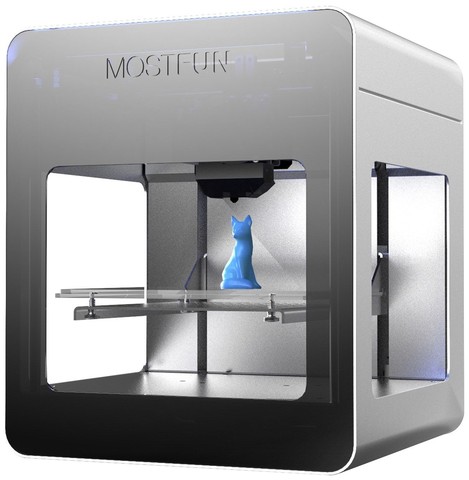
- Basic proof-of-concept models
- Simple prototyping
Learn More About FDM 3D Printers
FDM 3D printers build parts by melting and extruding thermoplastic filament, which a printer nozzle deposits layer by layer in the build area.
FDM parts tend to have visible layer lines and might show inaccuracies around complex features.
Having trouble finding the best 3D printing process for your needs? In this video guide, we compare FDM, SLA, and SLS technologies, the most popular types of 3D printers, across the most important buying considerations.
Each 3D printing process has its own benefits and limitations that make them more suitable for certain applications. This video compares the functional and visual characteristics of FDM, SLA, and SLS printers 3D printers to help you identify the solution that best matches your requirements.
Do you need custom parts or prototypes fast? Compared to outsourcing to service providers or using traditional tools like machining, having a 3D printer in-house can save weeks of lead time. In this video, we compare the speed of FDM, SLA, and SLS 3D printing processes.
Comparing the cost of different 3D printers goes beyond sticker prices—these won’t tell you the full story of how much a 3D printed part will cost. Learn the three factors you need to consider for cost and how they compare across FDM, SLA, and SLS 3D printing technologies.
As additive manufacturing processes build objects by adding material layer by layer, they offer a unique set of advantages over traditional subtractive and formative manufacturing processes.
With traditional manufacturing processes, it can take weeks or months to receive a part. 3D printing turns CAD models into physical parts within a few hours, producing parts and assemblies from one-off concept models to functional prototypes and even small production runs for testing. This allows designers and engineers to develop ideas faster, and helps companies to bring products more quickly to the market.
Engineers at the AMRC turned to 3D printing to rapidly produce 500 high-precision drilling caps used in drilling trials for Airbus, cutting the lead time from weeks to only three days.
With 3D printing, there’s no need for the costly tooling and setup associated with injection molding or machining; the same equipment can be used from prototyping to production to create parts with different geometries. As 3D printing becomes increasingly capable of producing functional end-use parts, it can complement or replace traditional manufacturing methods for a growing range of applications in low- to mid-volumes.
Pankl Racing Systems substituted machined jigs and fixtures with 3D printed parts, decreasing costs by 80-90 percent that resulted in $150,000 in savings.
From shoes to clothes and bicycles, we’re surrounded by products made in limited, uniform sizes as businesses strive to standardize products to make them economical to manufacture. With 3D printing, only the digital design needs to be changed to tailor each product to the customer without additional tooling costs. This transformation first started to gain a foothold in industries where custom fit is essential, such medicine and dentistry, but as 3D printing becomes more affordable, it’s increasingly being used to mass customize consumer products.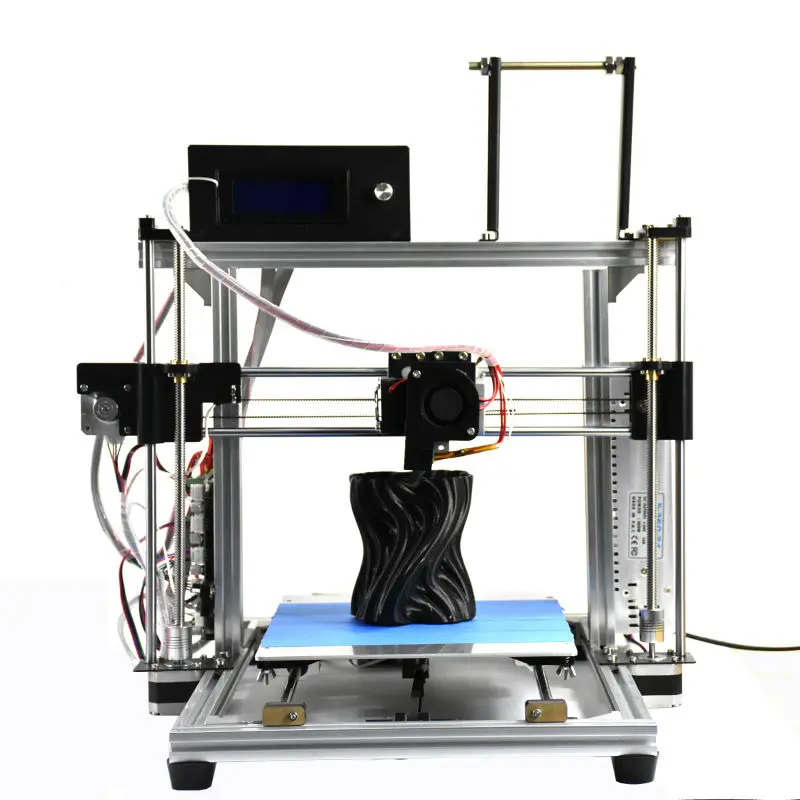
Gillette's Razor Maker™ gives consumers the power to create and order customized 3D printed razor handles, with the choice of 48 different designs (and counting), a variety of colors, and the option to add custom text.
3D printing can create complex shapes and parts, such as overhangs, microchannels, and organic shapes, that would be costly or even impossible to produce with traditional manufacturing methods. This provides the opportunity to consolidate assemblies into less individual parts to reduce weight, alleviate weak joints, and cut down on assembly time, unleashing new possibilities for design and engineering.
Nervous System launched the first-ever 3D printed ceramic jewelry line, consisting of intricate designs that would be impossible to manufacture using any other ceramic technique.
Product development is an iterative process that requires multiple rounds of testing, evaluation, and refinement. Finding and fixing design flaws early can help companies avoid costly revisions and tooling changes down the road.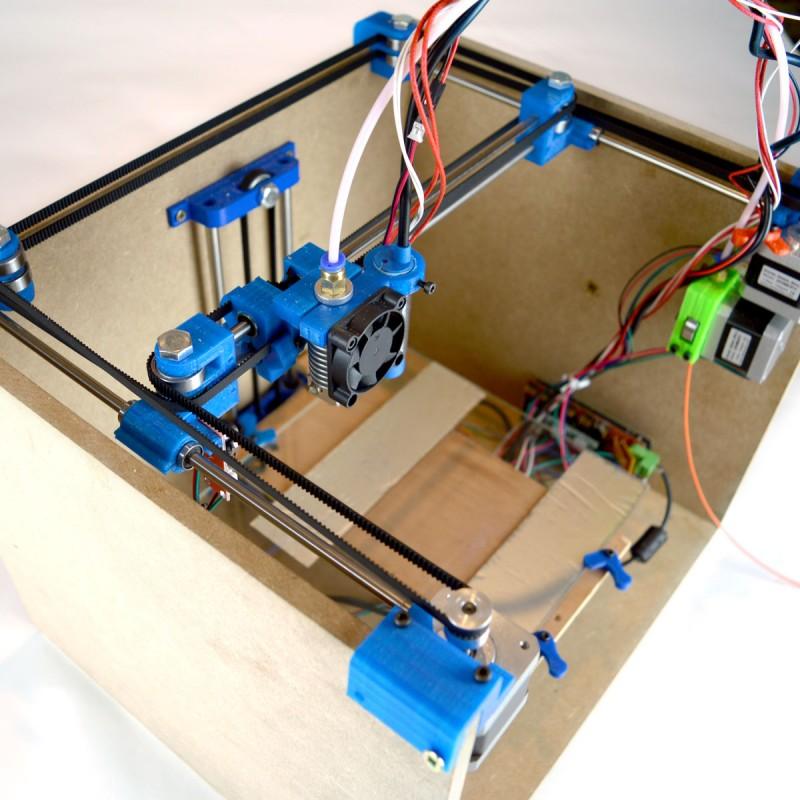 With 3D printing, engineers can thoroughly test prototypes that look and perform like final products, reducing the risks of usability and manufacturability issues before moving into production.
The developers of Plaato, an optically clear airlock for homebrewing, 3D printed 1,000 prototypes to fine tune their design before investing in expensive tooling.
3D printing accelerates innovation and supports businesses across a wide range of industries, including engineering, manufacturing, dentistry, healthcare, education, entertainment, jewelry, audiology, and more.
Rapid prototyping with 3D printing empowers engineers and product designers to turn ideas into realistic proofs of concept, advance these concepts to high-fidelity prototypes that look and work like final products, and guide products through a series of validation stages toward mass production.
Applications:
- Rapid prototyping
- Communication models
- Manufacturing validation
Learn More
Manufacturers automate production processes and streamline workflows by prototyping tooling and directly 3D printing custom tools, molds, and manufacturing aids at far lower costs and lead times than with traditional manufacturing. This reduces manufacturing costs and defects, increases quality, speeds up assembly, and maximizes labor effectiveness.
Applications:
- Jig and fixtures
- Tooling
- Molding (injection molding, thermoforming, silicone molding, overmolding)
- Metal casting
- Short run production
- Mass customization
Learn More
3D printers are multifunctional tools for immersive learning and advanced research. They can encourage creativity and expose students to professional-level technology while supporting STEAM curricula across science, engineering, art, and design.
Applications:
- Models for STEAM curricula
- Fab labs and makerspaces
- Custom research setups
Learn More
Affordable, professional-grade desktop 3D printing helps doctors deliver treatments and devices customized to better serve each unique individual, opening the door to high-impact medical applications while saving organizations significant time and costs from the lab to the operating room.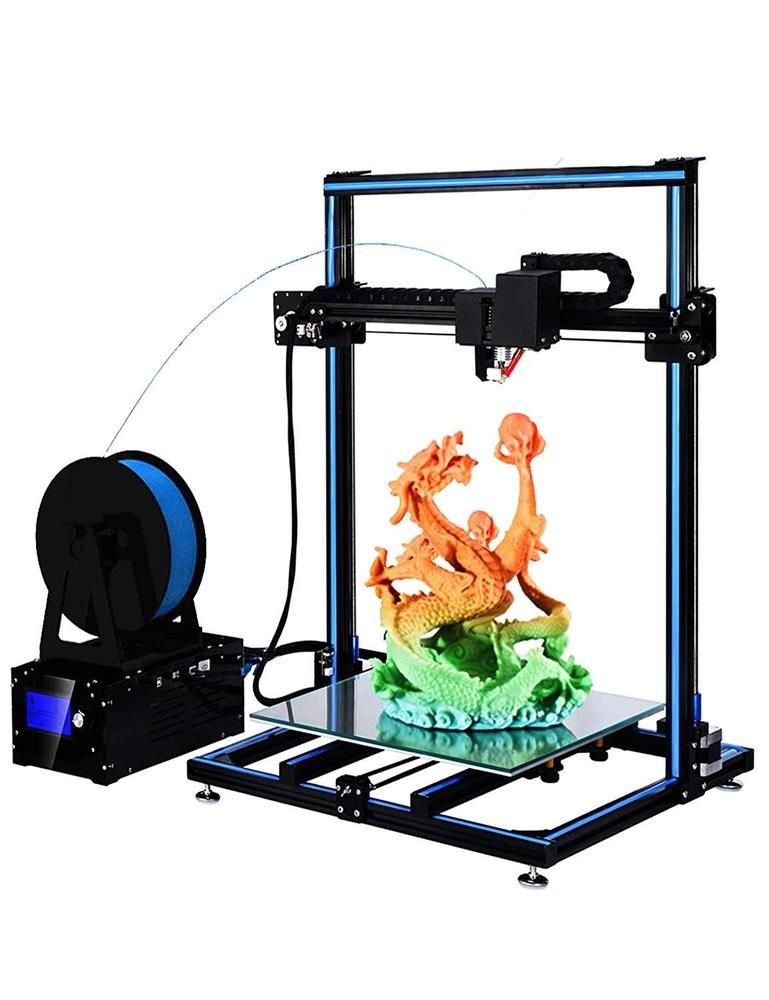
Applications:
- Anatomical models for surgical planning
- Medical devices and surgical instruments
- Insoles and orthotics
Learn More
High definition physical models are widely used in sculpting, character modeling, and prop making. 3D printed parts have starred in stop-motion films, video games, bespoke costumes, and even special effects for blockbuster movies.
Applications:
- Hyper-realistic sculptures
- Character models
- Props
Learn More
Jewelry professionals use CAD and 3D printing to rapidly prototype designs, fit clients, and produce large batches of ready-to-cast pieces. Digital tools allow for the creation of consistent, sharply detailed pieces without the tediousness and variability of wax carving.
Applications:
- Lost-wax casting (investment casting)
- Fitting pieces
- Master patterns for rubber molding
Learn More
Hearing specialists and ear mold labs use digital workflows and 3D printing to manufacture higher quality custom ear products more consistently, and at higher volumes for applications like behind-the-ear hearing aids, hearing protection, and custom earplugs and earbuds.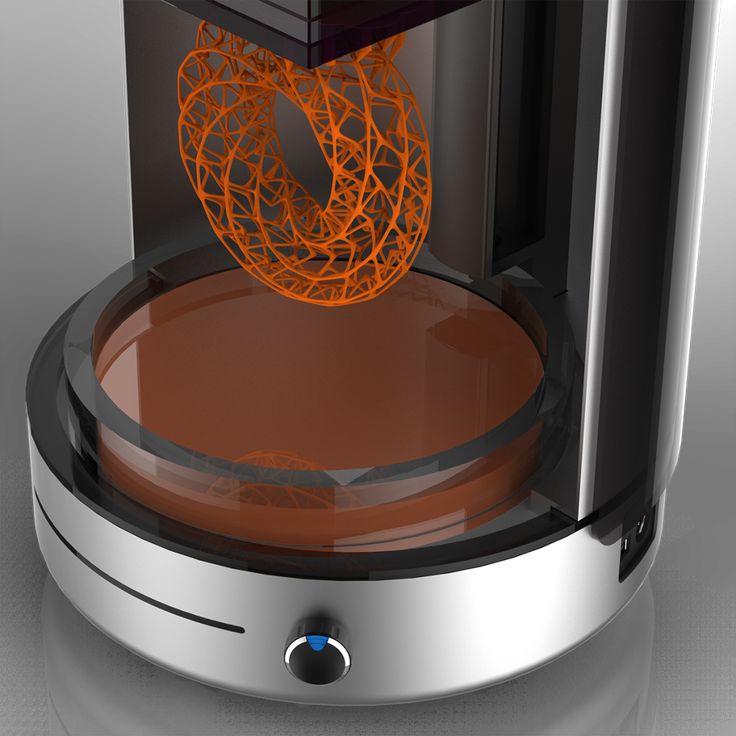
Applications:
- Soft silicone ear molds
- Custom earbuds
Learn More
The market for 3D printing materials is wide and ever-growing, with printers for everything from plastics to metals, and even food and live tissue in development. Formlabs offers the following range of photopolymer materials for the desktop.
Standard 3D printing materials provide high resolution, fine features, and a smooth surface finish ideal for rapid prototyping, product development, and general modeling applications.
These materials are available in Black, White, and Grey with a matte finish and opaque appearance, Clear for any parts requiring translucency, and as a Color Kit to match almost any custom color.
Explore Standard Materials
3D printing materials for engineering, manufacturing, and product design are formulated to provide advanced functionality, withstand extensive testing, perform under stress, and remain stable over time.
Engineering materials are ideal for 3D printing strong, precise concept models and prototypes to rapidly iterating through designs, assess form and fit, and optimize manufacturing processes.
Explore Engineering Materials
Medical resins empower hospitals to create patient-specific parts in a day at the point of care and support R&D for medical devices. These resins are formulated for 3D printing anatomical models, medical device and device components, and surgical planning and implant sizing tools.
Explore Jewelry Materials
Jewelry resins are formulated to capture breathtaking detail and create custom jewelry cost-effectively. These resins are ideal for jewelry prototyping and casting jewelry, as well as vulcanized rubber and RTV molding.
Explore Jewelry Materials
Specialty Resins push the limits of 3D printing, featuring advanced materials with unique mechanical properties that expand what’s possible with in-house fabrication on our stereolithography 3D printers.
Explore Specialty Materials
In recent years, high-resolution industrial 3D printers have become more affordable, intuitive, and reliable. As a result, the technology is now accessible to more businesses. Read our in-depth guide about 3D printer costs, or try our interactive tool to see if this technology makes economic sense your business.
Calculate Your Savings
New to 3D printing? Explore our guides to learn about the key terms and specific characteristics of 3D printing to find the best solution for your business.
For further questions,
Explore 3D Printing Resources
Monoprice Delta Mini V2 3D printer review: Great for beginners
Tom's Guide Verdict
The Monoprice Delta Mini V2 is an excellent 3D printer for the price, and a good way to get started in 3D printing if you don’t want to pay up for the Monoprice Voxel or Polaroid PlaySmart.
TODAY'S BEST DEALS
Pros
- +
Low cost, fully-featured 3D printer
- +
Prints PLA, ABS, PETG, and other materials
- +
Excellent print quality for the price
Cons
- -
The software has some rough edges
- -
Prints are limited to 4.
 3 inches in diameter
 - -
Can’t work with flexible materials
Monoprice Delta Mini V2 3D printer: Specs
Price: $199.99
Type: Delta Fused Filament Deposition (FFD) 3D printer
Filament Size: 1.75mm
Filament Type: PLA, ABS, PETG, Other
Interfaces: USB, WiFi
Storage: Micro SD
Size: 9.75 x 8.5 x 14.5 inches
Weight: 2.2 pounds
Even though it sports an unusual look for a 3D printer, there’s something familiar about the Monoprice Delta Mini V2. That’s because this is actually the second version of this device — we reviewed the original Monoprice Mini Delta a while back when it was a low-cost if flawed way to get started in 3D printing.
Does the new version address those flaws, which included unreliable USB connections and printing modes along with other bugs? Our Monoprice Delta Mini V2 3D printer review finds a much improved device, though software remains a weak spot.
Monoprice Delta Mini V2 3D printer review: Price
- Monoprice Mini Delta V2 3D Printer (Black) at Amazon for $179.99
You can get the Monoprice Delta Mini V2 3D printer for $179, a very attractive price for entry-level printers. Consider that our top rated choice for best 3d printer — the Monoprice Voxel — costs $449, that’s quite a bargain.
The Monoprice Delta Mini V2 is available directly from Monoprice .
The Monoprice Delta Mini V2 is a cute little printer, measuring just 14.5 inches high. While most 3D printers use left-right and forward-back rails that the print head slides along, the Delta 2 uses three spider-like arms, with the print head attached in the middle. Move one of these legs up, and the print head moves in that direction. By coordinating all three legs, the Monoprice Delta Mini V2 can move the print head anywhere in the print area.
(Image credit: Monoprice)It’s a rather compelling motion to watch, but it does have one limitation: the print area is circular and is smaller than a more standard printer of the same size. For the Mini Delta 2, the print area has a diameter of just over 4.3 inches and a height of just over 4.7 inches. That’s a total of about 81 cubic inches, which is somewhat smaller than the 107 cubic inches provided by the Polaroid Playsmart.
The Delta Mini V2 features several ways to connect to the outside world, including a micro SD card slot, a Micro USB port and a Wi-Fi interface. The latter option is of limited use, though — you can’t control the printer over a web interface or connect to it directly with a slicing app to send files. Instead, Wi-fi only works through a rather poor mobile app.
Monoprice Delta Mini V2 3D printer review: Controls
You’ve got several options for controlling the Delta Mini V2 — an on-device display, the PoloPrint Pro app, or through a slicer app such as Cura.
The small touch screen on the printer itself can be used with a fingertip or with an included plastic stylus. The latter is preferable, especially for precise jobs like entering a Wi-Fi password via the on-screen keyboard.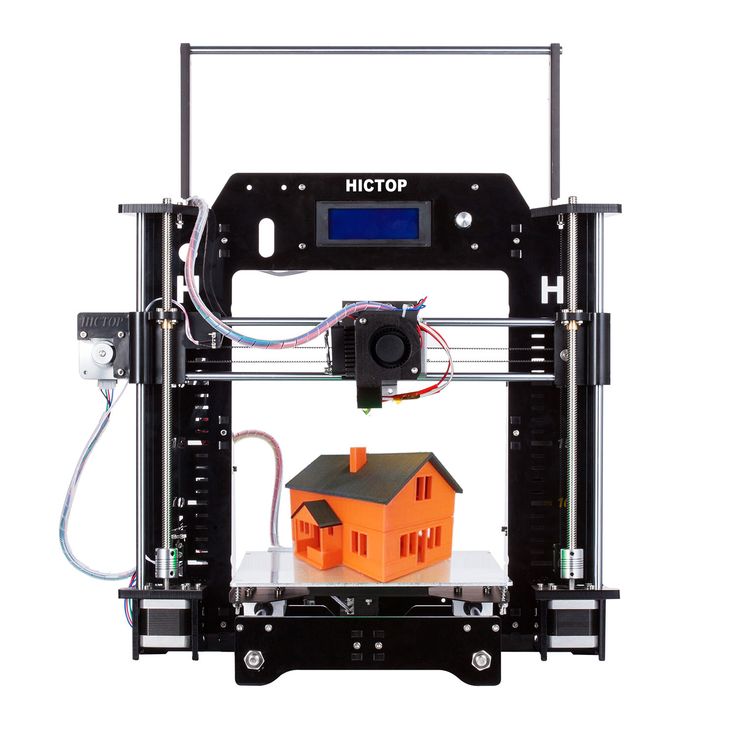 Fingertips are fine for simpler jobs like pressing the start button, though.
The pre-release version of the PoloPrint Pro app that I tried is available for both iOS and Android. It’s a bit rough around the edges: I found that it often crashed or failed to connect to the printer. When it did work, I was able to start a print from the micro SD card or from the online library and monitor the print progress, although there is no camera in this low-cost printer that lets you see the print in progress. Another omission here is the ability to load your own models and print them from the app; Monoprice told us that this might be added at a later date.
The best way to set up a print is with a slicing app such as Cura. A customized version of this open-source program for Windows and Mac is included on the micro SD card that comes with the Monoprice Delta Mini V2, and that is what we used to print in our tests. This doesn’t support connecting to the printer over WiFi, but it does support USB or saving a print file to the micro SD card. So, if you are using Cura to prepare prints, you have to use USB or micro SD to print.
Monoprice Delta Mini V2 3D printer review: Print process
The Delta Mini V2 is a pretty simple printer to use. Once you’ve created your print file in Cura or another program and copied it onto the micro SD card, you hit the print button in the on-screen menu and select the file to start printing.
The first thing the Delta Mini does is automatically level the print bed, touching the print head to the bed in three places to press a switch underneath it. That lets the printer know exactly where the print bed is— an important step for laying down an even first layer. Once ready, the Delta Mini lays down the first print layer on the heated print bed, then moves up to do subsequent layers.
I found that prints worked well, with few errors and no major failures. If anything, prints stuck to the print bed a little *too* well, as I usually had to pry the final print off the bed with a paint scraper.
The Delta Mini V2 can handle multiple filament types including PLA, ABS, and PETG. You’re not restricted to filament from any one source, as the Monprice 3D printer can use 1.75mm filament from any manufacturer. We tested the Delta Mini with both PLA and ABS material and found it produced excellent results with both.
Your biggest limitation will be the maximum temperature of the print head and the print bed (250℃ and 100℃ respectively). The Delta Mini V2 also can’t handle flexible materials, as these require a different style of print head.
Monoprice Delta Mini V2 3D printer review: Print speed
The Delta Mini V2 is a pretty fast printer in draft mode: it cranked out a 3.5-inch high Thinker figure in a little more than 3.5 hours in this mode, which uses a 0.2 mm layer height. The 3D printer is a blit slower if you run it in normal quality, as my print took 7 hours and 10 minutes. This mode halves the height of each individual layer to 0.1mm.
Monoprice Delta Mini V2 3D printer review: Print quality
We use several test models to test 3D printers, including a scan of Rodin’s Thinker statue, a set of gears and a geometric sculpture. I was impressed with the quality of the prints that the Delta Mini 2 produced, thanks to the excellent detail.
Image 1 of 3
(Image credit: Tom's Guide)(Image credit: Tom's Guide)(Image credit: Tom's Guide)Our Thinker test print came out looking very nice, with smooth, natural curves on his shoulders and good detail on the face. There was some noticeable layering, though in both the draft and normal modes.
Image 1 of 3
(Image credit: Tom's Guide)(Image credit: Tom's Guide)(Image credit: Tom's Guide)Our gears test model also came out well: All we had to do to fit the gears together was to remove them from the raft that they were printed on. We didn’t need to do any other trimming, cutting, or tweaking to produce a set of gears that turned smoothly and evenly.
Image 1 of 2
(Image credit: Tom's Guide)(Image credit: Tom's Guide)The geometric sculpture is a difficult print, which is why we use it in our 3D printer testing. It involves printing a lot of sharp edges at angles, which taxes the ability of the printer to precisely control the flow of the molten filament. The Delta Mini V2 handled it without issues, producing a print that had sharp, well-defined edges and points. Once we had trimmed off the support material that held the print in place during the printing process, we were left with a very well printed, spiky sculpture.
Monoprice Delta Mini V2 3D printer review: Verdict
The Monoprice Delta Mini V2 is a simple printer that does an excellent job. It prints quickly in high quality and can handle a wide range of different materials. The only limitation is the size of the print bed: with a diameter of 4.3 inches, it can’t print anything wider than that or more than 4.7 inches high. That is plenty big for most users, though, and at the price, you can’t beat the value the Delta Mini V2 offers.
The mobile software issues still prove to be frustrating, but it’s hard to find a better printer at this low of a price. The da Vinci Nano from XYZprinting hovers around $200, but it can be hard to find these days. For that reason, beginners would be wise to give 3D printing a try on a low-cost option like the Monoprice Delta Mini V2.
TODAY'S BEST DEALS
Richard Baguley has been working as a technology writer and journalist since 1993. As well as contributing to Tom's Guide, he writes for Cnet, T3, Wired and many other publications.
Selective Laser Sintering (SLS) 3D Printing Guide
Selective Laser Sintering (SLS) 3D printing is a technology trusted by engineers and manufacturers across industries to create durable and functional models.
In this detailed guide, we'll explain selective laser sintering technology, the different systems and materials on the market, the workflow and different applications of SLS printers, and when to choose 3D printing with this technology over others. additive and traditional manufacturing methods.
White paper
Looking for a 3D printer to create durable, functional models? Download our white paper to learn how selective laser sintering (SLS) technology works and why it is popular in 3D printing for functional prototypes and end-use products.![]()
Download white paper
Selective laser sintering (SLS) is an additive manufacturing technology that uses a powerful laser to sinter fine polymer powder particles into a solid structure based on a 3D model.
SLS 3D printing has been popular with engineers and manufacturers for decades. With its low model cost, high productivity, and common materials, this technology is well suited for a wide range of applications, from rapid prototyping to low-volume production, limited trial runs, or custom-made products.
Recent advances in technology, materials and software have opened up the possibility of SLS printing to a wider range of companies. Previously, such tools were used only in a few high-tech industries.
Introducing the Fuse 1 high performance SLS 3D printer, finally available.
Webinar
Watch our product demo to learn about Fuse 1 and SLS 3D printing from Formlabs.
Watch webinar
Schematic representation of the selective laser sintering process. The SLS method uses a powerful laser to sinter small particles of polymer powder into a solid structure based on a 3D model.
-
Print: A thin layer of powder is applied to the top of the platform inside the working chamber. The printer preheats the powder to just below the melting point of the feedstock. This allows the laser to more easily raise the temperature of certain areas of the powder bed and monitor the solidification of the model. The laser scans the cross section of the 3D model, heating the powder to the material's melting temperature or just below. Particles are mechanically joined together to form a single solid object. The unsprayed powder supports the model during printing and eliminates the need for special support structures. The platform is then lowered into the working chamber one layer, typically 50-200 µm thick, and the process is repeated for each layer until the models are complete.

-
Cooling down: after printing and before post-processing, the build chamber should cool down a little in the printer body and then outside the body to ensure optimal mechanical properties of the models and avoid their deformation.
-
Postprocessing: finished models must be removed from the working chamber, separated from each other and cleaned of excess powder. The powder can be recycled and printed models can be blasted or tumbled.
To learn more about the workflow, see the SLS 3D Printing Workflow section below.
SLS models have a slightly grainy surface, but the layer lines are almost invisible. To achieve a smooth surface, SLS models are recommended to be blasted or tumbled. This sample was printed on a Fuse 1 industrial 3D printer with SLS technology for workshops from Formlabs.
The green powder supports the model during printing and eliminates the need for special support structures. This makes SLS ideal for complex geometries, including internal features, undercuts, thin walls, and negative draft features.
Models created using SLS 3D printing have excellent mechanical properties: their strength is comparable to that of injection molded models.
Compare Selective Laser Sintering (SLS) 3D printing with other common plastic modeling technologies: Fused Deposition Modeling (FDM) and Stereolithography (SLA).
Selective Laser Sintering (SLS) is one of the first additive manufacturing technologies developed in the mid-1980s by Dr. Carl Deckard and Dr. Joe Beeman at the University of Texas at Austin. Since then, the method has been adapted to work with a variety of materials, including plastics, metals, glass, ceramics, and various powdered composite materials. Today, all of these technologies are classified as wafer synthesis, additive manufacturing processes that selectively sinter regions of a powder layer under the influence of thermal energy.
The two most common substrate synthesis systems currently available are a plastic based method commonly referred to as Selective Laser Sintering (SLS) and a metal based method known as Direct Metal Laser Sintering (DMLS) or Selective Laser Melting (SLM). ). Until recently, both systems were very expensive and complex, which limited their use to the production of small batches of expensive models or custom-made products, such as aerospace components or medical devices.
Innovation in this area will make plastic-based SLS as affordable as other 3D printing technologies such as stereolithography (SLA) and Fused Deposition Modeling (FDM) and become widely available in affordable, compact systems.
All selective laser sintering 3D printers use the process described in the previous section. Basically, such printers differ in the type of laser, the volume of printing and the complexity of the system. Different solutions are used for temperature control, powder dosing and layering in different devices.
Selective laser sintering technology requires high precision and strict control during the printing process. The temperature of the powder and (incomplete) models must be controlled within 2°C during the three stages of production: preheating, sintering and storage before extraction, in order to minimize warping, stress and thermal deformation.
For decades, selective laser sintering has been one of the most popular professional 3D printing technologies, but due to its complexity, strict requirements and high price, only service bureaus and large enterprises could use it.
Conventional industrial SLS 3D printing systems have one or more powerful lasers. An inert atmosphere (nitrogen or other gases) is needed to prevent the powder from oxidizing and breaking down during the printing process, which requires specialized air handling equipment.
These installations also require special heating, ventilation and air conditioning (HVAC) systems and industrial power supplies. In addition, even the smallest industrial installations occupy an area of at least 10 square meters. m.
Due to the high initial cost of approximately $100,000 (and much more for complete solutions), traditional industrial systems with SLS technology were out of reach for many enterprises.
As with other 3D printing technologies such as Fused Deposition Modeling (FDM) and Stereolithography (SLA), more affordable, compact systems with SLS technology have recently begun to appear on the market. However, these solutions had significant drawbacks. These include low quality models and complex manual workflows due to a lack of post-processing solutions. This severely limited their use in industrial production.
The Formlabs Fuse 1 printer is in a new category with these deficiencies fixed . It is the first industrial SLS 3D printer for the workshop, delivering high quality, compact size, streamlined workflow, and cost far less than traditional industrial systems of the same type.
The Fuse 1 printer does not require any special infrastructure and will easily fit into your workplace.
The Fuse 1 uses a single laser and has a smaller working chamber that requires less heat. The powder is exposed to elevated temperatures for a shorter period of time, so there is no need for inert gases and specialized ventilation equipment. Thanks to its lower power consumption, it can run on a standard AC power supply without requiring special infrastructure.
The Fuse 1 features patent pending Surface Armor technology. This creates a semi-baked shell that heats evenly around the models as they are printed. This results in excellent surface quality, stable mechanical properties, high reliability and a high material renewal rate.
In addition to providing a compact, self-sustaining ecosystem and complete powder handling capability, Fuse 1 is complemented by the Fuse Sift Station, a stand-alone stand-alone device for model retrieval, recovery, storage and powder mixing.
Overall, the Fuse 1 industrial 3D printer with SLS for workshops has slightly less print volume than traditional entry-level SLS systems, but is smaller, easier to work with and less expensive.
| Fuse 1 Industrial SLS Workshop Printer | Traditional Industrial SLS 3D Printers | 5 Cost | from 18,500 US dollars | 100 000 - 500,000 US dollars and more than | ||||
|---|---|---|---|---|---|---|---|---|
| Press volume | to 165 x 165 x 300 mm | 9010 x 550 x 750 mm 7509 Benefits | Availability High quality models High performance Simplified workflow Compact dimensions Low maintenance | High print volume High quality models High performance Many material options | ||||
| Disadvantages | Less print volume Limited material options | Expensive equipment Big sizes Infrastructure requirements Large amount of maintenance Special Operator Required |
The most common selective laser sintering (SLS) material is nylon. It is a high performance engineering thermoplastic for both functional prototyping and end-use fabrication. Nylon is ideal for the production of complex knots and strong models with high environmental resistance.
3D printed SLS nylon for strength, rigidity and durability. The final models are impact-resistant and highly wear-resistant. Nylon is resistant to UV, light, heat, moisture, solvents, temperature and water. Nylon models printed on a 3D printer are also biocompatible and do not cause allergic reactions. This means that they can be worn and used safely in many situations.
Nylon is ideal for a range of functional applications, from consumer product design to healthcare applications.
Nylon is a synthetic thermoplastic polymer from the polyamide family. It is available in several versions, each designed to print different products. Nylon 12 Powder has a wide range of applications and is a general purpose, general purpose SLS 3D printing powder. Nylon 12 GF Powder is a composite material with a high fiber content, increased stiffness and heat resistance for difficult industrial conditions. Nylon 11 Powder helps fill a gap in prototyping and end-use applications where increased ductility, impact resistance and the ability to withstand wear without brittle fracture are required.
- Impact proof prototypes, fixtures and fittings
- Thin-walled pipes and bodies
- Rivets, fasteners and latches
- Orthopedic products and prostheses*
- High Performance Prototyping
- Small batch production
- One-piece clamping and holding fixtures and tooling
- Conventional SLS models
- Heavy duty clamping and fastening fixtures and spare parts
- Continuous models
- Thread and sockets
- High temperature models
* Material properties may vary depending on model design and manufacturing method. It is the manufacturer's responsibility to confirm the suitability of printed models for their intended use.
109 40%
 8 MPa (°C)
 Nylon 12 Powder and Nylon 11 Powder are one-component powders, but some SLS 3D printers can also use two-component powders, such as coated powders or powder blends.
Nylon 12 GF Powder is a composite material with a high fiberglass content, while other nylon composites with aluminide, carbon or glass are designed to increase the strength, stiffness or flexibility of models. In such two-component powders, only the component with the lower glass transition point is sintered, which binds both components.
SLS 3D printing accelerates innovation and helps businesses in a wide range of industries such as engineering, manufacturing and healthcare.
Manage the entire product development process, from iteration of first concept design to production of ready-to-use products:
- Rapid Prototyping
- Product mockups for user feedback
- Functional Prototyping
- Functional testing of products under severe conditions (e.
 g. piping, brackets)
Manage your supply chain and respond quickly to changing needs:
- End-Use Manufacturing
- Small batch production
- Mass production of new customized consumer products
- Spare parts manufacturing, supply chain sustainability
- Durable, durable clamping and fastening devices (e.g. clamps and clamps) and accessories
- Custom manufacture of automotive, motorcycle and marine equipment parts, and restock military items on demand
Self-manufacturing of ready-to-use medical devices, taking into account the individual characteristics of patients:
- Medical device prototyping
- Prostheses and orthotics (e.g. prosthetic limbs and orthoses)
- Surgical models and instruments
- End use products (nylon 12 biocompatible and sterilizable*)
* Material properties may vary depending on model design and production method. It is the manufacturer's responsibility to confirm the suitability of printed models for their intended use.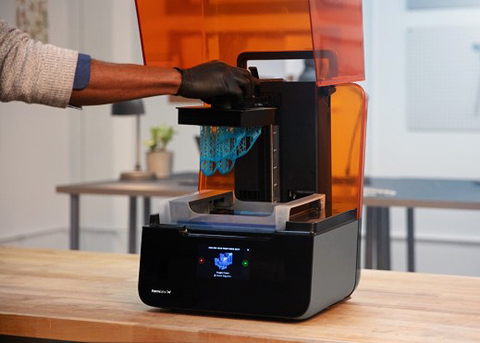
Use any CAD software or 3D scan data to design the model and export it to a 3D printable format (STL or OBJ) file. All printers with SLS technology use software that allows you to adjust settings, position models, estimate print times, and layer your digital model. Once set up, the model preparation software sends commands to the printer via a wireless or cable connection.
The Fuse 1 uses PreForm print preparation software (free to download). It allows you to easily duplicate and place multiple models on a 3D grid to maximize your print volume. PreForm automatically suggests the optimal orientation and position of models with the ability to make manual changes.
The workflow for preparing the printer varies from system to system. Most traditional SLS systems require extensive training, tools, and physical actions to prepare and maintain them.
Fuse 1 redefines the SLS workflow, making it simple and efficient, as well as providing trouble-free printing and complete powder handling thanks to modular components.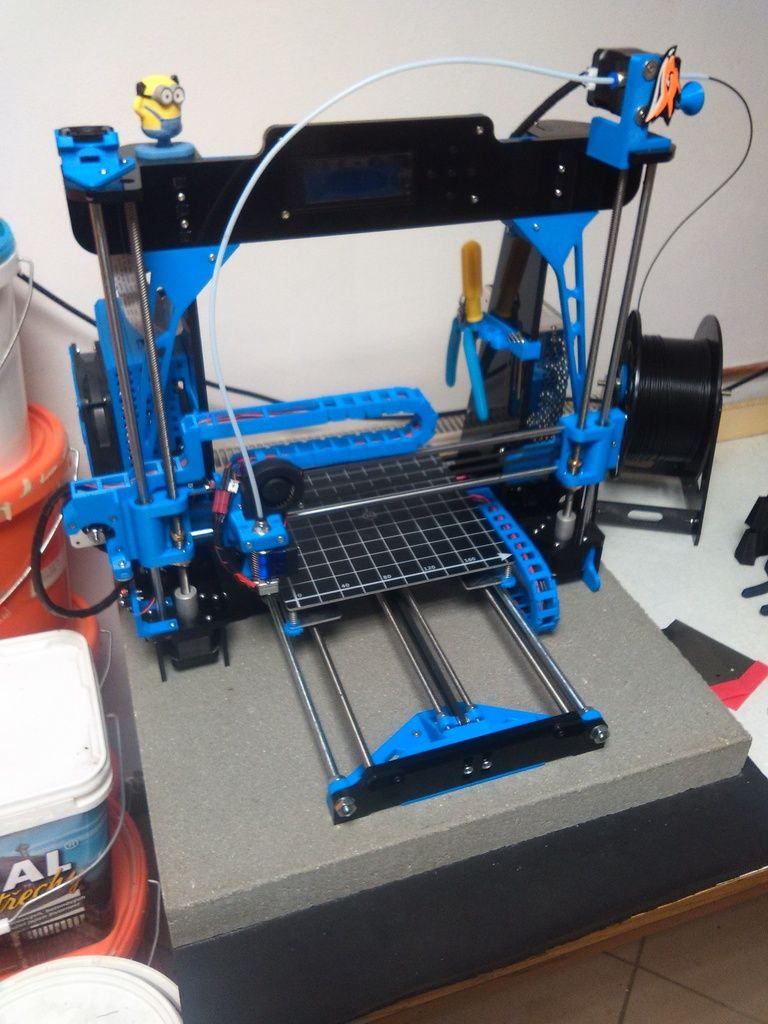
The Fuse 1 can be easily loaded with powder using a special cartridge.
The Fuse 1 uses a detachable build chamber so you can start a new print while the previous build chamber is still cooling.
Once all pre-checks have been completed, the machine is ready to print. Depending on the size and complexity of the 3D models, as well as their density, printing using SLS technology can take from several hours to several days.
When printing is complete, the build chamber in the housing should cool down a bit before proceeding with the next step. To start the next print, you can remove the build chamber and insert a new one. Before post-processing, the working chamber must cool down to ensure optimal mechanical properties of the models and avoid their deformation. This can take up to half of the total print time.
Fuse 1 is equipped with a touch screen that allows you to see in real time how each new layer is formed during the printing process. This camera image can also be transferred to a computer using PreForm to monitor the print without leaving the workplace.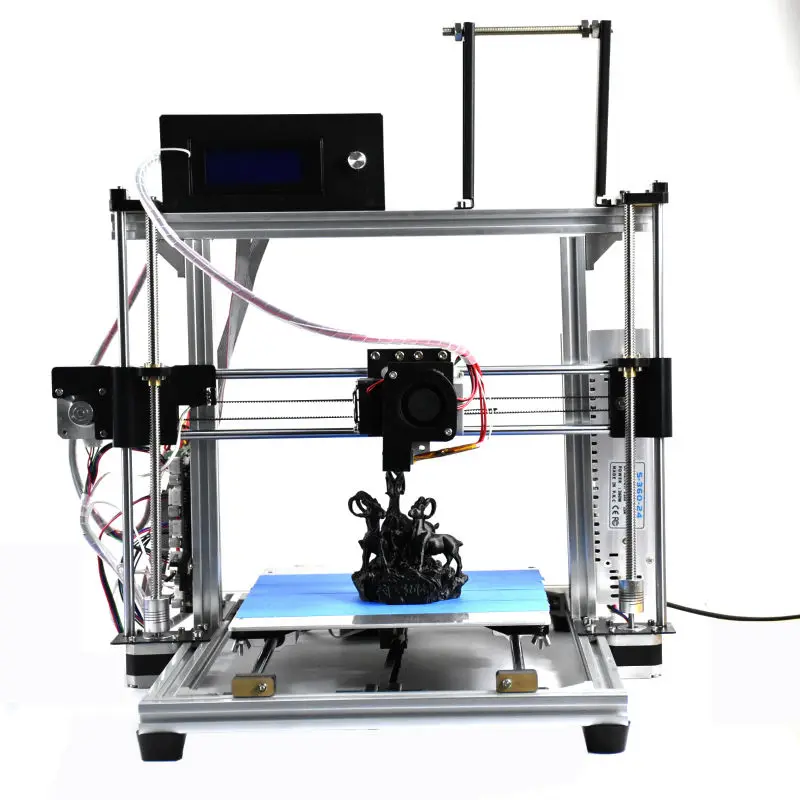
Compared to other 3D printing processes, post-processing of SLS-printed models requires a minimum of time and labor. With no supporting structures, it is easy to scale and provides consistent results across batches of models.
After printing is completed, remove the finished models from the build chamber, separate them and clean them of excess powder. As a rule, this is done manually at the cleaning station using compressed air or a jet apparatus.
The excess powder left after the creation of the model is filtered to remove large particles from it. After that, it can be recycled. Under the influence of high temperature, the properties of green powder deteriorate slightly, so for subsequent printing it must be mixed with new material. Due to the possibility of reusing materials, SLS technology produces a minimum amount of waste.
SLS technology typically uses separate devices for powder recovery, storage and mixing. The Fuse 1 workflow uses a single Fuse Sift to retrieve patterns and greens, store, dispense, and mix material streams.
Fuse Sift completes the Fuse 1 SLS print workflow. This system is used for safe and efficient model retrieval and powder recycling.
Fuse Sift automatically doses and mixes used and new powder, reducing waste and controlling powder delivery.
After the powder has been sieved, the 3D models printed using selective laser sintering technology are ready for use. However, there are a few more post-processing steps you can perform on these models.
By default, the surface of 3D models created using SLS technology remains grainy. To achieve a smooth surface, Formlabs recommends blasting or tumbling models made using this method. Models can be spray painted, lacquered, electroplated or otherwise to achieve the desired color, surface quality and properties such as water resistance (special coating) and electrical conductivity (electrolytic coating). Models created with SLS Formlabs are dark in color and therefore not well suited for staining.
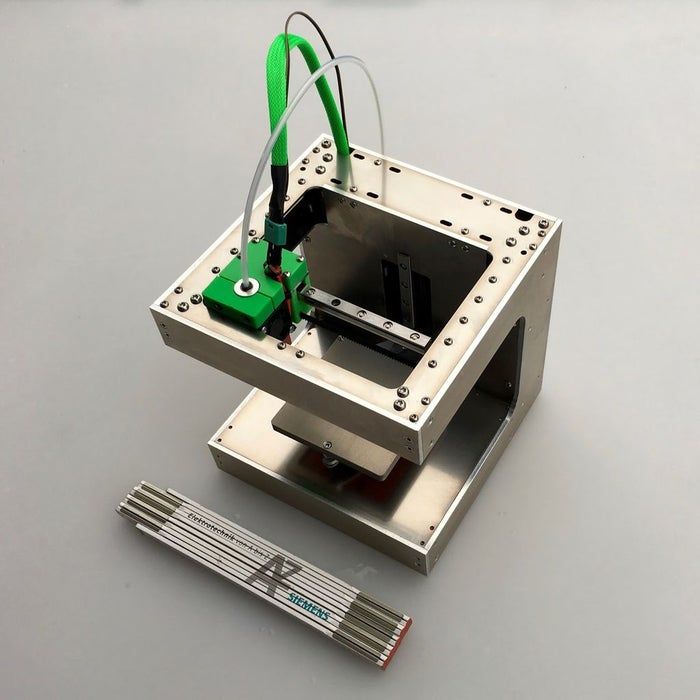
Immersion printed SLS model from Partial Hand Solutions.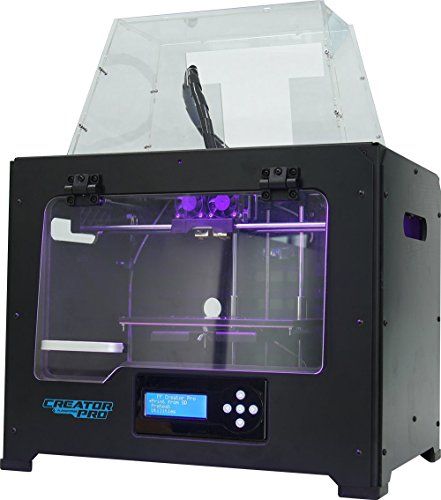
SLS models can be electroplated for a metal-like surface.
Selective laser sintering is preferred by engineers and manufacturers for its wide design options, high productivity, low model cost and proven end use materials.
Most additive manufacturing processes such as stereolithography (SLA) and Fused Deposition Modeling (FDM) require specialized support structures to fabricate overhang structures.
Selective laser sintering does not require support structures because the unsintered powder surrounds the model during printing. SLS printing makes it easy to create overhangs, intricate geometries, interconnecting parts, internal channels and other intricate details.
Intricately patterned arm splint for weight reduction.
Engineers typically design models in terms of the capabilities of the final manufacturing process, also known as design-for-technology (DFM). When additive manufacturing is only used for prototyping, it comes down to creating models and designs that can be replicated in the manufacturing process using traditional tools.
Selective laser sintering is emerging as a viable rapid production method and its application area continues to expand, so it can open up new possibilities in design and construction. 3D printers with SLS technology can create complex geometries that are impossible or incredibly expensive to manufacture using traditional processes. SLS technology also allows design professionals to combine complex assemblies into a single model that would normally require multiple models to be created. This helps avoid the problem of loose connections and saves assembly time.
Selective laser sintering can unleash the potential of generative design, as it allows the creation of lightweight models that use complex lattice structures that cannot be fabricated by traditional methods.
Selective laser sintering is the fastest additive manufacturing technology for making functional, durable prototypes and end-use products. Lasers used for powder sintering have much faster scanning speeds and are more accurate than the layering methods used in other processes such as Industrial Fused Deposition Modeling (FDM).
To maximize the available print volume in each printer, multiple models can be placed side by side. Operators can use the software to optimize print volume and maximize productivity by leaving only minimal clearance between models.
SLS technology allows operators to fill the build chamber with as many models as possible, as it allows them to be printed without supporting structures, saving time in post-processing.
SLS 3D printing requires the right materials for functionality and versatility. Nylon and its composites are proven, high quality thermoplastic materials. Laser-sintered nylon models have close to 100% density and mechanical properties that are comparable to products made using traditional manufacturing methods such as injection molding.
Screwdriver printed in Nylon 12 Powder. After a simple post-processing, nylon models have a smooth, professional quality surface.
SLS Printable Nylon is an excellent replacement for conventional injection molded plastics. The latches and other mechanical connections produced from it are superior to products created using any other additive manufacturing technology. It is ideal for making functional plastic parts that will work and not break down over time like products created through other additive manufacturing methods.
When calculating the cost of one model, it is usually necessary to take into account the cost of ownership of equipment, material costs and labor costs:
-
Equipment cost of ownership: The more models a printer can produce over its lifetime, the lower the cost per model. Therefore, higher performance results in a lower cost of ownership per model. With high laser scanning speeds, the ability to produce multiple models at once to maximize the working volume, and a simple post-processing process, SLS 3D printing guarantees the highest productivity of any additive manufacturing method.
-
Material: Most 3D printing technologies use proprietary materials, while nylon is a common thermoplastic that is produced in large quantities for industrial applications.
 This makes it one of the most inexpensive raw materials for additive manufacturing. SLS 3D printing requires no support structures and allows you to print with recycled powder with minimal waste.
 -
Labor: Labor is a disadvantage of many 3D printing solutions. Work processes in most technologies are quite laborious and difficult to automate, which can significantly affect the cost of one model. Easy post-processing with SLS printing reduces manual labor and allows for easy scalability.
A 3D printer with SLS technology is a significant investment initially, but this investment often pays off even faster than buying smaller devices. SLS for workshop technology significantly reduces initial acquisition costs and also reduces model costs in most applications.
If 3D printing is rarely used in your business, it is recommended to use the services of third-party service bureaus. But in this case, the cash costs will be higher and you will have to wait longer for the order to be completed. One of the main advantages of 3D printing is its speed compared to traditional production methods. But this advantage loses its value when it takes up to several weeks for a third-party company to deliver a model.
REEKON Tools
 In many cases, for the production of limited or small trial runs, selective laser sintering is a cost-effective alternative to injection molding.
 | 3DNews Technologies and IT market. Interesting news from the high-tech world 01/23/2015 [10:45], Dmitry Prikhodko 3D printing technology is gradually becoming a not so outlandish way of producing both small components and large structures. 3DERS.ORG 3DPRINTERPLANS.info www.gizmag.com Metro.co.uk EXTITURE WINSUN in Shanghai VILLE, built by Winsun printed on a 3D printer Winsun, as noted above, has mastered the method of high-speed “printing” of simple structures as a trial step. The company's specialists managed to build 10 compact one-story residential buildings in 24 hours, using a 3D printer developed in-house. The device was filled with a mixture of cement and construction waste, and a special hardener was added to the composition. Now Winsun, who decided to complicate the task, was able to demonstrate the promise of the considered 3D technology using the example of two new and more complex buildings. True, the manufacturer keeps a secret what the maximum dimensions of an element produced on their 3D printer can be, but given the demonstrated success, there is no reason to doubt the rationality of this method. The walls of a huge villa and a five-story house are made almost hollow, with zigzag elements inside to increase the reliability of the structure. The main advantage of the described construction method is the economic component, which makes it possible to reduce the consumption of building materials by 30–60% due to the use of recycled waste. The cost price of the presented villa for 1100 m 2 meters amounted to $161,000. |
 A clear evolution of the capabilities of modern 3D printing can be seen in the construction activities of the Chinese company Winsun, which was the first to use this method to create small residential buildings in the vicinity of Shanghai, and now built a five-story residential building and a luxury villa of 1100 m2 using a 3D printer. 2 .
  To realize the vision, the Winsun engineering team designed the printer to be 6.6 meters high, 10 meters wide and 40 meters long. The device produces separate solid blocks of future houses, which are assembled on site, strengthened with reinforcement and supplemented with insulating materials to meet all the necessary standards of modern construction.