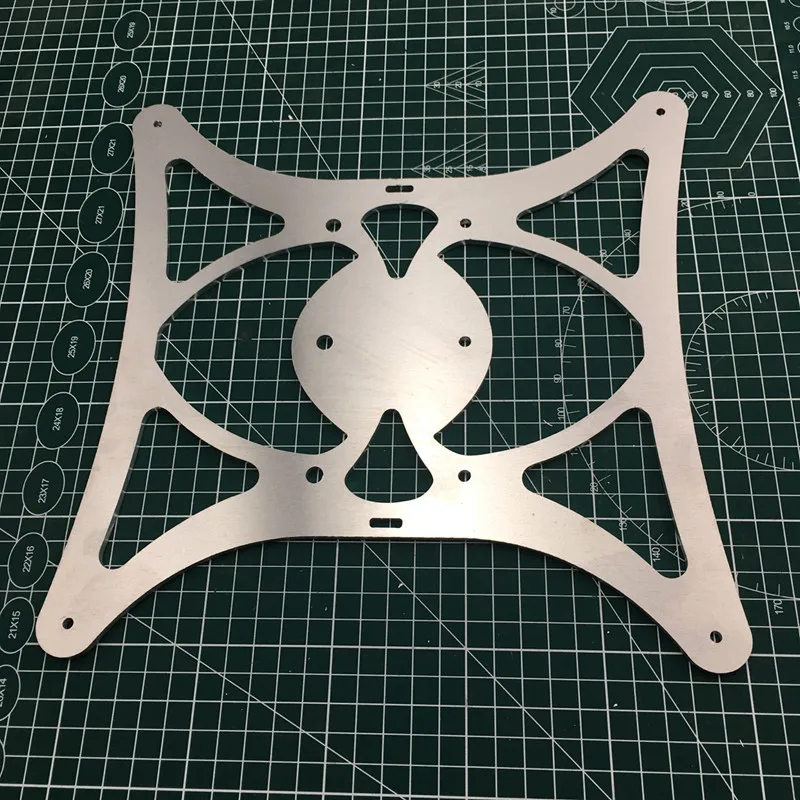
3D printer aluminum build plate
3D Print Bed Plate – Glass Vs Aluminum Vs Spring Steel – 3D Printerly
Most 3D printers will be equipped either with a glass or aluminum bed surface, both having their own advantages. You also have another candidate which is spring steel, so how do you know which one you really want to print with?
Choosing the right 3D printer bed is something that will affect your 3D printing journey, either for better or worse. This post will help you to identify which print bed plate you should be using on your 3D printer.
There is a difference between your 3D print bed plate and the build surface. Here we are talking about the bed plate, directly on top of the heated bed, so let’s look into the comparisons between glass, aluminum and spring steel.
3D Printer Glass Beds
You have a few types of glass print beds, so I’ll go through each one to give you a better understanding of the choices you can make.
- Borosilicate glass bed
- Tempered glass bed
- Normal glass bed (dollar store, scanner glass etc.)
- Mirror
Glass beds usually tend to be flatter, easier to clean, and simpler to use overall. Many people love the nice bottom surface finish you get on PLA and other materials from printing directly on a heated glass bed.
They are also cheaper depending on what type of glass you get, but the more you pay, the better quality you’re likely to get.
Borosilicate Glass
Borosilicate glass is the print bed material you want for ideal print quality.
It’s very popular in the 3D printing space for many reasons, the main ones being:
- It’s very strong and durable
- Has high temperature resistance and low thermal expansion
- It can chip, but it’s very less likely to with the right care
- Easy to try build surfaces with (glass in general)
- Cleaning glass is much easier than aluminum or steel
- Known to sometimes have adhesion issues
Borosilicate glass is made by combining many chemicals together, with the magic one being boron trioxide.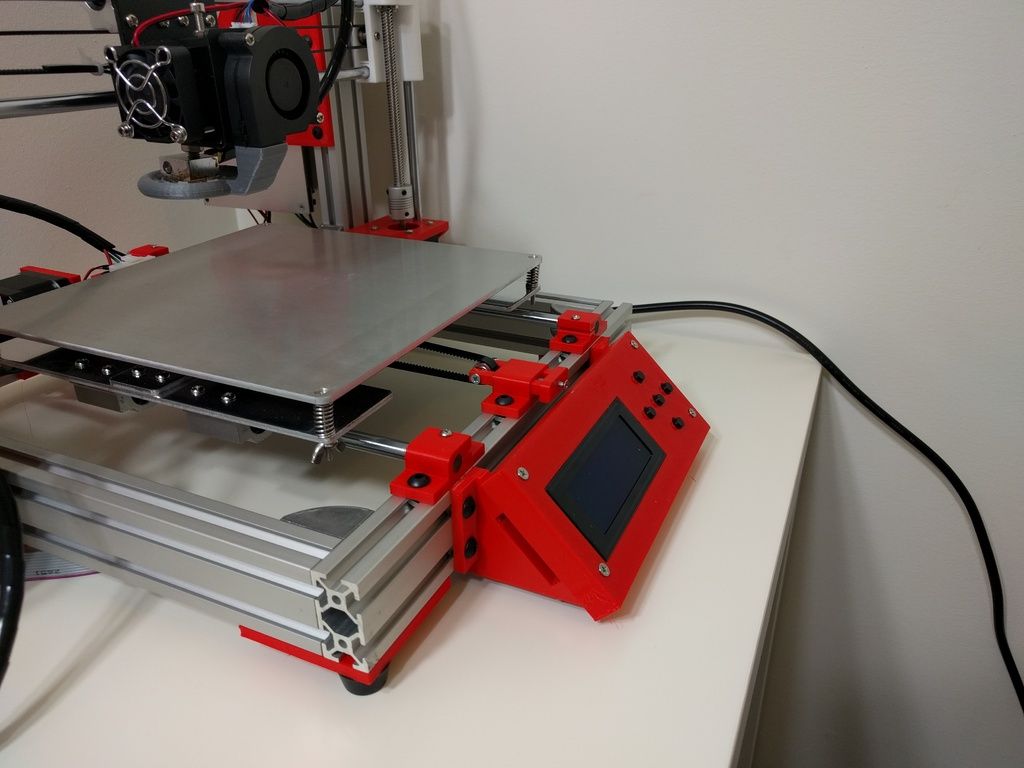 You can actually use this type of glass in a freezer or pour boiling hot water in it.
You can purchase a high quality Dcreate Borosilicate Glass from Amazon at a great price. It’s highly-rated, easy to clean and comes with a 12 month, hassle-free warranty and replacements for quality.
Trying to remove a print from a heated borosilicate glass can result in chipped glass.
You’ll find this type of glass being used in some Pyrex products because it has more resistance and is stronger than your normal glass.
Compared to other types of glass, borosilicate has a higher level of thermal shock resistance and a lower thermal expansion factor.
Once this glass has been tempered and in its final form, it can’t be cut or physically altered.
Tempered Glass
There is also Tempered glass which is a good print bed for you to use.
The chances of this print bed flaking while trying to remove prints is very rare and it is stronger than normal glass and shatter-resistant.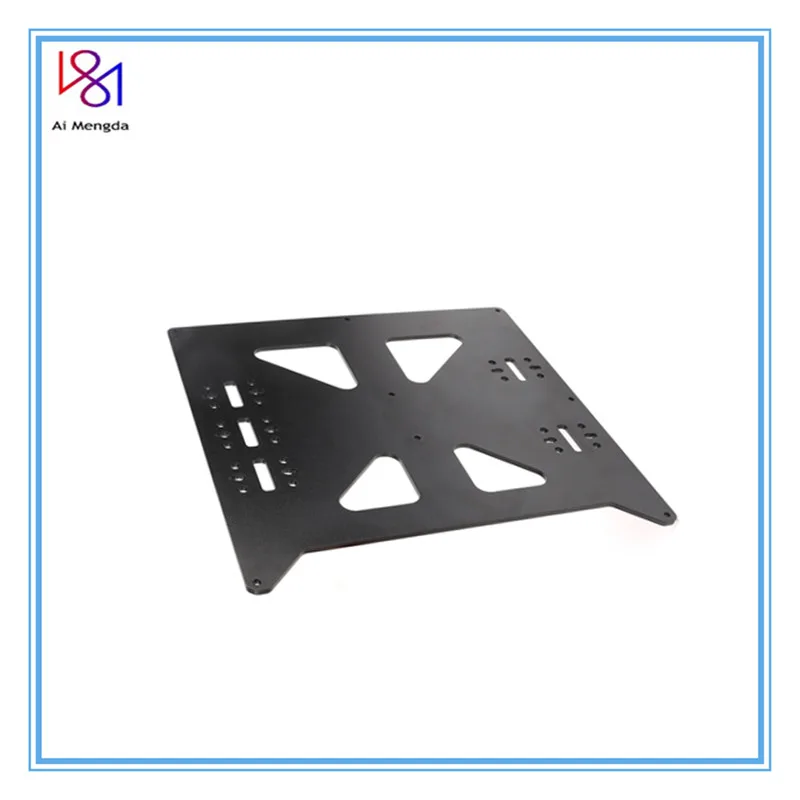 This type of glass is usually found in laboratories, safety glass windows or doors.
Rather than shattering, it breaks into several fragmented pieces that still connect together. This is why hockey rinks use this same glass to protect people in the crowd.
The way Tempered glass is treated, it is a lot stronger and heat-resistant compared to normal glass.
In a 3D printing environment, some people have had Tempered glass beds run for thousands of hours of printing without running into any issues.
It’s a fairly popular choice to add to your 3D printer so definitely consider Tempered glass.
- Much stronger than regular glass
- More heat-resistant
- A lot safer because it is shatter-resistant
- Less likely to chip under high temperatures
Normal Glass
Some people even use picture frame glass or cheap dollar store glass for their 3D printers, and although it might work for some time, they are a lot more prone to chipping and breaking.
You can even use normal glass plates on top of your heated borosilicate glass. You won’t have to wait for prints to cool down to start a new print, just put another sheet of glass on top and begin printing.
There are some cases where people have seen their PLA or PETG prints actually take out pieces of glass from sticking down too hard. The force needed to get these pieces of the glass bed would’ve been too much so you don’t want a low quality glass bed.
As most people know, normal glass has tendencies to shatter in several pieces on impact. This also occurs with sudden changes in temperature so in a 3D printing environment, it wouldn’t be an ideal choice.
One person managed to get a glass plate from a flatbed scanner that was thrown away, he then cut it to size using a glass cutter and it has been doing a great job with printing. This glass is more likely to be treated in some way to give it structural strength.
Mirror
This may seem like an odd suggestion for a build plate, but you might be surprised! A mirror used as a 3D print bed has heard many praises throughout the 3D printing community, it just gets the job done so well.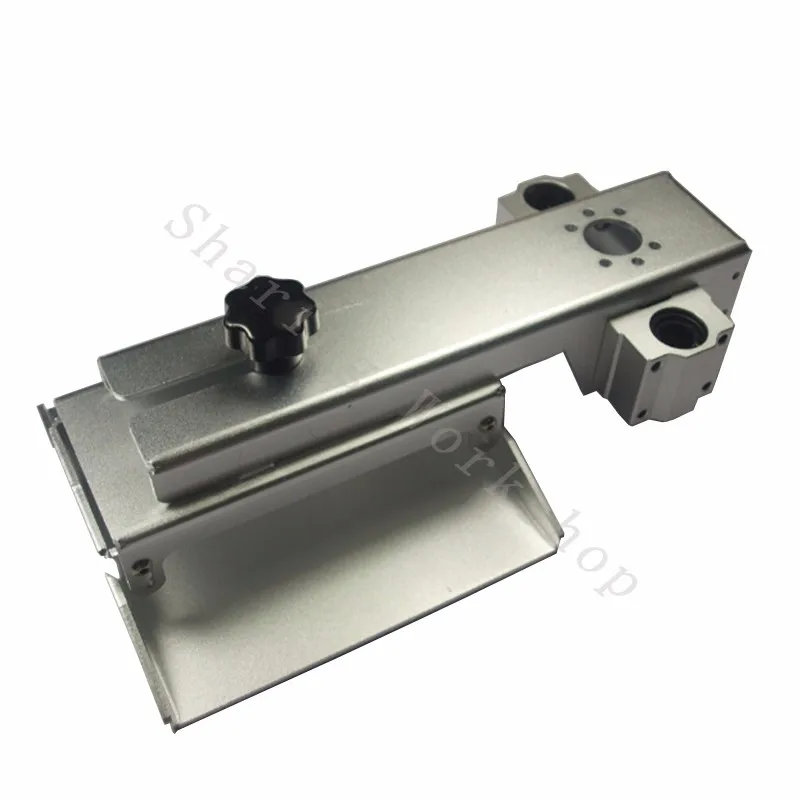
It does take some tough work to get this done, but it is worth doing if you enjoy doing some DIY.
Extra Info on A Glass Bed
- Requires raising the temperature around 10° to compensate
- It’s advised to try printing without using adhesive, then depending on the result use a small bit if necessary.
- Depending on the strength of the glass, Z endstop failures can crack a weak glass bed
- Let them cool down after a print and parts usually pop right off due to thermal expansion
- Ensure your nozzle isn’t too close to the build plate as it can make prints stick down too hard
- A heavy glass bed isn’t ideal since it can cause print imperfections like ghosting
- Leveling is easier with glass beds
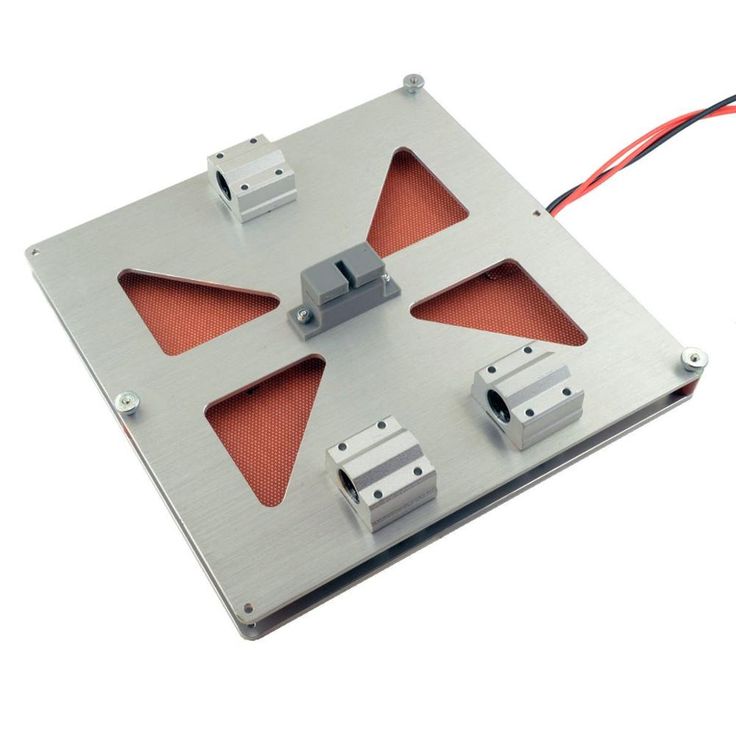
3D Printer Aluminum Bed
This material has many properties that are admirable:
- It’s a lightweight material that reduces the load on the Z axis
- Has a significantly high measure of conductivity compared to other bed materials
- Very widely available to be used on 3D printers
Aluminum is widely used due to its ability to conduct heat so well, so it helps in getting an even temperature across the whole print bed.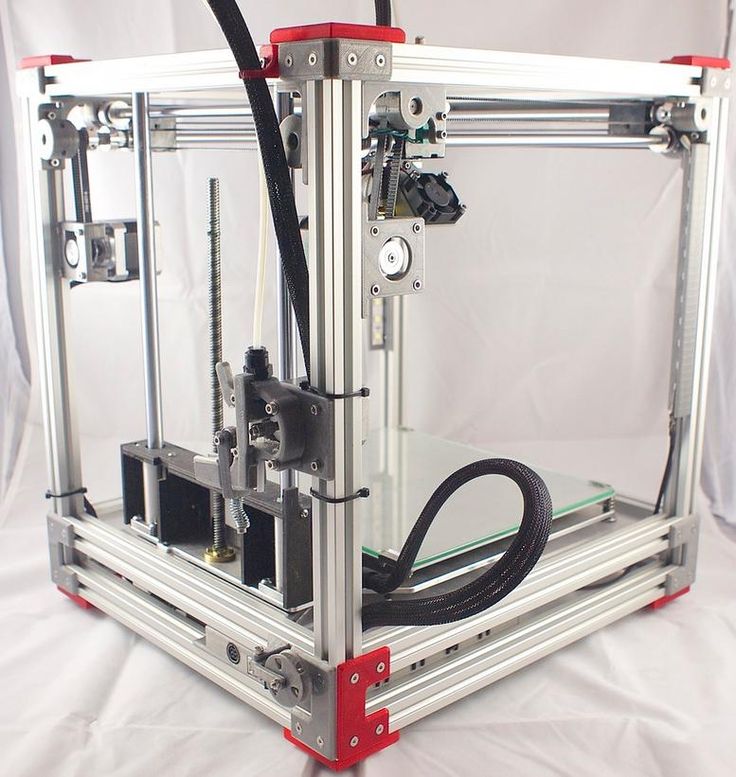 Some adhesion issues arise from uneven bed temperatures so this works out well in that regard.
My Ender 3 has a standard aluminum heated bed which works great and ihas been giving great prints so far.
If you are looking for a solid aluminum heated bed replacement, your best off going with the Official Creality Heated Bed. It’s mainly for an Ender 3 and Ender 3 Pro with 235 x 235 x 3mm dimensions.
To achieve adequate adhesion, people that use Aluminum beds usually need an adhesive substance such as Blue Painter’s Tape or Hairspray when printing difficult materials. It’s more so true for large ABS prints since they can have trouble sticking to the build plate rather than PLA.
When you 3D print on aluminum, it is likely to expand when it’s heated, resulting in a convex or concave shape over time (center higher than sides) due to its physical characteristics. You don’t get this with glass, at least at a significant enough level to affect prints.
The video below shows how you can compensate for a warped print bed with simple post-it notes!
It’s less likely to happen with filament that doesn’t require heating up your bed so high, but when it comes to ABS and other similar materials, it can definitely be a problem.
On the other hand, the expansion of aluminum from heat can be prevented by increasing the thickness of the aluminum bed (around 3mm), while at the same time, making sure it heats up evenly.
Many people actually choose to place a glass plate above their aluminum bed which works well, but it does require a longer heating time overall.
When you are trying to clean the residue (dried hairspray, glue etc) off of an aluminum bed, it is quite prone to scratching so having a build surface on top is a good idea.
If you do want to check the flatness of your bed you want to do it while it’s heated up.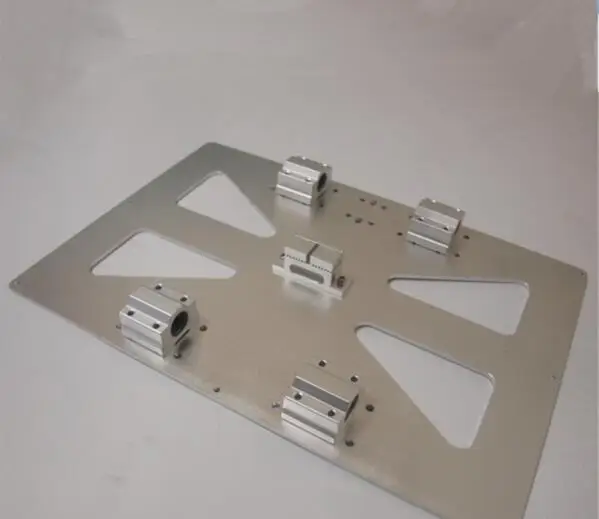 Aluminum beds may be flat when cool, but after reacting to the heat, you can start to experience warping.
Extra Info on An Aluminum Bed
- Aluminum conducts heat the best out of all bed types
- Needs replacing more often due to warping tendencies
- Works well with the popular inductive probe for bed leveling
- Won’t break due to a hotend crash
3D Printer PEI Spring Steel Bed
Spring Steel is actually used in tandem with your standard aluminum plate that comes with your 3D printer so, you just remove your original plate and stick this one down.
The adhesive behind the Spring Steel is very strong so make sure it is aligned properly before putting it down.
Spring Steel sheets have very high strength and heat-resistance, making it ideal for high temperature filament out there like ABS and PEEK.
You would see this type of bed used with a magnetic PEI bed because it sticks very well, and gives you a smooth surface for the first layer. All you have to do it let it all cool down before removing the steel plate, then flexing it until your print pops off.
Spring Steel is an addition that many people wish they had gotten sooner, to save them several hours of trying to get extruded filament to stick down.
I would recommend getting the Sovol PEI Magnetic Flexible Spring Steel Bed from Amazon. It comes with a PEI plastic sheet attached with your Spring Steel sheet and a magnetic sheet.
Assembly is easy, printing is made easier, and you get better quality prints! It’s a simple choice to make if you are a 3D printer hobbyist.
Verdict
There are many people out there who have made the switch to a glass print bed and never went back. Depending on your printing needs, glass might be a great choice for your 3D printing journey.
For adhesion, simply applying a few coats of hairspray or glue stick does the trick every time. If you exclusively print with PLA, you probably won’t even need adhesive at all because the glass bed surface works just great.
You can use a build surface like PEI, BuildTak, or some other material to add to your glass bed if you print with less manageable materials like ABS.
It seems like one of the best options is to have an aluminum build plate, then have a glass surface on top of that so you can detach the prints from the printer if need be. Just use binder caps or ZUPAYIPA Silicon Thermal Pads (Amazon) to adhere them with each other.
Instead of covering your whole bed with the silicon pad, you should cut it up into 2-inch squares and spread them out. This is beneficial because the heat rises between them so the areas which have small spaces get enough heat transferred.
It’s also a good idea doing this because it won’t act like a suction cup, making it hard to remove.
They have a good amount of grip so you don’t have to worry about your glass plate sliding around, when heat is being applied.
People have reported seeing binder clips be the cause of glass warping when they are too strongly clipped.![]() Having multiple glass plates you can swap out is ideal, so you can remove it to wait for it to cool, then use that glass plate to start another print.
Having multiple glass plates you can swap out is ideal, so you can remove it to wait for it to cool, then use that glass plate to start another print.
A Guide to Choosing the Best 3D Printer Build Plate
3D Insider is ad supported and earns money from clicks, commissions from sales, and other ways.
It is often said that a perfect base layer is one of the most important components of a perfect 3D print. There are a lot of considerations that go into creating that perfect base layer – the bed temperature, the type of adhesive used, and the z-offset of the nozzle among others.
However, one of the more important decisions you need to make is which type of print bed or build plate to use. While your 3D printer comes with a default build plate, there are lots of third-party options or replacements out there. Which one should you use?
The importance of a build plate
The build plate of a 3D printer is the flat surface on which the first layer of the molten filament is deposited. It provides stability and dimension accuracy for the entire project even if it only really comes in contact with the first layer. However, this first layer is the foundation for the entire project – it has to be perfect, otherwise, there are lots of things that can go wrong.
The build plate is also the surface to which the first layer of the print adheres. If adhesion is poor, then the layers will tend to shift, and the entire model may collapse or eventually topple over. There are several ways to achieve good adhesion, such as by heating the build plate or applying adhesives like tape or hairspray.
The surface quality of the build plate also influences the outcome of a 3D printing project. If the build plate were perfectly smooth, then this characteristic will also transfer to the bottom of the 3D print. On the other hand, a rough build plate provides a surface that is easier to adhere to. Balancing the importance of adhesion and surface quality is one of the many considerations when choosing between different build plates.
There is simply no way to overstate the importance of a good build plate. If you’re having issues related to warping, bed adhesion, layer shifting, or dimensional accuracy, then making a few tweaks to your build plate setup might just be the solution.
Build plate options
Your 3D printer already comes with a stock build plate by default, typically made with aluminum. The default build plate is still a viable option and is included in our list below. However, the great thing about alternative build plates is that they can just be placed on top of your printer’s default build plate. Switching from one to another is nearly effortless.
As with many 3D printer components, there is not one single superior choice for build plate. By looking at the pros and cons of each option, we should be able to help you determine the best choice for your situation.
Aluminum
The classic aluminum build plate is one that most users are familiar with. Many 3D printers come with an aluminum build plate by default, particularly because of how well it takes up heat.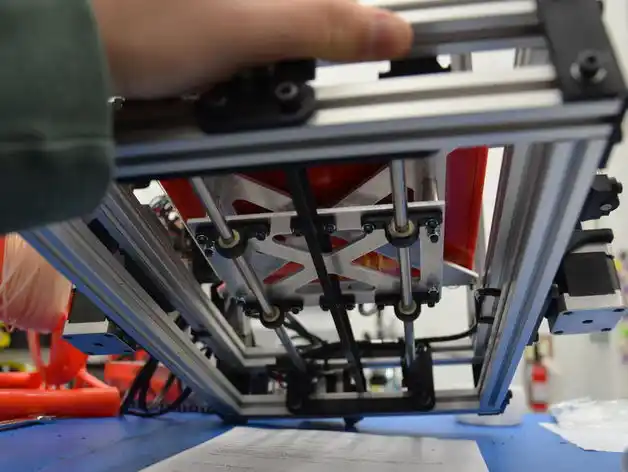 For heated beds, aluminum may be beneficial because of how quickly the material heats up. However, it can also create small “hot spots” in areas of the print bed that are closed to the heating elements.
An aluminum build plate can withstand quite a bit of abuse. This comes in handy when you have a hard time scraping off a finished print from the build plate. Yes, aluminum can still be scratched, but you likely won’t damage it so bad that you will need to have it replaced right away. This resistance to wear and tear, coupled with the low cost of aluminum build plates, makes aluminum one of the more cost-effective options.
| PROS | CONS |
|---|---|
| Robust and long-lasting | Prone to thermal expansion |
| Heats up quickly | May create localized hot spots |
| Inexpensive |
Glass
Glass is probably the most popular build plate used in the 3D printing community.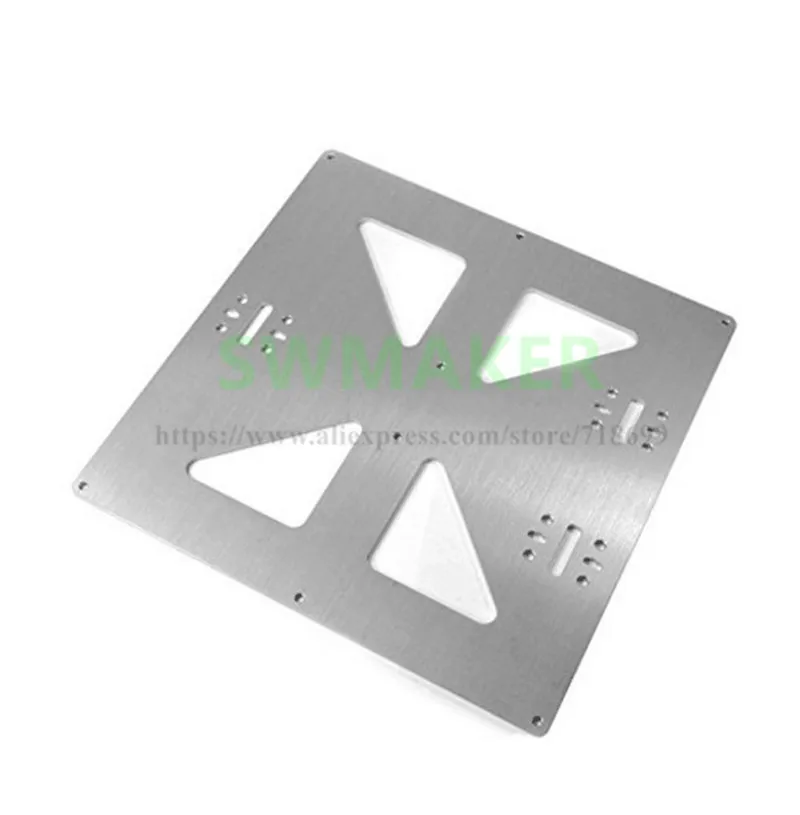 To use a glass build plate, simply have a piece of borosilicate glass cut to the size of your 3D printer’s print bed. This can then be attached by clips to your 3D printer’s original build plate. It’s simple, elegant, and inexpensive.
Glass offers a lot of unique advantages. It does not expand when heated, eliminating any tendency of the build plate to warp and create dimensional inaccuracies. The perfectly smooth surface of a glass build plate also means that the bottom surfaces of your finished 3D prints will be similarly smooth.
A glass build plate is an excellent medium for the application of adhesives. If your build plate ends up with residual adhesive, just take off the piece of glass and clean it with soap and warm water. With proper care, a glass build plate can last a few years without needing to be replaced.
For all its merits, glass is still not a perfect build plate material. If you struggle with the removal of finished prints, you might end up scratching a glass build plate easily.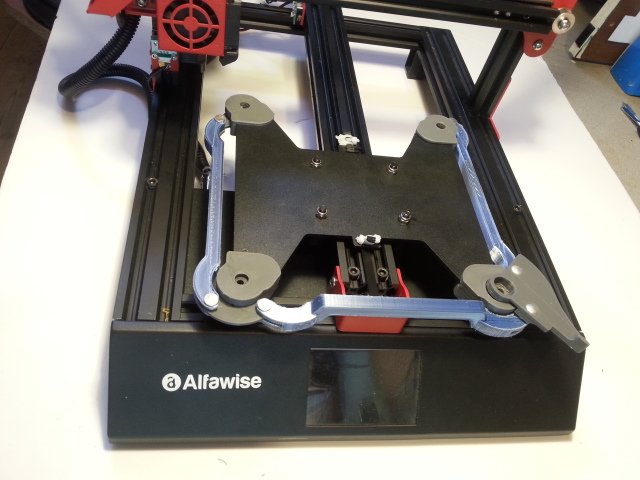 There is also the matter of glass being quite fragile, particularly if you get into an accident while cleaning or handling it.
| PROS | CONS |
|---|---|
| Smooth surface | Prone to getting scratched |
| Creates even heat distribution | Fragile |
| Easy to clean | |
| Does not warp | |
| Inexpensive |
BuildTak FlexPlate
The BuildTak FlexPlate is technically closer to an adhesive than a build plate. This standalone piece of flexible material is designed to attach to an existing build plate using a system of magnets. This is one of the more unique traits of BuildTak and may be advantageous if you have to maintain a quick 3D printing workflow for high-volume orders.
The BuildTak attaches to a build plate, providing a surface that provides much better bed adhesion. The surface of the BuildTak is not smooth, but rather has a texture that is specifically designed to help filament stick better.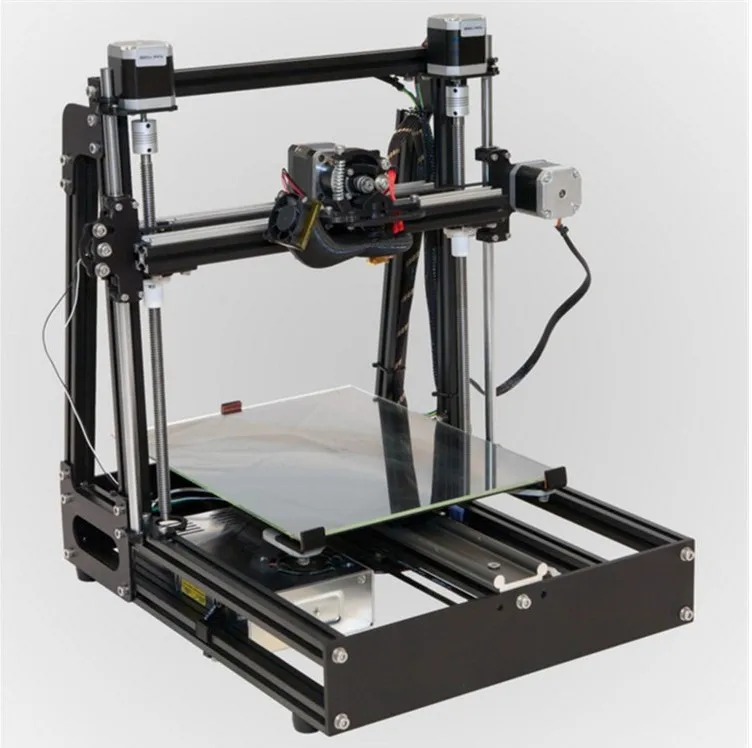 With a BuildTak, you will no longer need to use glue, hairspray, or tape.
BuildTak can be used on either glass or metal build plates and can withstand constant exposure to heated beds. When a print is done, the BuildTak can be removed and bent to facilitate print removal. This is a foolproof process that vastly simplifies this crucial step in 3D printing.
A single BuildTak can be used several times if handled with care. However, its surface can also be easily scratched by spatulas and other metal tools. This is problematic because BuildTak can stick a little too well in some circumstances. Replacing BuildTak surfaces frequently can quickly get very expensive.
| PROS | CONS |
|---|---|
| Superior bed adhesion | Expensive |
| Can be removed from the print bed | Prone to getting scratched |
| Can be used with either glass or aluminum | Can stick a little too well |
PEI Sheet
Polyether imide (PEI) is a material that is also used in 3D printing, although only sparingly. As a build plate material, PEI sheets provide superior bed adhesion even for challenging filaments. A single PEI sheet can replace all the glue and tapes that you probably have stocked in your workshop.
There are two types of PEI sheets that you can use for your build plate. The cheaper version is simply a sheet of PEI with a layer of adhesive at the bottom. The idea is to stick this sheet on top of a glass build plate for a semi-permanent setup. You can save a few dollars with this option but applying the PEI sheet perfectly can be a bit tricky.
There is also a version of PEI sheet that comes on a flexible steel platform. This sticks on a magnetic bottom sheet that is also stuck to your existing build plate with adhesive. This effectively makes the PEI sheet removable and changeable. Should your print get stuck, you can flex the steel plate gently to prod it loose.
Users swear by the adhesive properties of PEI, even when printing with ABS. However, PEI notoriously works poorly when printing with Nylon filament.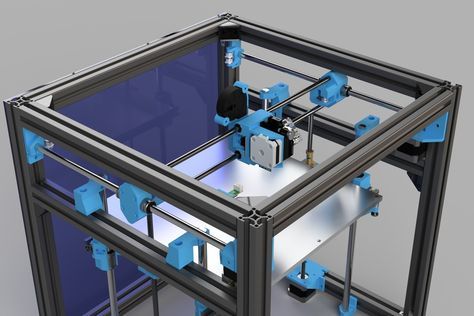 If you have a PEI sheet and Nylon filament, maybe don’t throw out your glue or tape just yet.
| PROS | CONS |
|---|---|
| Superior bed adhesion | Tricky to apply |
| Can be used with either glass or aluminum | Does not work well with Nylon |
| Can be sanded smooth |
Polypropylene
A polypropylene (PP) sheet is considered by many to be a cheaper and lighter alternative to a glass build plate. It can be clipped right onto the existing build plate of your 3D printer, providing a more reliably adhesive surface.
PP sheets have many of the same characteristics as glass. It is slow to heat up, allowing for a more even temperature distribution for heated beds. It also has a smooth surface that creates a better surface finish on improved prints. If you print with PP filament – one of the most difficult filaments to print with – then a PP sheet is your best bet for good bed adhesion.
Unfortunately, bed adhesion can be a hit or miss when using a PP sheet. Some users have reported having problems even when printing with specific PLA brands. If you’re having these problems, you might have to apply a layer of glue on the PP sheet before printing. The PP sheet also isn’t as easy to clean as glass, and you will likely have to sand it smooth periodically to refresh its surface.
| PROS | CONS |
|---|---|
| Works well with PP filament | Not as adhesive as other options |
| Lightweight and durable | Difficult to clean |
| Smooth surface |
Garolite
Garolite is another specialty build plate that is probably the least popular of the choices on this list. It is primarily known as the build plate of choice for printing with Nylon – a material that most other build plates have trouble with. Garolite is also useful for printing with other common filaments including PETG, ABS, and TPU.
In terms of adhesion, Garolite has to be at the top of the list of build plate options. Plastic sticks so well to Garolite that you might even be able to print with Nylon without a heated bed. If the Garolite sheet gets scratched or gets too dirty, you can easily refresh the surface by sanding it with 200-grit sandpaper.
The biggest drawback of Garolite is that it is easily the most expensive entry on this list. There also are not many retailers that carry Garolite sheets for 3D printing, on account of it being not as common as other build plate options.
| PROS | CONS |
|---|---|
| Works exceptionally well with Nylon | Expensive |
| Provides very strong adhesion | Hard to find |
Final thoughts
Your choice of build plate plays an integral role in your 3D printing experience and in the quality of your finished product. If you’ve never tried playing around with different build plates before, then it’s worth the time to experiment with them. This will help you understand the essence of bed adhesion and how materials interact with each other.
The great thing about different build plates is that you can usually just swap one for another. Your glass build plate isn’t working? Then just lay a BuildTak or PEI sheet over it to improve bed adhesion. Having options is always a relief when you encounter 3D printing issues.
Warning; 3D printers should never be left unattended. They can pose a firesafety hazard.
Metal 3D Printing Grades Overview
Experts recommend
Author: Semyon Popadyuk
Author: Semyon Popadyuk
SLM Solutions is a pioneer in metal 3D printing | A wide range of metals for 3D printing - from dentures to turbine blades | Aluminum alloys | Nickel alloys | Titanium alloys | Cobalt alloys | Tool and stainless steel | copper alloys
SLM Solutions is a pioneer in metal 3D printing
Headquartered in Lübeck, Germany, SLM Solutions is a leading developer of metal additive manufacturing technologies. The company's shares are listed on the first level of the Frankfurt Stock Exchange. The main activity of SLM Solutions is the development, assembly and sale of equipment and integrated system solutions in the field of selective laser melting (Selective Laser Melting, SLM).
The properties of the resulting product are highly dependent on the properties of the metal powder used in SLM printers, such as purity, fluidity and bulk density. Therefore, since 2016, SLM Solutions has been actively working in the metal powder industry to provide customers with materials that are ideal for use in SLM printers for specific applications.
Wide range of 3D printing metals from dentures to turbine blades
Customers across a wide range of industries use SLM Solutions 3D printers to produce complex parts in everything from dentures to turbine blades. All these products have one thing in common: they must meet the highest requirements in terms of stability, surface structure or biocompatibility. At the same time, the number of use cases is constantly growing, since the product can have almost any geometry.
Aerospace industry
This titanium air inlet is produced with high precision without the need for any serious finishing
Automotive
It only takes two days to get a flexible design to real-time testing of a similar shaft flange
Mechanical engineering
Pump impellers made of aluminum and stainless steel with optimized mold geometry produced without casting costs
Energy
Stainless steel impellers - innovative building blocks for decentralized energy systems
Dental prostheses
Custom brackets and palatal plates are produced after 3D scanning, no need for a dental impression or casting
Medical technology
The freedom to design individual titanium implants for each patient ensures their best survival
Universities and research centers
Today, engineers find new solutions to the problems of traditional production almost every day.
Aluminum alloys
In reviewing the metal powders developed by SLM Solutions, we will start with an aluminum-based alloy that is widely used in additive manufacturing to make functional parts and prototypes. The AlSi10Mg alloy is often used in industries where good mechanical properties and low weight are required: in the aerospace and automotive industries, mechanical engineering, and the production of heat exchange devices.
AlSi12 is an aluminum based alloy optimized for use in SLM Solutions' additive plants. The AlSi12 alloy is particularly well suited for applications requiring excellent thermal conductivity and resistance to deformation.
AlSi7Mg0.6 is an aluminum-based alloy often used in applications where excellent thermal conductivity, good corrosion resistance and deformation resistance are among the requirements. It is used in the automotive and aerospace industries, for prototyping, as well as in scientific research.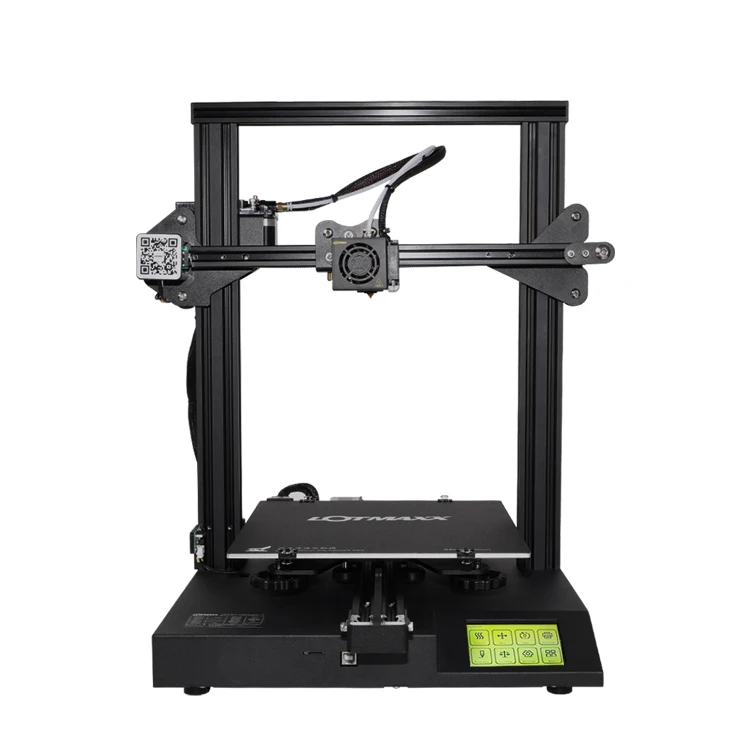
AlSi9Cu3 is an aluminium-silicon-copper based alloy with low density, good high temperature strength and corrosion resistance. Perfect for SLM technology.
Nickel alloys
Nickel Alloy NX from SLM Solutions is an alloy with a high content of chromium, molybdenum and iron. It is suitable for high temperature applications in corrosive environments such as energy, chemical, aerospace, turbine parts. The alloy is characterized by high strength, high creep resistance (up to 850 °C), good ductility and excellent oxidation resistance at high temperatures.
IN625 is a nickel based PH alloy containing chromium, molybdenum and niobium. It has high strength, good ductility, excellent creep and tear resistance up to 700 °C. A typical application for IN625 is aircraft engine components with operating temperatures up to 650°C.
Turbine blade with internal conformal cooling channels improving jet engine performance
IN718 is a nickel-chromium based PH alloy.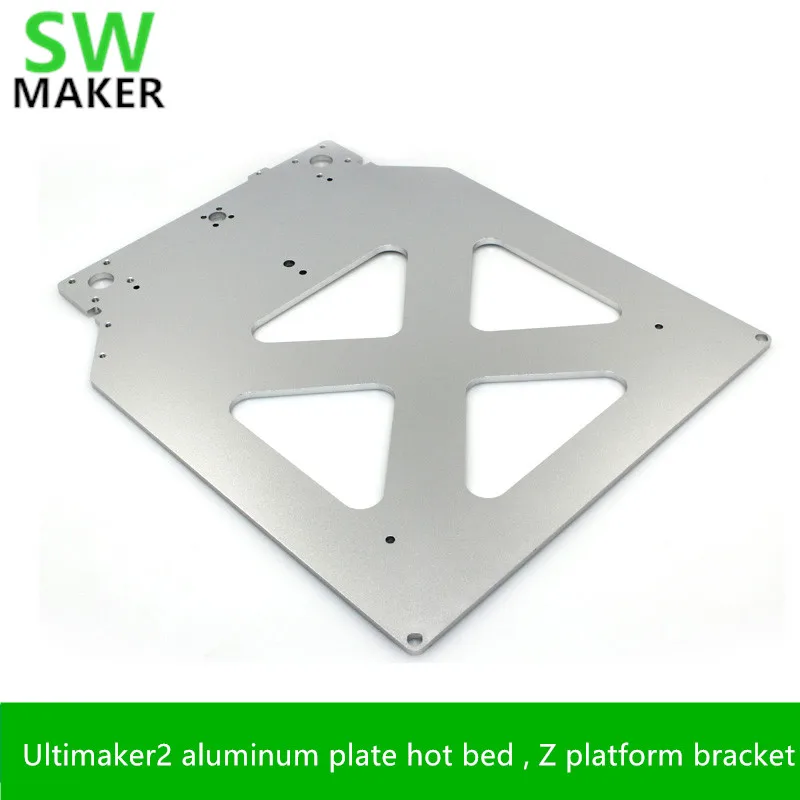 With excellent tear resistance, fatigue and creep resistance at temperatures up to 700°C, IN718 alloy plays an important role in the manufacture of components for aircraft engines, turbines (including gas) and other high-temperature applications.
IN939 is a high alloy containing chromium, cobalt, titanium, tungsten, aluminium, tantalum and niobium. Due to its good mechanical properties at high temperatures, IN939 is widely used in the creation of turbine components. Features of the material - high strength, good ductility, excellent corrosion resistance.
Titanium alloys
Titanium Alloy Ti6Al4V ELI Grade 23 from SLM Solutions is a high purity variation of Ti6Al4V Grade 5, the world's most widely used titanium-based alloy. Due to its high strength, low density, and good corrosion resistance, Ti6Al4V alloy is well suited for the production of parts in the aerospace, automotive, energy, and biomedical industries.
Titanium Alloy Ti Gd. II is a commercial grade titanium with excellent biocompatibility and good mechanical properties. This alloy is widely used in a variety of applications where excellent corrosion resistance, strength, ductility and low density are required, such as medicine, power generation, chemical and petrochemical industries, and aerospace.<
Brake caliper for Bugatti supercars made of titanium on SLM Solutions additive machine
Cobalt alloys
CoCr28Mo6 is an alloy of cobalt, chromium and molybdenum that is used in a variety of applications. With increased biocompatibility, it is used in medicine for the production of implants and prostheses. This material is also suitable for the production of components intended for use in high temperature environments, such as jet engine parts.
SLM MediDent is an alloy of cobalt, chromium, molybdenum and tungsten specially designed for dental applications. This alloy is mainly used for the production of biocompatible dental implants and prostheses.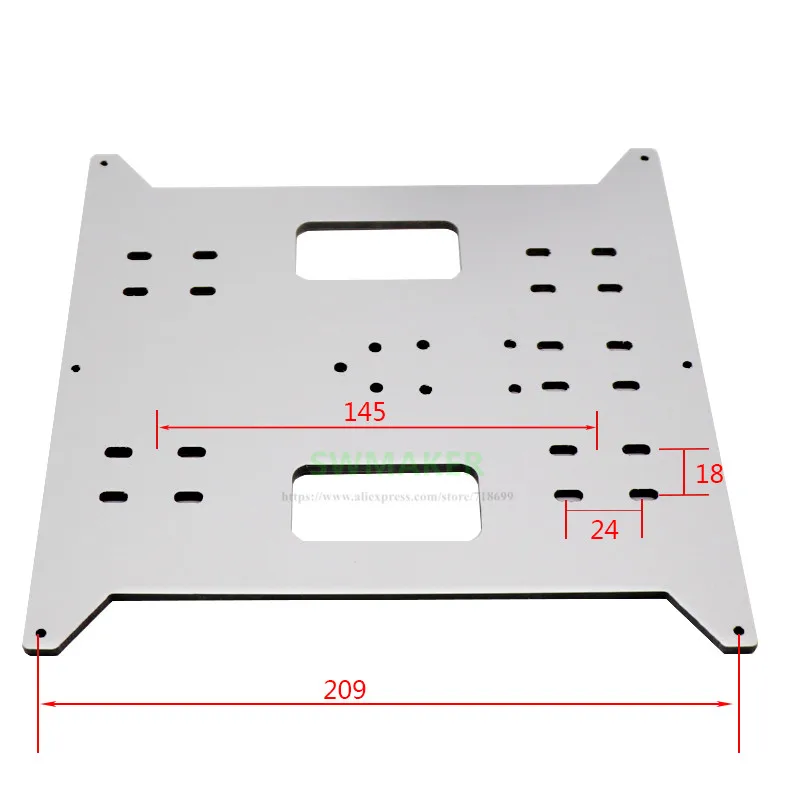
Mold inserts with conformal cooling channels (Gardena AG)
Tool and stainless steel
Stainless steel 316L is an austenitic high chromium steel that is great for SLM Solutions 3D printers. 316L steel is often used in applications where good mechanical properties and excellent corrosion resistance are required, such as chloride environments such as surgical instruments, shipbuilding, aerospace, automotive, and food industries.
15-5PH is a martensitic PH steel that is excellent for use in SLM Solutions equipment. 15-5PH steel is characterized by high strength and hardness combined with medium corrosion resistance. This material is a ferrite-free version of the 17-4PH alloy. Typical applications for 15-5PH are aerospace, chemical, petrochemical, paper, metalworking, and medical applications.
Stainless steel 17-4PH is a martensitic PH steel. It is suitable where high strength and hardness combined with medium corrosion resistance are required.
1.2709 is a maraging tool steel with a high nickel and molybdenum alloy content. 1.2709 steel finds a variety of applications in the tool industry and other critical applications where high strength and stiffness are required.
1.2344 Martensitic tool steel with chromium content. Also known as h23, this grade of steel is used in the tool industry and die casting for applications requiring exceptional strength and rigidity.
Alloy Invar 36® is a high nickel steel that has an exceptionally low coefficient of thermal expansion at temperatures below the Curie point of 280°C. Invar 36® is used to create components that require high dimensional stability over a wide temperature range, such as engine valves and precision tools.
Copper alloys
Bronze CuSn10 is an alloy of copper and tin with high tensile strength and medium hardness. It has good wear resistance, atmospheric corrosion resistance and seawater cavitation resistance.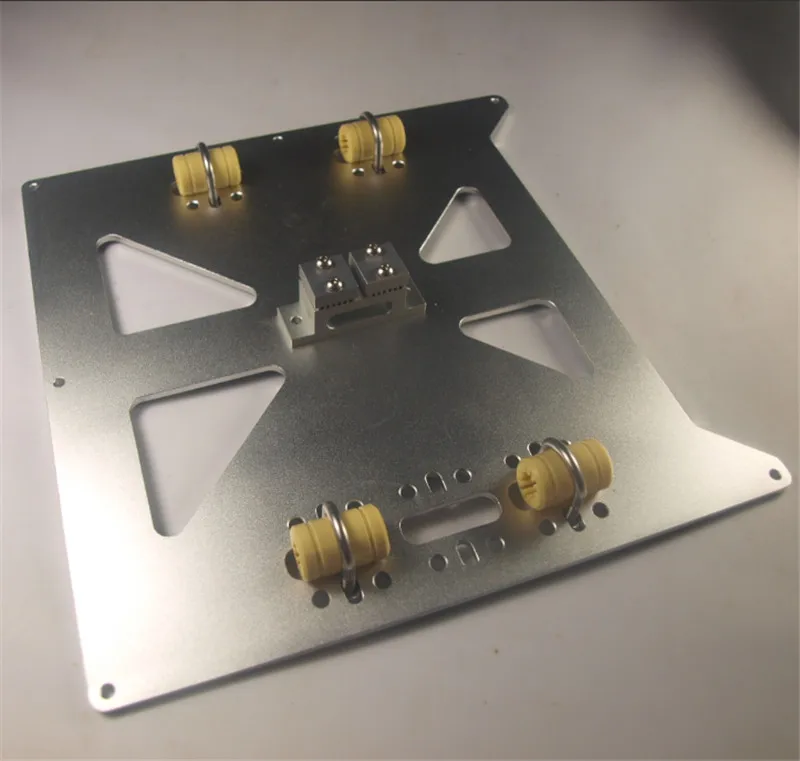 Typical applications are components and housings of devices used in environments exposed to sea water (shipbuilding, heat exchangers).
Learn more about metal powders, their properties and applications in the free brochure:
SLM Solutions are technologically advanced, innovative and highly efficient integrated system solutions. If you want to learn more about the possibilities of metal 3D printing or consult on the implementation of additive technologies in your enterprise, please contact the experienced experts of iQB Technologies. Call right now: +7 (495) 223-02-06 .
Article published on 06/05/2018, updated on 07/04/2022
Aluminum profile as a one-stop resource for assembling anything. Part 2 / Habr
In the last article, we talked about the types of aluminum profiles, types of fasteners and other nuances. Now it's the turn to add another great tool to the profile - 3D printing. Truly, using an aluminum profile and plastic parts printed on a printer, you can assemble anything.
Those of us who are lucky enough to have our own workshops can use woodworking, welding or metalworking. But if there is no workshop or it is small, or it is impossible to use all these methods for some other reason, it is better to turn to 3D printing and aluminum profiles.
Everything can be built from a profile
In the last article, some projects where an aluminum profile was used were already given as an example. For example, here is this adjustable modular desktop made of chipboard and profile.
Using a 3D printer, you can create custom connections for an aluminum profile that differ from those found in most catalogs. As a rule, standard fasteners are designed to connect the profile at a right angle. Using printing, you can create connections of any shape.
With their help, you can fasten the profile at any angle - 30, 45 or 60 degrees - it's easy to make this. An example of a non-standard plastic connection is shown above.
Non-standard - does not mean difficult
This is true - we can combine purchased components (profile and part of fasteners) with self-made elements. At the same time, the aluminum profile provides the overall structure of the product, and the plastic ties the guides together, setting a certain shape and maintaining it. Let's see how you can make fasteners for building non-standard angles.
Fastening design is carried out in any CAD program. Typically, this is a task of machining a rectangular solid with several cylinders cut to create mounting holes. A 3D-printed connection with a three-sided profile is usually strong enough to provide the desired structural rigidity. You can start designing small, gradually improving skills.
Example: Difficult corners without problems
My project, an aluminum extrusion robot, is too complex to print as a single unit.
 Therefore, I divided the case into separate parts, connected together with fasteners printed on a 3D printer.
 Look at the angles at which the profile elements are fixed. No fastener supplier will provide something like this, since the connection is non-standard. Moreover, the already customized plastic element is complicated by additional holes for bearings and some other elements. This is just a task for a 3D printer.
The purpose of the article is to show the possibilities of homemade connections, so for now we will not delve into complex topics. But still, it is worth noting the important features of 3D printing for us, which are important for creating complex structures.
Thus, the orientation of the layer and other parameters of plastic parts must be carefully selected, because if the calculated limit (bending load, etc.) is exceeded, the part will simply break, breaking along the layer. For each axle, it is worth using at least two fasteners spaced apart by a certain width to distribute the workload. The use of only one will lead to increased stress and possible structural failure.
Little trick: change t-nut, insert, whatever
After the individual connection for the project is ready, we are faced with another problem - the need to purchase specialized fasteners. In the last article they were discussed in detail. Most often these are inserts and nuts for the T-slot. The shape of such elements is specially designed for embedding in the groove of an aluminum profile. It is not difficult to buy such fasteners, the problem is not in its inaccessibility or rarity, but in the fact that it is quite expensive.
An alternative is to use conventional nuts instead of T-nuts. Standard nuts are not compatible with all types of profiles, but only with Misumi 3 Series. Misumi also offers specialized nuts, which cost about 9dollars for 100 pieces. At the same time, regular M3s cost about $0.88 for 100 pieces. We will use them, solving a couple of problems along the way.
The first problem is that a regular nut, although it fits the groove in the Misumi profile, does not provide the same tight and high-quality adhesion to the profile as a specialized nut. Secondly, specialized fasteners are usually held in place by a spring, but if you use a regular nut, we do not get any springs. It turns out that it is better to pay for specialized fasteners so that there are no problems later?
No, because we have 3D printers. And they are able to print something that will solve both of the above problems. Plus, it will be convenient to collect ready-made elements. The picture below shows a plastic element that eliminates the problems. Firstly, this part has a small protrusion that acts like a specialized spring, securing the connection. Secondly, this plastic element fits around the nut, so that it holds no worse than a specialized one. And thirdly, there is also a specialized ledge (reposition hook), which makes it possible to change the position of the mount without disassembling the entire connection.