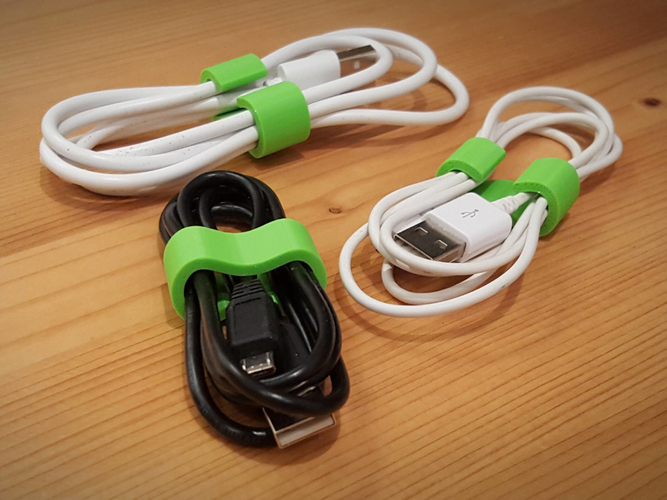
3D printed cable clips
▷ cable clip 3d models 【 STLFinder 】
Cable clip
thingiverse
Cable clip
Cable clip
thingiverse
Cable clip
Cable Clip
thingiverse
Cable clip
Cable clip
thingiverse
Cable clip
cable clip
thingiverse
cable clip
Cable Clip
thingiverse
Cable clips
Cable_clip
thingiverse
cable_clip
Cable clip
thingiverse
a simple cable clip
Cable clip
thingiverse
Simple cable clips.
Cable Clip
thingiverse
Cable clip. ...Kabelclip
Cable Clip
thingiverse
Cable Clip 50% Infill
Cable clip
thingiverse
A simple cable clip
cable clip
thingiverse
cable clip for everyone.
Cable Clip
thingiverse
Its a Clip.
Cable Clip
thingiverse
Simple Cable Clip.
Cable Clip
thingiverse
Cable clip for 2020 aluminum extrusions
Cable clip
prusaprinters
Cable clip Category: Pets
Cable clip
thingiverse
Cable clip for a 4040/4080 extrusion
Cable Clip
thingiverse
Just my design of a cable clip.
cable clip
thingiverse
cable clip for your cable managment
Cable Clip
myminifactory
Use this to clip USB cables!
cable clip
thingiverse
Cable clip for 6x < 5 mm cables
Cable clip
thingiverse
a clip to hold cable together
Cable Clip
thingiverse
You can screw this cable clip to a surface and clip a cable in it. .
.
cable clip
thingiverse
revamped cable clip scale to your own use
Cable Clip
thingiverse
Small and simple Cable Clip, for managing your messie cables.
Cable Clip
thingiverse
A cable clip for up to 6mm Cable.
Cable Clip
grabcad
Cable Clip (3 Core Flat Solid Copper 12x5 cable)
Cable-Clip
thingiverse
A clip to hold a cable onto your t-shirt
cable clip
thingiverse
A clip to hold a cable wound on a spool.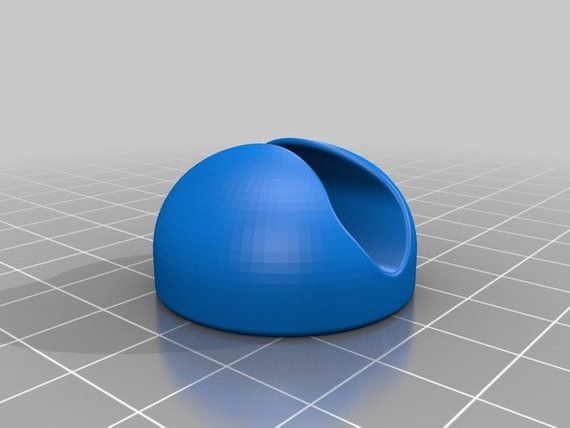
3D Printed Cable Clips with Fusion 360
User Parameters
Here are the user Parameters that I used with this cable clip tutorial.
- Thickness – 1.6mm
- Width – 10mm
- WireDiameter – 3mm
- HoleDiameter – 6mm
- Gap – WireDiameter/1.5
Access Parameters Dialog in Fusion 360
In the Design workspace, head to the SOLID tab > Modify (dropdown menu) > Change Parameters. Alternatively, use the shortcut letter “S” to open the shortcuts box > type out “Change Parameters” > Enter (or select the option).
Parameters for Cable ClipDownload JPG
Print Settings
I didn’t discuss my print settings in the tutorial. Below you’ll find an image of the “Fine” profile that I used in Ultimaker’s Cura. Along with the fine defaults, I changed the infill density to 100% to make sure they were stronger when the clips are flexed.
30K Subscriber Giveaway
Prizes
Grand Prize (1 winner) – 1 of each of the following Fusion 360 branded items: T-shirt, water bottle, notebook, hat, mousepad, fidget spinner, magnet
Second Prize (2 winners) – 1 of each of the following Fusion 360 branded items: Water bottle, notebook, hat, mousepad, fidget spinner, magnet, charging-cable
Third Prize (3 winners) – 1 of each of the following Fusion 360 branded items: Notebook, mousepad, fidget spinner, magnet
How to Enter
- Complete the model in this video and share a link to a screenshot or photo by commenting on the YouTube video OR share the image in my Facebook Group.

- Comment on the YouTube video with your idea(s) on how I can make the tutorials better.
This could be a suggestion about making more step-by-step blog posts instead of videos or creating 2-minute quick tip videos, or anything else you can think of that would help with the greater goal of making Fusion 360 easier to learn for everyone.
All 6 winners will be randomly selected and notified in the next YouTube video. Winners will be contacted with a reply on their original YouTube comment with instructions to provide a valid shipping address that accepts packages.
Official Contest Rules
NO PURCHASE IS NECESSARY TO ENTER OR WIN. A PURCHASE WILL NOT INCREASE YOUR CHANCES OF WINNING. ALL FEDERAL, STATE, LOCAL, AND MUNICIPAL LAWS AND REGULATIONS APPLY. VOID WHERE PROHIBITED.
- Eligibility
30K Subscriber Giveaway (the “Contest”) is open to everyone, including legal residents of the fifty (50) United States and the District of Columbia who are at least eighteen (18) years old at the time of entry. Employees of Kennedy Enterprises, LLC and other companies associated with the promotion of the Contest, and their respective parents, subsidiaries, affiliates, and advertising and promotion agencies, as well as the immediate family (spouse, parents, siblings, and children) and household members of each such employee, are not eligible. The Contest is subject to federal, state, and local laws and regulations.
 - Sponsor
The Contest is sponsored by Kennedy Enterprises, LLC, located at PO 1914, Woodinville, Washington 98072.
This contest is NOT affiliated with YouTube. YouTube is not a sponsor of this contest. By entering the contest you release YouTube from any and all liability related to the contest. - Agreement to Official Rules
Participation in the Contest constitutes entrant’s full and unconditional agreement to and acceptance of these Official Rules and the decisions of the Sponsor, which are final and binding.Entrants must be wholly compliant and consistent with the YouTube Terms of Service.
 Any entrants that don’t comply with the YouTube Community Guidelines will be disqualified.
Winning a prize is contingent upon being compliant with these Official Rules and fulfilling all other requirements set forth herein.
- Contest Period
The Contest begins on February 21, 2020 at 6:00 PM PST and ends on February 27, 2020 at 11:59 PM PST (the “Contest Period”). Entries that are submitted before or after the Contest Period will be disqualified. Submissions will be accepted for the duration of the Contest using any of the following methods: Online
- How to Enter
Online: This method of entry will be available by visiting our website (http://productdesignonline.com/p6) and following the directions provided to submit up to two entries. Limit two (2) entries per person, per email address, and per household for the duration of the Contest Period, regardless of method of entry. Entries received from any person, e-mail address, or household in excess of the stated limitation will be void. All entries become the property of Sponsor and will not be acknowledged or returned.
 - Prize Drawing
On or about February 28, 2020, the Sponsor will select potential winners in a random drawing from among all eligible entries received. The odds of being selected depend on the number of entries received. The Sponsor will attempt to notify the potential winner via telephone or email on or about February 22, 2020. If the potential winner cannot be contacted within five (5) days after the date of the first attempt to contact him/her, the Sponsor may select an alternate potential winner in his/her place at random from the remaining non-winning, eligible entries. - Winner Notification The potential winners will be notified by email, mail or phone. Each potential Grand and First Prize winner (parent/legal guardian if a minor in his/her state of residence) will be required to complete, electronically sign and submit a Declaration of Compliance within five (5) days of the date notice or attempted notice is sent, in order to claim his/her prize.
 If a potential winner cannot be contacted, or fails to submit the Declaration of Compliance within the required time period (if applicable), or prize is returned as undeliverable, potential winner forfeits prize. If the potential winner is at least 18 but still considered a minor in his/her jurisdiction of residence, Sponsor reserves the right to award the prize in the name of his/her parent or legal guardian, who will be required to sign the Declaration of Compliance on the potential winners behalf and fulfill any other requirements imposed on winner set forth herein. Potential winners must continue to comply with all terms and conditions of these Official Rules, and winning is contingent upon fulfilling all requirements. In the event that a potential winner is disqualified for any reason, Sponsor will award the applicable prize to an alternate winner by random drawing from among all remaining eligible entries. Only three (3) alternate drawings will be held, after which the prize will remain un-awarded.
 Prizes will be fulfilled approximately 8-10 weeks after the conclusion of the Contest.
 - Prizes Grand Prize (1 winner) – 1 of each of the following Fusion 360 branded items: T-shirt, water bottle, notebook, hat, mousepad, fidget spinner, magnet Second Prize (2 winners) – 1 of each of the following Fusion 360 branded items: Water bottle, notebook, hat, mousepad, fidget spinner, magnet, charging-cable Third Prize (3 winners) – 1 of each of the following Fusion 360 branded items: Notebook, mousepad, fidget spinner, magnet
- General Conditions
In the event that the operation, security, or administration of the Contest is impaired in any way for any reason, including, but not limited to fraud, virus, bug, worm, unauthorized human intervention or other technical problem, or in the event the Contest is unable to run as planned for any other reason, as determined by Sponsor in its sole discretion, the Sponsor may, in its sole discretion, either (a) suspend the Contest to address the impairment and then resume the Contest in a manner that best conforms to the spirit of these Official Rules or (b) terminate the Contest and, in the event of termination, award the prize at random from among the eligible, non-suspect entries received up to the time of the impairment.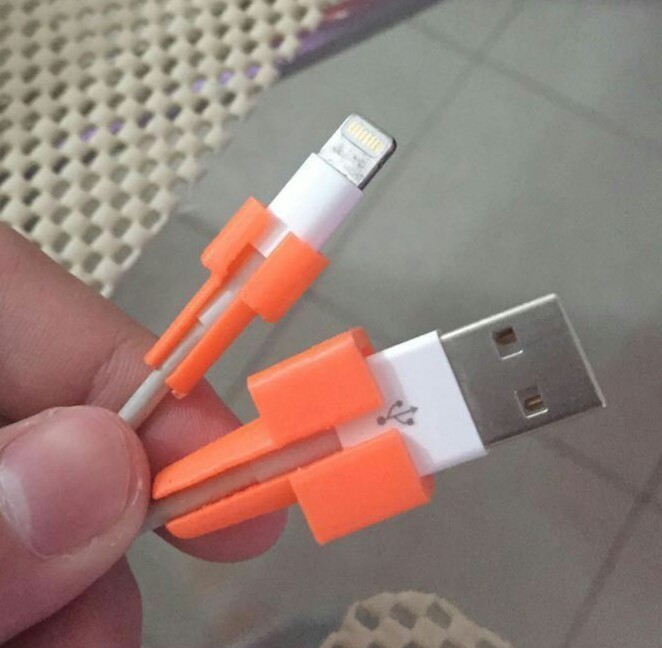 The Sponsor reserves the right in its sole discretion to disqualify any individual it finds to be tampering with the entry process or the operation of the Contest or to be acting in violation of these Official Rules or in an unsportsmanlike or disruptive manner. Any attempt by any person to damage the website or undermine the legitimate operation of the Contest may be a violation of criminal and civil law, and, should such an attempt be made, the Sponsor reserves the right to seek damages (including attorney’s fees) and any other remedies from any such person to the fullest extent permitted by law. Failure by the Sponsor to enforce any provision of these Official Rules shall not constitute a waiver of that provision.
 - Release and Limitations of Liability
By participating in the Contest, entrants agree to release and hold harmless the Sponsor, and each of their respective parents, subsidiaries, affiliates, advertising and promotion agencies, other companies associated with the Contest, and each of their respective officers, directors, employees, shareholders, representatives, and agents (the Released Parties) from and against any claim or cause of action arising out of participation in the Contest or receipt or use of the prize (including any travel or activity related thereto), including, but not limited to: (a) any technical errors associated with the Contest, including lost, interrupted or unavailable Internet Service Provider (ISP), network, server, wireless service provider, or other connections, availability or accessibility or miscommunications or failed computer, satellite, telephone, cellular tower or cable transmissions, lines, or technical failure or jumbled, scrambled, delayed, or misdirected transmissions or computer hardware or software malfunctions, failures or difficulties; (b) unauthorized human intervention in the Contest; (c) mechanical, network, electronic, computer, human, printing or typographical errors; (d) application downloads, (e) any other errors or problems in connection with the Contest, including, without limitation, errors that may occur in the administration of the Contest, the announcement of the winner, the cancellation or postponement of the event and/or the flyover, if applicable, the incorrect downloading of the application, the processing of entries application downloads or in any Contest-related materials; or (f) injury, death, losses or damages of any kind, to persons or property which may be caused, directly or indirectly, in whole or in part, from entrants participation in the Contest or acceptance, receipt or misuse of the prize (including any travel or activity related thereto). Entrant further agrees that in any cause of action, the Released Parties liability will be limited to the cost of entering and participating in the Contest, and in no event shall the entrant be entitled to receive attorney’s fees. Released Parties are also not responsible for any incorrect or inaccurate information, whether caused by site users, tampering, hacking, or by any equipment or programming associated with or utilized in the Contest. Entrant waives the right to claim any damages whatsoever, including, but not limited to, punitive, consequential, direct, or indirect damages.
 - Disputes
Except where prohibited, each entrant agrees that any and all disputes, claims and causes of action arising out of, or connected with, the Contest or any prize awarded shall be resolved individually, without resort to any form of class action, and exclusively by the appropriate court located in Washington. All issues and questions concerning the construction, validity, interpretation and enforceability of these Official Rules, entrants rights and obligations, or the rights and obligations of the Sponsor in connection with the Contest, shall be governed by, and construed in accordance with, the laws of Washington, without giving effect to any choice of law or conflict of law rules, which would cause the application of the laws of any jurisdiction other than Washington.
- Privacy
Information collected from entrants is subject to our privacy policy.
Transcript
By the end of this video, you’ll know how to 3D model a cable clip in Fusion 360. We’ll use parameters to make the model dynamic so you can reuse the model for various cable sizes. During the process, I’ll show you a different approach to turning a sketch into a 3D body.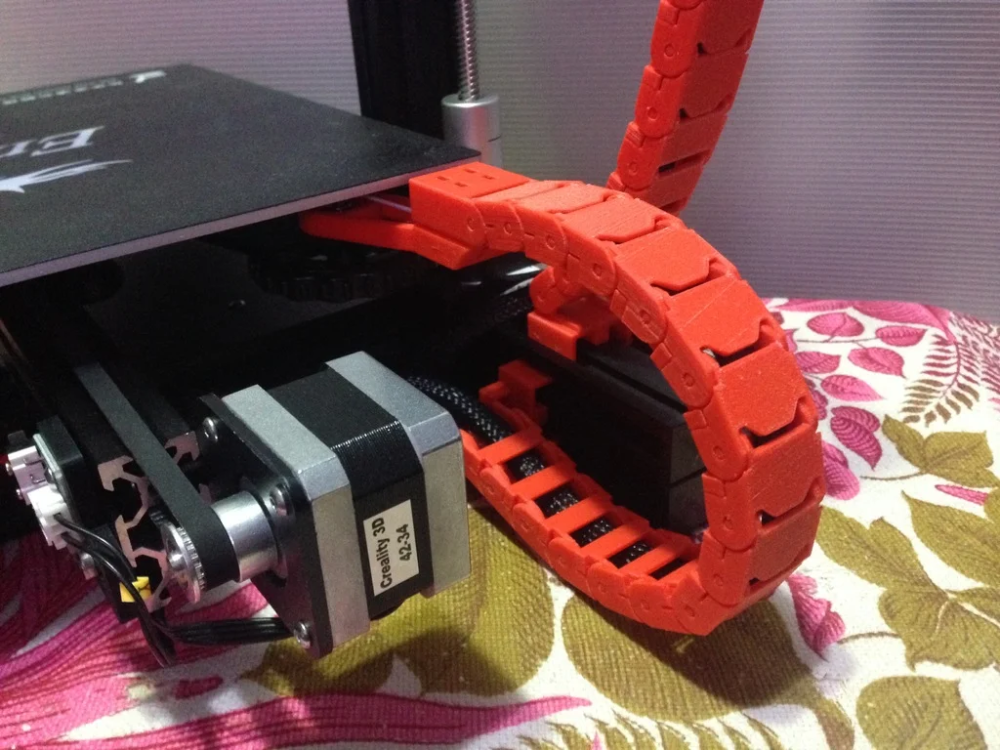
Hey there, It’s Kevin Kennedy and welcome to episode number 6 of practical prints. Before we get started, I want to first thank everyone who has supported the channel over the last year and a half. I’ve got several Fusion 360 branded items to giveaway to celebrate reaching 30,000 subscribers. Be sure to stick around to the very end of the video where I discuss how to enter the giveaway.
To get started on the model, I’ve created several user parameters. Instead of watching me enter each parameter, I’ve placed a screenshot of the user parameters on this tutorials resource page so you can quickly plug them in. You’ll find them at ProductDesignOnline.com/p6…that’s productdesignonline.com/p as in printer and the number 6.
We’ll also want to start with a new component so we can group everything.
My first use of these clips is to organize some cables underneath my desk. The diameter of the cable is approximately 3mm thick, so I’ll name the component accordingly.
We’ll then start by defining a circle for the cable diameter.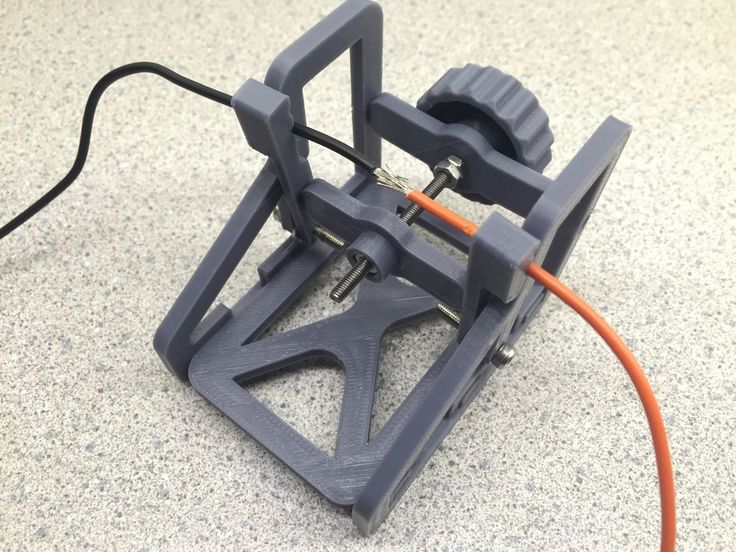 I’ll hit the keyboard shortcut “C”, as in Charlie, for the center-circle command. Select the XZ origin plane and click the origin point.
Looking at the User Parameters, you’ll see that I’ve created one for the “WireDiameter”. However, we also want to include some extra room for the wire, as this p-clip is going to be clamped together by the screw after the wire is placed.
To add the extra clearance we can type out the “WireDiameter” parameter, the plus symbol, and then 3mm, which will act as the clearance. This is to ensure that any time we change our wire diameter in our user parameters, we’ll always have at least 3mm of clearance.
Next, we need to create the two lines that run from the circle to the right, creating that p-clip shape.
I’ll activate the line tool and for the first line, I’m going to start at the bottom of the circle. For the distance, I’ll use the “width” user parameter times 1.5.
You could set up a user parameter for the length. However, I prefer keeping the number of parameters to a minimum, and to create functions for various dimensions, to keep the model a bit more dynamic and predictable.
Another thing we need to consider is how to fully-constrain our sketch. This is something you should always be concerned about, especially if you’re wanting to set up your model to be run by parameters.
You’ll notice the circle is black because it’s fully constrained. However, the line I just drew is not.
If I click and drag on the line we’ll see that it snapped tangent to the circle but it can still be moved around.
To fix this, we’ll need to add a construction line running down the middle of the circle. After activating the line tool you’ll need to hit the construction option in the sketch palette. Select the center origin point and click at the bottom of the circle where the line should snap into place. We can then hit the escape key to clear the line command.
At this point, we can use the coincident constraint by selecting it in the toolbar. Select the endpoint of each line and thanks to the coincident constraint our unconstrainted line will stay attached to the endpoint of the other line or the bottom of our circle.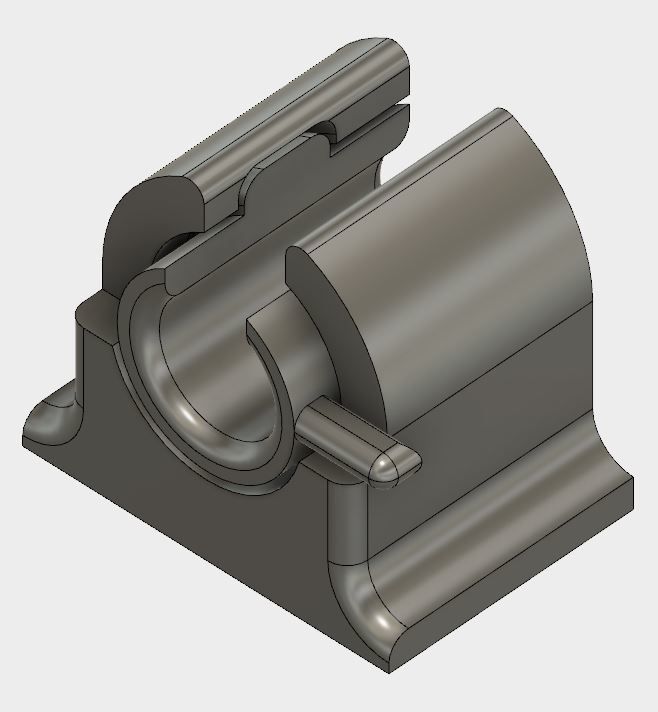
You’ll also see that all of our sketch geometry appears to be black. To double-check we have it fully-constrained we can look at the Sketch in the Browser. You’ll see a red lock icon when a sketch is fully-constrained.
To finish off the clip shape we’ll draw the second line above the first.
Make sure to turn off the construction line and start the line by snapping into the circle.
Instead of adding a length dimension for this line, we’ll use the horizontal/vertical constraint to ensure its always at the same point as the first line.
After activating the constraint simply click both endpoints. Notice how the length of the line snaps to the same vertical point.
One of the easiest ways to check why your line geometry isn’t black or fully constrained is to move the geometry around. Hit escape to clear all commands and simply click and drag the line. You’ll see if I select the endpoint on the left, that the line can still move freely along the circle.
To fully-define this, we’ll apply a dimension with the “Gap” user parameter.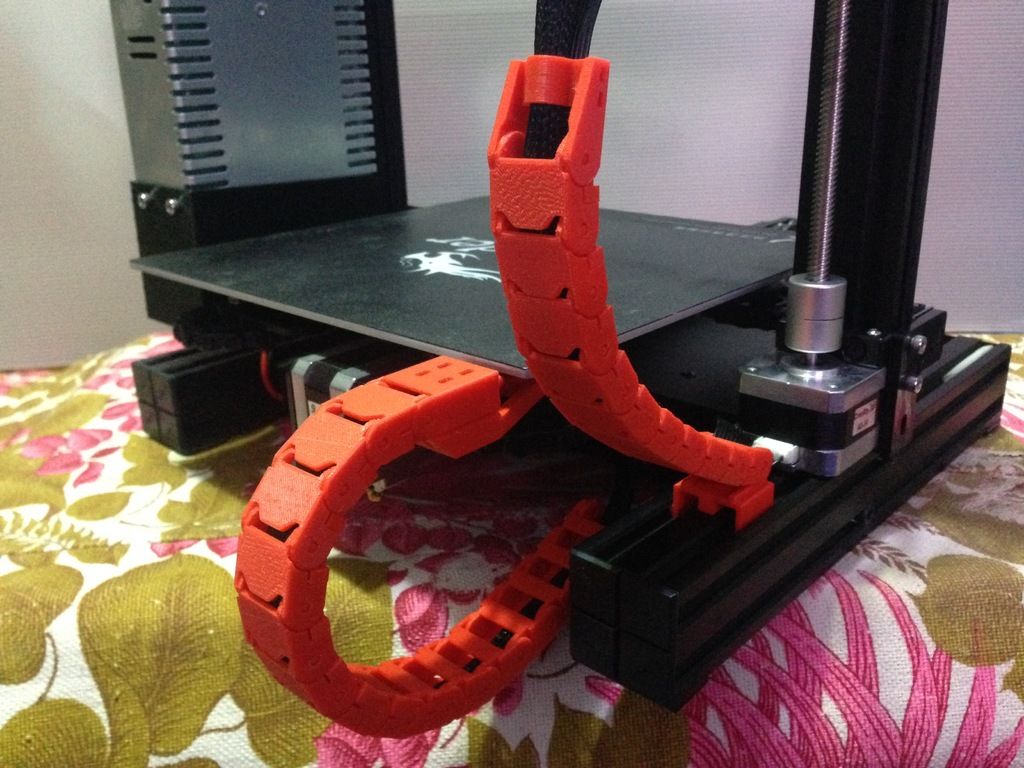 That way, we can always change the gap of our clip, based on our clip size.
I’ll hit the keyboard shortcut letter “D,” as in Delta, to activate the Sketch Dimension tool.
Select the two lines and drag the mouse cursor in between the two. Once the dimension is in the correct place you can click to set the dimension and type out the “Gap” user parameter.
The last thing we need to do is trim away the excess part of the circle so our wire can slide into this portion of the clip.
I’ll use the keyboard shortcut letter “T,” as in Tango, to activate the trim tool.
Notice the nice preview in red that shows what will be trimmed. Simply select the segment, making sure not to select anything else.
Before we move on, we want to check one more time that our model is still fully-constrained. If you still have the red lock icon then you’re all set and ready to move on.
This is where I wanted to show you an alternative method for turning sketches into 3D bodies.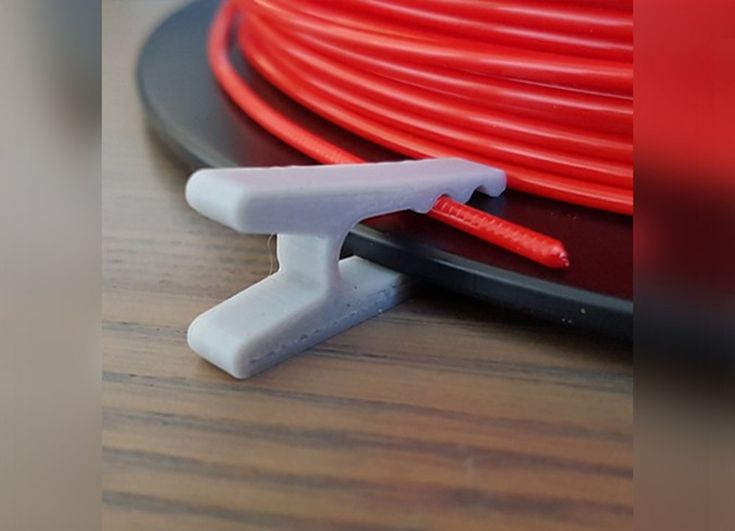
We could technically offset this geometry, connect the endpoints to create a closed profile shape, and extrude the profile to create the 3D body. However, that makes our sketch much more complex. Consequently, making it harder to ensure our model and parameters can be predictable.
Instead, in some scenarios, we can extrude this sketch with the surface tool. We’ll then “Thicken” the surface to create our desired thickness, resulting in a solid body.
To use the surface extrude we’ll first need to select the “SURFACE” tab in the toolbar. The extrude icon is the same as the modeling extrude – but the key difference is the color. The surface extrude is orange. Make sure you’re activating the correct extrude command, as I see users get tripped up on this all the time.
Remember, with the surface extrude, we don’t need a closed profile shape. We can simply select the line geometry and type out the extrude distance.
For the distance, I’ll use the “Width” parameter.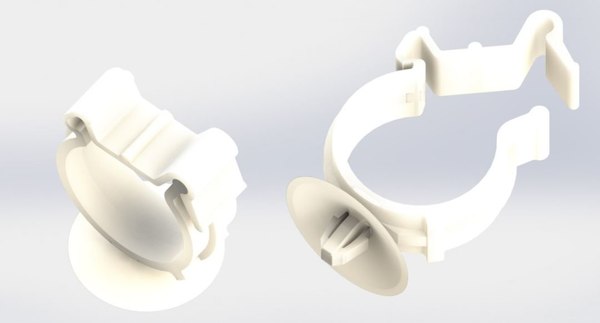
At this point, if we check our body in the Browser, you’ll see that we have a surface body. We’ll use the “Thicken” command from the create dropdown to turn this into a solid body.
We’ll need to select both segments of faces even with the chain Selection option checked. This is because the bottom straight face is tangent to the circle, but the top one isn’t, so it’s acting as its own entity.
Afterward, all we need to do is apply the “Thickness” user parameter, and we’re almost done with the cable clip.
The last two things we need to do would be to add fillets to the sharp edges and to add the hole for a screw.
Thinking ahead, I’d recommend creating the fillets first, because you’ll later see that we can use the center point of the fillet radius as a center point for our hole.
I’ll activate the fillet tool with the keyboard shortcut letter “F,” as in Foxtrot. I’ll select the four edges at the end of the clip.
For the fillet radius, I’ll use the width user parameter / 2.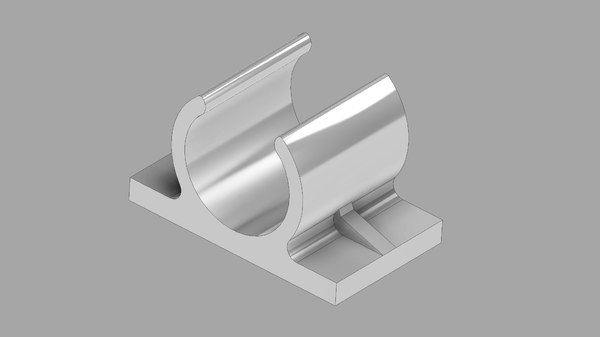 This function results in a nice rounded edge, ensuring that our fillets will always meet in the middle even if we change the width user parameter.
Last but not least, let’s create the screw hole. Depending on the type of screw you’ll be using, you may want to use the actual hole command so you can define the hole type as countersink or counterbore.
However, for my desk, I’m going to be using some spare Panhead screws that I had lying around, so I’m just going to create a simple circle cutout.
I’ll use the center-circle tool, again by activating it with the keyboard shortcut letter “C,” as in Charlie.
Select the top surface.
As I mentioned a bit ago, you’ll see that I can snap this circle to the Centerpoint of the fillet radius. This saved us an extra step of having to find the center by creating construction geometry.
For the diameter, I’ll use the “HoleDiameter” user parameter.
We can then extrude cut this all the way through. Remember, we’ll now want to use the Extrude command in the “SOLID” modeling tab.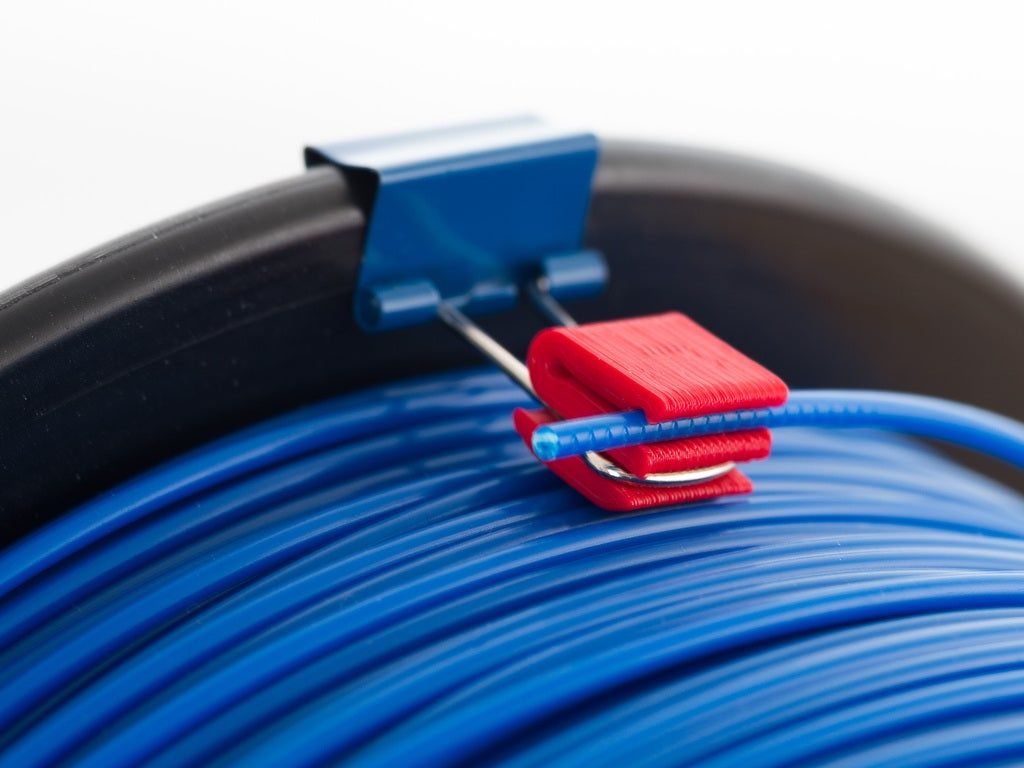 So make sure you’re activating the blue solid extrude.
You’ll also want to make sure you set the distance to “To Object” and select the bottom face of the clip. This will make sure our hole will be cut all the way through even if we change the thickness. Remember, the little things like this are required to ensure our model is predictable as we go to change the user parameters.
Take note of how our sketches are both fully-constrained and simple, and we utilized a small number of parameters along with a few sketch constraints.
To test the model, we can open up the “Change Parameters” dialog.
Let’s say that we also need to print some out for a 5mm cable. We can change the WireDiameter from 3 to 5mm.
You’ll see that our length and gap may also need to be updated. We can adjust the width parameter to 11mm.
For the gap, we need it to be close enough to the other edge so that it will flex without breaking, so we can set the division as 2 instead of 1.5.
Hopefully, this gives you a brief overview of how you can set up 3D printable models that you may need in multiple sizes. By copying and utilizing the same setup, we avoid the need to start over from scratch each time.
Now I didn’t have any PETG filament on hand, so I printed several batches of these out in some standard PLA. Although PLA is not the most flexible, it will flex enough to get the wire through – although this may be a concern if the clip were much larger.
If you have PETG filament on hand then I would recommend using that over PLA or ABS as its quite a bit more flexible and that softer nature of it works well for things like these cable clips.
Let’s now talk about the 30k subscriber giveaway of the Fusion 360 branded items. The goal of my channel has always been to make CAD education more accessible – so I’m not going to force you to subscribe or to like this video. Instead, to enter the giveaway, I’d like your help to continually improve the tutorials and types of content I provide.
I’ve linked to the official contest rules in the description of this video – but there are essentially two ways to enter your name, from which I’ll randomly draw winners for the prizes outlined on the contest page.
The first way to enter is to complete the model in this video – it doesn’t have to be 3D printed – but you’ll need to post a link to a screenshot or image or the link to your Fusion 360 design file in the comments of this video or if it’s easier you can post it in my Facebook group.
To be entered a second time, comment on this video with at least one idea that you think would make my tutorials even better. I’m curious and open to all your ideas – this could be a suggestion about making more step-by-step blog posts instead of videos, or creating 2-minute quick tip videos, or anything else you can think of that would help with the greater goal of making Fusion 360 easier to learn for everyone.
You’ll have until the end of the day, Pacific Standard Time, next Thursday, February 27th to enter and I’ll randomly select and announce the winners in the next YouTube video.
Last but not least, I want to give a quick shoutout to those who supported my content over the last two weeks.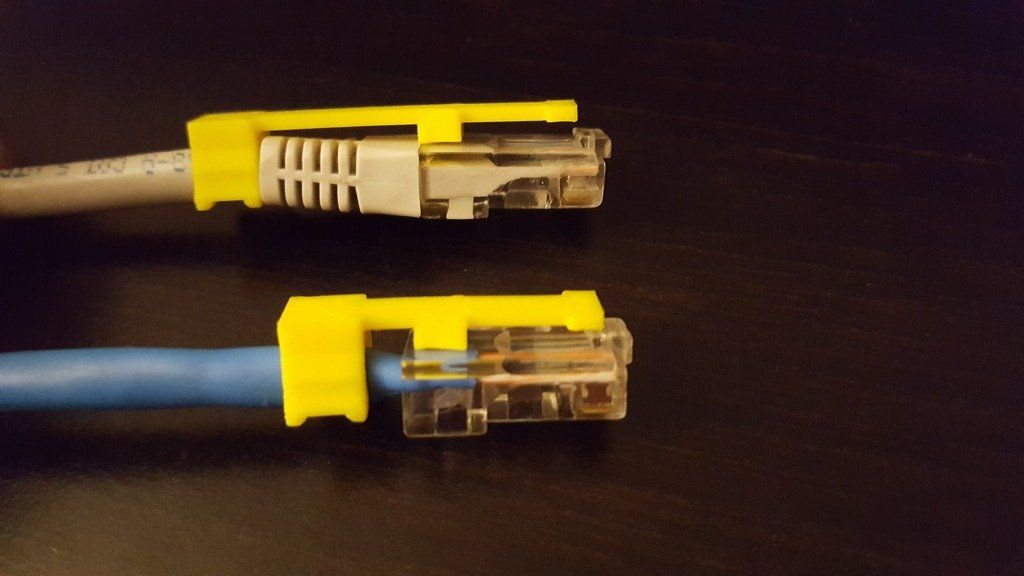
Special thanks to my new Patrons…
Chip Dickerson, Jesse Kelly, Ivan, Nigel Zett, and KoenigCNC
And thanks to those who supported the channel via my Buy Me a Coffee page…
Dennis Carne, Scott Elder, Kurt L, Matt Cline, Ronald Keller, Drew Lindsey, an Dr. Barry Dworkin
If you’ve enjoyed episode number 6 of practical prints help me out by clicking that thumbs up icon and share the video with someone you know that also does 3D Printing.
To watch the other episodes in the series you can click that playlist in the lower right-hand corner.
🔩 Best useful 3D objects you can make with a 3D printer・Cults
🔩 Best useful 3D objects you can make with a 3D printer
Download useful, practical and functional 3D models
Discover for our TOP of the best useful items for 3D printing in everyday life. Whether you want to make your life easier in the bathroom, in the kitchen, at home or at work, this list of 3D printer models has everything you need.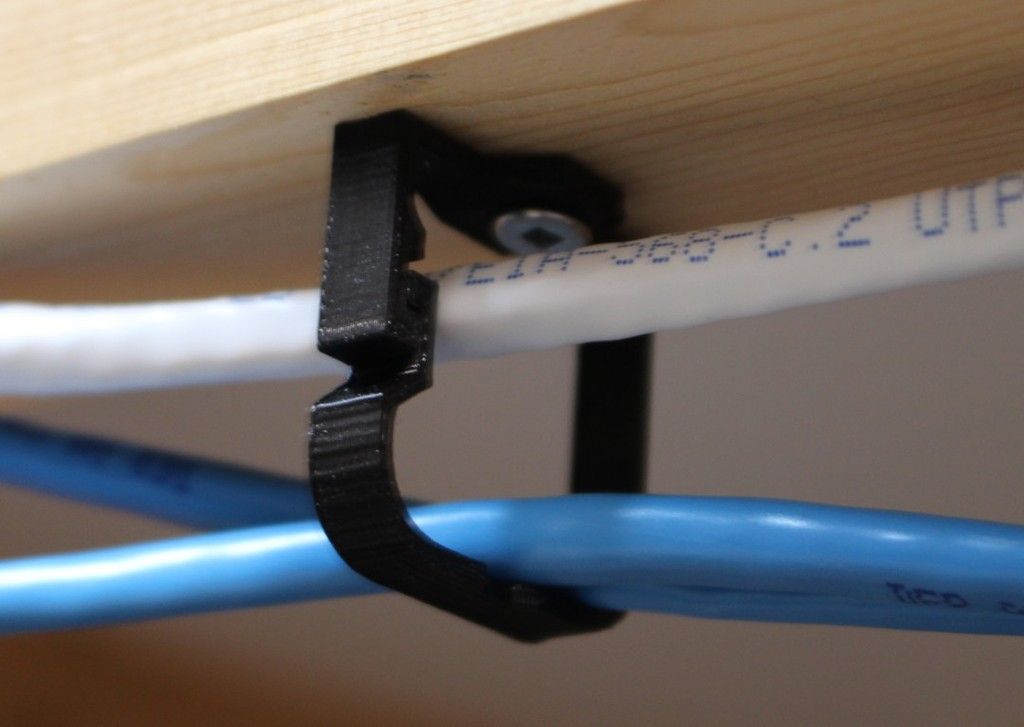 Start life hacking right now with your 3D printer!
Pen and pencil holder
Free
GROVIE MONSTER
Free
Mechanical quick release phone stand
Free
Filament clip / Universal filament clip
Free
Mobile phone holder in socket
Free
Universal phone holder _ Samsung galaxy / Xiaomi Redmi
Free
Refrigerator Storage Box Fresh Spacer
Free
FLEXI BEETLE
Free
Egg separator (kitchen)
Free
Bag stopper
1 €
MONEY CLIPS
Free
Tripod smartphone
Free
Bag Clips
Free
Switcherang: Nintendo Switch Joy-Con Grip
Free
Headset Holder
Free
PASTE PUSHER
Free
Clamp with hand screw
Free
Cable Gland for Desktop Sit-Up
Free
Cable clip
Free
Adjustable rugged waterproof box
Free
1.
 75 mm "DAS FILAMENT" Filament Clip
 Free
v2 sound amplifier
Free
Egg Tray
Free
Walnut cracker [my grandmother's design].
Free
Cool Squeeze - fan grip
Free
GuitarPicks
Free
Makeup organizer box
Free
3DMX / Crocmark (Bookmark)
Free
Bag Clip with Screw Cap (Modified Version2)
Free
Tape dispenser
Free
Monster Cookie Cutter
Free
Optimized G-Clamp
Free
Phone Amplifier Hex
Free
Mini Vise
Free
Salt and Pepper Text Shakers
Free
Self-aligning Gimballed drink holder
Free
Solo Finger Pen
Free
Pistachio Opener
Free
Tools tray
Free
Cable management Hive
Free
DIRECT SQUEEZER
Free
Phone Stand with Cable Routing
Free
Turbine Faucet Watersaver
Free
Geometric phone holder
Free
Joycon & Knuckles
Free
Print in Place Allen Key Holder Inspired by Wiha
Free
SD Card Mountain
Free
Bird lemon squeezer/MAJ
Free
Filament clip / Universal filament clip
Soap Dish
Mechanical quick release phone stand
Switcherang: Nintendo Switch 9 Joy-Con Grip0009
Here is a list of best STL files of useful and functional objects for 3D printing , all these 3D creations are taken from 3D file site Cults and are perfectly usable for 3D printing .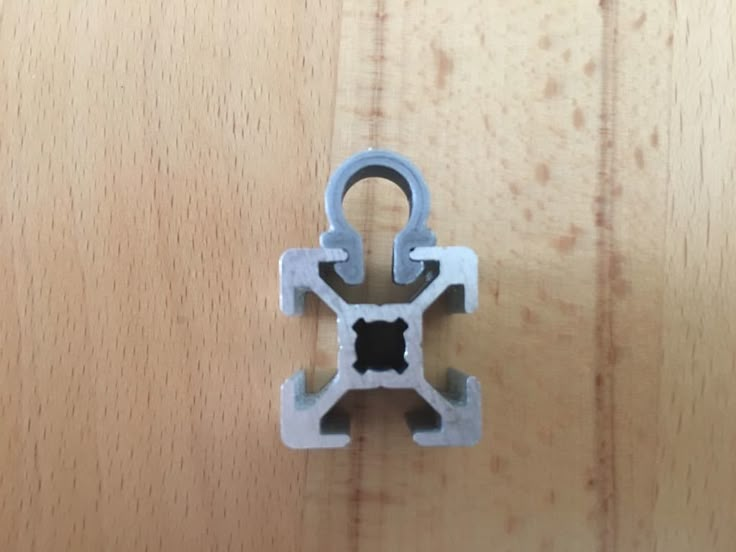
This collection contains useful free or premium 3D models of to make your life easier. Designers around the world face the same challenges as you and put their design skills to work innovative, practical and above all 3D printable solutions!
This TOP Useful 3D Printing has everything you need to make your daily life more efficient and practical . You'll find everything you need to amplify your phone's sound, clean things up, save toothpaste, repair... One of the criticisms often made about 3D printing is that creators only make useless things, this collection is - perfect example to prove otherwise. As proof, the 3D printer and 3D file sharing platforms enable 3D designers from all over the world to put their skills and design ideas to the service of all.
If you print the file for home, don't forget to show us how you use it by posting a photo of the result! This will help designers better understand the impact their ideas have on the daily lives of 3D printer owners.
3D copper printing - complete guide
Copper is one of the newest and most promising areas of metal 3D printing for everything from electric motors to heat sinks.
Previously, 3D printing with copper was a challenge due to the metal's reflectivity and high thermal conductivity, but advances in printers and materials have largely resolved these early problems. Today, 3D printed copper propulsion systems send rockets into space, 3D printed copper heatsinks cool processors, and 3D printed copper coils boost the performance of electric motors.
3D printed copper parts (Source: Trumpf)
Why 3D print copper?
Copper has always been a very useful metal due to its ability to conduct heat and electricity, resist corrosion and even kill bacteria and viruses. Demand for complex copper parts is on the rise as 3D printing opens up even more uses and possibilities for this metal.
3D printing (also known as additive manufacturing) enables the creation of exceptionally complex shapes, fine details, internal structures and lattice inserts that are not possible with any other form of metal fabrication.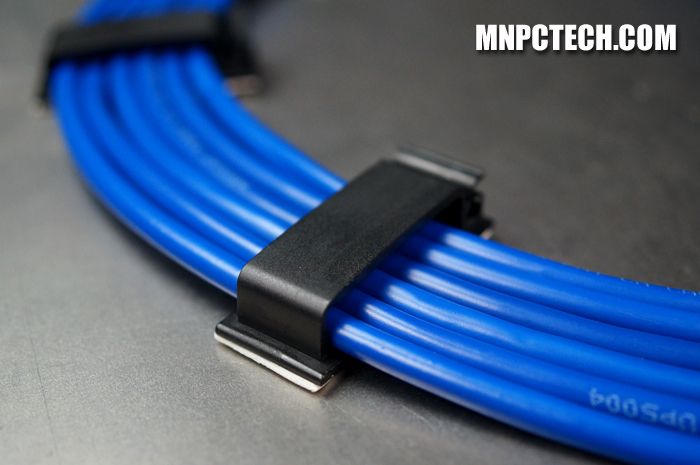 These capabilities reduce weight, increase efficiency, and reduce fabrication and assembly times, as multi-component assemblies can be 3D printed as a single unit.
Additive Metallurgy
3D printing also makes it possible to produce this relatively expensive metal more efficiently, reducing waste because only the amount of material needed is used to make each part. For companies interested in copper 3D printing, reducing raw material costs is critical.
If you already produce custom copper parts, 3D printing can significantly reduce your production costs while optimizing part performance.
Markforged 3D printed copper heatsink (Source: Markforged)
Although there aren't many 3D printers that can print copper, there is still a wide variety of printing technologies and prices.
FDM printers using copper-filled plastic filament can produce copper jewelry, decorative items, and other parts that are almost 100% copper. While for more advanced production, 3D printers using copper powder, rods or copper polymer slurry produce industrial parts with excellent mechanical and conductive properties, which can meet international standards such as IACS (International Annealed Copper Standard).
Let's take a look at what types of printers can work with copper today. Trumpf TruPrint 1000 Green Edition 3D Printer several equipment manufacturers have recently included copper in their material list. Since copper is highly reflective, laser processing of the powder has been a hurdle for manufacturers. However, this technology and materials have evolved to solve this problem.
3D printer manufacturer Trumpf, for example, has developed an industrial green laser that can 3D print materials such as copper, copper alloys, and precious metals that are difficult to process with infrared waves.
Two powder layer technologies for metal 3D printing, DMLS (Direct Metal Laser Sintering) and EBM (Electron Beam Melting), work by depositing a thin layer of copper powder onto a platform inside the printer. The powder heats up while lasers or electron beams draw the first layer of the part. When the particles in the layer fuse, the platform is lowered slightly into the assembly chamber, and fresh powder is poured on top, and the process is repeated. Some of the copper powder left over from the process can be recycled for use in the next print.
Copper powder for additive manufacturing from GNK Powder Metallurgy (Source: GNK)
Copper-bonded 3D inkjet printers
Copper powder bonded with a liquid binder and sintered in a furnace is a 3D printing technique known as binder inkjet printing that allows parts to be obtained without the use of an auxiliary material. Bond jetting is a no-heat process in which a bonding layer is sprayed between each layer of metal; the binder is then removed during the sintering process.
Binder blasting is a popular additive manufacturing method for high volume metal parts.
Featured image of
Metal-on-Copper FDM 3D printers
Copper parts printed on Markforged07's Metal X printer
The most economical approach to 3D printing copper parts is to use machines that extrude the filament. Metal filament for printing metal parts consists of a plastic base with metal particles evenly interspersed in it. Copper interspersed filament for copper parts is a unique type of composite filament that, when used correctly, produces strong, chemically resistant, and near-solid metal parts.
Virtually any Fused Deposition Modeling (FDM) printer can print near-solid metal parts using a polymer filament filled with copper powder. Currently, there is only one option on the market - from the manufacturer of threads The Virtual Foundry. The company claims that its copper filament is suitable for printing on any filament 3D printer with a hardened nozzle and a hot end that can reach temperatures of up to 225ºC. However, the parts do not become metal immediately after printing and require additional post-printing steps to melt the resin binder and leave only the metal.
Other types of copper thread contain enough real copper particles to be polished and given a metal-like weight, but are for decorative purposes.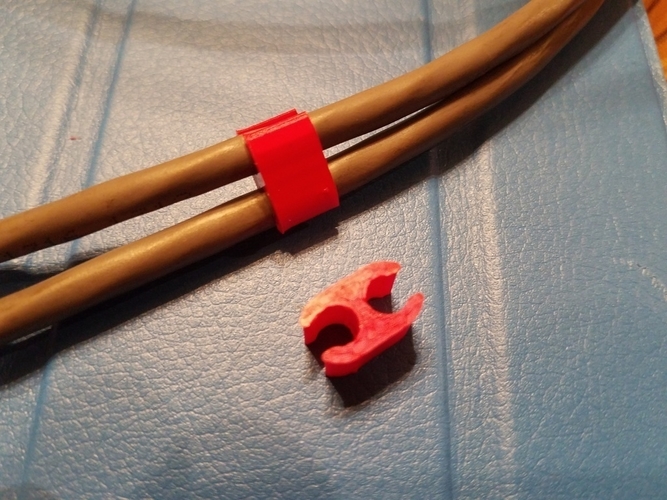
A company in Chile called Copper3D produces a copper-filled filament that produces not metal parts, but parts that have the antibacterial and antimicrobial properties of copper. NASA is even testing the filament for use in "interplanetary microbial contamination," according to the company.
In addition to the mainstream FDM printers, two other filament-extruding printers also offer copper, but they use their own proprietary materials. Desktop Metal uses a bonded metal filament, while Markforged uses a similar metal powder bonded into a plastic matrix. The printers from these manufacturers produce all-metal parts designed for industrial use, such as machine tools, induction coils, heat sinks, and functional prototypes.
Copper Cold Spray and DED 3D Printers
WarpSpee3D Cold Spray 3D Printer (Source: Spee3D)
Although these two methods of metal 3D printing are not usually combined together here due to their general application for coating metal parts with another metal and for layering metal parts with metal powder.
Directed Energy Deposition (DED) is a system developed by Optomec of New Mexico to create, improve and repair metal parts. Like SLS, in DED, high-power lasers build up 3D structures in layers, creating parts with high density and strength, ideal for mechanical applications. In 2019Optomec developed a new copper DED process to produce heat exchangers for use in the aerospace, chemical and other industries.
Spee3D's WarpSpee3D process is unique in using supersonic 3D deposition to produce parts from a range of metal powder materials, including copper and aluminum.
Cold spray is an additive manufacturing technology in which metal powder is injected into a supersonic pressurized gas stream. Instead of melting the metal, cold spraying holds it together in a process called plastic deformation. Companies such as Spee3D are using cold spray technology to apply an antimicrobial copper coating to doors, handrails and touch panels intended for use in hospitals, schools and other public places.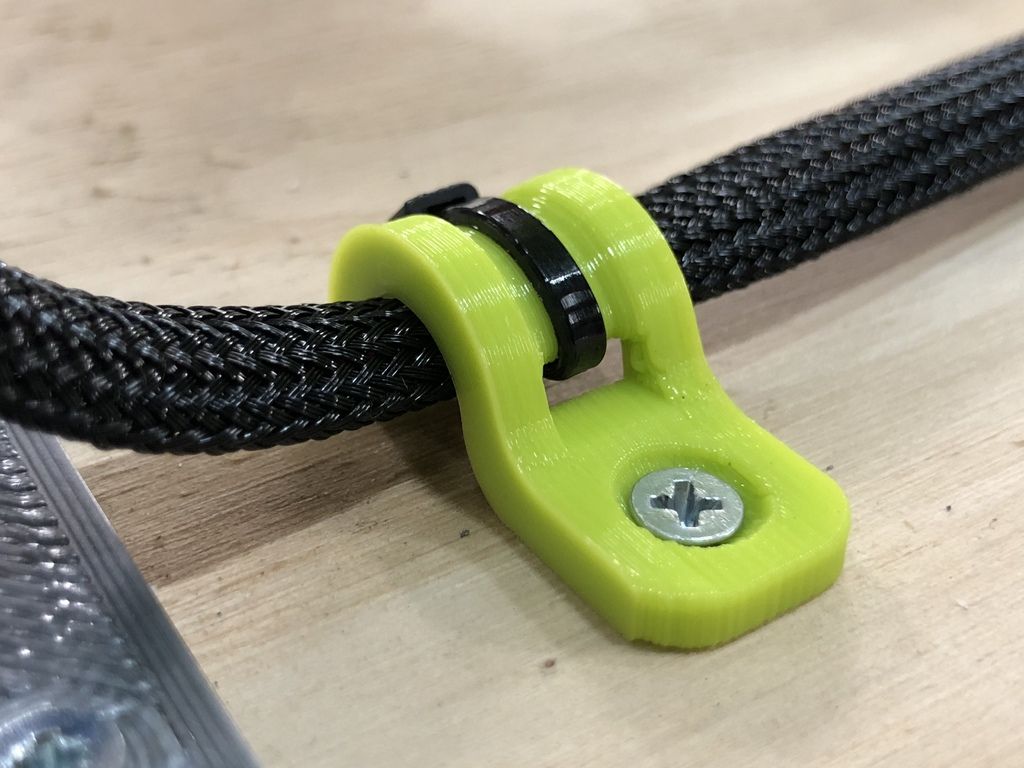
Cold spray is also the fastest metal 3D printing method. Spee3D printed a 17.9kg (17.9kg) pure copper aerospace rocket nozzle lining (pictured below) on WarpSpee3D in about three hours at a cost of just $716, according to the company. Parts like this are usually made from solid forged copper, which takes weeks and costs tens of thousands of dollars.
One of the disadvantages of DED and cold spray is that they are limited in the production of complex geometries.
Rocket nozzle copper plating, spark-free copper engineer's hammer and copper cable clamp, 3D printed by Spee3D (Source: Spee3D)
Photopolymerization
Holo)
Metal DLP 3D printing is similar to resin 3D printing in that it uses UV light projected onto a photosensitive slurry to cure layer by layer. Instead of resin, metal DLP printers use a liquid polymer filled with metal powder and a small amount of binder. After the parts are printed, they have to go through several more stages before they become the final metal parts.