3D print words
Best Ways How to 3D Print Text on Your 3D Printer – 3D Printerly
There are many things you can print on a 3D printer, one of those being text generated 3D letters for a name, logo, or almost anything you can think of.
The process to design these things can be confusing at first, even with 3D text, so I decided to make an article to show people how to get it done.
To convert text to 3D letters ready to 3D print, you need to choose a CAD software such as Blender or SketchUp to design the 3D text. Once you’ve entered your text, you can use a rectangular frame for the text to sit on and extrude the text past the frame. Export your file as an STL after complete.
I’ll go through the process in a little more detail, as well as list the best 3D printer text generators and how to make 3D text logos using this method.
Words are great, and they look even better when they can be touched physically. The conversion does not take much time as you would require specific software for converting a 2D text into a 3D one.
This is the only part that would require time, and then you can send that 3D text file to a 3D printer for printing.
There are different ways through which you can convert your text into 3D letters and print it with a 3D printer, such as Blender, SketchUp, FreeCAD, or Fusion 360. However, to convert a plain text into a 3D one, you will require software to perform certain tasks.
Creating 3D Print Text Using Blender
Getting & Opening the Application
- Download the latest version of Blender from their official website and install the application.
After it has installed, open Blender and you should see the main interface with a cube in the middle.
Adding the Text
- Click on the cube and delete it using the ‘Del’ button on your keyboard or by pressing the ‘X’ key
- Press Shift + A to add an element and select ‘Text’ from the menu.

- It will bring up actual text for you to edit.
- Now you want to rotate the object so you can see it clearer.
- Highlight the text and press ‘R’ on your keyboard then press ‘X’ to rotate it around the X-axis.
- Then press 90, to rotate it 90° and press ‘Enter’ to accept.
- You also want to rotate it 90° around the Z axis.
- To do this, highlight the object, press ‘R’ then ‘Z’ for the Z-axis, then press 90 again on your keyboard to do the rotation and press ‘Enter’.
Time to Edit Our Text
- In order to change the letters in your text, you want to change from ‘Object Mode’ to ‘Edit Mode’. You can do this by simply pressing the ‘Tab’ button on your keyboard.
You can also change mode by clicking the ‘Object Mode’ box and selecting ‘Edit Mode’.
- Once you’re in Edit Mode, you can easily change the text as normal. Delete the placeholder text and type your desired text.
- You can also change the font by using the main command zone on Blender to your right.
- This is done by clicking on the folder icon beside the ‘Font’ then choosing one of the several fonts in the list.
- If you want your letters to be closer together and not so spaced out, you can adjust the spacing under the ‘Spacing’ section. You can adjust spacing between letters and words too.
Making Your Text 3D
- This is pretty simple to do. Within the ‘Font’ area, there is a section you can edit under ‘Geometry’ called ‘Extrude’ which, if you increase, will make your text 3D.
- You can easily adjust Extrude values using the left and right arrows, or by inputting your own values.
Secure Your Text with a Block
- Make sure you’re in Object Mode & click an empty space on the build plane to deselect all objects.
- Press ‘Shift’ + ‘C’ to make sure your cursor is centered so your objects will be in the correct place.
- Now press ‘Shift’ + ‘A’ to add an object & add a ‘Mesh Cube’.
- Scale the added cube down using the ‘Scale’ box on your left, or using the ‘Shift’ + ‘Spacebar’ + ‘S’ shortcut.
- Scale the cube to fit your writing, from front to back and side to side until it looks right. You also want to be moving the block to the right location under your text.
- Change your view by clicking the Z in the view changing section, or by clicking ‘7 on your NumPad’ so you can get a good angle and move the block nicely in the center.
- Make sure your block and text are actually well-connected and overlapping over each other.
Printing Your 3D Text
- When it comes to printing your text you want to make sure you’re printing it on its back.
- We can rotate it within Blender like we did before, so click your object, press ‘R’, ‘Y’, ‘-90’ to put the object on its back.
- Make sure both objects are selected, then click ‘File’ > ‘Export’ and export it as a .STL file. Make note of what folder you saved the file so you can easily find it to import to your slicer.
- It will be very small when you put the STL into your slicer, where you then just have to scale it up, slice it, then print your custom 3D text!
Using SketchUp to 3D Print Text
There is a free and pro version of SketchUp, and in the video below, you’ll be following the free version if you choose this option.
The great thing about the free version is you don’t need to download any software. It’s all done straight from the SketchUp Browser App.
Adding text is very simple.
After clicking the ‘3D text’ option, the following box will pop-up where you can enter your custom text.
Below is a cool example of something you can create from following the video tutorial.
You can choose to just create the simplified text with the supporting block underneath like in Blender. With the video below, you can easily figure out how to navigate and adjust shapes and text to create your desired design.
3D Printed Text Using FreeCAD
The video below does a pretty good job showing how to create your 3D print text on FreeCAD, as well as creating an embossed text.
It’s pretty easy to follow, and once you get the hang of it, you can 3D print plenty of your custom text ideas, signs, and tags.
The picture below is after creating the text and extruding it by 2mm.
Now let’s get a nice rectangular frame on that text to support it and extrude that by 2mm also.
Then we extrude the text even further to get it sticking out of the frame, 1mm works out pretty well.
Select the files simultaneously then export them using ‘File’ > ‘Export’ and save them as a .stl file. You can then simply import that into your slicing software to get ready to 3D print your text!
3D Print Text Generator Using Fusion 360
Fusion 360 is a pretty advanced design software which can definitely create some great 3D text. If you need to design something a little more complex, it’s a great software to use, although, it works really well for creating 3D text.
The video below takes you through the process.
3D Print Text Troubleshooting
Some people run into issues such as gaps in the lettering of their 3D text which can be caused by either your slicer not correctly processing the model, or by under extrusion in your 3D printer.
If your problem is caused by your slicer, it’s hard to tell, but you can try changing your slicer to see if the model prints differently. Many people have seen massive differences in print quality just by using a different slicer, so I’d give this a try.
If the problem is under extrusion, I’d slow down the printing speed and also calibrate your e-steps to make sure you are extruding as much material as your 3D printer says you are.
Another thing you can do is set your infill to 100% to properly fill in the gaps in your model, as well as increase the overall wall thickness of your print.
When it comes to creating embossed text or recessed letters, you can do this within your CAD software, usually by a dragging function, or by inputting the distance you want your text to move.
It is done different with separate software, so try to figure out where you can input these values to move your 3D text.
If you are having trouble reading your 3D text, a great font you can use for 3D printing text actually happens to be Comic Sans since the spacing in the font is done very well and the letters are bold enough to make it easier to read, perfect for smaller text.
Arial is another font that works well for 3D text, as well as Montserrat, Verdana Bold, Déjà vu Sans, Helvetica Bold, and other heavy weight Sans-Serif or Slab-Serif fonts.
The 30 Words of 3D Printing
Posted By Amandine Richardot on May 17, 2017 |
3D printing is an always evolving technology, using multiple different materials and techniques in order to obtain the best results. With such ongoing innovations, the vocabulary of 3D printing can be quite difficult to master. That’s why we decided to elaborate this post on the main words of 3D printing, explaining to you what all of the most important terms mean.
If you wish to get more information, you can click on the different terms to go to our detailed glossary.
3D Bioprinting:
3D bioprinting is the process of creating living cell patterns, like skin or organs, using 3D printing. It’s generally used to regenerate and transplant organs in the medical field. As you may guess, this process is extremely complex.
3D Model:
A 3D model is a digital file representing an object in three dimensions. It is designed thanks to a 3D modeling software and can then be printed with a 3D printer. It is generally displayed as a two-dimensional model using 3D visualization.
3D Printing Resolution:
The 3D printing resolution corresponds to the accuracy of the 3D printers. It mostly relates to layer thickness. It depends on the material and technology used.
3D Printing Volume:
The 3D printing volume of a printer is the maximum size one object can have to be 3D printed by this machine. It depends on the material used, on the technique, and on the finishing options chosen.
ABS:
ABS plastic (Acrylonitrile Butadiene Styrene) is a thermoplastic polymer. This material is mainly used for personal 3D printing, with FDM or FFF techniques. It’s lightweight, with a good impact strength, and it’s affordable. Since its melting temperature is quite low (200°C/ 392°F), it can be considered as relatively safe.
Additive Manufacturing:
Additive manufacturing is another common way to call 3D printing.
Binder Jetting:
Binder Jetting is 3D printing technique which creates parts additively, with a binding agent. It can be used both for metal and for plastic. For metal, it’s the fastest technology and one of the cheapest.
CAD:
Computer Aided Design is the use of a computer software in order to create, manipulate, analyze and optimize a 2D or 3D design. It is commonly referred as CAD. It is generally used to make 2D designs for technical engineering and architecture or to make 3D designs for digital applications like animation or for manufacturing and prototyping processes like 3D printing.
CLIP:
CLIP stands for Continuous Liquid Interface Production. This 3D printing technology works by projecting a continuous sequence of UV images, generated by a digital light projector, through an oxygen-permeable, UV transparent window, below a liquid resin bath.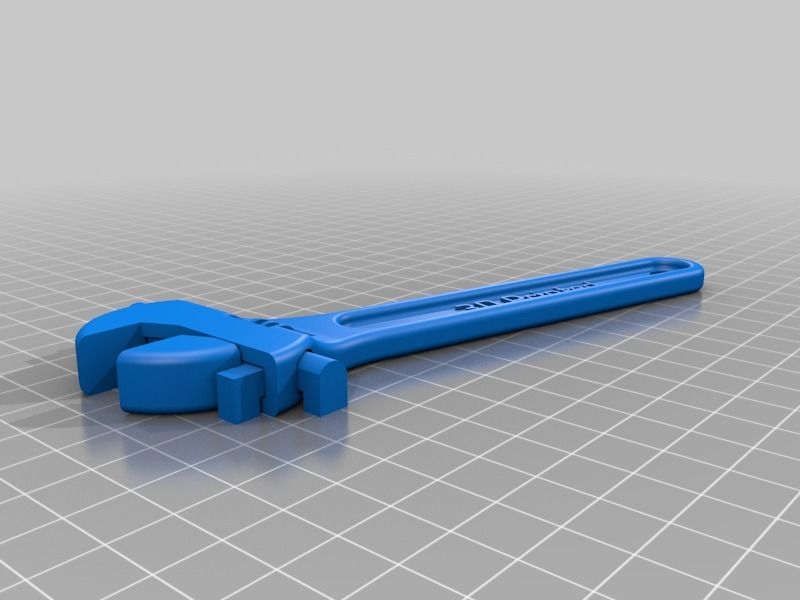 It creates a dead zone above the window which maintains a liquid interface below the part. Above this dead zone, the cured part is drawn out of the resin bath. This 3D printing technology was first introduced in February 2014. A few months later, the company Carbon 3D was created to commercialize it.
DLP:
Digital Light Processing is a 3D printing technique where a projector is used to cure photopolymer resin. It is very similar to SLA, with a slight difference: it uses a light bulb, not an UV laser. Objects printed with this technique have less visible layers. Moreover, it is a faster technique. It is mainly used to 3D print highly detailed artworks and non-functional prototypes.
DMLS:
Direct Metal Laser Sintering is an additive manufacturing technique for metal 3D printing. It was developed by EOS. This technology uses a laser as a power source to sinter metal powder by aiming a laser and tracing a cross-section of the object, layer by layer. With DMLS, you can 3D print highly complex geometries. Its main benefits are that no tooling is required and that parts can be 3D printed quite quickly.
Extruder:
Also called Printer head, the 3D extruder is the part of a 3D printer which ejects material in semi-liquid or liquid form, to deposit it in successive layers. In some cases, it can be used only to deposit a bonding agent to solidify a material that is in its powder form.
Fab Lab:
A Fab Lab, an abbreviation for FABrication LABoratory, is a place dedicated to digital fabrication, directed by a collective community. There, you can find computer-controlled machines, and sometimes 3D printers. To use the name “Fab Lab”, the place has to respect MIT’s rules.
Filament:
The plastic used by FDM 3D printers comes in the form of a plastic filament. It is generally sold in spools and usually provided by the printer’s manufacturer. The most common materials you can find in this format are ABS, PLA, PVA and TPU.![]()
FDM:
Fused Deposition Modeling, also called Fused Filament Fabrication (FFF), is probably the most popular 3D printing technology due to the important number of this type of 3D printers available on the market. It is an affordable 3D printing process compared to other technologies. During this process, the material is melted and extruded through a nozzle to 3D print, each layer at a time.
Layer:
In the context of 3D printing, a layer is each individual planar section of the object that is 3D printed. Before being 3D printed, the object is sliced in a large number of horizontal layers that will be manufactured in an ordered sequence, each layer adhering to the previous one, to then form a 3D structure.
Layer Thickness:
Layer thickness is the measure of the height of each successive addition of material in the 3D printing process. It is an essential technical element of any 3D printer. Generally, it is between 16 µm and 150 µm.
LOM:
Laminated Object Manufacturing is an inexpensive and very fast way to 3D print objects. It is available for several kinds of materials, but mostly for paper. Sheets are bonded together and then cut in the geometry of the 3D model. This process is mainly used for rapid prototyping, not production.
Multijet:
Multijet is a color 3D printing process which uses an UV light to crosslink a photopolymer, like Stereolithography. However, it is different from it since a printer head throws little droplets of the photopolymer (like in the ink in an inkjet printer) in the shape of the first layer, instead of using laser scanning to cure layers. An UV lamp, attached to the printer head, crosses the polymer and locks its shape. This process creates high resolution and highly complex parts, but it 3D prints elements that are less strong than SLS and FDM.
Photopolymerization:
Photopolymerization is the process of solidification of a photosensitive resin, using an UV light.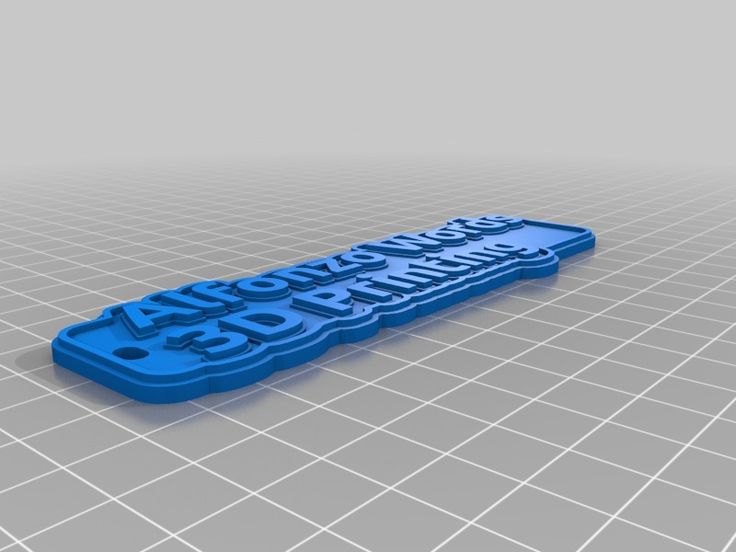 This technique is used in various 3D printing processes like DLP, SLA, and Multijet.
PLA:
PLA, also called Polylactic Acid, is a plastic material which is vegetable-based. The raw material it commonly uses is cornstarch. It’s the first natural raw material used in 3D printing. This thermoplastic polymer is fully biodegradable. It is a standard material for the FDM technology, along with ABS. It has a good geometrical stability during manufacturing, but it is less durable and more fragile than ABS. Therefore, it is perfectly suited for decorative objects, with no mechanical parts.
Polyamide:
Polyamide is a plastic material often used for 3D printing. It is also known as Nylon. Depending on the technique, it can be used in different forms. For instance, it is used in powder form for SLS, but it’s heated until it becomes liquid for FDM. Its properties allow both prototyping and production.
Polyjet:
Polyjet is a color 3D printing process, like Multijet.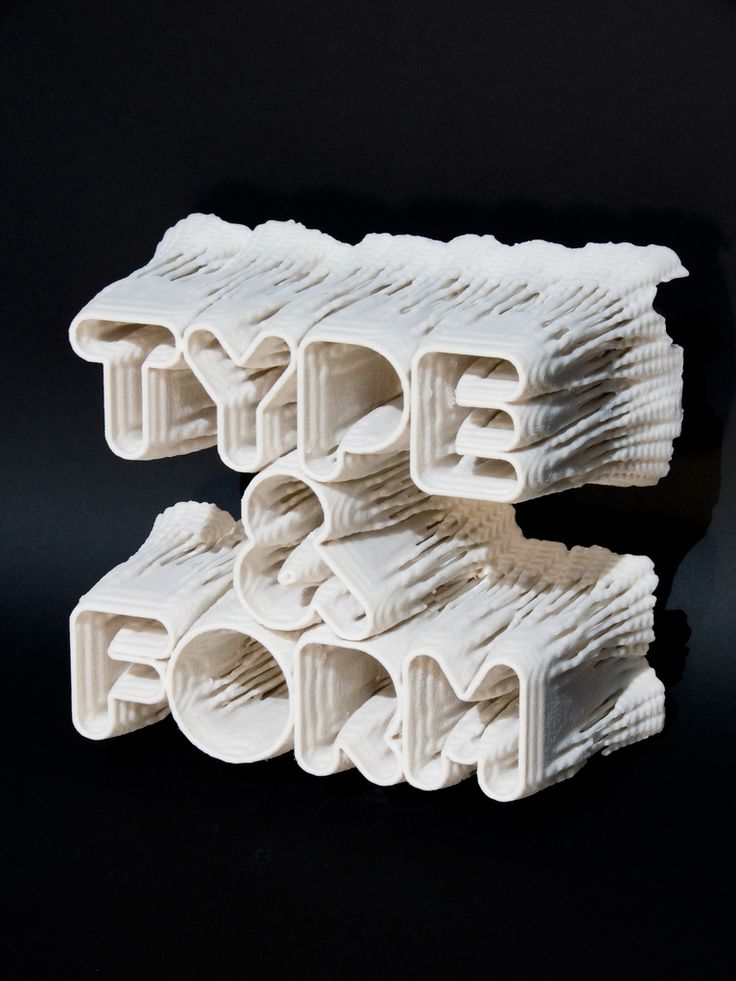 This technique is the most similar to 2D printing. A printer head deposits a layer of material, and then another one deposits glue before printing another layer above it. Glue and color can be applied at the same time, or later. It is a cheap technique, easy to use, allowing the creation of little objects and figurines.
Printer Bed:
The printer bed is the flat part of a 3D printer where the object stands during the whole 3D printing process. It can be fixed or moving, depending on the machine and on the 3D printing process used.
SDL:
Selective Deposit Layers is a 3D printing process using paper. It involves layers of adhesive coated paper (or plastic, or metal), glued together and cut to shape with a laser cutter, layer per layer. A roller moves each sheet of material over the last one until the object is totally 3D printed. Since you can use basic paper with this technique, it is a way to 3D print at a low cost. It is quite similar to the LOM technique, but the gluing process is different: in SDL, only the parts that will make the object are glued, while in LOM the entire sheet is glued uniformly.
SLA:
Stereolithography (SLA) is a 3D printing process for resin. A vat of photopolymer resin is exposed to an UV light laser, heating selected parts of it, layer per layer. SLA objects don’t have the strength of objects 3D printed with SLS and FDM technologies, but it allows a higher level of details. Thus, it is mainly used for not functional prototypes and highly detailed artworks.
SLM:
Selective Laser Melting is a 3D printing technique that allows to 3D print metal. A laser melts successive layers of metallic powder in specific places in order to create the 3D object wanted. With SLM, you can create highly complex parts. Thus, it is commonly used in the aeronautic sector.
SLS:
Selective Laser Sintering is a 3D printing technique. Powder material, typically Nylon, is transferred inside the 3D printer. Then, a laser selectively heats some parts of powder layers, in order to create the shape desired. Compared to other additive manufacturing techniques, SLS doesn’t require support structures since the powder acts as self-support.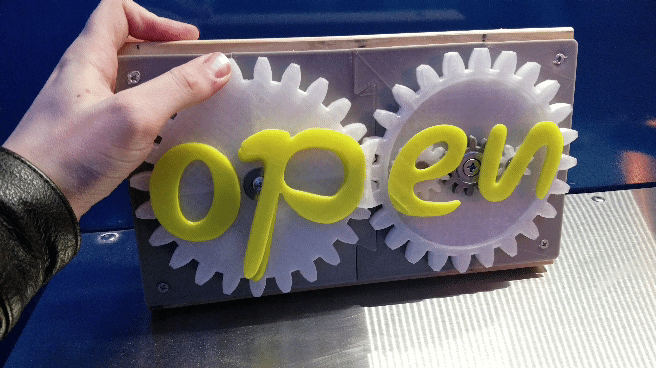 This allows the construction of complex geometries.
Thermoplastic:
Thermoplastic is a polymer material which softens when it is heated, and then solidifies when it cools. It is used for plastic 3D printing, especially with the SLS technology.
Wax:
3D printed wax is used to make molds, using the 3D Lost Wax Casting technique. It then allows creating high-quality jewelry in metal. How does it work? The 3D model of the object is Wax 3D printed, layer by layer. A mold is then built around the wax object. Afterward, the wax is melted and removed in order to obtain an empty space in the mold, corresponding to the final object. Finally, the empty space is filled with molten metal in order to get the final object.
We hope this article helped you get a better understanding of 3D printing. Something important is missing? Do not hesitate to suggest some new words in the comments, or check our 3D Printing glossary.
Terminology/slang in 3D printing in Russian
Hi all. I want to share my experience of my research in terms of 3D printed terminology. I myself am still a beginner in both 3D modeling and 3D printing, and at the beginning of studying the issue, I came across an abundance of terms unknown to me before. In order to ease the thorny path of the pioneers of 3D printing, I decided to create a list of terms / slang with a little interpretation (I took something from this site, something from WIKI, I interpreted something myself). I propose, within the framework of this entry, to limit ourselves to the FDM type of printing and not to interfere with the rest. I hope you throw those 9 in the comments0% of the article that I missed, well, correct me if I made a mistake somewhere.
The 3D Printer is a peripheral that uses a layer-by-layer method to create a physical object from a 3D digital model.
FDM (Fused deposition modeling)
Filament (plastic rod) (from English filament - thread) is a consumable used for printing on a 3D printer. It is a plastic thread with a cross section of 1.75 or 3 mm. nine0003
Extruder (from extrude - extrude) - a device that feeds a plastic rod into a heating block, in which a melt occurs under the influence of temperature and is squeezed out through a nozzle. A tube of toothpaste, a glue gun, a silicone sealant syringe work in a similar way. In a broad sense, this is a block consisting of a cold and a hot end.
Hot end (hot-end) — includes in the classical sense a nozzle, a heating block, a thermal barrier and an extruder heat sink. It is inside this block that the filament melts and is molded by welding. nine0003
Cold end (cold-end) is a device responsible for feeding the filament to the hot end, in the classical sense it consists of a feed gear, a pressure roller and a stepper motor. Often an intermediate reduction gear is used between the feed gear and the stepper motor to improve the accuracy of material feeding when printing thin layers or when printing at low speed.
Nozzle (nozzle) — metal, ceramic or ruby hairpin with a longitudinal hole, this element is responsible for the shape and size of the extrusion melt at the outlet of the extruder. nine0003
Heating block - a block consisting of a heater (heater), thermistor (thermocouple, temperature sensor) and the block itself, which depletes these elements in itself.
Extruder heater (extruder heater) is an element that converts electric current into thermal energy and is responsible for heating the filament melt chamber inside the heating block.
Thermistor (thermocouple, temperature sensor) - takes temperature readings to control the voltage supply to the heating element to hold the temperature within the specified intervals. It is used both in an extruder and in a hot table. nine0003
Thermal barrier - a device whose task is to reduce the distance between the two phases of plastic - liquid and solid, in other words, does not allow the plastic to melt above what is needed, usually connects the heating block and the extruder radiator.
The extruder heat sink is a device designed to remove excess heat from the thermal barrier, usually through an air-cooled jacket, but liquid-cooled models are also available.
Worktable (print bed, platform, bed) - a platform on which the material is directly melted from the extruder. The surface of the table can be either perfectly smooth or perforated / corrugated in both cases, it is required to improve adhesion with the print object. nine0003
Hot bed (hotbed) - the same as the work table, only with the heating function, which allows to reduce the distortion of the deposited model, due to the gradual decrease in the temperature of the object. It also improves adhesion with the deposited object to the platform.
The stepper motor is a multi-winding synchronous brushless motor in which a current applied to one of the stator windings causes the rotor to lock. Sequential activation of windings of the motor causes discrete angular movements (steps) of the rotor.
Driver - microcircuit, the purpose of which is to convert the commands of the stepper motor controller into pulses applied to the windings of the Stepper motor and amplify them.
Direct Feed Extruder (direct) is a type of extruder where the cold end is located immediately before the hot end. Used for printing flexible plastics, rubber. The main disadvantage of this design is a lot of weight. nine0003
Bowden extruder ('Bowden extruder', Bowden extruder) is an extruder whose filament supply unit and nozzle are spaced apart: the cold end is rigidly fixed to the frame of the 3D printer, and the hot end is located on the movable print head. The filament, in this case, is fed into the nozzle through a long Teflon tube. Used for printing with rigid/elastic plastics.
End switch - a sensor responsible for finding the carriage in the dimensions of the printer structure, in other words, limiters at the ends of the axles.![]() They are created both on button sensors and on optical or based on the Hall sensor. When this sensor is triggered, the printer control board resets the position of the carriage, and then counts the position from this starting point. nine0003
They are created both on button sensors and on optical or based on the Hall sensor. When this sensor is triggered, the printer control board resets the position of the carriage, and then counts the position from this starting point. nine0003
Slicer - software that converts a 3d model (usually from STL format) into gcode with specific print settings and for a specific material and printer.
Gcode ( G-code) - conditional naming of the programming language (markup) of devices with numerical control (CNC).
Retract - reverse filament withdrawal from the hot end, used to prevent plastic melt from flowing out of the nozzle at the moments of idle movement of the extruder over the model to be welded. nine0003
Raft (raft, raft) - horizontal filament mesh located under the model. The rafts are designed to increase the level of adhesion, and level out the unevenness of the bed and poor calibration of the extruder relative to the table.
Brim (border) - a skirt around the object of printing associated with the object itself, used to improve adhesion and entrainment of the plane of contact with the bed.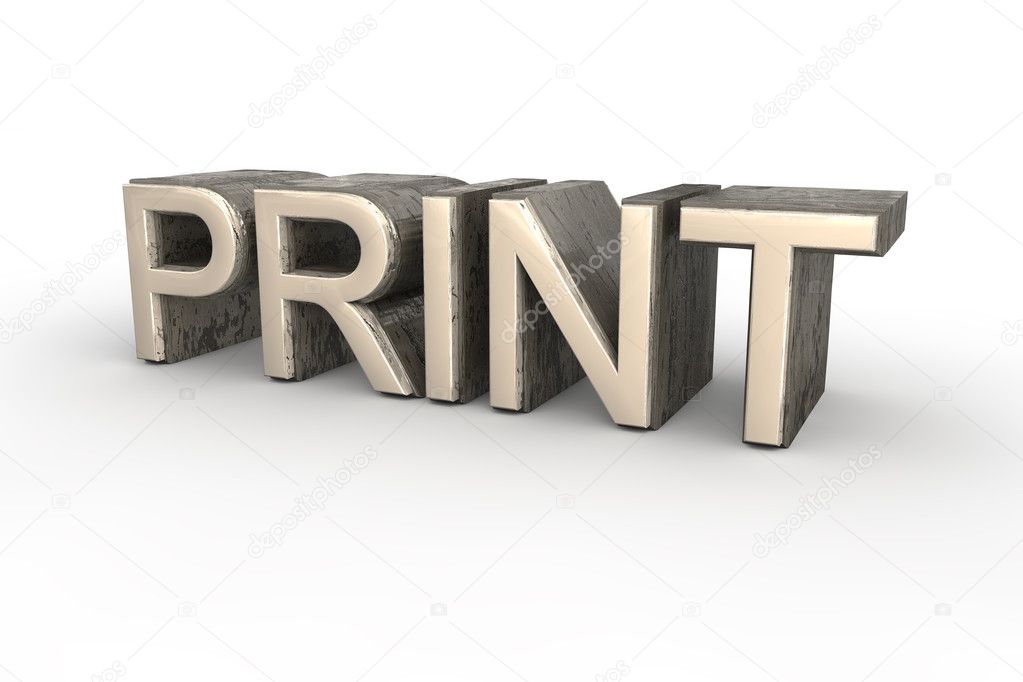
Support - additional printing elements not part of the model, designed to support overhanging elements. The printer simply cannot print through the air, it needs a base where to fuse the material. nine0003
Adhesion (from Latin adhaesio - sticking) in physics - adhesion of surfaces of dissimilar solid and / or liquid bodies.
Delamination (stratification) - the term is borrowed from biology, simply splitting the cell into two layers, in 3D printing it means both peeling off the part from the bed and splitting the print object itself into layers due to warpage of the object.
Juice (ABS Juice) - ABS solution in acetone with a consistency similar to baked milk, used to improve the adhesion of the printed object to the crib. nine0003
Post-processing - model processing after printing, grinding, heat treatment, chemical treatment, painting, gluing, etc.
Acetone (Dichloromethane, Dichloroethane) bath - a method of post-processing of the print object, in which the product is placed in an environment of saturated vapor of one or another chemical compound for a smooth effect on the model, after which the model changes its properties.![]() Acetone bath for ABS makes the part smooth, glossy. The dichloromethane bath for PLA turns it into a kind of flex/rubber. nine0003
Acetone bath for ABS makes the part smooth, glossy. The dichloromethane bath for PLA turns it into a kind of flex/rubber. nine0003
Hygroscopicity (from other Greek ὑγρός - wet and σκοπέω - observe) - the ability of some substances to absorb water vapor from the air, in our case, the ability of the filament to absorb moisture from the environment.
Drying - drying process of 'raw' plastic, printing with raw plastic is difficult due to water boiling inside the material and foaming as it exits the nozzle. Drying of plastic can be carried out both on the battery and in special heat chambers. In some cases, it is sufficient to store the materials together with silica gel in one package. nine0003
Warping - distortion of the product shape due to internal stresses caused by uneven heating or cooling.
I hope it will be useful to someone.
Please write in the comments on the merits, namely the interpretation of the missing terms (with images) and comments regarding my interpretations.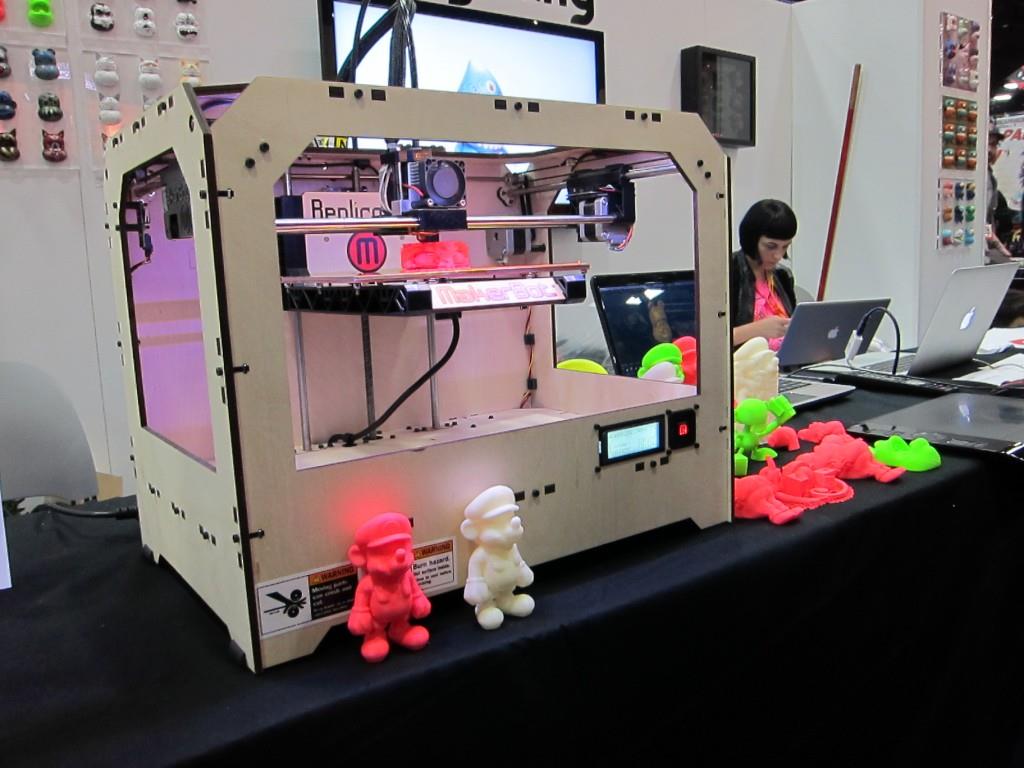
Thank you for your attention.
Any text on a 3D printer in a couple of minutes
My wife's birthday was approaching. And what's the best gift? That's right, handmade. and I decided to print the text on a 3D printer, something like a topping on a cake. I climbed Singivers and 3Dtoday, but did not find anything interesting. It would seem a simple task, but it is almost impossible to do anything artistic in SolidWorks. I came across an article that described how to solve the problem using CorelDraw and SolidWorks. Using this article, I about ... lost a lot of time, but nothing good came of it. Solid stubbornly did not want to make a boss, complaining about all sorts of problems. There was little time left, spitting on everything, I decided to go my own way. For those who are interested, welcome under cat. nine0003
And so, to solve the task, we need CorelDraw and registration on the site https://www.tinkercad.com/ Well, additionally, fantasy. So, let's begin.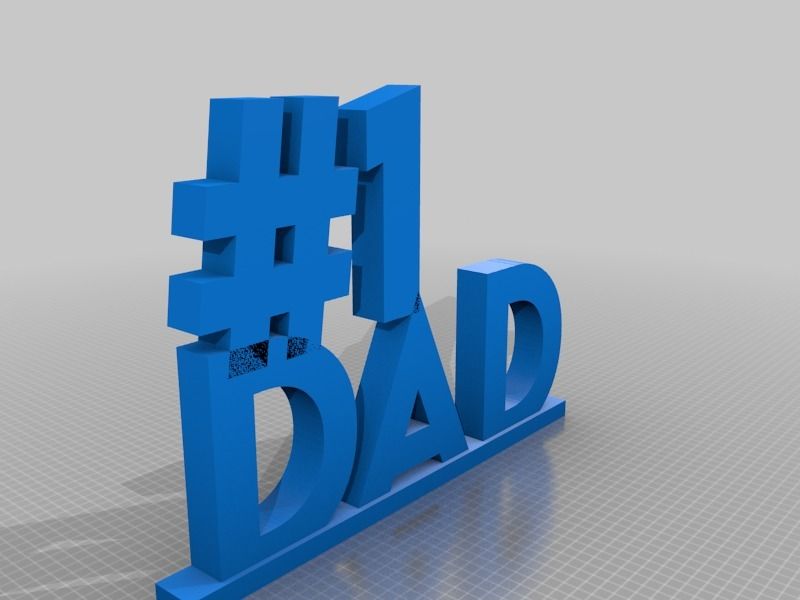
Start CorelDraw and create a new document. Corel will ask you to select the dimensions of the document. As dimensions I use the size of the printable area. But this is optional.
Now select the text tool and type the desired text.
Now the magic begins. Select the Block with written text and select the menu item “Object” - “Disconnect curly text, symbols ...” Or use the keyboard shortcut Ctrl + K
Attention. The first time the command is used on a block of text, the text is divided into words. Thus, in order to divide the text into letters, it is necessary to go through all the letters, and if they are selected by several characters, it is necessary to repeat the operation on an undivided block of text and do so until the entire text is divided into separate letters.
Now, after all the text has been divided into separate letters, artistically lay out the letters the way you want them to be printed by a 3D printer.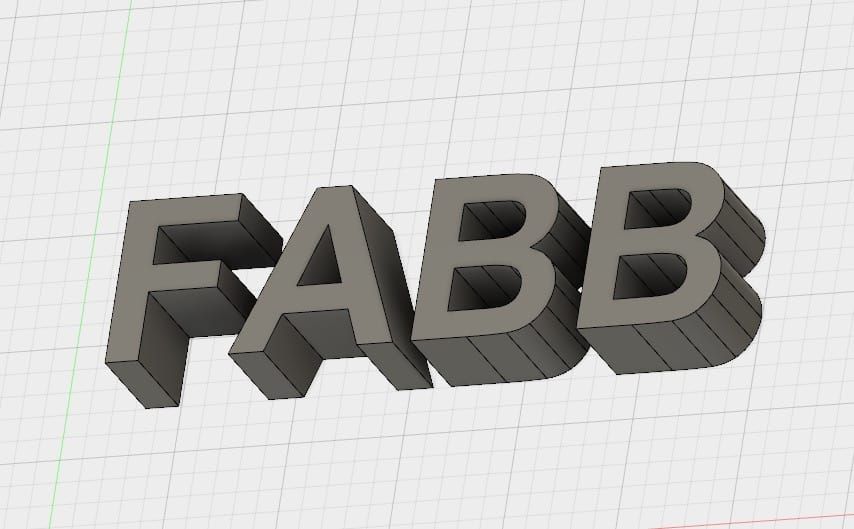 For example like this:
All. The layout of what we will turn into a three-dimensional figure is ready. And now the most important thing begins. We need to export the resulting image to SVG format. To do this, in CorelDraw we do the following: “File” - “Save As”
in the window that opens, give a name to our file and select the file type “SVG”
Now click the “Save” button And the following window opens:
Now we check that the document settings match those that we entered when creating it. So that the units of measurement are in millimeters and Be sure to export the text as curves. Those. We do as shown in the figure. do not touch other parameters. We press OK. nine0003
All file saved. Now go to the site https://www.tinkercad.com/. If you are not registered there, register, log in and create a new project.
And now the magic.
in the right corner press the IMPORT button
An import window will open in which you must drag or select your SVG file.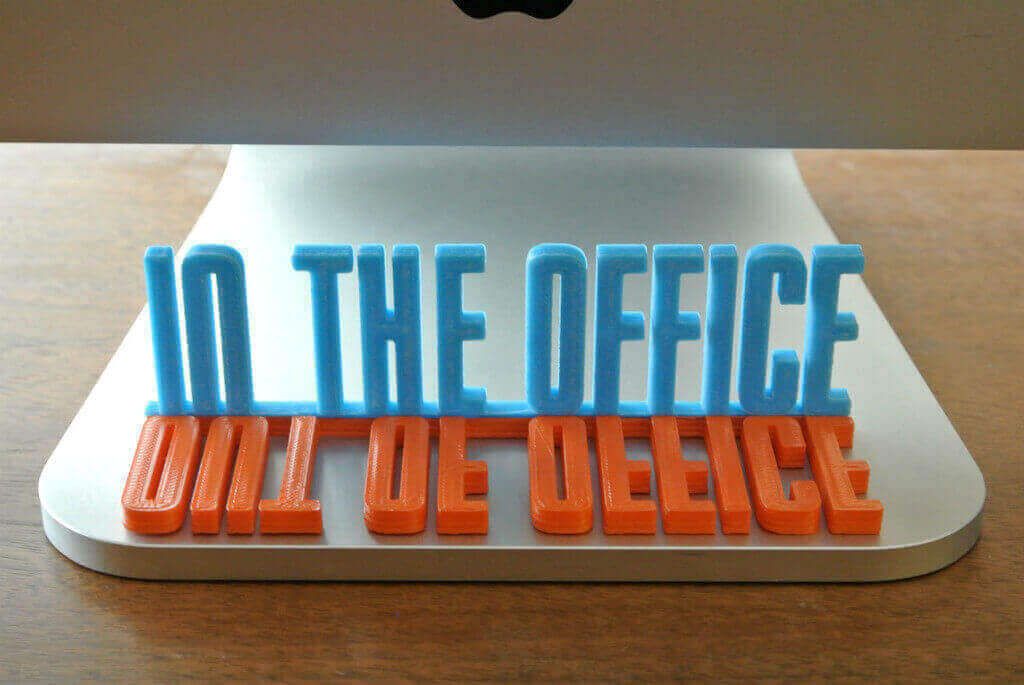
After selecting a file, tinkerkad will start swearing that the workspace size is too large:
There's nothing to worry about. It just seemed to him that the model was larger than it actually was. In the "dimensions" field, we bite off a couple of zeros so that they match the dimensions of your printer's table. For example, I have a table 200x200 mm. So I do this:
and click the "Import" button. Everybody. Our text is not only imported, but also became voluminous.
Now we have a three-dimensional model, which we can adjust in size and thickness, export to an STL file (for this we use the “EXPORT” button). Well, then you know what to do. nine0003
Here are some examples of my quick work:
Sorry for the quality of the photo. Made them on the phone. Their goal was to show how it can turn out. I hope the article was useful to you. If the article turned out to be useful for you, share the link to it with your friends on social networks, websites and forums on 3D printing.