3D printing speed vs quality
Do Lower Speeds Make Prints Better? – 3D Printerly
There have been a lot of controversies concerning the best printing speed required to produce the best print quality. How do we figure out the level of speed that we can set that doesn’t let up on quality?
Lower speeds generally make 3D printers better quality when you have not properly optimized your 3D printer. When you have good stability, have taken out slack out of your 3D printer’s parts, a high speed has less effect on print quality. Once optimized, the main thing that holds speed back is flow rates.
By the end of this article, you would be fully aware of the consequences of speed on the quality of your print and also get to make smart choices when deciding on the best approach concerning tweaking your 3D printer speed to produce the best quality.
The general answer for this question is yes, the faster the print speed you use, the lower the quality of the part you are printing. This isn’t so clear-cut because there are many factors which affect 3D printing speed, which doesn’t necessarily translate into lower quality.
Are you trying to print a functional, load-bearing part? Are you trying to build a beautiful aesthetic piece which you want to be durable?
Quality is subjective based on what you are trying to achieve, but this article will attempt to compare the usual quality factors with speed factors.
The Trade Off Between Speed & Quality
The first thing to note here is just how much does speed affect quality?
The first thing to get straight in this discussion is, what factors do we mean when we say speed & quality? I’ve looked far and wide to see what other 3D printer hobbyists say and this is what I got.
Speed
- Printing time
Quality
- Layer line smoothness
- Print strength
- Print durability
- Looks just like the sliced model
- Lack of imperfections
The time estimation factors that Cura gives us are as follows:
- Infill – Main factor
- Inner Walls – Main factor
- Outer Walls – Main factor
- Retractions – Minor
- Skin – Minor
- Skirt – Insignificant
- Travel – Main factor
Speed is down to just how long does the print take to make, but there is more. With speed, the less material we have to extrude, the faster printing times will be, so that closely ties in to printing time overall.
So all the ways we can use to reduce material extruded will cut down on printing time, but these might have a negative effect on print quality, depending on what is done.
If you’re using lower infill settings, is your print strength being reduced? Most likely according to tests that have been run. The less infill you use, the less strength your parts tend to have.
Quality has more intricate factors which can be pretty difficult to test unless you have certain machinery & plenty 3D printed parts at your disposal.
CNC Kitchen have exactly that so they have conducted some experiments on the strength of parts. They concluded many points which you can view for yourself in the video below.
Once you determine what quality factors you care about, we can properly answer the question of speed vs quality and whether slower speeds make print quality better.
Other than this video, we are going to look at what factors influence printing speed, and just what effects they have on the print quality.
- Printing Speed Setting
- Nozzle Size
- Layer Height
- Number of Walls/Shells
- Infill
- Retraction
- Line/Extrusion Width
We also have to realize that acceleration and jerk settings will make a significant difference in how fast the printer is travelling. For the sake of simplicity, I’ve kept them the same at default values set by my Ender 3 & Cura.
Printing Speed Setting
| Printing Speed | Printing Time |
|---|---|
| 20mm/s | 1 hour 54 minutes |
| 40mm/s | 1 hour 5 minutes |
| 60mm/s | 1 hour 1 minute |
| 80mm/s | 1 hour 1 minute |
| 100mm/s | 1 hour 1 minute |
I’m sure you notice a pattern here, when we reach 60mm/s it doesn’t make a difference increasing printing speed to 100mm/s. The reason for this is the printer doesn’t have the opportunity to actually reach these higher speeds.
This tends to happen when prints are smaller and don’t require much travel over the printer bed.
To prove this theory, I scaled the Calibration Speed Tower 300% to see what difference it makes in printing time
| Printing Speed | Printing Time |
|---|---|
| 20mm/s | 22 hours 30 minutes |
| 40mm/s | 13 hours 18 minutes |
| 60mm/s | 10 hours 28 minutes |
| 80mm/s | 9 hours 9 minutes |
| 100mm/s | 8 hours 29 minutes |
As you can see, when we give a 3D printer the opportunity to reach these higher speeds, printing time reduces drastically.
The thing we want to know is how much of a difference in printing quality are we going to see printing at 100mm/s compared to 40mm/s?
Also, is there going to be much difference between 20mm/s and 40mm/s vs 80mm/s and 100mm/s?
Nozzle Size
This has a direct effect on both printing time and quality of your print.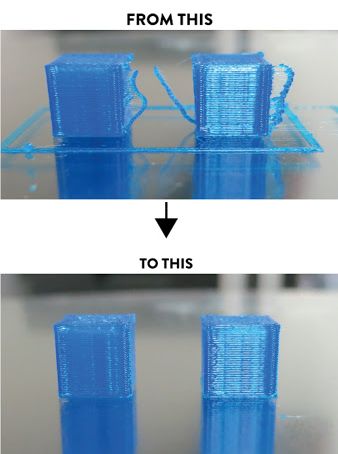 It is a well-known fact that having a bigger nozzle size will increase flow rates, as well as decrease print resolution.
Layer height tends to be a certain percentage of your nozzle size, so using a 1mm nozzle is just going to decrease that print quality.
Layer Height
Similar to nozzle size, layer height is essentially what we use to categorize print resolution. You cannot get details as intricate as possible when using a large layer height, and essentially, the larger the layer height the poorer details come out.
Large layer heights are usually used for parts that aren’t meant to look pretty or that people just want to get printed quickly. Prototypes, large parts or low-poly parts are where you will see bigger layer heights because quality isn’t prioritized with them.
Number of Walls/Shells
This one is quite important in the fact that tests have been run to show this has a huge impact on part strength. Increasing the number of walls or shells reinforces the weaker outside points of a part, resulting in a durable and strong part.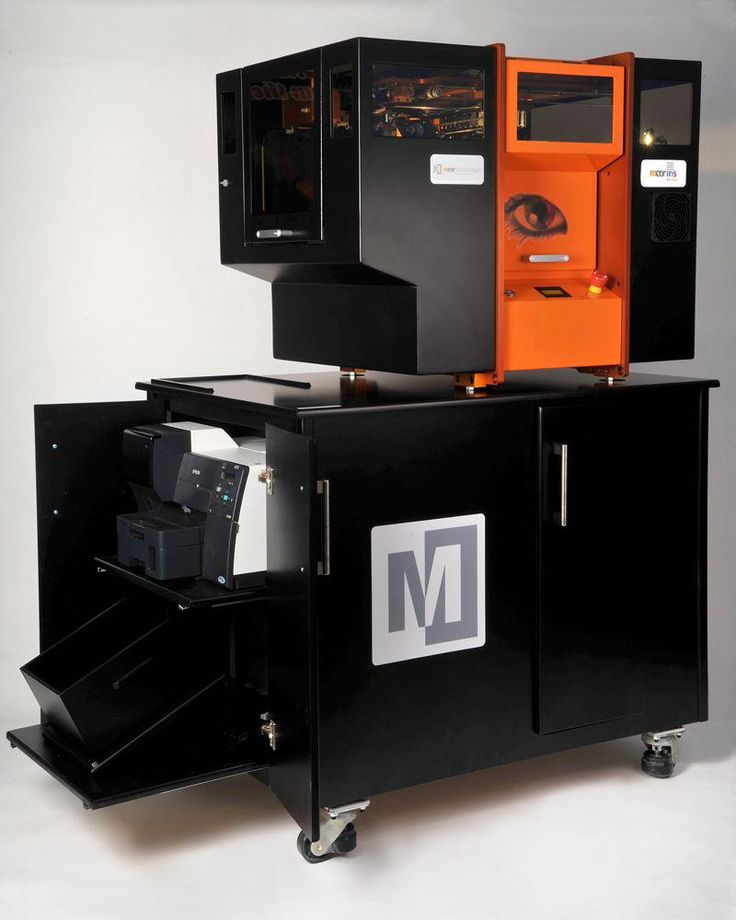
The great thing about doing so is how it doesn’t increase printing time by as much as you would think.
The trade-off between increasing the number of walls and print quality in terms of print strength is a great one. In other words, if print strength is a quality factor you are after, one of the first things you should do is increase the number of walls/shells/perimeters.
A wall line count of 6 rather than 2 from the original Calibration Speed Tower at 300% scale, goes from 8 hours and 29 minutes, up to 10 hours and 15 minutes. However, the material used goes all the way up to 135g, compared to 78g.
Left: 2 Walls, Right: 6 WallsWe’ve tripled the number of walls in this print, but added almost twice the amount of material. The quality difference in terms of strength is extremely significant here so if strength is your goal, it’s a good choice to use.
Infill
Infill is definitely going to increase the amount of material extruded, which can be a huge difference depending on how high your infill percentage is.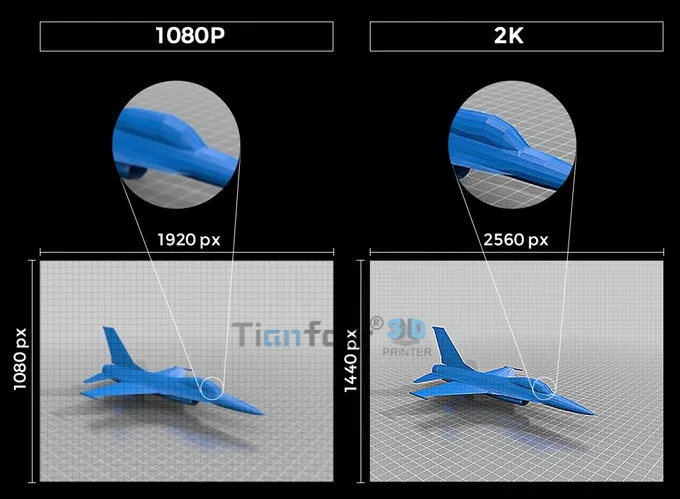 The difference between an infill percentage of 10% & 100% is extremely significant, especially in bigger parts.
For the 300% scaled tower, having 0 infill gives us a printing time of 4 hours 55 minutes with just 62g used.
Cubic infill pattern:
| Infill Percentage | Printing Time | Grams of Material |
|---|---|---|
| 5% | 6 hours 4 minutes | 66g |
| 10% | 6 hours 55 minutes | 70g |
| 20% | 8 hours 29 minutes | 78g |
| 30% | 9 hours 44 minutes | 86g |
| 60% | 12 hours 59 minutes | 111g |
| 80% | 15 hours 13 minutes | 128g |
| 100 | 18 hours 35 minutes | 139g |
Infill is also to do with strength settings, but can also have an impact on aesthetics, depending on the thickness of the walls, top & bottom thickness etc.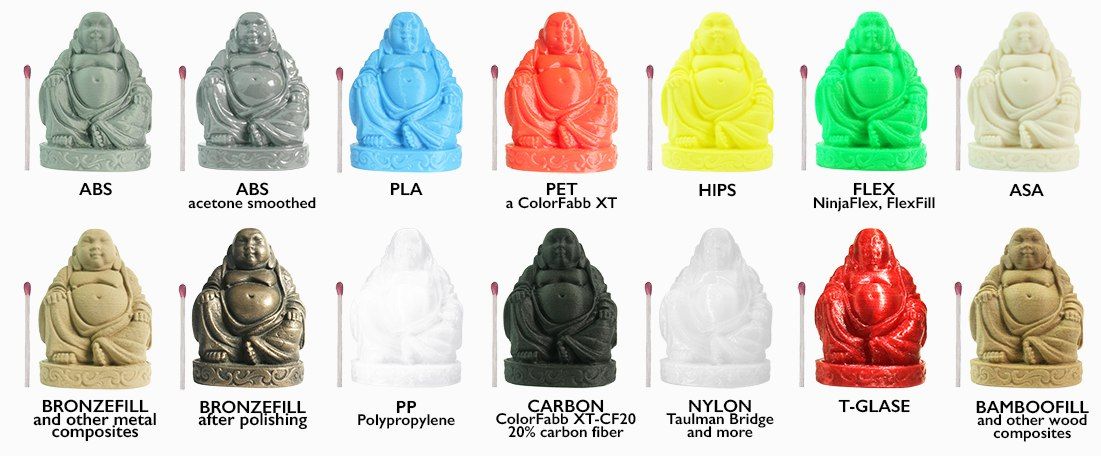 because you can sometimes see the infill pattern through prints.
Retraction
The retraction setting isn’t very significant when it comes to 3D printing time, but it can make a big difference to printing quality. The presence of stringing usually comes about when retraction settings aren’t tuned, or properly on at all.
Retraction is when your extruder pulls back filament within the printing chamber while moving to another area, so filament doesn’t accidentally leak out.
When you figure out this setting, it’s a blessing to your print quality and not so much a negative factor on print speeds.
Line/Extrusion Width
When using Cura settings, the difference between printing speeds makes a massive difference in just how long a print will take you. For example, when I slice a speed tower at 100mm/s I get an estimated print time of 1 hour and 1 minute.
On the other hand, a print speed of 20mm/s gives me a time of 1 hour and 54 minutes, which is almost double!
In Cura, they mention how slightly reducing the line width can actually result in better quality prints, so how much time does doing this add on to printing time?
With all else equal, decreasing line width to 0. 3mm instead of 0.4mm takes printing time from 8 hours and 29 minutes up to 9 hours and 36 minutes.
That is 509 minutes up to 576 minutes which is a 13% increase in printing time. Would this lead to a 13% increase in print quality? Pretty hard to say, considering quality can’t be quantified as easily as printing time.
It’s more so down to your perception with how smooth the layer lines look and how accurate the printed model looks to the sliced file.
Does this mean that speed affects the quality of your print? Yes, depending on what quality you exchange for printing time, but for the most part, a lower speed should end up with better quality prints.
It is also very important to note that printing too slowly, may cause heat to build up on the piece and cause warping of the plastic, this is especially true for PLA materials.
This means that to get the best print quality using the right speed is dependent on three things; the type of material, the kind of 3D printer and the settings of your machine.
Other Factors That Affect Speed Vs Quality
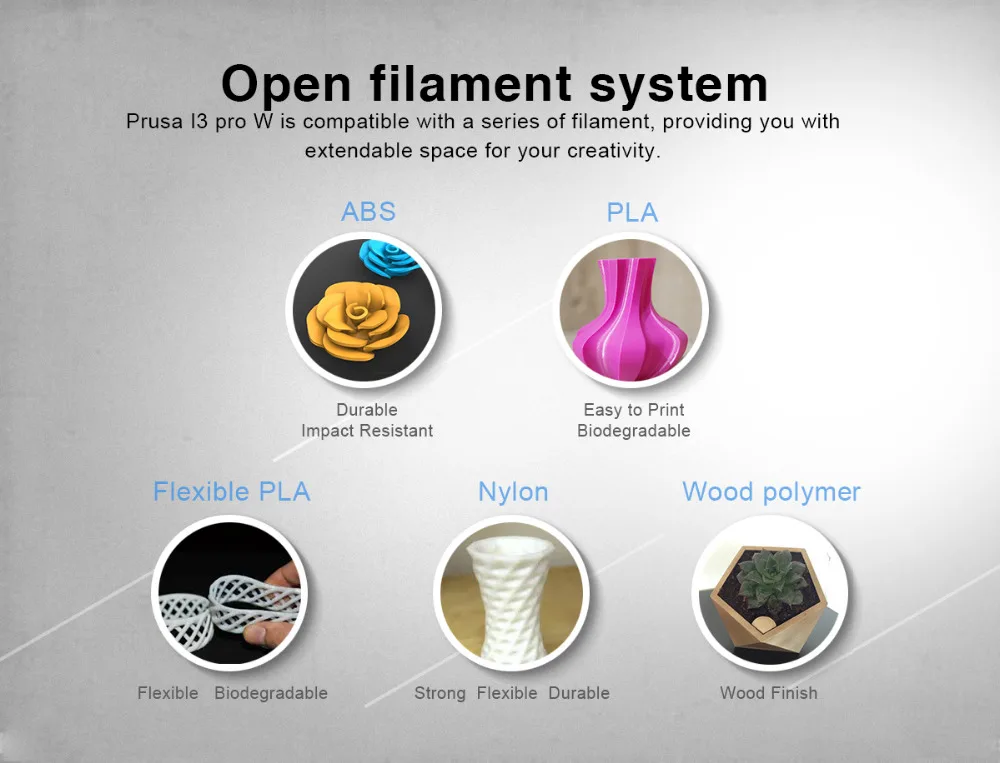
The Type of Material
Materials matter when it comes to determining speed VS quality.
There are various materials called filaments that you can use for printing. Each of these filaments when printed at the same speed can give varied print quality because of the difference in their texture and not because of the speed of your 3D printer.
What this means is that you can still print in high quality at a high speed and this is dependent on the kind of filament you choose. This is however not applicable to all printers.
The FDM for instance has a very hard limit when it comes to printing speed as filaments cannot be fed through the extruder beyond a certain rate.
Also, printing too slowly using a PLA material can cause warping and you definitely do not want that. This goes to show that printing slowly might be favorable on some filaments over some others.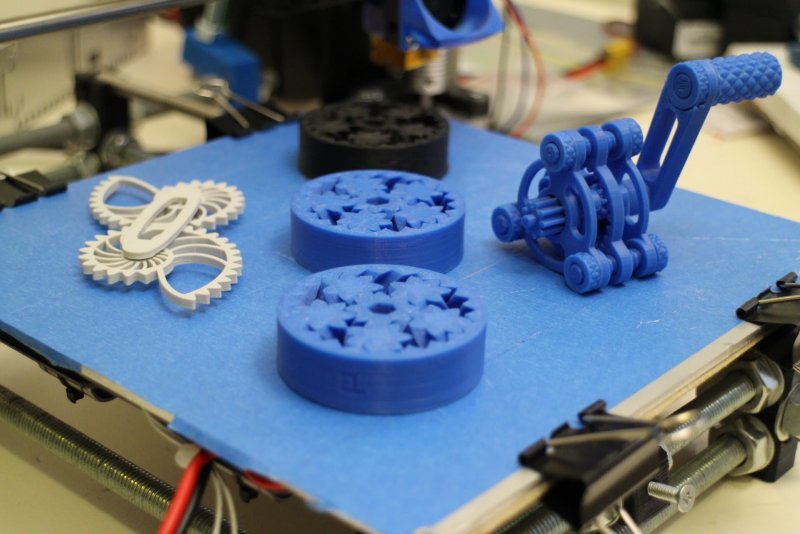
The Kind of 3D Printer
There is a need to reiterate that the quality of your print is determined by the speed of your printer but if you must print at a speed that is faster than what is the normal acceptable speed, that would then be determined by your machine’s ability to handle that speed.
For instance, a cheap Chinese printer if set at a higher speed should be expected to have a lot of design deficiencies, slops and maybe backlash.
However, a well-designed delta or Core-XY 3D printer with a Bowden setup can give you a faster speed without a decrease in quality if you improve the speed by decreasing the mass of your extruder.
E.g. moving to Bowden from direct drive. The real question, however, is how many 3D printers are true to their word of providing a faster printing time without compromising on quality?
There is no doubt that a premium 3D printer has a better potential of faster speeds, as well as higher quality than cheaper 3D printers. Make sure if quality and speed is what you are after, you are getting a solid, reliable machine.
The video above shows some pretty insane 3D printing speeds, probably the fastest you’ve ever seen!
Print profiles
This is a very useful tool you can use for slicing in 3D printing.
A print profile is basically a batch of settings that you save for the particular type of print you are going for. It is in this print profile that you can get to tweak the speed of the various filaments you choose to print.
This means you can have a specific print profile for every that every filament you use.
An example is, you can save a print profile for working with a TPU by tweaking or modifying printing temperature or speeds or any other parameter that you deem necessary to tweak. A print profile choice is based on the material and what works well with it.
You can have as much as 5 to 6 different print profiles that you can use on a regular basis and even have the different setups saved.
Why Printing Speed Affects Quality
While the concept of 3D printing is revolutionary and a lot of people are beginning to delve into this part of the industry, the slow speed required in printing materials still poses a problem for a lot of people.
This is especially true for manufacturers who have a large number of products to be printed.
Manufacturers would rather have their products massed produced in a factory than spend all that time waiting for a 3D printer to produce a high quality print.
What some other 3D printing enthusiasts do, however, is find a way to manipulate the speed of their machine and this lessens quality. It is quite understandable why a lot of them get impatient and try to do this.
On one hand, they do not understand how the speed of a printer should affect quality.
If you use top-notch filaments and have your printer set to give the best quality, how then does something as mundane as the printing speed of a printer affect the outcome of the whole printing process? Here’s why;
There has been a recent surge in the availability of 3D printers. Everyone who seems to be interested in this industry, can get better access to a 3D printer.
There are 3D desktop printers available everywhere and it is very easy and quite reasonably affordable to get your hands on one. The reason a 3D printer is affordable today, is one of the major reasons why fast speed affects print quality.
Following the sudden trend in 3D printing, manufacturers understood the impact price would have on the demand of 3D printers and decided to make it affordable for anyone interested.
What they did while building the regular 3D printer was to purchase cheap parts, parts that were especially flexible and light.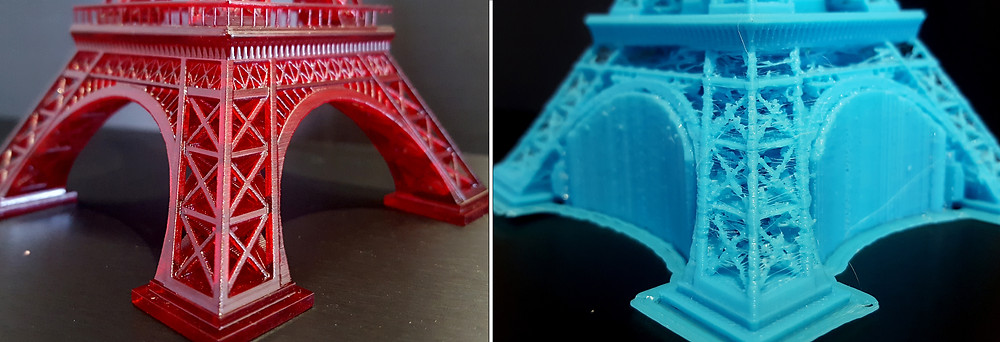 They did this in a bid to make 3D printers more affordable.
What this means is that if printing is accelerated, there would be some sort of movement in the printer because of the cheap parts.
These movements create significant vibrations which in turn causes poor print quality or even damages the whole print all together.
Do not mistake these cheap parts for substandard parts. Manufacturers only use more affordable options to make the 3D printer easily available and affordable for anyone interested in getting one.
Does this mean that a more expensive machine, with more expensive parts can print fine quality print at an accelerated speed without compromising on quality?
Does controlling unwanted vibrations result in better print quality? To these questions, we can safely answer yes. The development of 3D printers have focused on getting people into the field.
When manufacturers really focus on printing speed, without prioritizing ease of use and cheaper prices, 3D printers can print extremely fast. As technology progresses, we can only expect 3D printers to print faster, while keeping a high level of quality.
The Future of 3D Printing and Its Impact on Speed
The world is beginning to embrace this phenomenon and as such, scientists and engineers are willing to go the extra lengths to find ways of achieving the best print quality in the shortest time.
There have been varied inventions of algorithms and of 3D machines that have managed to find some sort of solution to this problem. Although these solutions are not yet widely embraced they seemed to have proven effectiveness on the speed of 3D printing.
Software Algorithm
There have been algorithms created to upgrade a 3D printer’s firmware, enabling an accelerated speed. E.g. the filtered B spline algorithm is said to make use the model of the printer’s dynamic to control the printer.
This particular algorithm is said to help prevent unwanted vibrations hence giving the printer the ability to print at a higher rate, mitigating unnecessary vibrations and thus producing a better print quality.
This algorithm was developed at the University of Michigan’s smart and sustainable automation lab and is said to be embraced by a lot of individuals.
Bigger, Better More Expensive Printers
The MIT laboratory for manufacturing and productivity recently built a printer that is said to be 10 times faster than the traditional desktop printer models and 3 times faster than a $100,000 industrial scale system.
With this printer, the MIT team printed a helical bevel gear in 10 minutes and also printed the frame of a pair of glasses in about 3 minutes and 40 seconds.
These algorithms and bigger printers prove that the future of 3D printing is giving room for the possibility of accelerated speed printing giving optimum print quality. There is a lot more innovations.
According to fastcompany.com, Icon, the winners of fast company’s 2020 world changing idea awards has built a very large 3D printer that is capable of printing the walls of a house in 24 hours.
Another story which originates in Mexico had 50 families move into the world’s first 3D printed community. The future of 3D printing is definitely accelerated speed, bigger printers and the possibility of using 3D printers to print just about anything.
Are All 3D Printers Slow?
Not all 3D printers are slow, since some can get up to some really high print speeds without compromising quality as much as other printers. Delta 3D printers are known to perform the best in terms of speed.
If you are wondering whether 3D printing is too slow in general, it is slow if you compare it to many traditional manufacturing methods. When you compare 3D printing speed when it comes to prototyping, you’ll find that 3D printing performs the best.
It is called rapid prototyping for a reason, so you can create 3D objects that started as a basic idea very quickly.
Some people ask, “can you 3D print too slow?” in terms of settings and speed. You can 3D print too slow since the filament in the nozzle can overheat if it stays in the nozzle chamber for too long. You can decrease your printing temperature if you want to print at a slow speed to account for this.
Conclusion
Print speed is ultimately a balance between varied factors, all of which are just as crucial as the others. You need the right filament that can flow and set at high speeds and you also need a machine that is mechanically designed to print at higher speeds if you must print at a higher speed.
The general rule of thumb however in achieving the best quality print as of now, is that the lower the speed, the better the quality.
Whether or not you decide to find a machine that promises you a faster print time, speed cannot be tweaked past a certain mm/s for every machine. What this means is that irrespective of any machine or filament you choose, the slower the speed of the 3D printer, the better the quality.
3D Print Speed vs Quality; Best Settings! – 3D Solved
We all want to get the best out of our 3D printed models, both in terms of quality and speed. The problem is most of the time quality and speed don’t go hand in hand and finding the sweet spot between quality and speed will take some trial and error for every printer and filament type.
In this article, I will talk about how much impact print speed has on print quality, the most common problems, and how to find the best settings.
Table Of Contents
- Does Printing Speed affect the Print’s Quality?
- Why does it affect printing quality?
- Best Speed Settings for 3D Printing
- Printing Speed
- Retraction Speed
- Travel Speed
- Print Speed and Print Duration
- Problems that arise when printing too fast
- Weak Layer Adhesion
- Layer Shifting
- Weak Infill, Under-Extrusion
- Ringing
- Bridging
- Other ways of achieving faster Print Times
- Use a Larger Nozzle
- Print with a thicker layer height
- Lower the Infill percentage and the number of shells
- Does Filament type affect the Print Speed?
- How fast can a 3D printer print?
- Ender 3 (Pro and V2) Speed settings
- Check out our recommended products section
Does Printing Speed affect the Print’s Quality?
More often than not the print speed has a significant impact on print quality.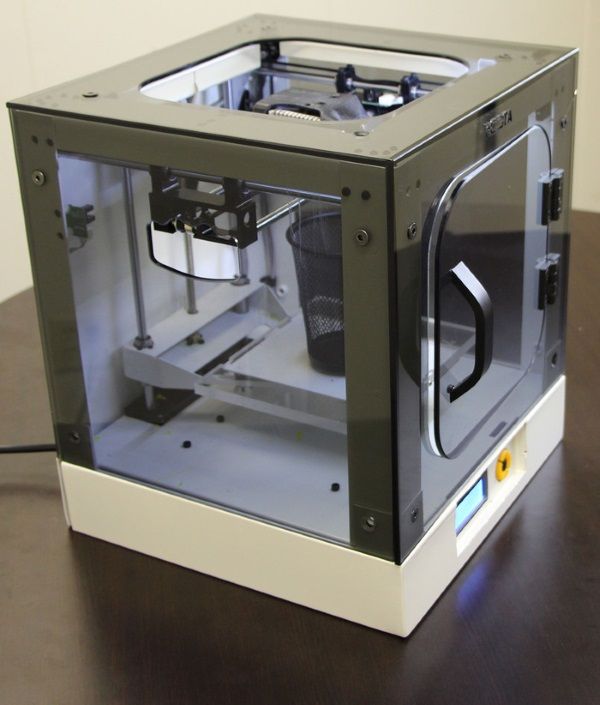 As a rule of thumb, slow print speeds produce better quality prints. Achieving fast printing times without losing printing quality is possible, but that will depend on your 3D printer’s type and the quality of the materials used.
Why does it affect printing quality?
The degree to which printing speed affects your print’s quality will be tied to the machine’s ability to handle that given speed. Most consumer-grade 3D printers are not made with fast printing times in mind. These machines are usually made with cheap materials to make them affordable to everyone. As you increase printing speed these design and material deficiencies are more noticeable.
Fast movements from the extruder generate a significant amount of vibrations and the results are poor quality prints. Bowden setups have less weight on the extruder thus are more stable and mitigate this issue. A good quality 3D printer with a Bowden setup can achieve fast printing speeds without losing quality.
Besides the 3D printer’s quality, we need to consider the filaments used to print.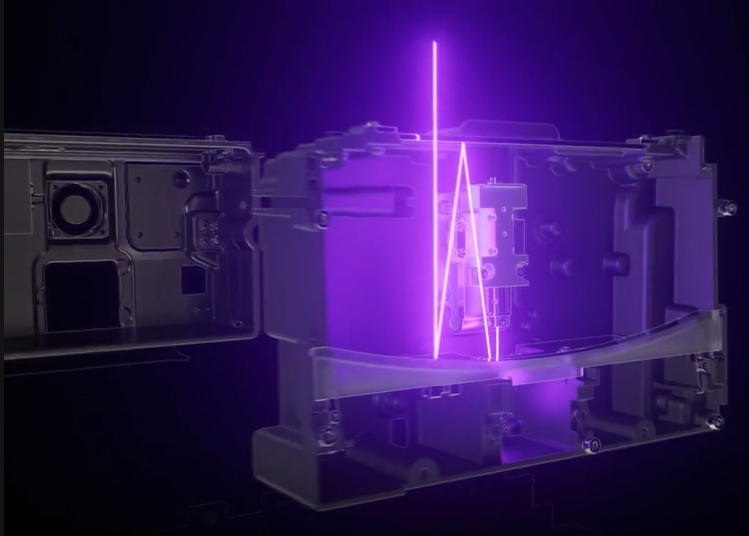 Even if the 3D printer can handle a given printing speed, the filament can only melt so fast thus limiting the extrusion flow rates. Different types of filament printed at the same speed yield disparate results as they possess different physical and chemical properties.
Best Speed Settings for 3D Printing
In 3D printing, the best settings vary for every maker as optimal settings depend on many factors such as the 3D printer model, filament, and environmental conditions.
Printing Speed
Printing speed controls how fast the nozzle moves across the build plate while printing. Usually, slow printing speeds produce better quality results as high speeds can lead to ringing and under-extrusion issues. To find out the best print speed settings for your machine download this Speed Test Tower.
In the link, you will find all the instructions on how to set up the Speed Test Tower print. Basically, this test increases print speed as the tower moves up so you can see the difference in print quality at a certain speed and figure out the best setting for your 3D printer.
Retraction Speed
Retraction speed determines how fast the printer retracts the filament through the nozzle while changing the printing position. This is done to avoid filament leaks. If the retraction speed is set too low, you will see stringing and blobs on your models. On the other hand, if the retraction speed is set too high the drive gears that feed the filament might damage the filament and mess with the feed flow.
To find out the proper retraction speed settings for your printer download this Retraction Test. Print a few tests, starting with a retraction speed of 25mm/s, and increase it by 5mm/s as long as you see good results. The speed that yields the cleanest result should be your optimal retraction speed.
Travel Speed
Travel speed is the speed at which the nozzle moves while it is not extruding the filament. If the travel speed is set too high the printhead movements can generate some serious vibrations which lead to ringing or even layer shifting issues.
To get the optimal travel speed settings for your printer download this Test (the same model used to test retraction speed). For the first print, use 100mm/s travel speed and if the surface looks good you can repeat the print increasing travel speed by 5mm/s. You can repeat the process until you see defects on the surface.
Print Speed and Print Duration
High printing speeds can drastically decrease the print duration. Using Cura’s Draft profile, I sliced a Benchy using different printing speeds to see how much the printing duration decreases. These are the results:
| Print Speed | Print Duration |
| 20mm/s | 164m |
| 30mm/s | 114m |
| 40mm/s | 90m |
| 50mm/s | 76m |
| 60mm/s | 66m |
| 70mm/s | 60m |
| 80mm/s | 55m |
| 100mm/s | 49m |
| 120mm/s | 45m |
| 140mm/s | 42m |
As you can see, the first speed increments are the ones that have a higher impact on reducing print duration. This happens because depending on the overall shape and size of the printed object the extruder might not be able to reach these higher speeds.
Problems that arise when printing too fast
Signs of under extrusion.Weak Layer Adhesion
Even if the 3D printer can handle a high print speed the filament still needs time to properly bond. As the filament is laid down, it needs to stick to the print bed and fuse with the other layers to maintain the desired shape. If the printer is going too fast, the filament does not have the time to create a strong bond resulting in weak layer adhesion.
Layer Shifting
When printing at a high speed there is a chance the X, Y, Z axis motors fail due to the excess stress and misplace a layer. This happens because the motors are being forced to move at a higher speed than they can handle. Layer shifting can happen gradually or as one big displacement.
Weak Infill, Under-Extrusion
If we are printing too fast the extruder might not be able to keep up and end up extruding less filament than the software thinks it is extruding. This under-extrusion usually produces a weak infill and thus weakens the overall 3D-printed object structure as it can easily break. We can identify this issue if we see the layers are too thin and the infill is stringy.
Ringing
When the printer is moving too fast and needs to make a sudden change in direction, like in a sharp corner, the inertia of the extruder can cause a considerable amount of vibrations which cause the ringing. Ringing is a visible defect of an unwanted pattern of lines on the surface of the 3D-printed object.
Bridging
High printing speed can decrease bridging quality. Whenever a print needs to connect two columns with a suspended filament extrusion (bridging), the filament needs time to stick to the previous layer. If the extruder is moving too fast the filament will not be able to adhere in time to bridge a gap.
Other ways of achieving faster Print Times
Use a Larger Nozzle
With a large diameter nozzle, you sacrifice detail quality in exchange for decreasing print duration as a larger nozzle allows more filament to be extruded at once.
Print with a thicker layer height
The thicker the layer height of your 3D printed object is the fewer layers need to be printed to finish your print. The downside to thicker layer heights is the loss of resolution in your model.
Lower the Infill percentage and the number of shells
Lowering infill percentage and the number of shells reduces the overall strength of a 3D printed object. As we decrease these settings the amount of extruded material is reduced thus we get faster print times.
Does Filament type affect the Print Speed?
The type of filament used for printing plays an important role in print speed. The physical and chemical properties vary for every kind of filament and thus the recommended print speeds for each one of them.
These are good printing speeds for some of the most commonly used filaments:
| Filament | Speed |
| ASA | 20 / 50mm/s |
| ABS | 40 / 80mm/s |
| PETG | 40 / 90mm/s |
| PLA | 30 / 90mm/s |
| NYLON | 40 / 60mm/s |
| HIPS | 25 / 55mm/s |
| TPU | 10 / 30mm/s |
Keep in mind that you should always check your filament spool for the best speed settings as these settings may change depending on the manufacturer.
How fast can a 3D printer print?
As I said previously, the maximum speed that a 3D printer can achieve depends on the quality of its components. For most common consumer-grade FDM printers the average print speed is around 40mm/s to 80mm/s while some better ones are able to achieve 100mm/s to 150mm/s.
I would like to make a special mention of the VORON project. This is a non-commercial project which handles users the opportunity to build their own printer. The plans are free open-source and these wonderfully engineered machines can achieve impressive print speeds. The build documentation is great and you can download the assembly manual from their website.
1000mm/s print with a Voron 3D Printer.
Ender 3 (Pro and V2) Speed settings
Since the Ender 3 is such a popular printer I decided to run a couple speed tests as well as some benchys and calibration cubes at different speeds on it to find out how fast I could print reliably without compromising on quality too much.
Here’s how to the prints turned out (my phone’s camera isn’t the best at detecting ringing and ghosting, so you may have to take my word as far as which one turned out better):
Speed test:
Speed test from 20mm/s up to 100mm/s.While it may not be as obvious in the image, at 200mm/s there was absolutely no ghosting going on and 40mm/s was very similar. However, from 60mm/s onwards you can clearly see more ghosting.
When looking at the same print from the sides, the height where it was printed at 20mm/s and 40mm/s is a bit smoother than all the other parts as well.
Benchy test:
Left benchy printed at 500mm/s, Right benchy printed at 90mm/s.While it may not be very apparent on this image, the Benchy printed at 90mm/s had a bit more ghosting present and some small bulging layer lines, but the difference wasn’t as noticeable as I expected.
We created a recommended products section that will allow you to remove the guesswork and reduce the time spent researching what printer, filament, or upgrades to get, since we know that this can be a very daunting task and which generally leads to a lot of confusion.
We have selected just a handful of 3D printers that we consider to be good for beginners as well as intermediates, and even experts, making the decision easier, and the filaments, as well as the upgrades listed, were all tested by us and carefully selected, so you know that whichever one you choose will work as intended.
90,000 at what speed are the FDM 3D printers
with what resolution 3D printers are printed
threaded parts of the printed parts
6 safe ways to remove 3D scribes
9000 3D-spent at home gives us the opportunity to give us the opportunity to produce given objects at a very low cost. However, the time it takes to turn a 3D model into a physical object is not as short as one might think.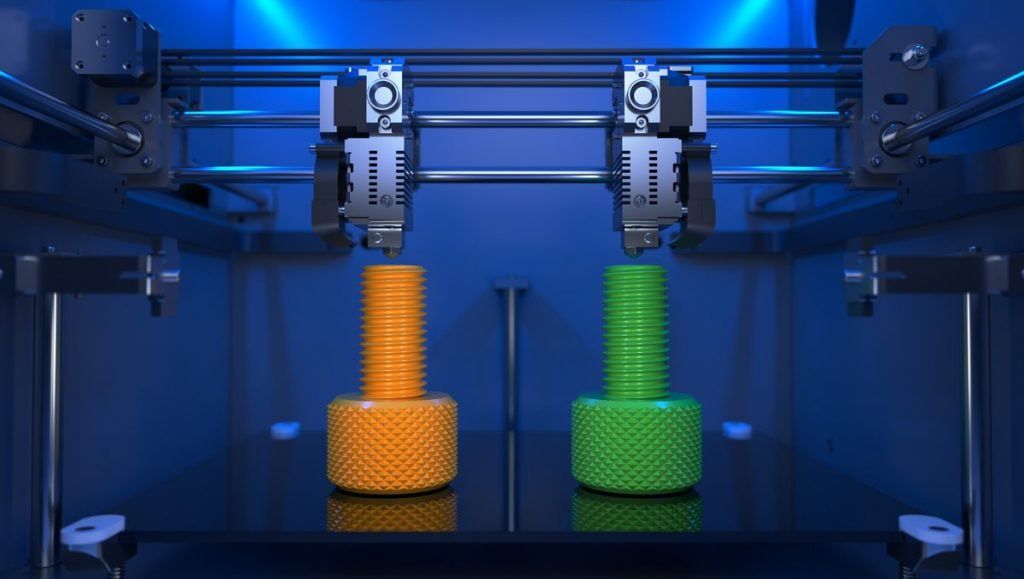 The size and quality of the print has a decisive influence on the speed of printing, and it can take many hours to get the final result. In fact, various tests show that printer speed has a much smaller effect on print time than size and quality settings. nine0003
 Desktop printers
3D print speed settings
In general, there are currently three blocks of speed settings supported by 3D printers. The first block includes speeds from about 40 to 50 mm / s, the second - 80-100 mm / s, the fastest printing is carried out at about 150 mm / s. Some printers can even print at speeds over 150mm/s.
Usually, though, faster 3D printing means lower quality. At speeds above 150 mm/s, the quality drops significantly, and problems can arise, since the filament is prone to slip at such speeds. nine0003
How to set the print speed
Typically, the 3D print speed is set in the slicer software used to prepare the 3D model for printing. In Cura, for example, you just need to enter the desired print speed in the Print speed field in the Basic tab (in previous versions, you first had to switch to the Advanced mode and open the Speed tab).
Cura calculates the duration of the print process based on print speed and quality settings. nine0040
As soon as the print speed ( Print speed ) or other setting is changed, Cura recalculates the print time and displays it (see arrow). Cura's calculations turn out to be very close to real-time printing.
How long does 3D printing take in practice?
To find out how fast 3D printers actually print, two popular desktop printers, the Ultimaker 2 and the Wanhao Duplicator 6, were tested on two more or less complex objects.
These two models were printed:
3DBenchy. This 3D model is designed to test and measure the speed of 3D printers; it is quite complex and requires attention. The boat is 6 cm long, 4.8 cm high and 3.1 cm wide. Here you can get the 3DBenchy STL file for testing for free.
3DBenchy's 3D printing speed is relatively slow, the model is quite difficult to print (Photo: 3DBenchy. com).
com).
Universal tablet stand (up to 1.2 cm thick). The stand is 14 cm long, 4.2 cm high and 9.8 cm wide. The STL file is available for free on Thingiverse.
The stand is quite large and difficult to print (Photo: Thingiverse).
These objects were printed at two speeds, 100 mm/s and 50 mm/s, at similar settings. Here are the results:
Printer
Model
50 mm/sec
100 mm/sec
Ultimaker 2
3DBENCHY
h 09 min 9 min.0003
1 h 55 min
Wanhao Duplicator 6
3dbenchy
2 h 13 min
1 h 51 min
Ultimaker 2
Stand
9000 H 23 min4 h 36 min 9000 min
Wanhao duplicator 6
Stand
6hrs 27mins
4hrs 45mins
- For the smaller models, the difference between slow and fast print is not particularly striking: almost 2.25 hours versus less than 2 hours.
 Unless you're insanely short on time, choose a slower speed for better print quality. nine0122
 - For large models, the print speed varies more significantly: 6.5 hours versus 4.75 hours.
Cunning. If you don't have your own 3D printer, download the free Cura software from the Ultimaker website. Cura has profiles for most desktop printers (FDM), so you can check how long it takes to print a specific 3D model on a particular device - just import the STL file and play with Cura settings. To try another 3D printer, select Machine > Add new machine.
Does high-speed sintering promise the fastest 3D printing?
On an industrial scale, even more impressive prospects dawn on the horizon. The University of Sheffield has announced that its scientists have built a £1m-funded 3D printer that can produce plastic parts as quickly as traditional mass-production methods such as injection molding.
The process is called high-speed sintering (HSS), which melts the polymer layer by layer (similar to the additive printing process), but instead of using lasers, HSS prints on a powder substrate with infrared-absorbing inks. After the layer is printed, it is exposed to infrared radiation, the ink-coated powder is heated, resulting in melting, while the non-irradiated powder remains cold. nine0003
A team led by Prof. Neil Hopkinson claims that their machine is capable of producing parts up to 1 m³, i.e. with a washing machine, which is three times more than existing printers can. The print speed is dependent on the size of the object, however, Hopkinson estimates that small components will be created at speeds of less than one second per part.
What use is this to us? The good news is that HSS technology has been licensed to industrial 3D printer manufacturers on a non-exclusive basis, and new machines are expected to hit the market in 2017. This means that in the near future we can expect the transition of this industrial technology to the "home" level. nine0003
3D printer speed: how to set it right?
3DPrintStory 3D printing process 3D printer speed: how to set it up correctly?
3D printing is often referred to as "rapid prototyping". The irony is that the creation of individual models can take up to several hours. Fortunately, 3D printing speed can be adjusted to reduce production time, but setting the speed incorrectly can also lead to defects and 3D printing failures. nine0003
In this article, we will introduce you to the general speed settings of a 3D printer. By the end of this guide, you'll know how to find the perfect balance between print speed and quality. Please be aware that different 3D printers, slicing software and materials may behave differently and retesting may be required.
So, run the slicing software and let's get started!
3D Print Speed
3D Print Speed is the main setting that affects the printing of your 3D model. As the name suggests, print speed determines how fast your printer's motors move. This includes the motors that control the X and Y axes, as well as the motor(s) of the extruder. nine0003
To test your 3D printing speed, download the test model above to determine the optimal print speed. The description of this 3D model also contains recommendations for speed settings. In essence, the experiment is that the same model will be printed, but at a gradually increasing speed, which will allow you to visually determine the optimal speed setting.
Too low a 3D print speed can cause deformation due to the nozzle being on the plastic for too long. If too fast, other overheating artifacts may appear, caused by insufficient cooling, as well as extrusion and poor adhesion of the layers. The optimal speed should be as fast as possible for your 3D printer without compromising print quality too much. This 3D model will help you determine what speed will be optimal for your particular case. nine0003
To optimize print speed, this parameter is usually divided into several sub-parameters:
- Outer Wall/Shell 3D Print Speed : This parameter controls the print speed of the outer perimeter of the model. Usually it is slightly reduced to improve the surface quality.
- Inner Wall/Shell 3D Print Speed : This parameter controls the print speed of the inner perimeter(s) of the model. It is usually the same as the overall print speed to reduce print time while maintaining durability. nine0122
- Infill 3D Print Speed : This parameter adjusts the infill print speed of the model. This is usually the same as the overall print speed to reduce 3D printing time while maintaining strength.
- Top/Bottom 3D Print Speed : This setting adjusts the print speed of the top and bottom of the model.
 Usually it is slightly reduced to improve the surface quality.
Travel speed (idle)
Travel speed controls how fast the printer print head moves when it is not extruding plastic. Increasing the movement speed can save a lot of 3D printing time, but increasing it too much can lead to many defects, including misaligned layers (and therefore 3D printing failure). nine0003
To determine the optimum idle travel speed for your printer, print this test pattern at various travel speeds, starting at 100 mm/s and working up in increments of 5 mm/s. Continue to increase the speed if the surface quality is acceptable, and decrease if the 3D print quality is deteriorating. Pay attention to defects such as mismatched layers.
Retract Speed
The Retract Speed controls how fast the 3D printer pulls material back before moving. This setting is critical for reducing material waste and improving 3D print quality. Too slow and you may be left with unsightly threads and blemishes on your models. Too fast and you can get excessive material wear on the extruder drive gear, resulting in voids. nine0003
To determine the optimal retract speed for your 3D printer, print this test model at various retract speeds starting at 25mm/s and adjusting in 5mm/s increments. Pay attention to the remnants of plastic in the form of a web, stretched between the spikes of the model. The ideal retract speed should be the maximum value that minimizes these artifacts without deforming the material in the feed mechanism.
To better tune the retract speed, this parameter is usually divided into two additional parameters:
Retraction Retract Speed : This parameter controls how fast the retract (actually pulling the thread back) occurs. This is usually the same as your overall retract speed and is set the same way.
Retraction Prime Speed: This setting controls how quickly the filament is re-feeded after the initial retraction in preparation for further printing. Increasing this speed will result in shorter 3D printing times and fewer defects due to prolonged exposure to heat on the plastic. However, increasing it too much can also cause the newly fed media to not heat up enough before printing resumes. For most cases, this setting should be left the same as Retraction Retract Speed. nine0003
To learn more about reducing retraction speed defects, see our separate guide to retract speed tuning.
Walls, infill and layer height
The speed of your 3D printer is not only affected by "speed". It is also significantly affected by how much and how thick plastic is extruded onto each layer of the 3D model. These settings are incredibly detailed, so we'll only cover general information about how each of them affects 3D print speed. nine0003
- Walls : The wall setting specifies how many perimeters of plastic are extruded to form the outline of your part. Increasing the number of layers increases the strength of the part, but also increases the 3D printing time.
- Infill : Infill is an internal structure designed to save material when 3D printing the interior of 3D models.
Learn more