Sandstone 3d print
Shapeways: Sandstone
Binder Jetting
Upload a model
Loading contents...
Show menu
Binder Jetting
Upload a model
Material info
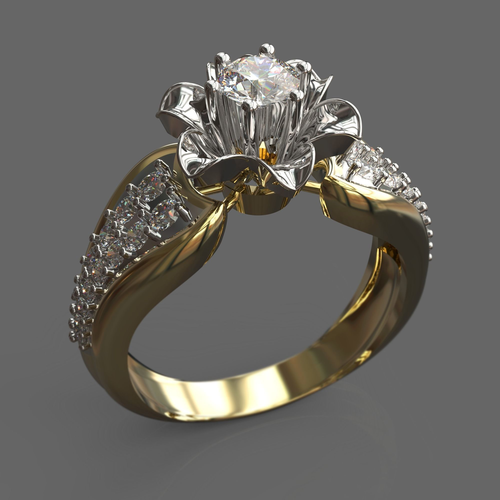
About Sandstone
Full Color Sandstone offers multi-color printing, making it the best material for figurines, architecture, medical models and other applications that require many colors. Although it’s a great material for decorative models, it is not well suited for handling due to its low strength and brittle nature.
Color & Finishes
Plain
Full Color
Technology
- Binder Jetting
Description
Material Highlights
multi-color, great value, great for architecture models
Design Guidelines
Bounding Box
Bounding Box Max
250 × 380 × 200 mm
Bounding Box Min
X + Y + Z > 10 mm
The bounding box is a 3D imaginary outline of a box that encloses the smallest area occupied by your model. Your model must be within the minimum and maximum bounding box sizes. If the size of the model is close to the maximum bounding box, then the printing orientation will be restricted.
Supported Wall Thickness Min
2.0 mm
Unsupported Wall Thickness Min
3.0 mm
A supported wall is connected at least on two sides of the wall, while an unsupported wall is connected only on one side of the wall. Walls that do not meet the minimum requirements may not survive printing and cleaning processes. Additionally, models may still be rejected based on the wall geometry of the model. Please consider the size of your model and reinforce the walls or add support structures as needed as minimum guidelines will not always be adequate for large models.
Supported Wires Min
2.0 mm
Unsupported Wires Min
3. 0 mm
0 mm
A wire is a circular, rectangular or even triangular feature that is thinner in its unconnected directions than its length. A supported wire is connected at least on two sides of the model, while an unsupported wire is connected on one side of the model. Wires that do not meet the minimum requirements may not survive printing and cleaning processes. Additionally, models may still be rejected based on the wire geometry of the model. Please consider the size of your model and reinforce the wires or add support structures as needed as minimum guidelines will not always be adequate for large models.
Details
Details Min Embossed
0.4 mm high & wide
Details Min Engraved
0.4 mm high & wide
For text, the ratio between width and depth, should be 1:1 and sans-serif fonts are preferred for line weight consistency.
Escape Holes
Single Escape Hole Diameter (Min)
25 mm
Multiple Escape Hole Diameter (Min)
15 mm or 10 mm when there are four or more escape holes
Escape holes are necessary to empty the support material of a hollow model. Two escape holes at the opposite ends of the model is optimal for the support removal process. Please consider the size of your model and make the escape holes bigger or add more escape holes as needed as minimum guidelines will not always be adequate for large models.
A single escape hole at the end of a cavity will not allow material in the corners near the escape hole to fully escape. So we recommend multiple escape holes at both ends of the cavity.
Clearance
Min
0.9 mm
Clearance is the space between two individual parts in a model.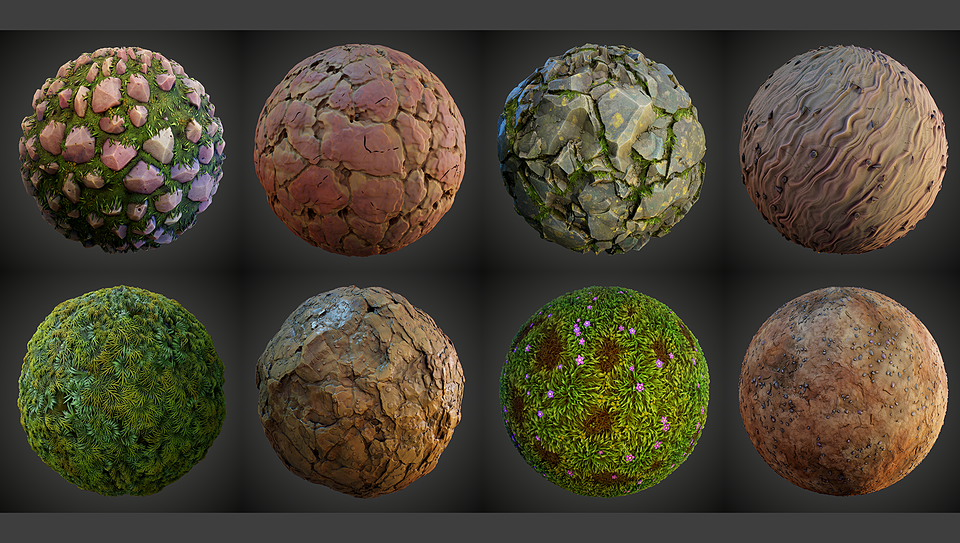 If the space among the individual parts do not meet the minimum clearance, then parts can fuse together or can be difficult to clean. This is important for movable pieces like hinges, gears, etc.
Interlocking & Enclosed Parts
Interlocking
Yes
Enclosed
Yes
Accuracy
Accuracy ±0.5 mm
Stay up to date on promotions, case studies, and more.
Newsletter Sign up
Stay up to date on promotions, case studies, and more.
Email Address
Sandstone 3D Printing - Simply Explained
ADVERTISEMENT
Table of Contents
Experts are consistently making progress in the field of additive manufacturing. From desktop printers to full-color printing, we have come a long way. You heard it right. Colorful models are possible to print. And, Sandstone 3D printing offers users the opportunity to create parts that are presentable with visibly pleasing aesthetics.
Sandstone is a material that is popularly known for its contribution to the construction sector. Commonly used as an additive with grindstones and other construction mixtures, the material possesses an imperative role within the sector. And, the material can be 3D printed. In addition, the models made using Sandstone 3D Printing can have multiple colors.
Using full-color sandstone printing, users can certainly add more depth to their art. Hence, without much further ado, let us just jump to the details.
What is Sandstone 3D Printing?
There are two 3D Printing technologies that can help print with Sandstone: ColorJet and binder jetting 3D printing. During the printing process, the grains fuse together with the help of a binding agent. The printed parts are brittle and require further processing.
Talking about its composition, the material is mostly a combination of quartz mixed with tiny grains. Popularly known for its unique hardness along with its chemical stability, Sandstone exhibits great mechanical properties.
Moreover, it can go through a variety of recycling processes, ensuring different results to the users. Hence, users can print Sandstone models with varying texture, color, hardness, and porosity.
Sandstone printing does have a few limitations too. For instance, printed parts using this material are usually brittle. Hence, you cannot use these 3D models for mechanical applications or, for creating models that must go through stress and high pressure.
In short, the 3D Printed parts are mostly for show. Either you are creating a figurine, a decorative item, or a prototype for testing the design appearance, you can definitely use Sandstone. Otherwise, it is best to find other alternatives which happen to be the right fit for your needs.
ADVERTISEMENT
How to Print with Sandstone?
Creating 3D models using sandstone is gaining huge popularity. However, it is not possible to create Sandstone parts with just any 3D Printer. On the contrary, there are two best-suited 3D printing processes that help print with this material.
Sandstone 3D Printing Using Binder Jetting
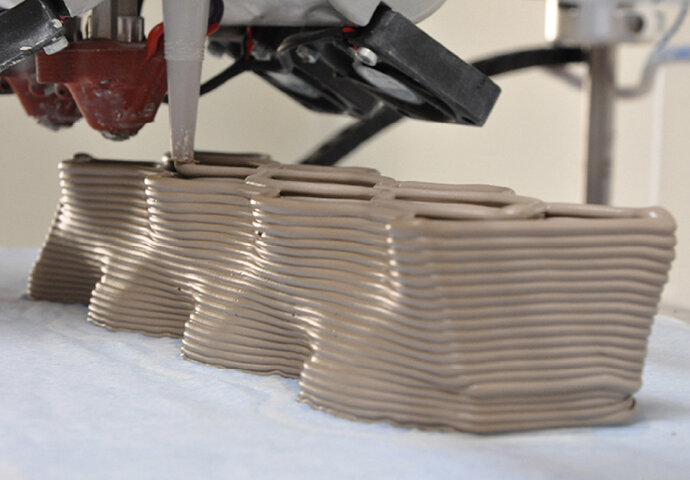
The process starts with spreading sandstone over the print bed. To fuse the particles together, the machine involves the inkjet nozzles, looking similar to the ones used with 2D printers.
The nozzle passes around the bed surface and keeps depositing droplets of binding agent selectively. This agent fuses the powder particles.
If you wish to work with a full-color Binder Jetting, along with the binder agent, the nozzle also sprays the colored ink. Usually, the drops are approximately 80 μm in diameter. Therefore, users can achieve commendable resolution using this technology.
After each layer completes, the build platform moves one layer downwards. This is when the recoating blade again comes into action recoating the surface with the next layer of powdered material. This entire process keeps repeating unless the complete part is ready.
Later, the printed part is left encapsulated inside the left powder. This helps in offering some extra strength to the part. Hence, the process is called curing. After a sufficient waiting period, the part is removed and the excess material is removed using pressurized air.
The parts created using binder jetting are in a “green” state initially, right after they leave the 3D printer. The green state is because these parts do not have a huge strength to withstand pressure. And, carry relatively poor mechanical properties. Resulting in very brittle as well as highly porous parts.
Hence, these parts must go through post-processing treatments such as sintering, infiltration, etc, for gaining strength.
What’s interesting is that the process does not require any support structure.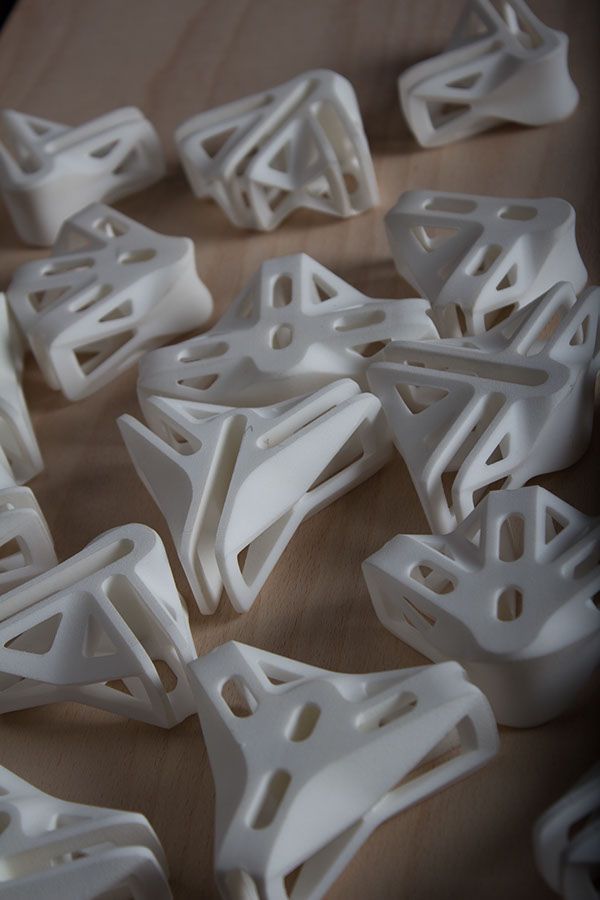 With excess powder supporting the 3D model, it is easy to get through with difficult designs as well. The powder itself acts as a supporting structure for all the models printed using this technique.
Just remember, you cannot create sandstone parts for “closed” prints. Not only will the resultant part be too expensive but it will trap the excess material inside of it.
ADVERTISEMENT
Sandstone – Colours and Textures
The material comes in different textures and color options. Either you can choose for a plain design with no added color. Or, you can also go for full-color printing. Depending on your part requirements, you can choose the most suited printing option.
When it comes to texture, you can attain two different results with Sandstone 3D Printing. The first one is the natural texture. This would provide your part a slightly rough finish with matte colorings.
On the other hand, the glossy texture would be smoother to touch and will allow users to enhance their part’s color. These parts are comparatively more resistant to moisture.
Sandstone 3D Printing – Design Guidelines
There is no doubt that Sandstone 3D Printing is a very delightful experience. Apart from letting users create impressive and colorful 3D designs, the process is easy to accomplish as well.
However, you will need a few tips to master the complete process. So, here are some guidelines you must follow when working with Sandstone.
Bounding Box
What is meant by a bounding box in terms of 3D printing? Well, it’s the imaginary outline in the shape of a box. This box encloses the minimum and maximum area limits that your model can occupy. In short, your 3D parts should not exceed the maximum bounding box limit.
At the same time, these parts must occupy an area as big as the minimum bounding box limit. For designs that are closer to the maximum bounding box, users must limit the printing orientation for the successful printing of the models.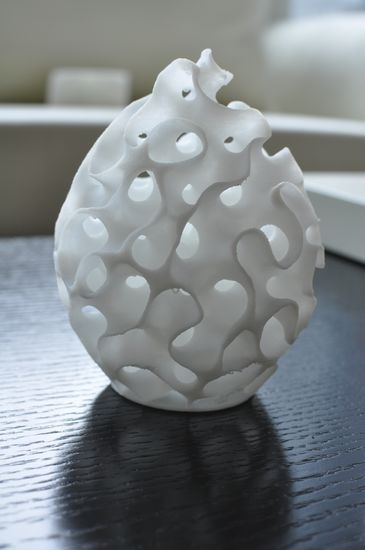
In the case of Sandstone 3D printing, the maximum bounding box must be around 250 × 380 × 200 mm. To calculate the minimum bounding box, one must make sure that X + Y + Z is greater than 10 mm.
ADVERTISEMENT
Wall Thickness
There are two parameters when it comes to wall thickness: Supported wall thickness and Unsupported wall thickness. While the supported wall is the one that connects to at least two sides of the wall, the unsupported wall is the one that connects only from one side.
The minimum wall thickness for the supported wall is 2 mm while for the unsupported wall is 3 mm. And, the users must meet these requirements.
If you do not meet the minimal wall thickness requirements, your prints will fall. Or else, if you anyhow complete the printing process with success, the part won’t be able to stand the cleaning processes.
Escape Holes
Why do we need escape holes in Sandstone 3D printing? Because these holes help clear the excess material left behind inside the hollow model.-650x650_666.jpg) For best results, you can create two escape holes, designed at the opposite ends of your 3D part. This easily helps remove the excess material.
For best results, you can create two escape holes, designed at the opposite ends of your 3D part. This easily helps remove the excess material.
For different sizes of parts, the need for the number and sizes of escape holes will vary too. Do not forget to consider your part’s size before planning the escape holes.
If you are using a single escape hole, the minimum diameter must be 25 mm. On the contrary, for multiple escape holes, the minimum diameter could vary from 15 mm to 10 mm, depending on how many you use and what is the size of your design.
ADVERTISEMENT
Clearance
In 3D printing, clearance specifies the space that exists between two individual components of a part. In case you do not allow the minimum clearance between two different components, they may end up fusing together or would really be complex to clean. Especially, meeting the minimum clearance is imperative for parts that are movable. For instance, gears, hinges, and others.
For Sandstone 3D Printing, the minimum requirement for clearance is 0.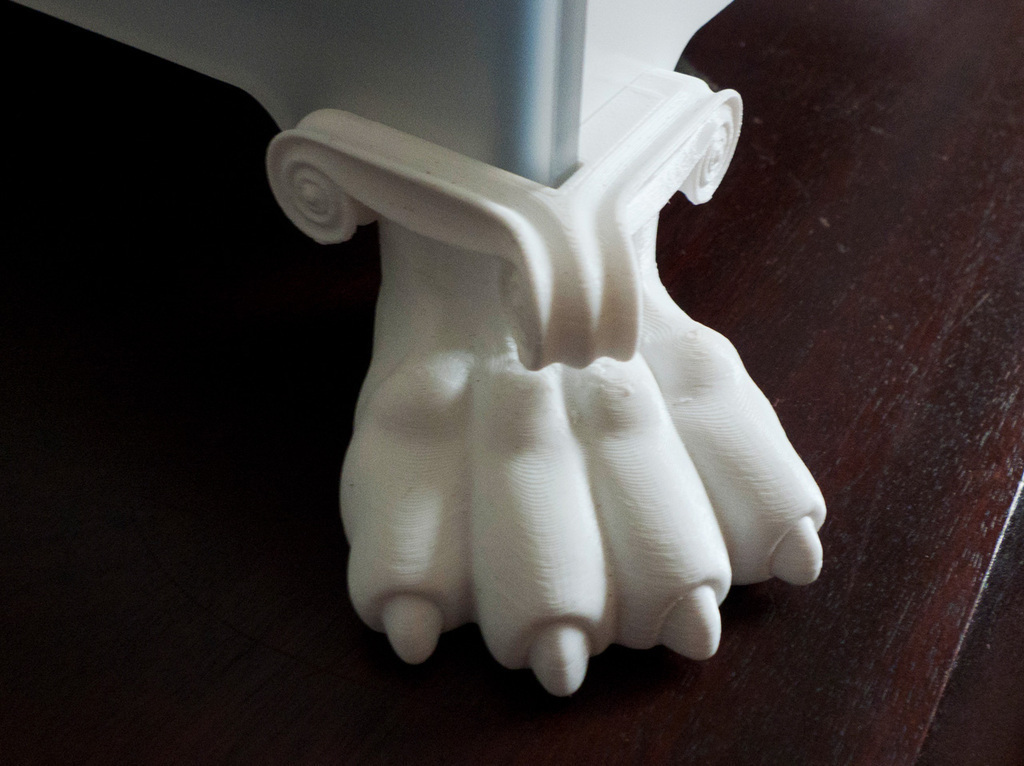 9 mm.
9 mm.
Watertight Models
When printing with Sandstone, users must ensure that the design is water-tight. Hence, the shell of the model should not bear holes. And, one can connect all the vertices for adjacent mesh faces.
Sandstone 3D Printing – Pros and Cons
Being a very useful material, Sandstone 3D printing is highly popular. However, the parts do carry a few limitations that make these models unsuitable as functional prototypes.
PROS:
- The property of the material helps in the quick and easy absorption of inks. Hence, the parts can be printed in full colors using Sandstone.
CONS:
- Sandstone parts are not waterproof. Hence, not suitable for models needed for outdoor applications.
- These parts have a rough surface.
Recommendation for 3D Printers to Print with Sandstone
Here are a few recommendations if you are really looking forward to jumping into Sandstone 3D Printing.
ADVERTISEMENT
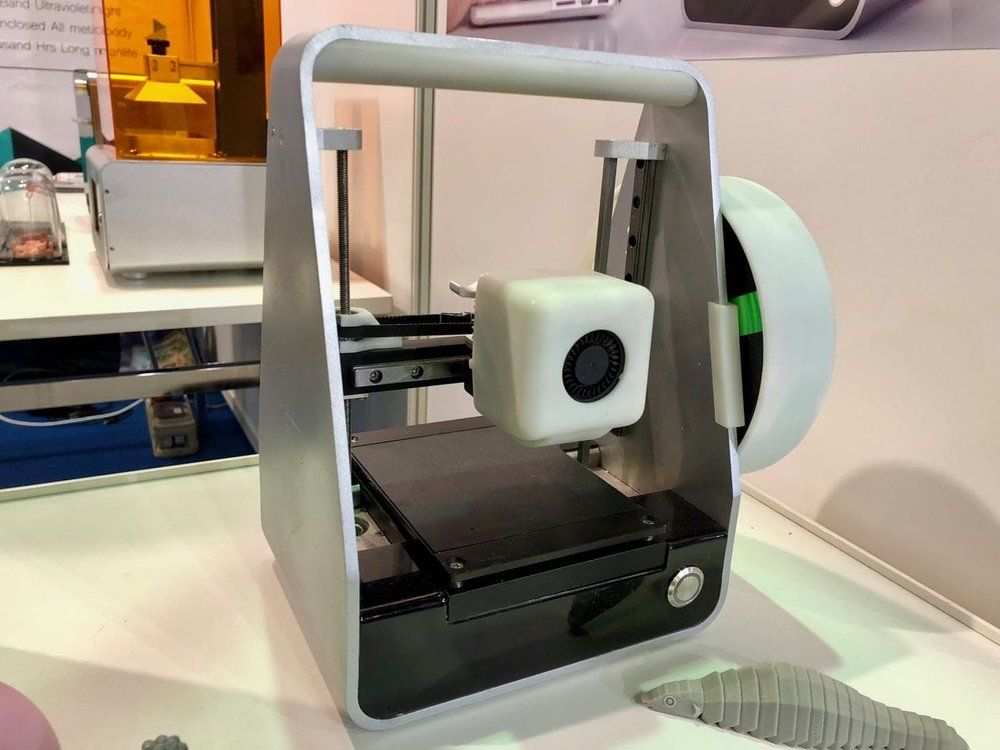
ComeTrue T10
The ComeTrue T10 is a full-color Sandstone 3D printer. The machine works with neutral sandstone that is plaster-like powder. To bind or color this base material, the printer uses ComeTrue’s proprietary liquid binding agent.
For removing the excess powder, the printer also has a dry vacuum unit. This is available separately though. The last step is to cover the printed model inside a liquid infiltrant. This further enhances the strength of the part after you leave it to dry, once taken out of the liquid.
Using the machine, users can create precise parts made of sandstone. In addition, the parts are colorful and very attractive.
Based on Binder Jetting, the printer offers a build space of 200 x 160 x 150 mm. The printer itself occupies a space of 800 × 620 × 700 mm and weighs 60 kgs.
Although there are many perks available with the 3D Printer, one might feel a little disappointed with its target price. It costs around $30,000. Hence, not everyone can afford to buy the machine. For those who can, the printer is a very suitable choice.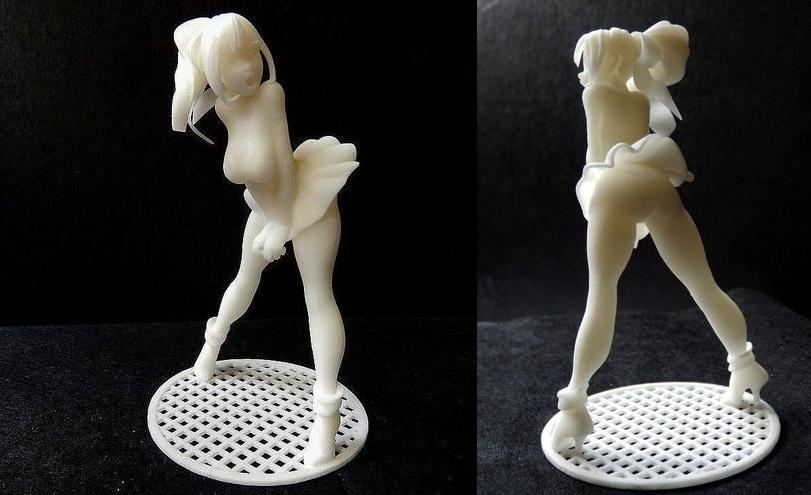
3D Systems ProJet CJP 660Pro
Another printer based on Binder Jetting allows for full-color sandstone 3D printing. With 254 x 381 x 203 mm build space, the machine ensures that the users get high-quality parts without much hassle.
Using its unique printing technology, CJP, a variant of binder jetting, the printer creates intricate parts with ease. You can print colorful models with high precision.
The printer involves core material and a binder to accomplish printing. After spreading the core material, the printer runs a roller on the build platform for creating even layers. Following this, the inkjet print heads selectively jet the binder over the core layer. Hence, solidifying the same.
ProJet CJP 660Pro 3D Printer is compatible with materials offered by VisiJet PXL 3D printing. Hence, producing full CMYK color parts. In addition, the part resolution is noteworthy.
There are many other benefits that this printer offers. For instance, it can print faster compared to its competitors. Also, the printing system is safe to use with a completely enclosed design. Not to forget, it’s also eco-friendly.
It is available for around $100,000.
The Conclusion
Before the invention of additive manufacturing, it wasn’t this easy to create complex designs with such precision. However, 3D printing allowed us to do that in the simplest way possible. And, among many different 3D printing materials, Sandstone 3D printing seems to be gaining great popularity among those wanting to create decorative parts that look amazing.
This is due to the various benefits the material possesses. In addition, its characteristic to blend well with different colors make Sandstone a really attractive choice for a variety of applications.
From beautiful models to figurines to aesthetically pleasing structures, users can create great designs using Sandstone 3D printing. If the possibilities interest you too, do not forget to read our complete guide to start printing with this wonderful material.
3D printing in color - rich color in full color 3D printing!
May202015
Color 3D printing: what it is
Full Color Sandstone (FCS) is currently the only material that opens up the possibility of full color 3D printing. This material is a great choice for creating human figurines, miniatures, memes, and other fun and realistic color models. Color 3D printing is a universal working tool for various purposes. Full-color professional 3D printers work according to the following scheme: they apply thin layers of powder and, using an adhesive component mixed with paint, bind this powder together, repeating the section of the future model in order to reproduce the whole product. Just like with 2D color printing, the colors on the printout may differ from those displayed on the screen. nine0007
Each pixel on the screen is made up of RGB red, green, and blue, while full-color printing sandstone uses cyan, magenta, yellow, and black (CMYK printing palette). When modeling for this material, there are several tricks that will help you significantly improve color reproduction, and we will talk about them below.
Color 3D Printing Tips
- First, it's important to know that CMYK color 3D printing is better at rendering light, bright, contrasting colors. To get a good result, avoid blurry borders, gradient transitions and shadows. The complex colors you see in photographs of photorealistic models are actually quite difficult to reproduce. nine0015
- Please note that some colors are simply difficult to print. For example, brown tones are difficult to reproduce because these colors require mixing all 4 inks (CMYK). And as a result, we can get an unpredictable result (a large amount of paint and a porous powder surface with uneven absorption).
- Be sure to take into account the wall thickness when 3D modeling, it is very important in painting.
Color 3D Printing Features
When you prepare a color 3D model for printing, you only specify the color of the surface - the texture determines the color outside, not inside the object. Actually, this is correct, since printers can only paint the outer layer of the model. After printing is complete, dip each model in Cyanoacrylate. This coating increases the strength of the model, and gives the color brightness and depth. If your model has a significantly varying wall thickness, then different sections of the model will absorb different volumes of this coating. As a result, you will see slight color changes, this effect is especially pronounced in massive models. nine0003
Also pay attention to the following points:
- If you make the model hollow and maintain a wall thickness of approximately 3 mm, the color will be more uniform, and the cost of 3D printing, by the way, will be greatly reduced;
- If your model requires variable wall thicknesses, it is better to have a smooth transition between thicknesses, this will avoid sudden changes in color saturation;
- Technical approval versus actual approval; nine0014 Another issue to keep in mind is that you are working with a powder that absorbs ink.
 Even though the inkjet printhead resolution is 300DPI, the effective texture map resolution is probably closer to 50DPI. Keep this in mind when designing small details, especially on small models.
 We hope these tips have helped you improve the color and quality of your prints. If you have landed on this page by accident and are interested in the presented method, we recommend that you familiarize yourself with the possibilities of color 3D printing in more detail and, if necessary, place an order. nine0003
Back to main page
Binder Jetting 3d printing technology
In this article we will talk about the additive Binder Jetting technology - layer-by-layer bonding of powder materials with a binder. We will look at what this technology is and how printing is carried out in devices based on Binder Jetting. We will also highlight the advantages of this method of manufacturing 3D products and tell you what opportunities it provides and in what areas it is used. nine0003
Contents:
Binder Jetting - the essence of the technology and the principle of operation
Binder Jetting (BJ) is a 3D printing method where powder materials are used as consumables, connected by a special binder. Various types of powders can be used for printing, such as ceramic, polymer or metal.
Binder Jetting was developed by the MIT Institute of Technology. She appeared at 1993, after which it was acquired by Z Corporation, and then the rights to it were transferred to 3D Systems. This printing method has become widespread in industrial areas - in design and production.
Binder can be translated as "binder", and jetting - "injection". The name of the technology reflects the essence of this printing method - applying an adhesive, similar to how ink is transferred to paper in an inkjet printer.
Printing is carried out in several stages - first, a part of the powder material enters the working chamber, it is leveled with a roller until a homogeneous thin layer is obtained, after which a printing unit passes over it, applying a binder by the jet method. After that, a new portion of the powder material is applied over the finished layer, and all steps are repeated until the finished part is obtained. nine0003
This technology works with different types of consumables - gypsum and metal powders, sand, as well as ceramic and polymer raw materials.
One of the distinguishing features of the technology is the possibility of obtaining full-color models, for which you only need to add a dye to the binder. In this case, the pigment can be applied not only on top of the product, but also to any required depth, which allows you to get a well-dyed model with a color that is resistant to external influences. nine0003
Binder Jetting products require additional processing, which varies depending on the type of raw material.
Working with metal powders
Metal additive printing in the Binder Jetting method uses raw materials in the form of metal powders of various types and compositions, as well as a binder polymer component. This method makes it possible to obtain metal models that cannot be made using traditional methods. Through 3D printing, complex internal elements of a part of any shape and configuration are made. When printing, different types of metals and non-metals are used, for example, stainless steel, copper, composite, titanium powders, inconel, tungsten carbide, ceramics. nine0003
After manufacturing, the part is sent for post-processing, where it is given the required strength characteristics. The model is placed in an oven and kept at a certain temperature. Thus, by burning out the binding component and/or sintering the model, a product is obtained whose properties are not inferior to conventional all-metal parts.
Sintered at 97% of the melting point of the material used to make the part. In this case, the products undergo shrinkage, but this is taken into account in advance when designing the model. nine0003
Sometimes post-processing is limited to only burning out the binder, without sintering. In this case, the product retains its original dimensions, but its density decreases. The resulting voids are subsequently filled with bronze. Binder Jetting Technology the possibility of manufacturing full-color models using the BJ method. nine0003
When producing color products, the printer uses two printheads: one applies the binder, and the other is used to add ink.
Post-sintering in the same way as described above helps to improve the mechanical strength of the part.
3D Binder Jetting can be made using a variety of raw materials, including natural sand and artificial silica.
Sand casting molds produced by BJ technology are highly accurate, in addition, this method can significantly save time for their manufacture and reduce the cost of parts. nine0003
BJ Media Types
Different types of powders can be used in printing, while the variety of raw materials gradually increases, new types of consumables are developed over time. However, the following types of powder raw materials are most commonly used in BJ 3D printing.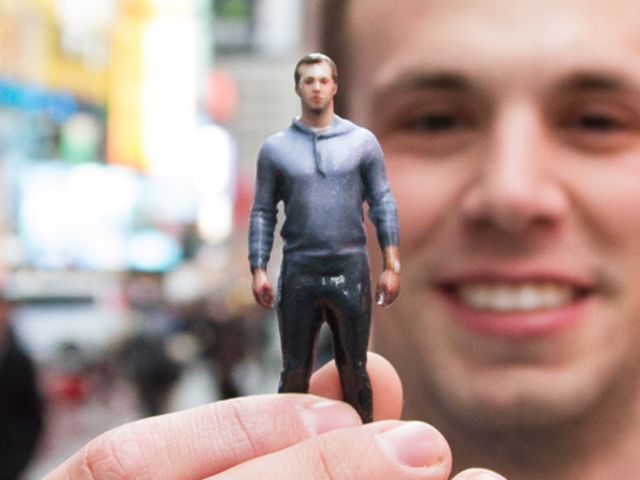
Stainless steel
It has already been mentioned above that metal products shrink during baking, their original dimensions change. However, if these model changes are taken into account at the design stage, stainless steel products obtained by this method can be used in any area, in no way inferior to those made by conventional casting or using other traditional manufacturing technologies. Finished parts have high strength and excellent mechanical characteristics, while being resistant to corrosion. nine0003
Non-sintered products, in which the binder is burned out and the cavities filled with bronze, also have high strength. But this figure is slightly less than that of sintered ones, due to partially preserved porosity, which can reach 10%. These products can also be used in a variety of areas, including in solving production problems. The advantage of the burn-in method is to obtain parts with more predictable and accurate dimensions.
Silica
Silicon dioxide, or silica, is used in the manufacture of 3D models that are highly resistant to high temperatures. This type of powder raw material is excellent for printing sand molds, where silica 3D printing can produce particularly effective results.
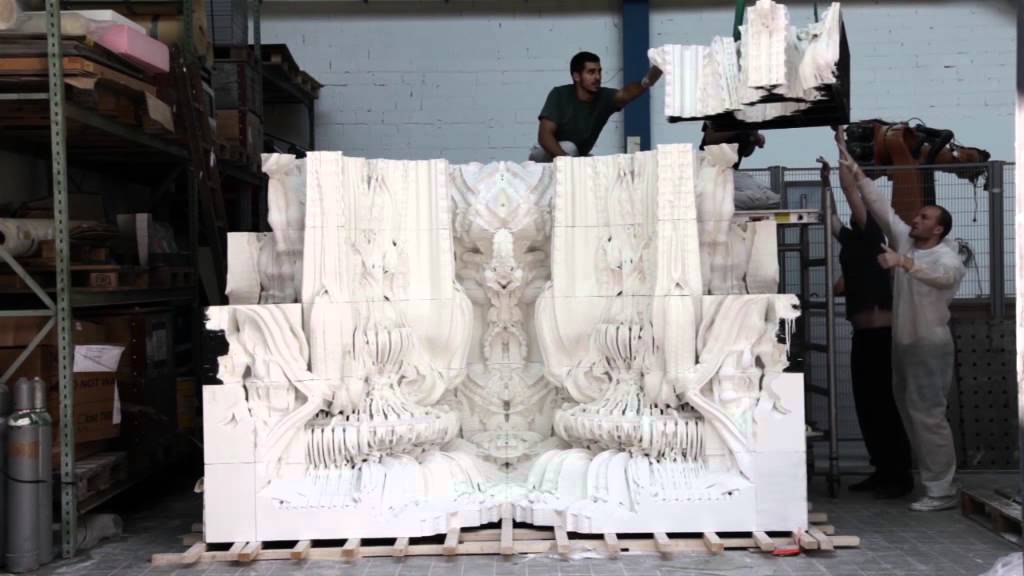
Making full-color plaster and sandstone models
Although products made from these materials do not withstand strong mechanical stress and are rather fragile, they are widely used for demonstration purposes, as well as in the manufacture of decorative elements. Using such models as an example, you can clearly demonstrate the possibilities of full-color 3D printing, as well as use them as visual material in training. Gypsum and sandstone make interesting decorative items, decorative elements, as well as copies of works of art or museum exhibits. nine0003
Inconel
3D printing with Inconel, which belongs to the family of heat-resistant alloys, after baking products, allows to obtain high-strength parts with excellent mechanical characteristics, resistant to high temperatures and aggressive (chemical) environments.
Tungsten carbide
Tungsten carbide products obtained by the Binder Jetting process, after baking, have a high hardness, which makes it possible to produce cutting tool bits with this method. nine0003
Like any other 3D printing technology, the Binder Jetting method also has its advantages and disadvantages. Consider the main pros and cons of this method in order to get a more objective idea of the capabilities of the technology.
BJ Benefits:
- Cheaper than other metal additive printing methods such as SLM, DMLS or Material Jetting.
- Allows you to get full color products.
- Excellent for making parts with complex configurations and inner sides. nine0015
- Products do not deform when printed.
- Differs in high productivity in the manufacture of small and medium batches of products.
BJ Disadvantages:
- Models have higher porosity compared to DMLS or SLM parts, resulting in lower strength.
- Prior to the heat treatment stage, parts are more brittle.
- If the part is to be baked, the difference in size due to shrinkage must be taken into account at the design stage.
 nine0015
 - Limited range of materials available - compared to other 3D printing methods, there are still not many.
3D printers based on Binder Jetting
Consider a few 3D printers based on Binder Jetting technology.
Robotech R-2000
This is a large industrial grade 3D printer designed for the needs of large manufacturing plants in the steel industry. Development of the Russian company "Robotech". Produces products at a speed of 6 to 20 mm/hour with a minimum layer thickness of 200 microns. A distinctive feature of the device is a large working area of 2000 x 1000 x 1000 mm, which allows the production of large molds for casting large products. Allows you to print 3D products of complex configurations. It is possible to customize for a specific order, including limiting the print area and reconfiguring the software. nine0003
Advantages:
- the production process is environmentally friendly and safe;
- reliability of the 3D printing machine;
- automated model making process;
- the ability to remotely control the device;
- sand left after the model is made without a binder can be reused;
- the ability to partially use the work area;
- support for integration with ERP systems.

Disadvantages:
- if the part is planned to be baked in the future, it is necessary to include the percentage of shrinkage in the dimensions of the model at the design stage.
Robotech R-600
Another development of the company "Robotech", a small industrial printer, well suited for small steel companies, universities, research centers, design bureaus. The printing area dimensions are 600 x 480 x 250 mm and allow the production of molds of small and medium sizes. The minimum height of the printed layer is 200 microns. The printing speed is from 6 to 20 mm/h, the production of the form takes, on average, no more than a day. nine0003
Advantages:
- possibility of making 3D models of complex shape;
- high precision fast printing;
- the ability to reconfigure equipment and software for a specific order;
- allows you to partially use the construction area;
- the possibility of reusing the sand left after the manufacture of the model;
- integration with ERP systems.

Disadvantages:
- Porosity and lower model strength compared to other 3D printing methods. nine0015
ExOne X1 160Pro
Binder Jetting 3D printer with large volume print chamber. The patented ExOne Triple ACT system controls dosing, distribution and compaction of powder materials, which provides the best density and repeatability of products in similar devices. The device allows you to make models with dimensions up to 800 x 500 x 400 mm thanks to a working chamber of 160 liters.
Advantages:
- high precision and repeatability of products;
- large working chamber;
- high speed;
- the ability to remotely manage the printer.
Disadvantages:
- lower product density than other printing methods.
Summary
Binder Jetting is one of the most accurate and cost-effective 3D printing technologies on the market today. Its use is especially effective in the metallurgical field and in the printing of sand casting molds.