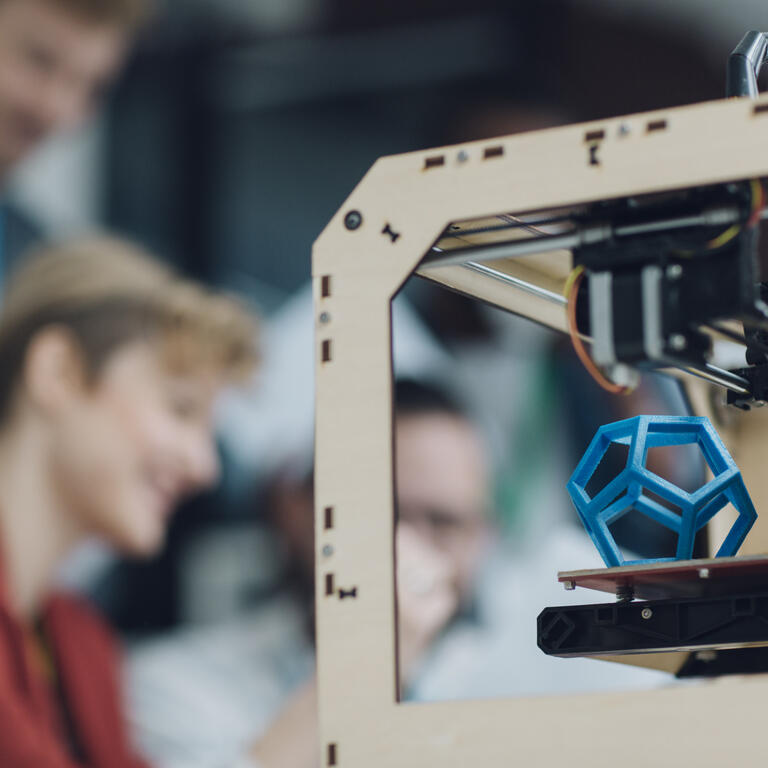
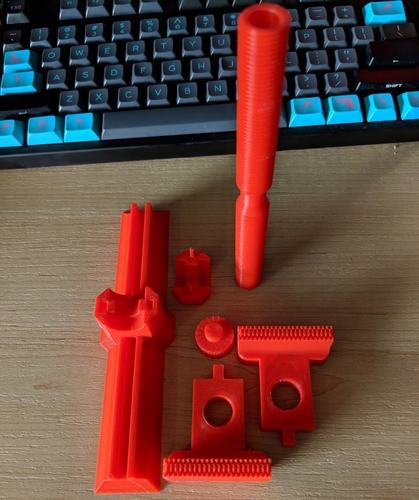
3D print support hard to remove
How to Remove 3D Print Supports Like a Pro – 3D Printerly
If you’ve ever 3D printed, you would have on a few occasions come across support material that was very difficult to remove and wished there was an easier way to do this.
I’ve had the same issues, so I decided to do some research and find out how to make removing 3D printing supports easier.
You should implement support settings such as reducing Support Density, using the Lines Support Pattern, and Support Z Distance which provides a clearance gap between supports and the model. Another setting called the Support Interface Thickness gives the thickness of material touching the model.
Once you have the right information about removing support, you won’t experience the same frustrations you once felt before. Other than the settings themselves, you can also use tools to help you remove the supports, making them easier to remove.
Let’s get into some more detail on removing supports effectively.
How to Remove 3D Print Support Material (PLA)
Removing supports can be very tedious, messy and even dangerous in some cases. Plastic is a hard material and when 3D printing at small layers, can easily come off sharp and potentially cause injury to yourself.
This is why it’s important to know how the professionals remove support material such as PLA and ABS from their 3D prints. Cura supports that are too hard to remove are an issue.
After removing your print from the bed surface, you want to analyze the model and see which locations have the support and differentiate it from the actual model itself.
The worst thing you can do is accidentally break into your model just after spending several hours printing it.
Once you identify where the smaller sections and larger sections of support are, grab your main snipping tool, and you’re going to want to slowly and carefully start to remove the smaller sections of support because these are easier to get out of the way because they are weaker.
If you go straight for the big chunks of support you run the risk of damaging your print and while you are trying to remove it, other support sections can make it hard for you to clear it.
After clearing the smaller sections you should be able to tackle the larger, harder to remove sections somewhat freely.
It will usually take some firm twisting, turning and snipping with your snipping tool.
Some people wonder why supports are needed in 3D printing, and it’s mainly to assist you with overhangs that aren’t supported underneath. Learning how to get rid of and remove FDM supports on a 3D printer is a very useful skill that you’ll appreciate in the long run.
When you do things correctly, supports shouldn’t be too strong and allow you to remove it fairly easily.
What Are the Best Tools to Remove Supports Easier?
There are some great professional tools in the arsenal of most 3D printing enthusiasts for a reason because they make our jobs easier. This section will list out some of the best tools you can get for yourself to remove supports easily.
If you want to get straight to the point and get an all-in-one solution, you’re going to be best off with the Filament Friday 3D Print Tool Kit, which is perfect for FDM support removal.
It’s exactly what you need to remove, clean & finish all your 3D prints, something you’ll be doing for years to come so opt-in for quality with this toolkit.
It’s a high quality 32-piece kit with the following included:
- Flush Cutters: Use your flush cutters to cut filament and other thin material associated with 3D printing.
- Needle Nose Pliers: Use the needle nose pliers to help remove excess filament from the hot extruder nozzle, or to reach hard to access places within the 3D printer.
- Spatula Removal Tool: This spatula has a very thin blade, so you can slide it underneath your 3D prints with ease.
- Electronic Digital Caliper: A lot of people don’t actually have calipers, but they are a great tool to have in your arsenal to measure inner/outer dimensions of objects or even filament.
 They are essential if you want to design functional models around your house.
 - Deburring Tool: Give your prints a 360° deep clean with the deburring tool.
- Cutting Mat: Keep your workspace undamaged with a quality cutting mat, so you can post-process your prints safely
- Avery Glue Stick: Just apply a few layers of Avery Glue Stick to your heated bed for better adhesion.
- Filing Tool: Use your filing tool to manage the rough edges of your 3D print by rubbing the tool against stubborn pieces of material.
- Knife Clean Up Kit: You’re always going to have some excess material on your prints, so a knife clean up kit is amazing for removing excess debris. You’ll be equipped with a 13 blade variety set, as well as a safe-lock storage organizer.
- Wire Brushes: Use your wire brushes to sweep away excess filament from the extruder nozzle or print bed.

- Zipper Pouch: Use your Filament Friday pouch to hold your tools.
People that have these tools in their kits rarely have frustrations with removing support because they are very well-designed and truly get the job done.
This is one of those things where you have to try it before you see how beneficial it is to your 3D printing journey. If you see yourself 3D printing for many years to come, you want tools that are durable and high quality.
If you don’t want a full tool kit and just want tools to remove supports, go for these two tools below.
Flush Cutter
The snipping tool usually comes standard with most 3D printers and is a great way to remove the bulk of supports around a print. The one you get with your printer isn’t the best quality, so you can choose to opt-in for a better one.
I recommend the IGAN-330 Flush Cutters (Amazon), made of high quality heat-treated chrome vanadium steel for great durability and performance.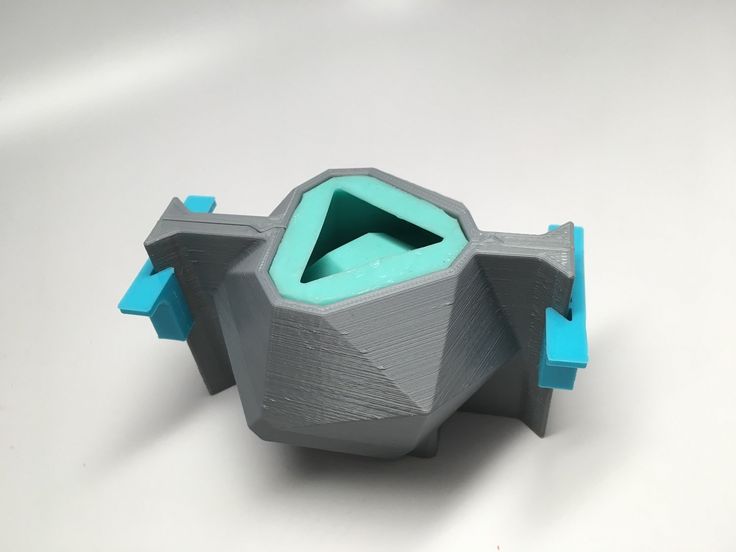 It has a smooth, light, springy action that makes it very easy to operate.
This highly rated tool has a great ability to cut sharp and flat, something that cheap flush cutters fail on. With cheaper flush cutters you can expect bends and nicks in the material after some time.
Tweezer Nose Pliers
Xuron – 450S Tweezer Nose Pliers is another important tool to remove support in harder to reach areas of your 3D prints.
It’s made for precision with a 1.5mm thick tip that can grasp support that’s less than 1mm thick and has fine serrations to improve holding power over any materials you use.
Being able to remove supports delicately but with enough strength is a needed ability, and this tool does it very well.
X-acto Knife
You want to be careful with these tools because they are extremely sharp!
The X-Acto #1 Precision Knife (Amazon) is a highly rated, lightweight tool that is easy to maneuver and cuts through plastic with precision.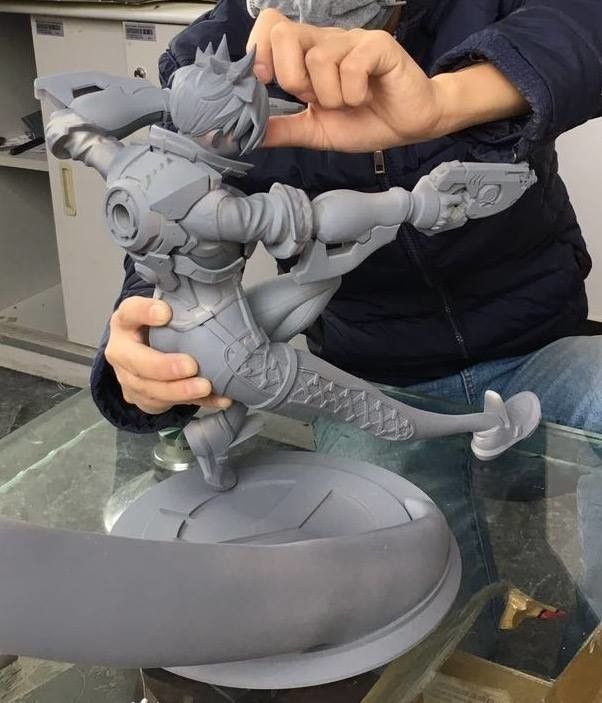 The blade is coated in Zirconium Nitride for durability, and it’s fully metal with an aluminum handle.
I recommend getting some NoCry Cut Resistant Gloves to use whenever you’re removing filament, especially when using the X-acto knife, because safety always comes first!
They provide you with high performance, level 5 protection and is also great to use in the kitchen or for other suitable activities.
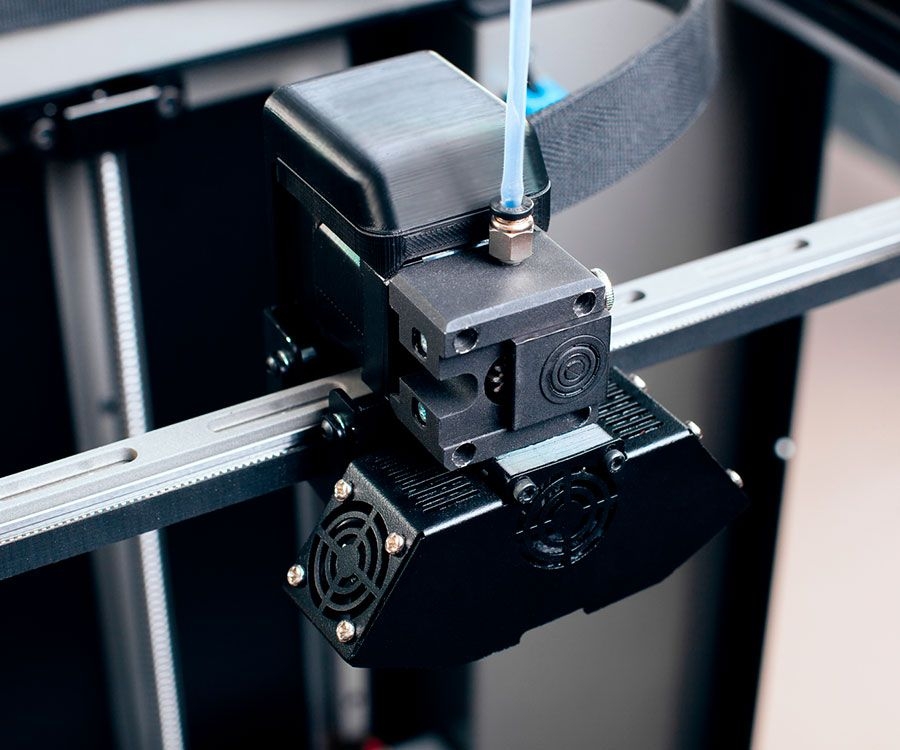
Best Support Settings to Remove Supports (Cura)
A very important factor in making support materials easier to remove is your slicer settings. This will determine how thick your support is, the infill density of the support, and in turn how easy it will be to remove these supports.
You want to change the following settings under ‘Support’:
- Support Density – 5-10%
- Support Pattern – Lines
- Support Placement – Touching Build plate
Support placement has the main option of ‘Everywhere’ which can be necessary for some models, so it will take you gauging whether your print has angles where it really needs to have the extra supports in between your print.
The density and pattern should do most of the work already.
As it is with any 3D printer setting, take some time to trial and error these settings with some basic test prints. Once you fine-tune your settings you’ll have a much better understanding how little support material you can get away with and still have a great print.
Another thing you can do to make supports easier to remove is to reduce your printing temperature.
When your nozzle temperature is higher than needed, it makes the filament a little more melted, leading to it sticking together a little stronger.
When your filament is heated to a temperature just high enough to successfully extrude, you are more likely to get supports that don’t bond strongly to your model, allowing you to easily remove the supports.
You don’t want to have supports sticking to your 3D prints by using the wrong settings or having a lot more support than you need. Once you learn how to do it properly, you should be able to avoid supports that get stuck to prints.
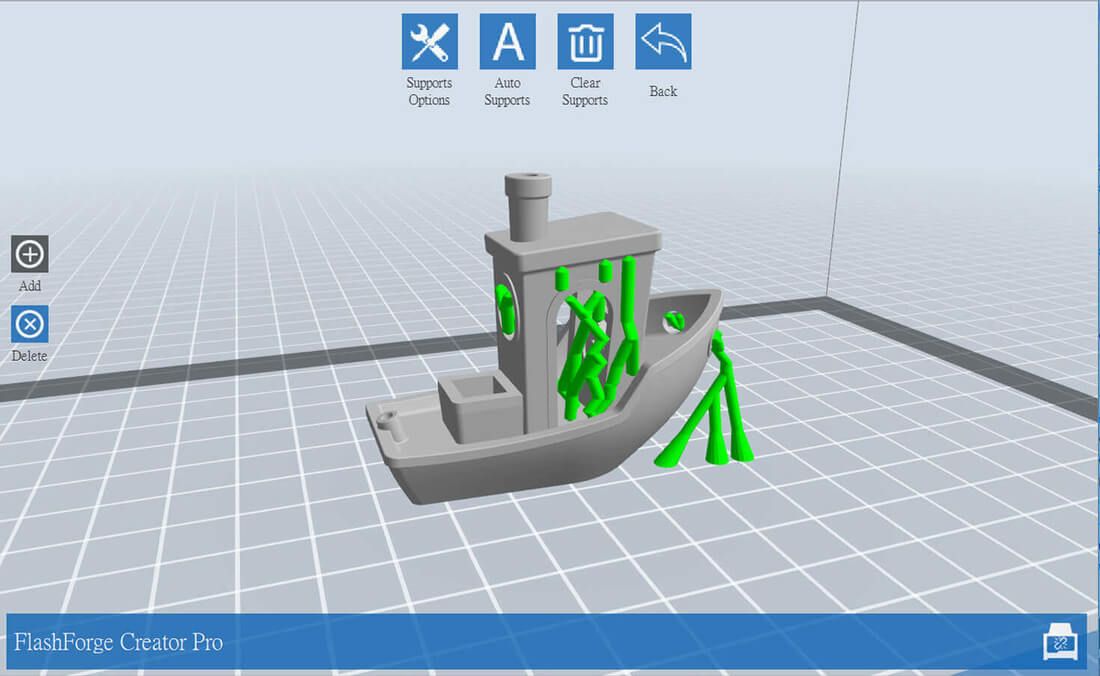
The best thing you can do is reduce the number of supports in the first place. I like to use Custom Supports in Cura, especially the Cylindrical Custom Supports which you can find in the plugins.
The video below by CHEP shows how easy adding custom supports is.
Do I Need to Print With Supports or Can I Avoid Printing It?
There are a few methods out there where you can learn how to avoid printing with supports in the first place, but they won’t work in every model and design out there.
Supports are especially necessary when you have overhang angles that stretch past the 45-degree mark.
One of the best ways to avoid printing with supports is using the best part orientation, so there aren’t as many 45 degree or sharper angles that your designs or objects have.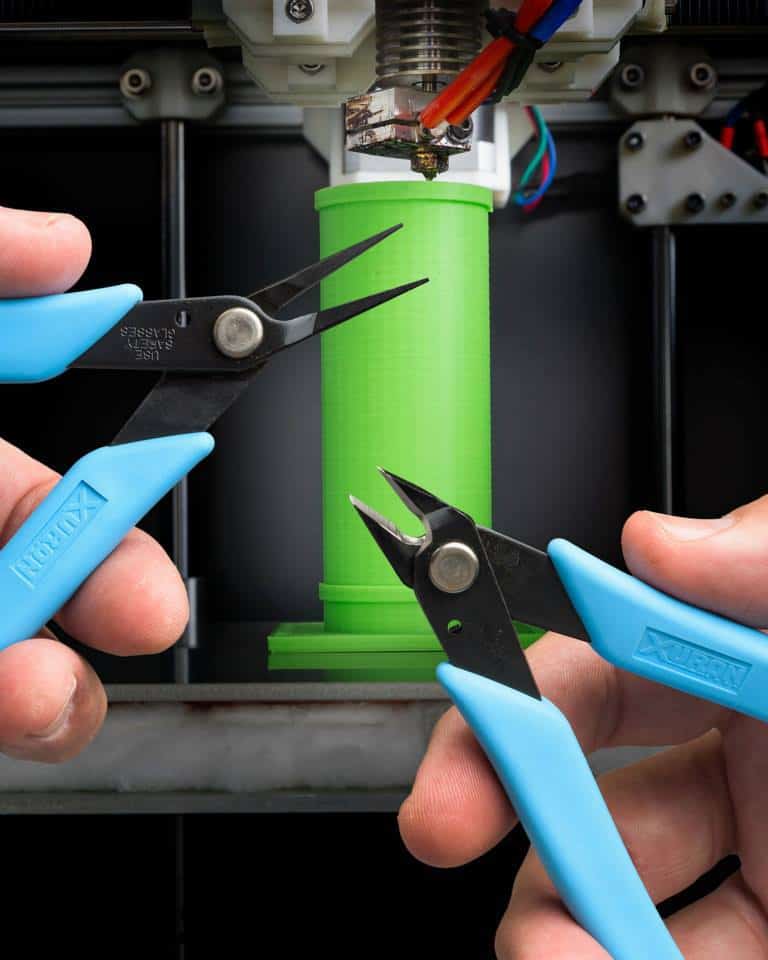
This video by Angus from Makers Muse goes into great detail about printing without supports so feel free to follow some great advice.
PETG Supports Hard to Remove
- Author
- Recent Posts
Martin
Martin has a M.Sc. in physics and has gained many years of experience in industry as a lab manager and quality assurance manager. He has now tested dozens of 3D printers and is happy to share the collected experience with each new article.
Latest posts by Martin (see all)
- BQ-Hurakan vs. Ender-3 V2 Neo | Comparison, Pros & Cons - November 10, 2022
- Mouse Ears (Brim Ears) vs. Warping in 3D Printing – Guide - November 10, 2022
- Ender-5 S1 vs.
 Ender-5 Pro | Comparison, Specs, Pros & Cons - November 9, 2022
Disclosure: Links marked with * are Affiliate Links. I earn from qualifying purchases if you decide to make a purchase through these links – at no additional cost for you!
PETG is known for hard-to-remove supports. So if you’re having this problem, you’re not alone. But there are a few ways you can make it easier to remove them – and without leaving any residue!
If PETG supports are difficult to remove, the settings in the slicer must be adjusted to reduce the adhesion between the supports and the printed object without losing their supporting effect.
In this article you will learn how to do this, which settings are important for PETG supports, how to test them and how to remove supports from your print object without leaving any residue.
Table of Contents:
- 1 Key Takeaways
- 2 The Correct Slicer Settings for PETG Supports
- 2.
 1 Support Z Distance
 - 2.2 Support X/Y Distance
- 2.3 Support Structure (Normal/Tree)
- 2.4 Support Placement
- 2.5 Support Pattern
- 2.6 Support Density
- 2.7 Support Interface
- 2.
- 3 How to Remove PETG Supports Without Residue
- 4 Summary
Key Takeaways
- If PETG supports are hard to remove, the adhesion between the supports and the print object has to be reduced.
- The biggest influences on the adhesion between the supports and the printed object are the Support Z Distance and the Support Density.
- → Increase the Support Z Distance
- → Decrease the Support Density
The Correct Slicer Settings for PETG Supports
In order for supports to fulfill their function and still be easy to remove, certain settings in the slicer must be optimized. These mainly include the distance of the supports to the print object, the structure, the placement, the support density and its pattern.
These settings are different depending on the filament type and can also differ between filaments of the same type from different manufacturers. The settings mentioned in this article are therefore relatively good guidelines, but will not be the perfect solution for every PETG filament.
Before we get into the details of each setting, here is an overview of the best settings for PETG supports in Cura (most slicers have similar options):
| Setting | Recommended Values for PETG |
|---|---|
| Support Z Distance | 0.2-0.3 mm or higher (in principle as high as possible without overhangs sagging) |
| Support X/Y Distance | 0,4-0,6 mm |
| Support Structure (Normal/Tree) | Normal |
| Support Placement | Touching Buildplate |
| Support Pattern | Lines / Zig Zag |
| Support Density | 5-15% |
| Enable Support Interface | No |
If your print object is relatively complex and large and you want to save filament and time testing these settings, you can use certain calibration objects. These objects are usually relatively small and can be printed in a short time with little filament. For example, the image above shows the object for testing supports from the Calibration Shapes plugin in Cura.
Note: Before you try to optimize the settings for the supports, you need to ensure that you don’t have stringing or other over-extrusion phenomena on your print. Only then does it make sense to optimize the supports, as these problems can bind the supports to the print object and make removal difficult.
Support Z Distance
The Support Z Distance defines the distance between support structures and print object in Z-direction. The smaller this setting, the greater the adhesion between support and print object. The greater the distance, the easier they are to remove.
This setting has the biggest influence on how well the supports adhere to the print object. If you reduce the Support Z Distance, the supports will adhere better to the print object, which has several advantages.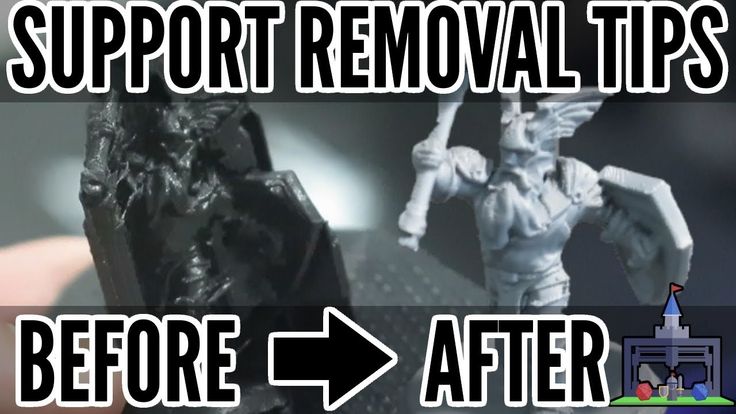 Overhangs will print better because they won’t sag as much and the stability of the supports will be improved. However, it will also be more difficult to remove them from the object.
If you increase the Support Z Distance, not only will the adhesion be reduced, but the residue on the object will also be reduced. So you get the advantage that the supports are easier to remove and the surface has less residue, but overhangs may not be as well formed because they may sag.
For PETG, values for the Support Z Distance of 0.2 to 0.3 mm have proven successful.
In general, the Support Z Distance can be larger with materials with good adhesion, such as PETG, than for others. If you have printed mainly with PLA before and have not changed the settings, it is likely that you will have problems with PETG supports.
You can set the Support Z Distance globally or separately for the upper and lower distance. In most cases, you only need to change the global setting and don’t need to bother with the two settings for the upper and lower distance.
Support X/Y Distance
The Support X/Y Distance defines the distance between support structures and print object in X/Y direction. If this value is increased, the supports can be released more easily, with lower values, the supports give more support.
When the X/Y distance is set so that the supports and the print object are no longer touching in the XY direction, you have found the minimum distance. The wider you set the distance, the easier it will be to remove the supports, but this will also reduce the supporting surface.
For PETG, values for the Support X/Y Distance of 0.4 to 0.6 mm have proven successful.
If you set the distance too large, smaller overhangs will not be supported at all and the beginnings of larger overhangs will be less supported. This setting is therefore mainly dependent on the bridging behavior of your filament.
Therefore, cooling also has an influence on the support X/Y distance. Most PETG filaments produce the best results with 50% cooling. Some filaments require 100% cooling or no cooling at all. If you want to improve the bridging behavior, you can also have a look at this article: Cura Bridge Settings | Easy Guide
Support Structure (Normal/Tree)
In some slicers like Cura, the support structure can consist of the classic patterns or a tree structure. With PETG, normal supports are easier to remove than tree supports.
The surface connecting the supports and the print object is relatively dense and irregular with tree supports. This can make tree supports harder to remove and more likely to leave residues. With normal supports with a simple support infill pattern like lines, it is usually easier to remove the supports without leaving residues.
If you have the adhesion between the supports and the print object well under control by the other settings, you can also use tree supports, which lead to better results in some applications.
Support Placement
Supports EverywhereSupports Touching BuildplateSupports can be generated either everywhere or from the print bed only. If you generate supports everywhere, support residues can occur not only on the bottom sides of the object, but also on the top sides on which supports were printed.
If you have problems with support residues with PETG, it would be a good idea to generate the supports only from the printing plate. That way, if in doubt, you only have to smooth the undersides.
Of course, the settings depend on the geometry of your object. Perhaps by reorienting the object, you can arrange the surfaces so that only the print bed is underneath. Also, tree supports can grow sideways from the print bed and still support surfaces that would normally be unreachable by supports from the print bed.
Support Pattern
Zig ZagLinesConcentricCrossThe pattern of PETG supports should be chosen so that they are easy to remove. The patterns “lines” and “zigzag” are the easiest to remove from the printed object and still provide a good support function.
The line pattern is the default setting in most slicers for supports. It provides relatively good support for overhangs and is the easiest to remove. Unless your PETG objects are very large and massive, this pattern is best for them. The more stable patterns (Triangles, Grid or Gyroid) offer a better support function, but can rarely be removed without leaving a residue.
Support Density
10%20%35%50%The denser supports are printed, the more stable they become. However, a higher infill density also increases the contact surface with the printed object, making them more difficult to remove. With PETG, a support infill density of approx. 10% is reasonable.
Again, it’s a matter of experimenting a bit. If you only have problems with larger overhangs, you can usually reduce the infill density extremely. Together with the Support Z Distance, the support density gives you the greatest leverage in terms of adhesion to the print object.
Support Interface
Support Interface ONSupport Interface OFFIn order to save filament, some slicers have the function to individually adjust the contact area of the supports to the print object under the support settings. Normally, this increases the density of the contact area, which makes the supports even harder to remove.
With PETG, you usually want to reduce the adhesion between the supports and the print object, not increase it. Therefore, it usually makes more sense to deactivate this function.
The function has two main applications:
- You can print the remaining supports at a lower density than the contact area, saving filament and time.
- For expensive and soluble support materials on dual extruder 3D printers, you can print the support interface from the expensive filament and the rest of the supports from cheaper material.
If you are not using a dual extruder 3D printer, you may not need this feature.
How to Remove PETG Supports Without Residue
With the correct support settings, PETG supports can be removed from smooth surfaces without leaving any residue. For round surfaces, contact points can be carefully removed with a sharp knife or side cutter.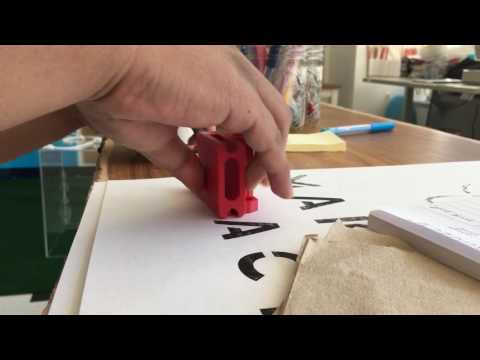
When removing support residues it is important to note that PETG has a strong tendency to scratch. Especially on very smooth surfaces, you will see scratches immediately. Therefore, finishing with sandpaper only makes sense if the appearance of the model is not so important or if you paint or otherwise coat it afterwards anyway.
The best way to get as little support residue on the print object as possible is to not put any supports in the first place… Try to orient and rotate your object in the slicer so that as few supports as possible are needed. Especially surfaces with a lot of details should be oriented in a way that no supports are needed at all.
If you want to slice individual parts or surfaces of your print object without supports, there is also the Support Blocker in Cura. This works like a separate object that suppresses the generation of supports in the overlapping areas.
Summary
Besides stringing, the difficult removal of supports is one of the most common problems with PETG. As with all other print errors, however, there are exactly the right settings with which you can fix the problem.
In this article, we’ve gone over the best support settings for PETG, how you can optimize them, and how you can remove PETG supports without leaving any residue.
Disclosure: This website is the property of Martin Lütkemeyer and is operated by Martin Lütkemeyer. Martin Lütkemeyer is a member of the Amazon Services LLC and other Affiliate Programs. These are affiliate advertising programs designed to enable websites to earn advertising revenue through advertising and linking to Amazon.com and others. Links marked with * are affiliate links.
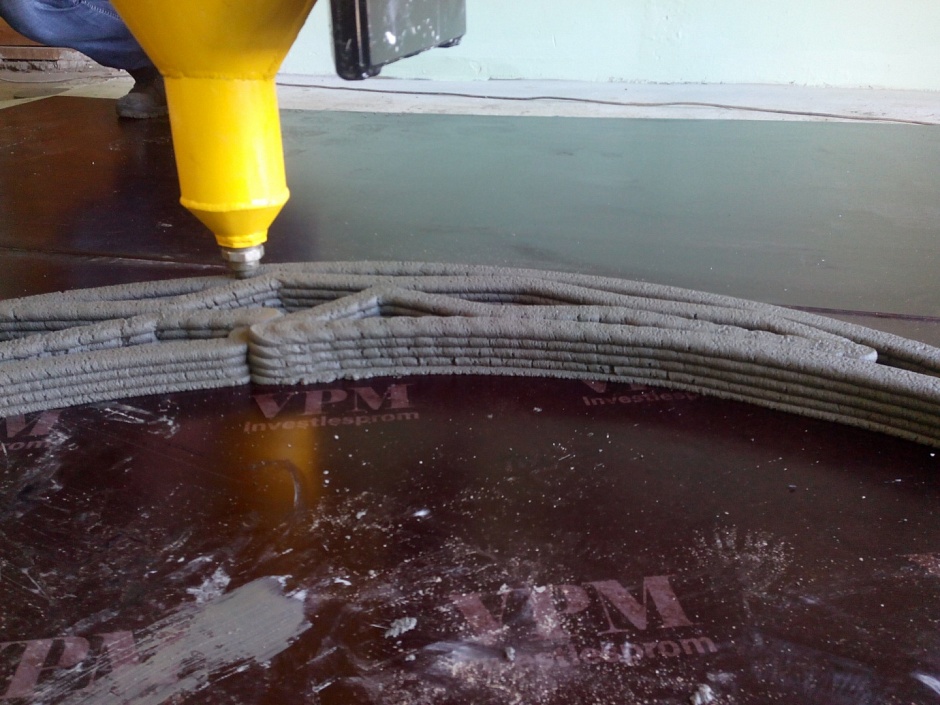
Removal of supports from printed models
Supports can be conditionally divided into 2 types:
1) simple
2) complex
To remove all types of support structures, you will need several tools:
1) mock knife or scalpel
) nippers
3) chisel
In some cases, you will need a mock scalpel and sometimes, perhaps, a set of needle files.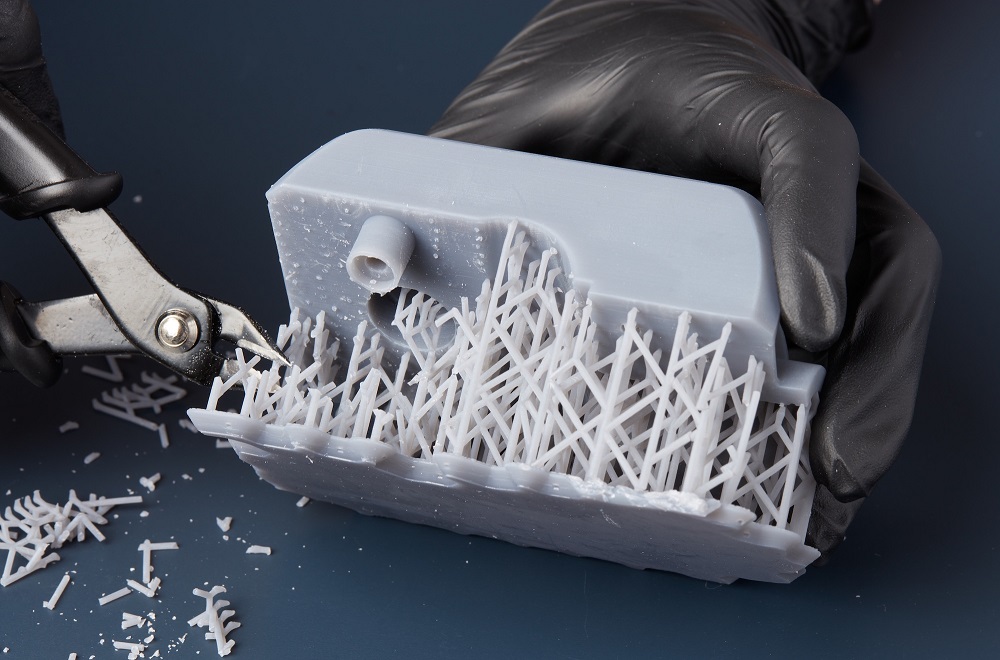
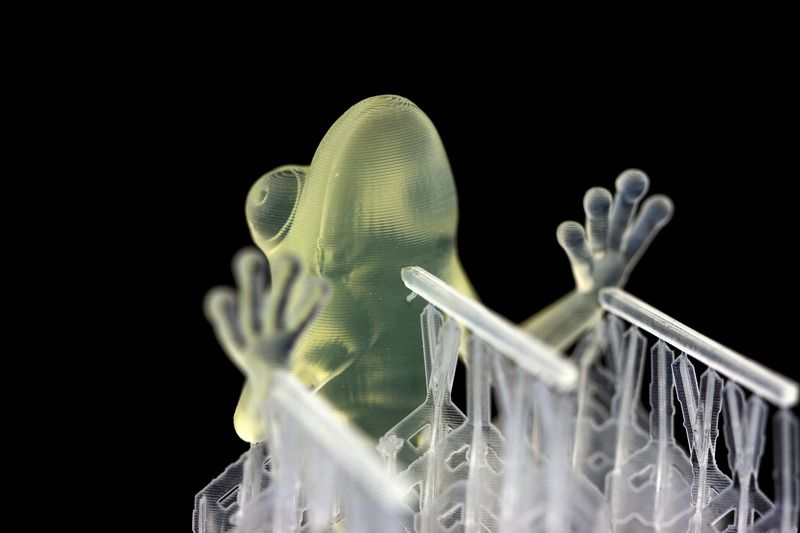
Simple support - support made by “solid mesh”.
Here is a good example of “simple” support.
To remove such support, you need to go through several steps:
1) Trimming the edges. We cut through the entire plastic of the supporting structures adjacent to the product itself with a breadboard knife. The same applies to all internal products.
The result should look like this:
2) Violation of the integrity of the structure. A chisel is best here, it is important to loosen the support and break it into “blocks”, do not place a chisel near the parts that are in the supporting structure if there is a chance of breaking them.
3) Pulling out the support. We take wire cutters and pull out the “blocks”. Try to grab large pieces with wire cutters. If all elements have been clipped - the support will pull out.
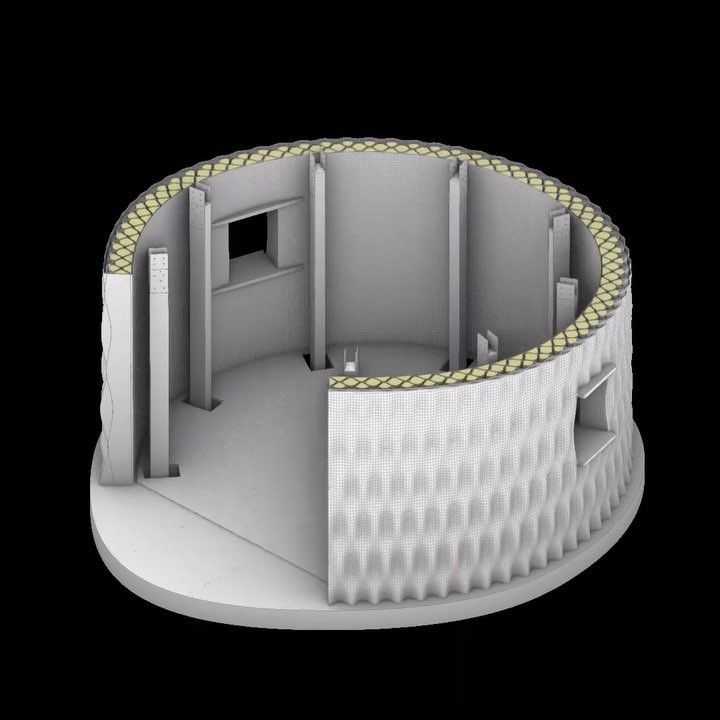
Complex support refers to support made in a large number of places without a single structure, in undercuts or holes.
Here is a striking example:
Algorithm of actions:
1) We cut the contact points of the supporting structures with the printed model.
2) If possible loosen large pieces of supporting structures with a chisel.
3) Remove the support with wire cutters.
4) Push the support blocks through the holes.
5) We clean the rest of the support with a mock scalpel.
Remove material supports from REC Flex.
Procedure:
1) Cut the supports with a mock knife.
2) Separate the support blocks from the model.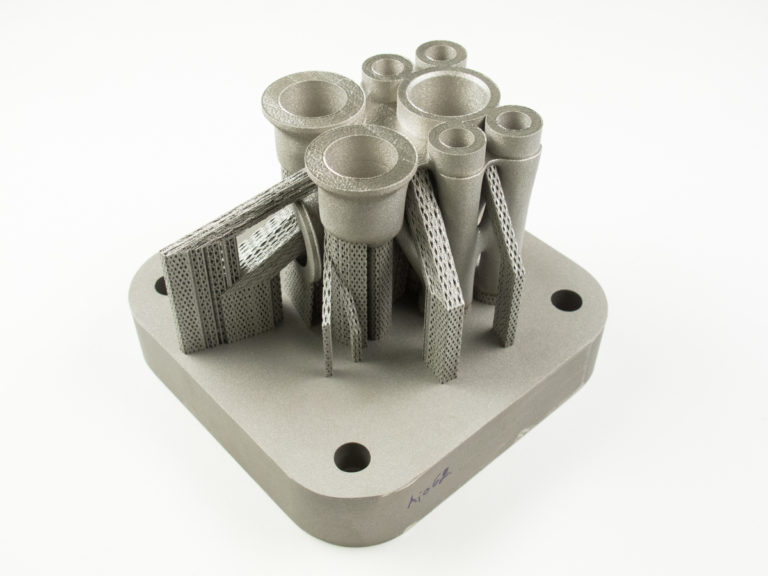
In some cases, you don't even need to use wire cutters, especially if you cut the contact points well.
3) We clean the remains with a mock-up scalpel and tear off the remaining little things.
The result is as follows.
Support on REC Flex leaves unpleasant marks and “drops”.
There are 2 ways to clean up:
1) Working with a dummy knife.
The dummy knife can be used in 2 ways: “blade towards you” and “blade away from you”.
In the “blade towards you” position, the scalpel is clamped into the second phalanx of the index finger.
The scalpel moves along a rotational path, by clenching the fist.
With the “blade away from you” position, fix the area where you work with your left hand as much as possible, but most importantly, so that your left hand is not in the trajectory of the scalpel.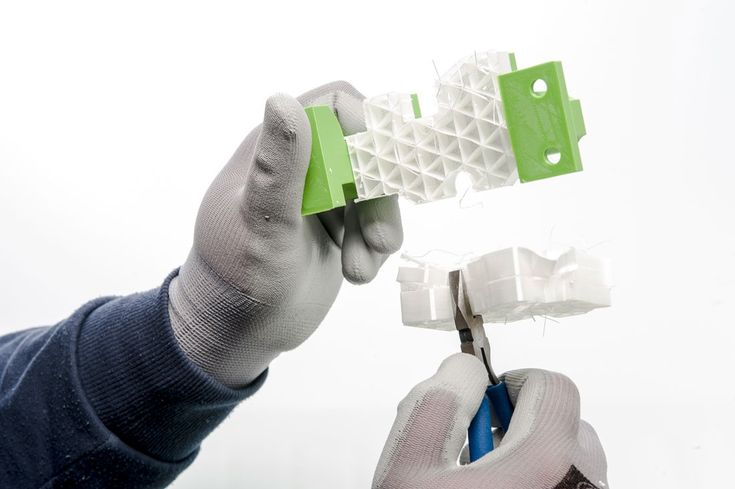
2) Hot air gun operation.
Flex is a thermoplastic elastomer, so some defects after supports can be removed with air at a temperature of 260°C.
Turn on the heat gun and heat the desired area until it becomes slightly transparent. Thus, the forms themselves are smoothed out.
If this does not happen, then heat the defect and smooth it with any available metal object.
Remove material support from REC Rubber.
Algorithm of actions:
1) We cut the supports with a breadboard knife.
2) Remove support manually.
3) We clean the remains with a breadboard knife and get the result.
The best ways to remove support when 3D printing
Experts recommend
Author: Alexey Chekhovich
Author: Alexey Chekhovich
1. Efficient support placement: inclined and scalable supports | 2. Fast removal: prongs, hourglasses and fragments | 3. Powder recycling: perforation and fragmentation | The process of removing supports can be even easier...
Everyone who works with 3D printers knows that the process of creating support structures has its own pitfalls. But what about removing supports? Where it has to be done by hand, a simple removal process and efficient support placement technology can significantly reduce finishing time. This article outlines three strategies that will make it easier for you to remove supports.
1. Efficient support placement: tilted and scalable supports
When support structures are connected to a part at two different locations, such as inside a pipe, slanted supports can be used. You can manually route these supports from the part to the build platform, avoiding unnecessary points of contact.
Left: Connection between sections of a part. Right: pipe with inclined support
If contact with a certain part of the part cannot be avoided, it is possible to guide the supporting structures to an area that is easier to machine, for example, having a flat rather than a curved surface. You can also reduce the width of the supports and thereby reduce the size of the area that needs post-processing. To do this, use the Scalable Platform Projection tool in Materialize Magics.
iQB Technologies Experts Recommend Article: Benefits of Materialize Magics in 3D Printing Supports
2. Quick removal: prongs, hourglasses and fragments
Block supports are used to create this automotive part. Unlike volumetric supporting structures, block structures are not continuous. Joint project with the InMotion development team
Along with the efficient placement of the supports, you can also consider using a design that allows them to be removed quickly. By positioning the thin teeth on the top edge of the support, you get a strong construction that can be easily removed from the part.
Another strategy is to use predetermined hourglass-shaped removal points that break in the middle. This avoids spalling due to poor support removal leading to part damage.
You can then sand the surface. Support structures can be removed without compromising surface quality by adding additional material where support is required.
This material is subsequently removed by machining to obtain the required final shape - the corresponding function in the Materialize Magics program is called the machining tab.
The methods described above have dealt with the ease of removal of the supporting structures of the product. When it comes to removing supports from the build platform, the general strategy is to create gaps between the various support blocks. These fragments are much easier to remove, offering less resistance.
Hydraulic valve from VTT and Nurmi Cylinders with inclined supports
3. Powder recycling: perforating and fragmenting
Since metal powder of the quality required for additive manufacturing can be quite expensive, it is desirable to reuse as much of the powder as possible.