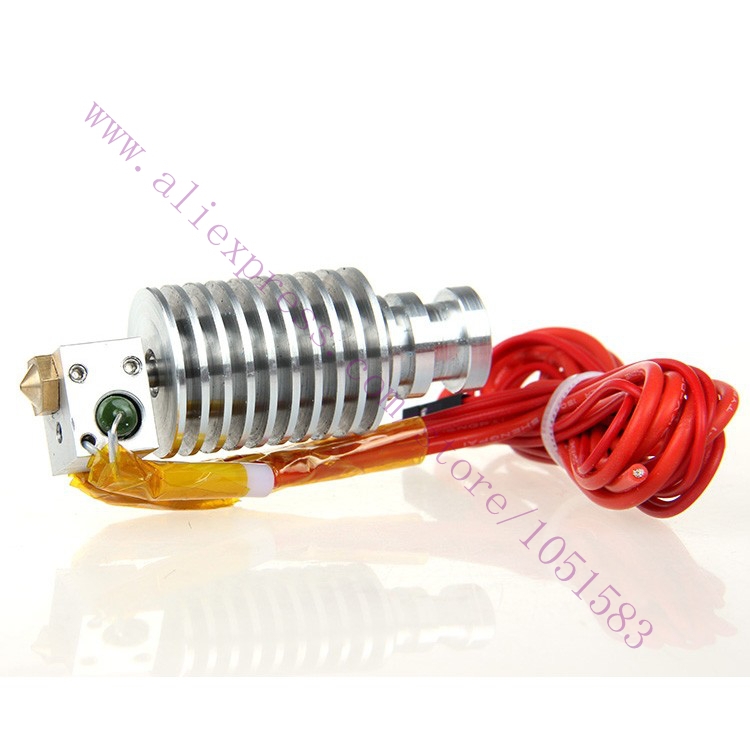
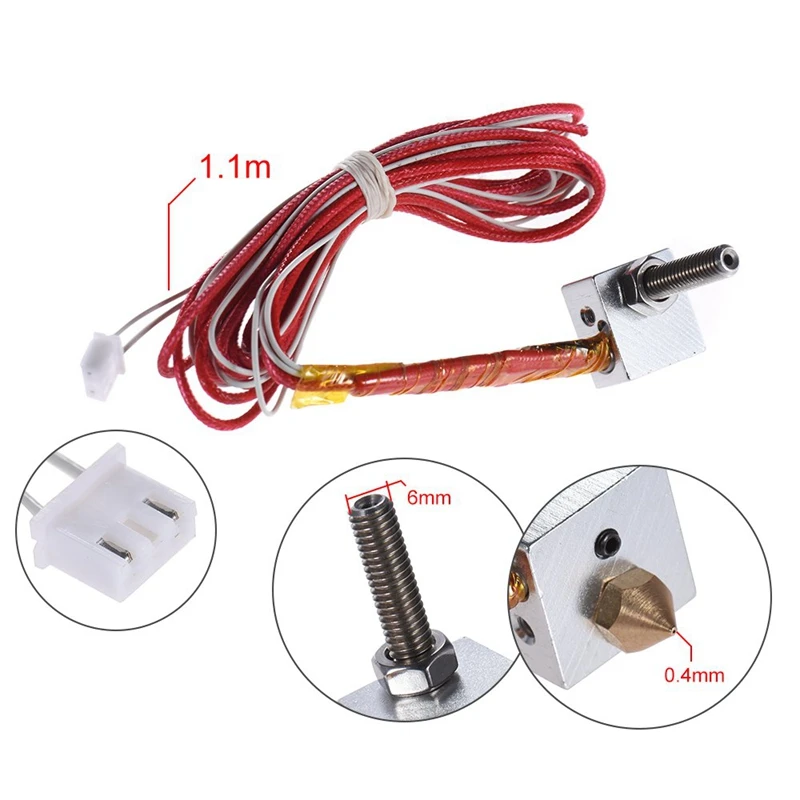
3D printer nozzle assembly
3D Printer Nozzle - Changing And Assembling Them
3D printer nozzle assembly and changing can be complicated. But not if you break it down into small chunks that are easy to understand. In this article, we will go over the things you need for a successful 3D printer nozzle assembly. There are many types of nozzles that are generally used in the 3D printing industry, some very common of them are brass nozzle, stainless steel nozzle, copper nozzle, etc.
We will discuss from the start to end about the brass nozzle which is used by most of us, although the assembly process is similar for most of the 3D printer nozzle types they are slightly wary. We’ll start with the workbench. Once you have a 3D printer, the first thing you’ll need to do is set it up by placing the print head and extruder assembly on a table. Then, place the tool holders to be positioned correctly and properly nested. Making sure all the supports are in place helps you produce better accurate prints, reducing the number of failed prints.
Next, you’ll need to have a flat work surface. If there isn’t one already, place it underneath your printer. For example, remove the platform if you’re using a RepRap printer sitting on a powered rotating platform. For a delta printer, make sure the base is flat. A heated bed isn’t required but can help your prints stick better.
Before you start printing with a nozzle, you should adjust it to be ready to use and smoothly extrude material. To get started, you need the right software settings. Now let’s get in more details.
What is 3D printer nozzle assembly?
3D printing is the future of engineering and design because it allows you to produce almost any item you want in limited quantities. While 3D printing holds a lot of potentials, there’s still a long way to go. Like any other manufacturing process, 3D printing requires specialized machinery and the right software and work environment.
The nozzle is an important element of your 3D printer. As the output from the print head travels through the hot extruder, it sprays thread-like lines of material layer by layer. The nozzle is responsible for ensuring that each layer of thread is printed correctly, with smooth transitions between layers.
What to know about 3D printer nozzle assembly?
It’s important to understand how to assemble the nozzle assembly. The nozzle assembly is a piece you can assemble with the rest of the printer itself. You need to ensure that everything is assembled properly and that the parts are not just put on and taken off the printer.
- The nozzle guides and push down on the printing surface and compress it flat against the base plate so that when we extrude filament out of the nozzle, we get a nice and even deposit of material across our print surface.
- The Interchangeable Thermal Print Head is an extra 3rd nozzle for a 3D printer. It’s like an assembly that you attach to your printer’s hot end.
 The main difference is that the “Nozzle” of this assembly is designed to work with a specific type of filament.
 - This nozzle differs from the Stock NOZZLE in that it has an “Easy to Clean” inlet for the filament. It also has an “SDC” feeder port for filament distribution “SDC,” which will allow you to print with more than one color.
- At the bottom of the guide is the smaller bar that is spring-loaded; inserting a cleaning filament through the hole unloads and resets it, clearing any jamming filament from the nozzle. This is a handy feature, and I recommend purchasing one with this nozzle upgrade.
- Assemble these parts from a barrier along the edge of your print bed to stop any extra material from oozing out of the side of your nozzle.
- The nozzle that comes with this assembly has a slightly higher tolerance for PLA than the stock nozzle, which allows you to print slightly faster at higher temperatures.
 It also works well with PETG and PC but takes a lot of tinkering to work well with ABS.
 - It is not compatible with the aluminum beds that are popular on printers.
- The steel nozzle core is harder to find than the aluminum one and can be replaced by producing your own at home or purchasing a nozzle core from another source.
- PLA of any type is compatible with this nozzle. I have successfully printed with ABS, PDMS, PETG, and PC; however, I wouldn’t recommend trying it out if you haven’t tried printing with ABS before; it’s more hassle than worth it.
- You will need a printable bed with a layer height between 1.5mm and 2mm. If you don’t have one, or it’s too small, try using the printer simulator in slic3r or Cura to test before buying the rest of your parts.
- Use PLA filament, ABS, and similar materials as they jam very easily with this nozzle for best results.
- This upgrade has various versions, with different nozzle attachments for slightly different purposes.

- Make sure you get the correct hotend for your printer; there are various them to choose from, depending on your requirements and budget.
Ultimate Guide To The 3D Printer Nozzle assembly
Start by having the extruder release the filament. Then try to get out as much as possible. It’s the best practice to do a cold pull when you are finished using the nozzle. This will make it ready for your subsequent use.
- Heat your hot end to 220 oC and use an E3D-style hybrid or all-metal hot lot. I recommend starting by loosening the screws on the heat block. This will give it some room to wiggle and prevent it from breaking.
The thing to remember: Remember, righty tightly, lefty loosey, and this shouldn’t require much force at all.
- Grip the heater block and unscrew the nozzle. Make sure not to put any extra force on the heat break by holding it straight. Clean off the end of the nozzle as you pull it out.
 If your particular model requires a PTFE tube, Now’s a good time to check that it’s still in place. Ensure it is not deformed or mangled.
 - If you’re going to disassemble your mower’s engine, start by applying a bit of anti-seize to the threading. Screw-in the nozzle without tightening it down but instead, make sure to leave a gap of half a millimeter to the block.
- Start by applying anti-seize on the threading of your new nozzle before reassembling it. Start by using anti-seize on the threading of your new nozzle before reassembling it. If you tighten the heater block and heat break, you can feel them snug against the nozzle.
- Finally, screw the nozzle all the way in and double-check that the gap between the nozzle and the block is still there. To tighten up the machine, heat the hotend a little more – around 250 degrees should be plenty, but if your hotend can go to 300 degrees, that’s even better.
- Tightening the pieces after they’ve been heated up ensures that they won’t loosen over time due to thermal expansion.
 The torque needed to use this nozzle isn’t intense.
 - To compare, just using two fingers on this tool is plenty, about one Newton meter. The heater block is the first piece you should tighten. Then, torque the rest of the assembly together.
The process for installing a hot end could differ depending on how it’s built. But this guide gave you a good idea of where to be careful.
FAQ on 3D Printer Nozzle Assembly
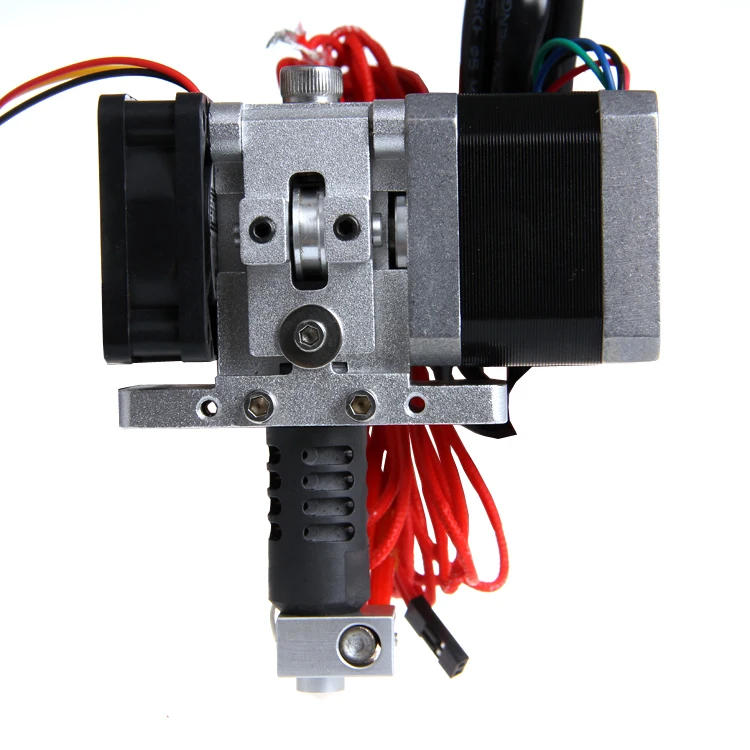
What are the important parts of a 3D Printer Extruder?
A 3D printer extruder is composed of multiple parts, some important of them are stepper motor, heater, nozzle, thermistor, etc.
Final Thoughts
The design of nozzle assembly would be an excellent place to start when working with kids. With a basic understanding of the 3D printer and how to assemble it, you can easily build this nozzle assembly. And if you’re learning something new, then a guide should help you familiarize yourself with the process.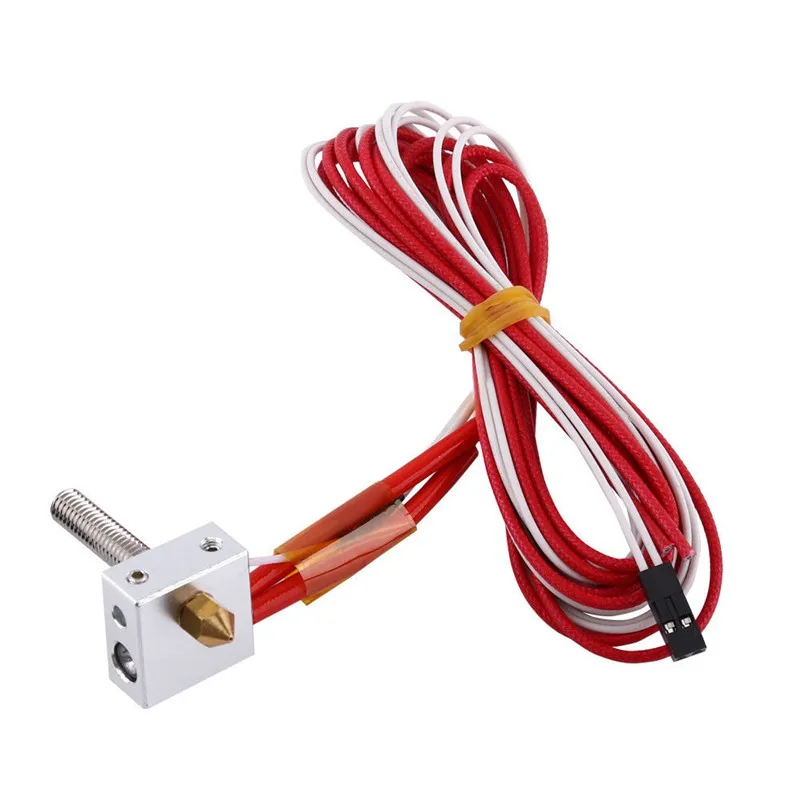
E3D Nozzles | MatterHackers
Technical Specifications
- Filament Diameters available: 1.75mm and 3.00mm
- Nozzle Diameters available range from 0.15mm with 1.20mm
- When changing nozzles, be sure to have the hotend at operating temperature to avoid damaging either the nozzle or heatbreak.
Browse by Nozzle Brand
3D Solex Nozzles
High-quality nozzles, designed for a wide range of 3D Printers.
Bondtech Nozzles
Browse the incredible CHT nozzles from Bondtech
CleanTip Nozzles
Nozzles with a special coating that stops filament from sticking
Dyze Design Nozzles
Don't miss the wear-resistant and high-performance benefits of these Dyze Design tungsten carbide nozzles!
E3D Nozzles
From small to big - these nozzles are perfect for any 3D printer upgrade.-kupit-v-soin-store.ru-3.png)
MakerGear Nozzles
Check out these MakerGear nozzles designed for specific projects.
Micro Swiss Nozzles
Upgrade your 3D printer with these micro-swiss nozzles
Olsson Ruby Nozzles
Brass nozzles equipped with a ruby tip that can withstand any abrasive filament.
Raise3D Nozzles
Explore wear resistant nozzle options for Raise3D
Slice Engineering Nozzles
Print abrasives with zero concern about wear on your vanadium nozzle.
Ultimaker Nozzles
Achieve greater creative possibilities with these various nozzle sizes.
Guides & Articles
How to Succeed When 3D Printing with Polypropylene
Successfully produce 3D printed parts out of polypropylene filament with these tips on achieving stronger bed adhesion and minimizing shrinkage.
How To Succeed When 3D Printing With PLA Filament
Discover the best practices for 3D printing with PLA filament - from finding the right temperature, to which surfaces to 3D print on, this step-by-step guide will help you succeed with 3D printing PLA.
How To Succeed When Printing With ABS
ABS filament is a versatile material that's a great option for when you need your 3D-printed parts to be strong and heat-resistant. Learn how to print this material like a Pro in this in-depth guide.
Printing Tips & Tricks: ABS Bed Adhesion
ABS: stronger, more durable, and more heat-resistant than PLA. An excellent 3D printing material, but ABS is prone to warp. Stop warping on your ABS prints, and create strong bed adhesion to produce flat prints by following these tips.
Living Hinge: Design Guidelines and Material Selection
Bring your prints to life by adding an additional degree of motion to your designs - living hinges are the foundation of expanded mechanical solutions.
Printing with Bronzefill
Bronzefill filament is made with real bronze powder and offers a unique look and feel for your decorative 3D printed parts
How To Succeed When 3D Printing With Nylon
Learn how to 3D print Nylon like a pro. Nylon is a stronger and more durable alternative to PLA or ABS and easy to 3D print with using these Tips and Tricks.
3D Printer Troubleshooting Guide
Use this guide to help you identify and solve the most common issues that may occur while 3D printing.
3D Printer Filament Comparison Guide
There are many different kinds of 3D printer filament, and each one has it's own strengths for different projects. Knowing these differences is key to a successful 3D printing experience and so we have created a Filament Comparison Guide with everything you need to know about every type of filament available.
Correct assembly of the extruder for a 3D printer
Technician
Good afternoon. I want to share with you some secrets of assembling an extruder for a 3D printer, which will greatly simplify your life in terms of working with it.
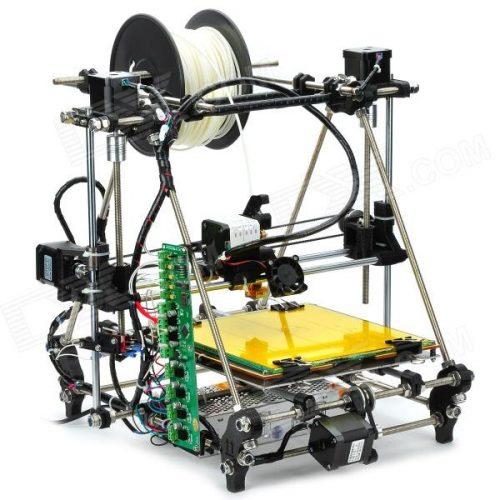
I have assembled Anet A6 myself and am completely satisfied.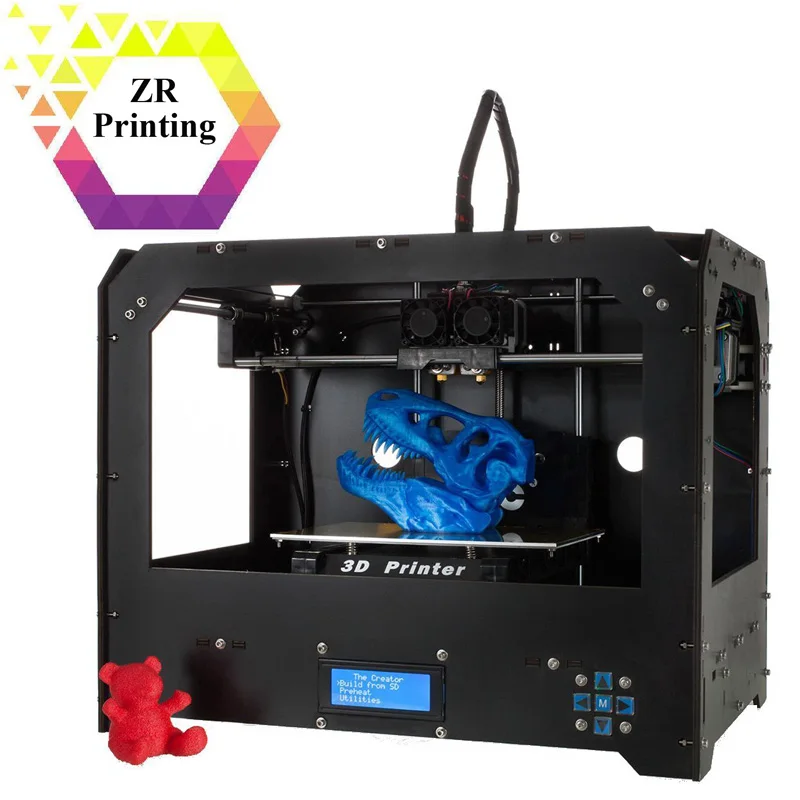 The 3D printer has already eaten about 5 kg of plastic without any problems or hitches. I leave the seal at night and when I leave for work.
All extruders that print plastic from a rod have the same principle of operation and the rules for anet A6 will be valid for other printers. We need 'thread for sealing threads' (not for sealing), thermal paste and our own
hands.
I must say right away that sealing against leaks of molten plastic occurs between the nozzle and the thermal barrier, nowhere else.
If this unit is correctly assembled, then the molten plastic will never leak and burn out on the heating element and nozzle, which means there will be no burning smell.
Let's start in order.
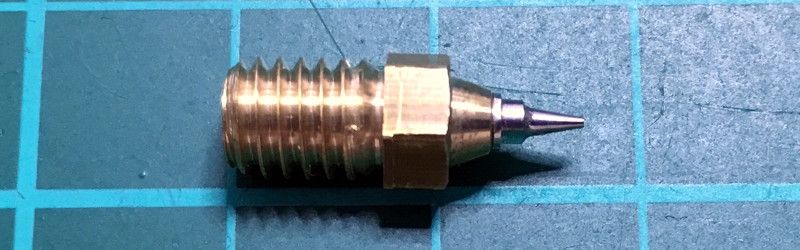
We do not completely screw the nozzle into the thermoblock with a heater, we do not screw it in about 1 mm as in the photo.
Then we screw the thermal barrier with the sealing thread all the way into the nozzle
At the point of contact between the nozzle and the thermal barrier, sealing occurs.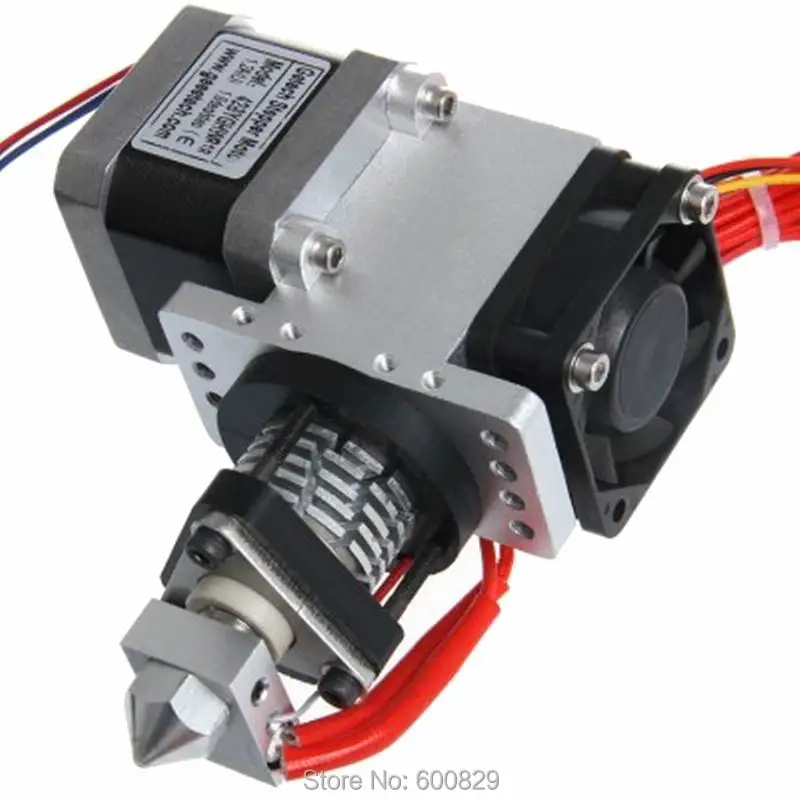
The thread sealing thread is needed so that during the change of the nozzle the heating block does not rotate on the thread of the thermal barrier, this eliminates the possibility of the thermocouple moving out of its regular place. After changing the nozzle, tighten it with a force of about 500 grams per 10 cm. Do not forget that the nozzle rests not on the thermal block, but on the thermal barrier.
Lubricate the heating element and the thermocouple with thermal paste before installation in the block.
This will allow your printer to maintain the set temperature within + or - 1 degree.
It will also significantly extend the life of the heating element.
I hope this information will be useful to you. Good luck everyone.
Some products printed on Anet A6
Subscribe to the author
Subscribe
Don't want
15
More interesting articles
26
Subscribe to the author
Subscribe
Don't want
A few tricks to speed up 3D printing and save filament! Kura allows you to use. ..
..
Read more
12
Subscribe to the author
Subscribe
Don't want
Foreword
Second version of the manual. I ask the admins to delete the first one, or replace it with ...
Read more
AKDZG
Loading
14.02.2015
841402
361
Subscribe author
Subscribe
Don't want
Many 3D printers run the popular Marlin firmware. The firmware is initially configured ...
Read more
How to clean the nozzle of a 3d printer: clean the extruder from plastic
The extruder nozzle is one of the most problematic parts in a 3D printer. It can easily get clogged or clogged. Poor plastic feed will affect the quality of the finished model. Print defects will occur. Sometimes the job is completely stuck as the printer needs a nozzle cleaning.
Main Causes of Clogged Extruder
Regardless of the type of print head, it can become clogged. The reason for this is the filament or dirt that accumulates inside the knot. Most often, the nozzle becomes clogged when the printer is not used correctly under conditions of:
- Increased load, when the device works for a long time without stopping.
- In dusty areas. Sometimes the printing device is placed in a non-residential room or workshop, where cleaning is very rarely carried out.
- Incorrect print settings. In particular, the use of an inappropriate filament or an erroneously set melting point.
In some cases, the design of the nozzle itself can cause frequent clogging. For example, when the printer comes with an initially defective extruder. The geometry of the nozzle is broken. The device should be returned under warranty or the nozzle should be replaced separately.
Information! The filament itself may be the cause of litter. A common factory defect or a burr on the plastic can cause a cork.
Pieces of sintered filament
In any case, it is worthwhile to carefully study the problem of clogging and only then proceed with prevention. If you are afraid to damage the device, it is better to take the printer to a service center.
Dust and debris trapped in the nozzle
The first cause is dirt or dust that has entered from outside. Most often, the nozzle becomes clogged with debris for a long time. Dirt can accumulate for months and even years. It sinters on the walls of the nozzle, plaque is formed. Over time, it can cause the filament to get stuck.
Extruder temperature too high
Beginner 3D makers find that an excessively high melt temperature will help avoid clogging problems.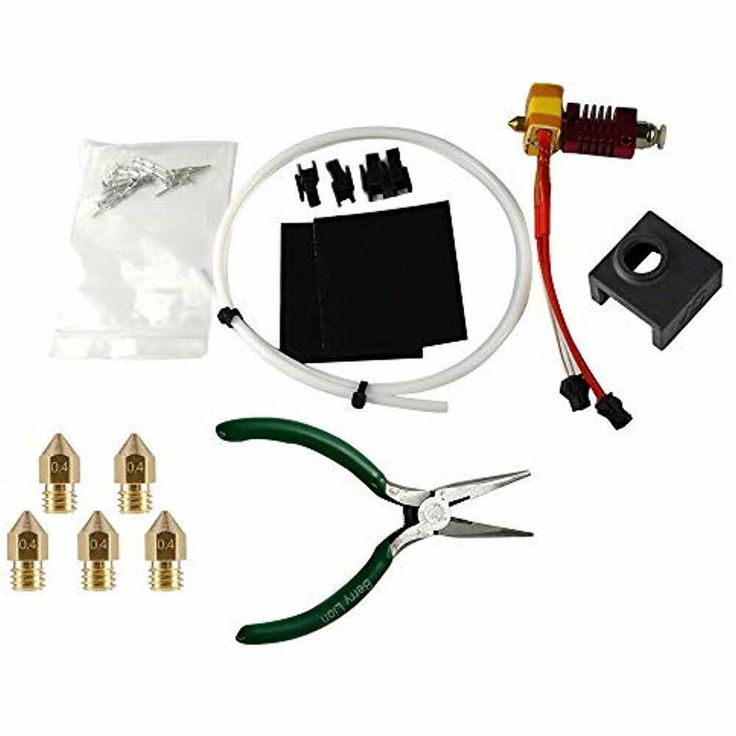 This is an incorrect judgment. When working at an elevated temperature, the plastic is instantly sintered right inside the assembly. Filament jamming occurs. A bottleneck is formed.
Therefore, it is important to follow the temperature regime recommended by the filament manufacturer. Sometimes this figure may differ slightly. Somewhere at +/- 5 ° С. It all depends on the printer model, as well as the extruder itself. The optimum melting point is found experimentally.
How to clean the 3D printer extruder: step-by-step instructions
You can clean the printer yourself, without going to a specialized workshop. There are several working methods by which you can clean the nozzle. Let's consider each of them step by step.
Clogged extruder nozzle
Manual
The roughest way to clean the extruder. Thin objects are used for it:
- drill with a diameter of up to 0.
 35 mm;
 - guitar string up to 0.33 mm in diameter;
- leg from a diode or transistor.
Special nozzle cleaning tool for different diameters
Cleaning algorithm:
- Shut off the 3D printer. Wait until the nozzle cools down a bit.
- Remove filament residue from nozzle tip.
- Drill or chisel the hole slowly with the tools indicated. Be careful not to make a hole too deep.
- Turn on the printer, feed the plastic to print.
- Repeat the procedure several times until the filament comes out in an even layer.
Some experts advise you to clean the nozzle while the printer is on. This can be done if the primary rubbish has been eliminated.
Attention! Do not use a screwdriver or drill! So you can miscalculate the force and go through the extruder, damaging the plastic capture mechanism. It is better to use a thin drill clamped in pliers.
Cleaning with a thin tool
Thinner
Sometimes mechanical cleaning is only partially helpful. With a drill, you can remove the cause of the blockage, but there are still plaques or influxes of plastic inside the nozzle. This situation is often encountered when working with ABS. To remove the filament completely, you will need to clean the nozzle in an aggressive environment. For example, in acetone or dichloroethane.
Cleaning algorithm:
- Turn off the printer, let the extruder cool down a bit.
- Unscrew the nozzle, put it in a container with acetone or dichloroethane.
- Leave the part for 2-3 hours, then remove and clean the nozzle with a needle.
Screw the nozzle onto the print head. Throw out the plastic.
Important! Spare nozzles can be stored in the acetone jar. In this way, they will always be ready for use without pre-cleaning.
Filament
Filament cleaning is one of the safest methods that does not involve intervention in the design of the extruder or partial disassembly of this unit. Two types of plastic are used to clean the nozzle:
- Filament with higher melting point. A reel with refractory plastic is placed in the printer. It literally pushes the cork out of the extruder.
- Cleaning plastic. It is usually sold in the form of short sticks or small coils. Its structure resembles nylon. Cleaning filament is the safest way to remove plugs in an extruder.
We recommend using the latter method as an alternative to manual or dry cleaning.
Carbon deposits on the filament
Prevention of clogging - expert advice
To keep the extruder and nozzle in good condition, it is worth following a number of rules:
- Use the filament melting temperature specified by the manufacturer.
- Perform regular printer maintenance. You can unscrew the nozzle once a week and leave it in a jar of acetone overnight. If the print device works almost every day, it is worth increasing the number of preventive cleanings to 2-3 times a week.