3D print google maps
How to Create 3D Printable Maps Using Touch Mapper
Summary
This blog post will explain how to use Touch Mapper to create maps that can be printed on a 3D printer.
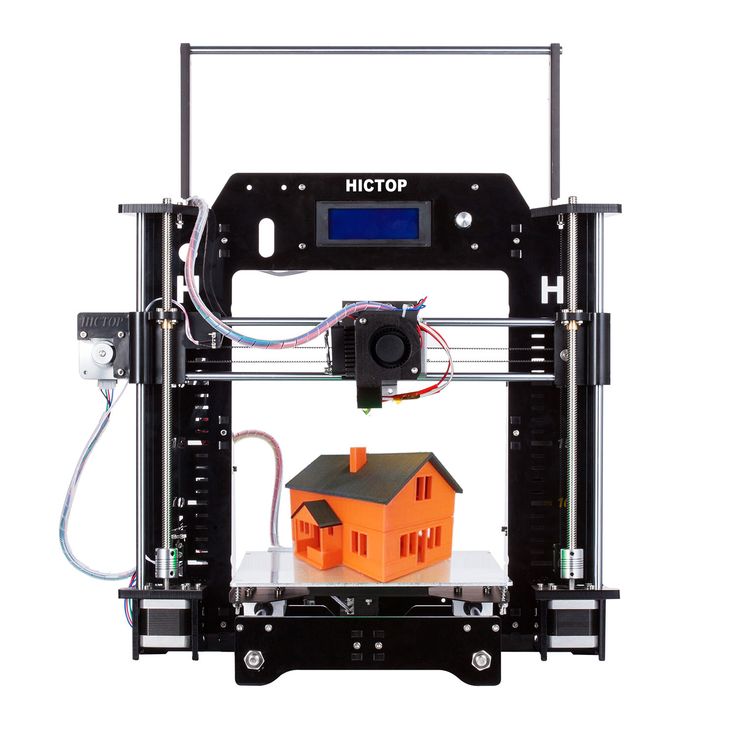
Touch Mapper is a website that enables you to create tactile maps. You can create maps that can be printed on a 3D printer, tactile graphics embosser, or swell paper. This post focuses exclusively on maps that can be 3D printed. It explains how to create and download an STL file that contains a map for a specific address. Loading an STL file into 3D printing software and printing it is beyond the scope of this post.
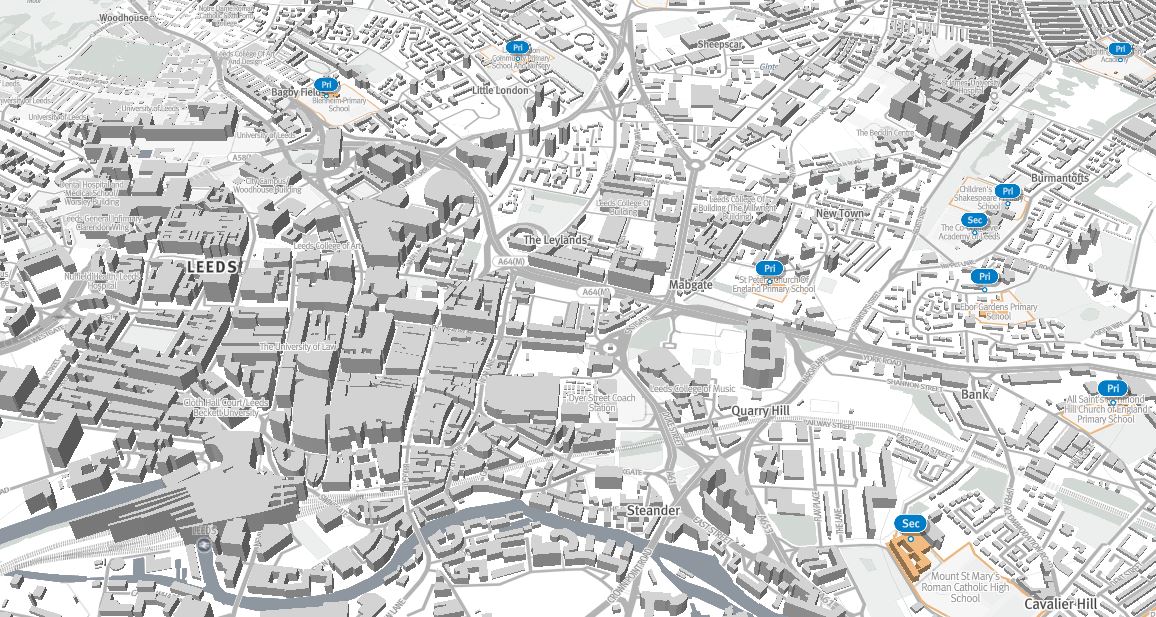
The maps you create using Touch Mapper may contain buildings, roads, sidewalks, and water features such as streams, rivers, and lakes. The objects represented in a map may vary by location based on the contents of the underlying data source which is Open Street Maps.
Touch Mapper supports many options. This is true for most products. Lots of options means lots of flexibility. However, lots of options also creates complexity which can be overwhelming. For example:
- How do I choose between all of the options?
- How can I use the product to solve specific problems?
- If I use the product to solve a specific problem, what options should I use and how should I use them?
Based on my initial experimentation with Touch Mapper, I think it works well for at least one use case that I’ll discuss in this post. I may include additional use cases in the future.
USE Case: Large scale map of a destination
Description
This use case produces a map of a destination such as a building as well as the area immediately surrounding the building. The surrounding area may include roads, intersections, and sidewalks.
Benefits to Map Creator
This use case requires only a few simple options. You do not need to use any advanced options.
Benefits to pedestrians with visual impairments or blindness
The map may enable pedestrians with VIB to create a mental map of the building and the surrounding area.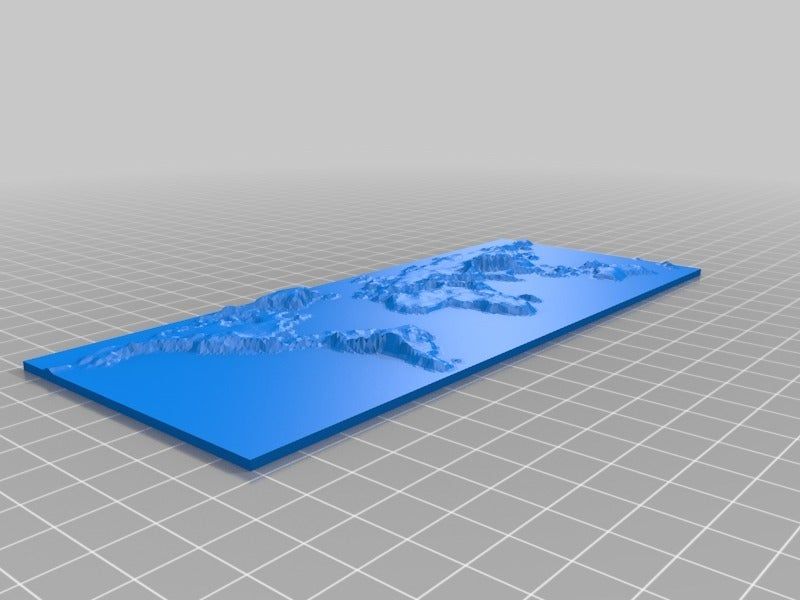 The mental map can be very helpful if the pedestrian is travelling to the destination for the first time or they need to refresh their memory of the destination.
Pedestrians with VIB may be able to discern the following information from the map:
- The approximate size and shape of the building.
- The location of entrances to the building.
- The location of the building in relation to nearby roads and intersections.
- The existence of nearby buildings as well as their size and shape.
- The path of sidewalks that approach the building.
- The location of sidewalks in relation to adjacent roads and intersections. For example, is there a sidewalk on both sides of Main Street? Note that sidewalks are higher than roads.
Limitations
The biggest limitation of Touch Mapper is that the map does not include any text or labels. As a result, the map has limited value by itself. Therefore, I recommend that the map creator also creates a written description to accompany the map. Together, the map and a thoughtful written description can enable independent exploration by pedestrians with VIB. See guidance below regarding written descriptions.
Step 1: Create the map
- Go to https://touch-mapper.org/en/.
- Enter the address of the destination in the text field and click Search.
- For printing technology, choose 3D printing.
- For print size, choose the largest size your 3D printer will support. Don’t worry about the price that is listed for each size. It is free to download the map and print it yourself.
- For map scale, choose 1:1800. See the note below about this item.
- Do not check hide buildings.
- Click the Create Tactile Map button. Note that it might take a few minutes for your map to be created.
Note: I recommend the 1:1800 map scale for a few reasons. First, this scale seems to provide enough spacing that it is possible to differentiate features that are close together, e. g. a sidewalk and a road that are parallel to each other. Second, at this scale one inch on the map is equal to 50 yards on earth. That’s a round number that is relatively easy to remember. I also encourage you to teach your students how to estimate distances in using yards because a yard is roughly equal to one step for an adult walking at a normal speed. If you do this, one yard equals one step. Hence, one inch on the map equals 50 steps.
Step 2: Download the STL file
- After the map is created, click the Download the Map Yourself radio button.
- Click the Download Printable STL File link. That will initiate the download of the STL file to your browser’s Downloads folder.
Step 3: Print the map
This step is outside the scope of this post. It assumes you have access to a 3D printer and you know how to use 3D printing software. If that is not the case, try to find a local maker space or science teacher that has access. In my experience, most Touch Mapper maps require four to five hours to print. This time may vary widely depending on your 3D printer.
Step 4: Finish the map
Notice the map has no writing on it whatsoever. I recommend that you immediately label the map so you will be able to recall what it shows. If you’re sighted, you can do this by writing on the back of the map. If you’re blind, you can braille the description on a large envelope and store each map in its own envelope. At a minimum, your label should include the address of the destination and the map scale.
Place the printed map on a table in front of you. Notice the map has a raised border on each edge. There should be a raised dot on one corner. That is the Northeast corner of the map. I recommend that you orient the map properly so the North edge of the map actually faces North and you also orient your body so you are facing North. In my experience, this practice reduces confusion.
Notice there is a cone in the center of the map. That cone can be very sharp. I recommend that you use a file to round off the top of the cone to prevent injury.
Finally, write a description of the map for your students. The description must include the name and/or address of the destination building and the map scale. In this case, the map scale should be express in terms the student can easily understand. I also recommend that you use cardinal directions to describe objects in relation to the destination building.
Here’s an example description:
- One inch on the map equals 50 yards on earth.
- The North Carolina Museum of Natural Sciences is in the center of the map. The address is 11 West Jones Street, Raleigh, NC.
- Jones Street is just to the north of the museum. It runs east-west.
- Edenton Street is to the south of the museum. It also runs east-west.
- Salisbury Street is to the west of the museum. It runs north-south. It is a one way street in which traffic flows south.
- Centennial Plaza is immediately to the east of the museum. It is a pedestrian plaza that runs north-south between Jones Street and Edenton Street.

- The main entrance of the museum is on the east side of the museum facing Centennial Plaza.
- Wilmington Street is on the eastern edge of the map. It runs north-south. It is also a one way street in which traffic flows north.
By Ed Summers
SHARE THIS ARTICLE
How to print maps, terrains and landscapes on a 3D printer
From time to time, every 3D printer owner is asked the same question: “Why is the printer really good and useful? I cannot imagine what would I use it for.” I did not find a satisfactory answer to this simple question at first, because I don’t consider printing figures and statues as the right example. That’s why every time the 3D printing technology is applied in practical use, I’m excited! Today, I’ll show you how to print a 3D map, that can serve in a number of situations not only using our Original Prusa i3 MK3 printer. How about a plastic model of terrain for school education, a small-scale version of a national park, a model that shows the overview of a real-world race track, or perhaps a tiny version of a mountain you climbed in the past. Thanks to these models, we can see the landscape from a bird’s eye view. Input data will be topographic maps that are most interesting for 3D printing purposes.
Models based on maps can be divided into two groups:
- Printing a terrain model – ideal for mountain ranges, volcanoes or abysses. So where there are well-known elevations.
- Printing a terrain model including buildings – ideal for cities and areas with buildings.
Terrain models
A 3D terrain model (without buildings) can be obtained simply and for free with the Terrain2STL web application.
- Find a place on the map. Rugged terrain works the best.
- On the Location tab, press Center to View. This will show a selection rectangle on the map.
- On the Model Details tab, adjust the size of the selected area by moving the Box Size slider. The selection can be moved in the map.
 If the resulting model is very flat, it is possible to scale it on the Z axis. This is done in the Model Details by using the Vertical Scaling slider. However, keep in mind that the resulting model will differ from reality.
 - On the Water and Base Settings tab, set the desired model base height.
- Press the Generate Model button. Then click the Download button and download the model.
Does a square or rectangular shape feel way too ordinary? Let’s take a look at how to work with some more complex shapes. Naturally, one of the basic ideas is to use borders of existing countries. For the sample print, I chose the Czech Republic – the home of Prusa Research. A good start is to successfully obtain the STL terrain model from the previous step. However, the disadvantage of the Terrain2STL application is that it is not possible to change the shape of the selection. So, if you want to work with a larger area, you will need to cut the STL model first using a 3D editor and then work with it. This is because the Tinkercad software we want to use limits the size of the imported file to 25MB. A better solution is to use a similar tool like Terrain2STL. The TouchTerrain project allows you to select any aspect ratio on the map. I recommend aligning the map, for example, in the upper left corner for a simpler placement of the shape for the cutout.
How to do it:
- Find and download the desired shape in .SVG format. Ideally, it should be on a white or transparent background. To make searching easier, I recommend adding the keyword “silhouette“.
- In a web browser, open the Tinkercad tool and sign in (or create a free account).
- Create a new design by pressing the Create new design button.
- Create a block (use the “Box” tool on the right) and change the dimensions so it stretches across the entire Workplane.
- Import the downloaded .SVG file with the shape using the Import button in the top right corner.
 When the import is complete, the image is automatically converted to a 3D object. Change the shape type to “Hole“.
 - Click the object with the right mouse button and first adjust its height in the Z-axis so that it is higher than the block. Then, adjust the size of the model by dragging any corner to fit the block. To keep the aspect ratio hold the Shift key.
- Now select both objects (Ctrl + A), group them with the Group button (Ctrl + G) and change to the “Hole” type. This creates a negative shape, which then cuts the terrain.
- Import the terrain model using the Import button in the top right corner and wait for it to finish.
- Adjust the size of the terrain model and place it in the right place in relation to the carved shape.
- Deselect the selection of objects by pressing the mouse outside the print area.
- Export the object using the Export button in the top right corner of the .STL format.
- The model is ready to be sliced, for example, in Slic3r, where it can be scaled in the Z-axis if needed for better terrain visualization.
Download link: The Czech Republic 3D terrain model on PrusaPrinters
City model with terrainIn this case, the procedure is a little more complex than the terrain itself and more tools need to be used. To get the model, we use the CADMAPPER web tool, which uses freely available maps from OpenStreetMap as a source. The tool allows you to download a 3D model up to 1 km² area for free. Larger areas are paid. In most cases, 1 km² is perfectly fine. By covering the entire print area (25 x 21 cm), we get the ideal scale for the model (approximately 1: 4000 to 1: 5000).
- Open CADMAPPER tool in the browser and click Create a map.
- Select the desired area up to 1 km² (or larger and buy the model).
- Select the output format for SketchUp 2015+.
- Include Topography and 3D Buildings in the output model and choose the height of buildings for which the height in the map is not defined.
- Press the Create button to start generating.
- Press the Download button to download a generated zip file that contains the .SKP file.
The downloaded file is not yet fully prepared for slicing. What we need to do is to create an object under the terrain. In addition, we can simply change the height of buildings in this tool, especially those that have a default value from CADMAPPER. We will use SketchUp Pro for editing, which is free to download in the trial version.
Eneroth Terrain Volume extension is useful when you want to create a solid object under the terrain easily. Download this extension as well.
Add extensions using the Window -> Extension Manager. Press the Install Extension button and select the downloaded file from the previous step.
Now we have everything ready and we can start editing the model.
- Run SketchUp, open the downloaded file from CADMAPPER (File -> Open).
- On the right side of the application window, expand the Layers section and remove all layers except buildings, topography and Layer0. Press the “Delete content” icon. The content of the deleted layers is not easily printable, that’s why we’re deleting them. However, you can play around with the content of deleted layers and see if something interesting comes out of it – we won’t be using them in our guide, though.
- Click anywhere on the terrain to select it. In the top menu of the app select Extensions menu -> Eneroth Terrain Volume. This creates a solid object under the terrain.
- If you want to change the height of the base or buildings, you must explode the model (select the whole model, right mouse button, Explode option), and then the Push / Pull tool to increase or decrease the height of the buildings or the base under the model.
- Export the model using File -> Export -> 3D Model.
The file is now ready for 3D printing. Open it in the Slic3r PE and adjust the size to fit the print area. For an area of 1 km², the approximately square shape of the model is reduced to about 20% of the original size. So we get the model on a scale of cca 1: 5000. We recommend a PLA material and a layer height 0.15mm.
1:5000
1:2500
1:1000
Download link: Prague Castle area on PrusaPrinters
Preparing the model for printing and correct orientationUse Slic3r PE or your favorite slicer tool to generate the gcode file.
Terrain models with at least one straight edge can be printed in two ways, either horizontally or vertically. Each of these orientations has its pros and cons and for each model, it is necessary to decide which orientation to choose. Let’s look at the main differences.
The horizontal positionThis position is natural in the real world.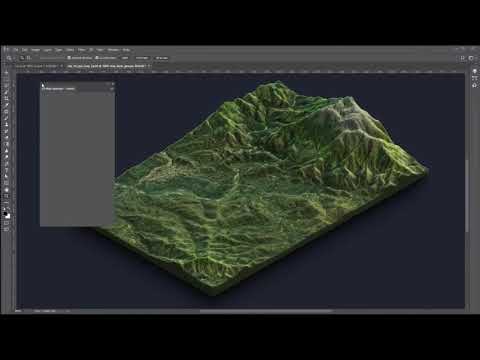 In this position, we are able to print almost any model. In the Z-axis, however, we are limited by the height of the layer. The lowest height of the extruded material is about 0.05mm and the most commonly used nozzle diameter is 0.4mm. The relatively large diameter of the nozzle alone causes “drops” on the peaks. The nozzle diameter also affects edge sharpness.
We recommend selecting a layer height of 0.15mm and a 15% to 20% infill.
Pros:
- you can print almost any model
- there are horizontal lines on the model that represent contour lines (some may consider this a con)
Cons:
- infill is necessary (longer printing time)
- drops on peaks
- there may be strings between the peaks/buildings
In the vertical position, the biggest advantage is that no “drops” of material on the peaks will be created, and the peaks will be smoother. This makes the surface more detailed and looks much better.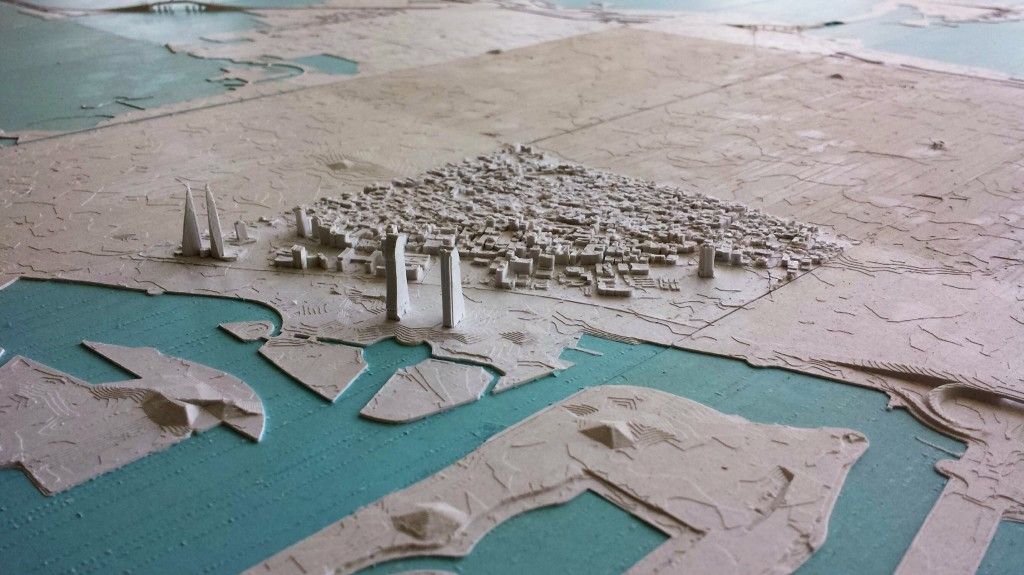 The vertical orientation is suitable for models where there are no areas that make an angle with the print area less than about 45°. Supports for such models is not a solution we would recommend.
Vertical orientation is also not suitable for printing city-building models, because almost every building would have a perimeter wall parallel to the print surface and therefore the model would be non-printable without supports.
With vertical orientation, it is advisable to choose the most suitable area on which the model will be placed. Choose the one that will touch the bed with the largest possible area. Use the Place on the face button to rotate the model.
We recommend selecting a layer height of 0.15mm and a 0% infill. Infill is not needed in most cases. The printing time will be almost half and you save some material. For best results, use PLA filament.
Pros:
- print without support and infill
- there is no stringing between peaks
- the terrain looks smoother than the horizontal print position
Cons:
- can not be used to print city models
- there’s a chance that it will become loose and that the print will fail
The difference of print in horizontal and vertical orientation is shown in the pictures below.
Our tips for color models:
- Use ColorPrint to change the color of the filament depending on the altitude. Learn how to use ColorPrint in this article.
- Print the model with a single filament and paint it afterward. It depends only on your imagination.
- If you already have Original Prusa Multi Material Upgrade 2.0, you can try to create a color model to distinguish terrain, buildings, waterways and roads.
Feel free to experiment, try various changes and edits, and don’t forget to share the results in our forum.
How Relativity Space prints rockets on a 3D printer
Relativity Space co-founder, CEO Tim Ellis / Relativity Space / AFP
Relativity Space is printing a metal space rocket on a 3D printer that it invented specifically for this purpose. Almost all: 95% is printed, and the remaining 5% falls on electronics, seals and some other elements. 3D printing has many advantages. She's cheaper. She's faster.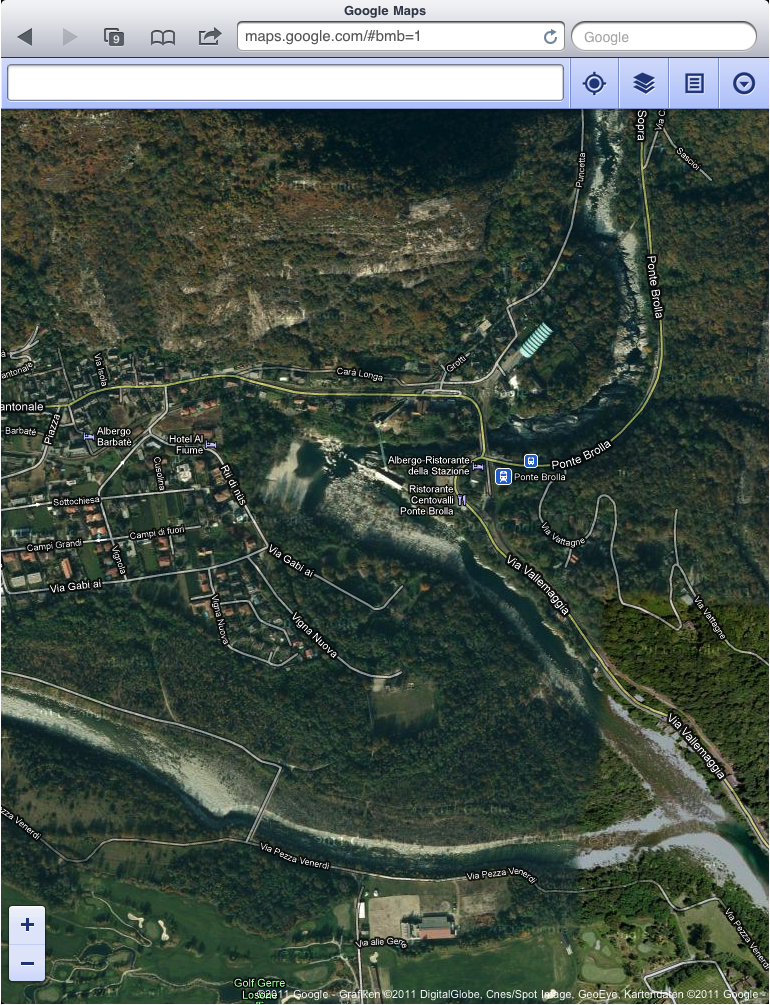 It is made on the spot, no need to wait until the parts are brought from another factory. It is stronger: fewer places for fastening parts. “The Shuttle had 2.5 million parts,” says Relativity Space co-founder Tim Ellis. “According to our estimates, SpaceX and Blue Origin have reduced this number to 100,000 per rocket. We have a thousand - less than in your car.
Many space companies use 3D printing, but only for individual components. Skeptics insist that no one knows how the printed rocket will behave during takeoff and in space. So far, the startup's first rocket, Terran 1, has successfully passed all ground tests. The first copy for a real flight is collected slowly and carefully checked. Now it is ready for 85%. A test flight is scheduled for the end of this year. But investors believe in the idea. Last November, Relativity Space completed a series funding round and raised $500 million. After that, according to research company Pitchbook, with a business valuation of $2.3 billion, Relativity Space became the second most valuable venture capital-funded space company in the world. In 1st place, of course, SpaceX (however, Pitchbook does not include Blue Origin in the rating, which is fully funded by Jeff Bezos).
Relativity Space has since raised another round, raising $650 million, based on a company-wide valuation of $4.2 billion. reusable. After all, competitors do not sleep. Relativity Space is just one of more than a dozen rocket companies created in the last 10 years.
Launch from Mojave
Ellis was born in 1990 in Texas. He is the eldest of three children of an architect father and a dentist mother. As a child, Ellis was fond of Lego and persuaded his parents to buy about 200 sets. He immediately threw away the instructions from them and collected the spaceships he invented himself. Until now, the thumb of his right hand, when at rest, arched back more than his left - Ellis assured the Los Angeles Times that this was the result of long hours when he assembled and disassembled the parts of the designer.
As Ellis got older, he began making amateur films with his friends, mostly action movies, where the characters were often confronted by zombies. He entered the University of Southern California to become a screenwriter. But already in his first year, he became interested in the profession of an aerospace engineer and joined the Rocket Propulsion Lab at the university, which was engaged in the development of rockets.
The University of Southern California is known for its space program. Its alumni include Apollo 11 commander Neil Armstrong, astronaut and former head of NASA Charles Bolden, and Dana Rohrabaker, chairman of the House Space and Aeronautics Subcommittee. There are several laboratories where students create real rockets and satellites. “I was amazed,” Ellis recalled in an interview with the university website about the first time he went to test the rocket engine he designed and built with his comrades in the Mojave Desert. – I always advise students: take part in practical classes. So you will understand why you need to study this or that differential equation, scheme or line of code.
They wanted to be the first student group to launch a rocket into space. But, having carried out dozens of successful launches, they did not even achieve a suborbital flight - this was done by their successors in 2019, having developed more powerful engines.
Why leave Bezos and Musk
At Rocket Propulsion Lab, Ellis met and became friends with classmate Jordan Noone. Then their paths diverged for a while. Noon went to SpaceX, where he worked, among other things, on the Dragon 2 spacecraft. His emergency rescue system uses a 3D printed SuperDraco engine.
Ellis interned for three summers at Bezos' Blue Origin, and after graduation he was accepted full-time. He convinced Bezos to create a metal 3D printing division (by then many competitors, including Boeing, were doing it). He also created it from scratch. The traditional way of producing parts is turning on a lathe, stamping or casting with a mold. In 3D printing, robotic arms deposit layer upon layer of molten metal. A printed rocket has fewer parts, and therefore, places to connect them using welding, rivets, etc. , and therefore fewer vulnerabilities. Skeptics object that if defects are found, the entire part has to be discarded and its manufacture must be started anew. But Ellis says that Relativity Space has developed a way to restart the printing process from the right place. “3D printed rockets are the future of rocketry and space exploration,” he told Inc. magazine.
Ellis and Noon often called each other and talked about rockets, although they worked for different space companies. They put together a rough cost structure to understand why rockets are so expensive. “80 to 90% goes to wages,” Noon told Bloomberg. 3D printing can dramatically reduce these costs.
Ellis once mentioned that he was going to start a startup to 3D print entire rockets. He later admitted to Inc. that he tried to get Bezos to print more parts for the rocket, but his suggestions were never fully implemented. Then he decided to take up rocket science himself. Noon liked the idea. Both left in December 2015 to create startup Relativity Space.
“I never saw him give up, give up, or fail to solve a problem, even a really difficult one,” Ellis told the Los Angeles Times of Noon. “I knew our startup was going to have a lot of problems, and he was the right person to make it all work.” And Noon noted: “I am strong in technical and practical aspects, and Ellis is strong in creative thinking and non-standard solutions.”
For 1 kg of satellite
Relativity Space received its first money from venture investor Mark Cuban. Ellis and Noon made about 20 attempts to guess Cuban's email address, as Cuban preferred texting to other forms of communication. Some of the letters were returned with a note that such an address does not exist, some got to other people. But one of the addresses turned out to be correct, and Cuban read the letter with the headline "Space Is Sexy: 3D Printing of an Entire Rocket." Ellis and Noon asked for $100,000. Cuban, after five minutes of texting them, agreed to invest $500,000 (although they had to wait two months to check if they were fraudsters). “They are smart, resourceful, driven and always learning,” Cuban wrote in an email to The Times. “These are exactly the traits I look for in innovators.”
First, the startup needed to create a huge 3D printer - there were no models on the market suitable for their purposes. A lot of effort was put into this. But now the latest generation printer is able to print a part up to 32 feet (almost 10 m) high, while the height of the Terran 1 rocket is 115 feet (35 m). Ellis and Noon say that even if the rocket venture fails, they can always cash in on the sale of industrial 3D printers.
Terran 1 /Relativity Space
Created with Cuban's money, the first printer could print parts half the size of the last generation. But the working rocket engine printed on it made an impression on investors. First, they invested almost $10 million in the startup, then another $35 million, and in October 2019d. - another $ 140 million. Ellis and Noon planned to stop there. They did not want to dilute their share, and the funds raised should have been enough for the time before the first commercial launch, if they worked without haste. But in November 2020, another $500 million round of funding was raised. As Ellis explained to CNBC, “the development and scaling of the project needs to be accelerated.” That summer, the startup moved to a new 11,000-square-meter headquarters in Long Beach, California. m, where there will be a site for the production of rockets (the most important thing is that their new printer climbed there in height). Over the past year and a half, the company has more than doubled the number of employees. She now has 400+ people and plans to hire 200 more this year.
Ellis told Inc. that they already have $1 billion in launch contracts from government and commercial entities. Terran 1 can carry up to 1250 kg of payload. This is smaller than SpaceX's Falcon 9, but larger than Rocket Lab's Electron. Relativity Space is targeting a mid-sized satellite niche, much like a car, Ellis said. Its competitors are the Russian Soyuz-2-1V and the European Vega. Or the same Electron, if Terran 1 displays several small satellites at once.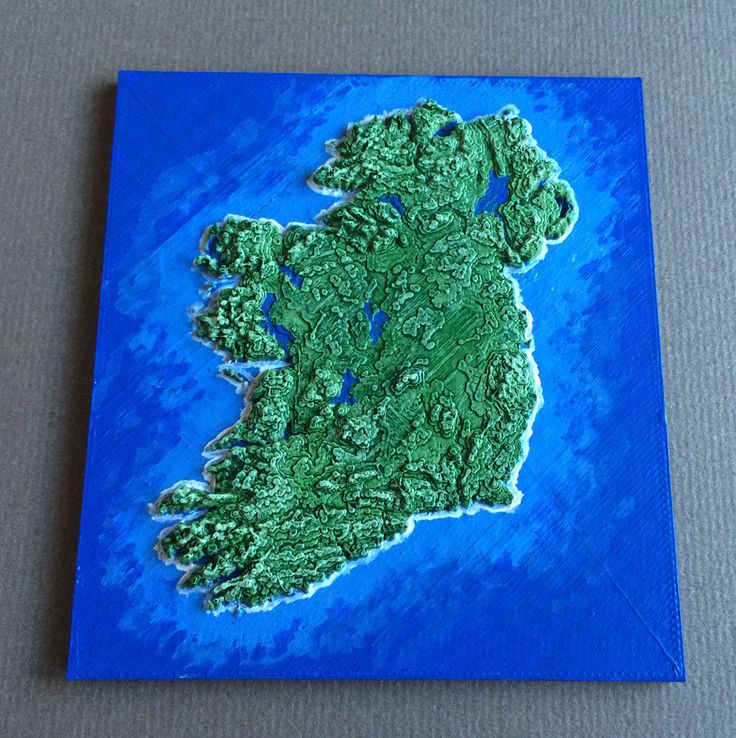
The launch cost of Terran 1 is $12 million, i.e. slightly less than $10,000 per 1 kg. Last year, Roscosmos CEO Dmitry Rogozin announced a more than 30% reduction in the price of launch services for a number of satellites to the level of SpaceX: to $15,000–17,000 per 1 kg instead of $20,000–30,000.
Target Mars
The competitive advantage of Relativity Space is not only in cost, but also in the fact that it can print a rocket to customer requirements, changing both the diameter of the rocket and the shape of the fairing for the satellite - of course, within the limits allowed by aerodynamics, Forbes explained. And she can do it quickly. Once the technology has been proven in practice, Relativity Space is going to print the rocket in 30 days and take another 30 days for pre-launch tests, Ellis told Scientific American. According to him, even SpaceX takes 12 to 18 months to build a conventional rocket. But Musk claims that his reusable rocket is ready for a new flight 51 days after the previous launch.
So in June, Relativity Space raised another $650 million from investors to accelerate the development of its own reusable Terran R rocket (of course, also almost completely printed on a printer). Its first launch is scheduled for 2024. It will be larger than the first one - 216 feet (66 m) high and designed for 20 tons of payload.
For Ellis and Noon, the main thing is that this project is another step towards interplanetary flights. Musk is looking for a way to get colonists to Mars, and Ellis and Noon are hoping to help them settle on the Red Planet. "If you believe - and I believe - that Elon [Musk] and NASA will send people to Mars, then <...> they will need a whole bunch of things," Ellis told CNBC. “Our printers are reducing the amount of infrastructure that would need to be transported from Earth to Mars in order to establish a colony there,” explained Noon Inc. – Traditionally, you need to send tons of equipment for a factory that will be able to produce factories that, in turn, will produce cars, houses, warehouses . .. In our vision of the future, you simply send a 3D printer to Mars that prints everything using Martian raw materials this is". In a speech to the students of his alma mater, Ellis added: “We are going to 3D print the first rocket made in Mars <...> I don’t see a future in 50 years in which rockets will not be 3D printed. It just doesn't make sense otherwise, because printing is much easier and cheaper."
50 3D Printing Ideas
It looks like we're about to start drowning in useless stuff made for 3D printing projects. But you can do something that will really be useful! If you're running out of ideas, here's a list of 50 3D printable items you're unlikely to throw away.
Bag clip with screw cap
Now the bag clip will have a new feature - a hole with a lid for quick access, as in the photo. This clip is easy to print and convenient to use. Strange that no one thought of this before.
Author: Minkix
Download: Thingiverse
Modular Furniture Connector
This connector allows you to quickly assemble modular furniture. The default model is designed for 17×17 mm wood, but the size and material can be changed to suit your needs using a parametric file for customization.
Creator: LeFabShop
Where to download: Cults
Sealant cap
No more throwing open sealant tubes away. The screw cap for the nozzle presses the o-ring tightly against the body of the tube and closes the access of air to the solvents inside.
Author: The-Mechanic
Where to download: Thingiverse
Laptop niche
Now the laptop will always be at hand, but hidden from prying eyes in a special niche that is attached to the bottom of any coffee table.
Author: Too Snide
Download: Thingiverse
Phone Holder - Candice
Elegant and simple, perhaps the easiest thing you can 3D print.
Author: Clem.C2
Where to download: Cults
Polypanels
The idea for Polypanels came from Devin Montes. A polypanel is a series of three-dimensional building blocks. The individual elements of a Polypanel look simple, but if you print a lot of them and different types, you can create all sorts of complex designs. Something like LEGO where you can design each brick.
Author: MakeAnything
Where to download: MyMiniFactory
Clothes hook
This clothes hook is designed as an E3D attachment and can be printed enough times to fit all your clothes.
Author: Filar3D
Download: Cults
Plant Pot
This anatomical brain flower pot is easier to print than it looks, creator DrFemPop says. For assembly, it is only necessary to glue the parts after printing. It turns out an original house for plants.
Author: DrFemPop
Where to download: Cults
Door Holder
This is a simple solution for holding a door. Double-sided adhesive tape is sufficient for surface mounting.
Author: Akiraraiser
Where to download: Thingiverse
Piggy bank
A simple piggy bank for beginners, no complicated settings.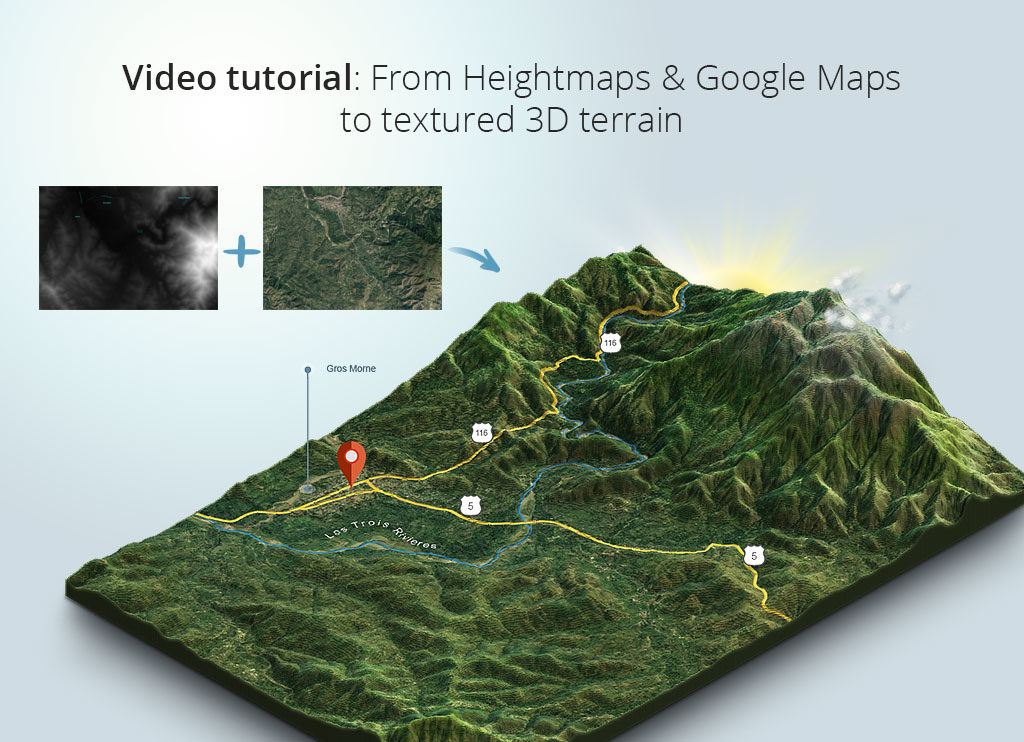
Author: lecaramel
Where to download: Thingiverse
Cable ties
This tie is perhaps the simplest and most ingenious of all devices. Clips are printed as a whole sheet at once, and then the required amount can be cut off from it.
Author: Sunshine
Where to download: Cults
Roller ruler
An indispensable device if you need to measure the length of something non-linear: a piece of rope, a curved line, a perimeter with bends, etc. The ruler is called Geneva and has step 5 mm.
Author: MechEngineerMike
Where to download: Thingiverse
Pliers
This small solid piece of plastic can replace your pliers/pliers. These forceps take the force to the handles and redistribute it at the end of the grip. It's definitely pliers. Just smarter.
Author: BYU CMR
Where to download: Thingiverse
Cylindrical textured box
Beautiful tube from Syboulette decorated with hexagons.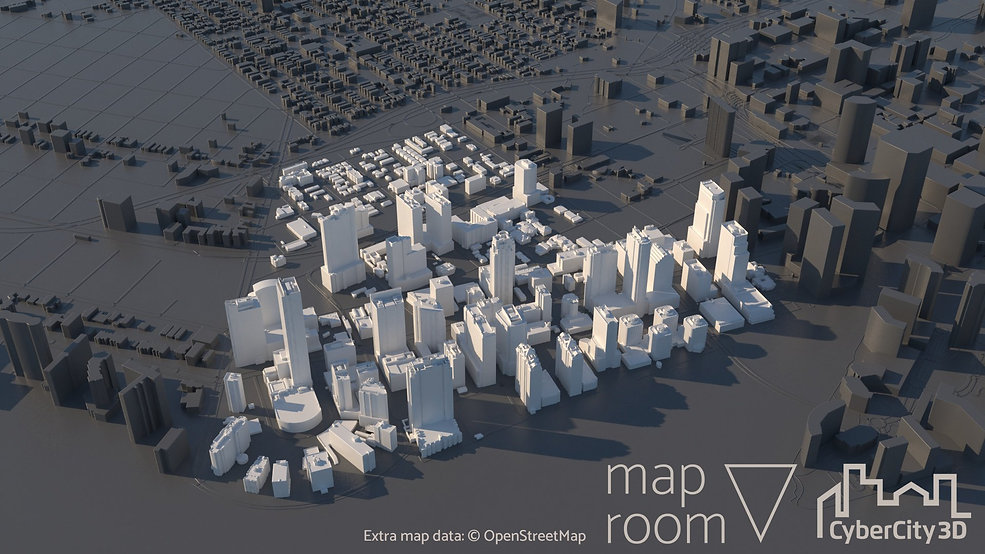 Well suited as a kitchen utensil for storing oatmeal, rice and other crumbly substances.
Author: Syboulette
Where to download: Cults
Door Stop
This stop is modeled after the Guyer Anderson cat statue in the British Museum. The design is hollow, which allows you to fill the limiter with something for additional weight.
Author: Duaneindeed
Where to download: Cults
Plague Doctor Mask
Not exactly the most useful item on the list since bubonic plague is a thing of the past. But a mask can come in handy, for example, when you need to clean up after your pet. And you can also go to the carnival in it.
Author: Odrivious
Download: Cults
Universal Spool Holder
This adjustable spool holder uses a spring and an adjustable rewind clutch. It's the perfect place to store those pesky wires.
Who made it: Vincent Goenhuis
Where to download: Thingiverse
Sturdy waterproof box
This tight-fitting box will keep things from getting wet. Print it in PLA or PETG, add a flexible TPU seal and M3 screws for the spring hinge, and you're done.
Author: ZX82
Where to download: Cults
Dice
This dice is suitable for flat 3D printing and has a face size of 16mm.
Author: Devin Montes (MakeAnything)
Where to download: MyMiniFactory
Collapsible Coat Rack
Really cool coat rack. That's all there is to say about her.
Author: Komaru
Where to download: Thingiverse
Business Card Holder
Great for showing off your new business cards to your Wall Street friends. What could be more delightful than this Zippo card holder with flip-top lid.
Author: PentlandDesigns
Where to download: Cults
Pencil and pen holder
Iceberg or melting beehive? Be that as it may, this is a handy pen and pencil holder that is cheaper to print than to buy.
Author: BeeVeryCreative
Where to download: Cults
Groovi Monster Audio Amplifier
This is a passive smartphone audio amplifier that looks stylish and does the job well. It's called Groovi Monster for a reason.
Author: 3DShook
Where to download: Cults
Cup holder
Can be used not only as a cup holder, but also as a coaster for hot dishes. The dimensions of the template are easily adjusted to suit any size cookware.
Author: jmdbcool
Where to download: Thingiverse
Clamp
Designed for fixing various materials, including the ends of the wire in the coil. Also great as a clothespin replacement.
Author: Med
Where to download: Cults
Pencil Box
Suitable for storing all your desk trivia and trinkets (memory cards, rubber bands, pencils, paper clips, etc.).
Author: Monkey3D
Where to download: Cults
Headphone holder
This is a duck. Yes, you can hang headphones on it.
Author: Toshi_TNE
Download: Thingiverse
Polyhedral Succulent Pot
Unusual geometric pots for your growing succulent collection.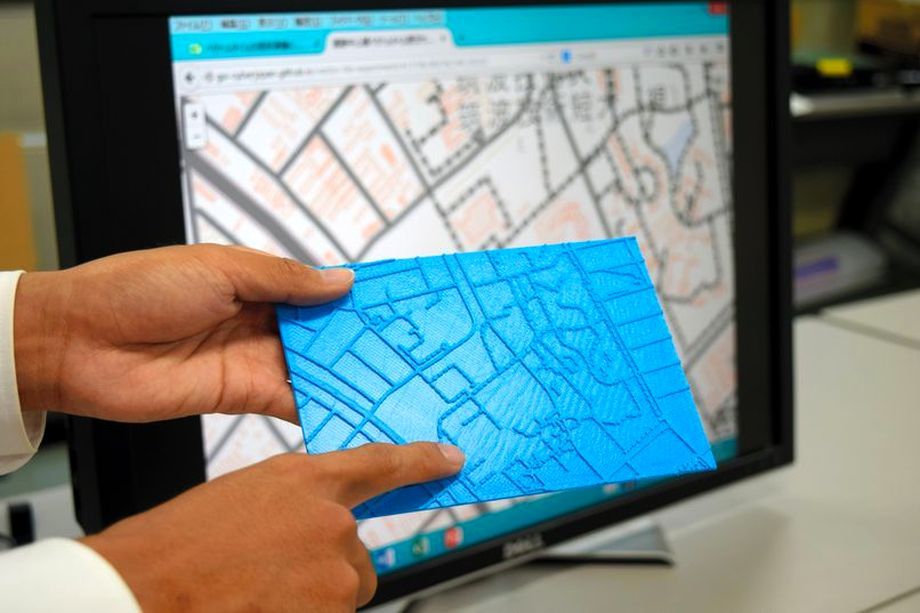 These small pots can be configured to be connected together.
Author: PrintFutura
Download: Cults
Survival whistle
This is a survival whistle with original design. It is durable, easy to make and very loud (118 dB is more than enough to be heard in an emergency).
Author: Joe Zisa
Where to download: Thingiverse
Measuring cube
A simple and original measuring cube for the kitchen. On each side there are recesses for measuring the volume of ingredients (in cups - according to the American system, and in metric units for everyone else). It is best to print with PETG material, it is the safest for products.
Author: iomaa
Download: Thingiverse
Hinge
This is a parametric hinge that can be sized to fit your needs.
Written by Rohin Gosling
Where to download: Thingiverse
Car Eyeglass Holder
Attaches to your car's sun visor. Glasses will always be at hand.
Author: Trevor Long
Download: Thingiverse
Opener
The simplest things are usually the most useful. Convenient and easy to print opener. Covers the sharp edges of the cork as much as possible, protecting you from injury.
Author: Jeremy Peterson
Download: Thingiverse
Superhero Keychains
Sometimes you need to remind yourself of your hidden superpowers. Stylish and cool keyrings are well suited as a small gift.
Author: Formbyte
Where to download: Cults
Headphone stand
Will be useful for music lovers and gamers who use headphones a lot and often. After all, now they will no longer roll around anywhere.
Author: MakerBot
Where to download: Thingiverse
Bag Clip
The model consists of two printed parts. Allows you to keep packages closed and keep food fresh longer.
Author: Walter Hsiao
Download: Thingiverse
Plastic wrench
Handy wrench, but don't choose soft plastic to make it.
Author: Daniel Noree
Where to download: Cults
Sliding Decal
No more worrying about whether cups are clean or dirty right now in the dishwasher! With the help of a special mechanism, the slider easily changes the inscription on the plate.
Who made it: MiddleFingerBoss
Where to download: Thingiverse
Collapsible basket
Cool picnic item. A folding square basket with five sections is printed from several parts and then glued together. For product safety, it is recommended to use PETG plastic.
Author: PatternToPrint
Where to download: Cults
Self-watering plant pot
Houseplants are dying from your forgetfulness? This will not happen again! This pot will water them by itself, and your conscience will be clear.
Author: Parallel Goods
Where to download: Cults
Maze Gift Box
Cash is not the most original gift. But if you present them in such a gift box, your friend will surely like it. The lucky recipient will have to work hard to get to the prize, because there is only one right way.
Author: Robert
Where to download: Thingiverse
Wired headphone holder
The headphones will now be protected from tangling and breakage.
Author: Robert
Where to download: Thingiverse
Tube Squeezer
Will help squeeze out the contents of the tube to the last drop. Wide enough to fit most tubes on the market. Printed in three separate parts.
Author: Justin Otten
Where to download: Thingiverse
Webcam Shutter
The best thing for the paranoid and just for those who are uncomfortable being under the gun of a webcam. Instead of sticking tape or sticky tape over the lens, attach a slider shutter to the body and open it when you need a video call.
Author: Horizon Lab
Where to download: Cults
Hexagonal Prefabricated Drawers
Useful to free your desk from the noodles of cables, wires and just every little thing. The design can be easily expanded if necessary.
Author: Dan O'Connell
Where to download: Cults
Wall Mounted Phone Shelf
Attach the shelf to a power outlet and place your phone on it while charging. The model also has a corner slot that holds your smartphone or tablet upright for watching videos.
Author: Tosh Sayama
Where to download: Cults
Card Shuffle Machine
Awesome item for poker lovers. This device will help to shuffle the cards and deal them during the game.
Author: LarsRb
Where to download: MyMiniFactory
Box with a secret lock
Box for storing things in a place inaccessible to prying eyes with a secret multi-stage opening mechanism.
Author: 3DPrintingWorld
Where to download: Thingiverse
Digital Sundial
Yes, your eyes don't deceive you. This is a digital sundial and it really works. They are designed to pass only the right beams at the right time and at the right angle to display the actual time in 20-minute intervals.