3D print fails halfway
8 Ways How to Fix Resin 3D Prints That Fails Halfway – 3D Printerly
There have been many instances where I find my resin 3D prints fail halfway through the printing process which can be quite frustrating.
After much research and looking into the way resin 3D prints work, I figured out some of the main reasons why resin 3D prints fail.
This article will try to guide you along the way to fixing resin 3D prints that fail halfway or resin prints that fall off the build plate, so stay tuned to find out more.
Why Do Resin 3D Prints Fail Halfway?
There are many reasons that can cause the resin 3D prints to fail halfway. It can be caused because of the wrong exposure time, unbalanced build platform, not enough support, bad adhesion, wrong part orientation, and many more.
Below are some of the most common and major reasons that cause the resin 3D prints to fail halfway. The reasons could be:
- Resin is Contaminated
- LCD Optical Screen is Too Dirty
- Having Too Many Prints on the Build Plate
- Wrong Print Orientation
- Improper Supports
- Build Plate is not Level
- Damaged FEP Film
- Wrong Exposure Time
The section below will help you fix the above-mentioned problems to prevent 3D prints’ failing and getting the best results from your 3D printer. Troubleshooting SLA resin 3D prints can be difficult, have patience and try different methods out.
How to Fix Resin 3D Prints That Fail Halfway
1. Make Sure Your Resin is Free of Residue
Check the resin you are going to use before every print. If your resin has cured resin residues from previous prints mixed in the bottle, the resin can cause issues in your print and may not print at all.
If your resin printer is not printing anything, definitely check for cured resin. It could be from a previous print failure.
This is likely to happen if you have a 3D printer that uses a fairly powerful LCD screen. For example, the Photon Mono X has settings within the 3D printer where you can set the “UV Power”.
When I had my UV Power setting up to 100%, it actually cured resin outside the lights’ precision due to being so powerful. On top of this, it has a monochrome LCD screen which is known to be stronger than the average screen.
If you have added a few drops of alcohol to the resin by accident, this may contaminate the resin and can result in print failure.
My normal routine before starting a 3D print is to use my plastic scraper and move the resin all around so no cured resin is stuck to the FEP film.
Check out my article called Ways How to Fix Resin Prints Sticking to FEP & Not Build Plate.
This Photon Scraper on Thingiverse is a good example of a tool you can use to help clean out any residue. Printing this on a resin printer rather than a filament printer is a good idea because you get that needed flexibility and softness for a resin scraper.
- Clean any used resin thoroughly before pouring it back into your original resin bottle
- Keep the resin away from the alcohol during the cleaning process to prevent alcohol from entering the resin.
- Clear the resin vat of cured resin/residue, so there is just uncured resin left
2. Clean the 3D Printer’s LCD Screen
Keeping the screen clean and clear of any cure resin residues and dirt will bring you better results. A dirty or stained screen can cause print defects and this is one of the most common reasons behind print failures.
If there is dirt or resin residue on the screen, your resultant print may have some gaps. The part that has dirt on the screen may not allow the UV lights to pass through the screen and the part of print above that area will not be printed properly.
I managed to get a hole in my FEP film which meant that uncured resin leaked through to the monochrome screen. I have to remove the resin vat and carefully clean the LCD screen with a scraper to remove the hardened resin.
The LCD screen on a 3D printer is pretty strong, so the light can usually pass through some forms of residue, but it’s possible that it negatively affects your print quality.
- Check your 3D printer LCD screen occasionally to ensure there is no dirt or resin present on the screen.
- Only use a simple scraper to clean the screen because chemicals or a metal scraper can damage the screen
3. Try Not to Overfill the Build Plate to Lower Suction Pressure
Reducing the number of miniatures prints on the build plate can effectively mitigate the probability of resin print failures. No doubt, printing a lot of miniatures at the same time can save you time and costs, but this can result in failures as well.
If you overload the build plate with so many prints, the printer will have to work hard on each layer of all prints. This will affect the performance of the 3D printer as it may not be able to handle all parts efficiently.
You can experience resin prints falling off the build plate when this happens.
This is something you’ll want to be doing when you have a little more experience with resin SLA printing. I’m sure you can still successfully print models with a lot on the build plate, but if you get something wrong, you can get print failures.
On top of this, having a print failure when you have so many models and resin used up isn’t ideal at all.
Some people have actually had their screen ripped off from suction pressure, so definitely look out for it.
- Print 1, or a maximum of 2 to 3 miniatures at a time in your early days
- For larger models, try to minimize the amount of surface area on the build plate by angling your models
4.
 Rotate Prints at 45 Degrees
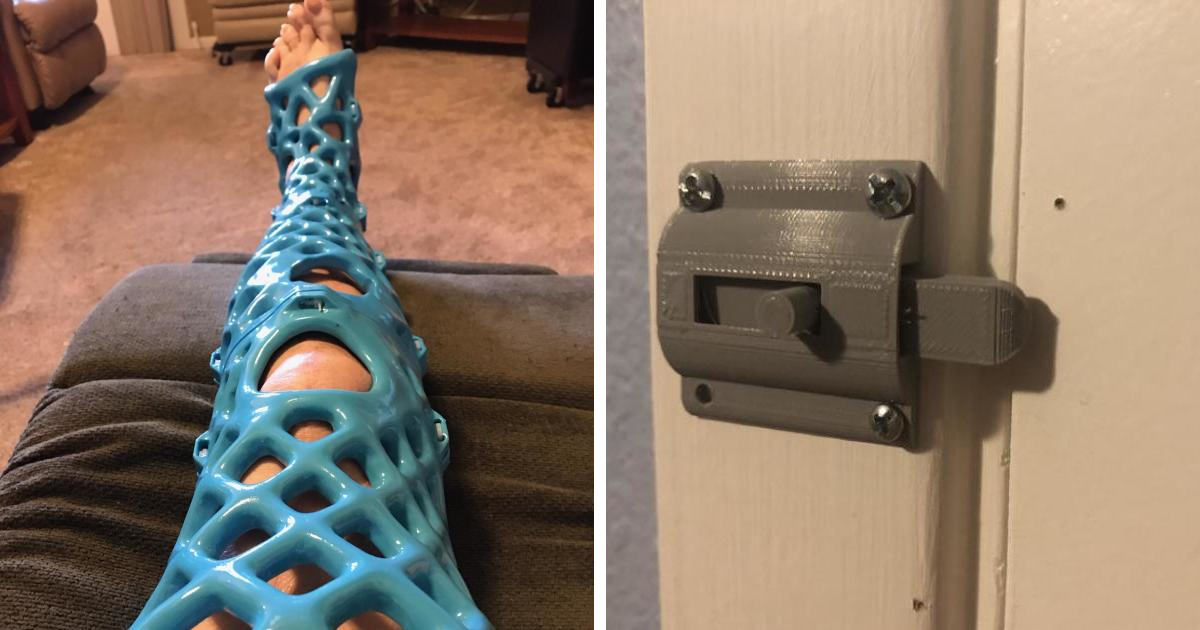
The general rule for SLA 3D printing is to keep your prints rotated at 45 degrees because straight oriented prints are more prone to failure compared to prints that have a diagonal orientation.
Printing models at a rotated angle means that every layer of the print will have less surface area. It also works in your favor in other ways such as easier removal from the build plate, as well as more efficient printing quality.
When you build up the supports on your resin prints, you can decrease the strain on them by rotating your resin prints, versus having vertically straight prints. It spreads out the weight of your model, rather than have it weigh down in one direction.
Whether you have an Anycubic Photon, an Elegoo Mars, a Creality LD-002R, you can benefit from rotating your models to improve your success rate overall. This is one of those small things that can make a difference to your resin printing journey.
- Try to have a rotated orientation for all your resin 3D prints, and avoid having completely straight models.
- A rotation of 45 degrees for your models is an ideal angle for your resin 3D prints.
I wrote an article called Best Orientation of Parts for 3D Printing that you can check out.
5. Add Supports Properly
Supports play a primary role in resin 3D printing and great supports is likely to bring high-quality results. As resin 3D printers print in an upside-down manner, it would be pretty difficult to 3D print without supports.
When I first got my SLA 3D printer, I didn’t really understand supports, and it really showed in my models.
The leg on my Bulbasaur 3D print came out terribly because my supports weren’t good enough. Now that I’ve got more experience with supports, I’d know to rotate the model 45 degree, and add in plenty of supports to ensure there is a good foundation underneath.
Creating supports on resin models can definitely get tricky depending on how complex your model is, so you should definitely start off with simpler models.
If you find that your resin supports keep failing or falling off the build plate, you should take some time to learn how to create them like the experts do.
The video below by Danny at 3D Printed Tabletop takes you through the proper process to add supports to your resin models.
- Use software preferably Lychee Slicer or PrusaSlicer to add supports to the models. This software will provide you with a visualization of each layer and how the model will be printed.
- Add supports of high density and make sure that no parts are unsupported or is left as an “island”.
The Lychee Slicer is excellent at identifying unsupported sections of 3D prints, as well as having Netfabb in-built to fix common model issues right in the slicer.
Check out the video below by VOG giving his honest comparison between Lychee Slicer and ChiTuBox.
Check out my article Do Resin 3D Prints Need Supports? How to Do It Like The Pros
6. Level the Build Plate
If you have a grip on this factor, you can get prints of the best quality without any hassle. If the build plate is tilted to one side, there is a huge probability that the print of the lower side will not come out efficiently and may fail halfway.
The build plate on your resin 3D printer usually stays pretty level, but after some time, it can require a recalibration to get it level again. This really does depend on the quality of your machine, with higher quality ones staying level for longer.
My Anycubic Photon Mono X is extremely sturdy with its design, from the dual linear Z-axis rails and strong foundation overall.
- Re-level your build plate if you haven’t done it for a while, so it’s back into its optimal position.
- Follow your printer’s instruction for re-levelling – some have a single leveling screw, some have 4 screws to loosen then tighten.
Another thing to check is if your build plate is actually flat. MatterHackers created a video showing you exactly how to make sure your build plate is flat through sanding with low grit sandpaper. It also works very well to increase bed adhesion.
I wrote an article in more detail called How to Level Resin 3D Printers Easily – Anycubic, Elegoo & More
7.
 Check & Replace FEP Film if Needed
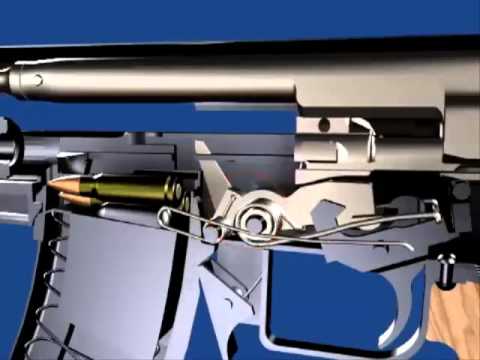
FEP film is one of the most important components of resin 3D printers and a minor hole can ruin the print and result in failure.
If there is a hole in your FEP film, the liquid resin can get out from that hole in the vat, the UV light will cure that resin under the film, and it will harden on the LCD screen.
The part of the print above that area will not be able to get cured because of UV light blockage and will result in print failure halfway.
I’ve experienced this first-hand, with my FEP leaking out due to a small hole. I managed to cover the hole using some simple see-through sellotape and this worked well until I received my replacement FEP film.
Usually you can get FEP film pretty quickly from Amazon, but since I have a larger resin 3D printer, I had to wait about 2 weeks to get the replacement.
Many people have gone through constant failures in their resin 3D prints, then after changing their FEP film, started getting successful resin prints.
- Inspect your FEP film sheet regularly
- If you notice any holes in the FEP film, replace it immediately with a new one before starting the printing process.
It’s a good idea to have spare FEP film sheets on hand just in case.
For the standard 140 x 200mm FEP film size, I’d recommend the ELEGOO 5Pcs FEP Release Film from Amazon, which is 0.15mm thick and is loved by many customers.
If you have a larger 3D printer, you’ll need 280 x 200mm, a great one being the 3D Club 4-Sheet HD Optical Grade FEP Film from Amazon. It has a 0.1mm thickness and comes packed in a hard envelope to prevent the sheets from bending during transit.
You’re also getting a 365-day return policy for top satisfaction guarantees.
Check out my article 3 Best FEP Film for Anycubic Photon, Mono (X), Elegoo Mars & More
8. Set Correct Exposure Time
Printing on wrong exposure time can result in many issues and can eventually lead to a failed print.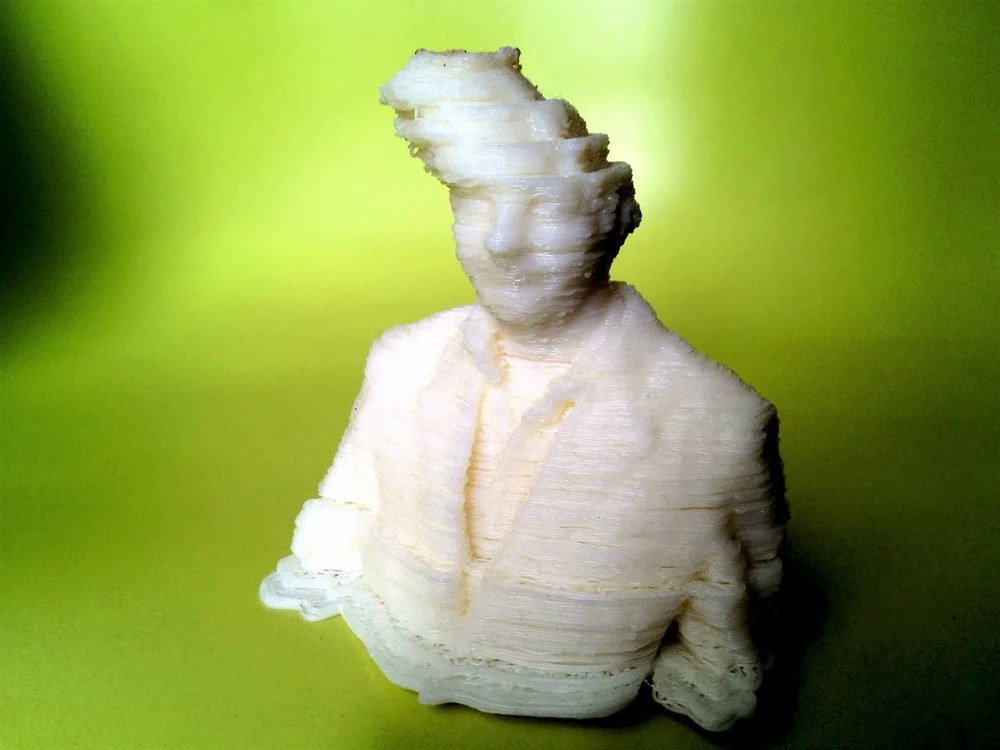 Right exposure time is necessary so that the resin can get cured properly.
Make sure that the first few layers have a bit more exposure time as compared to other layers because this will provide better adhesion of the print to the build plate.
- Make sure that you set the right exposure time depending on the type of resin.
- Calibrate all the settings properly, and it is recommended to review the settings every time before printing a model.
In order to find the ideal exposure time for your chosen resin and 3D printer, it can take some testing. There is a great way to get the perfect exposure time, which involves printing out a quick series of tests at different exposure times.
Depending on how each test print comes out in terms of detail, we can figure out the range in which your exposure times need to be in.
I wrote a pretty detailed article called How to Calibrate Resin 3D Prints – Testing for Resin Exposure.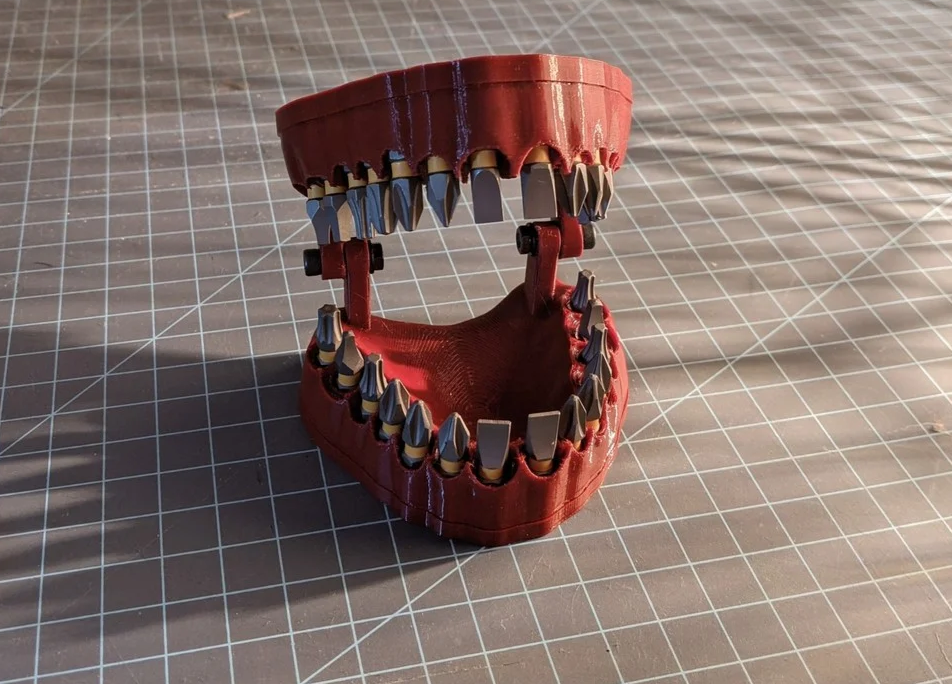
Persistent 3D Print Failure? Here’s What To Look For « Fabbaloo
A failed 3D printThe problem: you keep printing an item on your desktop 3D printer but it always fails. Solution? Read on.
I’ve seen this plenty of times when using plastic extrusion 3D printers and have come to realize there are several standard issues that might be causing the problem. It’s considerably frustrating as prints may take quite a while to complete and you’re wasting much time as well as filament.
The situation is common: you start a print to run overnight and in the morning you check the 3D printer only to find a pile of spaghetti. Even worse, melted – and now solidified – plastic might be embedded in the components of your machine. In the worst case you might actually wreck your machine.
It’s best to avoid these situations. Here’s a few things to consider if you’re having consistent problems printing a particular 3D model.
Bed Level? The most obvious problem you may encounter is that your print surface may be slightly unlevel.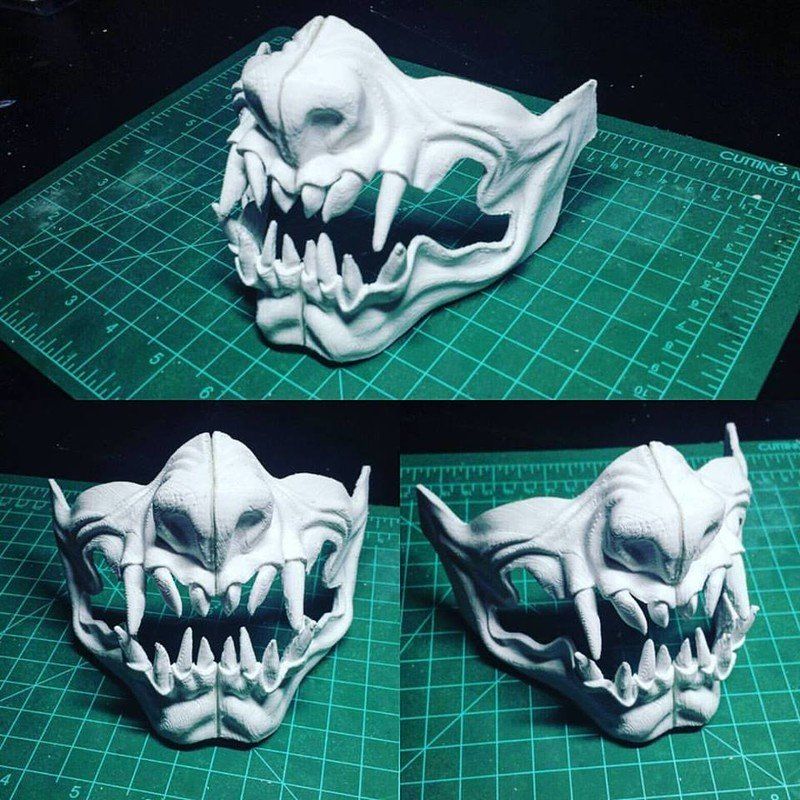 This means that in part of your 3D print’s first layer the extruder will be too high, while in the rest it will be too low. For a very small portion of the print surface it will be at the correct height. For machines that do not have an auto level function, you should ensure the machine is in fact level.
In some extreme cases the print surface itself is bent and thus cannot be properly leveled. This tends to happen only in older machines with non-metal print beds, such as acrylic.
ACTION: Level your print surface using the standard approach for your machine.
Z-Gap Wrong? Even when a desktop 3D printer is completely level, there is still the matter of ensuring the gap between the nozzle and the print surface is optimum. If it’s too much, then the first layer will not be sticking properly and likely will come loose later on. If it’s too tight you may find the print sticking too much when completed, or in some cases the extrusion may stop due to back pressure from a very tight squeeze pushing the filament.
Another failed 3D printACTION: Set the z-gap properly with a test print. Some machines actually allow you to tweak this on the fly, which you should almost always do during the first layer.
Print Surface Unclean: Very often people are handling the print surface and inadvertently leaving oils and other material. You can’t necessarily see it, but it can affect the adhesion properties of some plastics. There’s also the possibility of crud leftover from previous prints should should be removed. Each new print should face an unpolluted print bed.
ACTION: clean the print bed with appropriate solutions. Usually this means isopropyl alcohol, but check with your 3D printer manufacturer.
Filament Snagging? The plastic extrusion 3D printer will work only so long as filament is being delivered to the extruder. This means that your filament spool should rotate smoothly without much effort. Sometimes you can find the spool having too much friction on its mount, which can put undue stress on the extruder that could even slip.
ACTION: Ensure the spool rotates smoothly and even lubricate if necessary.
Knots: Another possibility is that the filament itself is knotted up. This occurs when you accidentally let the end of the filament slip underneath other strands, typically when changing spools.
ACTION: Always hold on to the loose end of the filament and stick it in the holes in the filament spool. For untangling, try this.
Flat Bottom? A print will stick if there is sufficient surface area on the bottom of the 3D model. But although your 3D model might LOOK like it’s flat, it may NOT BE SO. If this is the case, you might be surprised to find your first layer is fantastically smaller than you thought and is insufficient to stick.
ACTION: Use a 3D modeling tool to inspect the bottom of the 3D model before printing.
If necessary, use a Plane Cut to slice off a wee bit of the bottom to ensure it’s truly flat.
Enough Bottom? What is the ratio of surface area of the bottom to the rest of the print? Do you expect to 3D print a large object and have only a 4mm square area support it? I think not.
ACTION: Make sure the bottom of the 3D model is sufficient to support the rest of the model. Reorient if necessary.
Temperature Correct? Sometimes layers aren’t sticking together properly in mid print and depending on the model’s geometry it might cause a failure. This could be because you’re 3D printing at a temperature that’s a bit too low.
ACTION: Increase the print temperature slightly and ensure those layers really fuse into each other.
First Layer Adhering? You hit print and walked away, believing the print would actually work? Hahah, you should NEVER do that!
ACTION: Always, always, always observe at least the first layer of the print to ensure there is a good, strong base for the remainder of the print to build on.
Supports too Tall? Some 3D models require support structures, but depending on the geometry, the supports might be very, very tall and very, very fragile. It’s possible they’ll tip over before they get to the part they were supposed to support, simply by the actions of the extruder moving along the top.
ACTION: Look at the support tool path in a GCODE viewer and decide if it’s really too tall. If so, consider changing the support structure in your slicing tool to be more robust, or reorienting the 3D model to reduce the size of the supports. Another option: Meshmixer supports.
Wrong Material? Very often you’ll see warped prints, typically starting at the corners of the 3D model. This is caused by the thermoplastic shrinking slightly, and this effect is amplified over long axes. You’ll usually see the ends of a long piece lifting. If they lift too much they could detach entirely from the print bed and cause print failure.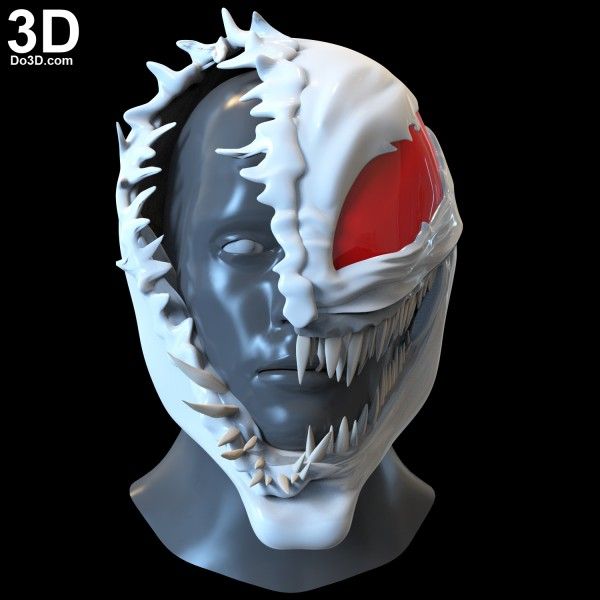
ACTION: Consider printing in a less warp-prone material like PLA instead of ABS, or using a 3D printer with a heated chamber.
That’s the list, but I am sure there are more failure possibilities. However, these are the ones I hit most often.
Know them, and they won’t burn you.
What to do if the 3D printer stops? How to continue printing
There are situations when for some reason the 3D printer has stopped printing. And for many, this is a problem, because if a couple of layers were printed, then you can start printing again and it's not expensive. But if the model was printed halfway or even more, then spending time again on a new print, wasting material again is too expensive.
There may be a number of reasons why printing has stopped:
- commonplace power outage;
- printer failure;
- clogging of the extruder nozzle;
- layer peeling and other incorrect printing problems.
Not all printers have the option to resume printing from a specific location. Moreover, they are currently in the minority. And so you have to solve all the problems yourself.
This material is devoted to this problem. We will look at Gcode and a universal way to continue printing from a specific layer.
How does 3D printing software work?
This is the first question to be dealt with. Any 3D printer works on the same principle, regardless of the printing technology. The model is first divided into a large number of the thinnest horizontal layers parallel to each other. If printing is carried out using FDM, DLP technologies, then each layer is divided into many lines, which, as it were, are drawn by a print head or a laser. In the case of DLP technology, each layer is a bitmap, which is highlighted immediately. In this case, the line width for the FDM printer will be the diameter of the nozzle selected for printing, and the height will be set by the layer thickness. That is, a certain route is set for the extruder, so to speak, a map along which it will form a layer. This map will be presented as a specific set of commands. It is this set that is called GCode. This code is generated by special programs in automatic mode. These programs are called slicers. They cut the model into layers according to the given parameters and form the GCode. Prominent representatives of such programs are Cura, Slick3r and others.
In G-code, each printhead path vector is specified by Cartesian coordinates. In addition, the code file contains a number of other information:
- movement speed;
- temperature;
- extrusion speed, etc.
Initially, GCode was developed specifically for CNC machines, so it can contain a variety of functions, commands. However, for 3D printers, GCode is much easier.
Slicers that work with 3D printers that print using SLA technologies, DLP work on a slightly different principle, and the generated code itself will contain slightly different information, since the plastic is not extruded, it is not the print head that works, but the laser controlled by projectors, galvanometers, mirrors, etc.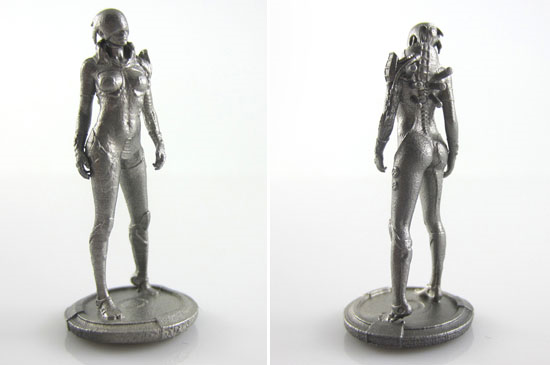 In DLP, in general, the entire layer is illuminated at a time, that is, with a single spot.
Resuming printing with Cura slicer on FDM printers
Consider the process of resuming printing using the example of benchy, a well-known 3D model. And the first advice is that you should not move an underprinted model, since it will not work to install it in the same place with an accuracy of millimeters.
This method allows not only to resume printing from a certain place in case of failure or force majeure, but also when printing a model with one extruder, but with different materials or plastic of different colors. To do this, you first need to make GCode in manual mode, and during printing, stop the machine and change the thread.
So, the first step is to measure the height of the resulting product. To do this, you need to use a digital caliper. The more accurate the metering, the less noticeable will be the place where printing was paused.
The second step is to use the Cura slicer to find the correct layer for the height of your print.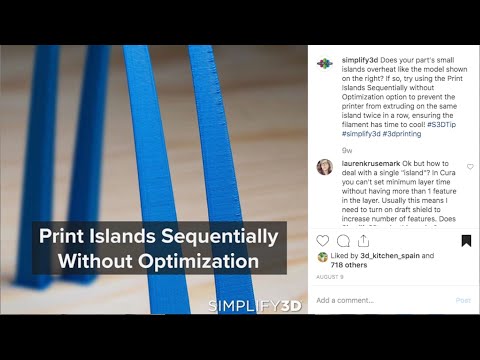 In our case, the height was 12mm. Printing was carried out at a layer thickness of 0.15 mm. So in GCode this data will correspond to layer number 80.
The SciTE program is used to edit sources. We use it for the next step - we open our GCode in it. This software is simple and intuitive. When opening a file with a code, be sure to select "All files".
The next step is to find layer 80 in GCode. To do this, declare a search: "Sear > Finde > LAYER:80".
The cursor is positioned at the end of layer 79. While holding SHIFT, move to the beginning of layer 1 and click on it. As a result, everything that corresponds to the already printed area will be selected. Delete the selected area. Next, you need to save the result and, if necessary, manually prescribe the resolution.
As a result of these manipulations, you get a new GCode, according to which printing will start from the layer you need. This code needs to be checked in Cura.
Slicers that are designed for printing using SLA, DLP technology, support the function of resuming printing from the right place if it is interrupted.
The head of CubicPrints told where startups disappeared in the Russian 3D printing market
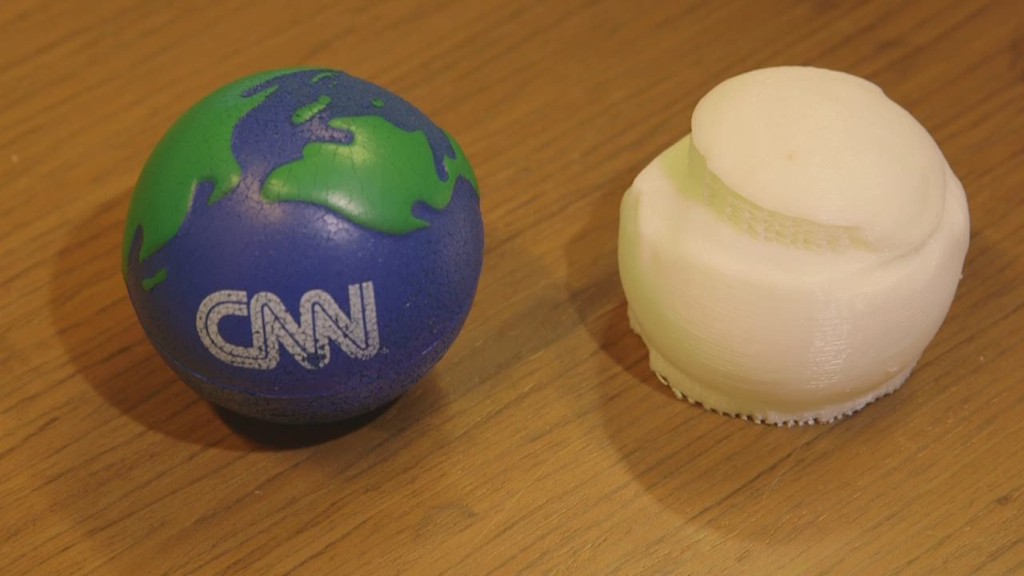
The first 3D printer was invented at 1984 in the United States, but 3D printing became widespread only in the 2010s, when the patent for FDM technology expired. Then there were many startups offering budget printers, but then the news about the achievements of 3D printing stopped. Roman Arkhangelsky, CEO of CubicPrints, told the Sekret Firmy about what is happening on the market now and where the teams that were engaged in 3D printing have disappeared.
In Russia, the excitement around the achievements of 3D printing began in 2013-2014. At that moment, CubicPrints and three other Russian startups entered the market. The companies had a similar business model: they focused on the American service Shapeways, which involved creating a platform for 3D designers that would allow you to create your own store with 3D models.
Roman Arkhangelsky
CEO of CubicPrints
“A year later, both we and our competitors were very far from profit. It turned out that the “designer shop” model does not work in Russia. Users, after reading the news, thought that 3D printing was very simple. …The fact that printing requires a 3D model, most of the callers learned only from a conversation with us. And then they refused to cooperate. Only 10% of requests were converted into real orders.”
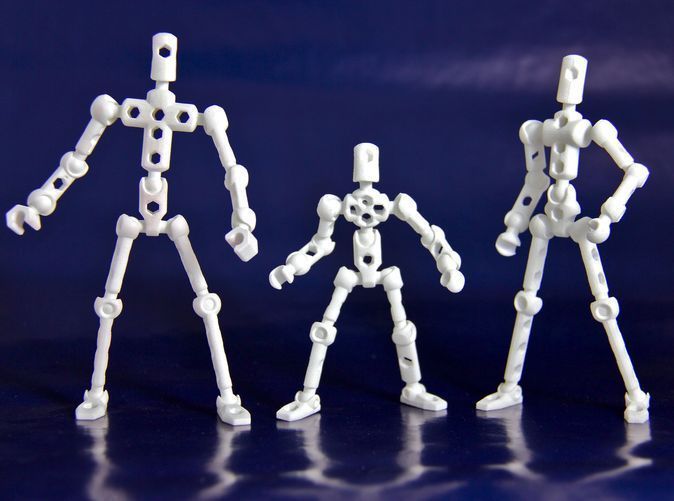
Users ordered complex models from the cheapest plastic. At the same time, they are printed on desktop printers with a large number of technological limitations. Because of this, CubicPrints had to dissuade customers from ordering: complex design models must be created on industrial printers at a higher price. Because of this situation, some startups closed, and other companies refocused their activities.
So, Shapeways still keeps the design store running. At the same time, the company receives the bulk of the profits in the B2B market. The French Sculpteo, which also launched as a marketplace, began actively promoting prototyping two years ago. The Belgian company i.materialise maintains the marketplace and creates software and hardware. Russian companies are also restructuring their work.
Roman Arkhangelsky
CEO of CubicPrints
“We changed naturally. We were increasingly approached by engineers, designers, developers and technology startups. So we realized that the engineering and manufacturing sector is more than others happy with 3D printers, because they allow you to quickly test a new development, save effort and money. Specialists in this industry, as a rule, own the technical side of the issue. A lot of people work with 3D modeling.”
The company launched its own production of plastic injection molding and CNC milling. As a result, the company's revenue in 2016 grew 12 times compared to 2014. According to Arkhangelsky, the engineering and industrial sector has the most prospects in the field of 3D printing. For example, Xometry, which is engaged in 3D printing in the automotive, defense industry and medicine, attracted $23 million in investments in 2017.
Roman Arkhangelsky
CEO of CubicPrints
“But the entertainment component of 3D printing is almost completely gone. Startups that target the B2C market are still popping up and offering printing of customized souvenirs, accessories, or miniatures of people and animals, but the market is small.