3D print layer gaps
3D Print Gaps and Holes: How To Fix EVERY Cause
Gaps and holes in 3D printing cause major problems: they’re ugly to look at, ruin your model, and make useable parts unstable and even brittle.
There are a few different kinds of gaps and holes you may find when 3D printing. Some are between lines, while others may consistently occur within or between certain layers. In any case, they are a very frustrating problem with a few possible causes.
In this article we’re going to look at a few of these causes, how to recognize them, and the best way to fix them.
Table Of Contents
- Gaps and Holes in 3D Prints: Reasons and Fixes
- Why Am I Getting Gaps and Holes in My 3D Prints?
- 3D Printing Gaps and Holes: Types and How to Fix Them
- First Layer Gaps
- Missing or Incomplete Parts
- Holes in Your Print
- Top Layer Gaps
- Holes and Gaps in Floor Corners
- Gaps Between Thin Walls
Gaps and Holes in 3D Prints: Reasons and Fixes
- First Layer Gaps
- Missing or Incomplete Parts
- Holes in Your Print
- Top Layer Gaps
- Holes and Gaps in Floor Corners
- Gaps Between Thin Walls
While the good news about gaps and holes is that they’re very easy to catch early, the bad news is that there are quite a few reasons they could be happening.
Likely causes for gaps and holes in your 3D prints are as follows:
- Under-extrusion – Your printer isn’t extruding enough filament for the model, leaving unwanted holes where not enough extrusion occurred.
- Temperature Changes – 3D printer filament reacts to changing temperatures. Too hot and the filament won’t set properly, leaving gaps. Too cold and it’ll set too quickly. Both leave unwanted gaps and misshapen outlines. Sudden changes in temperature are also an issue, so try to keep the printing environment consistent.
- Fast Printing Speed – A fast printing speed can lead to under-extrusion, which leaves gaps in 3D prints. Lowering your printing speed will help ensure the right amount of filament goes to the right place.
- Clogged Nozzle – A clogged or otherwise unclean nozzle won’t extrude filament properly, and will occasionally seem to randomly distribute it, especially between layers.
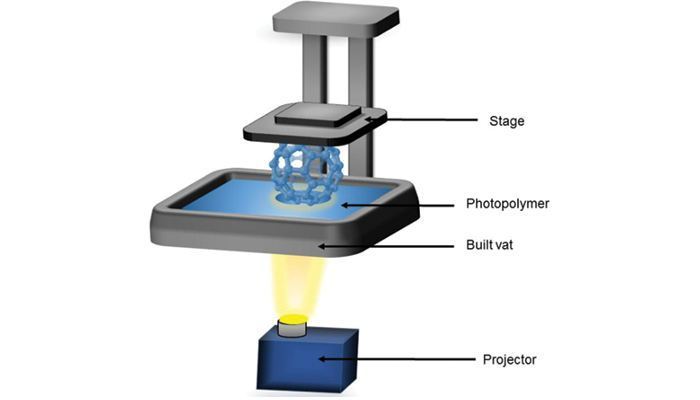 Maintaining your nozzle or replacing damaged ones will help you avoid this issue.
 - Slow Feed Rate – A slow feed rate prevents enough filament from passing through your extruder to accurately print your model, causing gaps where there simply wasn’t enough filament to print.
Quite often, errors or misjudgments in your settings lead to holes and gaps in your prints, all of which we’ll look at below.
Exactly where on your print these gaps and holes form will be the telltale sign for the cause. Here we’ll look at how to recognize the root cause of the problem and how to fix them.Source: Reddit
3D Printing Gaps and Holes: Types and How to Fix ThemThe first step in fixing these gaps and holes is identifying what kind of problem it is. In many cases, you may find the fix is simple if your gaps fall into one of these categories.
Before trying some of the more complex fixes, we recommend you first look at one of these very common causes of 3D printer gaps and holes.
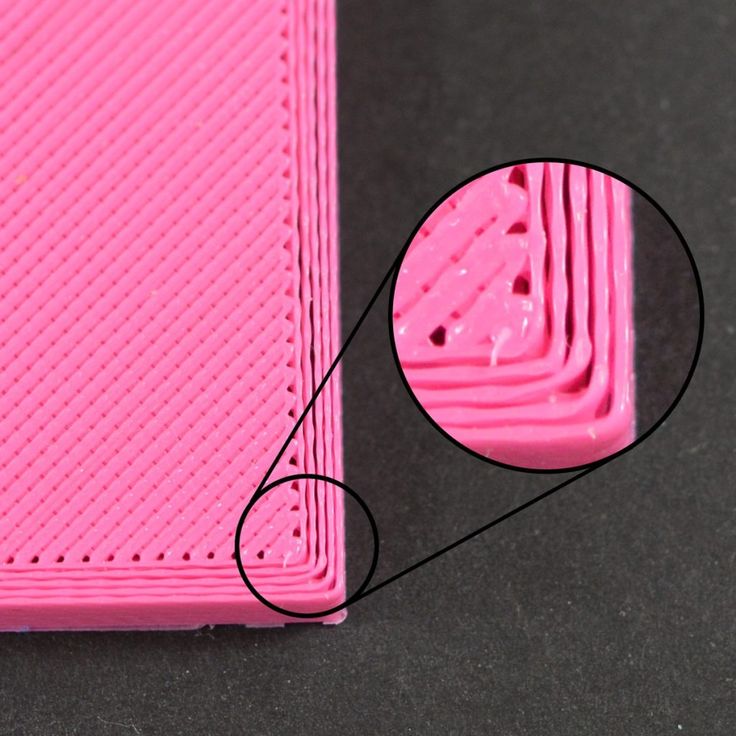
If you find the bottom of your print has consistently sized gaps, almost like they were designed to deliberately resemble a mesh, then the problem is likely with your initial layers. You’ll notice these gaps between the infill and outlines.
This issue can carry on through the print and be difficult to spot until it’s too late, wasting a lot of filament.Source: Reddit
This problem has two common causes, the first is an incorrect nozzle height. If your nozzle isn’t close enough to the build plate, then the first layer, normally forming the base of the print, will have gaps between extrusion lines.
The second common cause is temporary under-extrusion, which itself has quite a few causes including a clogged extruder or an insufficient flow rate.
How to FixIf your extruder is clogged or the speed is set too high, then not enough filament will be extruded to form a solid layer. Increasing your feed rate or decreasing the print speed should help with this.
Any settings that increase extrusion will help alleviate this problem, as will increasing overlaps to ensure enough filament is extruded to form a smooth, solid base.
Read more: every 3D printing fix for first layer issues
Missing or Incomplete PartsSource: Reddit
If you find in places in your model that there’s less filament than there should be, or even none at all, then the problem is likely under-extrusion caused by an offset z-calibration.
Having your nozzle too close to your build surface will cause unwanted retraction, which will clog your nozzle and prevent enough filament from coming out.
How to FixTo fix this problem, simply recalibrate your extruder height so it’s not too close to the build surface, and clean the nozzle to be sure.
Holes in Your Print
If you’re finding random holes and gaps throughout your print, then it could be a problem with the filament rather than the printer.
In a lot of cases, poor bed adhesion will cause holes and gaps between layers to form due to the model’s low stability.
Source: RedditHow to FixImproving bed adhesion with adhesives or heating the print bed can help reduce this problem, though it could also be caused by a too high z-calibration. Increasing bed adhesion and readjusting your nozzle height are good fixes.
Additionally, if you’ve left your filament out in the open air for a long time, it may have absorbed moisture from the air over time and become “wet” and brittle. This bubbliness affects print quality and can lead to small imperfections and gaps.
You can fix this by purchasing a filament dryer, or storing your filament in airtight storage when not printing.
Top Layer GapsSource: Reddit
Gaps in the top layer of your print is called ‘pillowing’, and has a few causes and solutions. The leading cause is insufficient cooling that prevents your filament to properly set on the top layer.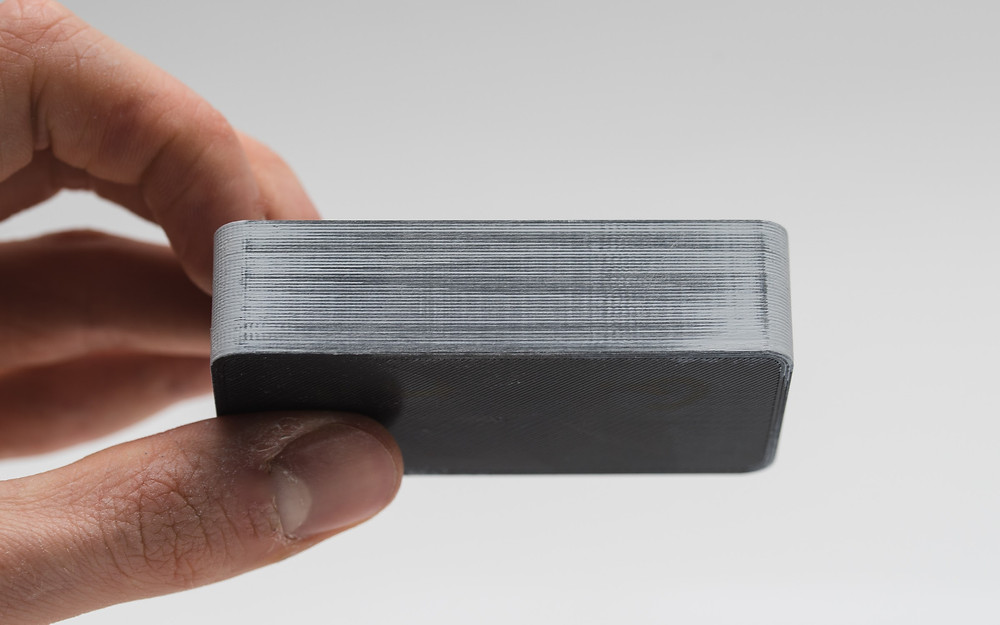
Pillowing can also be caused by an insufficient layer height. If you’re using a height setting greater than the standard 0.1mm, then you may find pillowing occurs quite often.
How to FixIncreasing the strength of your cooling fan will help top layers set as they’re supposed to, creating the smooth surface most prints need to look good.
If you find it’s not a problem with your cooling, then you may find gradually lowering your layer height greatly helps solve the pillowing issue. If you need the layer height set to higher than recommended, adding additional layers to strengthen the print works wonders.
Read more: finding the best layer height for your 3D prints
Holes and Gaps in Floor Corners
Finding holes in the base corners of your model is incredibly frustrating as it looks like the printer stops short of where it’s supposed to print. This not only makes your model less stable while printing, it looks pretty bad too.
Unfortunately, this is one of the most complex problems with holes in 3D prints, as there are quite a few causes and solutions to the problem, so it may take some trial and error to nail down the cause and understand how to fix it.Source: Reddit
Causes and How to Fix Them- Under-extrusion – A common issue that you can fix by simply increasing the feed rate.
- Insufficient Top Layers – Having too few top layers increases the likelihood of holes and gaps. Increasing these top layers and ensuring they’re at least 1mm thick will help.
- Printing Too Hot – If your nozzle or bed temperatures are too hot then the filament won’t cool or settle fast enough. Be sure to only use the temperatures recommended by your manufacturer and decrease them if you find the filament isn’t setting as quickly as you need it to.
- Insufficient Cooling – Another problem with temperature. If your cooling system isn’t high enough for the filament you’re using, the filament will take too long to set.
 Increasing the strength of your cooling fan will help solve this issue.
 - Insufficient Infill – If your infill percentage is too low then you’ll find gaps and holes appearing quite frequently. Increasing this percentage will help decrease the likelihood of these gaps and strengthen your model.
- Overlap Too Small – An infill overlap is a slicer’s setting to go slightly over the print wall to reinforce it. If this overlap is too small, there will be weaknesses in your print. Increasing this overlap gradually and noting the results will help you find the sweet spot.
- Not Enough Outlines/Perimeters – Another support measure that you would do well to increase gradually and note any improvement.
- Too Much Retraction – Overly frequent retraction will decrease filament extrusion, which in turn leads to layer gaps and unwanted holes as not enough material will come out. Lowering retraction settings will help keep your model’s surface smooth and decrease the chances of clogging and other extruder issues.

Gaps Between Thin Walls
Gaps between thinner walls of your model may appear if their width isn’t set to a multiple of the nozzle width. This empty space won’t be taken into account, and the gaps between the walls will be your printer’s compensation for it.
If you’re printing a 0.9mm thick wall with a 0.4mm nozzle, for example, then you’ll have a remaining gap of 0.1mm that the machine simply isn’t capable of filling.
Source: RedditHow to FixNaturally, the easiest fix for these wall gaps is to simply ensure the wall width is a multiple of your nozzle width. Adjusting the line width or even increasing flow rate to promote over-extruding. While not precise, this method will help the filament flow into gaps and make them sturdier.
If the wall width is not negotiable, then you can try getting a thinner nozzle. While the standard size is 0.4mm, you can attach different diameters to help handle different wall widths.
Related posts:
- Retraction Settings: How to Stop Ender 3 Stringing
- DIY Dry Box Projects To Keep Your Filament Dry
- Using 3D Printer Cleaning Filament The Right Way
9 Ways How to Fix Holes & Gaps in Top Layers of 3D Prints – 3D Printerly
Having gaps in the top layers of your 3D prints aren’t ideal in any circumstance, but there are solutions which you can try to solve this problem.
The best way to fix gaps in your top layers is to increase the number of top layers in your slicer settings, increase infill percentage, use a denser infill pattern, or look towards fixing under extrusion issues. Sometimes using a default slicer profile works perfectly to fix gaps in top layers.
This article will attempt to guide you through fixing this problem, so keep reading for a detailed solution.
Why Do I Have Holes & Gaps in the Top Layers of my Prints?
Gaps in prints can be a result of several errors related to the printer or the print bed.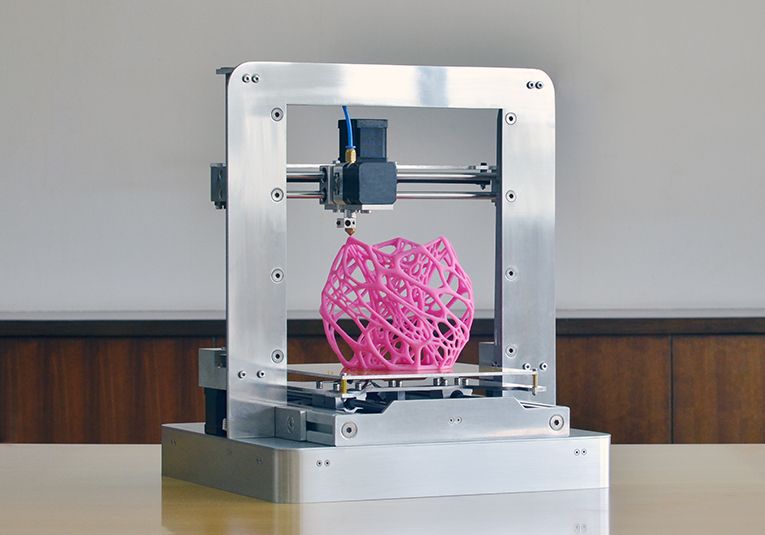 To identify the origin of the main issue you should consider overviewing some of the main parts of the 3D printer.
Below we have mentioned a few reasons which might be a reason for gaps in your 3D prints as well.
Reasons for gaps in 3D prints may include:
- Adjusting number of top layers
- Increase infill density
- Under-extrusion, over-extrusion and extruder skipping
- Fast or slow printing speed
- Filament quality and diameter
- Mechanical issues with a 3D printer
- Clogged or worn out nozzle
- Unsteady surface
- Unexpected or immediate temperature changes
How to Fix Gaps in the Top Layers of my 3D Prints?
The video explains one side of having gaps in top layers, which is also known as pillowing.
To improve your printer’s performance and the output’s quality, there are several ways you can practice to do so.
Sometimes just using a default profile for your 3D printer works a treat, so definitely try that beforehand. You can also find custom profiles that other people have created online.
Now let’s get into the other solutions that have worked for other 3D printer users.
1. Adjusting Number of Top Layers
This is one effective method of getting rid of gaps in print layers. The solid layer’s extrusions tend to drop and drool in the air pocket because of your partially hollow infill.
The fix is simply changing a setting in your slicer software:
- Try adding more top solid layers in your slicer
- A good rule is to go by is to have at least 0.5mm of top layers in your 3D prints.
- If you have a layer height of 0.1mm, then you should try to have at least 5 top layers to satisfy this guideline
- Another example would be if you have a layer height of 0.3mm, then use 2 top layers which would be 0.6mm and satisfy the 0.5mm rule.
This is probably the easiest fix in the problem of holes or gaps in your 3D prints since it’s a simple setting change, and it’s very effective in tackling this problem.
If you can see infill through your top layer, then this should help significantly.
2. Increase Infill Density
Another common reason behind having holes and gaps in your 3D prints is using an infill percentage which is too low.
The reason this happens is that your infill kind of acts as supports for the higher parts of your 3D prints.
A low infill percentage would mean less support, or foundation for your material to adhere to, so it can lead to melted plastic drooping which causes those holes or gaps.
- The simple fix here would be to increase your infill percentage for a better foundation on your 3D prints
- If you use an infill density of around 20%, I’d try out 35-40% and see how things work out.

- A setting in Cura called “Gradual Infill Steps” allows you to enable a low infill density at the bottom of your print, while increasing it for the top of the print. Each step you use means that the infill will be halved, so 40% infill with 2 steps goes from at the top 40% to 20% to 10% at the bottom.
3. Under-Extrusion and Extruder Skipping
If you are still experiencing holes or 3D printing gaps between layers or in your top layers, then you probably have under-extrusion issues, which can be caused by a few different issues.
Extrusion issues may include under-extrusion or your extruder clicking which effects the printing badly, and signals some weakness in your extrusion system.
When the amount of filament that your 3D printer thinks is going to be extruded is actually less, this under-extrusion can easily result in missing layers, small layers, gaps within your 3D print, as well as little dots or holes between your layers.
The most common fixes for under-extrusion are:
- Increase printing temperature
- Clean nozzle to clear any jams
- Check that your nozzle isn’t worn out from several hours of 3D printing
- Use better quality filament with good tolerances
- Make sure your filament diameter in slicer matches actual diameter
- Check flow rate and increase your extrusion multiplier (2.
 5% increments)
 - Check if the extruder motor is working properly and is provided with enough power or not.
- Adjust and optimize layer heights for your stepper motor, also called ‘Magic Numbers‘
Check out my article on How to Fix 3D Printer Under-Extrusion – Not Extruding Enough.
Other fixes that could help out in this instance are to make sure your filament feed and extrusion path is smooth and clear. Sometimes having a low quality hotend or nozzle just doesn’t do the best job at melting the filament adequately.
When you upgrade and replace your nozzle, the changes that you can see in 3D print quality can be quite significant, which many people have attested to.
I would also implement Capricorn PTFE tubing for a smoother filament feed into your nozzle.
4. Adjust Printing Speed to be Faster or Slower
Gaps can also occur if your print speed is too high. Due to this, your printer might find it hard to extrude filament in less time.
If your 3D printer is extruding and accelerating at the same time, it can extrude thinner layers, then as it decelerates, extruder normal layers.
To fix this issue, do try the following:
- Adjust speed by increasing or decreasing the speed by 10mm/s, which can be done specifically just for top layers.
- Check print speed setting for different factors like walls or infill etc.
- Check for acceleration settings along with the jerk settings to avoid vibration, then decrease these also
- 50mm/s is considered a normal speed for your 3D printer
It allows for more cooling which lets your filament harden to form a better foundation for the next layer. You can also print a fan duct to direct cool air straight to your 3D prints.
Check out my article What is the Best Print Speed for 3D Printing? Perfect Settings.
5. Check Filament Quality and Diameter
Incorrect filament diameter can cause printing complications bringing gaps in layers. Ensure your slicer has the ideal filament diameter.
Another reliable method of ensuring this is by measuring the diameter yourself with the help of calipers that you have the correct diameter specified in the software. The most commonly found diameters are 1.75mm and 2.85mm.
The stainless-steel Kynup Digital Calipers is one of the highest rated calipers on Amazon, and for good reason. They are very accurate, up to an accuracy of 0.01mm and very user-friendly.
- To keep your filament perfect for a long time, read the guide properly.
- Get a filament from the best manufacturers to avoid headaches of the future.
6. Correct Mechanical Issues with the 3D printer
When it comes to machines, small or big issues may arise. However, the thing is to be aware of how to fix them. Your 3D printer may experience mechanical issues that can bring gaps in the printing. To fix it, try out the following things:
- Machine oiling is necessary for smoother movements and general maintenance
- Check if all parts are working properly or not
- Make sure screws are not loose
- Z-axis threaded rod should be placed accurately
- The print bed should be stable
- Check printer machine connections
- The nozzle should be tightened correctly
- Avoid using floating feet
7.
 Fix or Replace Clogged/Worn Out Nozzle
The clogged and contaminated nozzle can also significantly bring gaps in 3D Printing. So, check your nozzle and if need be, clean it for better print results.
- If the nozzle of your printer is worn out, then purchase nozzle from a trusted manufacturer
- Keep cleaning nozzle with proper instructions as mentioned in the guide.
8. Put Your 3D Printer on Steady Surface
An unstable or vibrating surface cannot bring the perfect print out. This surely can bring gaps in printing if the machine vibrates or is likely to get unstable because of its vibrating surface.
- Fix this issue by placing the printing machine at a smooth and stable place.
9. Unexpected or Immediate Temperature Changes
Temperature fluctuations can be a great reason for your print to get gaps while printing. This is the most important issue which should be fixed immediately because it decides the flow of plastic as well.
- Use a brass nozzle as it works best when it comes to thermal conductivity
- Check if the PID controller is tuned or not
- Keep checking that temperature should not fluctuate immediately
Check out this video by CHEP for some more helpful tips to fix gaps in your prints.
Conclusion
Gaps between the top layers of 3D print can be a result of various printer’s shortcomings we have mentioned above. There can be more reasons for these gaps, but we have mentioned the major one.
If you figure out the likely root cause, it’ll be easier to solve the error. The main thing is to read the guide thoroughly when you are going to use any printing machine if you want to bring perfection to your work.
(There is a solution) Gaps/holes in 3D printing walls
I am new to 3D printing, I recently bought an Ender 5 Pro. I'm trying to print with 1.75mm PLA but the results are very poor unfortunately. When I got there after leveling the table, I got a decent result from the display dog and started printing small things where the quality was acceptable. I then tried to switch to larger items, but the print failed halfway through due to insufficient adhesion.
There were other quality issues with this print and you can already see that there are holes in the walls:
I did another round of table alignment and Z alignment to make sure the adhesion was good and the test print came out pretty good in all corners and center. Single-layer rectangles are not perfect, the lines split in some places, but mostly they are small. But now I have a different problem: all the prints are very dirty, less clear, they are not as strong as before, and there are also large holes in the walls. The same base of the statue (how I had to stop after getting dirty before) looks like this now:
Another attempt failed after a few hours (e.g. printing stopped and printed nothing in the air), but there are also problems with holes/gaps even more noticeable:
Finally, as a test, I printed an object with the same G-code as before, and the result is very different. The object on the left is the new one. It is weak, you can feel by pressing that the walls are not solid, they bend. The "eye" rectangle is also not clear:
There is a difference though, I changed the extruder nozzle between, the new one was also in the Ender package, it is also 0.4mm, as the original should have been, I changed to try with the new one.
Due to the last test with the same gcode and a different result, I think the problem may be in the hardware setting as well, not just in the software. Does anyone know what I'm doing wrong?
EDIT 1 : after calibrating the ejection amount and lowering the print temperature from 200 C to 190 C, now I get the following result. Used values:
- Table temperature: 65 C initial, 60 C for others
- Printing temperature: 200 C initial, 190 later
- Print speed: 80 mm/s
- Wall speed: 40 mm/s
- Retraction: 10 mm
- Retraction speed: 80 mm
- Wall thickness: 0.8 mm
- Layer height: 0.2 mm
- Starting layer: 0.2 mm
- Line width: 0.4 mm
EDIT 2 : Based on the comments, some changes have been made and here are the results. Cube XYZ,
- print speed reduced to 60 mm
- layer height 0.12 mm
- Seam alignment Z is the sharpest corner
- Fill density 30%
- Retraction distance 8 mm
- Retraction speed 40 mm
It looks good, although the layers are visible, some ghosts right on X and Y. Dimensions not correct though: X=20.07mm, Y=20.03mm, Z=19.84 mm
Are X/Y allowed? What to do with Z, increase steps/mm ?
Finally, here's the 3D benchy too, although it looks mostly ok, there are some bumps in the walls and small strings in the exposed areas. This has been printed previously and with different settings though:
- Layer Width 0.2mm
- Print speed 80 mm
- Retraction 10 mm
- Retraction speed 80 mm
- Z Seam alignment set randomly
EDIT 3 I tried now to print a polypearl which has thin curved lines. The first attempt failed after 2 hours, a pen appeared on the nozzle, which ruined the print. It was a print from 190 p. I gave it another try and printed with 200 C and surprisingly it completed the job. See below photos, here are my settings for it (changes for Cura 4.6.0 default Super Quality):
- Layer Height: 0.08mm
- Initial layer height: 0.12 mm 92$ (default 500)
- Print jerk: 8 mm/s (default 10)
- Retraction distance: 8 mm
- Retraction speed: 40 mm/s
The model adheres well to the glass plate even without glue or hairspray, maybe a little too well. I see some problems, although I'm not sure how normal they are:
- the outer area of the first layer is not very pleasant
- there are some oozing, strange lines on the surface and between the columns
- The top end of the turret is somewhat dirty and has a horizontal line attached to it (of course, it can be easily removed).

- the bottom is very smooth, I can see the texture of the glass (the top of the Creality glass is textured) and the texture of the very first failed print when I didn't take into account the extra height of the glass after leveling and the print head hit it hard and the nozzle was completely damaged. Rookie mistake.
These images are here: https://photos.app.goo.gl/ZfuMFFedL171eLeM7
Are these problems normal/acceptable?
▲ 4
Let's see what errors I'm seeing (accumulated from what I've commented):
The legs seem to be very weak. This can be either a clogged nozzle, printing too fast, or too low a temperature, or too low a pressure (for example, an incorrectly calibrated extruder). Try cleaning or a fresh nozzle, another parameter game can wait after you fix the next big problem.
To fix under extrusion if it persists after fixing the chime, experiment with the following settings:
- Check the mechanical system.
 Make sure the extruder
 - has no defects. I saw a lot of underextrusions when my extruder arm broke. The gear turned, but no longer pressed on the thread.
- presses the filament with the idler bearing well against the hob gear.
- is properly calibrated for physical parameters. Use the extrusion multiplier to account for different materials.
- Temperature. If the extrusion is not going well, increase it by a factor of 5. The °C steps can help.
The dented cube shows this best: massive ringing occurs. This is the effect that occurs when the printer changes direction rapidly - the printhead cannot speed up and slow down indefinitely as it has momentum, and as a result oscillates around the new path a bit, like a sine ring. This creates a "ghost" of previous toolpath changes on the flat face, which is why I asked for the cube to be printed.
There are 2 software fixes to fix ghosting and ringing:
- Reduce the print speed.
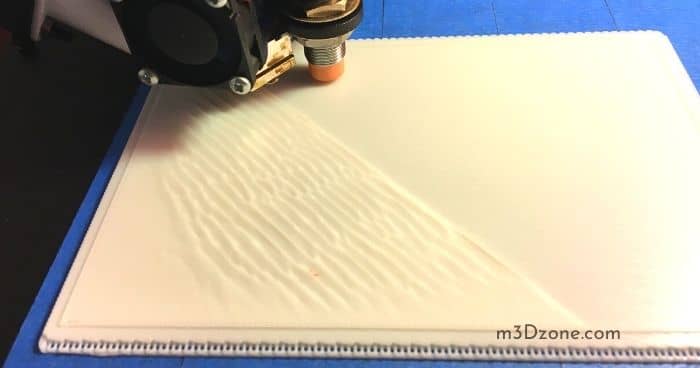
- this comes at the cost of longer print times
- Improve your maximum acceleration and jerk
- Slightly lowering the maximum acceleration (from 500 mm/s2 to 1000 mm/s2) can significantly improve print quality with little to no effect on overall print time and keep print speeds high.
- Jerk is a derivative of acceleration; figuring out the two values that might be best for setting up a printer can be a lot of experimentation.
There is also a hardware way to reduce it in many designs by shaving weight off moving parts or strengthening the design:
- Get a lighter printhead
- removal of unnecessary add-ons
- replacement for lighter print head design
- transition to Bowden design
- in CoreXY: use lighter rails
- Toughen the structure
- Adjust the carriage mount so that it compresses better
- replacement of bearings and bushings with bearings with tighter tolerances
- ties can significantly strengthen the structure of the portal and cube
This could come from any of several sources.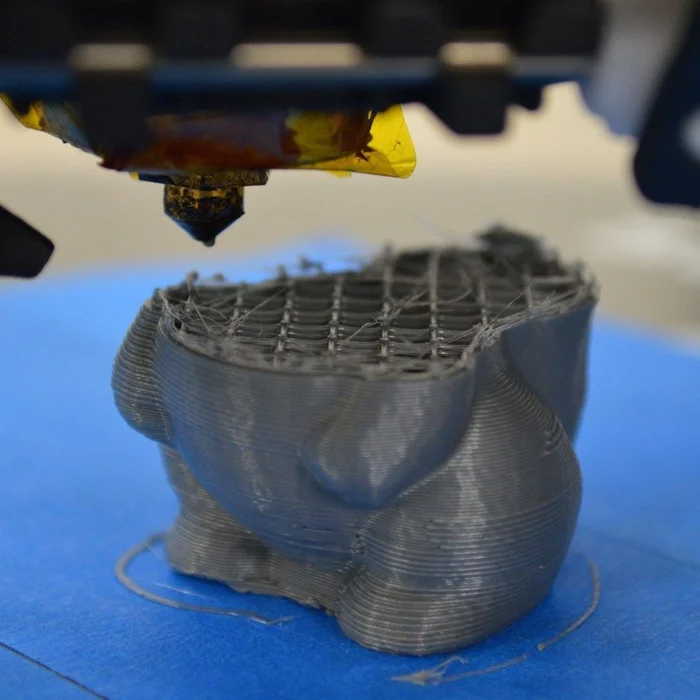 In descending order of similarity:
- the first layer is not a multiple of the actual layers (eg 0.12 instead of 0.2 mm), resulting in a partial layer at the top of the cut. in the example given, this would result in a fixed negative error of of about 0.08 mm.
- Incorrectly calibrated first layer. Depending on your alignment skills this can result in a fixed error of up to 0.1mm for a bad calibration up to 0.025mm for a really good calibration. This error can be either positive or negative.
- Z-axis inconsistencies due to misaligned lead screw, sticky lead screw, or insufficient Z-step motor voltage. Both tend to create a systematic error - as when printing a given percent loss of height. Such inconsistencies can be eliminated by solving the problem mentioned: first check the orthogonality, then carefully lubricate the screw with light machine oil (not WD40!), finally, increase the motor voltage a little. Only if your results are severely out of order, you should check if your steps/mm are set correctly.
 But I don't see the need for it.
, @ Trish
Problems, defects, 3D printing errors and solutions
Often during the operation of a 3D printer, problems may arise due to which defects appear on the finished model. Or instead of a neat product, plastic noodles suddenly appear on the table.
In fact, the causes of defects can be conditionally divided into 2 types - these are physical and software.
Physical ones are those that arise due to problems with the mechanics or any other causes that can be eliminated physically. These include problems with printer mechanisms (belt tension, backlash), clogged or deformed nozzle, incorrect table geometry, etc.
Software - these are defects that occur due to incorrect slicer settings or, less often, errors in the printer firmware. For example, incorrectly selected print speed, retract settings, incorrectly selected temperature for plastic, etc.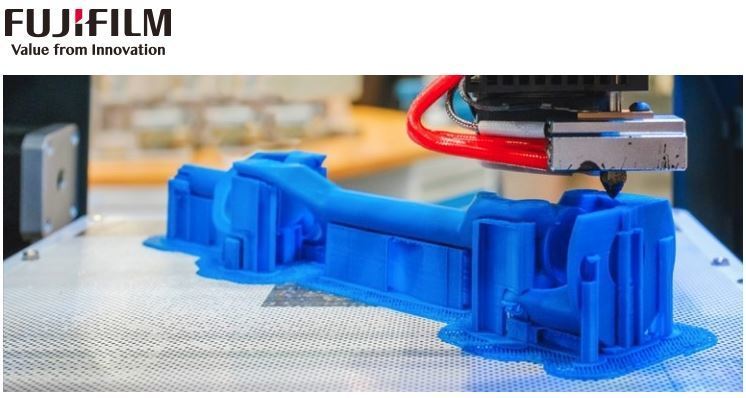
Very rarely, the problem may lie in the wrong or “flying” printer firmware (although usually the printer simply will not start then), overheating of some boards during printing, etc. These are rather special cases, so we will not consider them.
Model peels off or does not stick to platen
This is the most common 3D printing problem. Every 3D printer has had a case when the first layer treacherously rolls, clinging to the extruder, or the most offensive - when it tears off a partially printed model from the table. The first layer must stick tightly otherwise nothing will be printed.
Gap between table and nozzle 9 too large0026
This is the most common reason. You just need to set the correct gap between the table and the nozzle.
Modern printers often use an auto-calibration (auto-leveling) table system or an auxiliary table leveling program. To calibrate such printers, use the instructions.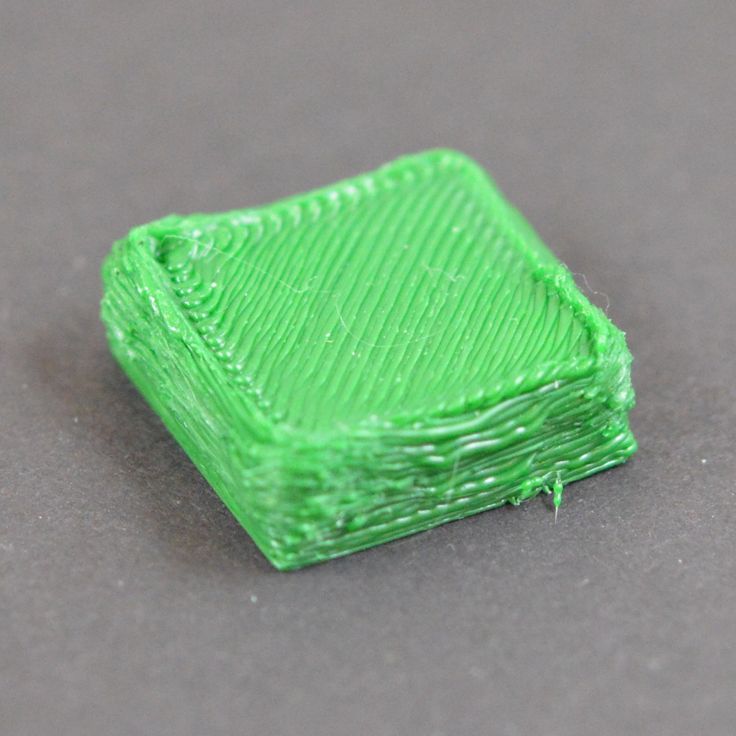 If there is no manual, it can be downloaded from the manufacturer's website.
If you have a simple printer without auto-calibration, a self-assembly or KIT kit, use a probe or a piece of paper folded in half to calibrate. The probe should be slightly pressed against the table by the nozzle. Before calibration, the table and extruder must be heated. Align the table surface over each adjustment screw (there may be 3 or 4) in turn, and only then check the center point.
If you're having trouble getting your table surface perfectly level, try raft printing. Raft is a thick substrate in several layers that is printed under the model. It will help smooth out the slight curvature of the table.
A small cheat sheet to determine the correct gap on the first layer
Plastic with poor adhesion
Some types of plastic, due to various reasons, such as large shrinkage, do not adhere well to the surface of the printing platform. In this case, try using stickers or special 3D adhesives to improve adhesion between the table and the first layer of plastic.
In the early days of 3D printing, there were experiments with different homemade 3D adhesive recipes. ABS diluted in acetone, BF glue, sugar syrup and even beer. Some experiments have been successful. Until now, some enthusiasts use some types of hairspray or glue sticks as 3D glue. But still they are inferior in their properties to industrial 3D adhesives.
Some types of high temperature plastics with a high percentage of shrinkage (ABS, Nylon, etc.) may peel off the table during printing. This is due to uneven cooling and “compression” of the model (the lower layers have already cooled down, but the upper ones have not yet). For such plastics, it is imperative to use a 3D printer with a heated table and a closed case.
Plastic temperature too low
The hotter the plastic is when it exits the nozzle, the better it will adhere to the print platform.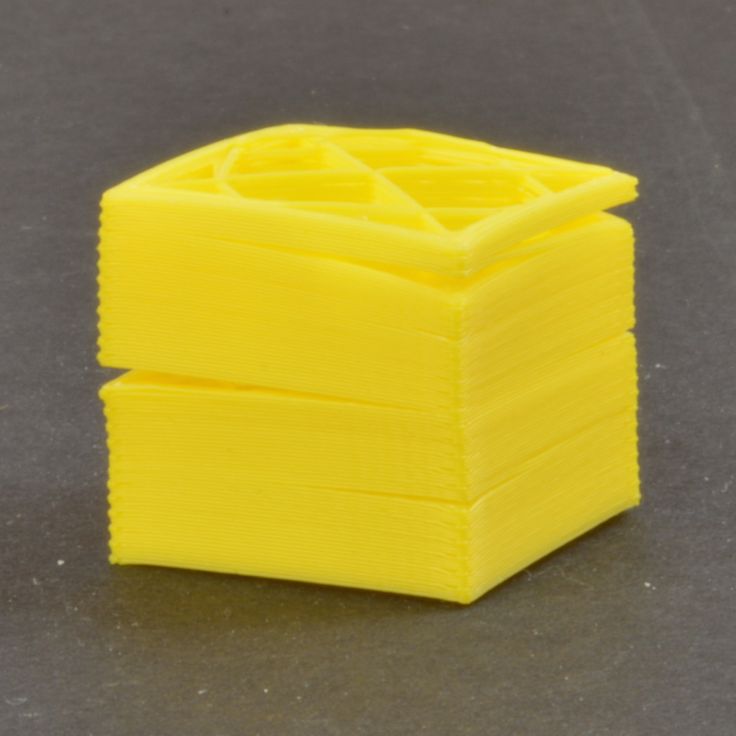 It is better to print the first 5-10 layers at a higher temperature (+ 5-10 degrees) and turn off the blower fan.
Wrong first layer settings (speed and thickness)
A thicker layer sticks easier, so the standard first layer is 0.3mm thick. With an increase in print speed, the heating block may simply not have time to heat the plastic to the desired temperature and it will stick to the table worse. Before printing, check the speed and thickness settings of the first layer in the slicer.
A lot depends on how the 3D printer prints the first layer. Try to control the printing of the first layer and only then leave the printer to work alone.
Plastic does not choke from nozzle
The printer has already begun to print, but the print table remains empty. Or part of the model did not print.
Clogged nozzle
In 3D printing, a nozzle is a consumable. The nozzles are clogged or worn out (frequency depends on the type of plastic). The simplest thing is to replace the nozzle. But if there was no spare at hand, you can try to clean the old one. To do this, there is a whole set of thin needles. Or you can heat a clogged nozzle above the melting point of the plastic and “burn out” the blockage. But later it is still better to replace the nozzle.
Low temperature nozzle
You need to increase the temperature of the extruder in the slicer settings or check the thermistor and heating block. Sometimes the thermistor may not read the temperature correctly due to a malfunction or incorrect 3D printer firmware settings.
If the problem occurs after replacing the thermistor - contact the manufacturer or read articles about PID tuning.
Empty extruder
As the extruder heats up, plastic begins to ooze out of the nozzle. Because of this, the extruder may start printing half empty.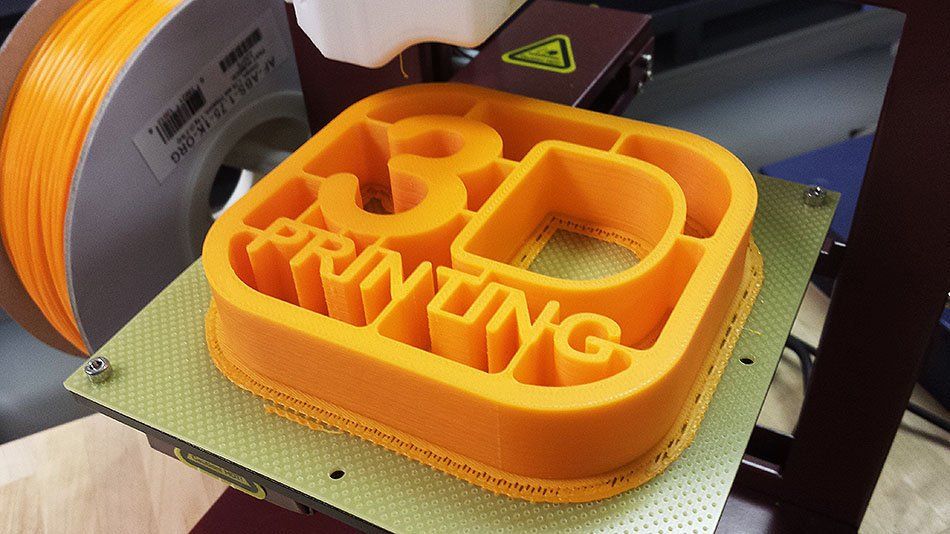 Because of this, part of the first layer is not printed. You can push the plastic manually by simply pushing the bar into the nozzle. Or solve this problem programmatically - in the slicer, add a contour print around the model (one line).
Some manufacturers and 3D enthusiasts add a line print on the edge of the table at the beginning of each GCode. This is done so that there is plastic in the nozzle by the time the model is printed.
Feed mechanism does not push through plastic
The plastic pushes the feed mechanism to the extruder - a motor with a special pulley put on the shaft. If for some reason the plastic is not pushed through (nozzle clogged, extruder temperature low, etc.), then the pulley “gnaws” through the bar. You need to push the plastic bar with your hands or cut off the damaged piece.
Elephant foot
The first layers of the model are wider and protrude beyond the boundaries of the model. This is due to the fact that the upper layers put pressure on the first ones that have not yet cooled down and flatten them.
Table high temperature
Due to the too high temperature of the table, the lower layers remain soft for a long time. Try lowering the table temperature. It is better to reduce gradually (in increments of 5 degrees). You can try to turn on the blower when printing the first layers.
Small gap between nozzle and platen
If, when printing the first layer, the nozzle is too close to the table, then excess plastic will be forced out. After a few coats, this will not be as noticeable, but can lead to the effect of an “elephant's foot”.
Plastic re-extrusion
When too much material is squeezed out of the nozzle, the walls of the model are not smooth, but bumpy, with sagging.
The solution is software - in the settings of the slicer, you need to set the material feed rate (fluidity) to a lower value. The average value is 95-98%.
It is worth checking the diameter of the rod. If its size is greater than 1.75, then the plastic will be squeezed out more than necessary.
Plastic underextrusion
The plastic is squeezed out too little, because of this, gaps may appear between the layer. The finished model will be fragile and fragile.
Wrong thread diameter
Check the filament diameter in the slicer settings. Sometimes, instead of the popular 1.75, the default is 2.85.
Incorrect feed rate settings
Check the fluidity settings in the slicer. The average should be 95-98%.
Clogged nozzle
Something could get into the nozzle and partially block the exit of the plastic. Visually, the plastic will choke from the nozzle, but in a smaller amount than necessary for printing.
Hairiness or cobwebs on finished model
Thin threads of plastic protrude from the outer wall of the model (most often on one side).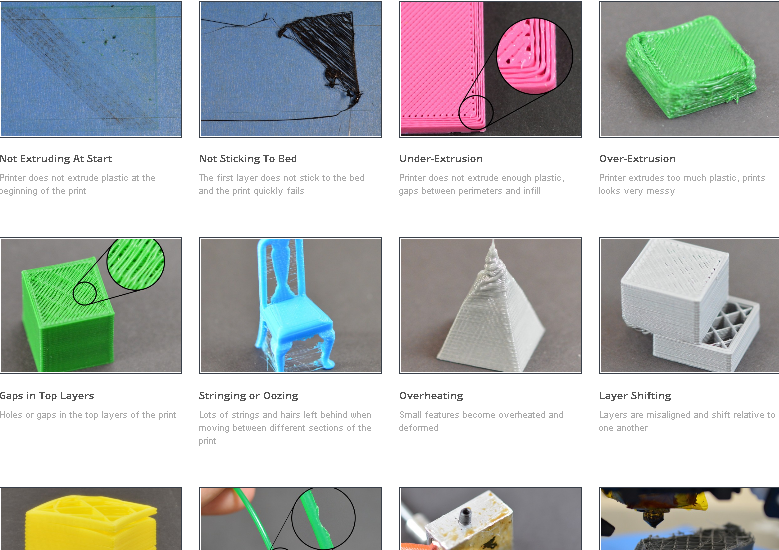 The defect appears due to the flow of plastic from the nozzle during idle movement.
Insufficient retract
A retract is a slight pull of a plastic filament from an extruder. Due to the retract when the extruder is idle (from layer to layer or from model to model), heated plastic does not drip from the nozzle. For some flowable plastics (eg PETG) the speed and amount of retraction must be increased.
"Hairiness" can be easily removed by grinding or cutting off the threads with a sharp scalpel.
High temperature extruder
The higher the extruder temperature, the more liquid the plastic becomes. It is important to find a balance so that the plastic is not too liquid and sticks well in layers.
In the selection of the optimal extruder temperature, a test model - a tower - helps a lot. It clearly shows how plastic behaves when printed at different temperatures.
.
Temperature test
Perforated or uneven top
The top of the model is bumpy or with holes. The problem may arise if the top of the model is flat. For example, like a cube.
Insufficient airflow
When printing the top plane (cover), the plastic does not have time to cool down and remains too liquid. Because of this, the threads are torn and holes are formed. Increase the fan speed on the last layers.
Few top layers
The top of the print may be too thin and deform as a result. Check slicer settings. The number of upper layers is not recommended to be set less than 6.
Fill percentage low
If the infill percentage is too low, then the top layer will simply have nothing to rely on. Increase the fill percentage in the slicer settings.
Model deformation
Some parts of the model seem to have melted in some places or on one side. The problem most often occurs when printing with PLA plastic. The defect appears due to the fact that the plastic does not have time to cool and deforms.
Insufficient airflow model
Turn the fans on to maximum. If their power is not enough (in some printers, the fan is located only on one side), you can put a regular desktop fan and direct it to the 3D printer table.
Small model
Small models are difficult to blow well. Try to print small items alongside larger ones, or place several identical models in different corners of the table. So the plastic will have more time to cool.
Layer offset
Layers shift along the x or y axis during printing.
Print head jam
Turn off the printer and try to move the extruder along the x and y axes with your hands. The extruder must move freely. If there are jams, check the mechanics of the printer. Bearing wear or the curvature of the shafts may be to blame.
Electronics overheating
Sometimes electronics problems can be to blame for misaligned layers.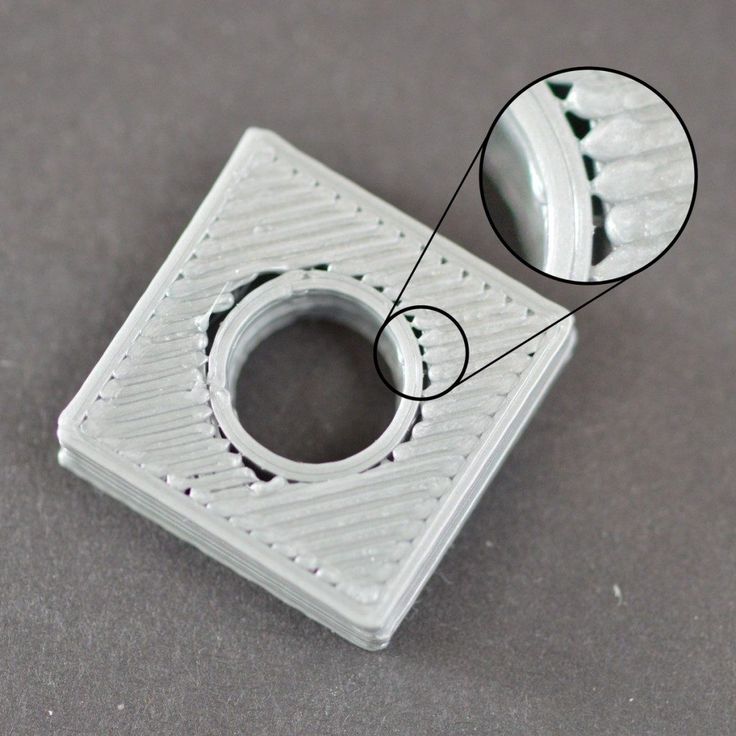 The most common cause is overheating of the drivers or too low current exposed to them.
Table top is loose
This is most often seen in 3D printers with glass. During printing, the nozzle may hit the model and move the glass slightly. Before printing, check if the glass or other printing surface is well fixed on the heating table.
Skip layers
Small holes are visible on the print, or the shell of the model is not continuous.
Teflon tube deformed
There are 2 types of thermal barriers - all-metal and with a Teflon tube. If overheated, the Teflon tube may deform. Plastic will pass through it, but in a smaller amount.
Low extruder temperature or high print speed
If the extruder is not heated enough, then the plastic will not be liquid enough and simply will not have time to be forced through the nozzle. The higher the print speed, the higher the extruder temperature should be.
Sometimes the outer walls print well, but the infill is “torn”. In this case, slow down the infill print speed in the slicer.
Model bundle
Cracks form on the surface of the printout during or after printing. Cracks can be large or very small. Most often, this problem occurs with plastics with a high percentage of shrinkage - ABS or Nylon.
Sudden temperature change (if model delaminates during printing)
With a sharp temperature difference (for example, a draft), part of the model cools down faster. This leads to uneven shrinkage and incorrect distribution of internal stress. For plastics with low shrinkage, this is not critical. But if the shrinkage percentage is more than a few percent, the model may burst in layers.
For printing with such plastics, it is recommended to use a printer with a closed housing. If this is not possible, try to avoid drafts and sudden temperature changes in the room where the 3D printer prints as much as possible.
Print temperature
Due to too low printing temperatures, the layers may not “stick” well to each other. Raise the print temperature in the slicer settings.
Hardening (if the model cracks after printing)
Sometimes cracks appear on the model a few days after printing. This is due to uneven distribution of internal stress after cooling. You can try to “harden” the finished product.
For hardening, the model is placed, for example, in an oven, and heated to the softening temperature of the plastic. After that, the heating is turned off and the oven is left to cool slowly with the model inside. Due to this, the stress inside the print is distributed more evenly. But accuracy is very important in this method - if you make a little mistake with the temperature, the finished product can “float”.
Ringing
In places where the extruder changed direction, ripples are visible. Most often it looks like a shadow around the “sharp” protruding elements of the model.
Mechanical problems
Sometimes the problem occurs due to extruder play. Check if the extruder mount to the rails is loose. Be sure to check the tension of all belts.
High print speed or high accelerations
Moving the extruder too fast can cause vibrations that cause ripples on the wall of the model. The lighter the weight of the extruder, the less noticeable the ripples will be. To get rid of ringing, simply reduce the print speed in the slicer settings.
Slots for thin-walled models (not solid shell)
The thin wall of the model is not solid, but consists of two thin walls with a narrow gap between them. This problem is often faced by fans of printing "cutting" for baking.
Left model with wall defect, right without
Wall thickness and nozzle diameter mismatch
If the wall thickness is 1 mm, and the nozzle diameter is 0.4, it turns out that for a solid wall, 2 nozzle passes are few, and 3 are already many. The result will depend on the slicer algorithm, but most often you will get 2 walls with a thin slot in the middle (the slicer cannot change the wall thickness). The solution to the problem may be a slight refinement of the 3D model or the use of a different slicer.
Algorithms for calculating 3D models are constantly being improved and refined, and now this problem is less common.
When modeling, take into account not only the thickness of the nozzle, but also the percentage of “overlapping” of lines on each other. If you have a nozzle with a diameter of 0.4 - make the wall in your model not 0.8, but 0.7 - 0.75.
Wrong model geometry
When instead of a circle you get an oval, and instead of a square you get a semblance of a rhombus.
The main reason is malfunctions in the mechanics of the printer. Be sure to check:
Belts
Check belt tension in x and y.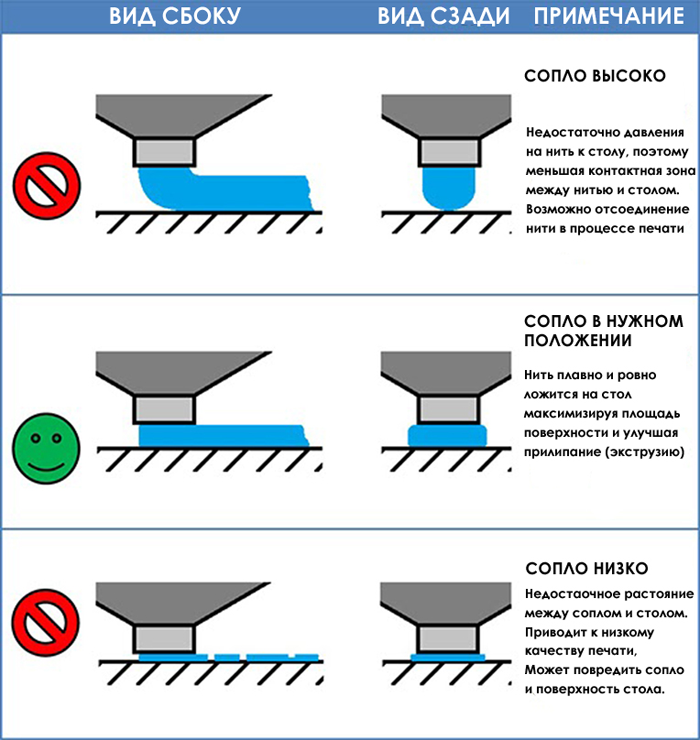 Belts stretch over time and may need to be tightened or replaced. Each 3D printer has its own way of tightening the belt. If the belts are slightly stretched, you can tighten them with the help of a "spring".
Loose pulleys, etc.
Check if all bolts and nuts are tight. Are there backlashes. Pay special attention to tightening the pulleys located on the motors along the x and y axes.
Sagging of some parts of the model
Some parts are not printed, broken, or instead of a neat surface, a swollen plastic snot is obtained.
No support for overhangs
A 3D printer cannot print in the air, so if there are overhanging elements in the model, you need to set supports - supports. The slicer can set the necessary support itself, you need to check the appropriate box in the settings.
When printing with soluble support, you can set the gap between the model and support - 0. This will make the surface smoother. If the support material and the model are the same, you need to add a small gap. Otherwise, it will be difficult to separate the support from the model.
Split model
Sometimes the supports can take more plastic than the model. In this case, to save material and time, it will be more convenient to cut the model. If you have more than one 3D printer, then the model will print several times faster.
When cutting the model, you can leave grooves or mortgages so that the pieces of the model are connected without displacement.
Totals
In this article, we talked about the most popular 3D printing defects and how to solve them. Don't be intimidated by such a long list. Some problems are rare and you are unlikely to encounter them.
There is a list of problems that arise due to the design features of a 3D printer, so try to choose a printer that suits your needs. To do this, you need to understand what products and what material you need.