Xyzprinting handheld 3d scanner review
3D scanning for under £150
Price when reviewed
I’ve lost a lot of time to the XYZprinting 3D scanner, but not in a good way. What it should offer is a simple way of creating 3D models using a clever USB camera. Unfortunately, my experience was a lot less smooth than I’d like – even for the seeming bargain price of under £150.
So, let’s start with the promise. The XYZprinting 3D scanner is a handheld USB camera that looks like the love child of a staple gun and a pair of hair straighteners. It can scan a person’s head (up to 40 x 25 x 40cm in size) and objects of up to 60 x 60 x 30cm, and will output to .stl or .obj file format, ripe for 3D printing your figurative or literal mug, or uploading to Google SketchUp or Thingiverse for others to enjoy. You plug it into your computer (Windows only, sorry OS X fans), install the bundled software and you’re away. In theory.
3D scanning made easy?
The instructions that came in the box were rather vague, but then the idea behind it isn’t that complex. You select whether you’re trying to scan a head or an inanimate object in the software, then press the single button on the scanner and you’re good to go. Simply move the scanner around the object, and a replica slowly begins to appear in the viewing window.
In practice, it’s a tricky beast to get good results from. For starters, the scanner insists on being held left-handed – a tough task for right-handers, especially when you have a thick, chunky wire trailing after you. True, you can hold it in your right hand if you adopt a “fingers up” stance, but this isn’t at all natural and is a baffling design decision.
Oh, and guess what? If you make sudden jerking movements – the kind your non-dominant hand is prone to making – the preview window freezes and you have to retry. You’ll be doing this a lot, by the way. What triggers a freeze isn’t consistent: all that remains constant is the sense of frustration and the volley of swear-words that follow (sorry, colleagues). Manage it, though, and you’re ready to output… maybe.
Compatibility
It turns out the XYZprinting 3D scanner is incredibly fussy about the computers it works with. Some of these are signposted ahead of time: it won’t work with laptops with Intel RealSense cameras built in, because it conflicts with the scanner, and it only plays nicely with fourth-generation Intel chips or later.
That’s fair enough – you can account for that, in theory. The problem we had was in finding any computer it would accept. We went through a number of review samples trying to find the magic setup. A couple would scan images, but then produce nothing in the editing window, while another would see the camera repeatedly disconnecting, a problem we later learned was down to power output: the camera needs a healthy dose of juice flowing out in order to function. Make sure your machine has a powered USB port, in other words (the one with the lightning bolt next to it), or you’ll fall at the first hurdle.
Should you manage to find the perfect combination, however, the results are pretty good for such a reasonably priced scanner. Obviously, this isn’t top of the range technology, but for a fancy webcam on a wire, it’s not bad at all. Detail is a little lacking, but for approximations of shape and volume, it’s certainly acceptable. See the comparison between the Morph and Chas bookends I scanned in and their digital counterparts:
After editing out any strange artifacts you may have brought in through your scan, you can then output the file to either an .obj or .stl file format. This might sound like a short list, but it’s actually not that bad. The .stl file format, in particular, enjoys widespread support among popular 3D design applications, including the free Google SketchUp, for further edits and beautifying, and online communities such as Thingiverse, meaning your creations can find a home in other people’s homes post 3D-printing.
Scanning someone’s head is a bit harder.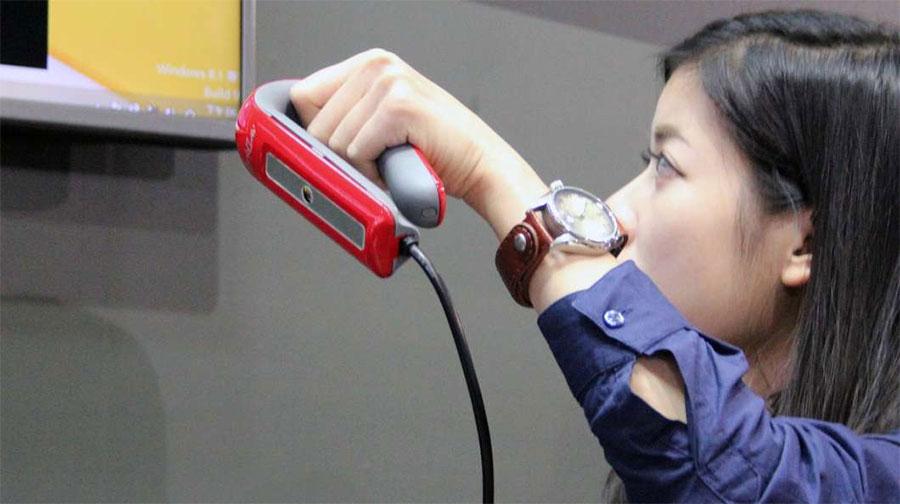 It’s certainly something you don’t want to do on yourself, but, even with an accomplice, I found it difficult to pull off. It requires your subject to remain perfectly still, the stray wire of the handheld scanner sometimes gets in the way, and often the scanner will refuse to recognise the whole head, leaving you with just the face. All the same, the results are good enough on a scanner of this type:
Verdict
All of this leaves me in a difficult position when arriving at a verdict. In some ways, the XYZprinting 3D scanner is hugely impressive. It’s cheap but surprisingly effective at picking out detail in objects for passable, if not exceptional, 3D scans. For under £150, that’s really something.
On the other hand, it was an absolute pain to get working, and the software is at times plain awkward. A cautious thumbs up, overall, if this is the kind of thing that would be useful for your school, or if it matches your hobbies.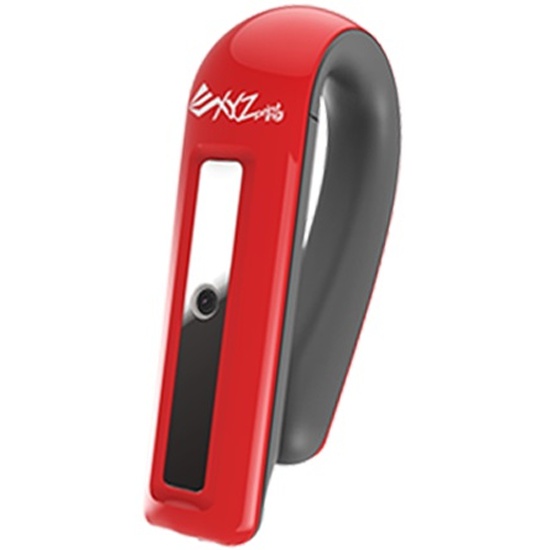 Just be sure to keep the receipt because whether it’ll play nicely with your hardware is anyone’s guess – no matter what the specifications say.
See also: The best laptops of 2016 – your guide to the best portables on the market
XYZprinting 3D Scanner review « 7Review
Digitise real-world objects
This might be the most futuristic gadget we’ve ever seen in the Computeractive office, which makes its affordable price all the more remarkable. It’s roughly the opposite of a 3D printer: you start with an object that already exists, which could be anything from your head to an ornament that you want to replicate, and capture a digital model of it that you can manipulate in 3D-modelling software (such as 123Design), whether as the basis for an art project, to output via a 3D printer, or just for fun.
Check Amazon
And it really is fun – at least in principle. The first problem we had in practice was that the 3D Scanner uses Intel’s RealSense technology, which is good because It standardises things to work with any PC, but also bad because when we tried it with PCs that already included Intel RealSense cameras (the feature Windows 10’s ’Hello’ face-recognition security relies on), the scanner conflicted and refused to work. This will presumably get fixed as RealSense develops.
Other PCs were also reluctant, but this turned out to be mainly because the 3D Scanner needs a fully powered USB port (the kind with the lightning symbol next to it). Once we’d set it up with a suitable machine, it worked as it was meant to – sort of.
The scanning process is a bit like taking a panorama photo with your phone. You hold up the scanner, which feels like a cross between a stapler and a set of curling tongs, and move it carefully around the object. A wobble will spoil the scan, and it’s tricky to keep the trailing wire out of the way, especially if you’re right-handed. To scan a live person, they have to keep very still.
SPECIFICATIONS
Handheld Intel RealSense camera • Scan volume 50x50x50mm to 400x400x25mm or 300x600x600mm • USB 3.0 port • Requires 4th generation or later Xitel Core 15 processor and Windows 8.1 or later (64-bit) • One-year warranty
7Review earns Amazon affiliate commissions from qualifying purchases. You can support the site directly via Paypal donations ☕. Thank you!
When it worked, we got convincing scans, albeit after a bit of cleaning up.
You don’t get ultra-fine detail, but you can recognise objects, and simple shapes are captured well. The resulting .obj or .stl files can be edited in free apps such as 123Design (www.snipca.com/21022) or 3DSlash (www.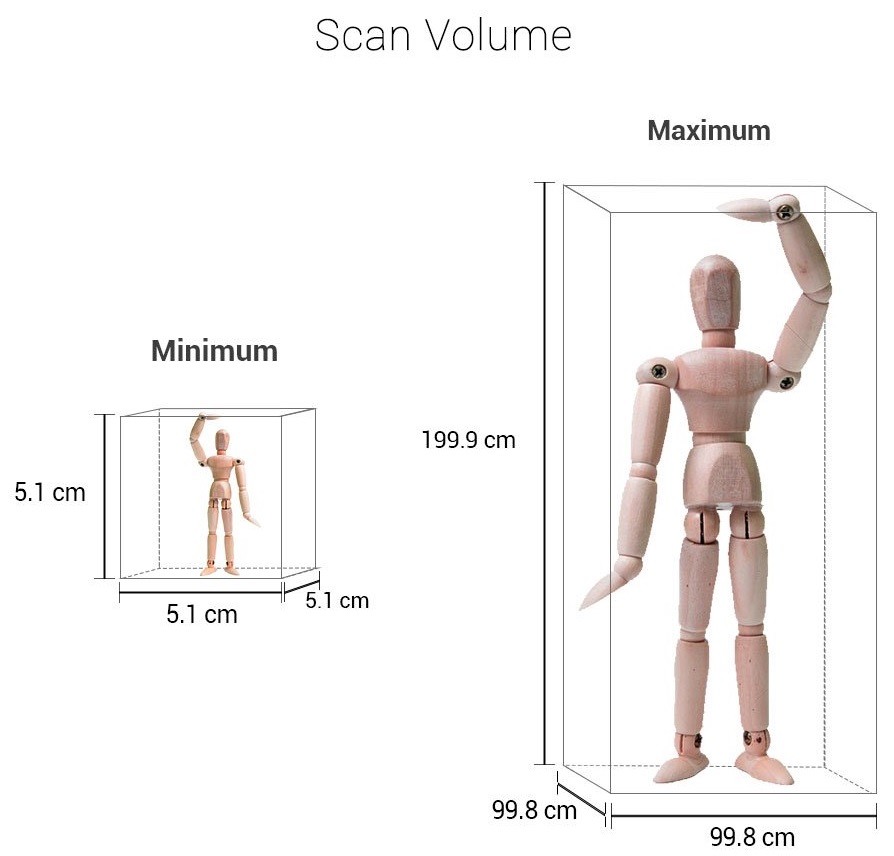 snipca.com/21021).
When It works, this Is a good-value accessory for 3D enthusiasts, but we still await that foolproof version
7Review earns Amazon affiliate commissions from qualifying purchases. You can support the site directly via Paypal donations ☕. Thank you!
Inexpensive high-resolution 3D scanner: a review of peel 2 CAD-S
3D scanners
Reverse engineering
Author: Aleksey Chekhovich
Author: Aleksey Chekhovich
Setting up and using the 3D scanner for the first time | Scanning process | conclusions
The peel 2 CAD-S 3D scanner is a welcome addition to the peel 3d line. Compared to its predecessor, the peel 2, the device boasts higher detail when scanning small objects.
Peel 3d is a trademark of Ametek/Creaform. All of the parent company's knowledge and know-how in 3D scanning and reverse engineering has been invested in making peel 3d products more accessible to reach a different target audience.
The peel 2 scanner proved to be very capable and useful in many applications, but it lacked the ability to capture the finer details of objects. Consider the new peel 2 CAD-S model to evaluate the changes that have taken place.
Explore the entire peel 3d line for faster and easier reverse engineering projects. Send an online application and our experts will advise you and find the best solution.
peel 2 CAD-S uses the same structured white illumination technology as the previous model, but with higher resolution and therefore better suited for working with smaller elements. The recommended part size is less than 0.5 m (for comparison, for peel 2 - from 0.3 to 3 m).
In practice, this means that when using the same sensors and cameras, the scan area is reduced from 380 × 380 mm to 142 × 108 mm. Essentially, you get the same number of pixels in a much smaller space, so the peel 2 CAD-S can capture 3D shapes at 0. 1mm grid resolution – in other words, five times more accurate than peel 2.
Setting up and using the
3D scanner for the first timeThe setup process is pretty much the same as with all other 3D scanning devices. The whole set comes in a regular case with a foam insert: a scanning device, software and a license key on a USB stick, as well as a switch. The cables are designed for power (from a standard power supply) and data transfer (via Hi-Speed USB 2.0). The installation process is simple: insert the flash drive into your computer, run the installation and follow the suggested steps.
In terms of hardware requirements, you'll need a modern workstation or laptop with an Nvidia GPU and at least 2GB of VRAM. Processor - the faster the better, but because the system is geared towards small parts, the chances of overloading a modern processor are minimal.
After installation, you need to calibrate. Calibration of this type of device is not difficult, and the general recommendation is that it should be done fairly regularly, especially as the conditions in which the scanner is used change. This may be due to light (for example, moving to another office, to another area of \u200b\u200bthe shop or workshop) or temperature. After the calibration is completed, the device is ready for use.
When the peel 3d software is launched for the first time, the user is presented with two main options. You can follow the help guide that will guide you through the entire 3D scanning process, determining how to capture the object, what resolution and positioning methods to use (geometry, texture, or position labels), and help you with your work. Another option is to do the setup yourself.
The peel 2 CAD-S scanner is compact, well balanced and ideal for processing miniature parts
First you need to determine the resolution of the scan.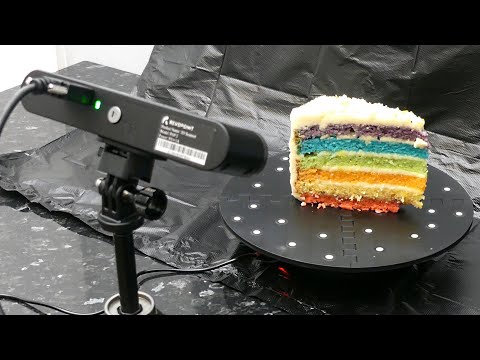 The default is 1.0 mm, but values from 0.1 mm to 2.0 mm are possible. The lower the value and the sharper the resolution, the better the scan and the larger the data set. Given that peel 2 CAD-S is designed for small objects with fine detail, a good GPU can easily handle even 0.1mm resolution.
The next step is to set up how the system will track the movement of the 3D scanner around the object. As with other similar devices, there are three options: texture, geometry, and labels. Structured light scanners equipped with texture capture can use the surface texture to track the movement of the scanner/object. peel 2 CAD-S can also use object geometry. Both of these methods work well for organic shapes and textured objects.
iQB Technologies experts recommend the article 3D scanning of a part: 9 easy steps with peel 3d
For products of regular shape with uniform surfaces (most often this applies to mechanical parts), the use of position marks may be required.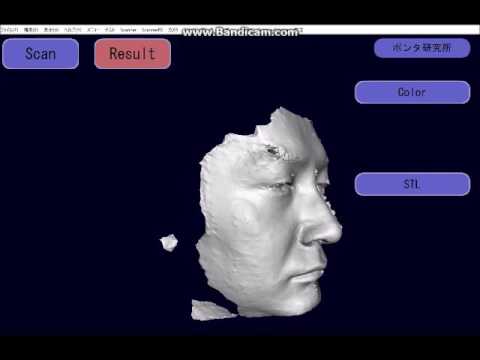
These are small reflective markers of a predetermined size that can be stuck on or around an object. They are used to determine the position of the scanner in relation to the object using triangulation methods. As long as there are three marks in the field of view of the 3D scanner at the same time, this method usually gives a good result and ensures correct tracking of the scanner.
The peel 2 CAD-S comes with a set of small plastic jigs with three marks that can be placed around the object for quick adjustments. These devices are very useful considering that the device is focused on digitizing small details with high detail, and sticking several 4mm marks on them is not a very practical solution.
peel 2 CAD-S is designed to scan physical objects at high resolution, and many of its features are based on proven Creaform designs
Scan process
3D scanning typically involves collecting as much data as possible in one position. The device is quite light and well balanced, which many competitors' products cannot boast of. The function of determining the distance to the object (ideally 300 mm) with color indication on the screen and on the device itself allows you to scan very quickly.
It is worth noting that the peel 3d software provides a very rough preview. Since the scanner usually collects a huge amount of data, it makes sense to gradually filter it out as you work.
As you get used to the operation of the device and develop the skill of quickly moving the scanner around the object (or quickly rotating the part on the turntable), you will understand how to maintain continuous tracking. At any time, you can take your finger off the shutter, pause the scan and review the data, and then return to digitizing the missing areas.
After the initial scan, there are two paths. If there is enough data, then you can start the cleaning process and remove excess data. There are a number of tools available for this and the procedure is quite simple - this is one area where all the investment in Creaform know-how is worth it. Then the meshing and further cleaning is performed.
Otherwise, especially for complex parts, a more thorough rescan may be required. This repeats the same process, resulting in two or more data sets that need to be matched. Once again, Creaform's knowledge and technology comes into play, allowing you to use common dots (you must select three common dots between two or more images) to combine multiple scans.
After the scan (or set of scans) is ready, the next step is to prepare for data post-processing. You may just need to create a mesh, fill holes, and export the data to OBJ or STL format. In this case, the available tools will help smooth surfaces, remove noise and fill in all holes to ensure reliable export.
In addition, analytical surfaces may need to be built from point/mesh data, either to obtain a point of reference for mesh reuse in CAD (surfaces allow alignment and reassembly of the model) or to create reference geometry to build a more complete model.
The peel 3d software is not really designed to build a fully sealed solid model. Its purpose is to help build a set of reference surfaces that are consistent with point and grid data. This view of the scanned data can be imported into a full-featured 3D design system and the 3D model can be completed.
After mastering the best methods for capturing a physical object with peel 2 CAD-S, the results will speak for themselves.
While this may seem a little complicated, in fact, in most cases, other surfaces (such as cylinders, spheres, planes, etc.) can be added almost instantly to a prismatic model.
These surfaces and points can then be loaded into CAD. This usually requires two exports: first a mesh data file in STL or OBJ format, then a surface data file in STEP or IGES format (for example). The result should be a set of two types of geometry that can be used to build the required model.
Conclusions
At first glance, the peel 2 3D scanner makes a strong impression.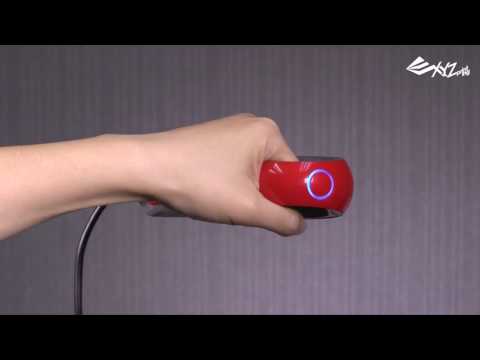 Relatively low price, excellent build quality and, last but not least, reliable and simple software. The main problem was that it is not suitable for those who require higher resolution scans.
peel 2 CAD-S takes the same approach as its predecessor but focuses (both literally and figuratively) on smaller objects and capturing finer details while maintaining the same ease of use when paired with software from Creaform .
The resulting scans are of excellent detail, and by mastering the art of multiple scans, stitching and alignment, as well as the practicalities of working with reflective surfaces, you can achieve impressive results.
peel 2 CAD-S and peel 2 complement each other optimally, and it makes sense to have both scanners at the workplace. In practice, this option is very common. If you are interested in 3D scanning solutions, the peel 3d line deserves a deeper look.
Source: develop3d.com
Article published on 10/05/2021, updated on 11/30/2022
How does a 3d scanner work? Device, principle and technologies of 3D scanning
3D scanner is a stationary or small hand-held device for scanning objects with complex spatial geometry. Simple scanners process images in a plane, while 3d scans physical volumetric objects, displaying information as a polygonal model or a cloud of points. Three-dimensional scanning devices are used in medicine (dentistry, plastic surgery, making prostheses, organ models, etc.), for creating computer games, in the film industry, design, architecture, engineering, for designing industrial parts, cars, for reconstructing objects in archeology. Scanners analyze and digitally recreate a three-dimensional model of an object, its shape and color with a high degree of detail, working in different conditions (with insufficient visibility, in the dark, with vibration), with any materials, provide the desired format of output information for software for work with her on the computer.
How does a 3D scanner work?
The principle of operation of the 3d scanner is the ability of the device to determine the distance to an object, convert the received data into a digital image (three-dimensional model), transfer it to a computer.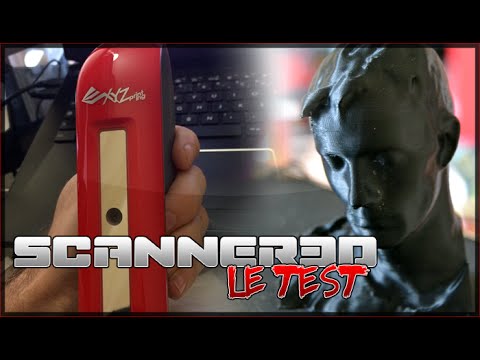 The scanner determines the coordinates of points in space on the surface of the processed object, analyzes them, and forms a detailed digital model. Cameras, lasers, rangefinders, devices for illumination are involved in its work.
3D scanning technologies
- Contact (contacts with the object).
- Non-contact (without object contact). These are the most promising and new technologies that allow you to create models of objects simply by directing a laser beam, light, waves at them. The scanner is applied at a distance and is able to create a copy of a hard-to-reach object without physical contact with it.
Non-contact 3d scanners
The two most common scanning technologies are optical (passive and radiation) and active laser.
Active emission principle
Scanner emits structured, intermittent light, laser triangulation.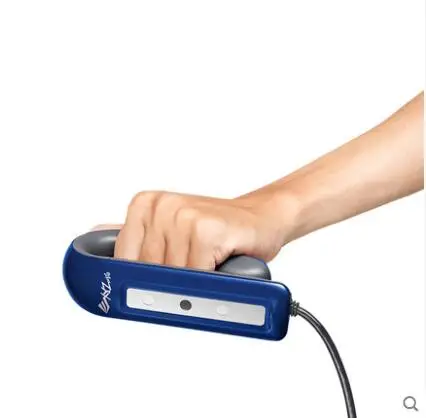 A laser beam, a beam of light generated in a special way (diodes, lamp flashes), and waves are directed to the object under study. Based on the analysis of their reflection and position, a three-dimensional copy of the object is formed.
Passive emission principle
Do not emit anything, analyze the light or infrared (thermal) radiation of an object. Work like a human eye;
Photometric non-contact passive 3d scanning technology
Scanners from this group are represented on the market by the XYZprinting model. These are quite compact simple models that have only basic 3D scanning functions.
Pros: affordable price and compactness.
Device
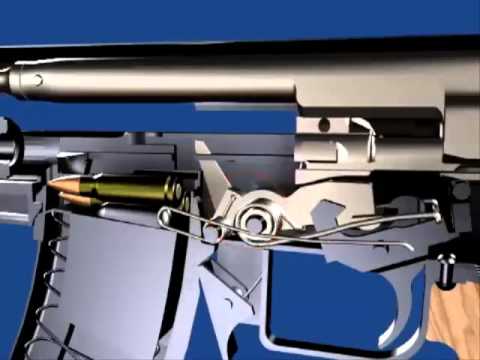
Passive 3d scanner device (on the example of the specified model): housing, one compact camera, USB cable for connecting to a computer and transferring the image of the scanned object to it. Scanner without stand, manual, made in the form of a stapler.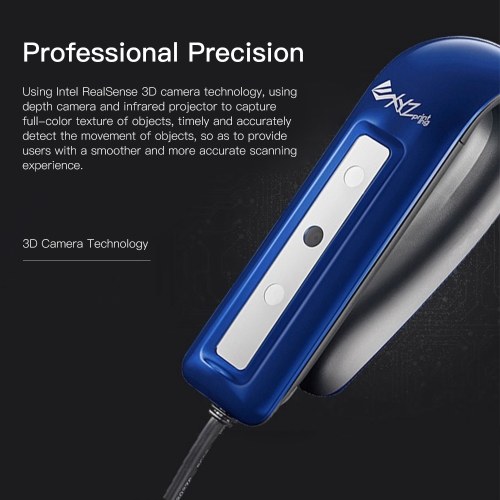
How it works
A light-sensitive camera captures light from an object, processes it, and forms a three-dimensional model, exporting it to a computer. The user can have two modes of operation: scanning a person or objects. To get started, you need to install the software on your computer, connect the device to it via a USB cable, select the operating mode, press the button on the scanner and, slowly swiping it in front of the object, scan.
How the technology works
The device works with passive scanning photometric technology without any radiation and projection onto the object. The work is carried out with a slightly improved simple optical camera that captures visible light. The disadvantage is that if the lighting is insufficient, the object needs to be additionally illuminated.
Scanning is performed using the so-called silhouette method. It reproduces the contours of an object based on a sequence of frames captured by a video camera swept around the object against a well-contrasted background.
Stereoscopic non-contact passive 3d scanning system
Models with non-contact passive scanning technology
This type of device is represented by 3D Systems Sense, 4D Dynamics Gotcha models.
Device and principle of operation of a 3d scanner based on a non-contact passive scanning system
Devices are equipped with two cameras and an infrared sensor. The 3D Systems Sense scanner is made in the form of a stapler, it is a compact handheld device, it can be used with a tripod, in Gotcha (with a tripod and a handle), it is included. The principle of operation is passive optical. In both cases, power and data transfer is carried out via a USB cable. The devices have standard modes: scanning a person and an object.
Scan technology
The camera uses this technology to detect infrared (thermal) radiation and normal light reflected from an object.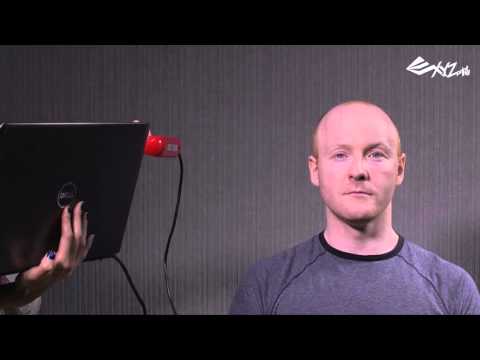 The systems are stereoscopic, that is, they use two cameras. The device compares frames, based on small comparisons of differences between them, determines the distance at each point of the image and recreates the object in digital form.
3d scanners with laser active scanning
This group of devices is represented by the following scanner models: 3D Systems iSense, DAVID Starter-Kit ver.2, MakerBot Digitizer.
Device
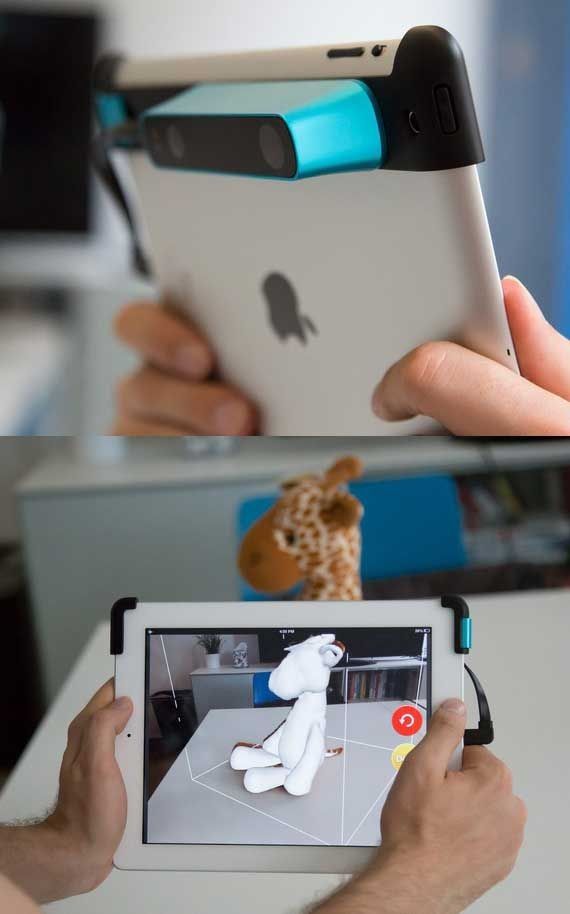
Devices have two lasers and a camera. It should be noted that the laser safety of gadgets corresponds to level I, which is completely safe for the eyes. The iSense scanner is designed to work only with the iOS operating system and with Apple iPad above 4 generations. It is made in a compact case, which is installed on a mobile gadget and connected to it with a USB cable, the battery lasts for 4 hours of its operation. It attaches like a webcam, scans and immediately displays the image on the iPad.
Models
DAVID Starter-Kit ver.2 3D scanner device: webcams and laser sensors with automatic adjustment function. The device comes with a tripod and tripod.
Maker Bot Digitizer is slightly different in design from the previous model. The body of the scanner is made as a pedestal, one part of which is a rotating platform, the other is equipped with two lasers on the sides and a camera in the middle. They scan an object located on the site.
How technology works
Let's describe how a 3D scanner works. Laser scanning is based on the triangulation method. This is an active scan tool. It uses laser beams by projecting it onto an object. The laser processes the surface of the object, its points are fixed on its different parts. The camera captures the laser dots on it, the angle of displacement of the laser beam and transmits the data to a computer with the appropriate software, which forms the object in digital form.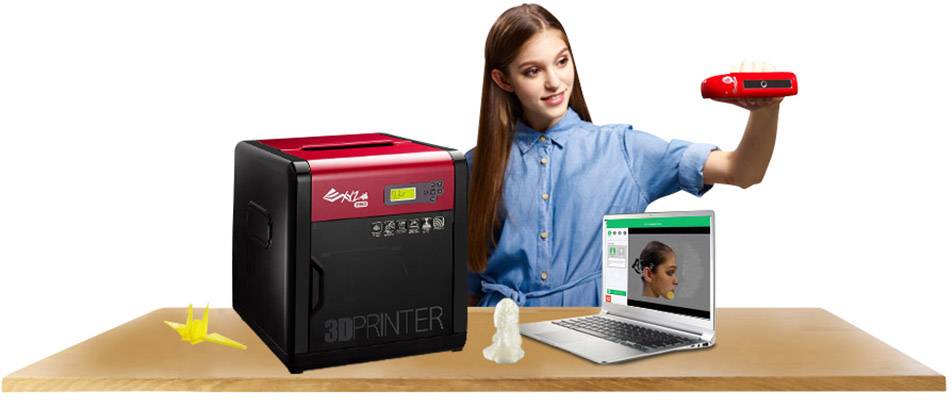
The scanning technology is called “triangulation”, because the triangle of the device's functional elements is involved in the work: the laser point on the object, its emitter, and the camera. In most cases, the dot is formed by a laser streak or spot passing over the surface of the object.
Structured light 3d scanning technology
Models that use structured or intermittent light technology in their work: DAVID SLS-2, RangeVision Smart, RangeVision Standard Plus, RangeVision Advanced, RangeVision Premium. A separate group includes manual Artec Spider, Artec Eva, Artec Eva Lite.
Device
The main functional elements of these devices are cameras and a light source that structures it in a special way and directs it to the scanned object. In the DAVID SLS-2 model, a video projector serves as a light source. These are mounted on a tripod with a tripod, which are included. This allows you to set up and calibrate instruments, install them in different positions and securely fix them, reducing vibration. Light sources in devices are halogen lamps, diodes, video projector.
Artec Spider, Artec Eva, Artec Eva Lite are made in a compact body with an iron-like handle. The handle has control buttons and outputs for interface and power cords. At the bottom there is also a hole for standard photo tripods and legs for fixing the device on the surface. 3d scanner device has the following. From the bottom it is equipped with a 3D camera (there are three of them in Artec Spider) with increased resolution, from the top of the device - a flash (projector) of structured illumination, a central color texture camera in the middle, along with light sources in the form of 6 or 12 diode bulbs. All light sources have white radiation. The device comes with a standard mini-USB interface cable and a power cable. Additionally, you can buy a rechargeable battery.