3D print auto sear
▷ full auto sear 3d models 【 STLFinder 】
AR - 15 Drop in Full Auto Sear
thingiverse
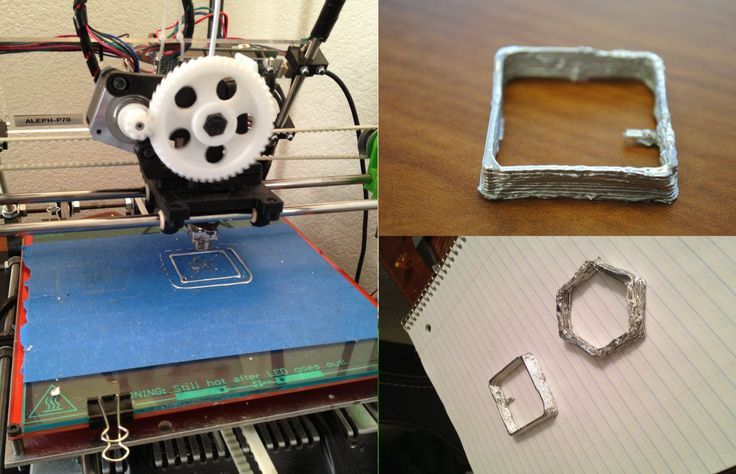
Pulled these specs from some old mag, bear in mind it is illegal to make and or possess one of these...FOR YOUR INFORMATION ONLY! ... To work, this requires a spring and pin to hold the two pieces together to function
Auto Sear for AKM
grabcad
Auto Sear for AKM
EZ Glock Auto Sear
cults3d
... system. The disconnector is to be made from 18 gauge steel. You can keep the backplate on and just screw the auto sear in whenever you want to. You tension the auto sear with the nut in the rear. ...Tighten to engage and loosen to disengage.
hk417 Auto Sear
grabcad
hk417 Auto [email protected]
SEAR
grabcad
SEAR 3d model
switch auto sear
grabcad
Step. StL. ...format files.
Glock auto sear
grabcad
For design purposes only.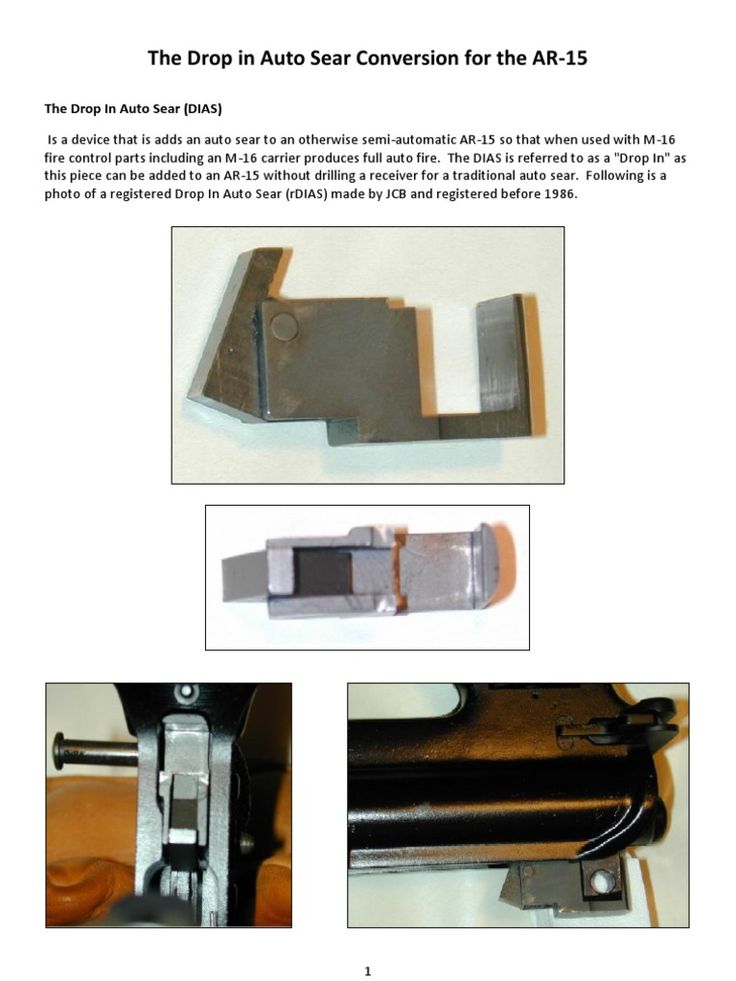 ..
..
Glock Auto Sear
thingiverse
Four educational purposes only please follow all local laws
AKM Auto Sear
grabcad
Came across some old blueprints, this is pretty close to the real deal other than errors readng dodgy russian drawings.
Sear&Auto Sear SPRING for Ak-47
grabcad
these springs are used for akm or ak-47 based on blueprint
full auto nerf modulus
thingiverse
this is a full auto kit for the nerf modulus fully tested and working have fun!
M16 Full Auto Hammer
grabcad
Full auto hammer for M16/M4 rifles modeled from blueprint. This is my first project, and their may be inaccuracies in my model I am not aware of as I am still trying to learn CAD. The blueprints I modeled this off have been uploaded in case anyone...
Nerf vortex full auto pistol
thingiverse
prototype; untested but should work. ...full auto takes nerf vortex ammunition mag goes in the handle. ...
HK MP5 Hammer Full Auto
grabcad
Full Auto MP5 Hammer. ...Drawn from blueprints email [email protected] for more info
Full color "Auto Max" Keychain
thingiverse
For full color print, change filament at 2. 4, 3.0, 3.6 and 4.2. Start with white, change after layer at 2.4mm to yellow, after 3.0mm to red, after 3.6mm to black and after 4.2mm to light blue. If you want to have silver/gray rim use acrylic art...
KWC Desert Eagle Full Auto Disconnector
thingiverse
Full Auto Disconnector link for a KWC Desert Eagle GBB. ...I Modeled it and removed the sear which causes the trigger to reset
SVD sear
grabcad
svd sear
SEAR
grabcad
COLT 1911A1
Full Auto Rubber Band SMG - V6
thingiverse
V5 - Display Stand, nubs on top to keep the bands a bit separated so they don't pinch the release catch, fatter release for wider bands, magazine tapered and smoothed at the corners to help with band release V4.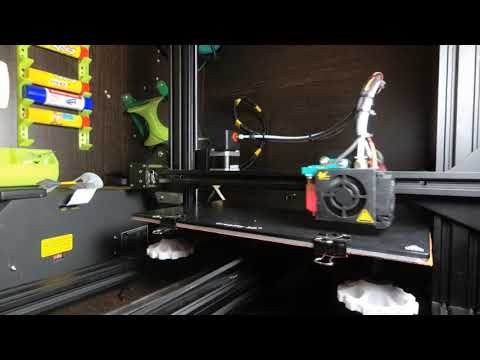 1 - Small bed version added (front and...
Worker Swordfish full auto short dart pusher
thingiverse
This was made to work with the worker full auto conversion kit they sell. Like this https://www.workerkit.com/p/Worker-Electric-Long-and-Short-Talon-Clip-Kit-Transparent_2678827.html Not this one...
Worker Swordfish full auto short dart pusher
cults3d
This was made to work with the worker full auto conversion kit they sell. ... Like this https://www.workerkit.com/p/Worker-Electric-Long-and-Short-Talon-Clip-Kit-Transparent_2678827. html Not this one...
D3+1 For Gruntz Full Auto Rolls
thingiverse
I created a D3+1 for when rolling full auto weapons number of shots in the Gruntz 15mm scifi game. Check for more info at my blog: http://15mm.42oranges.com/ Print Settings Rafts: No ...
selector plate ICS CXP (NO FULL AUTO )
thingiverse
por favor , se possível mandar feedback obrigado ATENTION this is a fully tested and aprooved part , however it isnt a licensed part from ICS , this parts is mean to turn off full auto feature on aegs with analog trigger switch we still are testing. ..
..
selector plate ICS CXP (NO FULL AUTO )
cults3d
por favor , se possível mandar feedback obrigado ATENTION this is a fully tested and aprooved part , however it isnt a licensed part from ICS , this parts is mean to turn off full auto feature on aegs with analog trigger switch we still are testing...
M14 Sear
grabcad
M14 Sear view only email [email protected] for more info
Lepus Full auto Talon Nerf Blaster mk2
thingiverse
I wanted a really compact full auto sidearm to be a companion for my caliburn or HPA blaster, using talons meant it was compatible with the mags I already use in my other blasters. Making the mag feed through the handle kept the size small and gave...
Gryphon Full-Auto (Foam Dart Blaster)
thingiverse
I had been modifying Stryfe and other flywheel blasters to make them full-auto. I wanted to learn some 3D CAD so decided I'd load up the Fusion360 from Flygonial and have a play. What I've uploaded is my modifications to allow the use of a...
Hippogryph Full Auto Foam Dart Blaster
thingiverse
The biggest challenge will be wiring, If you use full size switches the trigger switch will require good soldering skills to get the wires short enough to get the switch to nest like the pic.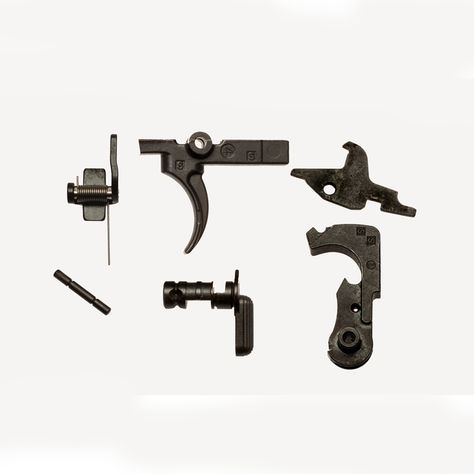 The screws are mostly m3x8/12, and blaster screws. Good...
Maxim 9 BRAZ 9mm full auto SilencerCo custom
grabcad
Maxim 9 BRAZ 9mm full auto SilencerCo custom
AR15 Full Auto Link
cults3d
Files you receive with the purchase: -2 Machining Blueprints -2 STL 3D printable files
▷ ar15 drop in auto sear 3d models 【 STLFinder 】
AR - 15 Drop in Full Auto Sear
thingiverse
Pulled these specs from some old mag, bear in mind it is illegal to make and or possess one of these. ..FOR YOUR INFORMATION ONLY! ...
To work, this requires a spring and pin to hold the two pieces together to function
..FOR YOUR INFORMATION ONLY! ...
To work, this requires a spring and pin to hold the two pieces together to function
AR15 Target Style Sear
grabcad
Sear that accompanies the target style hammer for an AR15
Auto Sear for AKM
grabcad
Auto Sear for AKM
EZ Glock Auto Sear
cults3d
... system. The disconnector is to be made from 18 gauge steel. You can keep the backplate on and just screw the auto sear in whenever you want to. You tension the auto sear with the nut in the rear. ...Tighten to engage and loosen to disengage.
hk417 Auto Sear
grabcad
hk417 Auto [email protected]
AR15 Sear
pinshape
Print on its side, 100% infill
SEAR
grabcad
SEAR 3d model
Glock Auto Sear
thingiverse
Four educational purposes only please follow all local laws
switch auto sear
grabcad
Step. StL. ...format files.
AKM Auto Sear
grabcad
Came across some old blueprints, this is pretty close to the real deal other than errors readng dodgy russian drawings.
Glock auto sear
grabcad
For design purposes only...
Sear&Auto Sear SPRING for Ak-47
grabcad
these springs are used for akm or ak-47 based on blueprint
ar15
grabcad
ar15
AR15 Full Auto Link
cults3d
Files you receive with the purchase: -2 Machining Blueprints -2 STL 3D printable files
AR15
grabcad
AR15 built from picked up parts
Drop In Sink
grabcad
Drop in sinkStainless steel hand sink15 x 15
Ar15
sketchfab
Game ready model of a AR15 assault rifle complete with animaitons.
Pencil Holder, Drop-in
thingiverse
This drop-in pencil holder fits the cutouts (cable access) of a HON brand desk. ... Remove the annoying, unwanted hole plug(s) and drop this in instead.
2x4 Drop-in Support
thingiverse
This is a replacement of the 2x4 drop-in support for the Centipede sawhorse.
Drop-in Cup Holder
thingiverse
Designed this simple cup holder for a temporary couch table. ...Just cut a hole 91-99mm wide and drop it in!
Haven't printed it yet, but my biggest concern is the strength of the lip. ...May have to make that thicker.
Dishwasher Grid drop-in
thingiverse
When your dishwasher grid for utensils breaks apart, use this to drop it in and fix it! A smaller version can be found here: http://www.thingiverse.com/thing:1568108 Print Settings Printer: Da Vinci 1.1 Plus ...
Drop-in Flashlight holder
thingiverse
I wanted a drop-in light holder for my flashlight. Putting it on the Molle webbing behind my seat of my vehicle. It is designed to clip onto Molle webbing or screwed to something or a single zip-tie. Spots for all kinds of mounts! It should work. ..
..
Y-Stage Drop-In
thingiverse
History x-y lowrider by twotimeshttp://www.thingiverse.com/thing:2845 Drop-In Y-stage for Batch 9 Cupcakes. Printable in 1 sheet (only 6 pieces) Uses minimal hardware (see instructions) Solves issues of: bolts jammed against guide rods Y timing belt...
20x40mm Drop in Nut
cults3d
With the drop in nut any place on the rail can be accessed. The nut fits the slot but when turned it locks in position. At first I had my doubts about making this. It is so small and it may be too weak. I was wrong on both counts. With my Prusa...
Printable Drop-in Paxtruder
thingiverse
. .. a plunger thing to push against the plastic like the original. Put it together. (Self explanatory, but if you need help head over to www.thingiverse.com/thing:1351) Mount it to your Dinos. Start extruding on your new Printed Drop-in Paxtruder!!
20x40mm Drop in Nut
thingiverse
With the drop in nut any place on the rail can be accessed. The nut fits the slot but when turned it locks in position. At first I had my doubts about making this. It is so small and it may be too weak. I was wrong on both counts. With my Prusa...
GoPro Drop In Bracket
thingiverse
I have been using the original go pro bracket housing to film my 3d prints but the original housing doesnt allow for charging while its in the housing as the flap cannot be accessed. So i needed just the face plate with some side support just to rest...
AR15
sketchfab
Have a look at my comprehensive tutorials and 3D assets on my website at www.chamferzone.com You will also find free tutorials and weapons there that you can use in your projects. Questions? ...Message me through www.facebook.com/chamferzone Cheers!,...
Cerchio in lega auto
grabcad
Cerchio in lega, stile BMW M5
AR15 M4 Full Auto Hammer
grabcad
This part was produced from this mode;
3D Printing Application - Automated Feeder
Autonomous Chicken Feeder is a project I was commissioned to have as inputs limited in scope and the ability to easily add feed. So I would like to tell you about such a project now. But before starting, I would like to suggest subscribing so as not to miss new materials.
You can watch the video, or by scrolling below there will be a text version of the material.
Problem statement
The beginning of this project was rather classic. I was approached by a person with a request to develop a project for an autonomous chicken feeder. I was given an electric feed dispenser, which, by the way, greatly facilitated the development of the project itself, since it remains only to make the feeder itself in which the feed will be distributed, as well as a container in which grain is stored and a valve for the possibility of removing the tank.
The following requirements were put forward as technical tasks:
- The height of the entire structure must be no more than 1m.
- Everything must be attached to the wall.

- Possibility to remove the grain container.
- Easy to install.
The tasks were set and I started developing
Development of autonomous chicken feeder
I started by thinking about what is better to print and what can be bought as a finished product. The result was that the valve, all brackets, the feed distributor would be printed, and the feed container would be purchased.
And this container was an ordinary 18 liter trash can.
Future feed storage tank.
The choice was in the direction of the bucket due to the fact that this bucket has a valve cover, thus no garbage will get into the feed, and it will be more difficult for chickens to get into the tank. Also, the cost of a finished tank is much cheaper than printing a similar one from scratch.
Simulation
I then proceeded to the modeling process itself. I decided to start by modeling the electric dispenser itself. Since it already exists and all subsequent geometry will be built from it.
A bracket for fixing the dispenser to the wall was also made right away.
Electric feed dispenser.
Next, the wall and floor were added, with the maximum dimensions possible.
The factory version of the feeder was taken as a model for the feeder with distribution. Only unlike the factory version, it was split in half to fit snugly against the wall, and the dimensions were adjusted to the size of the printer table.
Feeder model.
By this time I received a bucket from OZON and I made a dimensional model to understand it throughout the project. And he began to develop a valve that is attached to the tank and inserted into the dispenser.
Valve model.
The valve itself is quite simple in design, a hole is cut out in the tank, the side of the valve that is adjacent to the tank and has a cone, and in order to prevent the feed from spilling, a plate and grooves are made into which it is inserted.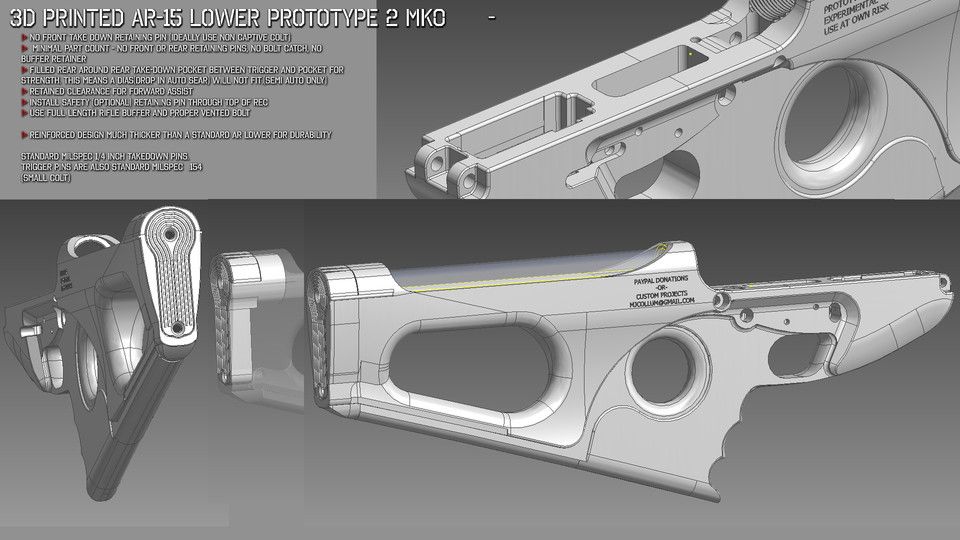
Valve model top view.
Well, how the finish was modeled for the bracket for the tank itself, its essence is simple, it is simply made in the form of an inverted letter P, and the tank simply clings to the side of this bracket.
Tank bracket model.
The result is a 3D model of an autonomous chicken feeder.
General view of the 3D model of an autonomous chicken feeder
Seal of autonomous chicken feeder
The printing process itself was quite easy.
Brackets were printed from ABC plastic, as static rigidity was needed.
Tank bracket.
The valve was printed from PETG plastic.
Printed valve
The feeder itself was printed out of PLA plastic, and the reasons for choosing PLA were that it is quite durable, and it is also safe in contact with food, to be honest I don’t know how relevant this is for chickens, but still. The disadvantage of PLA is the low operating temperature, but since this feeder will be in the chicken coop, there will be no strong heating.
Printed feeder and cover.
Installation
General view of the installation kit.
Freestanding Chicken Feeder has been unsealed and fitted. I came to the customer.
The customer examined everything and started the installation process, how the process went can be seen in the video.
Mounted independent chicken feeder
But I can definitely say that the installation process went quickly (about 15-20 minutes).
As a result, the height of the finished structure was 60 cm, and therefore it was decided to place the feeder on the outside of the chicken coop for the summer period.
Total
This is how the project turned out, and this project shows the possibilities of 3D printing, namely, obtaining those forms that cannot be bought in the factory video, for example, a feeder, no matter how much I searched, but I could not find a half version of this feeder. Of the minuses, I can only say that the mounting ears at the feeder broke off, but this happened because I foresaw that the feeder would stand on the floor, and the fasteners are needed so that the feeder does not crawl, but during installation you can see that the feeder was attached only to the wall and quite high above the ground. As a result, the chicken decided to sit on this feeder and broke off the fasteners.
Write in the comments what you think about this project, or suggest your own. Also subscribe to the channel so as not to miss new videos, and like it, it helps the channel a lot.
Site assistant: https://next3d.ru/
We are in Zen: https://zen.yandex.ru/next3dprint
We are in VK: https://vk.com/next3d
We are on youtube: http://www.youtube.com/channel/UCJwLRtSpgWO8l-8_rE0AMNQ
We are on rutube: https://rutube.ru/video/person/24801359
We are in TikTok: https://vm.tiktok.com/ZSd2WayjT/
Automation in FDM. What prevents us from printing 24/7?
The 24/7 production of parts using FDM technology is hampered by the high labor intensity of each action taken, as well as the need for an operator to be near the printer.
If we compare the most common modern FDM 3D printers on the Russian market with ordinary office printers, then in terms of automation level they are closer to a manual printing press than to an MFP.
The FDM 3D printer will be idle if the operator has not removed an already finished part from the desktop or if he has run out of material. In the event of a technical malfunction, the operator spends more time finding the malfunction itself than fixing it.
If the production is small (up to 10 printers, up to 1000 parts per month), then these problems are not noticeable. Typically, such a pilot plant is run by a single specialist who has a thorough knowledge of the printers entrusted to him, but even an experienced print specialist cannot work 24/7 and produce a large product range with high quality if it changes frequently (for example, in 3D printing service farms).
If a company needs to increase the productivity of its 3D printing department, this is usually followed by an increase in the staff of operators, an increase in the number of printers, an increase in technical costs (manufacturing defects, technical and technological downtime). When deadlines are pressed, there is a need to work first in two shifts, and then in three.
Over the past three years of running serial orders at our St. Petersburg 3D printing services farm, we have identified the most expensive operations in terms of productivity and labor intensity:
1. Material change - requires operator presence.
2. Preparation of the working area, calibration - in case of operator error, it leads to marriage, time is lost for reprinting.
3. Media Inspection - At the end of the printing process, the printer is either idle or the product is rejected.
4. The printer is idle until the operator removes the product from the worktable.
5. The printer is idle while the operator is looking for a problem or waiting for a response from technical support. The problem applies to printers whose manufacturer does not provide detailed technical documentation. A large fleet of printers requires a dedicated service engineer.
6. The increase in the number of orders for production requires the appearance of a technician to solve routine auxiliary tasks (for example, replacement and control of the availability of material), otherwise the workload on operators increases, rejects become more frequent, equipment is idle.
7. Delegation between operator shifts often results in overproduction of parts or loss of order information. To combat this, investments in accounting systems or the hiring of additional administrative staff are required.
It follows from this:
2. An increase in the number of orders is a non-linear increase in the labor intensity of production.
3. Staff expansion - growth of non-production costs.
4. Increasing the labor intensity of production - increasing the terms of product readiness.
5. Lack of automated accounting tools - increased costs for marriage and re-sorting.
6. Shift schedule - increased staff and increased costs for marriage and regrading.
7. Round-the-clock work - increase in staff, decrease in the level of responsibility for quality.
Thus, FDM 3D printing is scaling at a significant cost and is accompanied by an increase in staff, an increase in payroll costs, and a non-linear increase in production and administrative costs. Added to this are the difficulties with organizing in-line printing, the lack of analytics and statistical data on production, material consumption, and data on equipment loading.
The reason is the lack of technical and software automation of routine actions in FDM printing.
To solve the above scaling problems, in the spring of 2020, we began the development of an automated FDM 3D printing complex.
The following development goals were identified:
1. Automate the routine removal of finished products and material replacement, eliminating the need for the constant presence of the operator near the printers.
2. Have complete information about the technical condition of the printer without visual control and operator presence.
3. Ensure the scalability of production without increasing non-production costs.
4. Reduce the labor intensity of production planning, control and accounting of printed products.
5. Reduce the risk of technical failures and downtime for service and recovery.
6. Ensure compatibility with the most common thermoplastics and composites and reduce changeover downtime, reduce downtime between operations.
7. Collect and analyze data on the printing process and equipment status, display analytics not only for production, but also for administrative staff, including material consumption and manufacturing defects.
8. Predict project deadlines as accurately as possible by using real time to print the first samples in a batch.
9. Implement a management system with two-way exchange with third-party CRM (Bitrix24) and accounting systems (1C: UNF) for end-to-end analytics of the effectiveness of investments in the additive unit.
In this article, we present a comprehensive solution to the task of automating FDM 3D printing - the Redfab additive manufacturing hardware and software system.
Redfab's
3D printer solves existing problems in the following ways:
1. Automatic Selective Feeding and Media Change
The system allows you to selectively feed, remove, cut and rewind media autonomously or at the operator's command. Up to 5 D300 2.25 kg spools or up to 8 D200 1 kg spools are simultaneously connected to each print zone. Main extruder and sub extruder each have 4 slots for 1.75+/-0.15mm bar. Having loaded the coil compartment once, the engineer may not return to the issue of refilling the material for a long time, up to 8 days of continuous printing at a flow rate of ~50 cm3/hour, or 4 days at a flow rate of ~100 cm3/hour. At the end of plastic on the coil, the system automatically switches to the next one. This uses the media specified in the print job.
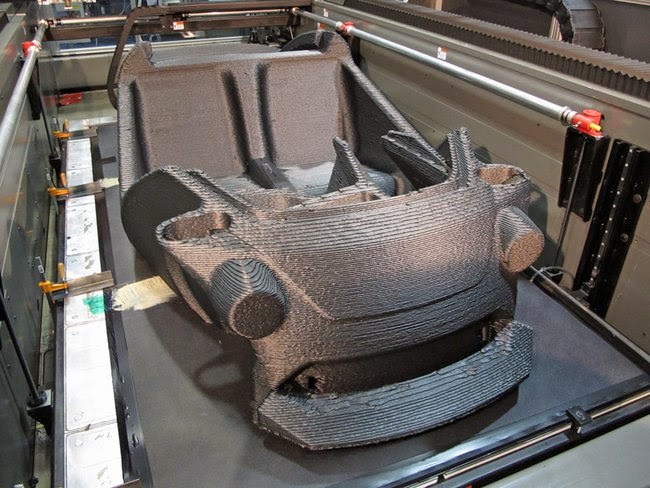
2. Automatic ejection of finished products
The part is printed on a film pressed by vacuum to the work table. After printing is completed, the film is pulled through the cooling system, the part is separated and dumped into a container. After the finished batch is reset, the printer autonomously starts the next print. Since the parts are ejected from the hot table, reheating is not required.
3. Automatic table plane calibration
4-point print plane and 20-point table calibration with correction factors entered into the control system (MESH). The milled table has no internal stresses, as it undergoes a heat treatment procedure.
The table is thermally decoupled from the power frame of the printer, due to which it does not warp when heated up to 140°C.
Calibration is performed automatically without the participation of a specialist.
4. Automatic print queue
The user sets the print parameters, the control system automatically generates a queue of projects and production jobs according to the user-specified parameters. The availability and availability of material, nozzle parameters, production priorities are taken into account.
5. Automatic service operations
The control system detects failures and accidents based on the readings of the sensors, and then attempts to independently maintain and restore the printing process in cases where it is possible. A well-thought-out control system prevents false failures and gives the user flexibility in making decisions.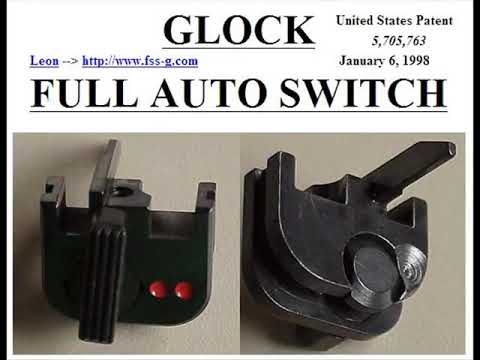 The printing process will not be stopped if a failure occurs in the auxiliary system. Thus, the complex will try to complete the current print, after notifying the user.
6. Easy maintenance
Modular design, quick-detachable extruders and easy access to all parts of the equipment allow periodic maintenance to be carried out quickly. You can write a request to technical support directly from the control system. When requested and authorized by the user, our technical support service can remotely connect to the control system and both carry out a complete diagnosis of the system settings and track the printing process itself thanks to the built-in video camera. Since we produce most of the components ourselves, we are ready to promptly provide the customer with spare parts.
The Redfab 3D printer is equipped with the advanced control system, which allows real-time analysis of production processes, which is indispensable for assessing the current work and making decisions on the development of FDM printing.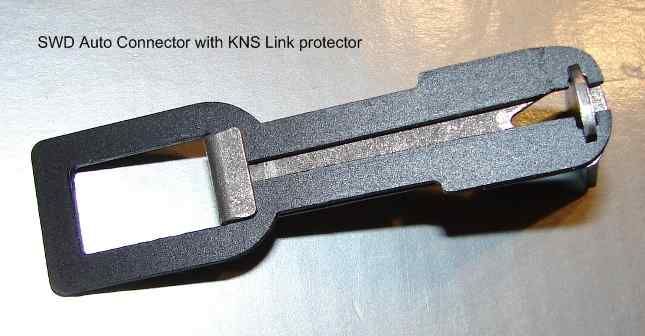
1. Statistics, accounting and analysis
The telemetry system collects and stores data not only from sensors, but also allows you to collect information about material consumption and costs for each individual project and order, keep records of print quality and product rejection, quality carrying out maintenance with the output of reports and comparison of periods.
2. Production time control
The system allows you to visualize the production time on the Gantt chart and calculates the order readiness for delivery based on the actual time of printing the first copy of the print job. This allows you to predict the completion time of the entire project with high accuracy.
3. Remote monitoring of the printing process
The user gets access to the video stream from the camera located in the working area. At the beginning and at the end of printing, a control picture is taken, which allows you to track the readiness of the product and the absence of defects. In the future, we plan to automate this aspect of work, using vision algorithms.
4. Access control and accounting
Authentication system, setting group rights, setting roles (trainee, technician, operator, administrator, technical support), logging user actions in the control system. This functionality allows you to ensure that the system is closed to third parties and restrict access to production and accounting data in accordance with the client's privacy policy.
| Parameter name | Value |
|---|---|
| Print area (X/Y/Z), mm | 250*430*250 |
| Number of printing areas in 1 complex, pcs. | 3 |
| Number of extruders per print area, pcs. | 2, direct, quick release |
| Maximum extrusion temperature, °С | 450 |
| Maximum air temperature in the active heat chamber with forced circulation, °С | 80 |
| Maximum heating temperature of the working table, °С | 140 |
| Parts Cooling Systems | Material cooling at nozzle exit. Cooling of the layer over the entire print area. |
| Performance at maximum practical printing speed, cm 3 / hour | up to 150 (for ABS Standard Filamentarno) |
| Supported file format | gcode, slicer of user choice |
| Data interfaces | LAN Ethernet, USB, Wi-Fi |

Our equipment is running 24/7 on our own 3D printing farm, so we can confidently provide you with a 2 year warranty on your Redfab 3D printer.
To calculate the profitability of purchasing our printer, we suggest using the calculator on our website www.redfab.ru.
The calculator allows you to estimate the rate of return on investment.
For large-scale productions (from 20 units of 3D printers), we recommend considering a one-time purchase of 4 units of Redfab printers at once for leasing at a special price.