Littlerp 3d printer
The LittleRP – A review and Getting Started guide
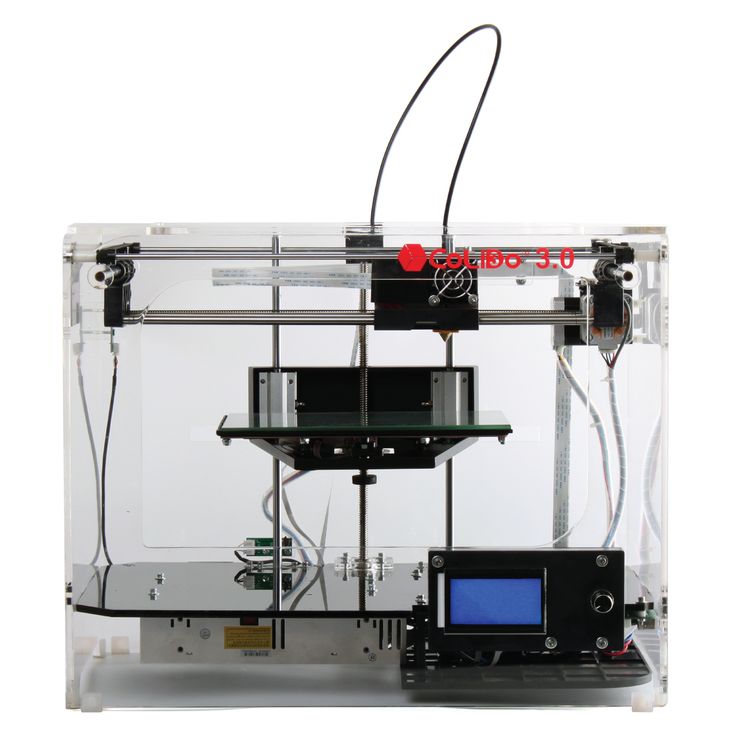
We needed a printer to test Nün&Noot designs without having to cast them, so we got a LittleRP 3D printer. It took a while to calibrate and get good results, so I decided to write a review and a “getting started” guide. Here it is.
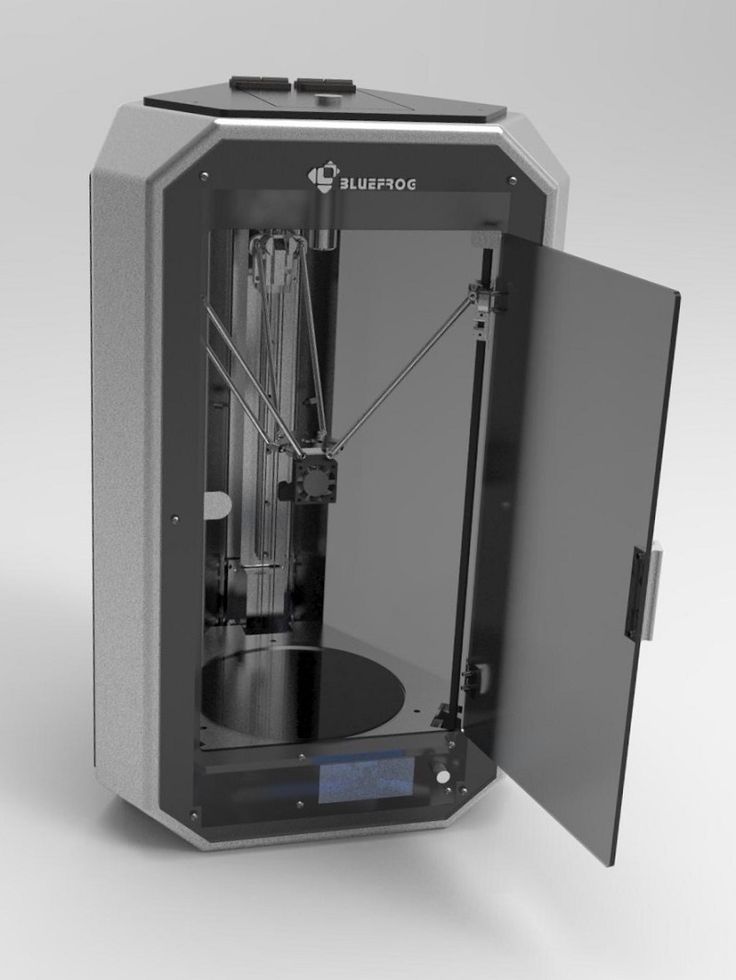
What is the LittleRP?The LittleRP is a kit for building a resin based 3D printer, also called an SLA or DLP printer. It uses a DLP projector (hence the name) to cure special resin that hardens when exposed to UV light.
So it’s a kit, you sayYup, that means you have to put it together. It’s not terribly complicated, but it will take you 3-6 hours. There are assembly instructions on LittleRP’s website, but they are slightly out of date. There are two sets of instructions, be sure to scan through both before you start. Here is a timelapse of me assembling the kit.
The projectorThe kit is just half the story here, you will need a projector. A DLP projector, to be specific. LCD projectors won’t work, as they don’t put out enough UV light. LittleRP has a list of projector models that are known to work. I tried the Acer H6510BD but found that I could not get it to focus sharp across the entire build area. These projectors are not designed for this kind of use. They have manufacturing variances that are not noticeable in normal operation but come into light (har har) when you try to focus on an object that is 10cm in front of the lens. The projector also died after 10 hours of use, so I returned it and got an Acer X152H instead.
Compact, HD and relatively cheap, The X152H is a good choice for the LittleRP. However, unlike the H6510BD, the X152H needs to be modified to allow focusing on a close target. Actually, most projectors will need to be modded to work with a DLP printer. The projector lens module needs to be moved forward about 5mm. This sounds scary but actually it’s a simple process that took me about 10 minutes to complete. If you want to know how it’s done (the process is very similar with all the projectors), I will describe the process (with pictures) in a separate blog entry. Once the projector was modified I was able to get a sharp image across the entire build plate.
The LittleRP needs to be modified a bit as well, to accommodate for the X152H height. The projector is thicker than most, so the printer needs to be moved up by about 18mm, and you will need to drill new mounting holes for the projector on the base plate. Send an email to LittleRP support and they will send you a template to help with the hole drilling.
The Build Plate and Printer OperationSome numbers and printer specsThe build plate of the LittleRP is 40x70mm. If you use an HD projector you can achieve feature size of about 36 microns (0.036mm). That is the size of a single pixel on the build plate. The smallest layer height is about 30 microns. This is very, very small. You can print objects with an incredible level of detail and complexity.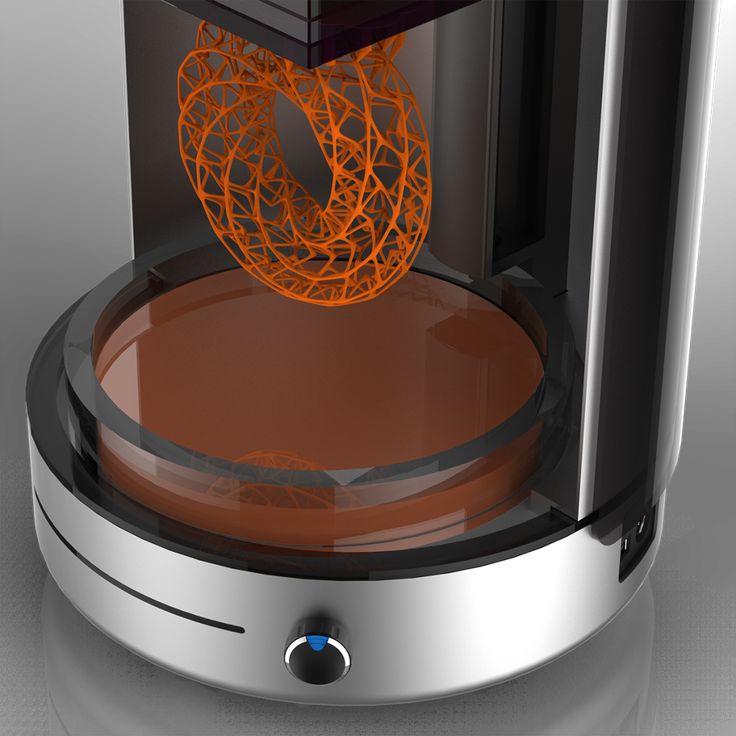
Layer cure time varies greatly with the resin being used, but overall it’s not a fast process. Anywhere between 5 and 20 seconds per layer is the norm. An object the size of a ring will take 1-2 hours print. Actually, I should say “an object the height of a ring”. The projector will always cure a full layer, and the cure time is constant, so it doesn’t matter how many objects you are able to cram into the build plate. Printing one ring takes the same time as printing 5, as long as they all fit on the plate. Print time is a function of layer count, and not volume.
Resins and operational costThere are several resins on the market for DLP printers. Some work better than others, some will work better with your projector & printer. The best way to know which works best is to experiment. I had great success with Vorex Orange by MadeSolid. I also tried MakerJuice, and while the objects look nicer and come out cleaner, I’m having difficulty getting it to render small features.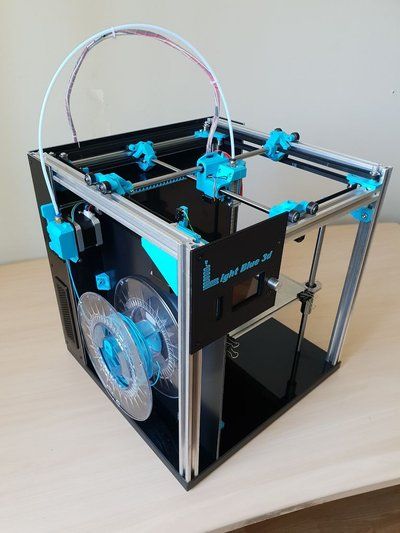
Resins sells for about $100/kg. This seems a lot, and it’s certainly a lot more than the $20/kg you can expect from FDM printers (plastic filament) but remember that DLP printers are designed and suited for printing small items. 1 kg of resin is enough to print about 200 rings. Castable resin is more expensive, and can go up to $250/kg.
The dark side of resinComing from FDM 3D printing, where a finished print is yanked off the build plate and is ready to be used, working with resin can seem like a huge pain in the ass. That’s because it is. Uncured resin is a skin irritant, whenever handling anything about the printer you should be wearing gloves. You will burn through a lot of gloves. The resin is also very viscous, it’s hard to pour without dripping, it gets everywhere and it’s hard to clean. A failed print will leave floating bits of cured resin in your vat, which are really hard to fish out. If you leave them in there they can stick to your prints and/or ruin the print completely. Changing resin is also an involved process, requiring cleaning the vat with Isopropyl alcohol. Luckily you can leave the resin in the vat most of the time, just remember to close up the printer cover. Some resins will require stirring before use, I use a brush to mix up the pigments in the vat if it sat there overnight or longer.
This is an add-on to the LittleRP but I highly recommend that you get it. It replaces the petri dish with a vat that has a transparent yet flexible bottom. This allows the print to peel off easily when the build plate is moving up, instead of just sticking to the glass and ripping off the build plate.
The downside of the flexvat is that the first few layers will be squished and funky. If those layers are important to your print’s geometry, you will need to raise the object it a bit and print support structure. I will write more about support structure and preparing objects in a later blog post.
Calibration and first layer woesAs any 3D printer, the LittleRP needs to be calibrated. These tips and procedures apply to almost any DLP printer. Also, like most 3D printers, printing the first layer is the hardest and most important part. There are several parameters you will need to work on:
- Flexvat tightness – The foil needs to be taut just the right amount. It should sound like a drum when you tap on it. Yeah, that’s hardly scientific but it’s all I got. You’ll need to experiment.
- Getting the right cure time for initial layers – If you under-cure it will detach from the build plate. Luckily, with the flexvats over-curing is not a problem. I usually cure the first layer for 1.5 minutes, than 10 layers at 25 seconds each.
- Getting the right cure time for the rest of the layers – Again, experimentation is key. I found that the Vorex Orange needs about 10 seconds per layer, while the MakerJuice needs at least 20.
- Z movement speeds and distances – You might need to change this if you have issues with layers detaching. Start with LittleRP’s recommended settings (4mm travel distance at 100mm/s).

- Build plate leveling – It has 3 screws, use them to make sure it’s perfectly parallel to the flexvat.
- First layer height – I manually move the build plate down, pushing it right into the vat and extending into the foil, then using the threaded rod I move it up a bit, until it’s still pushing down the foil but only a little bit. You will need to do this several times to get a feel for it.
Make sure the manual shutter is inserted before turning on the projector. You don’t want the projector logo and splash screen cured into your print. I will make a blog post about how to prepare a 3D model for printing, which software to use and how to execute a print.
Post ProcessingWhen the print is done the objects are not ready to be handled, as they are covered and infused with uncured resin. This is my post-processing routine:
- Detach objects from build plate using an exacto knife. Don’t forget to wear gloves.
- Put prints in a small container with isopropyl alcohol
- Put container in an Ultrasonic Jewelry cleaner for 3 minutes
- Remove items, dry, and put in cure box for 10 to 60 minutes, depending on resin.
- Snap off support structure (more about this in a later post)
Ultrasonic Jewelry cleaner. Get one with a stainless steel container.
Cure boxWhen the objects come out of the Ultrasonic cleaner printer they still have some uncured resin in them, that will eventually seep out and onto your hands. Post-curing is mandatory. You can place them in sun light for an hour, or you can build a cure box from UV led strips ($20 on ebay). I use a nail polish lamp, can be found in Walmart or amazon. Depending on the resin, prints need to be cured for 10 to 120 minutes. Some special resins need to be post-cured for many hours. Over-curing is not a problem, so feel free to just leave them in there for as long as you want.
Nail polish lamp box
ConclusionsDLP 3D printing is a great way to get incredible detail on a budget. For less than $1000 you can have a setup that generates professional quality prints. The LittleRP is an excellent kit if you are willing to invest some time in putting it together and learning how to use it. Their support is excellent and responsive, the documentation on the website is adequate although it does need to be updated and reorganized (as of Jan 2016). The LittleRP price can’t be beat, it’s one of the cheapest DLP printers on the market.
Check out our neat 3D printed sculpture jewelry at NunAndNoot.etsy.com
LittleRP: Open Source SLA 3D Printer With Unique Tilt Option Set to Hit Kickstarter - 3DPrint.com
Back in May, we reported on a 3D Printer called the LittleDLPer, which was an open source DLP SLA 3D Printer which had plans to launch a campaign on Kickstarter. After a few name changes (going from LittleDLPer to LittleSLA, and now LittleRP), and some more progress, they are just about ready to launch their crowdfunding campaign.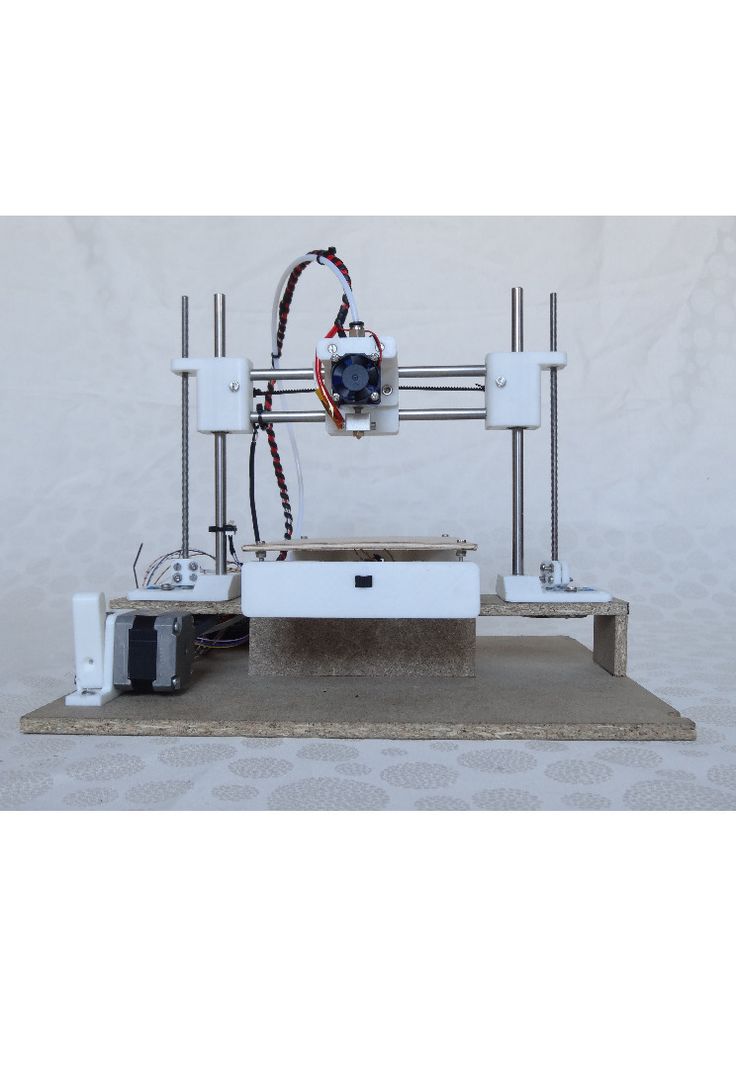
LittleRP’s founder Brad Hill tells 3DPrint.com that LittleRP stands for LittleR(esin)P(rinter). Via the soon to launch Kickstarter campaign, this SLA DLP 3D printer will be available in kit form, with several different packages to choose from. The “Complete” kit will include everything you need to begin 3D printing, including a 1024×768 projecter. The “Complete HD” kit will be the same, but come with a high definition 1920×1080 projector. The most affordable option will be the Projectorless kit, which comes with the hardware, minus the projector. This option will allow backers to purchase their own projector and install that themselves.
Standalone projectors typically cost between $300 and $600, depending on the resolution desired. However, Hill told us that he purchased a used Dell projector for only $99 that he used for their first LittleRP printer. Used projectors frequently sell for under $100 on eBay, so that is another option for those looking to save some pennies.
“The main projector choice of the LittleRP is the Acer x1240,” explained Hill. “Keep an eye out on the pricing as it can often be had for as cheap as $315. For those looking for increased resolution or for a projector solution that doesn’t require user modification, we will be supporting the Acer P1500, a 1080p projector. This projector is often on sale for $600, so if you know this is the route you want to go definitely keep an eye out.
The LittleRP features a unique Tilt option (an additional $149 via Kickstarter) which will allow users to get an increased print size.
“All LittleRP kits will now be upgrade ready to a tilt option which will be available when kits ship,” Hill told us. “The tilt option will increase the surface area of prints to the full build platform and allow more flexibility with resin. Even though the LittleRP has a 60x40x100mm (even wider for 1080p version) build volume, you can look at it more like available area to space out your models.
If the cross section volume of a print is greater than say 25% of the xy build area, then the forces needed will start to cause problems.”
Thus, the tilting allows you to break the sticking / suction forces. Different resin based 3D printers on the market today utilize different ways of doing this. For example the Form 1 uses a tilting vat that tilts downward, while the Titan 1 uses a flexible print surface so that certain parts of the print pull away from the vat surface before other parts. LittleRP uses a unique method:
“It sounds a little weird, but if you tilt the vat up, while at the same time raising the build plate, you end up with the same thing,” Hill told us. “One of the benefits of this method is that by altering the ratio of arm lift with vat tilt you can move the effective fulcrum location around.”
You can see an example of LittleRPs unique tilt feature below:
LittleRP has been working with resin producers to offer a large selection of colored and performance options to meet everyone’s needs.
Check out the timelapse video of the LittleRP in action below:
So what is the LittleRP capable of? Quite a lot. Here are some of its specifications:
- Stepper resolution of .005mm ( .020mm prints have been tested)
- 25/50/100micron recommended layer heights
- 60micron x/y resolution with Acer x1240
- 40micron x/y resolution with Acer P1500
- 60x40x100mm available build area (Acer x1240)
- 72x40x100mm available build area (Acer P1500)
- Tested with MakerJuice and MadeSolid resins
- Ideal layer times 1000ms-5000ms
While Hill and his team have not yet officially decided on the final backer level options quite yet, so far they plan on offering a limited quantity of early bird LittleRP kits for $475. These will include a complete projectorless kit. Later backers will be able to get that same kit for $499. If you wish to order a kit that includes a projector, the kit that includes the 1024×780 projector will be priced around $999, while the 1920×1080 version will be $1,249.
The LittleRP Kits will include:
- Lasercut Acrylic UV Shield Panels
- Lasercut Melamine Bonded MDF Panels
- 2020 T-Slot Frame Material
- Printed PLA Parts
- All Required Fasteners
- Modification Spacers for Acer x1240
- Pre-Assembled Build Plate and Knob
- Circular Pre-Coated Vat
- First Surface Mirror
- HiWin Linear Rail
- Sparkfun Redboard pre-loaded with GRBL firmware
- Custom LittleRP Arduino Shield w/ Stepper Driver
- High Quality DC Power Supply
- Integrated Leadscrew Stepper and Nut
- 100ml MakerJuice SubSF
- Modified 1024×768 DLP Projector (Complete Kit Only)
- 1920×1080 DLP Projector (Complete HD Kit Only)
The LittleRP has already been produced in limited quantities for their beta participants, and the company feels that all of the design hurdles have been solved. No further testing needs to be done, and the design is proven and ready to go into full scale production at the conclusion of the Kickstarter campaign.
What do you think? Will you be backing the LittleRP? Discuss in the LittleRP forum thread on 3DPB.com. Check out some more videos showing what this 3D printer is capable of below:
Stay up-to-date on all the latest news from the 3D printing industry and receive information and offers from third party vendors.
Tagged with: crowdfunding • dlp • kickstarter • littledlper • littlerp • littlesla • resin • sla • sla 3d printer • stereolithography
Please enable JavaScript to view the comments powered by Disqus.
Fixing the 20 Most Common 3D Printing Problems
3DPrintStory 3D printing process Fixing the 20 Most Common 3D Printing Problems
3D printing allows you to create amazing models. But everyone faces unpleasant moments when even a simple model does not print well.
You checked the model, made sure that many people have already printed it and they had no problems. What are you doing wrong?
This article has collected 20 of the most common 3D printing problems. We hope that the article will help you quickly identify the problem and find a solution for it. In addition, the article details the causes of problems during 3D printing, which will help you avoid them in the future.
Model tearing off
Problem description
At the base, the model rises up relative to the table (English - warping). In addition to the quality of the manufactured part, this problem can prevent the printing of tall parts that can finally fall off the table.
What causes this problem during 3D printing?
Part breakage is a very common problem due to the nature of the printable plastic. As the ABS or PLA plastic cools, it begins to make poor contact with the surface, so the "warping" effect occurs when the plastic cools too quickly.
Solve the problem: part is torn off
- Use a heated table. The simplest solution is to use a heated table slightly below the melting point of the plastic. If the temperature is set correctly, the first layer will be in firm contact with the table. Most often, the platform temperature is set in the program to generate the g code for the model. The recommended temperature is often indicated on plastic packaging.
- Use glue. If your model still wraps around the corners, apply some glue to the print table.
- Try another table. Replace your print bed with a model that offers better adhesion. Manufacturers such as Lulzbot use PEI (Polyetherimide) surfaces. XYZPrinting add special tape to the printer box and that works great too (but they don't have heated tables). Zortrax 3D 3D printers solve the problem differently - with the help of small holes in the table.
- Level the print table.
 The print bed may need to be calibrated. During calibration, make sure that the tip of the extruder is at a suitable, uniform height from the stage along its entire plane.
 - Reinforce contact. Increasing the contact between the model and the print table is another easy way. Most 3D printing software has the ability to add additional layers to the base.
- Play around with the temperature. If none of the above work, try increasing the print bed temperature in 5-degree increments. Also pay attention to the operating modes of the coolers. Usually coolers start to work at full capacity when the model height is about 0.5 mm. Try increasing this height to 0.75mm so that the base layers have more time to cool naturally.
And finally, even if you have a heated table, applying a little glue is unlikely to hurt.
3D Printing Problem Checklist: Part 9 Tear Off0017
- Use a heated bed
- Add glue to the print bed
- Use a high-adhesion bed from quality manufacturers
- Calibrate the bed
- Add extra layers to the model base in your 3D printing software
- Play around with temperature and settings cooler
Elephant leg
Description of the problem
The base of the model is printed with a clear indentation to the outside. It is called - “elephant's foot”
What causes this problem during 3D printing?
This undesirable effect is caused by the mass of the model itself, which presses on the first, insufficiently cooled layers. In particular, this problem occurs if you have a heated table.
Solve the problem: "Elephant's foot"
- Correct balance. In order to avoid this problem, it is necessary to properly cool the layers at the base of the model. The base layers must be able to support the mass of the part, but not overcool, so that the part does not start to come off the table. Finding the right balance can be tricky. Start by lowering the table temperature in 5 degree increments (within +/- 20 degrees from the recommended temperature). If your bottom and top layers are set to 0.6mm, start cooling earlier.
- Level the table. Most 3D printing problems are caused by improper table alignment. Start with calibration recommendations from your printer manufacturer.
 After that, print a square for calibration and evaluate how the plastic lays down. After printing, you will be able to see how evenly the plastic lays down depending on the height of the extruder relative to the table.
 - Raise the extruder. A simple increase in the distance between the extruder and the table can help. But if the distance is too large, the plastic will not stick to the table.
- Chamfer the base of the model. If none of the above work, you can chamfer the base of your model. Of course, this is only possible if you developed the print model yourself or have access to the original file. Start with a 5mm 45º bevel and experiment for the best result.
3D Printing Problem Checklist: Elephant Leg
- Adjust Table Temperature and Cooler Speed
- Calibrate Table
- Check the distance between the extruder and the table
- Chamfer the base of the model
If you are interested in more detailed information on this problem, we recommend that you read our detailed material on eliminating the "elephant leg" problem.
Other first layer problems
Description of the problem
The first layer does not adhere well to the table and some parts come off. Unwanted lines appear at the base of the model.
What causes this problem during 3D printing?
Such problems are a sign that the table has not been correctly calibrated (table calibration on the example of the Anet A8 3D printer). If the extruder is too far from the table, unwanted lines appear on the base and/or the first layer does not stick. If the extruder is too close, voids may appear.
Important: The print bed must be as clean as possible. Even fingerprints can cause the model to come off.
Solve the problem: The remaining problems of the first layer
- Calibrate the table. Each printer has its own table calibration features. For example, the latest Lulzbot models have an automatic calibration system. Ultimaker 3D printers are configured manually according to the corresponding guide.
 With Prusa i3 printers, you have to tinker a little longer and think for yourself.
 - Adjust the distance between the extruder and the table. If the extruder is too high, the plastic will not grip the platform. If too low, you may damage the table.
- Clean the print table. It is advisable to clean the table before each new print. Especially if you are using glue. Fingerprints and adhesive residue may cause the model to come off.
- Add glue. A small layer of adhesive can significantly improve adhesion. But do not forget that if you do not clean the table, then the use of glue can lead to the opposite effect.
- Special tape for non-heated table. If you are using an unheated platform, try applying tape to improve the contact between the base of the model and the table.
Cheklist of 3D Problem: the remaining problems of the first layer
- Calibrate the table
- Check the height of the extruder relative to the table
- Clean the table
- Use the special tape without heated
Slid of the layer 9000.
 Description of issue
 Some layers in the model are misaligned.
What causes this problem during 3D printing?
Your 3D printer belts are not tight enough. The top of the print table is not stable. One of the Z guides is not a straight line.
Problem Solving: Layer Mismatch
- Check belts. Start by checking belt tension. You should feel resistance as you bring them together with your fingers. If the top of the belt is stiffer than the bottom, this is a clear sign that they need to be tightened.
- Check table top plate. Check the top plate and screw sets in the printer. Make sure everything is taut and aligned where needed.
- Check the Z-axis screws. Most 3D printers use a screw-nut pair instead of a ball screw. In general, this does not particularly affect the print quality, but over time, the screw may deform. Do not disassemble the printer to check the screws. It is enough to use a program like ‘Printrun’ and move the extruder up and down.
 If one of the screws is deformed, you will notice it. Unfortunately, it's almost impossible to fix this. But, on the other hand, this is a great chance to modify your 3D printer and replace the screws with screw-nut pairs.
Cheklist of 3D Problem: Nesting layers
- Check belt tension
- Check the reliability of fixation of the upper part of the table for printing
- Make sure that the Zears of the Z axis are not deformed 9009
Last layers
9000 9000 description of the problem 9000 the model has voids because some layers were simply skipped (partially or completely).What causes this problem during 3D printing?
The printer did not feed the required amount of plastic. This may be due to problems with the plastic (for example, it has a different diameter), the extruder, or the plastic feed mechanism.
Friction has caused the table to stop temporarily. The reason may be that the vertical screws are not calibrated.

There is a problem with one of the screws or the Z-axis nut. For example, the screw is damaged, dirty, or not well lubricated.
Troubleshooting: Missing layers
- Mechanics check. A 3D printer, like any other piece of equipment, needs maintenance. If you have this problem, this is a clear sign that you should pay attention to its service. Start by checking the screws. Make sure they are well seated in the bearings/holes, with no undue misalignment.
- Screw alignment check. Check that all screws are aligned and not bent. You can appreciate this by turning off the power and carefully moving the extruder along the coordinate axes (depending on the layout of your 3D printer). If you feel resistance, then something is wrong.
- Damaged bearings. Damage to the bearings is manifested in the characteristic vibration during the operation of the 3D printer. If you notice vibrations, turn off the power and manually move the carriage with the extruder to find exactly where the bearing failed.
- Check lubrication. Many people forget about the lubrication of joints. But this is a very important point for the correct operation of your 3D printer. Regular machine oil is inexpensive and is great for maintaining printer connections. Before lubricating, check the guides. They must not be dirty. You need to apply a little oil. If you have applied too much lubricant, simply wipe off the excess with a rag. Naturally, after lubrication, check that the carriages run smoothly.
- Plastic feed problem. The last possible problem is insufficient plastic supply. The solution to this problem may not be simple, so it is considered separately below.
3D Printing Issue Checklist: Missing Layers
- Check mechanics and make sure all screws are tight
- Check screw alignment
- Check bearings
- 0016 Problem Description
Dimples form on the sides of the model, especially on tall models.
 One of the most unexpected problems, the solution to which is usually not where you are looking for it.
 What causes this problem during 3D printing?
In higher layers, the material cools faster because the heating from the table does not reach this height. Because of this, adhesion on higher layers is lower.
Solve the problem: Dimples on high models
- Extruder temperature. Start by raising the extruder temperature in 10ºC increments. The specifications for your plastic should list operating temperatures. Try to keep the temperature within the specified range.
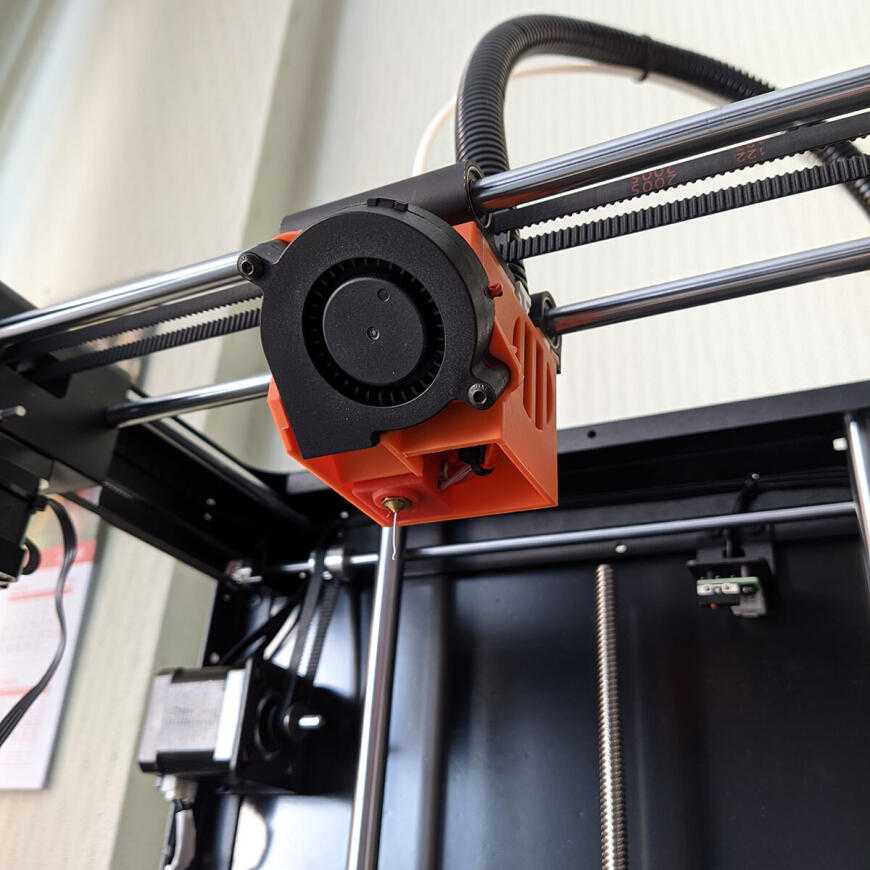
- Cooler direction and speed. Check the coolers, make sure they work and point to the model. If so, try reducing their speed.
3D Printing Problem Checklist: Dimples on Tall Models
- Check extruder temperature and raise it in 10 degree increments
- Check the location and speed of the coolers aimed at the 3D model
Dimples, holes on the top of the model
Description of the problem
Dimples or even holes form on the top of the model.
What causes this problem during 3D printing?
The two most common causes are improper cooling of the top layer or insufficient thickness.
Solve the problem:
hollows, holes on the top of model- Printable plastic diameter. Most common when printing with 1.75 plastic. Similar problems can appear in any 3D printer, but most often they appear when using plastic with a diameter of 1.75 mm, not 2.85.
- Check cooler location. Any cooling problems are naturally related to coolers. At the start of printing, the coolers run slowly or turn off altogether, but after the first coat they should work much harder. Be sure to rate the performance of the coolers at the end of the print. If everything works, just in case, check the direction of their rotation. Cold air should flow to the model, and not vice versa.
- Set the fan speed in G-code. As the last layers of the model are formed, the cooling must be very intense so that the plastic does not fall into the holes of your mesh in the model.
 Cooler speed can be configured in G-code. The standard code for an on cooler is M106 and M107 for off. That is, adjust the maximum speed for the upper layers. An example would be a 1 cm by 1 cm cube with a layer thickness of 0.1 mm. In this case, the G-code obtained from CURA for the Prusa i3 3D printer will be 97 layers. Knowing that we have the 'Bottom / Top Thickness' settings set to 0.6mm, we can look at ;LAYER:91 and add M106 S255 at the end of the line. The M106 kicks off the cooler, while the S255 makes it run at full capacity.
 - Increase the thickness of the top layer. The simplest solution is to increase the thickness of the top layer. In most applications, this can be done in the advanced settings under ‘Bottom / Top Thickness’. It is desirable to form a minimum of 6 layers and 8 for extruders with a smaller nozzle diameter and, accordingly, a smaller plastic diameter. So if the layer height is 0.1mm, set ‘Bottom / Top Thickness’ to 0.6mm. If this does not help, increase the thickness to 0.
 8 mm.
8 mm.
3D printing problem checklist:
hollows, holes on the top of the model- Increase the diameter of the printing plastic
- Make sure the coolers are correctly installed and working
- Specify the speed of the cooler in manual mode - in G-code 9027 Increase the thickness of the top layer
Plastic residue
Problem description
Unwanted plastic residue forms between parts of the model.
What causes this problem during 3D printing?
When the extruder is moving and not printing (in idle mode), plastic residue is still coming in.
Solving the problem:
plastic residue (more detailed article on troubleshooting plastic residue between parts of the 3D model)- Activate the Retraction option. Retraction is a very useful option, especially when it comes to finishing. It works very simply - before the print head begins to move, the plastic flows back into the extruder, and is not fed.
 Thus, the problem can be nipped in the bud.
 - One-click backfeed activation. Most apps like Cura offer a one-click option to activate this option. The default settings are used, which is sufficient for most cases. However, if you want more flexibility, there should be other options. For example, you can set the minimum printhead path before activating plastic backfeed.
- Minimum travel (mm). Reducing the minimum path is usually the quickest fix if the standard retraction settings didn't help. Decrease this value by 0.5 mm until the problem goes away. By the way, activating reverse feed will increase the speed of 3D printing.
- Just cut off the rest of the plastic. This is not the most elegant solution, but by far the easiest and fastest.
Cheklist of 3D Problem:
Residual plastic- Turn on the return submission of plastic (Retraction option)
- Set up the minimum path before starting feedback
- Just delete the remaining plastic with a knife
Regularly
The 3D printer cannot feed the required amount of plastic (or at the required speed).
 As a result, thin layers are formed, layers with unwanted depressions or layers are completely absent.
 What causes this problem during 3D printing?
There may be several reasons. The first is that the diameter of the plastic for printing does not match the diameter specified in the software for forming layers. The second - the amount of plastic supplied is insufficient, due to incorrect settings in the software. Well, perhaps your extruder is very dirty.
Solving the problem: Insufficient supply of plastic
- Check the diameter of the plastic. Start with the simplest case - check the plastic diameter settings in your software. If you are not sure about the correct diameter, it and the temperature are usually indicated on the packaging of the plastic.
- Measure the plastic diameter. If the problem still persists, measure the plastic diameter manually and enter more precise settings in your G-code generation software.

- Check the print head. In most printers, the print head is retracted from the print table. Check extruder. There should be no obvious contamination on it.
- Set the extrusion ratio. If there is no difference between the actual plastic diameter and the settings in the software, check the extrusion coefficient (extrusion multiplier or flow rate or flow compensation). Perhaps these settings are too small. Each program handles these settings differently, but the principle is the same - increase the value in the settings by 5% and restart 3D printing.
In Simplify3D open Edit Process Settings and go to Extruder tab - extrusion ratio set to 1.0 corresponds to 100%; If you are using Cura, open the Material tab and increase the Flow setting (you may need to activate the Flow settings in the Preferences panel).
3D Printing Problem Checklist: Plastic Insufficiency
- Check Print Plastic Diameter
- Manually Check Plastic Diameter
- Check Extruder Cleanliness
- Increase extrusion ratio by 5%
Too much plastic feeding
Problem description
Your 3D printer is feeding too much plastic.
 Because of this, the material peels off at the edges of the model.
 What causes this problem during 3D printing?
This is usually caused by the Extrusion multiplier or Flow in your G-code generation software being set too high (see section above).
Solve the problem: Too much plastic feed
- Extrusion ratio. Open your layering software and make sure the extrusion factor is set to the correct value.
- Feed settings. If the previous point did not help, reduce the flow value (Flow).
3D Printing Problem Checklist: Too Much Plastic Feed
- Check extrusion ratio settings
- Decrease plastic feed value
Layer misalignment
Problem description
Bottom and top layers are shifting relative to each other during 3D printing. Usually the offset is not as large as in the figure, but the above case can also occur.
What causes this problem during 3D printing?
Layer misalignment can occur for a variety of reasons, including a blow to the printer during printing! This problem may manifest itself due to incorrect belt tension or misalignment of screws.
 Or due to the fact that the extruder hooked the model and it shifted a little right during printing.
 Solving the problem: Layer misalignment
- Check the stability of the printer. The 3D printer must be placed on a stable surface. Even slight shocks can cause the layers to shift.
- Check table stability. Most 3D printers have removable tables. Although this is convenient in terms of replacing it, over time the mounting screws can loosen. So it's worth checking them periodically.
- Check the bottom layers. If you print at high quality, the underlying layers may break off due to cooling. If a break occurs, the plastic rises and the extruder can hit it. In most cases, the model will come off the table, but if there is no lift, the powerful motors can push the model and the table. So if you have problems with the first layers, try reducing the rotation speed of the coolers.
- The print speed is too fast.
 Raising the temperature and increasing the feed can speed up 3D printing. However, even though the plastic will feed properly, your printer may not be able to handle the selected mode. If you hear clicks while printing, this is a sure sign that the printer is running at too fast speeds. In this case, check if the plastic breaks in the extruder itself, and then go to the settings for the actual speed of the 3D printer. The speed can be adjusted in your software to generate the g-code. If you are using Simply 3D go to ‘Other > Default Printing Speed (mm/min)’, if Cura go to ‘Basic > Print Speed (mm/s)’.
 - Check belts. If the layers are still shifting, it's time to check the belts. The tension of all belts must be the same. Timing belts tend to stretch over time (this is clearly manifested when the belts begin to slip on the pulleys). If the tension is very weak, you should consider replacing them. Strong belt tension can also be a problem. But usually this is a problem with DIY 3D printers.
 Some 3D printers (such as the Prusa i3) have special screws to adjust the tension.
 - Guide shafts must be clean and lubricated. Over time, the guides become covered with dirt in places with maximum friction. This, in turn, can cause problems when moving and shifting layers. A quick cleaning and lubrication usually solves the problem.
- Curved or misaligned rails. If you notice that the print head position error occurs in a certain place, this may be a sign that one of the guides is deformed. You can check this by turning off the 3D printer and moving the print head along the coordinate axes. Check axle alignment. If everything is in order, remove the guides and lay them on a flat surface. If there is a bend, you will immediately see it.
3D Printing Problem Checklist: Layer Misalignment
- Check the stability of the 3D printer base.
- Check table stability.
- The first layers of the model should not form cliffs.
- The print speed is too fast.
- Check belts.
- Guide shafts must be clean and lubricated.
- Curved or misaligned rails.
Blocked plastic feed mechanism
Problem description
You start 3D printing, but no plastic comes out of the extruder. You took the rod out of the extruder, put it back in, but it didn't work.
What causes this problem during 3D printing?
After replacing the plastic, a small piece of bar remained in the feed mechanism. Most often, the break occurs at the very end. When you insert a new rod, the remnants of the old one block the flow of plastic.
The second option - the remnants of the old plastic dried up at the end of the extruder. In this case, the remnants of the frozen plastic must be removed manually.
Solving the problem: blocked plastic feed mechanism
- Unlock with a needle. If you're lucky, unlocking the feed mechanism is quick and easy.
 Start by removing the plastic. After that, on the control panel, select the option “heat up nozzle” (heat up the extruder) and increase the temperature to the level of plastic melting. If you have an Ultimaker 2 3D printer, go to Maintenance > Heat Up nozzle. For PLA plastic, set the temperature to 220 C. When the extruder is hot, use a needle or something with a small diameter and clean the hole (be careful not to burn your hands!). By the way, it is useful to clean the outside of the extruder.
 - Push through the old plastic. If the extruder is still blocked, you may be able to push the stuck plastic through with a new rod. Remove the plastic supply tube from the print head. Preheat the extruder to 220 C for PLA plastic and then, using a new rod, try to push the stuck plastic through the extruder. It may take some effort, but be careful not to bend the printer's horizontal guides. After that, you can clean the nozzle with a needle in accordance with the instructions from point 1.
- Remove and reassemble the extruder. In extreme cases, you will have to disassemble and reassemble the plastic feed mechanism. If you've never done this before, consider taking photos or recording your every step as you take apart the feed mechanism, as you'll need to put it back together afterwards. First remove the plastic bar. After that, read the instructions for dismantling the print head in the instructions for your 3D printer. Wear gloves while doing this, as the nozzle will be hot. Let's take a closer look at the Ultimaker 2 3D printer as an example. Move the print head to the center of the printer. Loosen the four screws on the print head. Preheat the nozzle to 220 C (for PLA). When the extruder reaches the desired temperature, turn off the power. Holding the cooler's plastic case, remove the rest of the interfering plastic. Clean the nozzle with a needle. You can also clean its outer surface. When the nozzle is cool, assemble the extruder, turn on the 3D printer and load the new plastic.
3D printing problem checklist: blocked plastic feed mechanism
- Warm up the nozzle and clean it inside and out with a needle.
- Remove the plastic feed tube and try pushing through the remaining plastic with a new rod.
- Disassemble the feed mechanism and try to remove any remaining plastic.
Faulty plastic
Problem description
Plastic appears to be fine, correctly seated in the feed mechanism, and exits the nozzle when printing. This happens most often in Bowden-feed 3D printers rather than straight-feed 3D printers, as the plastic isn't visible or noticeable when it's broken.
What causes this problem during 3D printing?
Printing plastic breakage can occur for various reasons, but mostly because the plastic is old or cheap. Most plastics like PLA and ABS last a long time, but if stored in poor conditions (such as direct sunlight), they can become brittle. If you use such plastic, no settings will help.

The second possible reason is the bar diameter, which may vary slightly depending on the manufacturer. And if the pressure in the feed mechanism is too high, it can break.
Troubleshooting: broken plastic
- Remove the plastic. The first thing to do is to remove the plastic from the 3D printer. If you are using Ultimaker, you can use the Maintenance and Change Material option. Heat up the extruder and remove the plastic.
- Try another plastic. If the problem persists after reinstalling the plastic, try a different one to make sure the media quality is not the problem.
- Reduce feeder pressure. If the new plastic also breaks, loosen the pressure on the feed mechanism. Start 3D printing and increase the pressure until the slip is complete.
- Check nozzle. Check nozzle for cleanliness.
- Check flow and temperature. If problem persists, check nozzle heating.
 Also make sure the pitch is 100% and no more.
3D Printing Problem Checklist: Plastic Breakage
- Check the shelf life of plastic
- Check the diameter of the plastic
- Set up the pressure in the supply mechanism
- Check the cleanliness of the nozzle and its temperature
- set the supply of 100%
Glorment of the rod
Description of the problem
Prrukta can start slipping for love. 3D printing stage. And it does not depend on the type of plastic. As a result, no plastic is fed.
What causes this problem during 3D printing?
Clogged nozzle, insufficient feed force, incorrect nozzle temperature. As the motor rotor rotates, the small wheel that normally grips and feeds the plastic will pinch the bar and prevent it from being printed.
Solving the problem: bar slippage
- Help the feed system. If the plastic has just begun to slip, this will show up as a characteristic noise.
 Try applying some pressure to the bar to get this section through. This often helps and the 3D printer continues to print well.
 - Adjust the feed force. Start by depressurizing. After that, start increasing the force until the bar stops slipping. Heads vary in diameter, so some require fine tuning.
- Remove the plastic. More one solution is to remove and reload the plastic into the feed mechanism. After removing the bar, cut off the plastic over the place where the slip marks are visible and reload it into the feeder. If slippage remains, try this operation again. If that doesn't help, replace the plastic as this one is most likely no longer printable.
- Check nozzle temperature. If you installed a new plastic and the problem persists, or vice versa, check the temperature of the nozzle.
Cheklist of 3D Problem: slippage of the rod
- Help the supply mechanism with an additional force
- Set up the force in the supply mechanism
- Eliminate the plastic and load a re -
- Check the temperature of the nozzle
Bad Semit 9d Seal Seal 9D SEMS0016 Description of the problem
The printed product is missing an internal mesh or it is obviously incorrect
What causes this problem during 3D printing?
There can be several reasons why the internal structure of the 3D model does not print well.
 The most common is incorrect settings in your software for generating a G-code. It may turn out that the problem is a clogged nozzle.
 Solving the problem: Poor 3D printing of the inner mesh
- Check the fill factor. This is checked in your software. A value of about 20% is quite acceptable. If less, problems may arise. This parameter should be increased for large models.
- Speed for printing inner layers. The speed at which printing takes place can have a direct effect on the quality of the inner grid. If you see problems, try reducing the print speed of the inner grid.
- Change the mesh configuration. Most programs allow you to change the grid configuration. Squares, triangles, hexagons, etc. Experiment with these settings.
- Check nozzle. It may be that the cause is a clogged nozzle. At the same time, the outer parts of the model will be printed well, since plastic is fed more intensively on them.
3D Printing Problem Checklist: Poor 3D Printing of Inner Mesh
- Check and Adjust Inflation Ratio of Model
- Reduce Inner Mesh Print Speed
- Change Mesh Configuration
- Check Inner Nozzle
- 0013
Description of the problem
The printed model generally looks normal, but the internal mesh is visible through the outer walls of the model.
What causes this problem during 3D printing?
See-through problem occurs when your model has thin walls and the internal structure intersects with the outer wall line.
Normally the outer wall thickness should be proportional to the nozzle diameter. That is, if your nozzle diameter is 0.4 mm, the wall thickness of the model should be 0.5, 0.8, 0.12 mm, etc. If the proportion is not maintained, the effects of the clearance of the internal structure may occur.
Problem Solved: Inner mesh showing through
- Check the outer wall thickness of your 3D model.
 Check that the wall thickness value is proportional to the nozzle diameter.
 - Increase the outer wall thickness. The simplest solution is to increase the wall thickness. Doubling the thickness will most likely help solve the clearance problem.
- Use the filling option after the walls have been formed. Most g-code programs have the ability to generate the internal structure after printing the outer walls.
- In Cura open 'Expert Settings' and in the Infill section activate the option 'Infill prints after perimeters'
- In Simply3D click on 'Edit Process Settings', then select 'Layer' and in 'Layer Settings' select 'Outside-in' next to 'Outline Direction'.
- Check the print table. Examine the printed model. If the effect is more on one of the sides, the cause may be in the calibration. If so, calibrate.
- Use this effect to your advantage. Depending on the task, you can use the print sequence to your advantage.
 If you need a model of high quality, with a good outer surface and at the same time the rigidity of the model is not critical, choose Outside-in printing (first the outer layer, then the inner filling). If the rigidity of the model is important, print inside-out, doubling the wall thickness.
3D printing problem checklist: inner mesh shows through
- Check the outer wall thickness of the model.
- Thicken the outer wall.
- Use the filling option after wall formation.
- Check print bed and calibrate if necessary.
- Use this effect to your advantage.
Gaps between inner mesh and outer walls
Problem Description
If you look at the bottom or top surfaces of the model, you will see gaps between the inner mesh and outer walls.
What causes this problem during 3D printing?
Gaps between outer wall and inner mesh used to be a common problem, but with the increasing accuracy of 3D printers, this is now a rare bug.
 However, there are new materials for 3D printing that can cause this problem again.
 The most common cause of these gaps is that your software does not have an overlap of the mesh and outer walls set, or this value is set to "0". Your 3D printer considers this so that the wall and mesh should not intersect, and gaps may occur.
Another possible reason is the sequence in which you set the printing of the inner mesh and the outer wall. If you print the outer wall first, there may be no or minimal overlap. Accordingly, there is a chance of occurrence of these gaps.
Solving the problem:
gaps between the inner mesh and the outer walls of the 3D model- Check the parameter of the intersection of the walls and the inner mesh of the model. This is the most common problem and is very easy to fix. Find the "Infill Overlap" option in your gcode generation software and increase this value.
- Cura defaults to 15%.
 Increase it to 30%.
 - In Simplify3D these settings are in the 'Edit Process Settings > Infill > Outline Overlap' tab. Again, increase this value. This setting is directly related to the thickness of your head. So the % value will be % of the bar thickness to be printed. When tuning, do not set this value above 50%, as you will go beyond the walls.
- Cura defaults to 15%.
- Form the inner mesh before printing the walls. If at the same time the inner mesh begins to show through, increase the thickness of the outer wall of the model as indicated in the section above.
- Increase extruder temperature. Some newer 3D printing materials (such as XT-CF20) may require finer temperature settings. Try increasing the extruder temperature by 5-10º. It might work.
- Reduce speed. You probably want to print your model faster, but faster speeds can cause a lot of problems. Especially if the 3D printer is not perfectly calibrated.
 If print speed is still important to you, try lowering it for the top layer only.
3D printing problem checklist: gaps between inner mesh and outer walls of the 3D model
- Check the intersection parameter between the walls and the inner mesh of the model.
- Print the inner mesh first and then move on to the outer walls.
- Increase extruder temperature.
- Reduce the print speed.
Intersection of objects
Problem description
Parts of the model are missing or the final model is not rigid enough. The finished product and the 3D model are different and there are incomprehensible errors in the geometry of the printed product.
What causes this problem during 3D printing?
Virtual walls are one of the most common causes. Vertical walls only exist in 3D space, not in the real world.
For example, if you have two cubes in the real world and you try to match them, it won't work because the outer walls won't let the two objects intersect.
 In the 3D world you can combine two objects and still exist as two separate objects and your slicing program will also allow them to intersect in the virtual world.
 For correct printing, these two objects must be combined into one so that the inner walls disappear and one object remains.
Another possible problem - for example, you have a cube object and you have deleted one of its surfaces. In fact, you have an object with a hole. It may look like a 3D correct object, but it only exists as such in 3D space. Such an object cannot exist in the real world.
Deleting one of the surfaces leaves only two coordinates. The wall thickness, the third coordinate, has no dimension in the real world. We only see it in 3D modeling software. And when we start to form the layers of the model, the program will try to fix this bug and add the third coordinate. However, in more complex models, this can lead to unpredictable effects.
Solving the problem: object intersection
- Use the latest slicing software.
 Most recent versions of slicing programs support automatic correction of intersecting objects, but it's still better to make sure that your 3D model is formed correctly.
 - Set the Fix Horrible settings in Cura. In Cura, open the Expert Settings tab with the 'Fix Horrible' option set to match all (Type-A).
- Set Silmplify3D's Non-manifold settings. In the 'Process settings' select the 'Advanced' menu and then 'Heal' next to Non-manifold.
- Use layered representation. Use the layer view in your slicing software to check for problem areas in your model. A superficial view of the layers can help you quickly identify problem areas and fix the problem.
- Use your software to fix object intersections. One of the easiest solutions is to use additional software to solve the problem. Blender and Meshmixer have built-in mechanisms for identifying problems and fixing the 3D model before slicing.

- Merge objects. It's better to fix your 3D model before importing it into the slicing software. When doing this, make sure that if your two objects intersect or overlap, you use the appropriate intersect, merge, or subtract function.
3D Printing Problem Checklist: Object Intersection
- Please use the latest version of your slicing software.
- Use the "Fix Horrible" option (in Cura).
- Use the “Fix Non-manifold” option (in Simplify3D).
- Use layered view to identify the problem.
- To correct errors, use additional software like Blender or Meshmixer.
- Merge objects.
No base for next layers
Description of the problem
You have loaded your 3D model into the slicing software and everything looks good. We started printing and as a result part of the model was printed well, and some parts - badly. This is a fairly common problem in 3D printing.
What causes this problem during 3D printing?
During 3D printing, each layer is built on top of the previous one.
 Naturally, if your model has a part that does not have plastic underneath (for example, as shown in the figure above - horizontally outstretched arms), printing problems will arise.
 Ideally, the slicing software should somehow detect and point out this problem. However, in most cases, the programs will let us print without indicating that additional supports are needed for the model.
Problem solved: no base for next layers
- Add supports. The quickest and easiest solution is to add calipers. In most programs, this is done quite simply. For example, in Simplify3D go to Edit Process Settings > Support > Generate support material; you can customize the quantity, shape and specify other caliper settings. If you are using Cura, just select Support type in the Basic settings.
- Make your own calipers. Software generated calipers may not suit you, so you can create your own in the base 3D model. This will require a little more skill, but can give fantastic results.
- Add an additional object to your 3D model. Most often, problems occur when printing hands and similar details. In this case, adding supports from the base of the model to the arm can also result in a problem, since the distance can be quite large. Considering that the calipers should be easy to remove, the high height may prevent them from being printed correctly. You can get around this by adding an additional object to your model (a piece of wall, a bench, a box, a flower, etc.) and printing an additional rack already from this object.
- Change the angle. For example, models of people whose arms are raised at 45º will print well and it is absolutely impossible to print arms stretched horizontally at 90º relative to the body.
- Divide the model into separate parts. Another option is to divide the model into separate parts and print two pieces instead of one. The only problem that will need to be solved is how to combine the resulting parts into one model after printing.
3D printing problem checklist: no base for next layers
- Add Software for Slosing
- Add calipers in the original model
- Add an object that can be replaced by a caliper
- Change the angle of the problem node
- Separate the
Slove
description problems
As the model builds, the layers begin to shift. As a result, instead of a straight vertical model, displacements appear. In this case, the offsets are not the same over the entire height of the model. The offset can increase/decrease at different heights.
What causes this problem during 3D printing?
The reason is quite simple. One of the belts connected to the stepper motor has lost tension. To eliminate model drift, it is enough to check the tension of the belts and the pulleys that keep the belts in tension.
At first glance, the solution to the problem is simple. However, before you fix it, you should find out which belt is causing it, as getting to the belt can be a difficult task.
Solving the problem: layer shift
- Check the X and Y axes. If the model moves to the left or right, the problem is in the X axis. Forward or backward, the problem is in the Y axis. When you have decided on the coordinate, check the belts and pulleys. If you have a Prusa i3 3D printer, this shouldn't be a problem since the pulleys are mounted on the stepper motors themselves. In printers like Ultimaker, you will have to tinker.
- Tighten the pulleys on the stepper motors. Check all belts and pulleys. More complex arrangements such as the Ultimaker 2 have multiple belts and pulleys. On the main axes X, Y, eight pulleys are installed on top of the printer. Review and pull up each of them.
3D Printing Problem Checklist: Layer Offset
- Check the X and Y axes.
- Tighten all pulleys along the problem axis.
A little about 3D printing | PC World
What should you pay attention to when choosing a 3D printer? Tips for newbies.

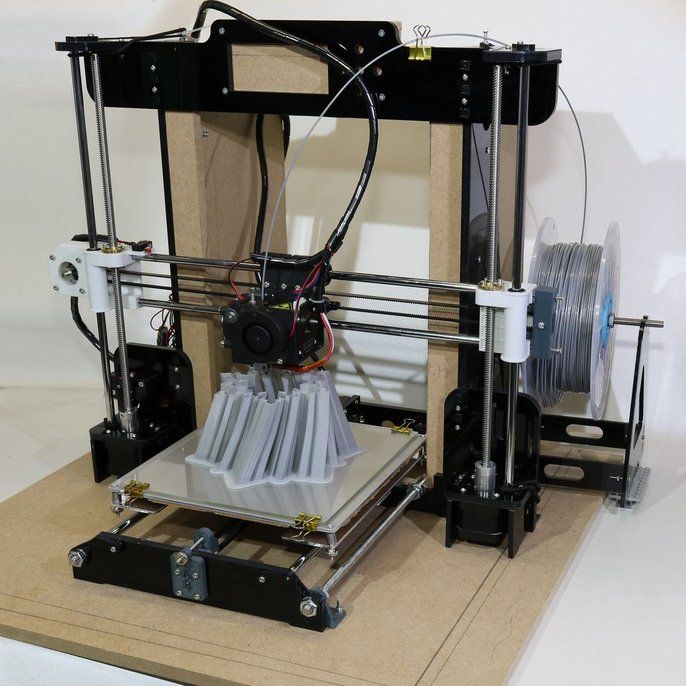
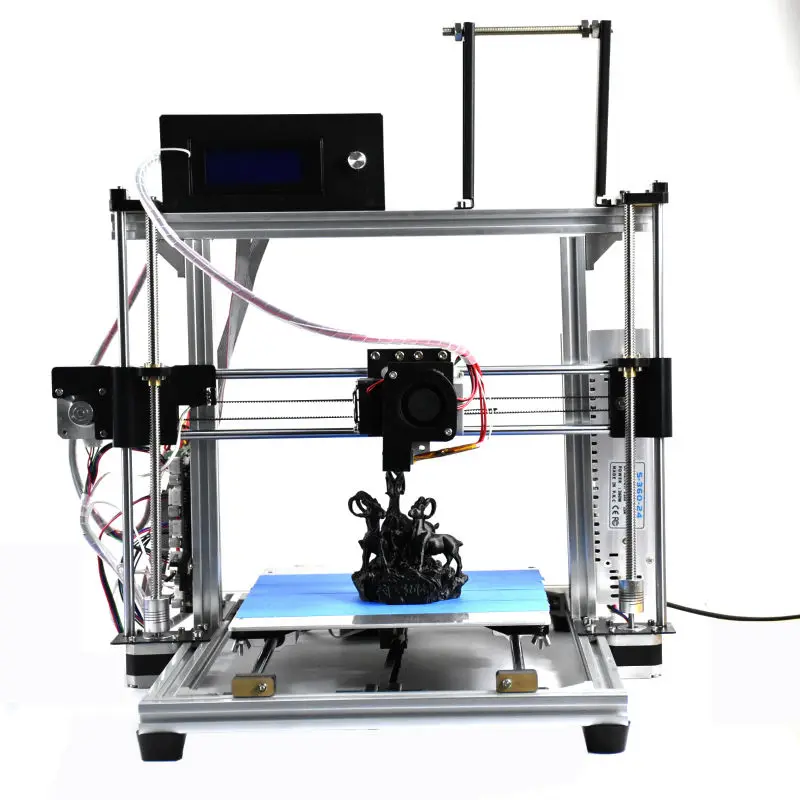
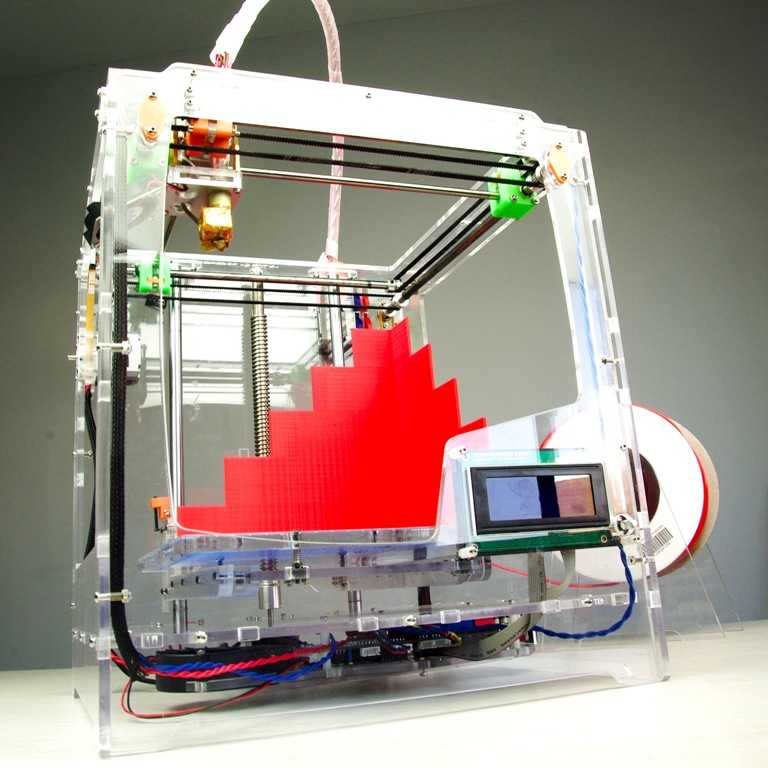
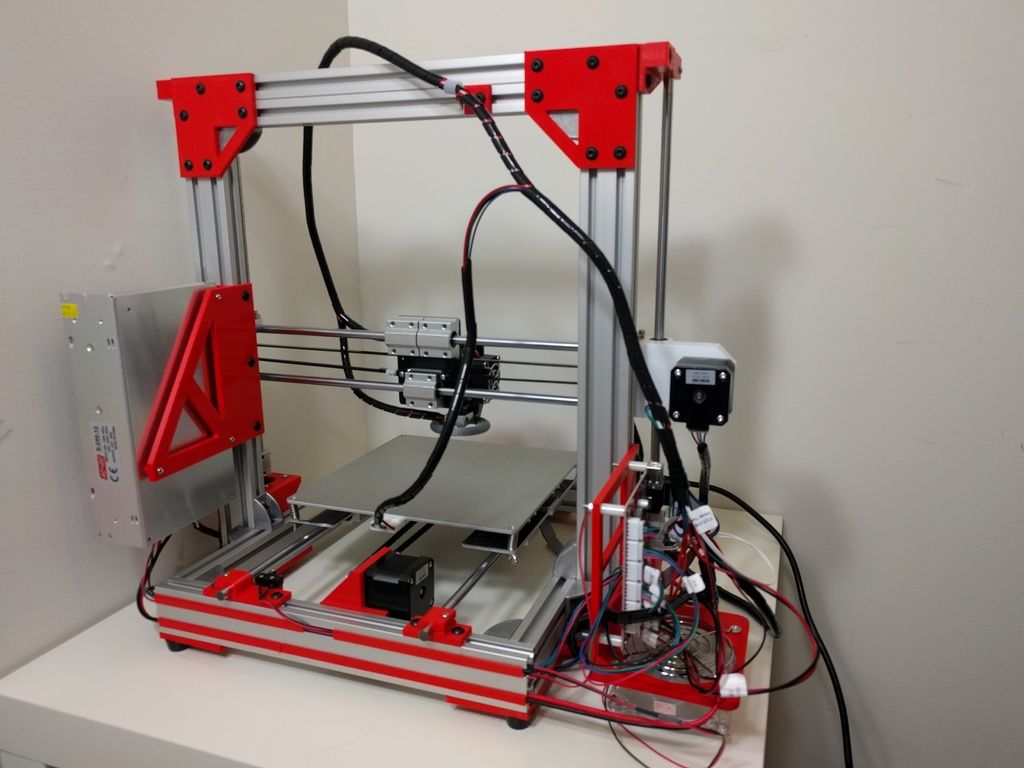
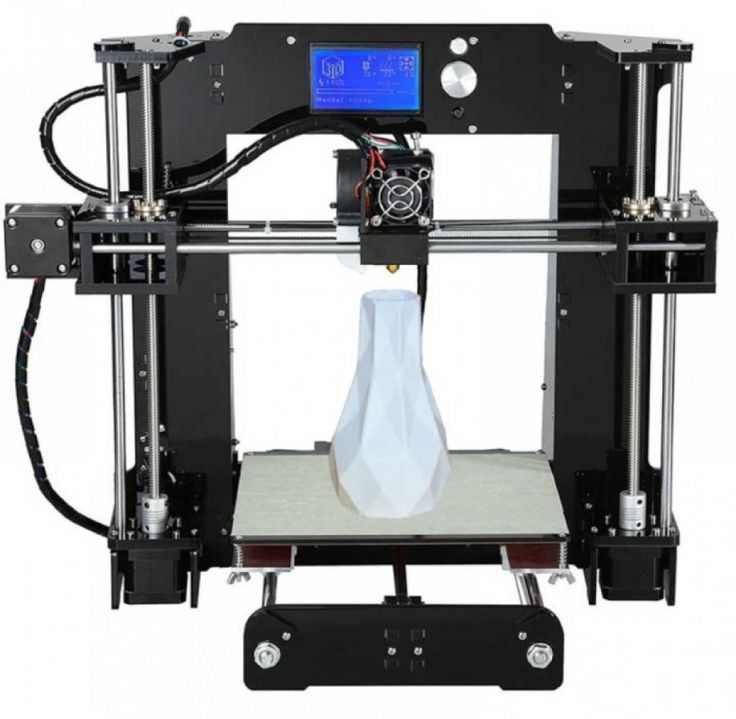
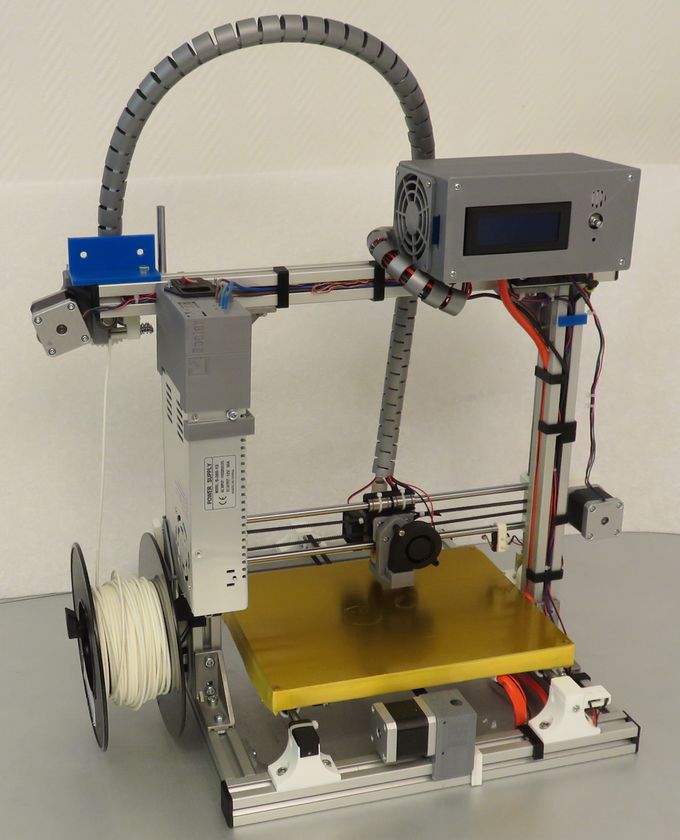
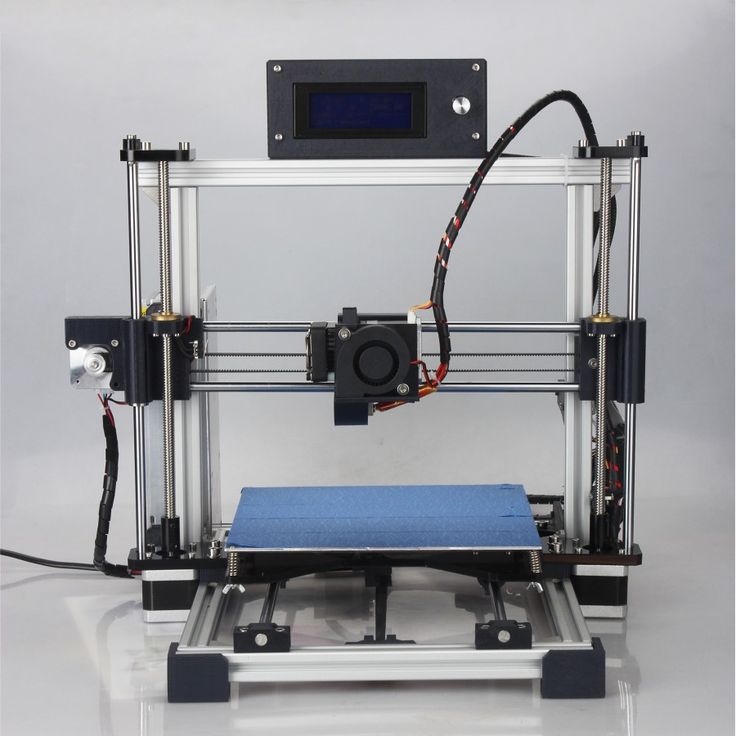
The first 3D printers appeared quite a long time ago, back in the 80s of the XX century. Over the past time, printing technology has stepped far forward, and now there are many models on the market that implement various types of printing. The most popular and affordable 3D printers are based on FDM (Fused Deposition Modeling) technology.
Their principle of operation is simple: a plastic thread, called a filament, enters the heater, where it is melted, and then ejected through a tiny hole in the printing nozzle. The moving head of the printer can be compared to a very precise glue gun, but the molten plastic flows out of the nozzle of the 3D printer (extruder) in a much thinner stream. By successive passage of the head, the printer is able to build very thin layers of plastic, each subsequent of which is superimposed on the previous one.
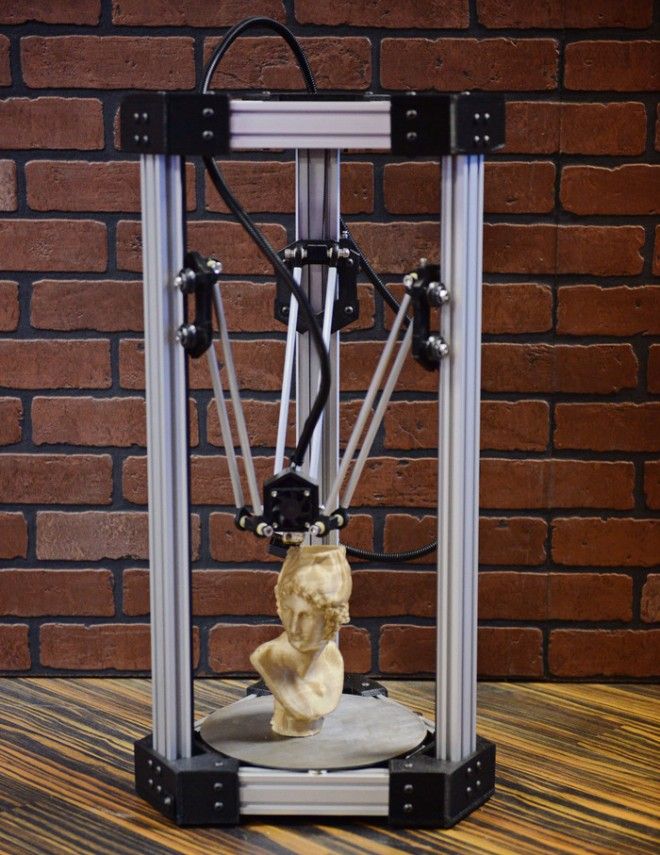
If there is nothing at the bottom—for example, when you print an arch or a roof surface—the printer creates a special support that can be removed when the print is complete.
 Some models build relief by cooling with air flow. You can create anything, it depends on your imagination and the physical dimensions of the printer.
 If you decide to purchase such a device, you should pay attention to a few points.
First, accuracy and speed. Accuracy is usually understood as the height of the layer when printing - the smaller it is, the higher the accuracy. Currently, the most accurate 3D printer is capable of printing with a layer height of 50 microns. Speed refers to the rate at which the model grows, measured in square centimeters per hour. When printing, you should pay attention to the fact that the higher the accuracy, the lower the speed, and vice versa. For example, printers with an accuracy of 150 microns are suitable for the home.
Secondly, you should take into account the declared accuracy of printing and the conformity of the materials and components from which the 3D printer is made. Sometimes manufacturers claim very high print accuracy (for example, 50 microns is less than the pixel size of the iPhone), and the printer body is assembled from plywood, which does not provide a rigid structure and similar accuracy.
Most printers are compatible with one type of filament, usually ABS (acrylonitrile butadiene styrene) or PLA (polylactic acid, which is basically polyester). ABS and PLA are the most common now. Some printers can print with both types, others only with one of them. But, in addition to them, other threads with different properties can be used: solubility in water; glow in the dark; great flexibility; structure and smell of wood; increased strength, etc.
It is likely that you will not need most of the plastics, but you can hardly know this in advance. And therefore, if you like to experiment or still don’t really know what type of model and what you plan to print from, choose a 3D printer with the maximum number of supported types of plastic filaments.
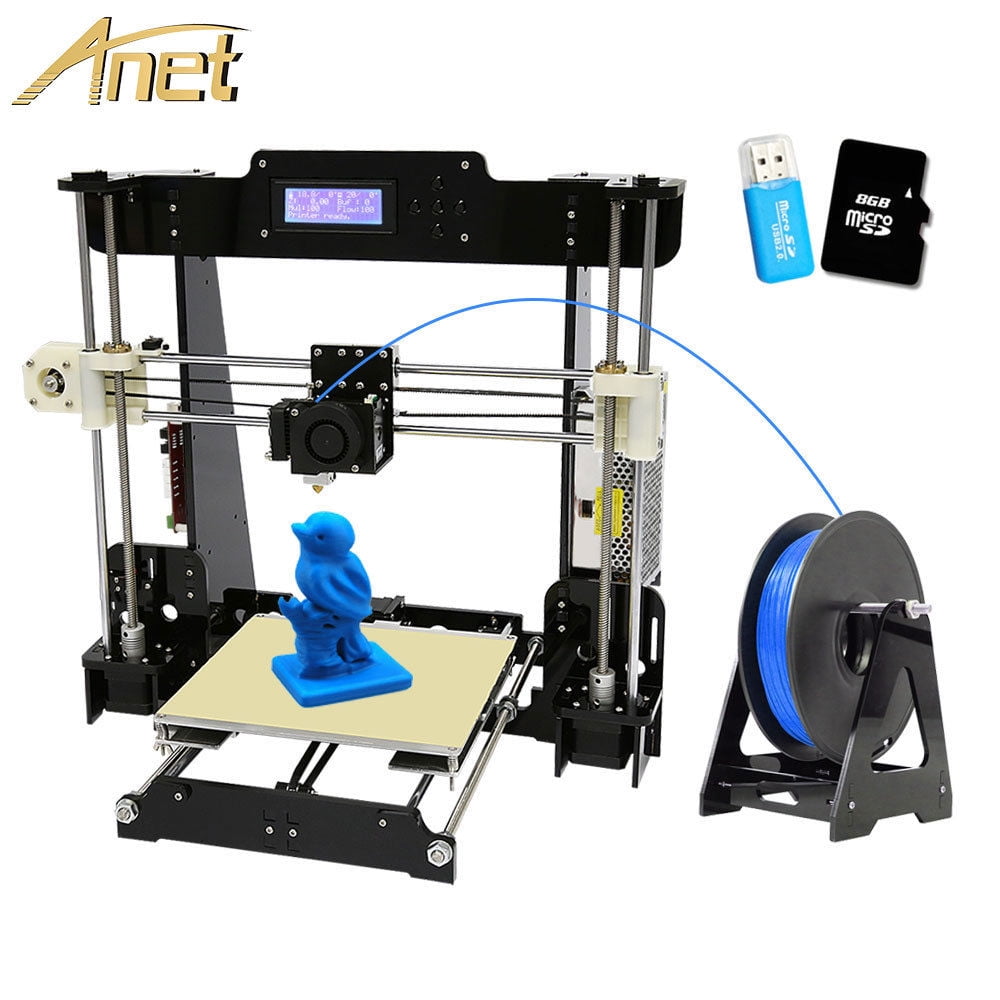
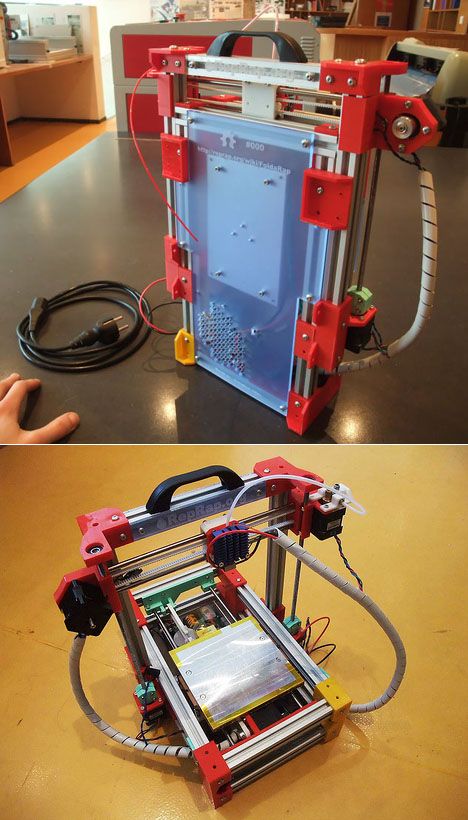
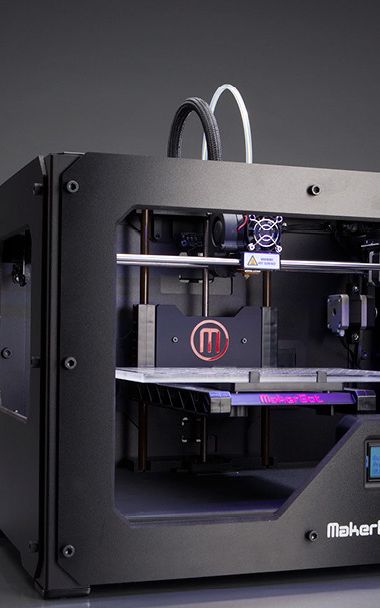
Many manufacturers supply 3D printers in a box with individual elements, which are assembled by the user. If the DIY approach doesn't suit you, choose a pre-assembled model.
In the early days of 3D printing, assembling a printer was a very complex process, involving pins on a printed circuit board (and often searching for missing components).
 To date, this procedure has been greatly simplified. Kits like the Ultimaker contain few parts, do not require soldering, drilling and cutting, and all components are connected to each other with standard screws or bolts.
 Another option is to purchase all the necessary components in the nearest store. If you have enough experience and patience, you can build a RepRap (Replicating Rapid Prototyper) printer. RepRap printers usually consist of widely used elements and components that can be printed on the 3D printer itself. The use of printed components eliminates the need for custom manufacturing, but you must have access to other 3D printers during the assembly process
And the last thing you should pay attention to is the printing software. It tells the printer how to move when printing an object. It also allows you to control the speed of ejection of the plastic thread from the extruder, the heating temperature of the filament, the speed of formation of layers and their thickness.

For some 3D printers, the required software is not included in the package. If not, you should go to the manufacturer's website and look for relevant links or recommendations.
For those who are new to 3D printing, we decided to clarify a few topical issues. To do this, we talked with Mikhail Loktev, a design engineer at Foto-Business.
– What is 3D printing for?
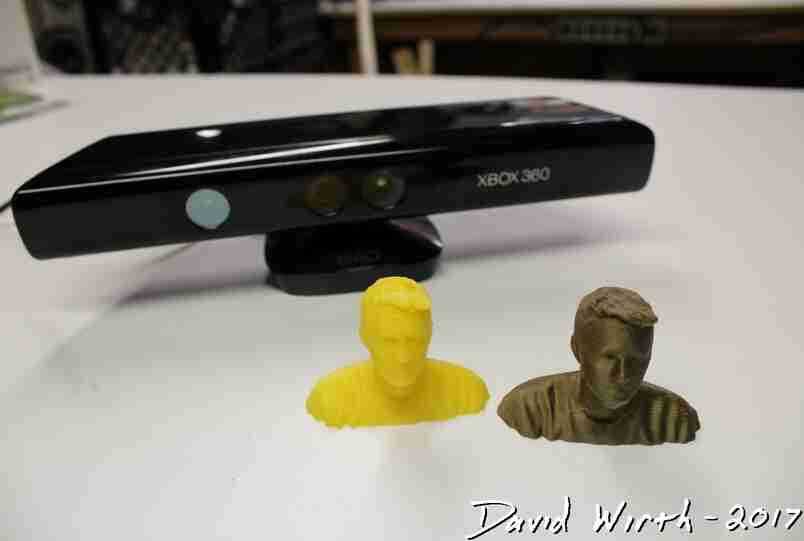
– Simply put, the printer takes any three-dimensional model and implements it in plastic or some other material and simplifies the work of creating an object. This is actually where it all began - fast and easy prototyping. You are an engineer who has designed a new door handle or gear. Before launching it into a series and spending a large investment, it is reasonable to check it. What was done before - they took plasticine, a file, an expensive CNC machine, which made this model from wood, metal.
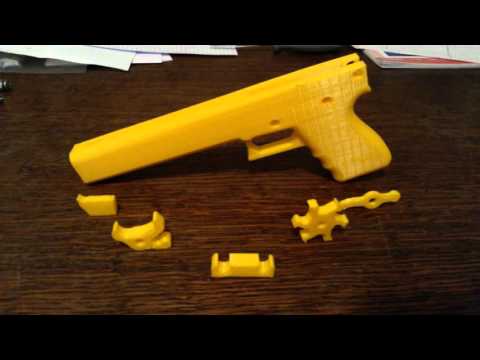
 But the machine can cut far from everything, and it will take a lot of time to set it up to make some kind of detail. The printer also allows, roughly speaking, to do the same thing in 20 minutes to 20 hours, only practically without any human participation. There is a model, just press a few buttons and the process has begun. Some of the first who were our customers were filmmakers, they constantly need to make some items for films and to be inexpensive. For example, a pistol or a blaster - printed, painted as needed and ready. Printers are also bought by state corporations that need to make some kind of model, because there are secret things, military developments, dual-use. But they do not want prototyping to be carried out on the side and extra people were admitted to them. Buy and place a machine in KB - is not affordable for everyone, but the printer solves this problem and allows you to get rid of information leakage. This is true for commercial structures as well.
Plastic is an exceptionally plastic material. We can make very low volume parts without significant mold and casting costs. Again, personalized products, souvenirs. Now many businesses are founded by students, for example, they print custom phone cases with silhouettes of something, a logo or the name of the customer. It's cheap enough.
The printer allows you to simplify existing technological processes, improve any detail, refine it. For example, a customer came from the food industry, they are constantly changing something in the form of bakery products. Before launching them into a series, you need to see how it will look. They print both the form and the sample itself.
– Is food grade plastic used in printing and can kitchen utensils be printed?
- Let's just say that PLA plastic - organic material is theoretically absolutely safe in terms of chemical composition, but I would not expose it to high temperatures when cooking.
 In general, a great variety of plastics are now appearing - luminous, with the smell of wood, flexible, conductive, etc. It is possible that soon they will also be used to create dishes, the potential for chemistry is huge and there is room to move. The main thing is that there are tasks, it pushes manufacturers.
 –
– Actually, there is nothing complicated. Depending on perseverance - from several hours to several days, but this time is necessary to master the printer itself - after all, such a printer is now like a fashionable gadget. Knowledge of modeling programs is not required, although it will not hurt. The Internet is full of model files optimized for printing. For example, there are no cases for the iPhone. Download, print. If you want something of your own, there are, in addition to complex programs, many simple visual editors.
– What is the cost of consumables?
- The cost of printing using good quality plastic is about 1.
 5-1.7 rubles per gram. The cost of the finished model depends on the filling. It is worth considering that the printer allows you to print both thin-walled and fully filled models, everything can be adjusted.
Plastic comes in 1kg spools and is easy to buy.– Do I really need to take care of the ventilation of the room, can I, for example, put the printer at home?
– The situation is this: PLA plastic can be printed without problems at home. With ABS plastic, everything is more complicated, there are noticeably more emissions from it, you should take care of a separate, well-ventilated room. However, it is noticeably stronger.
– What is the average life of a 3D printer?
– Some American models have a daily constant load of about two to three months.
Learn more
- Check the outer wall thickness of your 3D model.