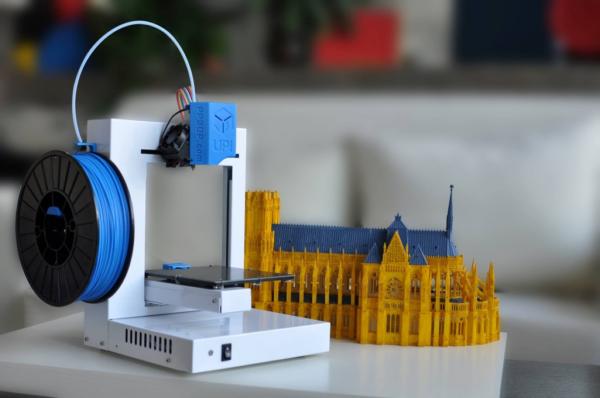
Why do 3d printers need a heated bed
Heat Beds in 3D Printing – Advantages and Equipment – Boots Industries
Why use a heat bed?Heat beds are used because they dramatically improve print quality by keeping the extruded plastic warm and thus preventing warping. Warping is a common condition caused by plastic on the edges of the part cooling down at an uneven rate when compared to the plastic inside of the part. The result is that corners warp up and deform your model.
Rafts are an effective ”no-heat bed” strategy to deal with warping when a heat bed is not available.In the past, techniques such as the raft (building parts on top of a ‘raft’ of material which is larger than the final part onto the build surface) were used to prevent warping by increasing the surface area of the part (and increasing it’s adhesion – thus fighting warping).
Derived from the raft, mouse ears are a clever and effective technique to make sure that the corners of your prints are well secured to the platform and won’t lift. Although they offer greater adhesion by increasing the surface area for your part to grip onto the bed, they are not 100% effective without a heat bed. Sometimes the warping forces are simply too great and can overcome the mouse ears.
Heat beds work to prevent this warping effect by keeping your part warm during the whole printing process which keeps the material at or above heat-deflection temperature (the temperature at which it is malleable). Keeping the parts in the heat-deflection range ensures that the part remains flat on the print bed. Heat beds, in combination with other tools to increase adhesion, will be covered in this article to bolster your ability to fight unwanted effects and improve your printing quality.
The following video shows what happens with no heat bed and no adhesive added to the glass. It depicts what can typically happen when printing on a non-sticky platform with no heat bed – Disaster!
No heat bed, print stuck to the extruder. Disaster!No adhesive used; a dramatic result and wasted PLA!
There are several types of heat beds & heating elements. We specifically discuss the PCB heat bed, the polyamide film heater (kapton film heater) and the aluminium clad heater. You can find a more exhaustive list of heater types here.
Types of heat bed
Regardless of the heat bed you are using, you should generally use these temperatures (heat deflection points) for PLA and ABS:
| PLA | 50-60°C |
| ABS | 100-110°C |
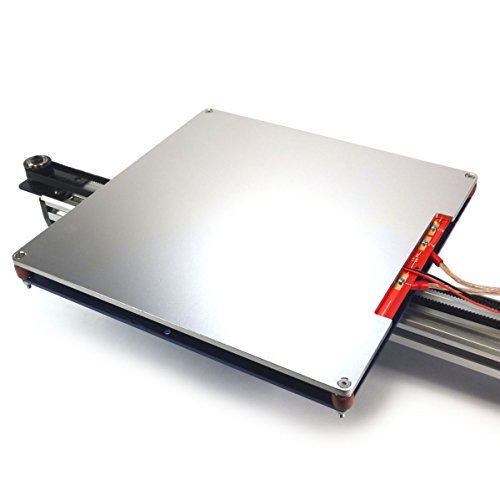
The MK2A heat bed (200mm x 200mm) is a good example of a PCB heat bed. These heat beds are used by many 3D printers and our own (Rostock V1.0) due to their great performance and affordability. This particular heat bed has 2 integrated LEDs and an integrated resistor which makes it rather ‘plug and play’ when compared to other solutions.
You can generally expect a simple & clean implementation with these heat beds thanks to the 5 holes available for leveling and installation purposes. They require little vertical clearance when compared to a stainless steel sheet mounted with aluminium clad resistors and offer an even heat distribution. The cons is that they can be slow to heat up especially when used with another surface such as a glass pane.
Kapton (Polyamide) film heaterKapton or polyamide is well know as a tape of choice for print surfaces, because of its heat resistance, smooth finish and high adhesion for PLA. Now think about two films of polyamide with a heating element sandwiched in between, now you have a polyamide film heater. Obviously, these are very thin, easy to install with an adhesive back, reliable and heat really fast. They have an integrated thermistor and are provided, unlike the PCB heat bed, in an unlimited variety of shapes. For these reasons, this is the type of heater foil we use on our latest 3D printer (BI V2.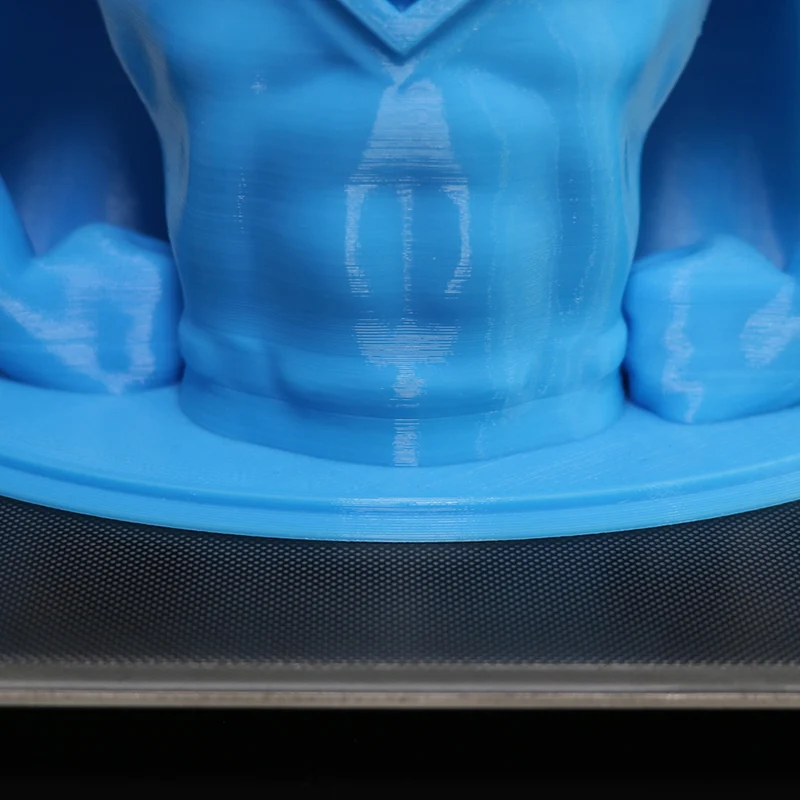 0).
0).
This type of heaters is both very efficient and inexpensive, but they require more installation steps than the last two heat source we’ve discussed. As a matter of fact, they need to be screwed onto a surface, normally a stainless steel or aluminium plate. Then, the electrical circuit needs to be completed with a thermistor and an insulator if you have any temperature sensible elements under the print bed. Finally, it’s also a good idea to use thermal paste between the clad heater and the surface to be heated.
Surface to use with heat bedsAll the heat sources mentioned in this article will typically need an added surface to preserve the quality & integrity of the heating element over time or to provide protection in the event of a hotend collision. Obviously, the aluminium clad heaters are always used in conjunction with a surface.
The recommended print surface to be used with a PCB or Polymide film heater is a borosilicate glass, or when unavailable, a tempered glass.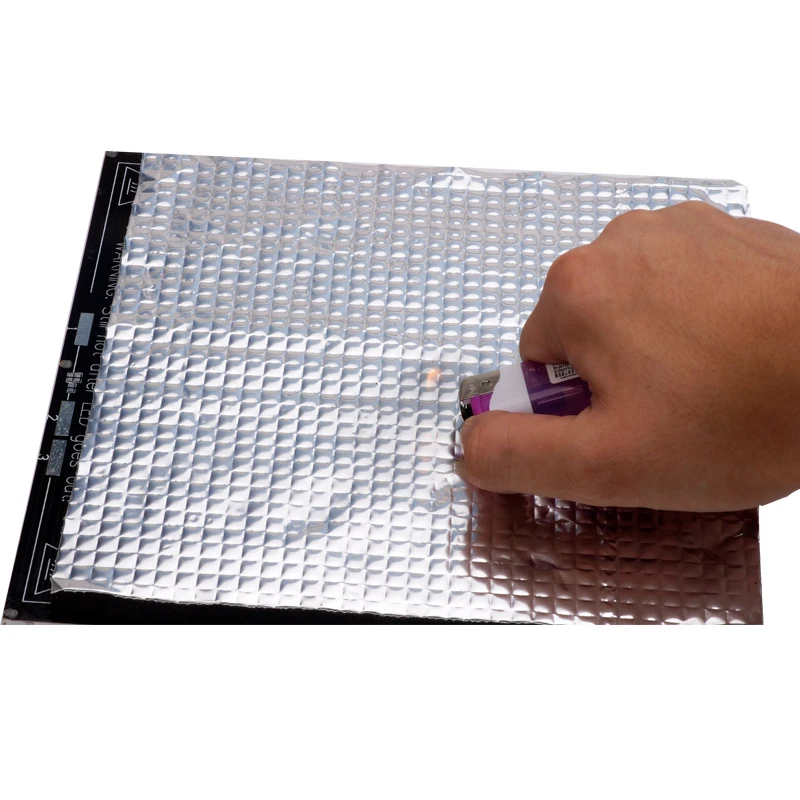 For the PCB heat bed, we recommend layering Kapton tape or using a thin glass (2 mm) over-top.
In addition to a heat bed surface, most users will experience that some form of adhesive or method is required to make PLA or ABS stick properly. This is where Kapton tape, painter’s tape, glue or hairspray comes into play.
Painter’s tape is an ideal product for printing ABS with a heat bed because of it’s textured surface increasing adhesion. We’ve used it with varying degrees of success and others report great results as well.
As far as PLA is concerned, our experience is that it doesn’t stick well to heated painter’s tape and that painter’s tape itself doesn’t stick well to the glass when heated. However, we found that PLA sticks very well to Kapton tape which is typically layered to cover the entire print area. The Kapton tape needs to be periodically replaced and this process can be tedious. To remove this obstacle, you can buy Kapton tape in wider rolls which means you need to layer a lesser amount of strips onto the print area to fully cover it.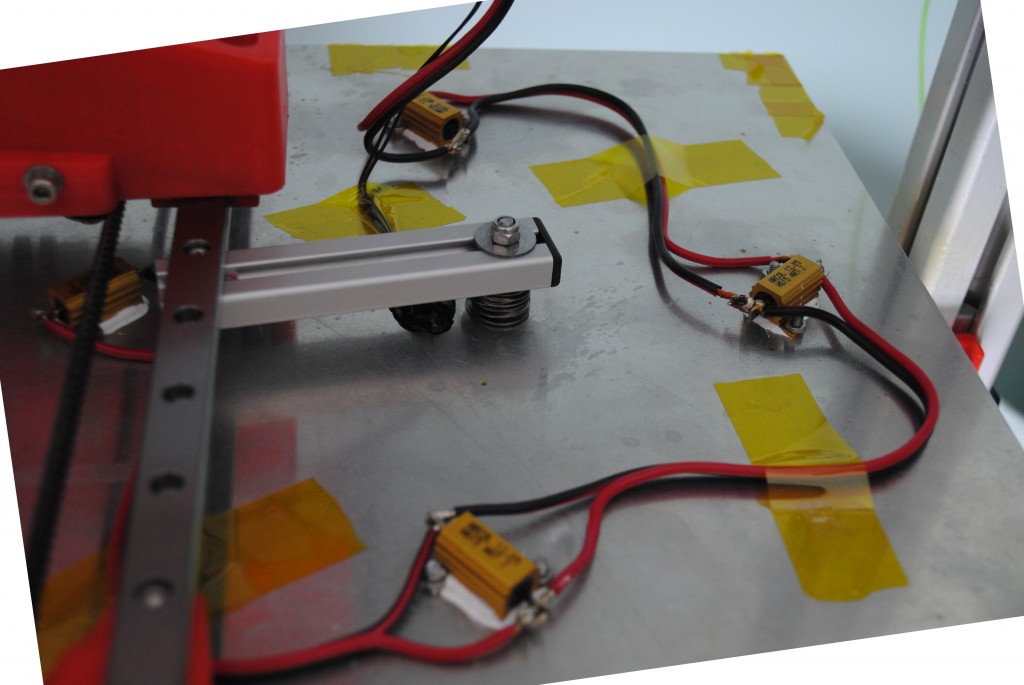
Glues are frequently used to make sure your print “sticks” to the print surface. The most common glue we have seen is the typical arts and craft glue stick (Elmers). This technique works well with ABS in conjunction with painter’s tape.
In the PLA department, we prefer to use hairspray on a glass surface. The glass surface is really flat and produces a really smooth finish for our parts. Another advantage of hairspray is that it can be applied in a few seconds and will typically create a thin film that strips away with the printed part or is easily scraped with a wood chisel or similar tool. Sometimes we use a wet rag to remove hairspray residue from the underside of parts when it’s not desired for aesthetic reasons.
What we recommendWe recommend the PCB heat bed or Polyamide film heater in conjunction with a glass surface. For PLA we always apply a thin coating of hairspray and so far this simple combination has been producing great results.
4 Reasons Why a Heated Bed is Needed With a 3D Printer – 3D Printerly
Out of the many components of a 3D printer, the heated bed is one that doesn’t get too much attention, even though it serves a very important purpose.
Without an efficient heat bed, prints will go from successful, high quality prints to stringy, warped, tacky-looking prints. That’s why I put together 6 reasons why your heated bed is recommended with your 3D printers.
Heat beds are needed for great print quality and layer adhesion throughout the print. They work by keeping the extruded material at it’s optimal temperature which stops common problems that many people experience when printing. Many prints turn out bad due to not using heated beds.
Heat beds work extremely well to combat these problems, but they are always a better solution when combined with other techniques to improve temperature retention and layer adhesion. Below are 4 reasons why a heated bed is recommended with a 3D printer.
1. Prevents Prints From Warping
Warping is a common problem which is when the edges of your printed material cools down at a different rate compared to the rest of the material. When a hot, expanded material is extruded onto a cold, contracted material, it results in stresses in the material after the new layer cools.
This causes the cooled plastic to warp upwards and change the look of the print.
It then builds up over several layers which causes bending stresses which attempt to lift the edges of a print off the bed. It’s an issue which many people experience.
To prevent warping, we will need to minimize how much cooling the previous layer does before the next layer is extruded.
There are two ways a heated bed prevents materials warping:
- It heats up the surface temperature to a point where the print will stick better.
- Through radiated heat which keeps extruded materials warm throughout the print above the surface.

The biggest factor in how much a print is going to warp is the difference between something called the glass transition temperature (Tg) and the cooled down temperature during a print.
In simple terms, the glass transition temperature is the temperature range where the material changes properties from being firm to a rubber-like state (not melted), measured in stiffness.
PLA has a low Tg of 122°F (50°C). With an unheated bed, it would cool down to room temperature, being roughly 68°F (20°C).
ABS, on the other hand, has a Tg of 212F (100C) so if it cools down to room temperature, the big difference in temperature change is bound to cause warping.
It’s important to bear in mind the properties of the material you are printing. They handle temperatures very differently, so some materials will experience issues more than others.
A heated enclosure/chamber works by keeping your printing environment at a higher temperature 140-176 F (60-80°C) so you will end up with the same temperature difference of roughly 86°F (30°C).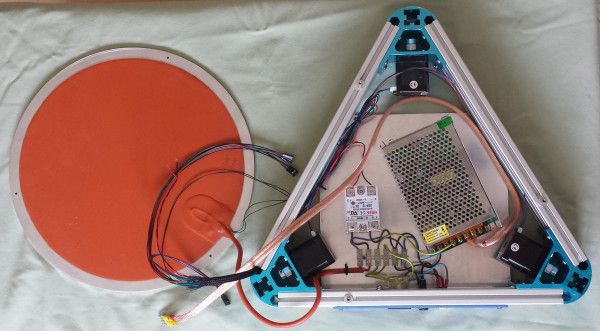
It would be hard to count how many prints have been ruined by warping. That’s a lot of plastic wasted and turned into junk, so a good quality heated bed can save you a lot of time, money and frustration. Warping happens more so with thinner parts of plastic so it could depend on your models.
It’s important to note that heated beds aren’t a complete solution to solve warping issues. They will work to lower the chances that your prints warp but when used in conjunction with other methods, it works more efficiently.
2. Retains Temperature of the Printing Space
Heated beds used to be a rare addition to 3D printers which resulted in printed objects cooling very quickly once the printing process started. In today’s 3D printing culture, heated beds are more commonplace.
They do a good job of retaining temperature of the 3D printing area to help the materials perform at their best. This results in printed objects cooling at a much slower rate, and reduces stresses on the material.
A downside with some heated beds is that they don’t always cover the full size of the bed and tend to be a smaller pad that fits underneath your print surface. This can create uneven temperatures on your printing surface so it’s important to test the temperature of your surface all around, and make sure it’s not concentrated around the sides or middle.
Some temperature readings can give you inaccurate numbers due to parts of the print surface taking more time to heat up. You can combat this by waiting 10 minutes or so after your reading is giving you the correct temperature just as a counter-measure.
Another solution that some people use to retain temperature in their printing space is a heated chamber or enclosure. They work a similar way, but instead of the surface being heated, the whole enclosure is heated.
Heated chambers or good enclosures work well with high-temperature plastics because they increase and maintain optimal temperature levels above the heated bed in order to help prevent prints warping.
Keep in mind that constant running heat can get costly, and more care needs to be taken to ensure things are running smoothly. Some parts that you have in your printer may not run so well at higher temperatures as they can cause stress on some electronic parts, resulting in a shorter lifespan.
The upside here being, when your printing environment is insulated, it should reduce your running costs due to not having to add more heat. It also keeps your temperatures even which should reduce the cooling at the edges of your enclosure.
3. Helps First Layer Adhesion
This step also ties in with warping within materials. Your first foundational layer of material is very important to the rest of the printing process.
Without good first layer adhesion on the build plate, your prints will not stick very well and it will increase the chances of a print failing. When you have good adhesion it also works by reducing the warping of the material.
3D printers have print surfaces which are very durable but also quite smooth, which can cause materials to slide rather than stick to the surface.
Using a heated bed reduces this sliding issue by giving the material an optimal level of adhesion to the surface. It relates back to the glass transition temperature where materials are in their more ‘rubber-like’ state so have an easier time sticking down.
This is especially true with adhesion using ABS and similar thermoplastics because they have a higher glass transition temperature. After materials are extruded from the extruder, they have nothing in particular to stick down to when put onto smooth surfaces.
This means warping becomes enhanced, resulting in reduced adhesion to the print surface.
The fix here is to use build surfaces as well as substances that boost your adhesion. Many people out there use items such as painter’s tape or Kapton tape to improve first layer adhesion.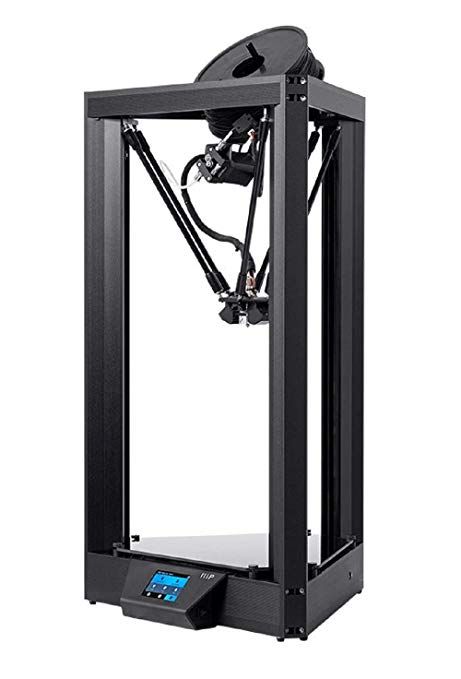
Depending on what combination of build surface material and filament type, you can have an easy or hard time getting your first layer adhesion. Over time, you’ll learn what works best with some trial and error.
Many bed surfaces do tend to change its shape when there are temperature changes.
Metal heat beds are great because of its property of retaining heat and spreading easily. This is because metal has a high thermal conductance. Some metals are the opposite, such as copper and steel, which take more time to heat up and cool down.
Most metals actually expand somewhat when they are heated, so you should be aware that this change in shape of a metal heat bed can damage prints. The thinner a metal print bed is, the more is it susceptible to expanding and bending.
The best thing to do is experiment with different temperatures, increasing and decreasing them in increments until you have many successful prints.
Making sure you’re using the correct temperature on your heated bed will ensure that the first layer(s) of your print stays warm and doesn’t contract too much from cooling. There are guides out there that will tell you what temperatures are best for a specific material.
First layer adhesion issues can sometimes be solved by increasing the temperature of the heated bed, but if this occurs, there’s usually an underlying issue you need to take care of such as bed levelling.
4. Assists in Print Removal
Heated beds are great for helping remove your finished prints from the bed.
So many 3D printer users have issues getting their prints off the bed, to the point where they either scratch their surfaces using harsh tools, or even worse, accidentally cut themselves using too much force for something that should be easy.
With most PLA prints, especially the smaller ones you should be able to remove prints without the use of a heated bed due to the nature of the material. Your medium size PLA prints may require some removal tools to successfully get the print off the surface.
With larger prints a heated bed should work wonders in helping you remove it because they can be quite tough to remove, due to the surface area adhesion being far higher than normal.
The first thing I’d advise when removing finished prints from the surface is to let the heated bed cool down completely. If you’re lucky, once the material has cooled down, your prints can simply pop right off the print surface with ease.
If this doesn’t work you can do the opposite by cooling the area with a fan or a cool pack. Putting the build plate in the fridge or freezer for a short time should also assist with print removal.
I’d say it’s much more worth it in the long-run having a heated bed and avoiding common problems people have. It will save you time, effort, money and a lot of stress!
When a material has cooled down, it gets back to it hardened state rather than it’s ‘rubber-like’ state and shrinks abit, making it easier to remove from the print bed.
If you are printing directly on glass, letting your heated bed cool to room temperature should do the trick in lifting prints off without effort.
Sometimes prints can still get stuck down even after cooling. In this case, some people have found it helpful to heat the bed back up then try to remove the print.
Heated Beds Vs Filaments
Heat-beds for the most part, keep the bottom of the print warm. Enough distance from the build plate (1cm) and the print will be closer to the ambient temperature than the bed temperature.
Some materials hold heat better than others such as PLA so action isn’t always needed. Some brands of filaments perform differently at temperatures so keep this in mind.
The three main filaments:
ABS
ABS has a tendency to warp and really doesn’t bode well with breezes or temperature changes, so a heated bed is highly recommended when printing it.
A heated bed along with an enclosure will be a great solution to these problems, and should help you get your successful prints.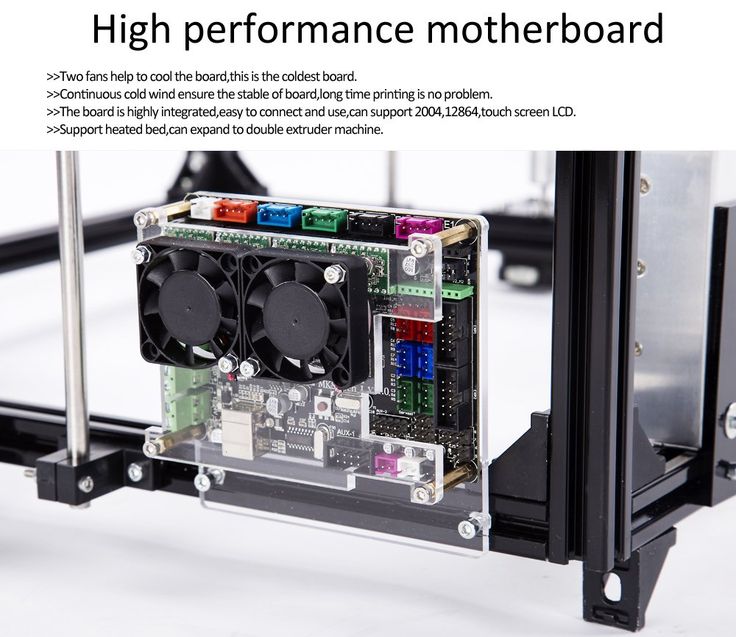
Certain print surfaces are better than others to prevent issues such as warping, but the nature of ABS means that a heated bed does a great job in keeping prints under control.
PLA
The most widely used filaments is PLA because of many reasons, one of which being its low tendency to warp and generally being easy to print in many environments.
PLA doesn’t necessarily need a heated bed to do its job, but bigger prints can cause trouble, by not sticking down too well if not printed on a heated bed.
As previously mentioned, it will help out with warping issues and many others, so it’s definitely beneficial but not required.
PETG
This material is described by many to have the printability factors of PLA while incorporating the strength and durability of ABS. It does, however, have stringy properties and a higher chance of warping compared to PLA.
With PETG a heated bed is something that I would recommend, as it should help prevent warping.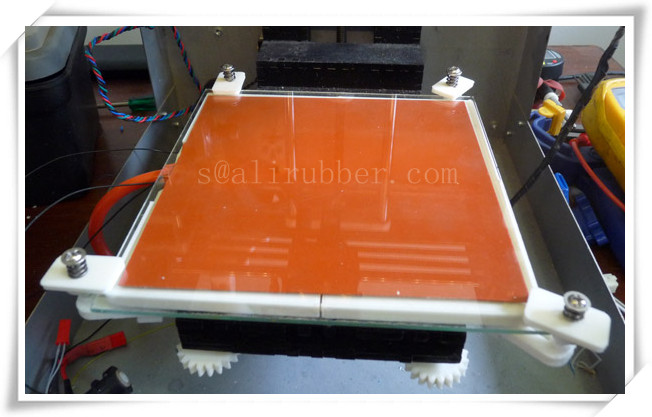
Having a glass bed with a sticky substance such as glue or hairspray can be enough to help extruded material stick to the print bed.
Glass beds don’t have the best insulation so it requires more heat to get it to the set temperature, but they are great for removing prints once they have finished.
There are techniques that are used to get prints to stick better to the print bed such as rafts or brims, but these won’t be as effective without having a heated bed.
There are many different types of heated beds, some that come in kits, some that are different materials but they all serve the same purpose.
A good thing to remember is that the temperature that you set your bed and your bed temperature may not always be the same. It depends on the construction, assembly, quality of the heater and temperature sensors so it can differ.
Heated beds do require a lot of power so it can be relatively costly to have running all the time. You want to make sure your heated beds are installed properly because improper installation can lead to burned wires and connectors.
Why do I need a heated table for a 3D printer?
3DPrintStory 3D printing process Why do you need a heated table for a 3D printer?
With the development of 3D printing, a lot of new research and experiments have appeared. Many of them are aimed at finding the best way to increase the adhesion of the first layer.
And we all know why this is so important. A standard heated 3D printer table will do the job. Although there are other alternatives when working with the first layer, nothing compares to this one.
Most importantly, 3D printer tables are a very important part of the overall design.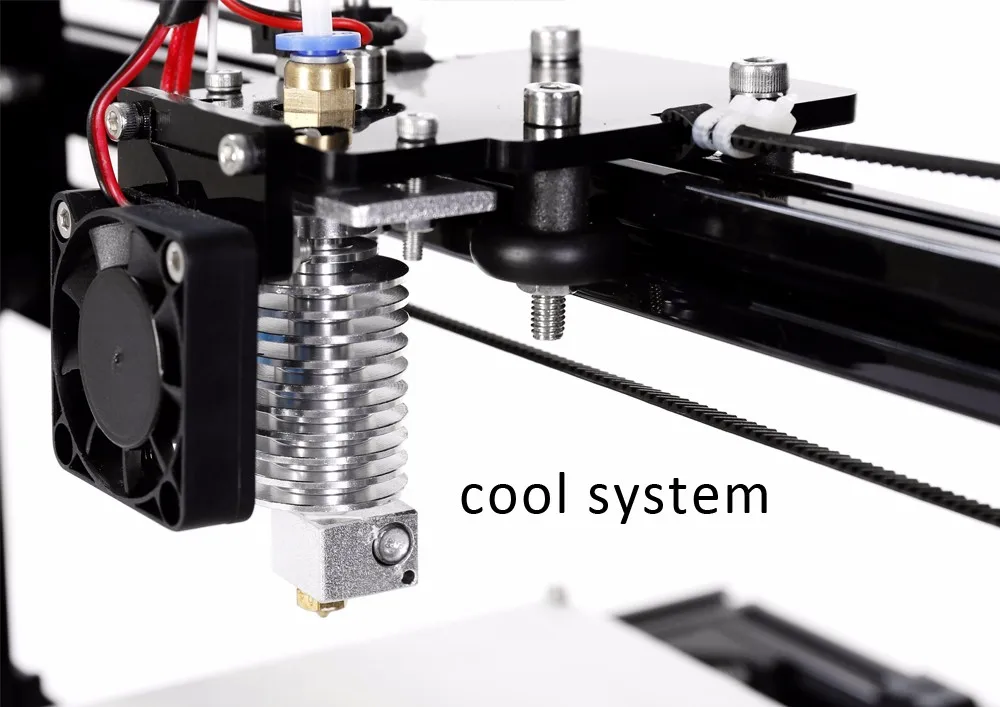 In fact, without a table, you will not be able to create physical embodiments of your 3D models. Therefore, understanding how you can make the best use of the table should be your top priority for quality 3D printing. Understanding and navigating the different types of heated tables and their features will definitely help you choose the right 3D printer and implement your own ideas.
But before we get into all the 3D printer heated tables, let's get to the bottom of what 3D printing is. Most of us are already aware of this, but a brief overview will ensure that we are on the same wavelength in the context of the current article.
What is 3D printing?
We have been hearing about additive manufacturing or 3D printing for a long time. And the lucky ones who had a chance to work with this technology at least once are becoming more and more every day.
3D printing has become one of the most revolutionary technologies and is spreading very quickly, influencing the entire ecosystem of production, industry and hobby.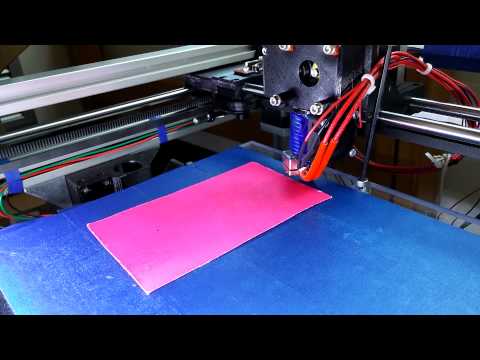
3D printing is a process in which 3D printers create layers one on top of the other to create a finished product of the desired shape and dimensions.
3D printing may differ in the principle of creating 3D models. For example, there are FDM, SLS, SLA and many others. They differ in the way the layers are created and connected. However, the fundamentals remain the same. Layers are stacked on top of each other to build the entire 3D model.
3D printing has made it possible to create extremely detailed models and designs in a short time and in many cases cheaper than classic manufacturing processes. But when using a 3D printer, certain precautions must be taken to ensure that the finished product exactly matches the desired characteristics.
However, 3D printing has its own problems. And the biggest of them is too fast heating and cooling of the layers of the 3D model. One of the major problems that arise from improper heating/cooling is shrinkage. It changes the shape of the 3D model and deforms it. Therefore, in this case, we get low-quality products.
To solve this problem, heated tables for 3D printers have appeared. These tables, among other things, are designed to maintain the required temperature of the first layers of the model and the entire model as a whole. They help control the temperature during the entire 3D printing process. Therefore, this additionally results in proper adhesion of the first layer throughout the entire 3D print time of your model.
What is a heated 3D printer bed?
Returning to the main topic of the article, we must answer the question: what is a heated table for a 3D printer? Although we have already briefly discussed the usefulness of heated tables, let's learn more about them.
Heated tables using printed circuit boards as heating element
Heated tables for 3D printer designs may vary. Among the most common types of heated tables, mounting or printed circuit boards are used as heating elements. They usually come with budget 3D printers. However, this solution is not very suitable if your 3D printing projects are complex and require frequent work with a 3D printer. In short, they are designed for small projects that do not take much time to complete.
The reason why they are not suitable for complex 3D printing is that PCBs are made of copper and aluminum plates, and they are prone to deformation when heated for a long time. Over time, heated plates will no longer perform the task for which they were originally designed.
There is another problem that may arise. They take longer to heat up. You can get rid of this problem, but for this you will need to replace the power supply with a more powerful one.
Heated tables using AC silicone encapsulating heating element
The second type of heated 3D printer table is one that uses silicone to encapsulate the heated elements. To create a structure, a heated element is inserted between pieces of glass and a heat insulator.
This is to minimize excess heat leakage and to deliver maximum heat to the table surface. In addition, electricity consumption also becomes smaller. And they can work longer without causing any problems to users.
This version of the heated table design is much more reliable and can last you much longer. In addition, the bill for the consumed electricity will also be reduced due to the minimization of losses for heating the table.
Heated table 3D printer operation process
The 3D printer works by extruding a plastic filament onto the table. Immediately after exiting the extruder, the material begins to cool. As we all know, shrinkage goes hand in hand with the cooling process. The problem arises when the layer is not cooled uniformly at all points. This leads to uneven shrinkage and, ultimately, to deformation of the entire 3D model.
To avoid cooling the plastic at different rates at different points, heated tables have been developed. The job of a heated 3D printer bed is to ensure that the parts do not cool completely until the 3D print is complete. This allows for a more uniform shrinkage process.
In short, heated tables basically take care of two things. First of all, by increasing the surface energy of the printing table, the heated layer enhances the adhesion of the first layer. Secondly, a sufficiently high temperature of the lower layer is ensured, which avoids the problem of deformation at any stage of the 3D printing process. Therefore, the heated bed maximizes efficiency and avoids excessive cooling of the layers.
When material hits the 3D printer bed through the extruder, it carries a certain amount of heat with it. For best results, the temperature of the heated bed should be below the glass transition point. This should turn the liquid thread into a solid form. The temperature sensor is responsible for maintaining the required temperature of the table.
You may need to experiment to find the optimum table temperature, as the melting point of different materials and manufacturers is different.
Several DIY Heated Table Designs for 3D Printer
The basics have already been discussed above, now let's look at some interesting DIY solutions.
In addition to the PCB and AC sealed heating element, there are other DIY designs to replace your table with a heated table.
Polyamide Film Heater
Polyamide, which we also call Kapton, offers a huge advantage when used as a tape for printable surfaces. They are best suited for use with PLA plastic. Providing effective heat resistance and high adhesion for PLA printing, this film is very popular. The use of this film helps to improve the surface quality of 3D models.
However, you may not know that in combination with a heating element sandwiched between two polyamide films, you can get a polyamide film heater. In addition, they are easy to install by adding glue to the back. They heat up very quickly. In addition, they can be of different shapes and sizes. So this is a great option to upgrade your 3D printer table.
Aluminum Coated 3D Printer Heater
If you are looking for an efficient and cost effective solution, this is the one for you.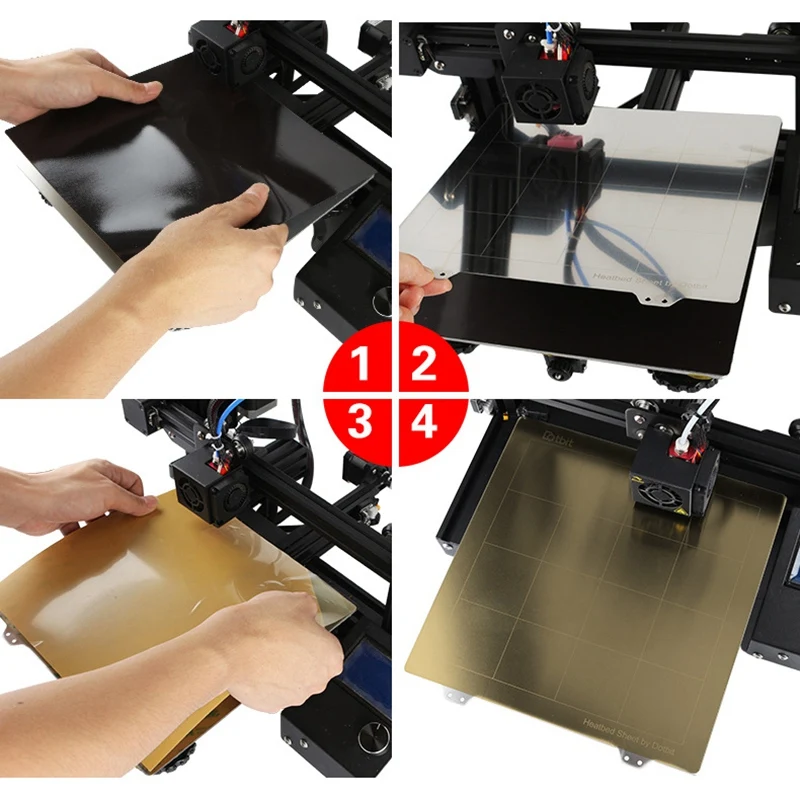 However, keep in mind that installing these heaters on your 3D printer may require some work.
After installing the heaters, it is necessary to close the electrical circuit using a thermistor and an insulator. Last but not least, the thermal paste must remain between the lined heater and the build surface.
Do you need a heated table for your 3D printer?
Since many 3D printers do not have a heated bed, the question is, do you need a heated bed?
You may have heard that working with PLA plastic does not require a heated table. Or perhaps you've only heard of ABS printing on a heated table. But what is the truth?
When 3D printing with ABS you will need a heated table. Why is that? ABS tends to compress more than other materials. Therefore, the likelihood of deformation increases when 3D printed using ABS. With the table heating turned on, the material will better set on the first layer, minimizing potential deformations at the edges of the 3D model.
What about PLA? Do we need a heated table or not? In the case of PLA, heating is not always needed. However, if you want to print large models, it is better to use a heated bed to eliminate the possibility of possible problems.
As mentioned above, you also need to know the optimum temperature for your material. Otherwise, there will be no point. For example, when working with ABS, it is recommended to heat the table to 110 ° C. On the other hand, when using PLA, it is worth stopping at 60 ° C. By the way, the temperature of the 3D printer table is set at the stage of processing the model in the 3D slicer.
3D Printer Heated Table Precautions
Heated tables maintain very high temperatures, so you should take the necessary precautions.
Heated tables can leave scars for life if they come into contact with the skin. They are very hot, so direct contact with their surface should be avoided.
If you have children, you must take the necessary precautions when working with 3D printers.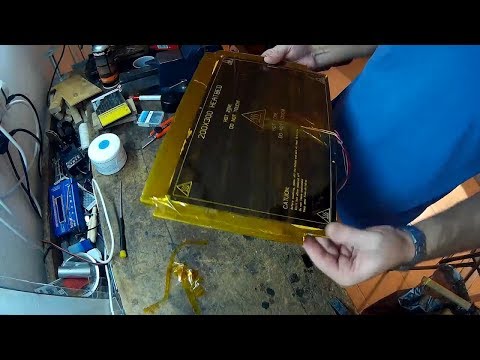
If the heated table is not properly installed, you may experience other problems. If the legs of the table are uneven or the table is not placed on a level surface, this can lead to defective 3D models.
Conclusions
Heated table is an almost essential attribute of a 3D printer, which will provide high-quality 3D printing using various types of materials. If possible, it is better to buy a ready-made heated table, and not develop it yourself, since many subtle nuances in the assembly will already be taken into account. Remember to take precautions when working with heating elements and good luck with your 3D printing.
How to choose a 3D printer, or why you need a heating table and a closed chamber / Sudo Null IT News0001
Different models of 3D printers differ in the maximum heating temperature of the printing table. In this article I will talk about the different categories of printers for this very important parameter. After all, the range of materials that the printer can print also depends on the heating of the table. I will also touch on the question of why a closed chamber is needed.
Printers without underbed heating
They are able to print only one type of plastic - PLA. This material is suitable for prototypes, souvenirs, and when heated to 60 ° C, it becomes soft and the product loses its shape. With great effort on such printers, you can try to print with other materials, but the result will not please you. Usually these are Prusa-type printers with a movable table, but there are also "cubes".
Problems occur due to shrinkage (reduction in size) of the plastic product after cooling. If the plastic shrinks (and this is almost all plastics, except for PLA), then the edges of the product begin to tear off the table on which the print is being made, the geometry of the product is irreparably damaged or it completely peels off from the table, risking damage to the print head, which continues to move.
The plus (or minus?) of such printers is that manufacturers save not only on the table heater, but on everything else. Therefore, these are cheap printers.
At the same time, in the description of such printers, the absence of table heating may not be indicated in any way (be careful!), but sometimes the possibility of printing with other plastics, except for PLA, is indicated, which misleads the buyer. And you will encounter printing problems after purchasing such a printer.
The best known non-heated printer is the Makerbot Replicator 2
Of the Chinese models - TEVO Michelangelo
Next, the story will go about more interesting printers with a heated table from 100 ° C to 170 ° C, which are designed for printing with plastics with shrinkage - from classic ABS to Polycarbonate. The higher the maximum temperature of the table, the more plastics you can print, because. heating of the table prevents damage to the part due to shrinkage during printing.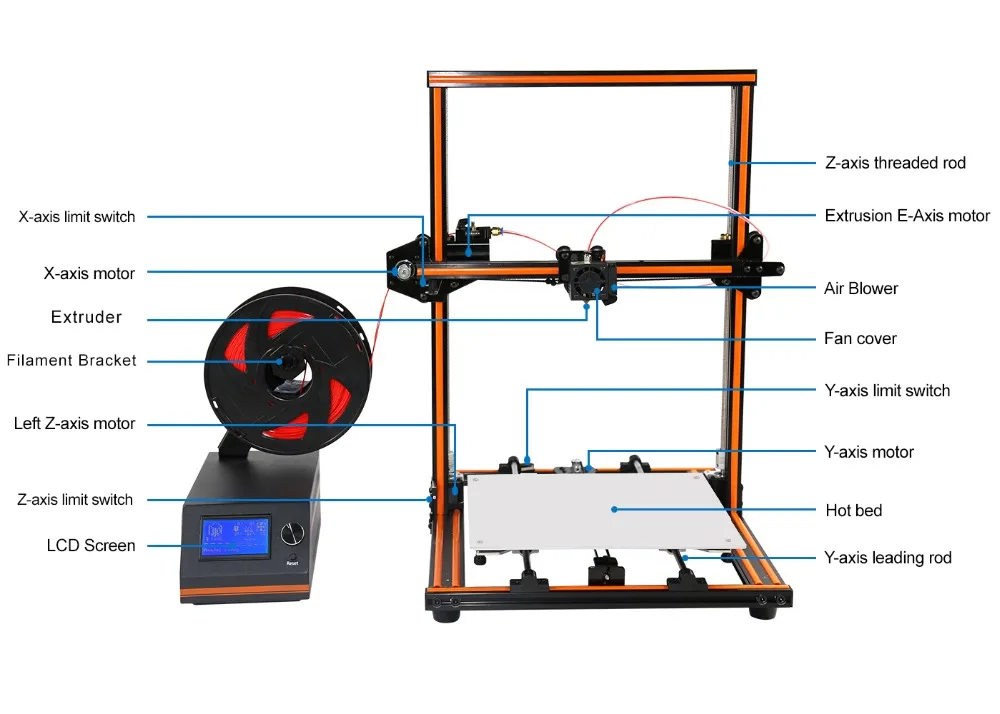 At the same time, the higher the melting temperature of the plastic, the stronger the table should be heated.
Printers with heated table up to 100°C
Suitable for printing with many plastics, except for technical ones. At the same time, printing large products with popular ABS plastic at such a low temperature will be problematic. In reality, ABS requires from 110°C to 130°C on the table, especially for cheap brands with high shrinkage, which are very widely represented on the market. Printing with more interesting technical plastics - nylon, polypropylene, polycarbonate, on such printers will not work at all.
Chinese printers include Anycubic, various Flashforge models.
Printers with heated table up to 120°C
Perfect for ABS printing. But, if you need to print large ABS products, then such a printer also needs a closed print chamber. It is needed to maintain a high air temperature around the printed product, which reduces shrinkage during printing along the entire height of the product.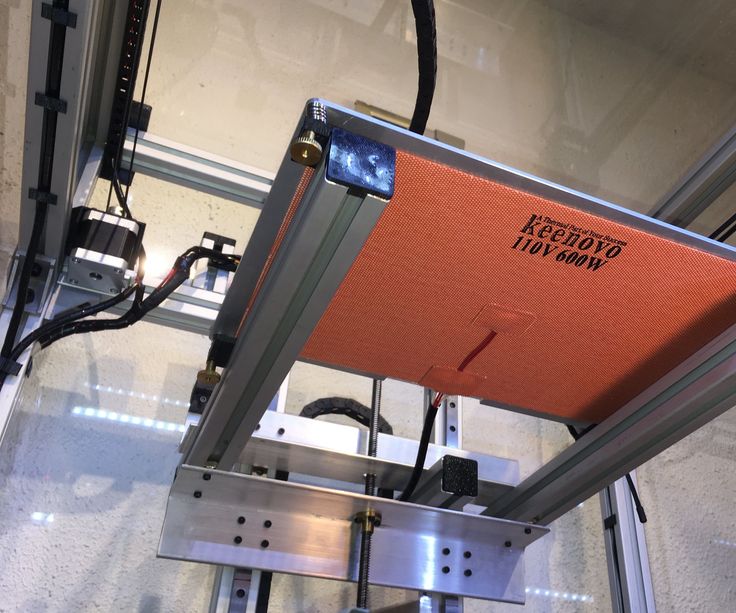 The higher the chamber temperature is kept, the better for printing!
And this is where things get interesting. Those manufacturers who have conventional models with an "open chamber" cover them with a plastic transparent "aquarium" on top, and sellers offer them under the guise of printers with a closed chamber! Of course, such a solution is cheap, but the larger the volume of the chamber, the more difficult it is to maintain a high temperature in it, and in this case the volume increases significantly. This means that in such printers, the temperature in the chamber will be lower than necessary for high-quality printing.
Even more interesting is the situation when the printer is closed on the sides, but completely open on top and does not have any cover at all. At the same time, sellers pass them off as printers with a closed camera (be careful!).
The question is, why not cover any printer from above completely, without increasing the volume with an "aquarium"? Yes, because all simple models are designed so that a bundle of wires rises vertically from the extruder (print head), as well as a tube through which a thread with plastic is fed (look carefully at the photos of the printer from all sides when choosing). All this sticks out from the top of the printer and does not allow it to close normally. This is especially true for printers with remote Bowden plastic feed, where the motor pushing the plastic thread is placed on the printer body.
It would seem, so what? Well, turn the wires to the side of the extruder so that they do not stick up and do not interfere ... However, for this you need to apply design solutions with a horizontal arrangement of wires and tubes suitable for the extruder, and design the printer initially taking into account the closed chamber.
Interestingly, even some expensive closed imported printers have a large height and an increased clearance inside the chamber between the extruder and the top cover, because. in them, the designers could not (did not want to) turn the plastic supply tube horizontally. So, in them the volume of the chamber is larger than necessary.
Most of both imported and domestic printers fall into this category.
Printers with heated bed from 130°C to 150°C
These printers are already quite well developed by designers. Most of these printers do have a well-heated closed chamber with side wires and extruder tubes. They can print both large products made of ABS plastic, and small products made of technical plastics - nylon, polypropylene, polycarbonate.
Of the domestic printers in this category, we note Picaso3D and PrintBox3D.
Printers with heated table up to 170°C
Here we come to closed printers with a very high table temperature. These printers have been engineered to take into account the trend in 3D printing to increase operating temperatures, which means the ability to print with increasingly durable, heat-resistant plastics. There are few such printers, they are expensive, with rare exceptions.
Why heat the table so much? The fact is that the higher the melting temperature of the plastic, the more the table and the surrounding air in the chamber must be heated, otherwise the product will peel off the table during printing and printing will be interrupted. So, for polycarbonate, the extruder print temperature can reach 310 ° C. If small details can be printed at a table temperature of 130°C, then medium ones are already from 150°C, and large ones can be kept on the table only at 170°C.
In addition, these printers have the potential to print other refractory plastics. For example, at an extruder temperature of 400°C, PEEK (polyether ether ketone) can be printed. This refractory and durable plastic is used in aviation and space technology.
In this high-temperature category, we note the Chinese Intamsys FUNMAT HT printer with an extruder temperature of up to 450°C, a bed temperature of up to 160°C.
Of the domestic ones, we cannot fail to mention the Faberant Cube
3D printer with extruder temperature up to 340°C, bed temperature up to 170°C.
Terminals
If you want to print with different plastics, and not just one PLA, then the 3D printer must have a heated bed.