Makerbot 3d printer software
A Quick Guide to 3D Printing Software
In 2021 there are a variety of 3D printing software options from CAD to slicer and beyond but which have evolved into modern and convenient cloud-based platforms?
3D printing software is one of the crucial elements of the entire 3D printing process that often gets overlooked in the buying process. Understanding which software options are available and how they interact will help you make the most of your 3D printer. First a bit of background. If you’re new to 3D printing, the basic workflow is as follows: (1) Design your print in CAD or 3D modeling software, (2) prep your file for printing using a slicer, (3) start your print either from your computer using a program OR by exporting it to a USB flash drive and loading it directly onto your 3D printer.
In this article, we’re going to cover three groups of softwares that contribute to 3D printing: The main two being CAD or 3D modeling software and slicers / printer management. The third group of other softwares includes a variety of tools that can enhance your capabilities.
Traditional 3D Printing Software - From CD-ROM to Download
Just as in every other industry, there was a time when 3D printing software was relegated to your computer. CAD modeling software from companies like Solidworks, Autodesk, Rhino, and Catia has traditionally been costly - think $10,000 per license, and cumbersome - requiring a highly capable computer. While some of these companies have adjusted to a more modern SaaS approach, others are slower to adapt.
On the slicer side of 3D printing software, programs have also remained strictly on computers. MakerBot Print (formerly MakerBot MakerWare) traces its roots back to the early days of the desktop 3D printing revolution. Over the years, many features such as native CAD import, print preview, and remote printing and monitoring made their way into MakerBot Print, but the program still lived only as a desktop application on the computer.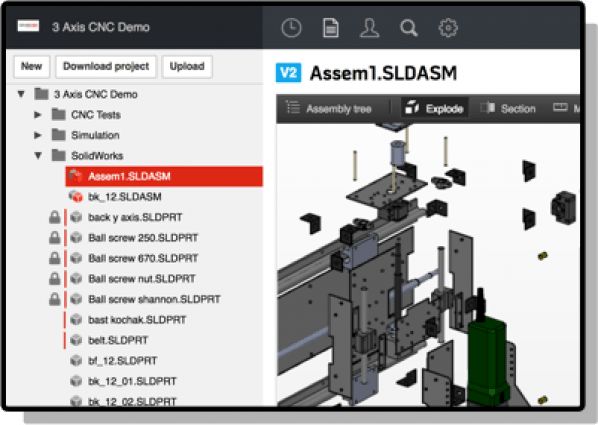 Several popular software products, such as CURA, Preform, and Simplify3D still remain primarily as desktop applications, which require users to manually download updates and may be limited by computer capabilities.
3D PRINTING SOFTWARE IN THE CLOUD
While it may upset some to know, the year 2000 was over 20 years ago. In 2021, most new software companies are focused on cloud-based software as a service products. Why is this? SaaS products allow users to stay up-to-date with the latest features, without requiring manual downloads. Much of the capabilities are moved to cloud servers, only requiring a fast internet connection. It is also easier to implement new features and integrations.
While the 3D printing software industry is slowly making its way into the cloud, here are some of the early innovators in each category.
CAD DESIGN
Besides the enterprise software solutions offered by some, many new CAD 3D printing software platforms have emerged to fill the gap of an affordable CAD solution.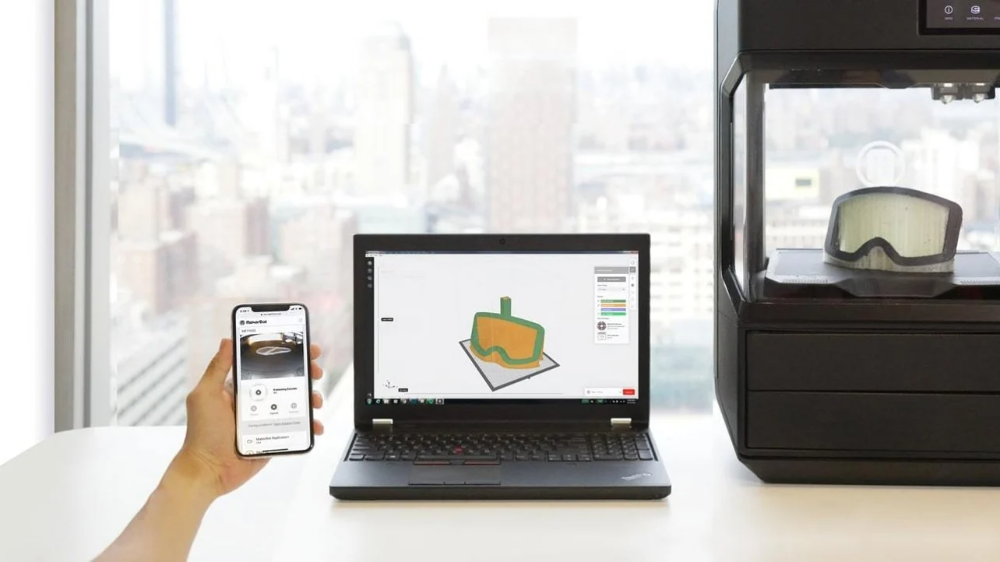 We will see some of the popular CAD design software in this category.
TINKERCAD
Tinkercad is one of the first of the new-age 3D printing software for designing simple models. Its target user is the student community who wants to learn and get started with 3D printing. It boasts of a simple browser-based UI that eliminates the need for downloading the software on a computer. This makes it super simple for teachers to get their students up and running, especially with the prevalence of computers in some schools. TinkerCAD uses shapes or primitives that users can combine, or subtract from each other, to make more complex projects.
Tinkercad was early to the scene of cloud-based 3D design programs and thanks to its cost (free), accessibility, and ease of use, it’s likely that the majority of kids who learn 3D modeling early in school today get their start using Tinkercad.
Tinkercad 3D printing software is a great place to start learning about CAD designing.
ONSHAPE
OnShape also started as a free CAD designing software but has quickly expanded into a multi-role 3D printing software platform that enables CAD designing, PDM, PLM, collaboration, analytics, and reporting. OnShape makes use of cloud computing to run the software on a web browser, thus automating its regular upgrading/maintenance.
This 3D printing software focuses on product designing and is used by designers from many industries like 3D printing, industrial equipment manufacturing, medical devices, mechanical machinery, and consumer electronics. It is feature-rich and built upon similar frameworks of more traditional softwares, but with the added benefits of cloud computing and real-time collaboration features.
MakerBot 3D Print Software | MakerBot Australia
Search for:
Prepare, manage, monitor, and share your 3D prints. MakerBot’s 3D print software and apps will streamline and optimise the 3D printing process for any workflow or environment.
-
MakerBot Print
-
MakerBot Cloudprint
-
MakerBot Mobile
MakerBot Print
MakerBot Print offers the easiest way for you to prepare, preview, manage and monitor your 3D print files. With MakerBot Print you can import design files and enhance your settings for optimum 3D printing results. MakerBot Print also includes native CAD file support so you can streamline your print preparation. Plus, you can control and monitor your 3D printers with live camera feeds and on demand print status updates.
DOWNLOAD MAKERBOT PRINT
MakerBot Connect
This streamlined mobile app keeps users connected to their 3D printers at all times. MakerBot Connect makes your 3D printing workflow both easy and convenient.
Download for IOS
Download for Android
MakerBot Cloudprint™
MakerBot Cloudprint™ allows you to print and monitor your projects from your browser right to your MakerBot 3D Printer. Add the Print from CAD integration for your favourite CAD program and start a print in just two clicks.
With MakerBot Cloudprint, you can prepare and launch 3D prints from anywhere. Open a native CAD file in MakerBot Cloud, adjust your print settings, and start a print on your connected MakerBot 3D printer with no downloads or updates required.
Discover MakerBot Cloudprint
MakerBot Labs
MakerBot Labs is an experimental platform built for developers and engineers. MakerBot Labs allows you to create, build and customise 3D printing designs.
Find Out More
Thingiverse
MakerBot Thingiverse is the world’s largest 3D printing community with over 1.7 million 3D printable models. Browse all of the designs, remix them using Thingiverse apps, or share your work with the world!
Discover Thingiverse
Thingiverse Education
Thingiverse Education provides hundreds of free 3D printing lessons that make teaching with a 3D printer easier and more effective for a variety of grade levels and subjects. It also provides a community where educators can exchange best practices or remix projects.
Find Out More
Thingiverse Mobile
Thingiverse Mobile lets you browse Thingiverse for millions of free 3D printable files from your mobile device. Check out the latest and greatest 3D printing designs or scroll through trending product categories to see what other people are 3D printing.
Download for IOS
Download for Android
Contact Us
Enquiry 1300 118 308
Service 1300 448 384
[email protected]
Success!
Subscribe
HEAD OFFICE: 40 Koornang Rd, Scoresby
Victoria Australia 3179
3D Printers Australia : Melbourne, Adelaide, Brisbane, and Sydney
Designed by Kiodo Design & Marketing
Designed by Kiodo Design & Marketing
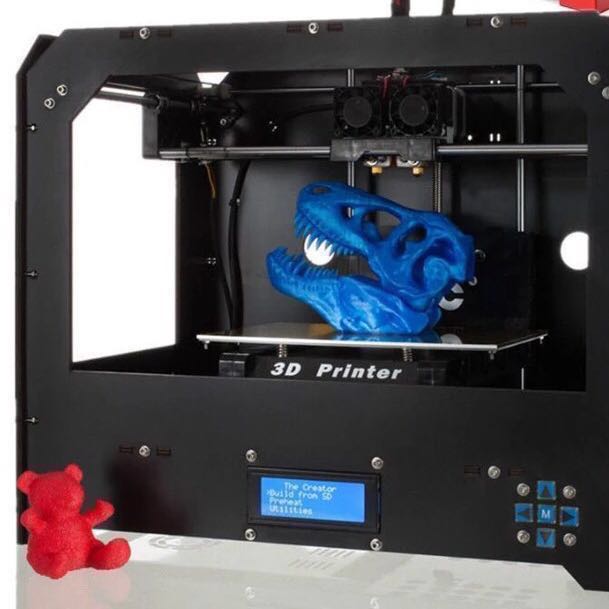
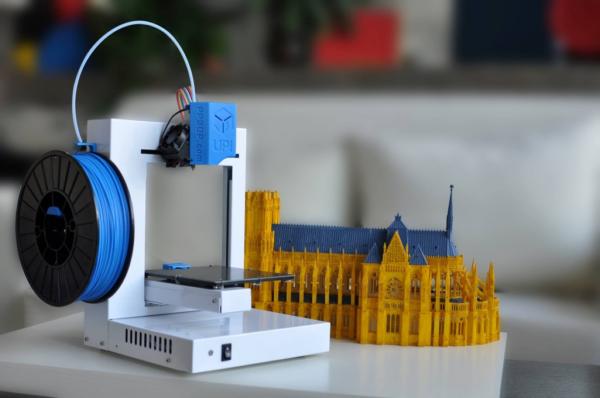
MakerBot Replicator 3D Printerfrom MakerBot Industries, LLC The Makerbot Replicator is one of the most popular desktop 3D printers and has spawned many imitations around the world.
 Since its inception, the design of the printer has been constantly improved: the fifth generation of the popular device is currently being released. The printer is designed to print with polylactide (PLA) using a single extruder. The maximum size of manufactured models reaches 252x199x150mm with a minimum applied layer thickness of 100µm. The printer is equipped with a control module with LCD screen, USB port, wireless connection (Wi-Fi) and Ethernet interface.
 About the MakerBot Replicator
MakerBot welcomed 2014 with a new range officially classified as "5th Generation". This includes the new compact MakerBot Mini printer, its exact opposite of the MakerBot Z18 (the name directly refers to the height of the working area of 18 inches, i.e. 455mm) for printing large objects and, of course, the updated flagship and golden mean - MakerBot Replicator.
Here it is, handsome
Don't be confused by the name of the model - the new Replicator is the development of the Replicator 2 printer. The company deliberately did not call it Replicator 3, but instead introduced the concept of generations. Thus, the Replicator 2 belongs to the fourth generation, and the new printer - to the fifth.
This option has a lot of interesting and quite rational ideas, although the result can hardly be called ideal. So:
Design
The appearance of the printer gives the impression of a high-tech gadget, which is what the Replicator is. While maintaining the black, matte severity of the Replicator 2, the new device was “licked” - the panels disappeared, the supporting steel frame was hidden in a smoothed plastic lining. The first optimization is visible to the naked eye: the control module has moved from its usual place in the lower right corner to the top, which makes its use much more convenient. Despite rumors about the touch screen, the display remained just liquid crystal, but color. But the large rotary knob is very convenient, reminiscent of the smoothness of the volume controls on expensive stereos.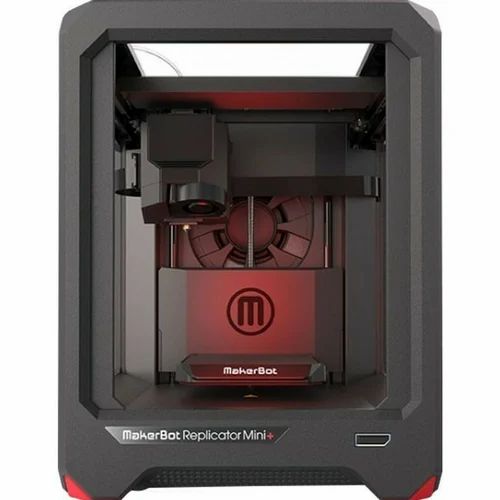
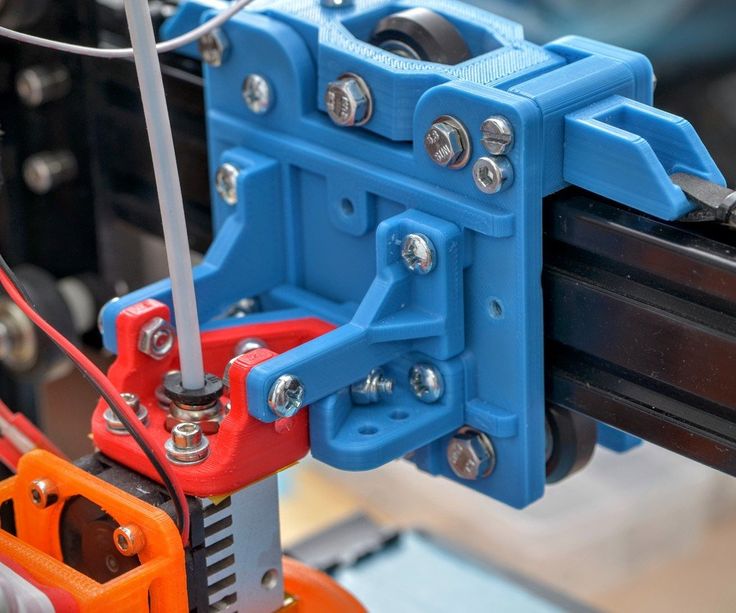
Smart extruder mounted on magnets
The new version of the extruder has become "smart": built-in electronic components allow the printer to detect when the consumable is running out and warn the user about it. This moment alone deserves huge praise for the designers. No printing "over the air" and decommissioned semi-finished models - received a warning, changed the coil, continued printing. Amazing.
The “jumping nozzle” is also interesting: when changing the horizontal position without printing (for example, when layering individual fragments on the same level), the platform movement is no longer required to distance the layer from the nozzle and prevent smearing of freshly applied plastic. Instead of a platform, the nozzle itself comes into motion. The extrusion stops, the nozzle rises, separating from the applied plastic, the print head moves to a new position, the nozzle lowers and printing continues. This approach theoretically allows for higher Z-axis accuracy and higher print speeds. As for the mechanism of movement of the nozzle, it is extremely simple: the feed mechanism simply turns on the “reverse speed”, and the plastic thread pulls the nozzle up with it.
The third interesting element was the Hall sensor built into the print head. The platform calibration procedure has become much easier. Now tilt adjustment is carried out using two large, comfortable handles. The sensor in the head tells you when one or another edge of the platform reaches the optimal position. The light came on - it means that the slope is eliminated. The same for the perpendicular axis, and the calibration is complete. But why not put two servomotors instead of handles and make the process fully automatic?
The downside of the new extruder is its relative complexity. In fact, it is not designed to be repaired on its own. If the nozzle becomes clogged, then the entire extruder will most likely have to be replaced with a new one or the old one should be sent to a service center, which is a problem in Russia.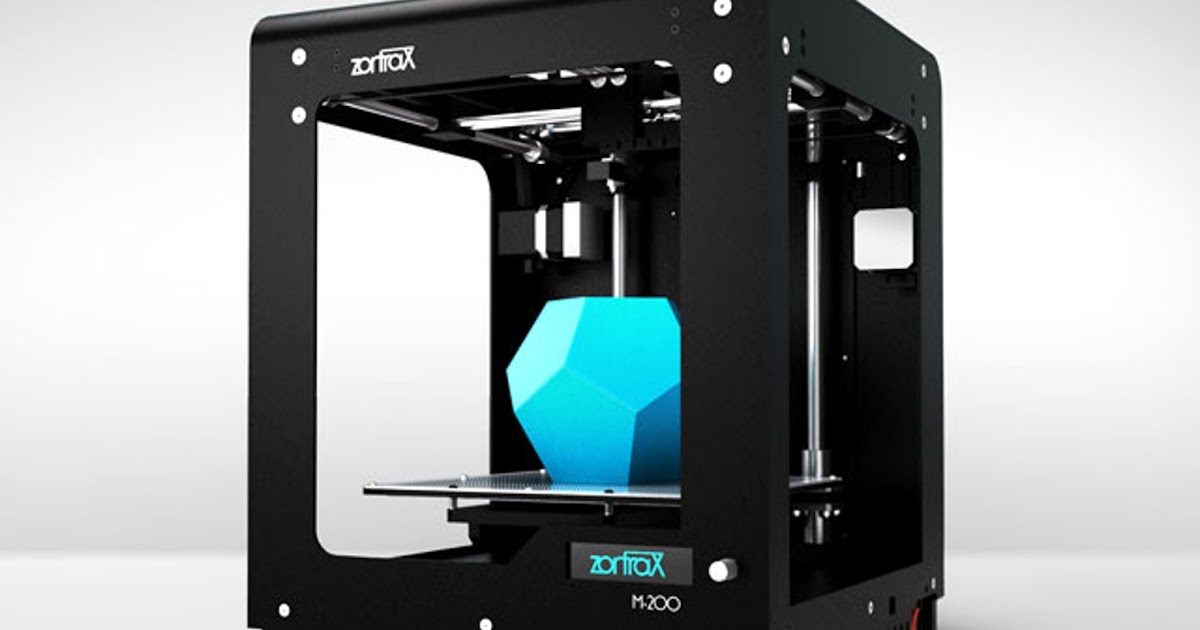 The good news is that detaching the assembly is exceptionally simple: the extruder is held in place with fairly powerful magnets. You just need to apply enough force, and the whole assembly separates. I stuck a new extruder in its place, threaded the thread, continued working.
Glass platform covered with blue masking tape. An illuminated light near the nozzle indicates that the stage is properly calibrated. MakerBot deliberately sticks to the flagship concept of printing with one filament and one extruder. On the one hand, this allows you to slightly increase the size of the working area while maintaining the dimensions of the printer - after all, the more extruders, the larger the printed assembly. On the other hand, polylactide is one of the easiest materials to print, does not suffer from high shrinkage and does not emit harmful fumes due to its organic origin. Since PLA plastic is almost not subject to deformation during curing, the Replicator is not equipped with a heated platform.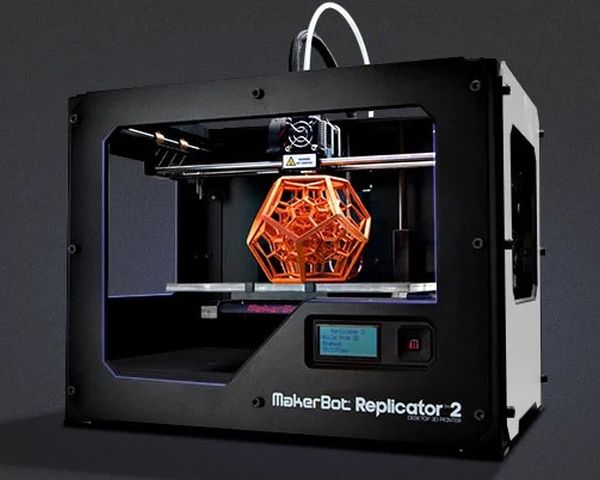 On the other hand, fans of "replicators" often misuse these printers, printing with ABS plastic, polystyrene, nylon and other alternative materials. Many of them require platform heating. Fortunately, purchasing such an upgrade from a third-party manufacturer is quite simple. The previous model used an acrylic worktop, but on the new version, the designers decided to use glass. In principle, both options are excellent for printing with polylactide.
Built-in camera allows you to transfer images of the printing process to remote computers and mobile devices
Finally, for the first time, the "replicator" was equipped with a camera. The idea is to be able to control the printing process remotely. What if there's a crash? To receive images and control using a mobile device, you will have to connect the printer to the network, for which an Ethernet interface was provided. The USB port remained in place and became multifunctional, as the developers abandoned the use of memory cards in favor of flash drives. By the way, branded flash drives, as in the case of CubeX, are not required. Any drive with standard formatting will do. True, the drive is not supplied in the kit. Remote control is carried out using the MakerBot Mobile mobile application or the standard MakerBot Desktop software, and within the office, you can also use a Wi-Fi connection.
Plastic filament spools have been resized. All fifth generation MakerBot printers use thinner, larger diameter spools. This was done so that the coils fit more ergonomically into the dimensions of the devices themselves, because they are stored inside. You don't have to turn the entire printer around to change the spool: the spool slides into a drawer at the back of the printer with the mount facing forward. After installing the spool, the section drops down and the printer looks neat.
Spools of filament are inserted into the drawer
Of course, no one else, except MakerBot, produces such spools. But! The company does not break the hands of users by forcing them to use branded cartridges, as 3D Systems did. Those who wish can use standard coils, they just have to be installed outside the printer. And the drawer section, with the guide tube attached, has a latch that holds it in the raised position. It will not look particularly attractive, but the functionality is provided. Branded thread is sold at a price of about $40 per kilogram, which is about 20% more expensive than consumer goods. But the quality is guaranteed - no dust or oval profile. Unfortunately, a rather complicated filament feed path, coupled with a narrow nozzle, creates an additional load on the pulling mechanism of the extruder. Although the designers have spring-loaded the roller, there are times when the printer simply cannot grab onto the filament. As a rule, such problems do not appear immediately.
Despite all the tricks, such as optimizing algorithms, using an ARM9 processor and a jumping nozzle, the new printer is noticeably slower than the Replicator 2. In one of the comparative tests, the task was to print a Lego brick. The Replicator 2 completed the task in 18 minutes, while the 5th generation "replicator" took 25! Even the inclusion process is quite long - the download takes about three minutes.
Not practical, but glamorous!
And yet, if everything works as expected, the Replicator is pleased with the good quality of the models. The printer allows you to print with a resolution of 100 microns vertically, although the thickness of the applied layer can be increased to speed up the process. Back at the office, the MakerBot team prints mostly in 200-micron layers, which is enough for most tasks, according to CEO Bree Pettis. Positioning accuracy has remained at the level of the fourth generation printers, which is good in itself: 11 microns in the X and Y axes, 2.5 microns in the Z axis.
And yes, the new Replicator informs you about the progress of the print and estimates the remaining time. This feature has been enabled due to persistent user requests. As Pettis explained, there was simply no room for it on the old hardware.
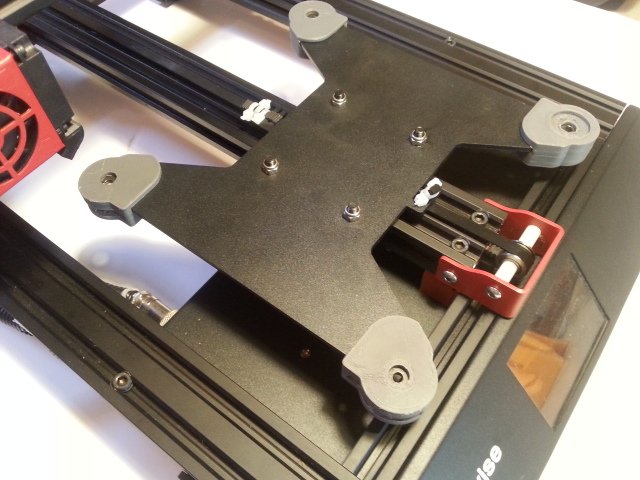
The platform has undergone significant changes. The dimensions have changed: the area of the table has slightly increased and become “square”: 252x199mm versus 285x153mm for the Replicator 2. The material of the table has been replaced with more and more popular glass, and the table itself is now attached to the platform using skids instead of clips. So it's safer and more convenient. For better adhesion of plastic to the table, a time-tested solution is used - masking tape.
Software
MakerBot Desktop software. The status bar at the bottom indicates that the model being printed is 98 percent complete.
The software used is the MakerBot Desktop software package. This includes MakerWare, which made its debut on the Replicator 2 and is responsible for model processing, slicing, and other functions and settings related directly to printing. In addition, networking features have been added, including access to the Thingiverse website, which features many digital models, including free ones, uploading your own digital designs for the benefit of the community, the ability to order additional consumables, and more and more. With it, you can also receive pictures from the built-in camera or remotely control the printer. To use the software, you will have to open an account on Thingiverse, but it is not at all difficult and completely free.
The MakerBot Digitizer Desktop 3D Scanner and MakerBot Replicator Printer is a Chinese engineer's dream. Copy, copy!
It's worth noting that MakerBot is seriously aiming to create a 3D "ecosystem" tested by 3D Systems. This means the integration of hardware, software and networking into a single whole. If in the case of 3D Systems the ecosystem consists of Cube 3D printers, Sense 3D scanner and Cubify online service, then in the case of MakerBot we have Replicator, Digitizer and Thingiverse, respectively. Adding to the intrigue is the fact that MakerBot is actually an independent division of 3D Systems' main competitor, Stratasys.
Summary
The new "replicator" has become friendlier due to an optimized design and user-friendly software. It's still a favorite of seasoned 3D enthusiasts, but the new version is easy enough to use for inexperienced users. A lot of convenient innovations and improvements are pleasantly surprising. Unfortunately, the first batches of delivered printers clearly showed the dampness of the design: there were problems with the extruder, bugs in the firmware, and a surprisingly slow print speed, which, on the contrary, should have increased. If the designers bring this wonderful machine to mind, then it will have every right to the title of "best among equals." The cost of the device is high, although this printer is primarily intended for serious users and design companies, for which the manufacturer's selling price of almost three thousand dollars will not be prohibitive.
Benefits
- Stylish, ergonomic design
- Convenient control module and software
- High print quality
- MakerBot 3D Ecosystem Integration
Shortcomings
- Fairly large number of shortcomings
- Slow print speed
- High price
Makerbot 3D Printer Overview
No other name in the world is more associated with 3D printing than Makerbot Industries.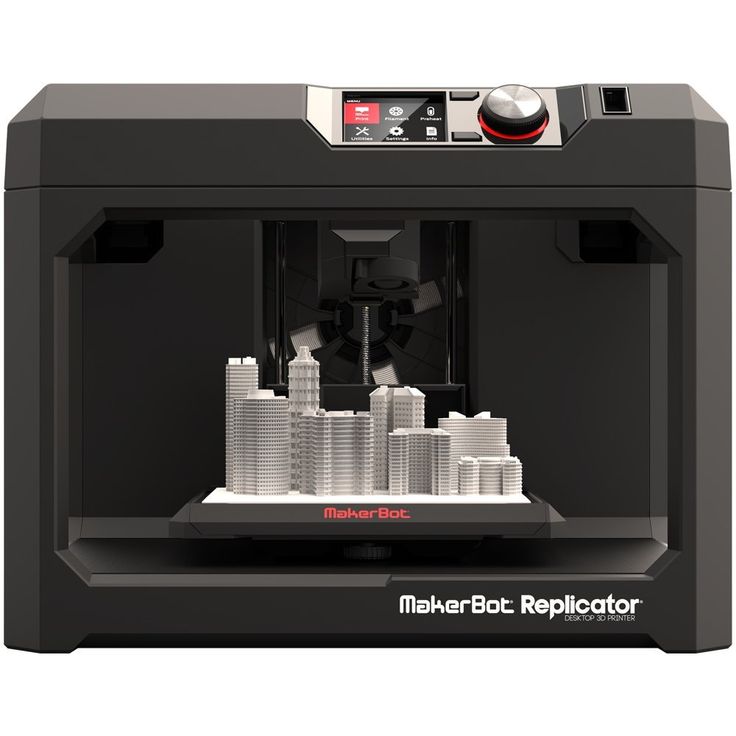 Makerbot has taken the 3D community by storm with its 3D printers and Thingiverse. The company was formed in Brooklyn, New York and began first sales in April 2009. June 19, 2013 Stratasys Inc. acquired Makerbot Industries for $403 million.
Fast forward to the present. Makerbot has unveiled an impressive lineup of home and semi-professional 3D printers. Consumers approach buying a 3D printer based on their needs and desires, as well as the available space where they want to install their 3D printer. We will try to briefly talk about the capabilities of Makerbot 3d printers, and we hope that we will take the reader one step closer to buying a 3d printer and joining the 3d community.
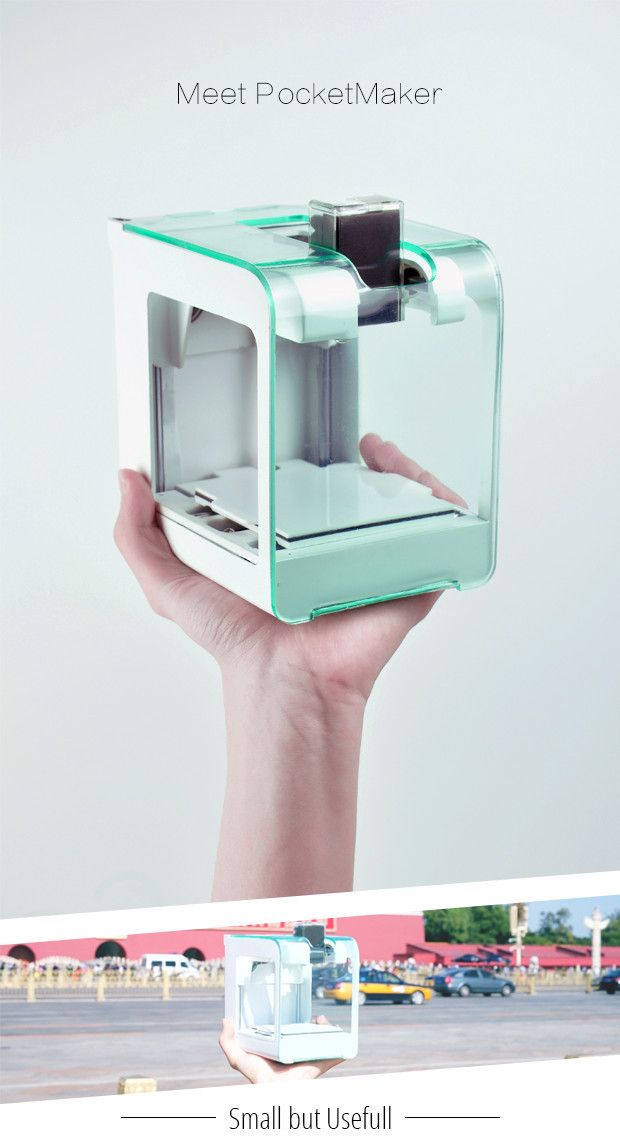
Makerbot Replicator Mini
This is a small entry level 3d printer that is ideal for beginners. It has an easy-to-use interface that is not overloaded with features and settings compared to more complex 3D printers, which, while allowing the user to deeply influence the printing process, can be difficult for inexperienced users.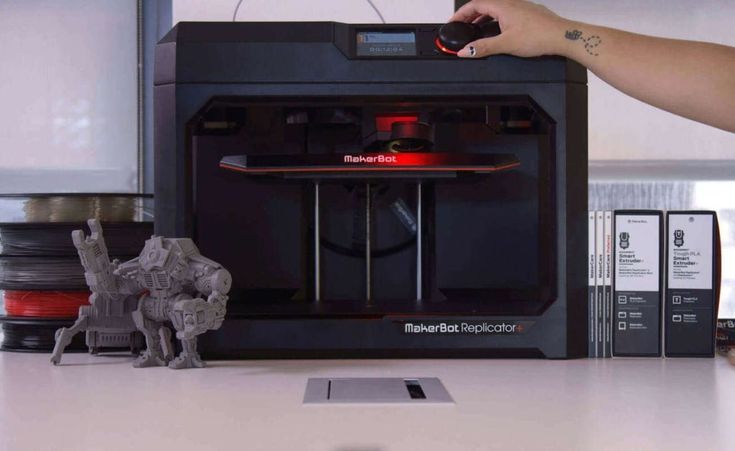
The Replicator Mini can be operated over wifi using the makerbot app, or using the included USB cable. You can load the model into the 3d printer while at home, or even if you are away from home. Thanks to the camera built into the 3D printer, you can control the printing process remotely via a computer or smartphone. You can stop or cancel 3d printing as needed, or share photos of your 3d printing on social media. You can also give access to watching online video of the 3d printing process to anyone who wants. Since this is an entry-level 3D printer, it does not require platform leveling, and thus saves users time and, most importantly, nerves. The second great feature of the mini is the closed chamber and transparent plexiglass door on the front side, they keep the child from touching the hot extruder, making it suitable for schools and child care facilities.
Makerbot Replicator Mini comes with an exclusive Makerbot Smart Extruder which is very easy to connect and install thanks to its gold plated contacts and magnetic holder. This makes it easy and effortless to change the extruder or carry out its maintenance or cleaning. Masks, decorations, toys for children are just a few examples of what you can print if you buy a Replicator Mini 3D printer for your home.
This compact and lightweight 3D printer is easy to carry and take on the go. Just put it back in the box and put it in your car while driving. 3D Printer Replicator Mini is a mobile factory that can produce 3D products for you even when you are away from home.
 Unlike the Mini Replicator, the 5th Generation Replicator allows you to print with a smart extruder with a resolution of up to 100 microns. In this way, high quality and smoothness of the 3d print is achieved, and gives users the flexibility to change the look of the 3d model, such as printing thinner support for easier removal. Printing a 3d model has never been so easy, because the prototyping process has become as easy and efficient as possible.
You can connect to the 3d printer and download the model via wi-fi, USB, Ethernet or USB flash drives. The 5th generation replicator is a powerful tool that is suitable for small or home production. It allows you to conveniently and cost-effectively create a working prototype of a device or part. Also, this printer is a great example of an average 3d printer that will fit well into the high school curriculum.
3d modeling and 3d printing is gaining immense popularity due to its versatility and is increasingly being used in various industries such as automotive, medical and robotics, etc.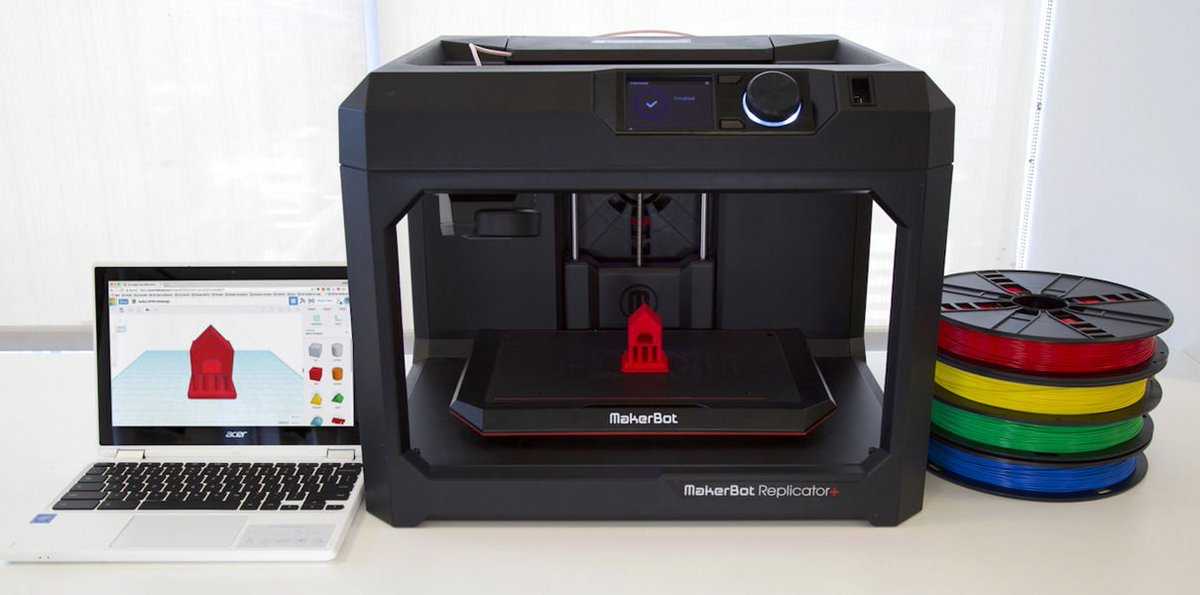 9
9