Weistek 3d printer review
Review of the RS IdeaWerk 3D Printer, an easy to use all round performer
star_borderFollow article
AJS72
0star_border 0question_answer 0thumb_up
Your next article
Dave from DesignSpark
How do you feel about this article? Help us to provide better content for you.
Dave from DesignSpark
Thank you! Your feedback has been received.
Dave from DesignSpark
There was a problem submitting your feedback, please try again later.
Dave from DesignSpark
What do you think of this article?
Unpacking
Many 3D printers require significant time spent assembling and calibrating them, and in some instances a degree in engineering, not this one. The RS IdeaWerk is a very straightforward out-of-the box experience. Simply lift the accessories out of the top, and then lift out the printer in its protective foam.
It's a good idea to keep all of the packaging in case you need to move the printer at a later date.
Initial setup
There is very little that needs to be done in the set-up of the printer as well. An SD card contains the printing software, manuals and quick start guide. There is also an Allen key which you need to attach the filament guide and reel holder. Then you can clip the parts for the print bed into place. All very simple and in a matter of minutes that is the printer assembled.
As with all 3D printers the machine needs to be calibrated before you can start printing for the first time. For this you need the print software on the SD card. One nice aspect of this printer is that a card reader is supplied with the printer making transferring data so much easier. Simply plug your printer into the power and, via USB, to your PC and let it all find itself.
Next you need to fire up the Doroware software and connect the printer. This is done by selecting the COM port and hitting connect. In some cases (as in mine) there are several options popping up. You can either try trial and error to select the right one or go to the device manger list and check what COM port is connected to what. You will soon know once you have connected as you can then start to control the printer from the PC.
Once connected, follow the instructions on setting up the Z gap. This is important, as it will directly impact the quality of the print. You need to check that the print bed moves parallel to the nozzle and this is done by moving the nozzle to each corner of the bed in turn and checking the gap distance. The instructions to do this are clear and easy to follow.
Finally you need to thread the filament through the eye on the bracket, then through the tube and into the print head. Follow the instructions on heating the print nozzle up and using the motors to feed the filament. Once you have seen it feed through freely you are ready to go.
All in all a very easy set-up which makes this printer great even for less technical users and certainly good for anyone who doesn’t want to spend lots of time assembling their machine.
The first print
Now you're ready to print!
You'll need a 3D model, either in STL, X3G or CODE file format, simply upload this to the Doroware software where you can scale or rotate the model should you wish to and then finally transfer the file to the SD Card. Finally, simply insert the SD card into the SD slot on the printer and follow the on-screen instructions.
Some words of advice:
- When you transfer your model to the SD card – chose something short and simple. The screen on the printer is limited in characters and often a long file name won’t be fully visible.
- The software is not the fastest. Wait until the dialogue box appears telling you the file is ready and that it is safe to remove the card. There aren’t any progress bars and the temptation is to think it has finished and do something too quickly. This will corrupt the print.
Maintenance
Not only was this machine easy to set-up and use, it doesn’t really need much maintenance.
Some hints and tips
- If the models start to lift off the bed, or start printing too close to the print bed just repeat the process for setting the Z gap (as per the initial set-up) and this will be corrected.
- Sometimes plastic can build up on the nozzle. This is easily removed. Use the software via USB to heat the nozzle up and then use of a cotton cloth to carefully wipe the residue away.
- The print is retained on the print bed on a perforated sheet. Over time this gets a bit messy with the perforations filling with plastic. You can drill, or poke, them out but I found careful use of a heat gun removed them far more easily and quickly.
- The software is needed if you want to replace the filament reel so don’t lose that USB cable.
- If you are not using the printer for extended periods it is worth removing the filament and storing it in a sealed container or bag. PLA filament is biodegradable and is affected by heat and moisture. As such it can become brittle and will deteriorate over time.
Conclusion
Overall this is a relatively inexpensive 3D printer and in some ways its functionality reflects this. You can only print with PLA filament and in a single material. Connectivity is via USB or SD card unlike other more expensive models which accept Bluetooth or Wi-Fi. The print volume is a fair size, although not large.
With that all said, the machine is incredibly robust, it is easy to set up and operate and is very forgiving if you are starting out with 3D printing. As such I think this machine is ideal for low volume, quick printing. In my printing tests it is as fast if not faster than similar machines from other manufacturers. Another good feature is that the printer is not locked to one specific software package unlike some other machines.
For beginners, in a workshop, office or educational environment, this is an excellent 3D printer to get started with.
Buy an RS IdeaWerk 3D Printer
Want to continue reading articles from DesignSpark?
Become a member to get unlimited access to all DesignSpark content for free!
Sign up to be a member
Already a DesignSpark member? Login
Share this post
thumb_upLike star_borderFollow article
I started out as an analytical chemist getting to work with various advanced automated analysis systems. This rekindled my love of engineering (who would not after working with robots and liquid nitrogen) and so set me on the path back in to engineering. After many years in industry where I was lucky enough to try my hand at most aspects of design, construction and testing I would up where I am today.
Recommended Articles
Your next article
Snapmaker J1 3D Printer Review: Double the Print Heads, Double the Fun
Standard 3D Printers are capable of making complex models from almost nothing. Did you know there are 3D printers that can print two models at the same time? It's impressive.
3D Printers are getting faster, better-looking and more feature-packed. Printers like the AnkerMake M5 and the BambuLab X1 Carbon appeared out of nowhere, for example, with ludicrously fast print times and a well-engineered aesthetic. The Snapmaker J1 is fast and attractive -- it's a printer you would actually want to put on your desk -- but it also uses a few different tricks to maximize output.
8.2
$1,200 at Matterhackers
You're receiving price alerts for Snapmaker J1
Like
- Simple to setup
- Well-engineered
- Fast and accurate
Don't Like
- Slicer software is poor
- Expensive
The J1 is an IDEX, or Independent Dual EXtrusion, machine. It allows you to print using two separate print heads in one 3D printer. This allows you to print one model in two different colors, one model in two different materials -- dissolvable supports are amazing -- or even two mirrored models at the same time in different colors. IDEX printers have been around for a while, but they're often difficult to set up and hard to maintain. The J1 has made the setup a breeze: The process is mostly automated and its large LCD guides you through each step of the process.
Like all Snapmaker models, the J1 is well made. It's mostly prebuilt, though you will need to add the doors. While the entire machine is enclosed, allowing for high-temperature filaments like ABS, the top is removable, allowing it to work with filaments that need a cooler environment like PLA. I would like to see the lid on a hinge, or a place to put the lid when it's not in use, but having it removable at all is a helpful addition.
James Bricknell / CNETSnapmaker is known for its combo machines that combine 3D printing with laser etching and CNC milling. The J1 is its first dedicated 3D printer, so a lot of the concessions the company made in previous multipurpose machines don't exist here. This makes for a better-quality product and lets it focus on improving print quality and print speed.
The print quality is as good as you would expect for a $1,300 printer, but it's not mind-blowing. Several of the best 3D printers would do a better job out of the box, but with a little work and better software, the J1 could likely produce amazing results. I would have liked to see the J1 at around $1,000, but it certainly looks like a premium product.
James Bricknell / CNETWhere the J1 has a leg up on a lot of other printers is that extra tool head and the speed at which both can be used together. Snapmaker claims a speed of 300mm per second, which sounds impressive but is somewhat misleading. At that speed it should be printing models six times faster than the previous generation of printers, which average about 50mm per second. In practice, however, the J1 prints about three times faster than most with similar settings. That's still quick, don't get me wrong, but it isn't quite what's advertised. There is a way to make this 3D printer even faster, however, by using the IDEX system.
My favorite thing about having two nozzles is not the ability to print different colors, but the ability to print the same model twice. Because the tool heads move independently from each other, they can print two of the same model using the duplicate mode, or the same model but flipped using the mirror mode. I printed a Flexi Factory flexible hand using mirror mode, which gave me left and right hands at the same time it would take to print one.
James Bricknell / CNETAn even better example is the CNET test print. On the Anycubic Kobra Plus, the test print takes about 6 hours. On the Snapmaker J1, it takes 2 hours and 40 minutes. That's significantly faster already, but with IDEX in duplicate mode, I printed two test prints in an astonishing 2 hours, 40 minutes. If I was printing the test print to sell, I could print 10 in about 2.5 days on a regular machine, or 10 in just 1 day on the J1. That's a massive deal.
3D printing as a hobby is great, but there is a large market out there for the sale of good quality 3D models. The more of these models a printer can make, the faster a business can grow. The Snapmaker J1 would make a good manufacturing tool simply because of its speed.
James Bricknell / CNETIf I could change one thing about the Snapmaker J1, it would be the software. Snapmaker has used Luban as its slicer for a long time, and while it's OK for the 3-in-1 Snapmaker and Snapmaker 2, the J1 needs a dedicated 3D slicer that Luban just can't deliver. There are a lot of small issues that make Luban lackluster but it is the lack of advanced controls that make it feel unfinished. For example, while I can choose which model uses which nozzle, I can't select parts of the model to color. In slicers like Prusa Slicer, I can manually paint a different color to a model and assign one of the nozzles to print it. This is how you can customize your models. Unfortunately, Luban doesn't offer that, so you can only have separate models in different colors, not parts of the same model.
Thankfully, the software team is aware of this and is actively trying to create profiles for the J1 so you can use it with better 3D printer slicers for more control.
Read more: The best 3D Printer Slicers
While this isn't Snapmaker's first 3D printer, it is the company's first dedicated one and there's a lot to like here. The easy setup and calibration, smooth industrial look and print quality all make it a product I would recommend. It could be a little more affordable -- $1,300 is a premium price -- but the J1 could easily pay for itself if you used it in a business setting.
fast resin for budget 3D printing / 3D printers, machines and accessories / iXBT Live
iXBT. com projects require cookies and analytics services. By continuing to visit project sites, you agree to our Cookie Policy
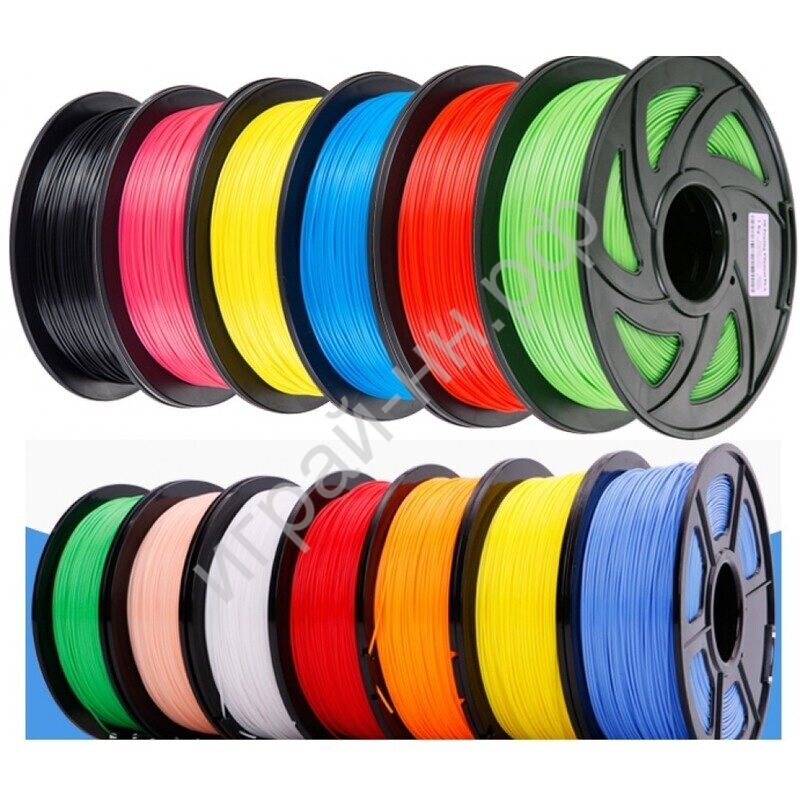
Hello everyone interested in SLA photopolymer printing! I present a short review of a budget fast photopolymer for home 3D printing - WEISTEK UV resin, which has an optimal price-quality ratio and stands out among other similar consumables with its low price.
WEISTEK UV Resin 0.5L
WEISTEK UV Photopolymer Resin 1L
WEISTEK 3D SLA Printer Resin is a good option with low cost and decent print results. The choice of photopolymer color: white, beige, black, blue, gray, transparent. Delivery from a warehouse in the Russian Federation. Other consumables and accessories for photopolymer (SLA) printing can be found in a separate article.
I want to draw attention to the beige, which looks like a flesh-colored photopolymer - a very interesting option for printing figures. It also makes sense to take a transparent photopolymer - with this you can do a lot of things, ranging from large-scale copies of glass products (for example, for modellers: headlights, windshields of cars, and so on), ending with technical details (lenses, diffusers, etc. ). ).
). ).
Do not ignore simple budget models of photopolymer 3D printers, which are suitable for beginners, for example, for a student or schoolchild. One of these is the Longer Orange 30 photopolymer 3D printer. As for other available models of photopolymer 3D SLA printers for work, study and modeling, you can also see recommendations for choosing.
Features:
Brand: WEISTEK
Type: UV Resin
Wavelength:
Packing: 0.5L
Flexural modulus: 1.882-2.385 MPa
Flexural strength: 40-70 MPa
Thermal distortion temperature: 80℃
Thermal expansion coefficient: 95 10 - 6 /° volume: 3.72-4.24%
Linear shrinkage: 1.05-1.35%
Tensile strength: 30-52 MPa
Tensile modulus: 1.779-2.385 MPa
Elongation: 120%
Ground hardness: 65-75D
Temperature transition glass: 100 ℃
Density: 1.05-1.25g/cm3
Impact force: 44-49 j/m
Absorption range: 385nm-410nm
Supplied in protective packaging - cardboard box, inflated plastic bag, dark container.
For testing, I chose a medium capacity (0.5 liters). This is a small bottle, with a tight cap, and made of opaque material. I remind you that an open photopolymer should not be left in the light, you must either close the lid, or pour it into an opaque container, or use it in a closed SLA printer (the printer usually has a cap made of UV protective material).
The color is marked on the lid in the form of a round sticker. You can always quickly identify, especially convenient if you have several identical bottles of different colors.
All the main characteristics and basic parameters are indicated on the bottle.
Includes instructions with all necessary information.
As for operation, everything is fine. We prepare the SLA 3D printer (we calibrate, set the optimal settings for printing in the slicer - it depends on the printer), pour our resin bath. It is not worth pouring a full bath, it is better to check more often.
Pictured is the Kelant S400 Professional Resin Printer, one of the wide area printers available.
Loading the model, starting printing. As you can clearly see in the photo, the resin has a flesh tone, which can be interesting for printing figurines.
Separately, I want to pay attention to the special box needed for the final illumination of the models. I recommend doing a short backlight (30-60 seconds) in UV rays.
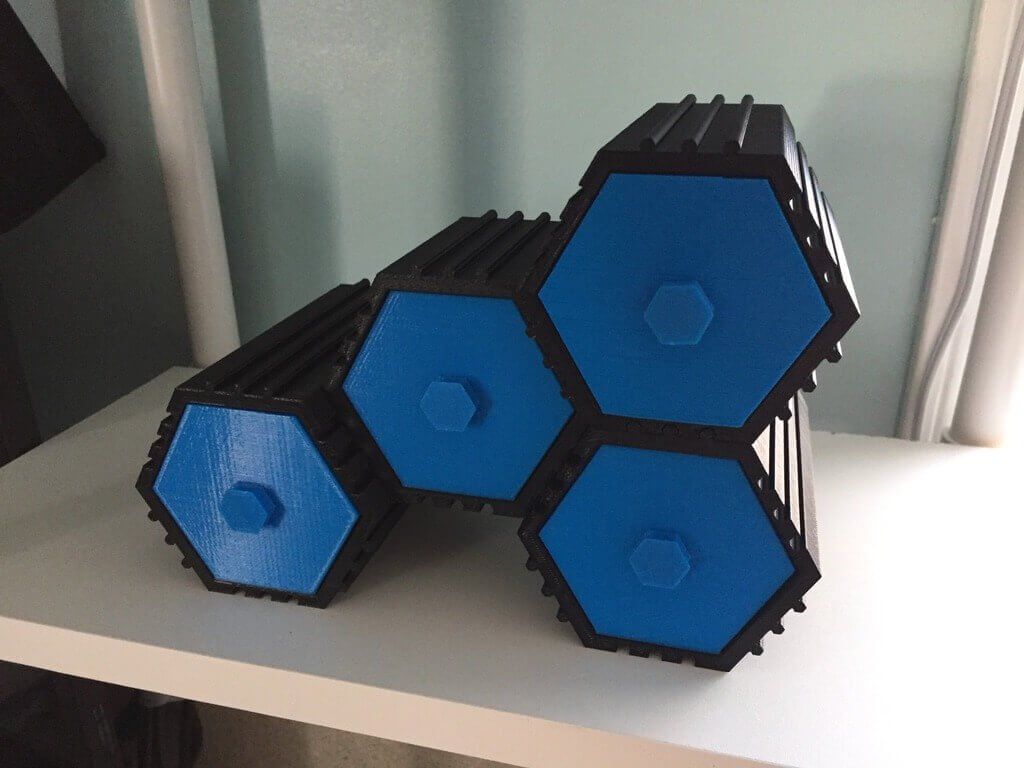
Example of some printed models.
And, of course, rings. In general, photopolymer printers are used, among other things, for creating burnt-out master models for jewelers.
The print is quite good, all the details are preserved.
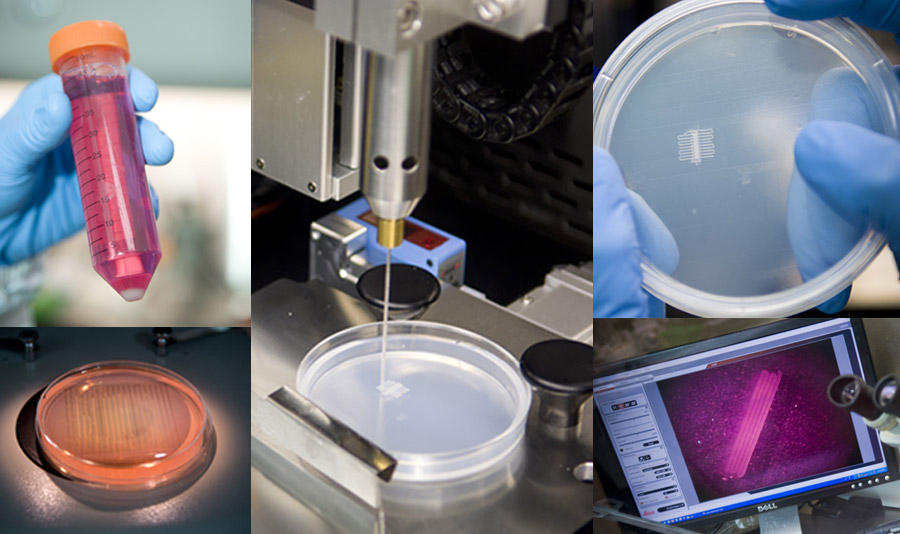
Let's try to look at a close-up under a microscope. I have one of the microscopes that are used to repair electronics and printed circuit boards (I recommend).
Highly magnified details of elvish characters are visible. The size of small parts reaches 10 microns (µm).
Another Witcher model.
One advantage of this resin is that it cures quickly at standard light settings. Because of this, small details turn out to be of high quality - for example, the fangs of the model.
In general, the resin holds detail very well. Do not forget to thoroughly rinse and lighten after printing.
Since the resin has a certain transparency coefficient, additional effects can be obtained, for example, used as light conductors.
If you have already decided on a purchase or you already have a 3D printer that prints with resin, then I recommend trying one of the cheapest photopolymers on the market - WEISTEK. Available in jars of 250/500/1000 ml. I am sure that modelers will appreciate it.
News
Publications
Shaving is process that absolutely every man faces, starting with adolescence. Each of us chooses a "shaving tool" based on your preferences and needs. On my...
Ugreen continues to please with a variety of different devices for laptops, tablets and computers.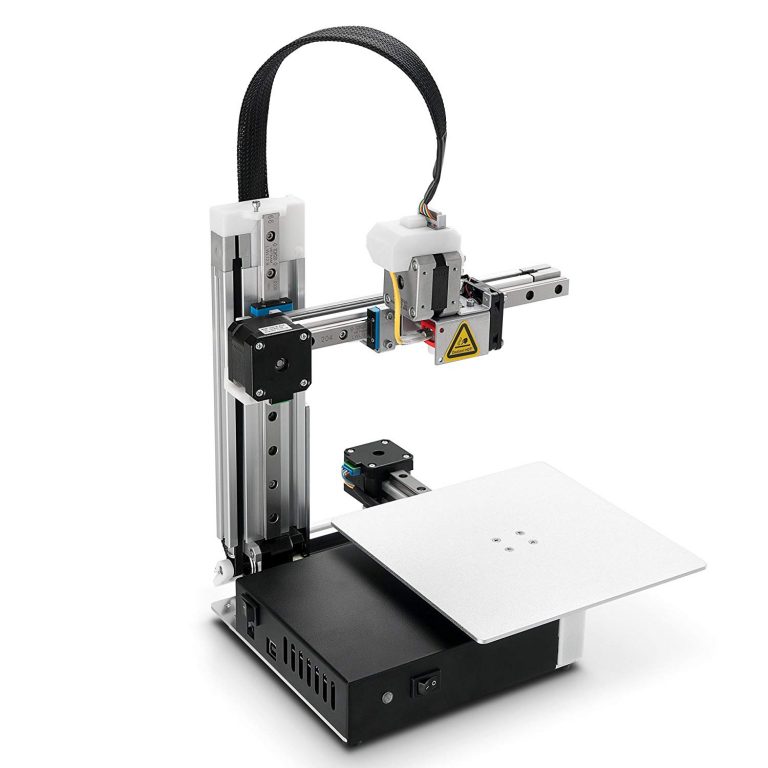 Earlier I talked about hubs and hubs with HDMI output and lots of expansion slots...
Volvo is called a boring brand. In this case, the Volvo hearse is a deadly longing. I was leafing through ads for sale, stumbled upon a hearse in the near suburbs, and then a vacation came in handy...
As of Steam statistics at the end of January 2023, AMD video cards are outsiders in the graphics accelerator market. And more and more manufacturers of professional software and games...
I bring to your attention a review of unusual Haylou PurFree Buds OW01 wireless headphones. The developers decided to test an open design using a fairly large dynamic emitter...
Good afternoon, dear readers! I would like to dedicate today's short story to domestic watches again, and for the third time we will take a look at UCH products. A watch in a sense ...
Weistek W5501 printer - the last of the Mohicans628348.html.
At the beginning of December, Alexei wrote to me in ICQ that a photopolymer is being sold on Ali for ridiculous money - about 120 dollars. Moreover, according to the description, it seems like with good parameters - paraled, standard 2k display (5.5 inches, RGB). And the manufacturer was already quite famous for its resins.
Plus, judging by the pictures of the interface, it has a board from Chitu, which means there is a possibility that a simple flashing can make it work with a monochrome display.
True, judging by the same pictures, it was all plastic, but damn it - it even had to cost more in terms of spare parts - paraled, display, Chituvskaya board - this in itself costs more than 10 tr on Ali. :)
I sent the link to the Telegram chat, they discussed it and several people ordered this printer. Plus, seller's coupons and some kind of promotional code were also found, in the end it went for $ 103 (and some paid a little more than 7 tr after the use of coins). Here I could not stand such a freebie and ordered it :)) Paid 102.90$. The Russian warehouse ran out of printers, in my opinion, a day after that :)
In general, there was still a banner on the product page, on which they promise to reduce the cost of the printer on 11.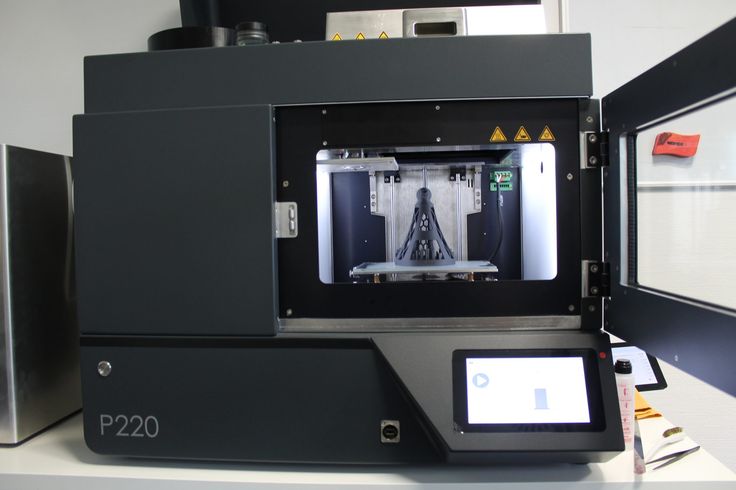 11 from 220 dollars to 182. So the cost of 103 dollars is real a freebie :) Sergey (winso) gave an explanation for the reason for such an attraction of generosity: according to his information, the new management of the company said "we are tying up with these printers, freeing warehouses from them." So more of these printers, apparently, will not be, especially at this price. They still remain in the European, Chinese and US warehouses (the people from there write that they buy them for 98 dollars), but they don’t send it to Russia from there.
The printer was sent by mail from Moscow. To my great surprise, already on the second day after sending, the printer reached my post office (Krasnodar) and on the same day I took it. It's even faster than many courier services!
Packing - no surprises, cardboard box, polyethylene foam inside, in which the printer is placed. All spare parts are inside the printer in a cradle made of the same polyethylene foam.
The kit is also standard for budget photopolymers: a flash drive, a pair of funnel filters, gloves, a mask, a steel spatula, a spare film (already with holes for the bath bolts) and a piece of paper like a manual:
The first impression is some kind of children's toy: ) The plastic is of such texture and colors that this is a direct analogy with a toy truck :)) And yes, plastic is absolutely everywhere - the body, internal parts, table, platform, platform bracket, bathtub - everything is made of plastic. True, very hard plastic is used in the platform and bracket, something even similar to carbolite. From metal, only the Z-axis stand and the plate in which the Z-axis rollers are attached. Yes, the Z-axis is made on rollers - 4 pieces, two of which have the ability to adjust the tension.
Lid made entirely of red transparent plastic, flips up as in Photons.
There are no complaints about the smoothness of this design - everything runs very smoothly, without jamming and backlash.
Threaded bushings are molded into the plastic in critical places - in the platform and in the tub.
The printer table is made with a protruding display part, it is not clear why. Maybe as an additional protection against resin getting on the display if it splashes out of the bath ...
The display itself is glued around the perimeter with adhesive tape, so you can not be afraid of resin leakage inside.
The bathtub is fixed as in Fotons - with bolts on the uprights. Racks, of course, are plastic, so it will not work to clamp the bath tightly, as on Photons - the racks begin to bend back. However, this does not affect the print results. There are ledges on the back of the table, against which the bath rests, there are also limiters on the sides. So you won't be able to insert the bathtub crookedly :) By the way, due to the side limiters, the bathtub from Photon is not included in this printer - it is literally a couple of mm wider.
PSU is external, for 24 volts 1.5 amperes, and its dimensions somehow do not inspire confidence at all. Although it seems to pull the printer's work and does not heat up much, which is strange, because when you turn on the paraled, the printer's consumption reaches 1.8 amperes. In this case, the voltage practically does not sag.
When turned on, the standard Chitu interface really appears. The following version is shown in the information menu:
Board L, firmware for a 5.5" color display. By the way, the printer accepts files of the new Chituv format - .ctb, in which anti-aliasing is already implemented by the brightness of the pixels, and not by a sequence of frames, like this was in the old formats. And indeed, the brightness of the pixels varies on the display. That is, the native slicer for this printer is Cheetoobox. The flash drive comes with a profile for Cheetoobox, although manually setting up a new profile there is a matter of minutes.
This is what real anti-aliasing looks like on the display :)
By the way, 128 gradations of brightness always work in this format when AA is turned on. Smoothing of vertical surfaces is very good.
But the smoothing of horizontal layers leaves much to be desired.
Disassembly
The disassembly of the printer is quite simple. To begin with, the bottom cover is removed, for which 4 screws located in the legs under the rubber bands are unscrewed:
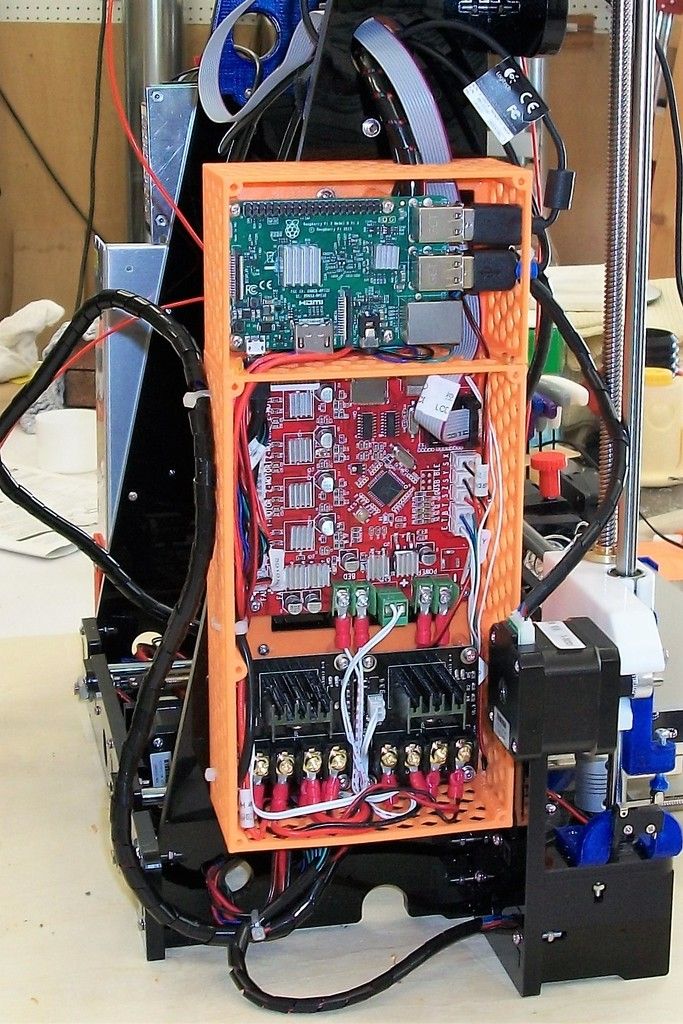
And here is the main filling of the printer in front of us. Below is a paraled heatsink with a driver and a fan, and a Z-axis motor. stretches and between the paraled and the display. For some reason, half the size of foam rubber was inserted into it, although I don’t understand why filtering the blow out of the printer :) There are also USB and Ethernet connectors, and a power switch. By the way, according to reviews, Ethernet works, you can send files for printing directly from Chituboksa.
Well, behind only the power connector and the tail from the optical sensor of the Z axis:
Motherboard
Let's take a closer look at the motherboard. The question that interested me quite a lot - what version of the board is there? One that can be flashed for monochrome displays or an older one that only works with RGB? And bingo! Here is a modern version of the board - L V3, which is quietly flashed for a monochrome display :) For the sake of interest, I tried to flash it for a monochrome display and vice versa - everything is flashed perfectly.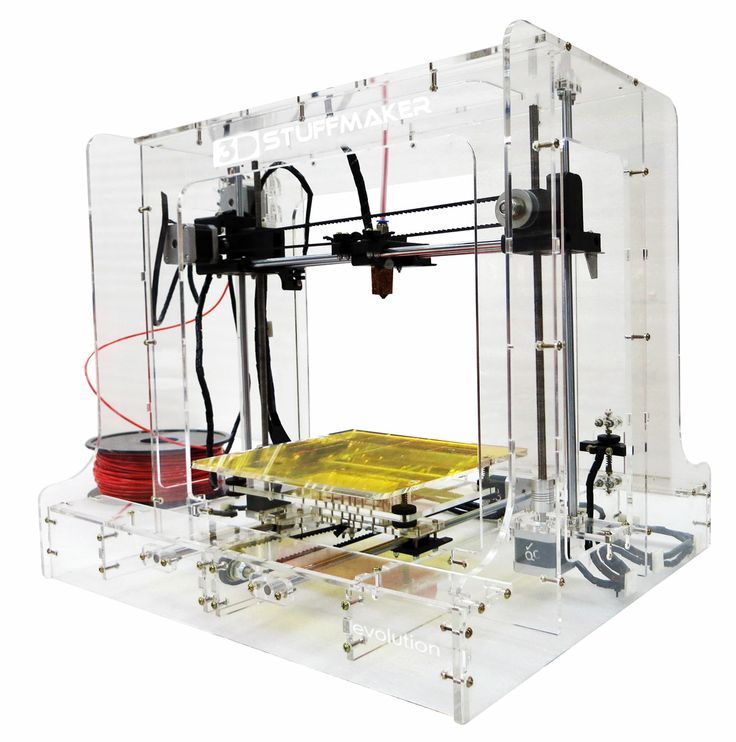 A 6.08" monochrome display is already on its way to me, I'll think about how to attach it.
By the way, if anyone needs it, I merged a full firmware dump with a bootloader from the microcontroller.
Here is the board with all connectors connected. The display, by the way, is connected via an angled extension cable.
The basis of the board is the same STM32F407 microcontroller as in previous versions. In addition to it, the board has a small EPROM for storing settings, an 8 MB SPI flash for storing fonts and interface pictures, an ethernet chip and SDRAM 64 per megabit for FPGA operation.
As you can see, there are also several additional connectors:
that number).
2. UART - some information is displayed at startup, "ok" periodically falls out during operation, and commands can be sent to the printer through it (G- and M-codes, some other options).
3. Connector for external motor driver.
4. Two debug connectors - SWD for the microcontroller and JTAG for the FPGA.
The bottom side of the board:
Here stands the FPGA itself from Anlogic - Chita switched to it from Alter, at the same time getting rid of two MIPI interface converters, the interface is already built into this FPGA. There is also a main feeder for 5 volts and mosfets for controlling illumination and fans. And you can see an empty place for desoldering some kind of microcircuit. Most likely, a 4-8 gig NAND flash is soldered here in some versions of the boards. And most likely, in the firmware it is supported by default, because. at the start of the board in the UART, a bunch of messages "Disk init error" fall out - this, I think, is just an attempt to initialize this flash.
Paraled
Here is installed a standard "reduced" paraled for 15 diodes, which is sold by Chita (in Photon S, for example, paraled for 28 diodes).
The driver is quite simple. The power of the paraled is about 37 watts, which is slightly less than the Photon one (about 45 watts).
Everything else
Well, it remains to disassemble the inside of the printed area and see what and how it is.
This removes all the screws and bolts on the top of the red internal structure plus two bolts on the back of the printer, under the stickers.
These bolts pull the Z-pillar to the rear wall, which gives at least some rigidity to the axis :)
After that, the entire blue top cover, together with the door, is removed upwards. But before that, you still need to unscrew the bracket from the plate with rollers and turn the screw to unscrew this bracket from the screw. And remove the tape around the perimeter of the display.
And here it is :)
By the way, this tape around the display turned out to be very, very thin:
Right at the level of aluminum tape. Who knows where they get this...
Now you can take a closer look at the axle itself and its personal belongings. The plate with rollers, as I already wrote, is one of the two metal parts of the printer.
Movement on the rack does not cause any complaints - everything is smooth and completely without backlash:
Nut made of polyamide or similar. Moreover, the nut has a very interesting method of backlash sampling, which I have not encountered before: the nut is a collet with slots, this collet is compressed by a special sleeve under the action of a spring:
There are no backlashes in any direction, absolutely.
By the way, the shafts on which the rollers roll are not pressed in, and with some effort they move out of the steel (not aluminum) rack :)
This stand itself is screwed to the bottom end of the printer's plastic table, which makes it surprisingly flimsy... that is, flexible :) To make this structure more rigid, it is also attracted to the back wall, and in this form, rigidity is already quite acceptable for printing.
An optical sensor is also attached to the base of the rack. In the same place, a motor with a screw will be attracted with four bolts. Yes, the motor here is with a built-in screw, without extra couplings.
My printer turned out to be with a crooked screw, and, judging by the reviews in Telegram, I was the only one who turned out to be so lucky. Later, I ordered a separate screw and replaced it by disassembling the motor, but that is another story.
Now about the display. There is a display with a rather thin protective glass - about 0.55 mm, these are sold on Ali. It lies in the recess of the raised part of the table and is glued around the perimeter with double-sided tape. It is removed in the same way as on Photon - very carefully from below we press on the glass with something thin plastic, passing around the entire perimeter. After a while, your efforts will be rewarded.
The design, apparently, provides for a reference glass for the display, but it is not available. According to a recent review in Telegram, glass with a thickness of 3 mm and a size of 71x127 mm fits perfectly there.
In general, it is not clear why they made such a lodgement for the display instead of a simple groove in the plane.
And yes, a display with a mirror film, the removal of which greatly improves print legibility.
After dismantling, I didn't put the display on tape, but fixed it with my favorite method - aluminum tape on both sides :) I expected much worse results from this pile of plastic. There is no wobble (after replacing the screw, but this is my special case), there are no stripes. Printed on it in total already, probably, about a liter of resin.
Here is his test result in stock form:
This is much better than the same stock Photon S. And it gets even better after removing the mirror film from the display. Here is the same model with the same exposure time:
There is not much to write about the bath. Similar to many other similar baths, only plastic. The film changes in the same way as on Photon - it is pulled together between two metal frames and inserted into a groove at the bottom of the bath, fixed there with screws.
Conclusion
The usability of the printer suffers from some drawbacks.
1. Firmware from Chita with all its oddities. Take at least a pause before flashing... But so far I have overcome this problem by replacing the board with MKS DLP with my own firmware.
2. The plastic case serves as an excellent mouthpiece for the motor, so the printer is really loud. The situation saves quite a lot TMC2208:
, plus I'm still waiting for these dampers, I'll try to put it, look at the result:
3. The inside of the case is rather cramped. Even the Photon with the same design has a little more freedom inside.
4. To remove the platform, you need to push it forward quite a lot, which increases the chance of dripping resin on the printer table or somewhere beyond it. In Photon, for example, it is enough to extend the platform by only 1-2 cm and you can already tilt it so that the corner of the platform is above the bathtub and all the drops will drip into it.
What else can I say about this printer... Well, the rigidity of the Z-axis, of course, is not ice. Although this has not yet affected the results of printing.
And, perhaps, this is where all the bad things about him end. For its price of 100 dollars, all these shortcomings can be forgiven without hesitation :)
In general, I took it rather than as a ready-made working printer, but as a field for experiments, a kind of debugging set of parts. However, in the last month I have practically only printed on it.
At the moment the modifications are limited to the following:
1. Removing the mirror film from the display.
2. Replacing the motherboard with MKS DLP with my firmware.
3. Connect external driver TMC2208.
Next, I plan to think about how you can fit a 6-inch monochrome display into it.