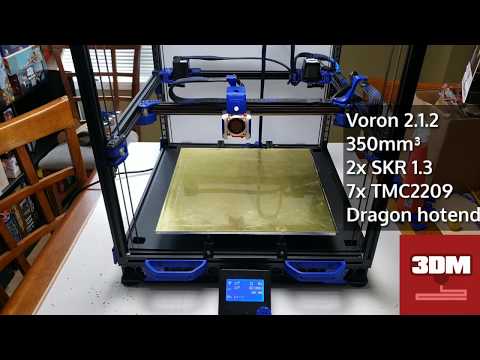
Voron zero 3d printer
Voron V0.1 Corexy 3D Printer Kit
11 Review(s) Sold:882
- Description
- Reviews(11)
Attention
This kit doesn't include any 3d printed parts, we just collect high quality components for Voron V0.1 corexy 3d printer,
so you don't need to buy anything from different stores, that'll save your search time and cost for shipping parts separately.
(Thanks for Voron Team's great work, they always design fantastic printers)
Note: due to lack of chip, Raspberry Pi is in short supply seriously, we have to offer this kit without Raspberry Pi so far.
Get the 3d printed parts from Voron official, so as to ensure the quality of functional parts: https://pif.voron.dev/
Or get the 3d printed parts from our certified printing partner: www.etsy.com/listing/1212120170/
which is great print quality and usually in stock ready to ship. (use VORON10 to get 10% off)
| Model Number | Voron V0.1 |
| Max. Print Size | 120*120*120mm |
| Layer Height | 0.05~0.3mm |
| Nozzle Temp. | 300℃ |
| Bed Temp. | 110℃ |
| Nozzle Diameter | 0.4mm |
| Filament Diameter | 1.75mm |
| Max. Print Speed | 250mm/s |
| Max. Travel Speed | 300mm/s |
| Power Supply | 150W |
- 5 star81%
- 4 star18%
- 3 star0%
- 2 star0%
- 1 star0%
Average rating: 5. 0 based on 11 reviews
Share your thoughts with other customers
Write a review
Product reviews can be carried out after the member login, please click here to login
-
VORON Trident CoreXY 3D Printer Kit with Premade Wiring Harness
$647.66
$689.00
-
Voron Switchwire DIY CoreXZ 3D Printer Kit with High Quality Components
$587.88
$639.00
-
Voron 2.4 R2 Version CoreXY 3D Printer Kit
$675.
 86
86 $719.00
-
VIVEDINO CORE XY Fully Enclosed 3D Printer with Orbiter V1.5 Direct Drive Extruder
$1573.56
$1674.00
The VORON 0 - A Mini, Fast & Awesome Core XY 3D Printer — CNC Kitchen
This all started on a recent “The Meltzone Podcast” episode in which Tom and I somehow got on the topic of printing really fast…. Build a VORON he said, and this is what I did even though I never heard of VORON before and just can’t understand why! VORON is not a company that sells printers. VORON is an open-source project that started out as a one-person operation to build a no-compromise 3D printer that is quiet, clean and pretty and capable of operating for long amounts of time without constant tinkering. Over the year the engineering team, the community and also the number of VORON printers grew. They do have different size machines from the big and scalable VORON 2.4 to the mini VORON 0. You might be curious why I didn’t choose the popular V2.4 and there is a reason. My goal with this build was not to build a universal 3D printer. I wanted to have a very fast prototyping machine and a fast motion system needs to be lightweight, stiff and powerful. I’m impatient, and even though I own a ton of 3D printers, it always bothers me if printing a single part for a project I’m working on, takes a couple of hours because that means that I can only iterate the design once or maybe twice a day. Even worse, often the design might already be outdated once the print finished. 80% of my parts fit on a 100x100mm build plate, so I wasn’t looking for something huge. The VORON 0 fits that very well with it’s 120mm cubed printing volume and a tiny footprint of only 230x230mm. It also makes use of a fast COREXY motion system and uses linear rails for all axis, which is great because that adds quite some rigidity.
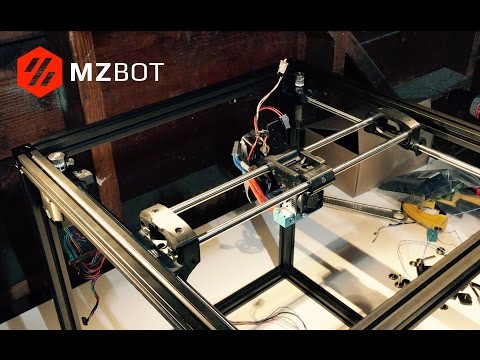 Even though a tiny direct extruder is currently in development for the V0 I was particularly interested in the stock Bowden system because it takes away quiet some weight from the printhead. The less weight that needs to be moved, the faster you can accelerate, and the stiffer the motion system the more precise the moves will be due to higher frequency resonances. To be clear – I know that people already printed sub 10 minutes 3D Benchys, but I’ll be totally okay with a decently looking 10 minutes one for the moment. This video won’t be covering the journey to that goal because there were and still are some complications I want to dedicate separate videos on. So make sure to subscribe and select the notification bell if you don’t want to miss that!
VORON 0 stacked on a Prusa Mk3 stacked on a Snapmaker 2.0
As I said in the beginning, VORON doesn’t sell printers or even parts. There aren’t any official sellers of full kits, not even to speak of completely built printers. So I had to source the necessary parts for the build myself. The VORON website provides a great sourcing guide for parts that they tested and highly recommend for the build. Following their guide is probably the best method to end up with a printer that works as it’s supposed in the end.
I, unfortunately, just didn’t have the time and patience to source all the individual parts myself and that’s why I browsed around and found a decent-looking full kit from Formbot on Aliexpress. With a price of $400 plus an additional $50 for shipping, I thought that this couldn’t contain the worst of all parts if I don’t get ripped off. Shipping took around two weeks until I had the box on my doorstep. Just on a side-note: After reading a bit in the VORON discord, I realized that there are also quite a bunch of local shops worldwide that at least sell some parts, like motor kits or pre-cut extrusions for the VORON. So if you go the self-souring route, make sure to inform yourself.
My first thoughts on the Formbot VORON 0 kit
While the package was in transit, I used the time to print all of the required parts that can be downloaded from Github, because that was something that’s not included in the kit.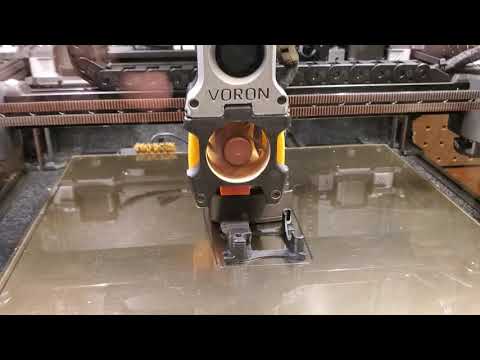 The STLs come marked as accent and non-accent parts. The accent parts are usually printed in color, while the other parts are printed black or whatever other color combination you like. It’s recommended to print all of the parts in ABS because the VORON can get pretty hot on the inside, especially with the full enclosure. Since my primary plan is not to run it enclosed, I used fire-red PETG for the accent parts and for all the other parts Carbon Fiber Nylon. The is a reason, especially for the latter choice. So, as I said previously, I was looking for a really stiff setup and the Carbon Fiber Nylon from Fiberthree that I used is more than 5x more rigid than ABS. Felix from Fiberthree very kindly provided a bunch of their PA-CF Pro material for the build. Since I still had a more than 2-year-old roll of the same material around, I thought I save the new ones and printed the parts out of the leftovers, which will haunt me really badly, soon! The VORON parts are designed beautifully and printed without any supports.
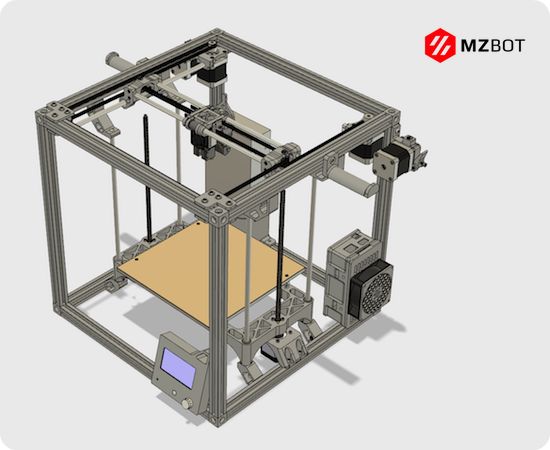 I used 4 or 5 perimeters for the parts and 60% infill to make them strong. Carbon Fiber Nylon prints so great and, if kept dry, so easily. Even though pure Nylon might be a pain to print, as soon as you add chopped carbon fibers to the mix, most filaments barely warp anymore. Think about that when you next time see someone printing a really high-performance polymer like PEEK or Ultem in the even cooler form with carbon fibers. That’s often not primarily to add strength but it’s often just for making it properly printable.
Accent (red) and non-accent part combined
Unfortunately, I don’t have any footage of the package that arrived with my VORON kit, because it smelled so badly of freshly lasered acrylic that I had to quickly rip it open and put the parts outside for venting. A couple of days later, I started with the build. The parts delivered in the kit didn’t look bad at all. There was a Meanwell PSU, LDO stepper motors an SKR mini E3 V2, Gates belts, a Raspberry Pi, a V6 hotend including titanium heatbreak, a removable and PEI powder coated bed and a full parts kit for the dual drive Pocketwatch extruder.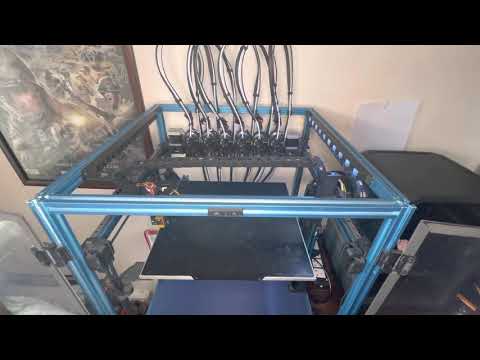 The sheets for the enclosure were transparent and black 2.5mm acrylic and all the screws came in labeled bags. The extrusions were cut to pretty much the exact length and pre-drilled and tapped. Only at that point I realized how tiny the machine is really going to be. The extrusion were only 15x15mm instead of the common 20x20mm ones, the motors were NEMA14 instead of NEMA17 and the linear rails were also way small than I thought. I won’t go over the full build, because I don’t want to bore you to death. If you’re interested in a full build video series check out and subscribe to “Nero 3dp”s channel. You find a huge collection of videos about all the VORONs and also things like Klipper, Input Shaper and much more.
All in all, the build took me a good 10 to 15 hours, including wiring. Some parts are really small on the V0, so if you rather have bare claws than hands, maybe check out one of the bigger VORON models. Still, the build was a real pleasure. Some might call the machine over-engineered but I’ll just call it well engineered.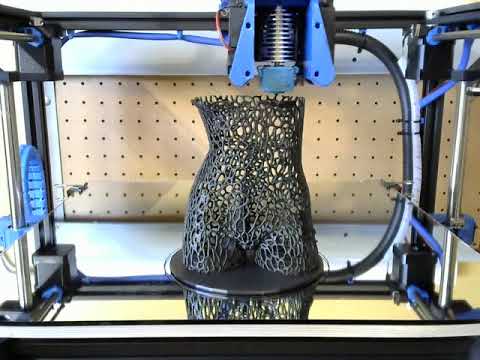 Nothing seems superficial and belt-tightening is super handy with the nuts. Besides one cross drill in the extrusions missing, too little M2 nuts and the grub screws of one pully missing, the Formbot kit I bought really contained everything I needed. The printer can be used fully enclosed and mine came with all of the side panels but since I’ll probably run into cooling issues in the sense that I don’t have enough cooling, I, so far, didn’t install the panels and the top cover yet. Though for the top cover, I have a really interesting idea. I want to put an activated charcoal and HEPA filter in it to avoid the smell and dangerous particles when printing ABS or PC.
VORON provides a build manual for the whole process though it’s not super detailed and I regularly had to check the CAD model for clarification. Unfortunately, that also stops at the point when it’s time to install the electronics. There is also a setup guide that includes wiring diagrams but no best preactice on how to route the wires. So cable routing and management is up to you. At that point it’s a good idea to have joined the VORON discord where the members will happily help your out if you have any questions.
Rather than building and using the Pocketwatch extruder, for which all parts were included in my kit, I put an E3D Hemera in its Bowden configuration into my machine that fit perfectly. There is no particular reason not to use the included extruder on the machine as a start; I just had the Hemera lying around. I also didn’t use the included V6 hotend because that’s limited to around 12 to 15 mm³ extrusion rate, and I’ll need more. Adding a volcano hotend isn’t really an option because that would take away quite a bit of the already limited 120mm z-height and also, since it’s dangling around that much, is in my opinion not very good for fast printing. The VORON files come with stls for three different hotend options: the V6, a dragon hotend and a SliceEngineering mosquito. So I reached out to my friends at SliceEngineering and asked if they’d like to sponsor a Mosquito hotend for the build. In its standard configuration, it’s already capable of slightly higher extrusion rates than a V6. If you additionally use the Magnum heatbreak you significantly increase the meltzone to push out way more material per time than in the stock configuration. I estimated and noticed that I need around 30mm³/s for my 10 minutes 3D Benchy, so a more capable hotend was a must for me.
Mosquito (left) VS V6 with Volcano
To finish the electronics a soldering iron and probably also a crimping tool, to attach the plugs to the end of the cable, are a must. You’ll have to make sure that the cable chain is short enough that it won’t clash with the x-axis during homing. You should also definitely install the thermal fuse to the bed to avoid overheating problems. The power cable of the silicone matte included in my kit, is also too thick that I wasn’t able to fit it and a ground wire through the cable chain, so I ended up with a separate ground wire for now. Since the bed heater is AC, you shouldn’t omit it because it’s a potential electrification risk. Talking about AC; the bed is controlled via a Solid State Relay. Ensure that you have one, that is on in it’s high state, otherwise it will start heating the bed right when you turn the machine on if you use the standard VORON configuration probably until you notice it or your thermal fuse blows. I noticed it early enough to avoid damage but mine still was an active low one but I talked to Formbot and they’ll probably start shipping active high ones for future kits. One thing where I’m not particularly happy about on the VORON 0 is that there is no cover for the electronics compartment and on the PSU as well as on the SSR there are exposed live wires. I enclosed the SSR and need to figure out something for the PSU to not shock myself while picking it up.
Wire management and routing looked pretty nice in the end with the help of those adhesive cable clamps. The last step was flashing the firmware. Even though you could run the machine with a standard installation of Marlin, the firmware of choice is Klipper and that’s also the reason why a Raspberry Pi is included in the standard build. Contrary to most other firmwares, Klipper is not running on the controlboard itself but on the faster Raspberry Pi which then does all of the complex path planning for cool custom features like pressure advance and input shaping. The controlboard then only passes on the step signals to the drivers. Klipper is usually interfaced with Octoprint or the even more custom-made applications Mainsail or Fluid. I went with Octoprint, just because I’m familiar with it and its configuration and I wanted to use plugins like Octolapse. Installing Klipper is well documented but will require you to use a couple of shell commands to install it and compile the custom firmware. Configuration is done via a config file that can easily be accessed via Octoprint and in which the printer itself, steppers, directions, currents, speeds, etcetera are configured.
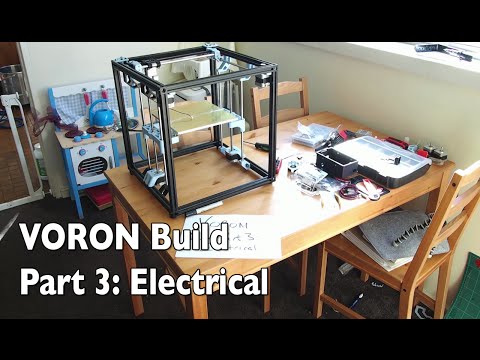 I had to change a couple of settings until my printer moved into the right direction and at least for my active low SSR had to change that setting as well. Once that was working it was finally time to get to printing! The first print should always be the VORON cube of which you post a video on Reddit to get your official serial number!
When homing the V0 for the first time, I didn’t even hear it moving because the TMC2209 make it so silent! There is no bed probe, so leveling is all done manually via three screws. I started with PLA and got really beautiful print results but as soon as I started printing faster, the material showed that it needs a ton of cooling that the two 30mm fans just can’t provide. Even though movements are silent, as soon as the fans start kicking in, the machine is not the most quiet if you don’t fully enclose it. I then switched over to PETG which was already behaving better in terms of cooling, though somehow the stringing just didn’t want to go away. Even though I hadn’t enclosed the printer yet, I put a roll of Extrudr ABS on it and … well…wow…was impressed with the printing results.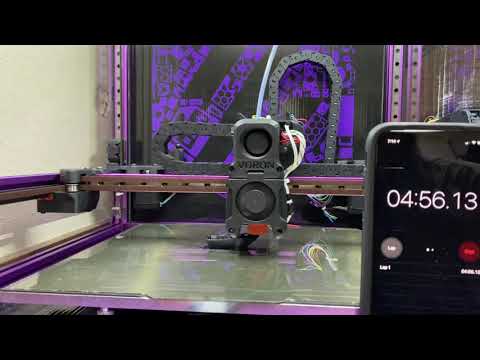 Beautiful and highly detailed prints at easily double the speed compared to the speed profile on a Prusa MK3!
PrusaSlicer Profile
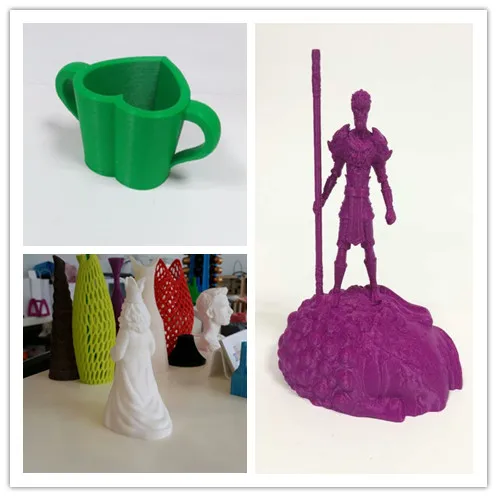
The combination of lightweight and stiff motion system plus the use of Klipper produced some really beautiful prints. Again, here, without any serious tuning, I ran with 120-150mm/s, accelerations of 4000mm/s², and got parts that don’t even show huge signs of ringing or other speed artefact. That’s even without the use of input shaper! To get these nice ABS results, I also used the auto-cool feature in Prusaslicer that turns the part cooling fan on, the shorter a layer takes to print. Yes, cooling and ABS seem to work very well on the VORON so far, though I didn’t print any huge models, yet.
Thanos Bust by Eastman printed in Extrudr ABS
Unfortunately, with ABS that was when my problems that I mentioned in the beginning, started. I already noticed before that it seemed that I regularly had to retighten basically all screws. And by an amount that is more than you’d consider settling, so this is probably material creep. For parts that got warm it was even more obvious! With the heat from the bed, the carrier itself quickly started severely deforming and I had to re-level the bed basically after every print. Honestly, that’s probably mostly my fault because I was so focused on using the super stiff and strong carbon fiber Nylon for the mechanical parts. Felix from Fiberthree warned me, that this was an issue with older batches and that was recently fixed, but the spool of material I used was one that was 2.5 years old and thinking about it, I even had the same issue on the CPU cooler bracket I printed in the past. I think this is one beautiful or nasty example of materials creep, so the slow permanent deformation of a part under constant load. The material flows away where it’s loaded so I lost all of the pretension in my bolts and since creep is a function of time and temperature, it even lead to the whole bed carrier deforming under its weight.
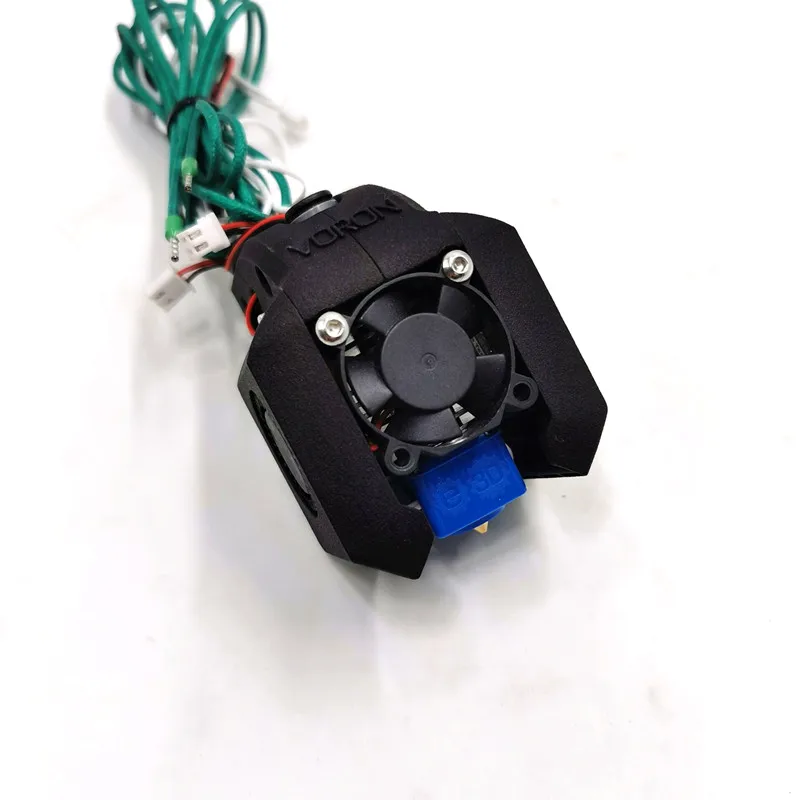 I think this is also finally the time to perform my constantly postponed creep test for 3D printing materials. Before I continue my endeavors towards the 10 minutes Benchy, I’ll re-print all of the parts and re-assemble the printer. However, I’m currently not 100% sure which material to use. Fiberthrees new Carbon Fiber or Glass Fiber Nylon, ABS, PETG or maybe some kind of polycarbonate? I really don’t know! What’s your opinion?
20-minutes 3D Benchy
So I’ll have to end this here for now though still wanted to show you that the VORON 0 is a really beautiful, well-engineered and capable small little printer. It’s probably not suitable for everyone with it’s tiny print volume but should still be plenty big for many applications where speed, quality and high-performance polymers are involved! Sourcing the parts, and putting everything together is a considerable amount of work, and not everyone might be happy wiring electronics or even working with mains voltage. The $450 I invested in the kit was well-spent in my opinion and I’m looking forward to the tuning that’s still required to get my final goal because my fastest Benchy still sits at around 20 minutes. But what do you think? Where do you see upgrade potential and bottlenecks on my way to the 10minutes 3D Benchy, and would this be a machine that suits your needs? Post a comment down below! Links to the VORON website, assembly and sourcing guide, Discord, and also the kit I bought are down in the description.
PrusaSlicer Profile
🛒 Equipment used in this article:
VORON 0 Kit (Affiliate): https://geni.us/VORON0
VORON 2.4 Kit (Affiliate): https://geni.us/VORON24
FiberThree filaments: https://fiberthree.com/
SliceEngineering Mosquito (Affiliate): https://geni.us/SEMosquito
SliceEngineering Magnum Heat Break (Affiliate): https://geni.us/SEMagnum
E3D Hemera (Bowden): https://geni.us/E3DHemera
Crimping Tool (Affiliate): https://geni.us/PyRxC1
Soldering Station (Affiliate): https://geni.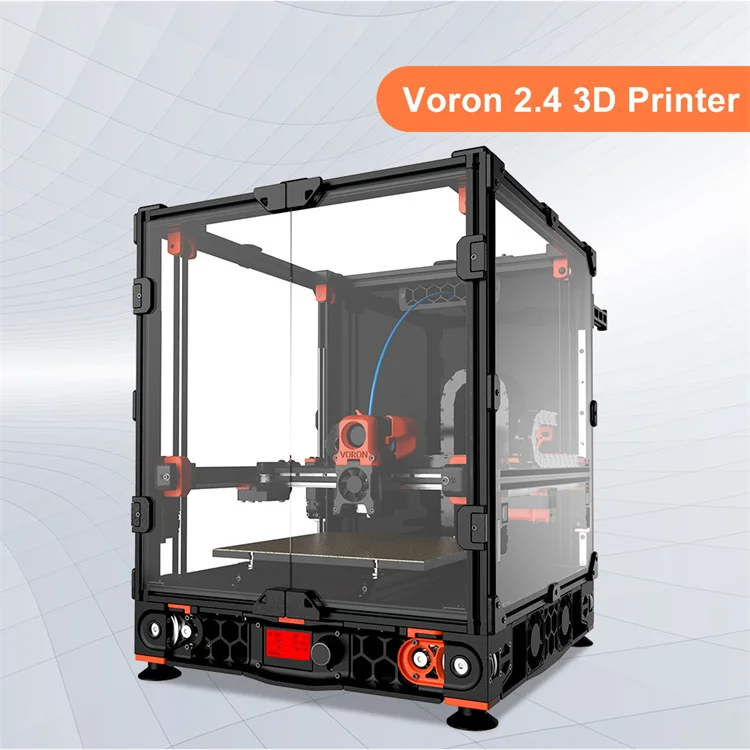 us/T2MAgzG
Stefan Hermann
0 LikesVoron printers. Stream from VoronDesign.
“The best way to be creative is plagiarism!” (c) I am, but this is not accurate.
Unfortunately, the process of plagiarism of the ideas of foreign makers in Russia is extremely hampered by the language barrier (I am now talking about even English-speaking makers, not to mention original Asia). Personally, I think that this is fundamentally wrong - if you want to make your own, find someone who made it similar and improve it! Today I want to introduce you to the work of such a creative team as VoronDesign. The guys are relatively famous in the world thanks to the beautiful designs of core-xy printers Voron 1 (on shafts) and Voron 2 (on rails, with a movable portal). These printers even have a Russian-speaking community ... But it is mostly not from Russia.
It all started with such a project as MZBOT, but now the guys from VoronDesign write about themselves that they have “common design ethos”. So the common ethos of designers. Well, ethos, and ethos, but when Volk broke away from them (later, like “Annex-Engineering”), shit flew in all directions so that it was difficult to suspect the participants of having at least some kind of ethics. But the crows really have a lot of design ethos - everything looks more beautiful than the average. A small digression - the work of Annex-Engineering with their abundance of harsh ball screws and MGN12 - MGN15 can make fans of the domestic Yo-bot with 12 rails enviously groan :-)
So, the advantages of VoronDesign's engineering ethos include the beauty and detail of their designs, the high quality of documentation, and the chronic unwillingness and inability to bring designs to perfection. And also a lot of not quite ordinary engineering solutions, completely uncharacteristic, for example, for domestic and Chinese printer building. And to be honest, it's not always a plus. Worth exploring though. Tormented by the desire to build something interesting, I built their Voron 1. 6 printer and began to follow their work. Well, how is Raven 1.6? The XY portal there is from 1.6, but everything else is a dense off-spec and is still being finalized. As they say - "I'm not Bill Gates, to do everything at once" (oldfags, who remember where it came from - write to ICQ). But about the cons of 1.6, both those that I saw in advance, and those that I saw only after construction, I will tell in a separate article, and here I will just go over the VoronDesign stream from March 4, where they showed a pack of their promising developments, their "promising" developments and "their" not-understand-why developments :-)
I must say right away that the format itself is frankly amazing in a good way - to see a crowd of makers who work more or less harmoniously on some large and common tasks is very cool and inspiring. Regardless of the results achieved.
But about what they showed... let's learn from the mistakes of others.
It all started with a show of the long-announced voron 1. 7 (now it has become 1.8). Actually, what's the catch. They promised the following key features: 1) a closed body and a slightly larger working area with the same dimensions 2) rails instead of shafts 3) direct extruder 4) replacement of the z limit switch with an FSR (pressure resistor) to a regular button. 5) New motherboard - SKR + 2209with a ready-made config (for the lazy, it used to be possible to run this banal CoreXY like 2 fingers even on an 8-bit arduino). Strictly speaking, everything that they promised was already a year and a half like no one needs. For good, it was necessary to bring to mind 1.5 with its ability to put a chimera, in extreme cases, bring to mind 1.6 (since 1.5 was canceled), but the Ravens are interested like this. And now about the ambiguity of this whole process from its very beginning. 1 and 2) actually 1.6 on rails was a long time ago in the form of Franken-voron mod (https://github.com/FrankenVoron/Voron-1.6-mod). Take it and do it, Lord, there you have rails and a closed building.
 True, 3 rails were needed there, and in 1.8 the Ravens managed to use as many as 4 rails on the XY axis. Straight up upgrade!
3) direct extruder for 1.6, as well as for 1.7, is not a problem at all ... since 1.6 is absolutely compatible with 2.2 nozzles. If you want, put their own Afterburner, if you want, put mods with BMG on top, if you want, put newfangled Nimble with nema8. Those. there was no need to release another revision for the sake of adding existing mods at all. Only from the latest series of requests for 1.6 with direct.
One
Two
4) The Z-limiter, as it was idiotic, not allowing the continuation of interrupted printing, remained the same. Now it's just a little easier to implement it. 5) It would be better if, instead of replacing the MP, they wrote a good and understandable manual for installing the clipper on at least something. 6) The illumination of the working area is gorgeous in its uselessness. The fact is that the “ears” of the chic and beautiful head of the Raven block the flow of light from side lighting. This lighting is better than nothing, but still bad. Although it might even be worse than nothing. And, by the way, the button to turn off the backlight is not visible. And this is the most important thing from an engineering point of view, because LEDs installed the way they have often hit strangers in the eye. And this is just what is visible right at first sight - and after all, when designing, it was possible to make another 100-500 mistakes, with the same tensioners or engines (for a year now, they have not been able to do this engineering correctly on Vorona 2). Well, here they have everything new - everything is compatible with version 2.4 In general, as Ax said: “I ask for one thing - do not hire idiots for this business.” Apparently they didn't watch a great movie. Therefore, they did what had already been done before them and did not do it in the best way. Then there was a funny piece number 2, where they discussed the problems of the Raven 2.2 and 2.4, especially in matters of portal ends (tensioners and engines).
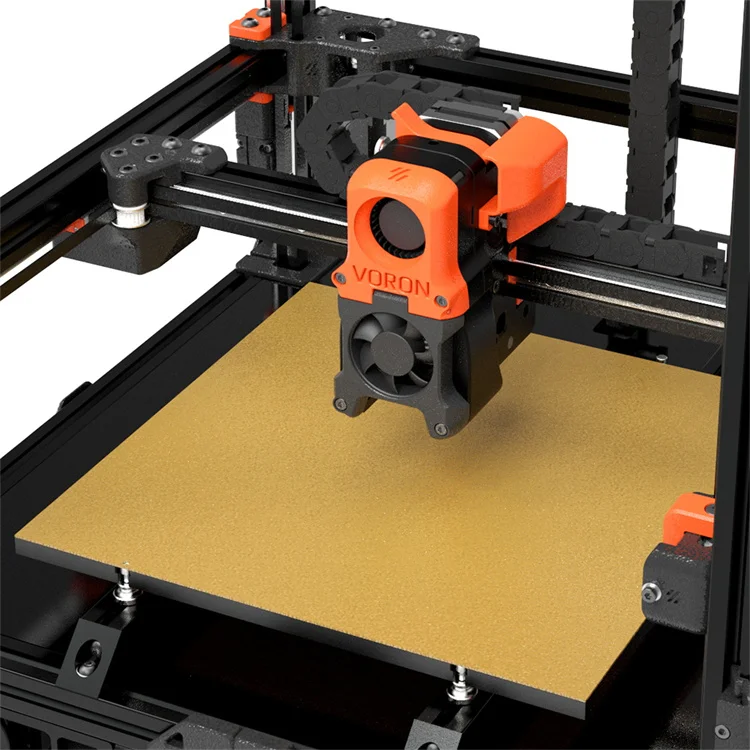
The fact is that the original design of the Raven 2.0-2.2 in this place is terrible and there are about 5 modifications of this node, in the form of mods. Including from the people cursed in the crow chat who-must-not-be named. For some reason, the designers did not want to take a good mod (as always) and they designed another shushpanzer, calling it 2.4. So that it is not compatible with good mods from "he who must not be named." They say that 2.4 will be tested. It looks like it's on people. Oh well. Why they don't like their moderators so much and quite good, working mods for their designs, I honestly don't understand. As a result, we have unfinished 2.2 and will be 2.4. Apparently I'm far from their ethos. And then they introduced what it was all about - Voron 0. A new tiny printer on 5 rails and nema14. Insane typing speeds (like up to 120mm/s or something), add support for Mosquito and Dragon in addition to V6 hotends (hotends, by the way, are also promised for 1.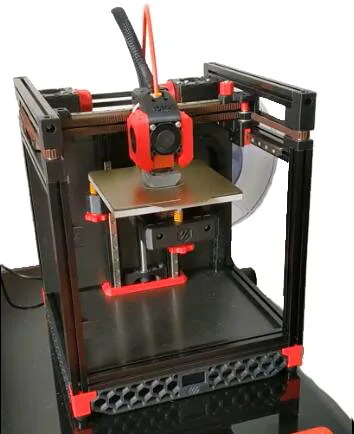 8 and 2.4). There is exactly one thing that is not clear in the problem. What did not suit their old 1.5 and 1.6? In the mini versions, they gave out exactly the same insane speeds, with a much cheaper BOM. In general, a lot of work has been done ... but in vain. Here, for example, mini 1.6. Well, like, do you need all this exoticism, if possible on 8 shafts? In general - who is interested, the links are available, join, study. A separate pleasure is the designs of Annex-Engineering. Well, once again - the guys are really great fellows, in general, if you dig their work, you can peep a lot of interesting things from the point of view of how to do it beautifully and well. But the last year has led them into an unprecedented satire on themselves, it is not so much interesting to watch as it is fun.
Top Models for 3D Printing Voron・Cults
Trident in a mouse
1.20 €
SwissBurner CR Sensor Mount
Free
OV9726 Voron 2.
 4 R2 Camera Mount
 Free
VagoVas
€2.49 -fifty% 1.25 €
Voron 2.4 R2 Mount for Orange Pi PC Plus
Free
VORON AFTERBURNER Mount for AM8 BLV MGN12
Free
exoslide creality mount for stealthburner
Free
Coil holder "Radio tower"
Free
Voron Z belt clips 9-10 mm
Free
ENDER3 TOOLBAR // modular holders for accessories and tools
Free
Duet Wifi Case - 2020 2040 Extrusion Mountable
Free
V2: Guide to Extrusion Filaments 2020 2040 3030
Free
Extrusion Thread Guide 2020 2040 3030
Free
Bearing spool holder for extrusion 2020 2040 3030
Free
Stock Ender 5 Plus + Voron Afterburner - cable cover solution
Free
Voron v2 Electronics PCB cooling fans
Free
BLV MGN Cube Metal VORON 2.
 4 Afterburner Direct Drive Mount
 Free
Voron 2.4 Front Skirt 19mm Power Switch Adapter
Free
Voron 2.4 Adjustable feet
1.15 €
Voron Bootstrapper's Fan Kludge
Free
Voron Bootstrapper's Screen Kludge
Free
FIDGET AND CUP HOLDER! Hexagon themed fidget toy and cup holder!
1.44 €
Voron-Designed Pincher Handels
Free
Voron 2.4, C17 -EXT, HEPA external carbon filter
Free
voron 0.1 六边形打印面板
Free
k1 hotend for voron 1&2
Free
voron 1.
 8升级1.9支撑脚修改
 Free
voron 1.8 直线轴承优化
Free
Tiny M Ducts for Phaetus Rapido Hot End
Free
Voron stealthburner 40x40x15 fan mod
Free
Slice Mosquito Mod for Voron Stealthburner Final Release with CW1
Free
Beer mug - Khmelyaki 2022
Free
SolidCore Lightweight Hotend Mount with BLTouch Offset Mount Bracket
Free
Alchemy_Mini_Direct_Drive
Free
IN-SITE PRINTING OF NOZZLE BOX
3.36 €
Wire cutter handle
Free
Voron v0.