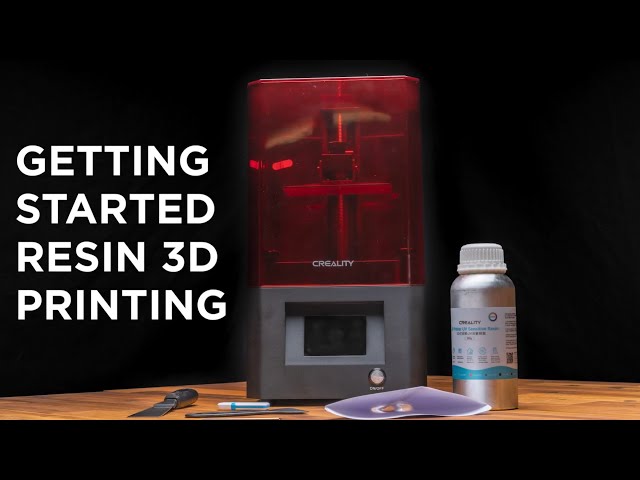
Using a resin 3d printer
Resin 3D Printing For Beginners: From Zero To Hero
Resin 3D printing is quite different from regular FDM printing, and it requires a lot more post processing when the print is finished.
In this guide, I will share some information about resin 3D printing which should help beginners start their journey. Without further ado, let’s get started.
What are Resin 3D Printers?
A resin 3D printer uses ultraviolet light to cure photosensitive resin, layer by layer. The ultraviolet light is partially blocked by a screen, and the exposed resin layer hardens.
Compared to a regular FDM 3D printer, where the plastic filament gets extruded trough a nozzle, a resin printer cures an entire layer at once, allowing for faster 3D printing in some cases.
The main benefit of using a resin 3D printer is the print quality you can get.
With a resin printer, you print layers as thin as 0.05 mm, while on a regular FDM 3D printer, it’s a bit hard to go under 0.1 mm.
Unfortunately, there’s also a few drawbacks when dealing with resin 3D printers. The main drawback for me is the need to clean the printed models from the remaining resin, which requires chemicals like Isopropyl alcohol or acetone, and protective gear. After cleaning the models, you also need to cure the models further with UV light
All these extra steps can be cumbersome, compared to a regular FDM 3D printer where most of the prints can be used right off the build plate, without too much post-processing.
Safety Precautions for Resin 3D Printing
Resin 3D printing is more dangerous compared to regular FDM 3D printing and should be treated with the respect it needs when it comes to safety.
Avoid contact with uncured resin
Every time you handle uncured resin, it’s imperative to use protective gloves. Avoid touching uncured resin, and always handle resin bottles with care.
Uncured resin can cause burns or irritations to your skin, so if you happen to touch uncured resin, use soap and water to clean the affected area as soon as possible.
Use a well-ventilated space
When printing with resin, it’s important to have a well-ventilated space. Fumes from resin and cleaning chemicals are harmful and should not be inhaled. Using a face mask will help you minimize the effects of any remaining vapors.
Even though some resin 3D printers have carbon filters, or good insulation, it’s not a clever idea to use a resin printer in the same space where you live/work. If possible, try to use your resin printer in a separate room with good ventilation.
If this is not possible, I recommend printing when you are not in the same room. I usually print overnight when I’m not in my office. This way, in the morning I can simply remove the finished print and post process it, while properly ventilating the room. I also take extra precautions of adding another insulation layer to my resin printer so most of the smell stays inside the enclosure.
Deciding what Resin 3D Printer to buy
If you have decided to purchase a resin 3D printer, you need to think about what kind of models you are looking to print, then chose the appropriate machine for your needs.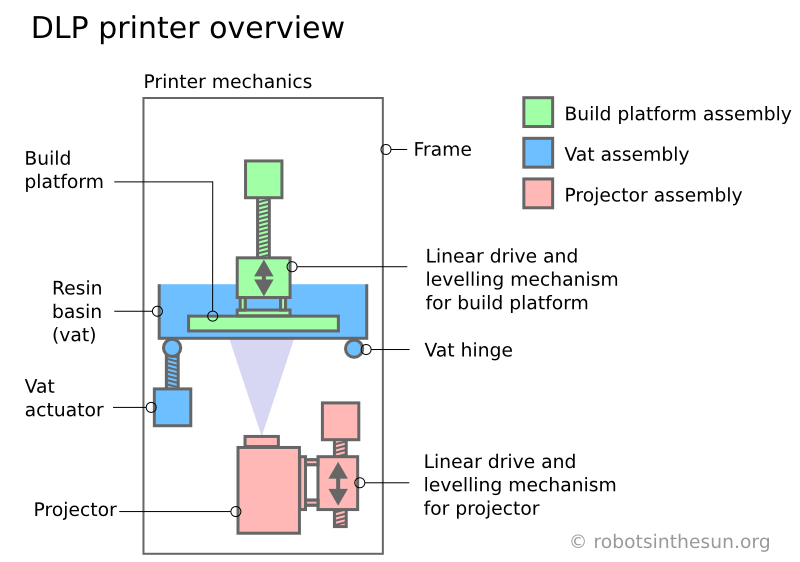
Small format resin 3D printers
A small format resin 3D printer is excellent if you plan to print small objects, like miniatures or jewelry and you don’t plan to print a high number of models at the same time.
These printers are excellent for hobbyists or people who just want to get started with resin 3D printing. By choosing a small format resin 3D printer you save money and space.
Phrozen Sonic Mini 4K
The Phrozen Sonic Mini was my first monochrome resin 3D printer, and I was quite happy with it. Now, the mini has been upgraded with a 4K screen and currently it’s probably the most capable small format resin printer out there.
It has a high-resolution 4K resin screen which produces excellent details while still keeping the cost of purchase reasonable. I haven’t had the time to try it out, but there are a lot of happy owners.
You can purchase the Phrozen Sonic Mini 4K from the following websites:
Phrozen
Anycubic Photon Mono 2K
I haven’t had the chance to test the Photon Mono 2K from Anycubic but in my experience, most of their printers are ok.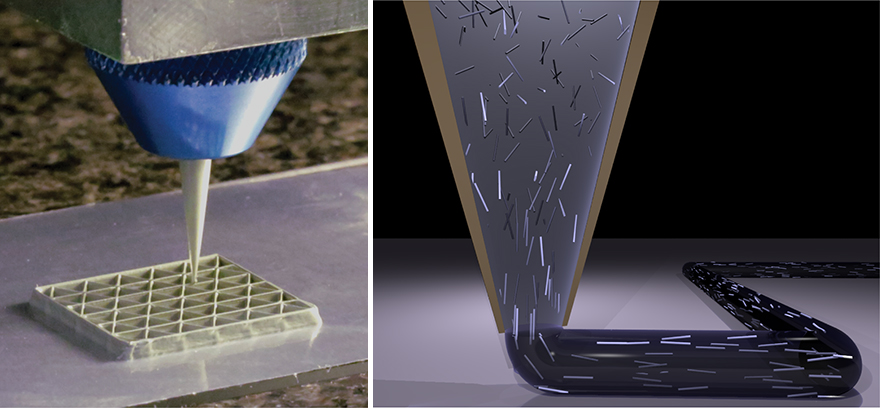 This is the updated version of the old Anycubic Photon, which has a monochrome 2K screen that is more than enough for its print volume.
You can purchase the Anycubic Photon Mono 2K from the following websites:
AliExpress
Amazon
Banggood
Creality LD-002H
The Creality LD-002H is excellent for a beginner. It’s basically the same printer as the Creality LD-002R I reviewed a few months ago but with a monochrome screen which will print about 2 times faster, while it lasts 4 times longer. The price is quite good for a machine of this size, and it also looks great in my opinion.
You can purchase the Creality LD-002H from the following websites:
AliExpress
Amazon
Banggood
Large format resin 3D printers
A large format resin 3D printer is great when you need to scale up production or print bigger models which wouldn’t fit on a small printer.
These printers have a larger build plate which allow you to print a larger number of small models increasing the yield and production capacity.
They’re also great for people wo are looking to print big models in a single piece, without needing to split them in multiple parts.
Because of the higher price, most of the large format 3D printers are bought by people who use them as a production machine for their business, or by 3D printing enthusiasts who are looking to up their resin printing game.
Anycubic Photon Mono X
The Anycubic Photon Mono X is my biggest resin printer currently. It performed admirably during my review period and I strongly recommend getting one, if you need the volume.
Read more about it in my Anycubic Photon Mono X review, where you can also check out a few printed models to judge the quality.
You can purchase the Anycubic Photon Mono X from the following websites:
AliExpress
Banggood
Amazon
ELEGOO Saturn
The ELEGOO Saturn was the first on my list when it comes to large format resin 3D printers, because it promised a huge print volume for a small price. I liked it so much that I also wrote a preview at the time when it was announced.
Unfortunately, they were not able to keep up with the demand, and at the time of writing this article, the Saturn is still hard to get. From time to time, it shows up on Amazon in limited quantities.
If you are lucky enough to snatch one, then I don’t think you can go wrong with it. Price is good, and it mostly has the same features as other large format resin printers.
You can purchase the ELEGOO Saturn from the following websites:
Amazon
Phrozen Sonic Mighty 4K
Another popular option when it comes to large format resin 3d printers is the Phrozen Sonic Mighty 4K. It’s the “big brother” for the Sonic Mini 4K but it’s not as popular.
Unfortunately, Phrozen doesn’t have local warehouses to send their printers from, so most of the time you need to pay extra for shipping and customs. This increases the price, making it a less attractive product, compared to the Mono X.
You can purchase the Prozen Sonic Mighty 4K from the following websites:
Phrozen
Post Processing Tools
Wash and cure stations
Buying a wash and cure station is strongly recommended because it will make the whole post-processing work a lot easier. One of the most annoying things for me when printing with resin printers is cleaning up the models. It’s such a messy process, and without a dedicated solution, it also takes a lot of space.
Most of the models available for purchase are two-in-one machines, which besides washing your models, are also capable of curing them after cleanup. Really, there’s no reason not to buy one.
For small format 3D printers, one of the most popular wash and cure stations is the Anycubic Wash and Cure, which works best with Anycubic resin printers.
The ELEGOO Mercury Plus is similar to Anycubic’s offering with the same wash and cure features in a single machine, but mostly made for Elegoo resin printers in mind.![]()
Creality also has the UW-01 machine that works with their line of printers.
You might think that these wash and cure stations are made specifically to be used for the same brand resin printers, but this is not completely true. By pairing your resin printer with a same-brand wash station, you get the possibility of also attaching the model directly from the build plate.
Keep in mind that these wash and cure stations are best suited for smaller resin printers. For large format resin printers, we are still waiting for a few models to become available for purchase.
Required Consumables for Resin 3D Printing
Resin
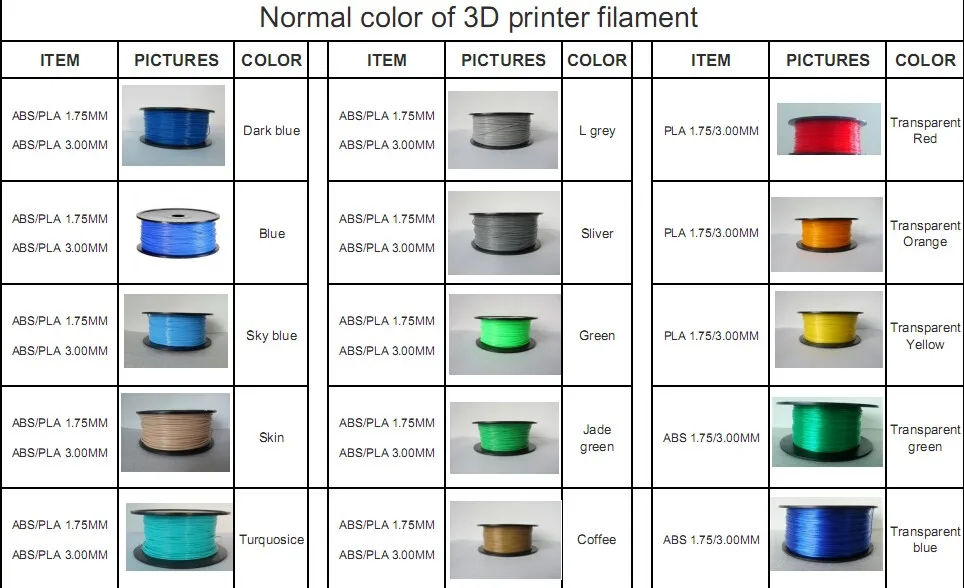
As the name suggests, resin 3D printers use photosensitive resin as a build material. Resin is available in a wide range of colors and each type of resin has different proprieties.
For example, there’s regular resin like the Anycubic Basic resin which is mostly used for miniatures and generic resin objects. It doesn’t have any kind of “special ability”.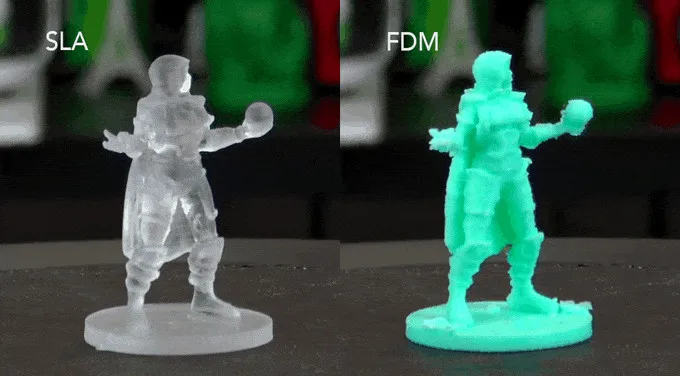 It’s just a resin good for day-to-day prints.
Recently, water washable resin is starting to get popular because it’s marketed as a resin that can be post processed only with water, eliminating the need of IPA or other chemicals. In my tests, this type of resin performed quite bad, and I don’t really like it.
Besides that, it also gives people the impression that this resin can be washed under running water, but this is not the case. Water washable resin should be treated like any other resin and should be properly disposed.
We also have resins with special proprieties, like the Siraya Tech Tenacious which is a flexible resin. This is mostly use as an additive for other resins to improve their strength, but it can also be used “as is” for specific projects.
Siraya Tech also makes one of the strongest resins available, in the form of the Siraya Tech BLU. Some people used this kind of resin to print gun silencers, which is quite impressive.
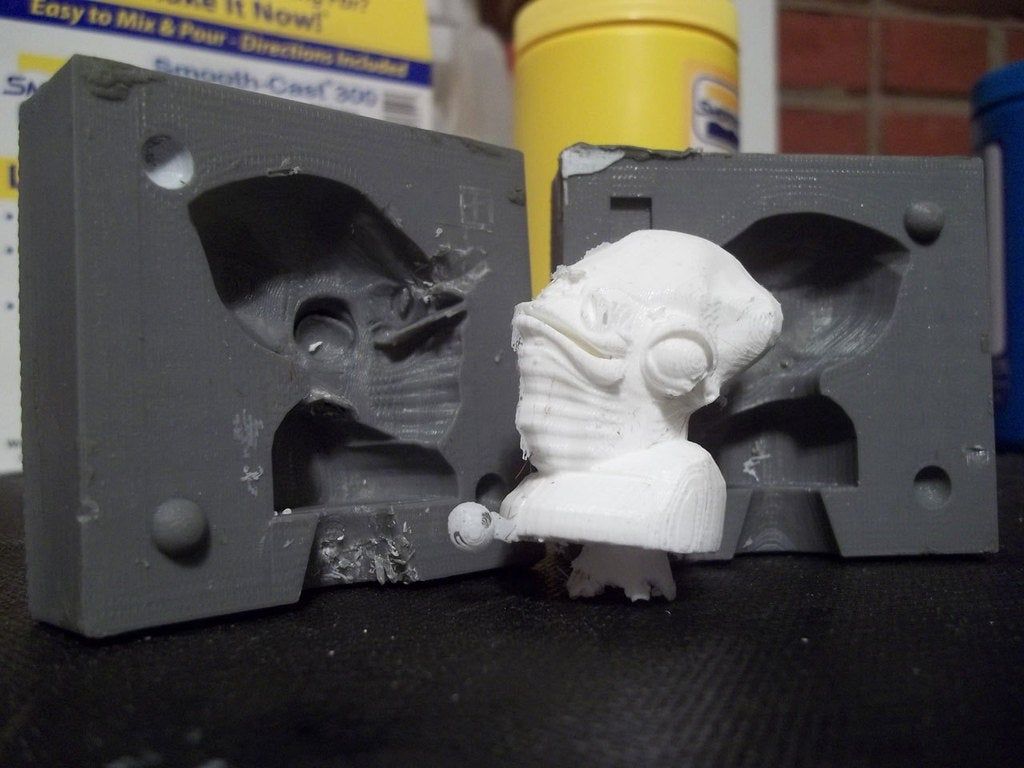
Finally, there’s also casting resin which can be used to print negatives of models which will be later casted in other materials.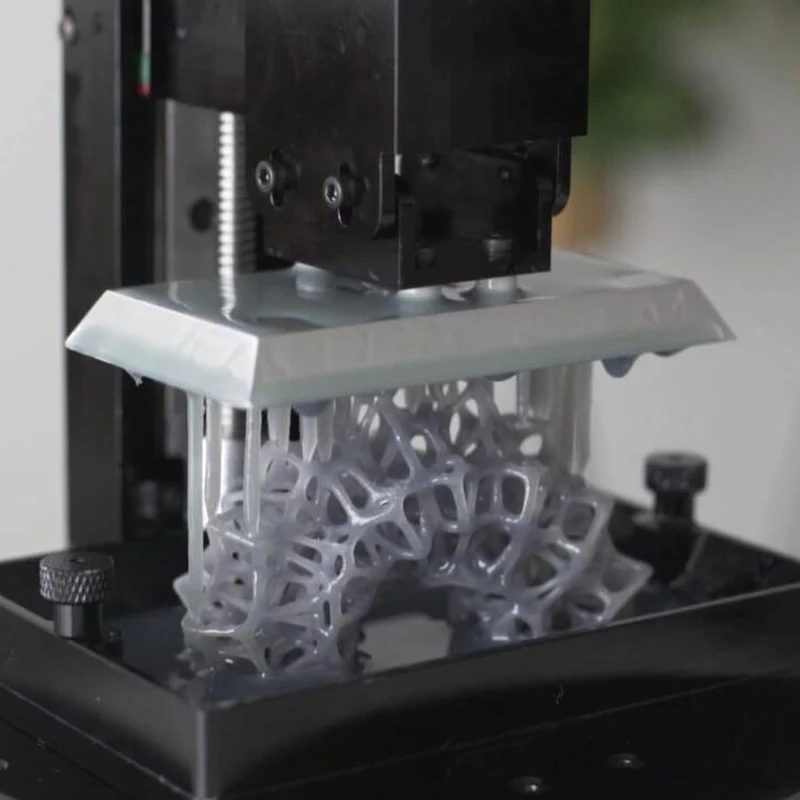
FEP films
The FEP film is the transparent sheet from the bottom of your resin printer’s vat. This is considered a consumable because after a while, it can get damaged or worn out. It’s a good idea to check the FEP integrity after each print, to avoid leaks.
I strongly recommend in buying a few FEP sheets as a backup, because most of the resin 3D printers don’t come with spares and it’s better to have them at hand when you need them, instead of waiting for them to be delivered.
You can purchase pre-cut FEP sheets specifically for your machine, or you can buy larger sheets then cut them to size.
Resin printer screens
Monochrome resin 3D printers require less maintenance because the screen will last a lot longer compared to the old screens. But sometimes you might need to replace it if it failed, or if the FEP film was damaged and resin cured on your screen.
I don’t have spare screens because I think this risk is quite low, but if you are using your printers for production then it might be worth it having one at hand, ready to be replaced.
Cleaning solutions
Isopropyl Alcohol
One of the most common solutions for post processing resin 3D prints is Isopropyl Alcohol also known as IPA. This chemical is great because it’s mostly safe (with the proper precautions and protection) and can be used with other cleaning tools without affecting them.
IPA can be reused if you keep it in a enclosed transparent container. The used IPA needs to be exposed to UV light and in a few weeks, the uncured resin will start to cure and drop on the bottom of the container while the IPA starts to clear.
Acetone
Another chemical which can be used to clean resin prints is acetone. Using acetone is a bit more dangerous compared to IPA because it evaporates much faster and it’s also more flamable.
You cannot use acetone with wash stations because it starts melting most of the plastic containers in just a few minutes so it’s only good for manual washing.
Cleaning your finished prints with acetone is much faster compared to IPA, but long exposure of finished models to acetone can make them brittle.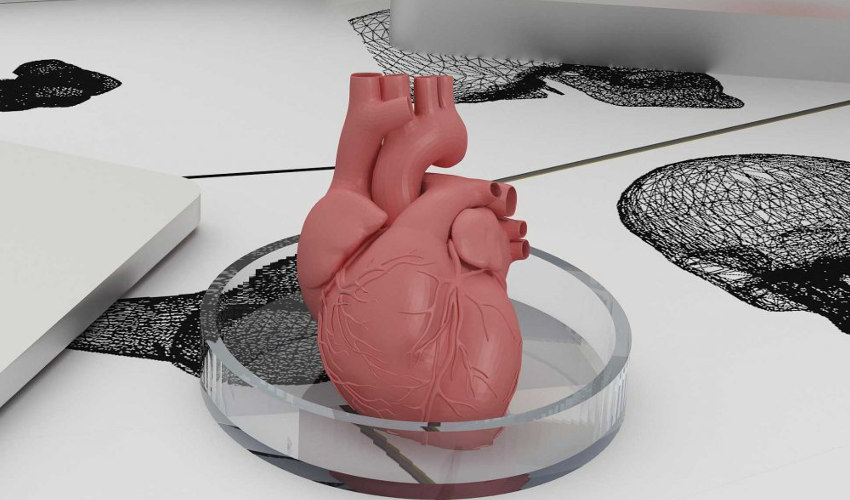 It’s recommended not to expose the models for more than 45 seconds to 1 minute.
Printed upgrades for resin 3D printers
After you receive your resin 3D printer, I recommend you look for some upgrades you can print to make your resin 3D printer a bit better.
Dripping mount for the vat
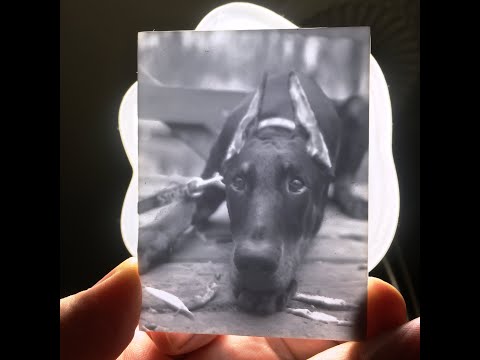
If your printer doesn’t already have a way to mount the build plate onto the printer and leave the model to drip all the resin, then I recommend you look for one online and print it.
This will allow you to attach the build plate in an angled position, and then leave it for 10 to 20 minutes for all the resin to start dripping from the top of the plate, and from the model.
Doing this will help you save a bit of resin and will also make the cleaning process a bit easier.
Vat cover
Adding a vat cover is also important because it will help trap most of the resin smell right in the vat, and you will also protect the resin from UV light and dust.
You need a vat cover if you do a print, and then leave the remaining resin inside the vat for the next time.
Usually, it’s not a big issue to keep the unused resin in the vat for a short period of time (~1 month) but if you don’t use the printer for longer periods, it’s always a good idea to empty the vat and clean it.
Remember to always stir your resin before starting a new print, to make sure it’s properly mixed. After sitting for a while, you will notice that the resin starts to separate so don’t skip this step.
Vat dripping holder
Emptying the vat from resin is a process I sort of hate because it’s always messy. But you can ease this pain by printing a vat dripping holder which will allow you to mount the vat in an angled position over your resin bottle.
That way, you can empty the vat completely and clean it with much less effort.
Find the best settings for your resin
A good trick about resin 3D printing is to look for resin spreadsheets on groups where people are talking about the specific printer you are using.
For example, I found this resin spreadsheet for the Anycubic Photon Mono X where people contributed with their resin settings. You can then pick the settings used by others for the same resin you are using and start from there.
Most of the times, the settings are ready to go, but from time to time you will need to perform some small adjustments to get everything just right.
Preparations before printing
Level the build plate
To ensure good adhesion for the model on the build plate, it’s crucial to have it properly leveled. This translates into having the build plate parallel to the screen, so an even amount of resin is between them.
Different resin 3D printers have different solutions for leveling the build plate, but most of the times, it’s an easy process which will be described in the user manual of the printer.
To do this on my printer, I need to loosen the four screws holding the build plate. I place a piece of A4 paper between the bed and the screen then carefully lower it.
While the build plate is laying on the screen, you need to press the build plate on the screen then start tightening the screws to hold it in place.
Elegoo has a good video about this, but this process will be different from printer to printer.
Fill the vat with resin
Before starting your resin print, you need to fill the vat with resin. Every resin 3D printer has a maximum volume of resin, and you should never overfill the vat. Always consider the displaced resin when it will lower itself to print.
If you do this for the first time, and your build plate doesn’t have a marking to indicate the fill limit, I recommend you home the printer then pour resin in the vat.
Print Process for Resin 3D Printing
Decide what model you want to print
This step is probably the easiest when it comes to resin 3D printing. Most of the people who are looking to get into resin 3D printing already have a few models which they want to print with high detail.
The best places for finding models are Myminifactory, Thingiverse, and Cults. On these websites, you can find models specifically made for resin 3D printers. Some of them are free, some are paid but there’s a wide variety from where to choose.
Besides these websites, a lot of Patreon pages showed up which offer premium 3D models for resin printing, for a monthly fee. Most of the times these premium models also come with pre-made support making your resin printing a lot easier.
Slice the model
After getting the model, we need to first slice it with a dedicated program. Chitubox is probably the most popular slicing software, but Lichee Slicer and even Prusa Slicer are good alternatives.
I used Lychee Slicer a lot lately and it never produced a failure. It’s also quite easy to use and there’s a free version which is more than capable to slice your resin files. I will cover it in a dedicated article soon.
The automated support feature in Lychee slicer allowed me to improve my success rate to ~90% since I started using it, compared to the ~70% success rate with other slicers. It makes the whole slicing process much better.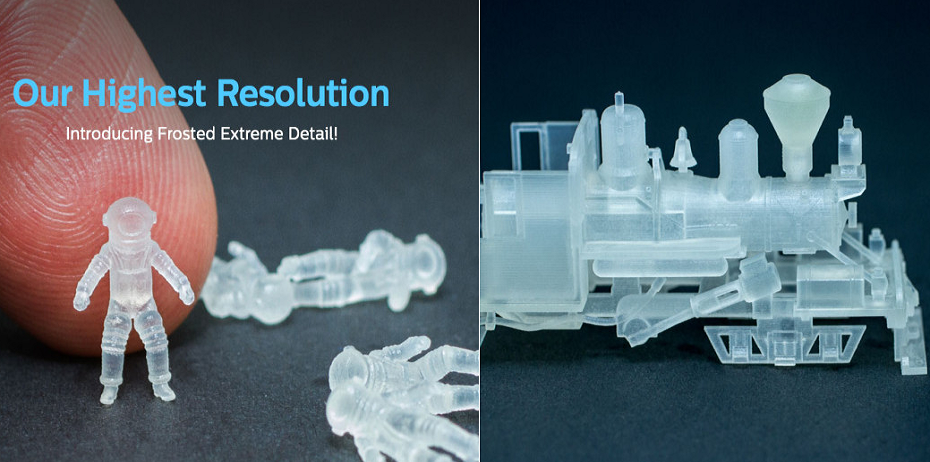
There’s also the possibility of using the slicer software included with your 3D printer, like Anycubic Workshop or Creality Slicer but these are usually lacking features compared to the previously mentioned slicers.
Print the model
Printing the model is the easiest part of the whole process. Just copy the exported file from your slicer to a USB drive, then insert it on your printer.
Next, take your resin bottle and shake it for about a minute to make sure it’s properly mixed, then pour some of it in the resin vat.
Finally, start your print and wait for it to be completed. Easy, right?
It’s also important to note that resin doesn’t print that great with low environment temperatures so make sure your printer sits in a place where the temperature doesn’t go under ~20C. If the temperature is higher, then the resin will print better.
Wash the finished model
If you don’t have a wash and cure station, the post processing task will be the most annoying task when it comes to resin 3D printing (at least for me).
But you can make this task a bit easier if you have a few containers where you add IPA to do the cleaning process in stages.
First, you do the first wash in the first container to clean most of the resin present on the model. You can use a brush, but I had great results with a toothbrush too.
After you thoroughly clean the model, you move to the second container where the IPA is cleaner to start removing the remaining resin off the model.
Finally, you can move to a third container to repeat the process and ensure your model is thoroughly cleaned and there’s no more uncured resin on the model.
Remove the supports
Some people like to remove the supports after curing the model, but I found out that removing them in advance produces better results and less scarring on the model. There’s also a trick to do this.
After I thoroughly clean the model, I submerge it for a few minutes in hot water (~60C-70C). This will allow you to easily remove the supports with next to no damage to the model.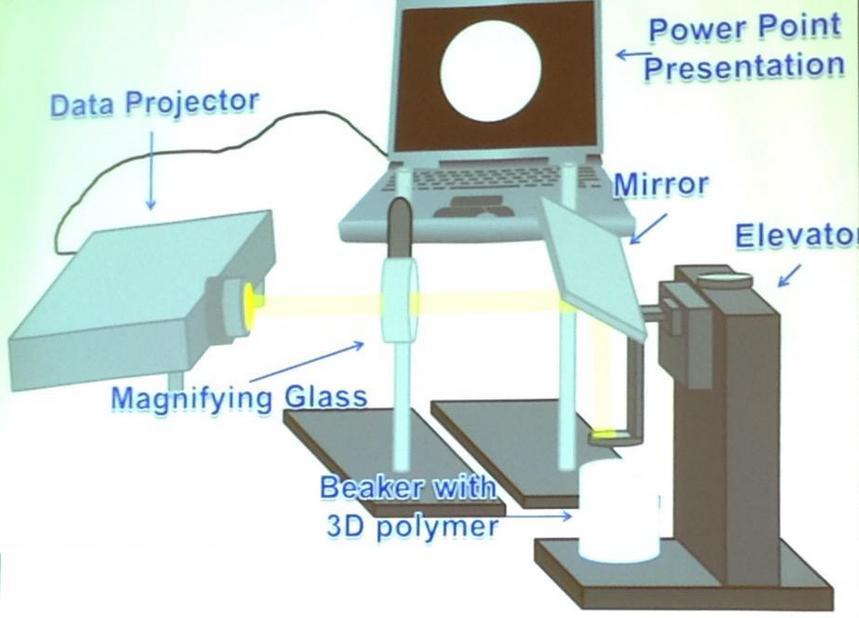
Please note that if the water is too hot, or you leave the model in hot water for a prolonged period of time, you can damage the small features of the model, so don’t keep it submerged more than 2 minutes.
Cure the washed model
Finally, the model is now cleaned, supports are removed so we can move on the last step, which is curing.
Depending on what curing solution you choose, and the intensity of your UV lights, the final curing time might vary.
I use the Phrozen Cure V2, and I cure the models for around 2 minutes. This amount of cure time works best for me, but you need to do some testing for various resin types. For example, the Siraya Tech BLU resin needs to be cured for around 6 to 8 minutes for it to keep its proprieties.
Please note that if you over-cure your models, you risk making them more brittles and “burn” your resin, causing it to become less transparent (for translucent resin) or to darken (for white resin).
It’s a matter of trial and error, but you can also check out the resin printing groups to see what curing times other people use, so you don’t start from scratch.
Wrapping up
Hopefully, the information in this article will make your resin 3D printing a bit easier. I would love to hear from you if this article helped you, and don’t be shy of showing off your print results in the comment section. Sharing this article with others also helps.
If you find some missing information, please let me know and I will update the article accordingly, to make it easier for beginners to start printing with resin.
If you have questions, feel free to leave a comment or join the 3DPrintBeginner Forum where there’s a dedicated category for Resin 3D printers.
Liked it?Consider supporting 3DPrintBeginner if this content helped. You can also join Patreon for exclusive perks! |
How To Use a Resin 3D Printer – A Simple Guide for Beginners – 3D Printerly
Resin 3D printers can seem like a confusing machine at first, especially if you have never used a 3D printer before. Many people who have used a filament 3D printer can feel intimidated by the new style of printing, but it’s a lot simpler than most think.
I went from filament 3D printing to begin with, over to resin 3D printing and it wasn’t so complex. This is why I decided to write an article about how to use a resin 3D printer, going through the step-by-step process on how to create resin 3D prints.
Keep on reading through this article to get better knowledge of how to use a resin 3D printer. Let’s start off what what a resin 3D printer is.
What is a Resin 3D Printer?
A resin 3D printer is a machine which uses wavelengths of UV light from an LCD to cure and harden photosensitive liquid resin from a resin vat below onto a build plate above in small layers. There are a few types of resin 3D printers such as DLP, SLA, and the more popular MSLA machine.
Most resin 3D printers that are sold to the average user tends to use the MSLA technology which cures whole layers in one flash of the light, leading to a much quicker printing process.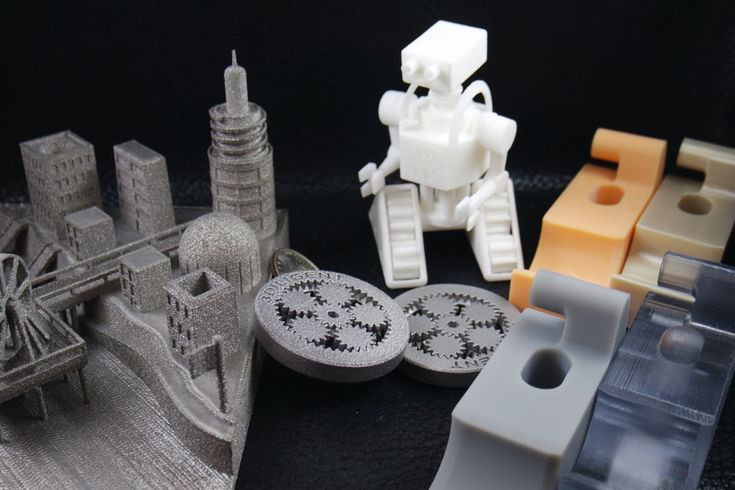
This is a pretty large difference compared to filament or FDM 3D printers that extrude melted plastic filament through a nozzle. You can get much better accuracy and detail when using a resin 3D printer which is why they are so popular.
You can get an excellent level of quality at just 0.01mm or 10 microns when using a resin 3D printer, compared to 0.05mm for some of the best filament 3D printers out there.
Prices of filament 3D printers used to be much cheaper than resin 3D printers, but nowadays, the prices are almost matched, with there being resin printers as cheap as $150.
The costs of resin 3D printing are known to be a little more than filament 3D printing because of the extra accessories and consumables that are needed. For example, you need to purchase a UV light and a cleaning liquid to clean up your resin prints.
As time has progressed though, we are getting new innovations such as the water-washable resin, so you no longer need these cleaning liquids, leading to a cheaper resin printing experience.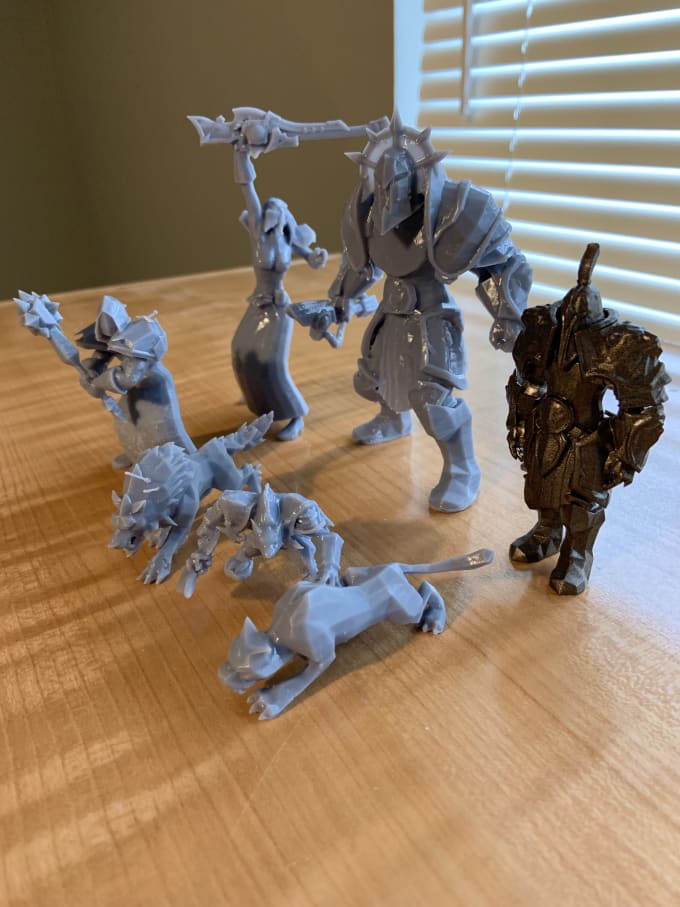
Many people recommend getting a Wash & Cure machine along with your resin 3D printer so you can streamline the processing of each resin 3D print.
If you want to do less work for each print, you’ll want a filament 3D printer, but if you don’t mind doing additional work for amazing quality, then resin printing is a great choice.
Resin 3D printing is also known to be quite messy and more dangerous since you don’t want to get resin directly on your skin.
There are many things you’ll want to have along with your resin 3D printer.
What Do You Need for Resin 3D Printing?
Resin 3D Printer
As we all know, resin 3D printing cannot be done without a proper resin 3D printer.
There are plenty of options from good to great 3D printers and you want to choose the one that can fulfill your requirements. I’ll give you two popular recommendations below.
ELEGOO Mars 2 ProThe Elegoo Mars 2 Pro (Amazon) is a well-known machine and is appreciated by thousands of users because of its amazing features and specifications that can be purchased with a short budget.
Many users have said in their reviews that if we have to mention a star feature of this 3D printer, high-quality prints with fine details would be the one. Other features that come with the machine include:
- 8” 2K Monochrome LCD
- Multi-Language Interface
- ChiTuBox Slicer
- CNC-Machined Aluminium Body
- Sanded Aluminium Build Plate
- COB UV-LED Light Source
- Light and Compact Resin Vat
- Built-In Active Carbon
The Anycubic Photon Mono X (Amazon) is a premium option used for advanced and professional resin 3D printings. It has a hugely positive reputation among the users and has high ratings on many selling platforms.
Many users have mentioned different features and qualities of this 3D printer as their favorite and some of the best include build volume, model quality, printing speed, and ease of operation. Some of the best features that are included in this 3D printer are:
- 9” 4K Monochrome LCD
- New Upgraded LED Array
- Dual Linear Z-Axis
- UV Cooling System
- App Remote Control
- Wi-Fi Functionality
- High-Quality Power Supply
- Large Build Size
- Fast printing Speed
- Sturdy Resin Vat
You can also get the Anycubic Photon Mono X from Anycubic’s official website.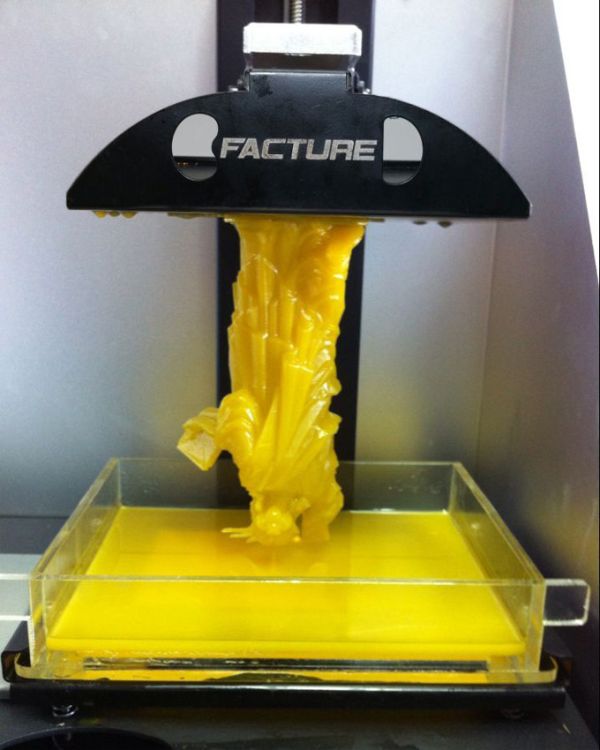 They sometimes have sales.
Resin
The photosensitive resin is used as a 3D printing material that comes in various colors and has different chemical and mechanical properties. For example, Anycubic Basic Resin is used for miniatures and generic resin objects, Siraya Tech Tenacious is a flexible resin, and Siraya Tech Blu is a strong resin.
There is an eco-friendly resin named Anycubic Eco Resin, which is considered the safest resin as it contains no VOCs or any other harmful chemicals.
Nitrile Gloves
A pair of nitrile gloves is one of the leading picks in resin 3D printing. Uncured resin can cause irritations if it comes in contact with your skin, therefore you need something that can protect you from this.
Nitrile gloves can protect you from chemical burns to a great extent. Usually, these gloves are not disposable but can be cleaned or washed using isopropyl alcohol (IPA). You should purchase Nitrile Gloves for your safety on Amazing today.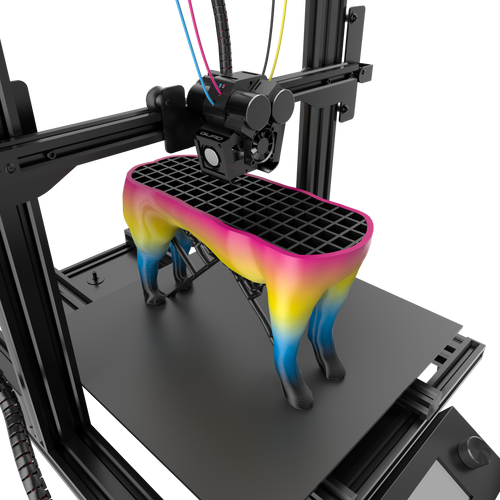
FEP Film
The FEP film is a transparent sheet that is placed at the bottom of the resin vat. FEP film can get damaged after a few prints and need to be replaced.
You can get the FEP Film from Amazon today. The FEP film is suitable for almost all types of LCD/SLA 3D Printers under the print size of 200 x 140mm such as Anycubic Photon, Anycubic Photon S, Creality LD-001, ELEGOO Mars, etc.
Wash and Cure Station
The Wash and Cure Station is used for post-processing purposes. Cleaning, washing, and curing resin models is a bit messy job and this accessory makes this process easy and efficient.
Although you can make your own Wash and Cure Station as a DIY Project, the Anycubic Wash and Cure Station is one of the best options if you need a professional one which can make your resin process more seamless.
This is a 2-in-1 wash and cure station with benefits like convenience, wide compatibility, effectiveness, diverse washing modes, and comes with an anti-UV light hood to protect your eyes from direct UV rays.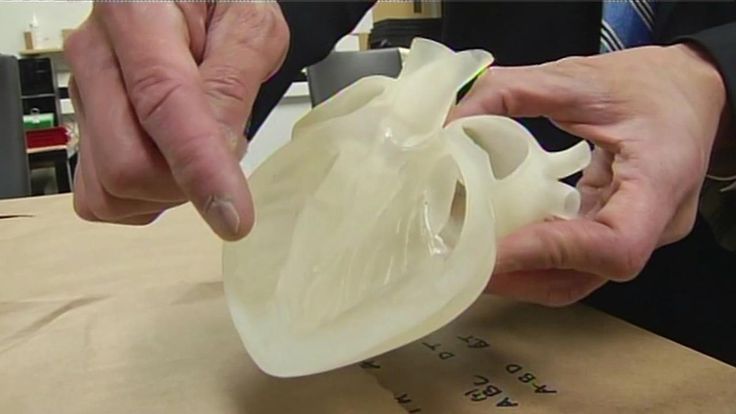
Isopropyl Alcohol
Isopropyl Alcohol is also known as IPA which is a well-known solution used for cleaning and washing the resin 3D prints. This solution is safe and can be used for cleaning with different types of tools without affecting them.
You can get a bottle of Vaxxen Labs Isopropyl Alcohol (99%) from Amazon.
Silicone Funnel
The silicone funnel with filters is used to clear your resin vat and pour resin into the bottle. When pouring resin back into the bottle, you want to make sure that no residue or hardened resin gets poured back in, since this can ruin future prints if it is poured into the resin vat.
I’d recommend going with the Jeteven Strainer Silicone Funnel with 100 Disposable Filters from Amazon.
It comes with Nylon paper which is durable, waterproof, and solvent resistant making it perfect for resin 3D printing and is suitable for almost all types of resin printing materials.
Slicer Software
You need to slice your 3D designs with the help of some programs, these programs are known as slicer software in the resin 3D printing industry.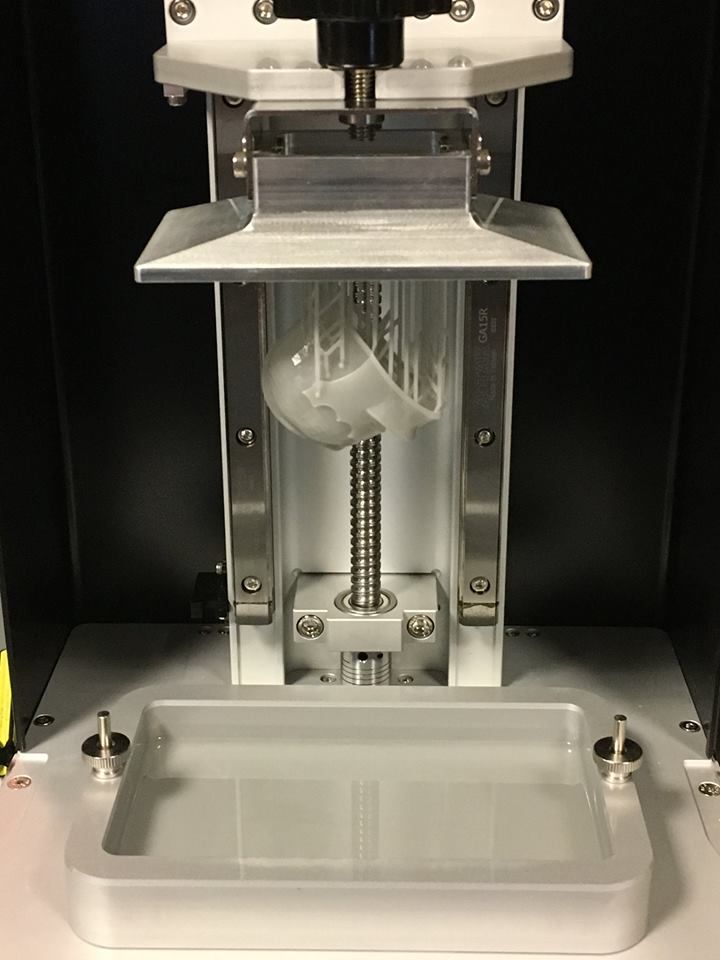
ChiTuBox is considered a respectable slicer software for resin 3D printing, but I’d recommend going with Lychee Slicer. Many people also have success with the Prusa Slicer for their resin 3D printing.
Paper Towels
Cleaning is an essential factor in resin 3D printing and you need something that can help you out in the most efficient and easiest manner. You may not find anything better than paper towels when it comes to cleaning messy resin and 3D printers.
Paper towels that you may find in drug stores are not so absorbent and you need high quality so that they can better absorb resin to make cleaning easier for you.
Bounty Quick-Size Paper Towels is considered a good product for this purpose.
Now that we know what we need, let’s see how we go about using the 3D printer and creating 3D prints.
How Do You Use a Resin 3D Printer?
The video below by Nerdtronic goes into some great depth about how to use a resin 3D printer, made especially for beginners.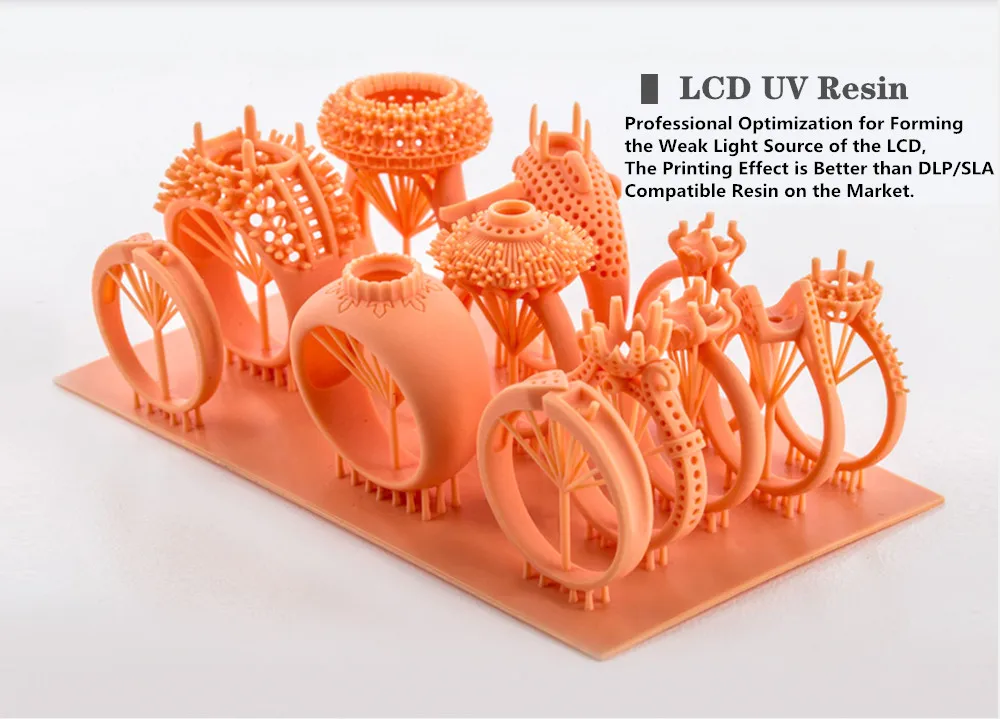
Set Up the 3D Printer
Setting up your resin 3D printer means to assure that all the components are in place, power is coming to your machine and it is totally ready to start the printing process.
Depending on what resin printer you have, this can be done in as quick as 5 minutes.
Pour in Resin
Pour your liquid resin into the resin vat. The vat has a transparent bottom which is placed over a screen that lets UV lights pass and reach the resin to cure or make it hard while forming your designed 3D model onto the build plate.
Get STL File
You can find a whole host of great files on Thingiverse or MyMiniFactory for resin 3D printing. Make use of the search bar or explore features to find some of the most popular models out there.
Import into Slicer
Using Lychee Slicer, you can easily drag and drop your STL file into the program and begin creating the file needed for your 3D printer. Slicers all do the same thing, but they have different user interfaces and slight changes in how they process files.
Put In Settings
With Lychee Slicer you can easily apply settings automatically for things like supports, bracings, orientation, placement and more. Simply click the automatic buttons to let your slicer do the work.
If you are happy with what it done, then you can move onto the next step. Some settings require manual adjustments such as normal exposure, bottom exposure, number of bottom layers, and so on, but generally speaking, the default values can still produce a decent model.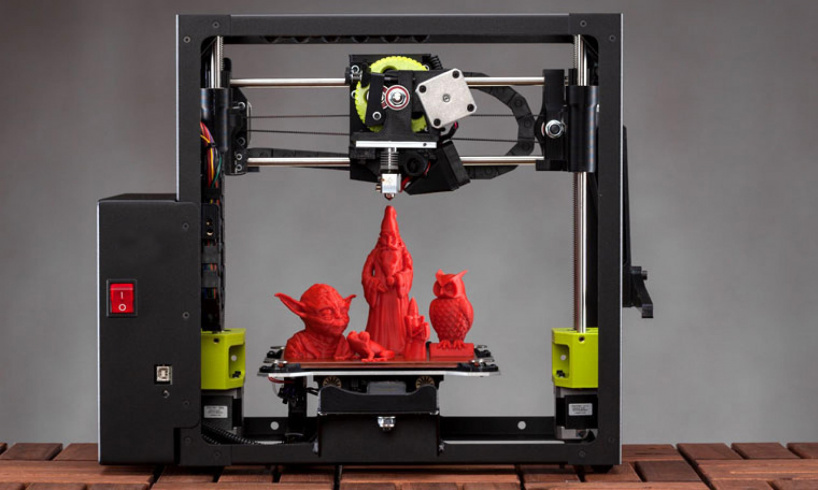
I’d definitely recommend adding a raft to all your resin 3D prints to help it adhere to the build plate better.
Save the File
After completing all the steps in your slicer, you will have an exact design of the model. Save the file to your USB or MicroSD card so that you can use it on your 3D printer.
Insert the USB into Resin 3D Printer
Eject your memory stick then simply insert your USB or SD card into the 3D printer. Select the STL file that you need to print from the USB drive, this will be done using your 3D printer’s LCD screen.
Start your Printing Process
Your 3D printer will load up your design within a few seconds and now you only have to click on the Print option to start your printing process.
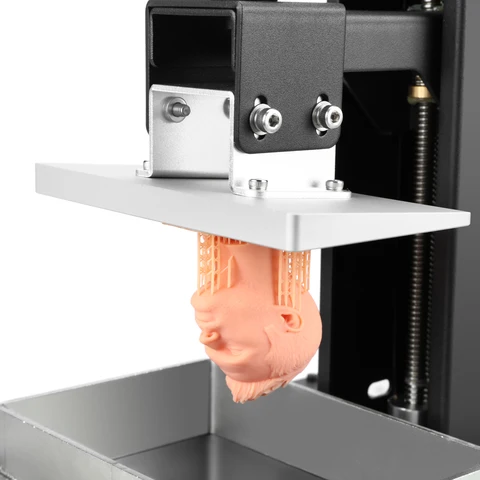
Drain Resin from Print
Once your printing process is completed, it is recommended to let your print stay for some time so that excess resin can be drained out from your print. You can use paper towels or some types of sheets for this purpose as well.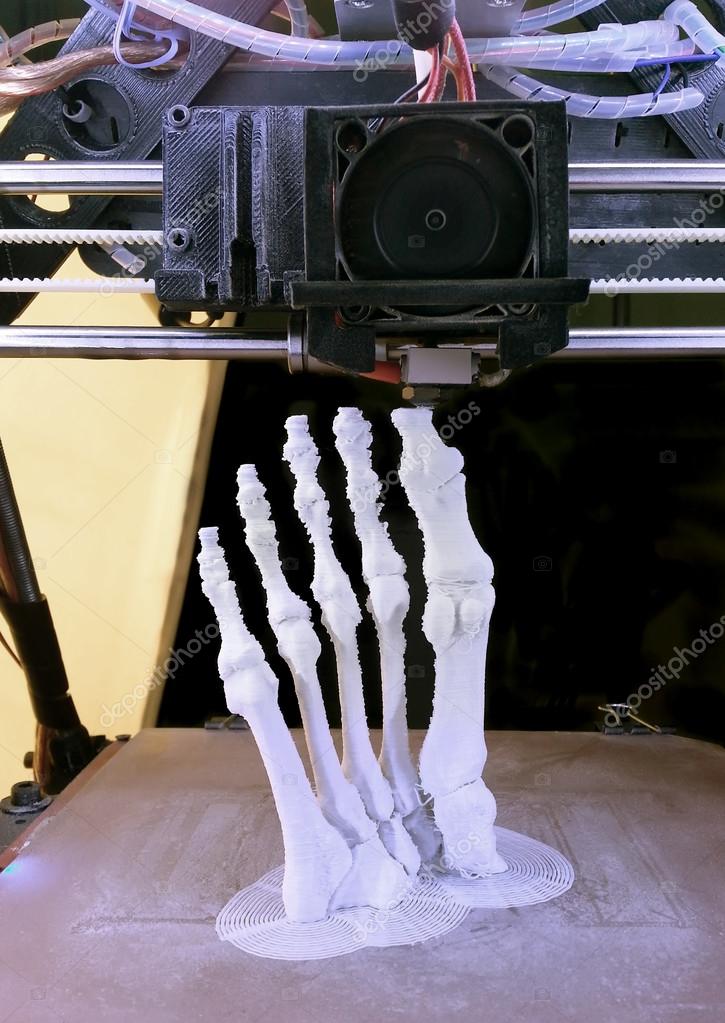
You can also make some upgrades to your 3D printer to make this process easier and more efficient. The draining arm is one of the best techniques to be used for draining resin from your 3D print.
I personally use this a different model on my Anycubic Photon Mono X and it works very well.
Remove Print from the Build Plate
You need to remove your model from the build plate, once it is completed. You want to be gentle as removing the print from a resin 3D printer is quite different from FDM 3D printers.
If you do use a metal spatula to remove prints from your build plate, you want to be very gentle so you don’t damage your print or the build plate.
- Wear nitrile gloves to protect your hands from uncured resin.
- Gently remove your build plate from the printer. Make sure that you don’t bump the model in any component of the printer as it can damage your print or may break off some parts of it.
- Resin 3D printers usually come with their own spatula, lift your print from the raft or edge.
- Slightly slide your print removal tool under the print and wiggle it side to side until it lifts, then continue until the model is removed.
Wash Resin Off
Every resin print will have some uncured resin on it which needs to be cleaned off before curing your model.
If that extra resin becomes hard, either it will ruin all the shine and beauty of your model or it will remain sticky even after curing your model, resulting in a part that doesn’t look feel or look the best, as well as attracting dust and debris on your model.
In order to wash off your resin 3D prints, you have a few options
- Use an ultrasonic cleaner with a cleaning liquid
- Denatured alcohol, isopropyl alcohol, mean green, or methylated spirits are choices many people use
- You want to make sure your print is clean all over, ensuring that the part is submerged and scrubbed nicely
- If you are doing a manual wash, you can use a toothbrush or soft but slightly rough cloth to get all the grit off the part
- You can check whether your part is clean enough by rubbing it with your finger through gloves of course! It should have a squeaky clean feel to it.
- Let your part air dry after it has been properly cleaned
Nerdtronic created a great video about how to clean a part without an ultrasonic cleaner or professional machine like the Anycubic Wash & Cure.
Remove Supports
Some people like to remove supports after the print is cured, but experts suggest removing supports before the curing process. If you remove supports after curing your model, it can also cause you to remove important parts of your model.
- Use a flush cutter to snip off supports from your resin 3D prints – or manually removing them can be good enough depending on your support settings
- Make sure you are cutting off supports as close to the surface of the print
- Take good care when removing supports.
 It’s better to be patient and careful rather than quick and careless.
Cure the Print
Curing your resin 3D prints is essential as it will not only make your model stronger, but will also make it safe for you to touch and use. Curing is the process of exposing your resin prints to direct UV lights which can be done in various forms.
- Using a professional UV Curing Station is one of the best options as it is specifically designed for this purpose. It usually takes 3 to 6 minutes to get the job done but you can give more time if needed.
- If you need to save money, you can build your own UV Curing Station instead of buying it. There are plenty of videos on YouTube that will guide you to get this done.
- The sun is a natural source of UV light which can be used for curing as well. This option will take a bit longer but can bring you efficient results. For small prints, it takes about 20 to 30 minutes but you should keep on checking your print’s quality after a few minutes to analyze this factor.
Post-Process with Sanding
Sanding is the best technique that is widely used to make your 3D prints smooth, shiny and to get rid of supports’ marks and extra uncured resin attached to your print.
You can sand 3D models with your hands but you can also use an electronic sander while working with less complex parts.
Using different grits or roughness of sandpaper is what allows you to easily remove any layer lines and bumps from supports, which then progress into finer sanding which gives a more polished and smooth look afterwards.
You can go really high in sandpaper grit if you want a very shiny and clean look, with grits even going up to 10,000 grits and above. Those kind of numbers are if you want a glass-like finish.
A good set of sandpaper you can get from Amazon is the YXYL 60 Pcs 120 to 5,000 Grit Assorted Sandpaper. You can either dry sand or wet sand your resin prints, with easy identifying of each grit with the numbers written on the back.
It comes with a 100% satisfaction guarantee, so you know you’ll be happy with the results, like many of other users.
Post-Process with Painting
As its name suggests, this is the process of painting your resin prints in different colors to make them attractive and look perfect. You have the option to:
- Print directly with a dyed resin. It is usually done by mixing white or clear resin with a suitable dye ink to create new colors
I’d recommend going with a diverse set of colors like the Limino Epoxy Resin Pigment Dye – 18 Colors from Amazon.
- You can spray paint or paint your resin 3D prints after they are completed and cured.
A staple primer that is used throughout the 3D printing community is the Rust-Oleum Painter’s Touch 2X Ultra-Cover Primer in gray. It provides your models with a Double Cover Technology that enhances not only the quality, but the speed of your projects.
The Krylon Fusion All-In-One Spray Paint from Amazon is a great option for spray-painting your 3D models because it mixes primer and paint, all into one effective solution.
It provides amazing adhesion, durability, and even rust protection for other types of surfaces. Although you’ll be using it for your 3D models, it has real versatility, being able to be used on surfaces like wood, ceramic, glass, tile and so on.
- You can paint with acrylic but it is normally recommended for more complex 3D prints.
Tons of 3D printer users choose the Crafts 4 All Acrylic Paint Set of 24 Colors on Amazon. It provides you with a whole host of colors and visuals for you to get creative on your 3D models.
What Are Resin 3D Printers Good For?
Resin 3D printers are good for printing highly accurate 3D prints with a wide range of colors. If you need a 3D printing technique that can print quickly while offering extremely high quality, resin printing is the option for you.
You even now have tough resins that can compare to some of the stronger filaments that are used in FDM 3D printing. There are also flexible resins that have similar properties to TPU, but not as flexible.
If you want to print models that have remarkable dimensional accuracy, a resin 3D printer is a great choice. Several users are making high quality miniatures, figures, busts, statues and more.
Photopolymer 3D printer
3D printers can be sorted not only by the printing technologies used, but also by the consumables used. In this section, we will look at devices that use photopolymer resins to build models.
- 1 Consumables
- 2 Laser stereolithography (SLA)
- 3 Projector stereolithography (DLP)
- 4 Multi-jet (MJM and PolyJet)
- 5 3D pens
- 6 Additional illumination
Consumables
Photopolymer resins are liquid polymers that harden when exposed to light. As a rule, such materials are sensitive to the ultraviolet range, which determines the design of photopolymer printers. One of the common design elements is a transparent colored cap or housing made of a material that filters ultraviolet radiation. This is done both to protect the user's eyes and to protect the supplies inside the printer from exposure to sunlight and background lighting.
Photopolymer resin loaded into Form 1 3D printer
The physical properties of resins after polymerization vary widely. Both rigid and flexible options are available, transparent and matte. A wide selection of colors is also available. Resin consistency and exposure times also vary, so a range of compatible media should be considered when choosing a printer.
The last aspect to consider when choosing a material is its toxicity. There are both quite toxic options and biologically safe ones.
The cost of consumables can be considered the Achilles' heel of photopolymer printing. The plants themselves are already reaching quite acceptable price levels, but it is still quite difficult to find inexpensive photopolymer resins. It is hoped that the proliferation of inexpensive photopolymer printers will lead to an increase in the production of consumables and lower prices.
Laser Stereolithography (SLA)
SLA Model
The firstborn of photopolymer printing and modern 3D printing in general. The technology was developed in 1984 by Charles Hall, who later founded 3D Systems.
SLA printers use laser emitters to cure the photopolymer supply.
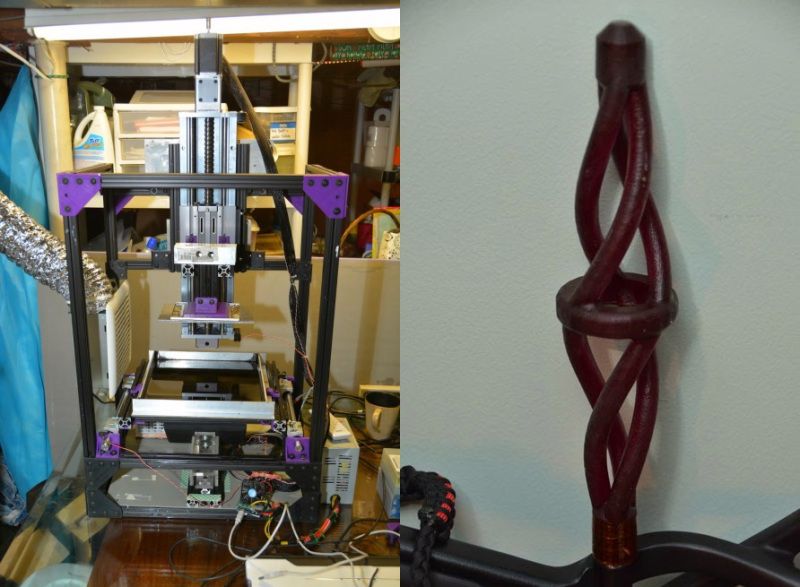
A typical SLA printer consists of a consumable tray sitting under a build platform driven vertically by a raise/lower mechanism.
Alternatively, the cuvette itself can be driven - what matters is the relative movement of the platform and the container. Above the cuvette is a laser emitter and a mirror system for deflecting the laser beam.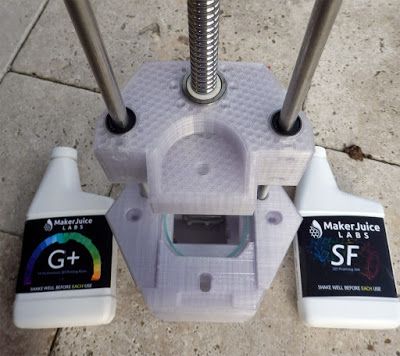
During the printing process, the platform is immersed in the consumable for the thickness of one layer of the digital model.
Since photopolymer resins can be quite thick, a leveling mechanism is often used to speed up the process.
SLA printer operation scheme
After leveling, the process of illumination of the material begins. Illumination is produced by laser irradiation. Most photopolymer resins are designed to cure (polymerize) when exposed to ultraviolet light, which determines the choice of laser frequency. The movement of the beam along the X and Y axes is determined by the operation of the deflecting mirrors.
After the drawing of the layer is completed, the platform is immersed in the material for the thickness of one more layer, and the process is repeated with the drawing of the next layer of the digital model.
Model building animation
SLA printing takes quite a long time, and printers using this method tend to have relatively small build areas.
This is mainly due to the high cost of laser emitters: printing large objects with a single laser will take too much time, and installing additional emitters and mirrors will complicate the design, increase the dimensions of the installation and raise the price to an unacceptable level for most users.
Despite the success of this technology, projected stereolithography is considered to be a more promising, although very similar method.
Projector Stereolithography (DLP)
Formlabs Form 1 Desktop DLP Printer
A close relative of laser stereolithography, this method uses digital LED projectors instead of laser machines with mirror deflection systems. The method became popular due to the development of technology for the production of low-cost high-resolution digital projectors by Texas Instruments.
Layers are illuminated using a digital projector that highlights patterns of the entire layer, which distinguishes this method from SLA, where the "picture" emerges progressively using an ultraviolet laser.
A similar approach has previously been used on SGC-type plants, but this technology used physical photomasks, making the process costly, time consuming, slow and noisy.
At the moment, the FTI technology continues to exist - the development of SGC, almost indistinguishable from DLP printing, since it also uses digital LED projectors.
DLP printer design
Simultaneous illumination of an entire layer using projectors can significantly speed up the printing process even compared to SLA printers that have a high scanning speed (ie beam movement).
In addition, these printers are less sensitive to rough physical impact due to the absence of delicate mirror systems.
The absence of mechanical mirror systems improves accuracy. Finally, the cost of projectors sets them apart from laser systems.
Projection size can be quite significant, reaching the average of popular FDM printers.
An interesting feature of DLP printers is the ability to "reverse" or "reverse" printing.
In this case, the projector is installed under a transparent (material choice for transparency in relation to ultraviolet light) cuvette, and the platform does not sink into the material, but gradually rises, pulling out the layers of exposed polymer.
This approach eliminates the alignment mechanism and achieves even higher Z resolution than SLA printers.
In addition, the size of models in height is not limited by the depth of the cuvette, which favorably affects the dimensions of the printer and the possibility of increasing the build area.
Multi-jet printing (MJM and PolyJet)
3D Systems ProJet 3500HDMax MJM printer
MJM and PolyJet technologies are practically indistinguishable from each other. The name difference comes from the respective patents: Multi Jet Modeling is owned by 3D Systems, while PolyJet is owned by rival Stratasys.
The very principle of multi-jet polymer printing was developed by the Israeli company Objet, which eventually became a division of Stratasys.
Multi-jet printing technology combines features of 3D inkjet printing (3DP) and projection stereolithography (DLP).
How the MJM PolyJet printer works
Models are built by spraying photopolymer using linear arrays consisting of multiple nozzles.
The applied layer is immediately exposed to ultraviolet lamps - as a rule, two processes occur simultaneously.
By the time the array reaches the end of the build chamber, the previously deposited material is hard enough to print a new layer.
Composite models created on the ProJet 3500 DP dental printer
This approach allows to achieve very high printing speed, but is characterized by high design complexity, which negatively affects the cost of such installations and limits their distribution to professional use.
One of the advantages of MJM and PolyJet technologies is the ability to create composite structures from photopolymer resins with different physical characteristics.
It is therefore possible to create models with easily removable supports, use multiple colors and use flexible and rigid materials in parallel within the same model.
3D Pens
CreoPop 3D Pen
Recently, there has been a craze for hand-held printing devices called 3D pens. At the moment, there are three main options for such devices: drip-jet pens (DOD), called BioPen and used in the development of new methods for treating damaged tissues, FDM 3D pens, which are manual extruders (essentially similar to the usual hot glue guns, but using thermoplastics) and developments in 3D-drawing with photopolymer resins.
CreoPop 3D pen was the first "handheld resin printer". The design of this device is quite simple, because the most complex function, positioning, is performed by the user himself. The pen only extrudes resin through the tip surrounded by LED emitters.
CreoPop 3D pen in action
This way the resin hardens immediately after application, allowing you to literally draw on air.
The advantage of such handles over FDM-analogues is the low operating temperature - there are no heating elements in the device. As a result, with such pens you can even draw on the skin.
In addition, a wide range of photopolymer resins with different physical properties can be used with such devices, which greatly expands the range of possible applications. At a minimum, this is a relatively inexpensive, but entertaining toy.
The only drawback is the relatively high cost of consumables, but such devices are unlikely to require large volumes of photopolymer resin when used in everyday life.
Additional Lighting
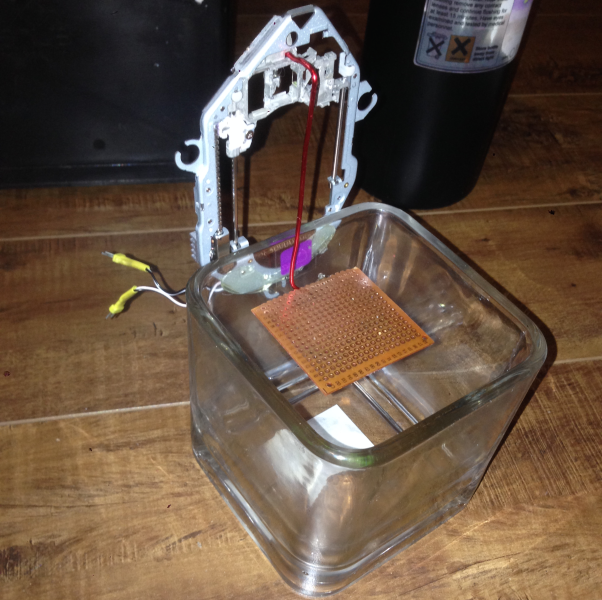
Final Lighting of Resin Models in a Homemade Camera
Full curing of models can take quite a long time, so models during SLA and DLP printing are only partially polymerized, sufficient to maintain the physical shape of the part.
After production, the models are usually placed in chambers equipped with ultraviolet lamps until fully cured. Of course, if possible, you can simply lay out the models in the sun - the effect will be the same.
Just keep in mind that ordinary glass practically does not transmit ultraviolet light, so exposure to sunlight must be direct.
If desired, a UV-transparent quartz glass container can be used.
Go to the main page of the Encyclopedia of 3D Printing
Top 5 Resin 3D Printers (2021 Review)
Resin 3D printer produces highly reliable prints using SLA, LCD or DLP technology. It cures UV resin and turns liquid into high quality 3D models at a faster rate.
To go into more detail, stereolithography (SLA) is the earliest form of resin 3D printing, which works by adding a light sensitive liquid resin substrate to a UV laser beam. The resin is then cured to the desired pattern and the product is formed layer by layer to completion.
On the other hand, when we talk about digital light processing (DLP), we mean the process of projecting one image in each layer with a digital projector by emitting UV radiation. And with the advent of LCD technology, resin 3D printing with LCD screen is becoming predominant in the 3D printing industry today. Since the LCD screen acts as a mask over the UV light source, it is sometimes referred to as MSLA (masked stereolithography).
Having said that, getting the right resin 3D printer has never been easier with so many brands and models available on the market. So, to help you on your buying journey, we've provided the top five resin 3D printers, along with advice from our technical experts and 3D printer enthusiasts, to give you the most important information before you buy.
Just click the buttons below that we have prepared for you to view their best deals on Amazon. That being said, we hope you find the best resin 3D printer to suit your next printing project in the future!
The best polymer 3D printer in comparison and rating
| Smol 3D printer |
|
| 2. ELEGOO Mars 3 Mono MSLA 2D Printer |
|
| 5. |
 Cons:
Final take: This ANYCUBIC Photon Mono X resin 3D printer revolutionized resin 3D printing. It impressed us during the testing process as it consistently printed at 3 x 192 x 120mm. It has a monochrome LCD in the center as well as a 245K resolution panel with 4 micron pixel size (XY). We printed with a thickness of 50mm and were impressed by the quality of the print, which perfectly brings out important and small details. The slicer program is simple but accurate.  Cons:
Final take: The ELEGOO Mars 3 Mono MSLA 2D printer is among the most affordable 3D printers we've seen so far. It features a monochrome LCD, COB UV light source and a 6.08-inch 2K HD LCD. We printed everything from industrial parts to board game mini-games with a build volume of 129mm x 80mm x 150mm. Compared to RGB LCD 3D printers, it has four times the shelf life and twice the print speed, making it one of the most powerful, reliable and maintenance free resin 3D printers. 30 mm/h |
| Slicer software | Longer in-house developed slicing software. CHITUBOX4 |
 3D printer for polymers Anycubic Photon Mono X
 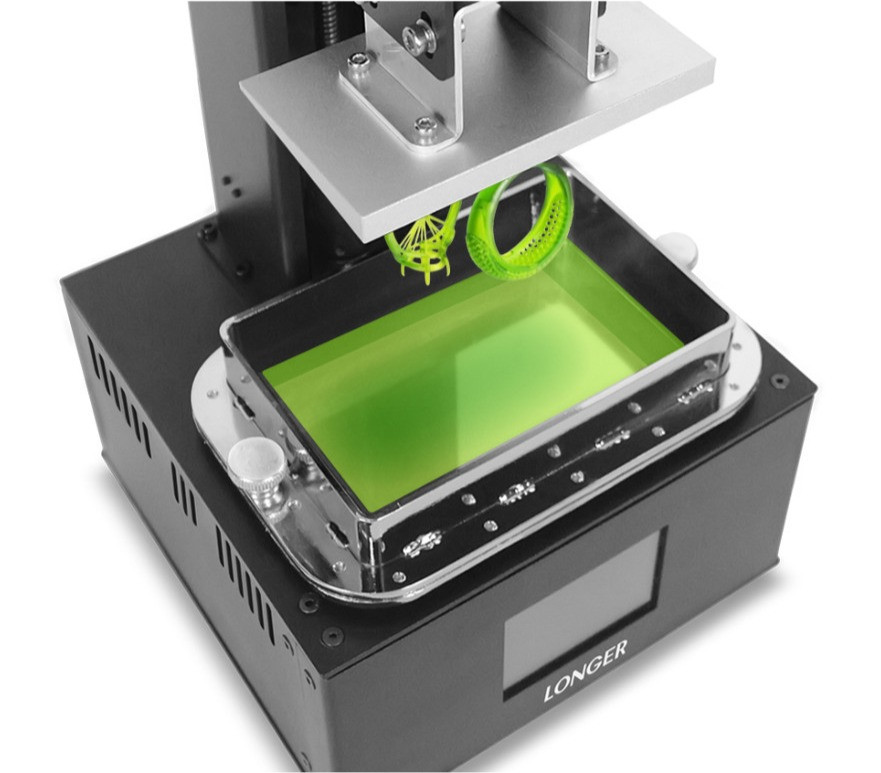 PHROZENEN Sonic Mini Resin 3D printer
 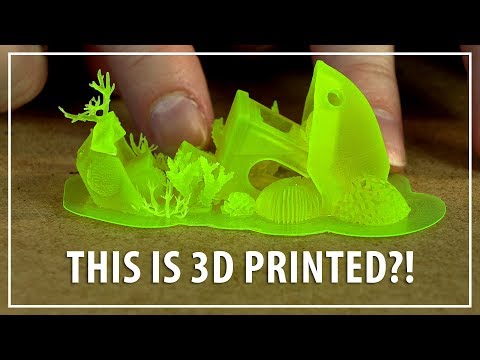 So far, the auto support feature has been reliable because we haven't had missed or failed prints due to insufficient support. The Z-axis is indeed a thread-height bar, while the plastic tank is anodized aluminum, so we've never experienced any Z-axis wobble before this entry. It also features a brushed aluminum platform that improves the adhesion between the platform and prints, as well as its design and durability. Ultimately, this ANYCUBIC Photon Mono X 05D Resin Printer is an excellent entry-level resin UV printer with exceptional print efficiency. We were blown away by its printing capabilities and we can't say enough about the print quality!
 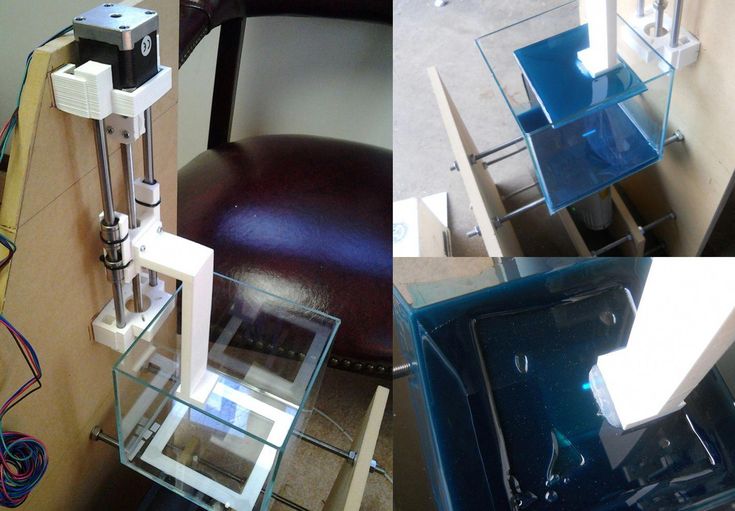 In the process of testing the transparent resin, we set at least 8 seconds per layer at a height of 0.05 mm, and it showed outstanding consistency. Also, at 11-12 seconds for opaque resins per 0.05mm layer, the prints from this 3D printer are really beautiful and flawless. We had a great time with this ELEGOO Mars 3 Mono MSLA 2D Printer as it is incredibly easy to operate while in use and comes with amazing support. In addition, it creates amazing objects with stunning detail and resolution.
 Quality and accuracy of
Functions
Simplication in use
PLASS :
- offers an incorrect reservoir with a faster reservoir with a faster reservation.
 and finer details compared to FDM printers.
 - Comes with an advanced UV LED module that provides specialized optical path configuration and even power distribution to help improve prototype accuracy and print performance.
- Has a self-developed slicing program that creates a 100MB slicing file in one minute, which is three times faster than others.
- Features 24 parallel LEDs for improved print efficiency, cure speed, layer adhesion support, and consistent light output compared to other printers.
- Features a full color touch screen interface, real-time display and monitoring of print status, fast bed leveling, strong steel body, strong adhesion, and a temperature warning system for greater safety.
Cons:
- We are a little limited in the printing area because it is a little small.
Final take:
This Longer Orange 3 Resin SLA 10D Printer is one of the most iconic SLA 3D printers available and is a great entry level LCD light curing device. Assembly takes minimal time as we were able to start printing within minutes of unboxing and the entire process took only 15 minutes. The self-developed slicing program is incredibly easy to use and very fast. We printed 28mm high mock-ups which took about 3 hours to complete. One thing to note when printing with resin is that the printing process is proportional to the height of the model, meaning that it takes the same amount of time to print six models as it takes to print one model. It produces highly accurate prints and can print complex models such as miniatures including accessories. Ultimately, there is no doubt about its effectiveness, because it produces quality products of an exceptionally high level! This Longer Orange 3 Resin SLA 10D printer is a great buy when it comes to 3D printing.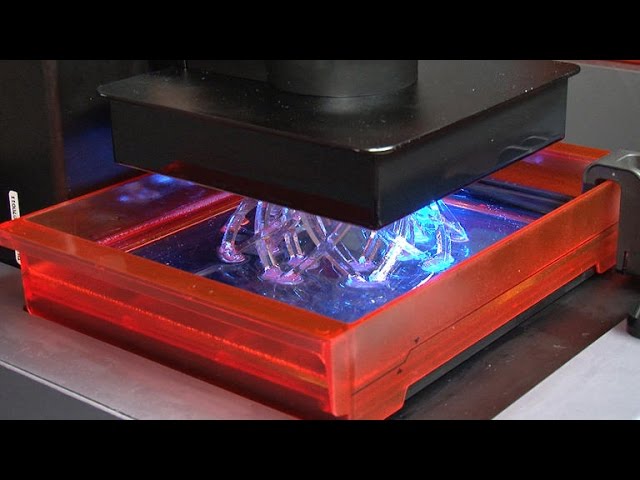
Cons:
- The manual is useless because there doesn't seem to be any cleaning or post-processing procedures, and even all the instructions are written in Chinese.
Final take:
Creality 3D printers are gaining popularity and this Creality LD3R Resin 002D printer is another great resin 3D printer in the industry. It is economical yet effective as its powerful UV output delivers 4 seconds per coat with exceptional precision and resolution. During the testing procedure, the initial calibration and setup is extremely easy and our first prints were pretty good. After weeks of continuous testing and use, we can confidently state that this 3D printer is a fantastic piece to get started with resin 3D printing. The resolution is really very good, and the surface quality of the printed parts is impressive. We have been using the printer for two months now, and since we have used it, it has not disappointed us. In addition, the performance of this 3D printer is amazing. Without a doubt, this Creality LD3R Resin 002D Printer is a fantastic way to start your 3D printing journey.
Cons:
- The work table is not tilted and holds a significant amount of resin.
- Compared to other 3D printers in the same price range, it usually has a smaller build volume.
Final take:
This PHROZEN Sonic Mini Resin 3D printer is an impressive low cost resin 3D printer with high speed printing, high precision and ease of use. It has a very advanced production and processing method that cures the resin in a fraction of a second. In the same way, it uses a thermally stable mono-LCD display, which will better last about 2000 hours, so we don't have to worry about maintenance and care.