3D printer cleaning bed
How to Clean a 3D Printer Bed
By Sammy Ekaran
It's essential to keep your 3D printer's bed clean to ensure high-quality results and also prolong its lifespan. We show you how.
If you're using a 3D printer, you know that keeping the bed clean is essential for producing high-quality prints. If the bed isn't clean, your prints will be covered in streaks and smudges, which can ruin the overall look of your project. The steps below will show you how to clean your 3D printer bed quickly and effectively.
What Is a 3D Printer Bed?
A 3D printer bed is a platform where the 3D object is built. It is made of glass, metal, or plastic. Each layer is bonded to the previous layer in the bed during 3D printing. The 3D printer bed must be clean and level for the object to be printed correctly, but if it’s not, you will experience first layer woes, and the object will be printed with distorted layers.
Most 3D printers have an automatic bed-leveling feature that makes it easy to keep the print bed level. Some 3D printers also have heated beds that help prevent filament warping during printing. Having looked at what a 3D printer bed is, let’s now look at what you need to have to clean it.
What You'll Need
Depending on your build plate's material, you need various things to clean your 3D printer bed. Here we will use a metal 3D printer bed to demonstrate how it’s cleaned. Below are the primary materials required:
- Isopropyl alcohol (IPA). Ensure the IPA is at least 99% pure—anything less won't be effective.
- A lint-free cloth—you can also use a pocket tissue or cotton wool.
- You'll also need something to scrape off any stubborn bits of a filament—a putty knife, or credit card works well for this.
- Painter's or masking tape is also necessary. Just use the low-tack variety so it won't damage your print bed.
Once you have all the materials, you can proceed with the cleaning process.
Step 1: Remove Any Debris or Dust on the Bed
You can remove debris or dust from the bed's surface using a brush or vacuum. If the dirt is clinging to the bed in clumps, you can use a brush, but a vacuum is helpful if the debris is spread more evenly across the bed. If debris is stacked below the bed, you can unscrew it completely, remove anything that might be stacked, and return it later.
To remove the bed, use a screwdriver to loosen the four screws on each corner. But remember that you will need to level your build plate after removing it because some materials like PLA can be difficult to stick to the bed if it's not level enough. Also, exercise caution so you don't damage the bed
Step 2: Apply Isopropyl Alcohol to the Cleaner
Take a lint-free cloth and dampen it with isopropyl alcohol. You can also use a cotton swab or a pocket tissue to do this job. To start cleaning, gently wipe down the entire surface of the build plate in a circular motion. This will remove residual oils and/or fingerprints and leave the build platform ready for your next print.
Once you're done, remove any residue with a dry, lint-free cloth. It's essential to ensure the build plate is completely dry before using the 3D printer again. Any water or alcohol left on the surface could cause the filament not to stick correctly, resulting in poor print quality.
Step 3: Clean Further With Masking Tape
During the printing process, 3D printers often leave behind a trail of excess material, which can be challenging to remove, especially in the heated build plate that forms the base of the printed object. Even after cleaning using the two steps above, removing the excess materials attached to the 3D printer bed can be a tough job, and that’s where the masking tape comes in now.
The tape will adhere to the build plate and help lift any remaining bits of material. To use the tape, simply apply it to the build plate and then peel it away. With a bit of patience, you should be able to remove all the excess material and leave your build plate clean and ready for the next print job.
Step 4: Wipe the Bed
After you have cleaned your 3D printer bed, it is important to wipe it with a dry cloth. This will help remove any residue left behind from the cleaning process.
Wiping the bed with a dry cloth helps prevent static electricity build-up which can damage sensitive electronic components. It also ensures the surface is adequately prepared for the next printing job.
Tips for Cleaning a 3D Printer Bed
A few more handy hints to help you keep your printer bed clean:
- Use isopropyl alcohol and a lint-free cloth. Avoid using abrasive materials like sandpaper, which can damage the build surface.
- If there is a stubborn residue that won't come off with alcohol and tape, you can try soaking the build plate in acetone overnight. However, be sure to ventilate the area well and take care not to damage any other parts of the printer.
- Rinse the bed off with water and dry thoroughly before printing again.
- Clean the bed regularly. This ensures that your prints are always coming out correctly and that your printer will last longer.
- It's also essential to clean the nozzle regularly. You can do this with a brass wire brush or needle, but be careful not to damage the nozzle opening.
- Use a soft cloth or brush to remove dirt or debris from the bed's surface.
- Once you've cleaned the bed, applying a thin layer of adhesive is vital before printing anything on it. This will help ensure that your prints adhere properly.
Get Quality Prints With a Clean Bed
Cleaning a 3D printer bed is essential for optimal printing results. If the bed is not cleaned, prints may be lower in quality or have imperfections, and the bed itself may become damaged over time if it is not cleaned correctly. Following the above steps will ensure your build plate is clean, and you won’t have a failed print due to a dirty 3D printer bed.
How to Clean a 3D Printer Bed
In 3D printing communities, there’s a lot of discussion around the best 3D printer bed cleaning methods. Whether you’re a newcomer or a veteran, we’ve got some tips for success.
We’ll discuss various cleaning products and how to use them to clean the beds of FDM printers.
Table of Contents
Why Clean the Print Bed?
It may seem obvious, but plastics stick better to clean surfaces. If you have poor bed adhesion, your printing quality may suffer. To get the best adhesion, remove any buildup of filament, oil, dirt, and dust.
Plus when you have a clean 3D printer bed, you might not need to use hacks like glue sticks, painters tape, and hairspray to improve adhesion.
Safety First
As with anything involving chemicals and electricity, a little common sense will go a long way to protect yourself and your property.
Never mix chemicals. You may end up inadvertently creating toxic and dangerous substances. Specifically, never mix acetone and isopropyl alcohol. It forms a toxic chemical, peracetic acid, which can cause chemical burns or worse.
Don’t use any of these products in a confined space, and make sure you have good ventilation.
Also remember that acetone and all kinds of alcohol are highly flammable. All it takes to start a fire is a spark from the electronics or heated bed.
Cleaning Solutions
Only a few cleaning products are effective and safe to use to clean the bed surface.
Isopropyl Alcohol (IPA)
IPA or rubbing alcohol at a 90% concentration or higher is an excellent cleaning solution. Anything above 90% will be hard to find at a drugstore, but you can easily find it on Amazon.
In a pinch, you can use 70%, but keep in mind it won’t remove as much oil from the build surface, and it may contain chemicals other than just alcohol and water. When alcohol and water dry, they might leave a thin film of other, unknown compounds on your bed.
In our experience, 70% isopropyl will do a great job on beds that are already fairly clean. If you see fingerprints or smudges on your build plate that don’t come off with 70% isopropyl, you may need something stronger. We’ve found 90% isopropyl to be the sweet spot between price and effectiveness.
Ethyl Alcohol
In theory, ethyl alcohol is also a good cleaning solution. However finding it in a strong enough concentration is difficult, and in some U.S. states it’s illegal to purchase over the counter.
Everclear is a brand of ethyl alcohol that you can buy at a liquor store. Everclear is 190 proof, which means it’s 95% alcohol.
On the whole, though, ethyl alcohol is more likely than isopropyl alcohol to have impurities, and it’s more expensive. For these reasons, we recommend isopropyl over ethyl alcohol.
Acetone
You might already have some acetone in your home. It’s the main ingredient in some nail polish removers. Read the label, because not all nail polish removers contain acetone. You can find 100% acetone at hardware stores, and it’s a relatively inexpensive solvent.
Acetone is extremely good at removing oil, and it evaporates very quickly. It has a very strong smell and is highly flammable. It can also dissolve some plastics like ABS and acrylic. For that reason, be very careful about what you’re putting acetone on. Prevent damage to your skin, your 3D printer, floors, and furniture by avoiding contact with any other surface besides the bed.
Even though it’s extremely good at cleaning the build plate, we don’t recommend using acetone regularly. In fact, it may damage beds that have a PEI coating.
Soap and Warm Water
Alcohol and acetone, though they can take off grease, aren’t good at removing glue sticks, which some people use to help with first layer adhesion. Dishwashing soap and water work well to remove both grease and glue stick. It’s easier to use dish soap and water if you have a removable bed because you can take it to your sink.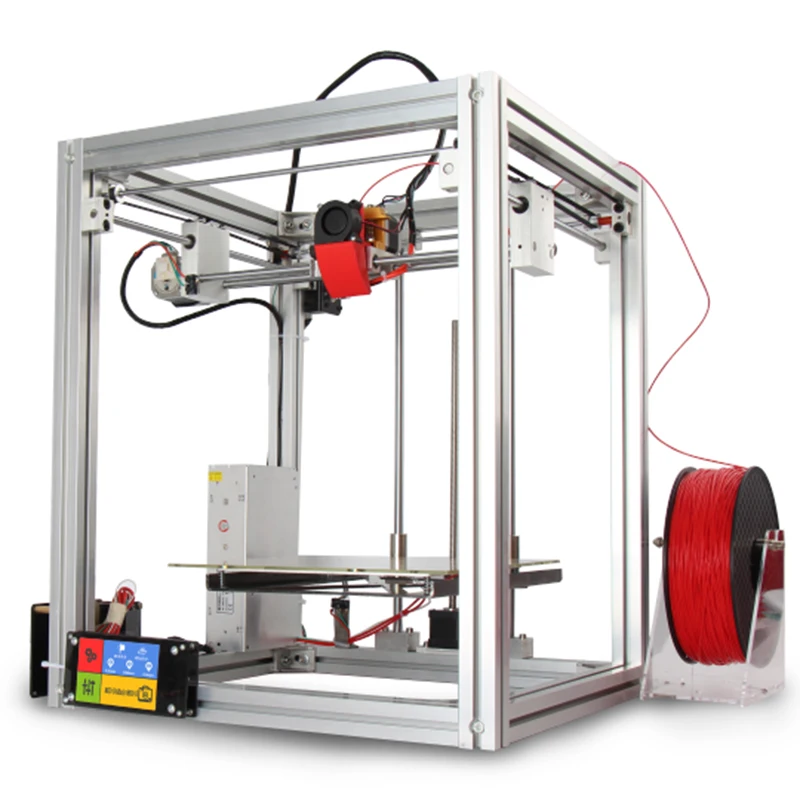
Remember, soap and water mixtures are conductive, so don’t get any on the electronics on your 3D printer. It might cause a short, or, worst case, a shock.
All in all, soapy water may be the best mix because it can remove all types of contaminants.
Glass Cleaner
Glass surface cleaners like Windex aren’t just for cleaning glass. They can act as release agents too. Windex will remove some oil from the bed as well as some other water-soluble contaminants, but it will also leave its own film behind. That might result in less adhesion—which isn’t always a bad thing.
In some cases—like when printing with PETG onto a PEI-coated printing surface—your prints may stick so well that they can pull up the PEI coating when you try to remove them. If you’re having that problem, consider using a window cleaner to clean your bed, or just spray some on to help reduce adhesion, even if your bed is perfectly clean. Just remember to clean it again if you switch to a filament type that doesn’t adhere as well, like PLA or ABS.
How to Clean Your 3D Print Bed
The steps for cleaning the bed of a 3D printer are largely the same, whether you have a glass bed (like the Anycubic Kobra Max), a metal bed (like the Voxelab Aquila), a magnetic bed (like the Anycubic Vyper), or a PEI-coated bed (like some Ender 3 printers).
There’s really only one exception. You shouldn’t use acetone to clean PEI sheets because it might damage the PEI sheet over time. With that in mind, follow these steps for cleaning beds of different materials.
These are the steps for cleaning with isopropyl alcohol, ethyl alcohol, acetone, or Windex:
- Using a scraper, remove any leftover filament residue or adhesive tape from the glass plate, metal bed, or PEI sheet.
- Make sure the bed is at room temperature. Otherwise, the cleaning fluid will evaporate. You want to give it time to soak the oil off.
- Don’t touch the bed directly with your hands, lest you recontaminate it.
 Pretend you’re a surgeon.
- Always add your cleaning solution to a clean paper towel or cloth and avoid spraying it directly on the bed because the mist might get into your electronics. Put enough cleaning solution on the paper towel so you’re able to wipe down the whole bed before it starts evaporating.
- Methodically clean the entire bed, applying pressure evenly throughout the cleaning process.
- Optionally, introduce a second paper towel or clean cloth to dry the bed. Drying can remove even more surface contaminants and oil, and it can dust off any remaining dirt or pieces of the first paper towel. The first pass is dissolving the contaminants. The second pass is removing those contaminants. If your bed is relatively clean, you can skip the second pass. If you’re having adhesion issues, definitely dry the bed.
If you see any remaining smudges, fingerprints, etc., repeat the steps above until they’re gone.
With Soap and Water
When using soap and water to clean the bed, follow these steps:
- First, wash your hands thoroughly.
- Wash the bed like you would a dish, but don’t use anything abrasive. A soft sponge or cloth will work. You could just use your hands, but you’ll get off more grease if you use a sponge, cloth, or paper towel.
- Add some pressure while you’re soaping it up to help dislodge the oil.
- Then rinse all the soap off. Don’t leave any behind. You don’t want any soap left on the bed at all.
- Lastly, dry the bed thoroughly with a new, clean cloth.
Keeping Your Bed Clean
The best way to have a clean bed is to not get it dirty in the first place. Avoid touching the bed at all, if possible. Thoroughly clean your hands if you do need to handle the bed. Better yet, wear clean gloves. Nitrile or latex gloves work great.
Once you’ve cleaned the bed, only touch it on the sides. Keeping your bed clean means future prints are more likely to be successful.
*Special thanks to FormerLurker for his 3D printing expertise.
Cleaning the 3D printer table. Tips and Tricks.
3D printing is a very unstable process, I think everyone who is at least slightly familiar with plastic filament printing technology will agree with this. Unpleasant crashes in the 3D printer can occur for various reasons, and one of the most common reasons is the detachment of the model being grown from the desktop surface. And as a rule, this happens in the middle of printing, when you are already convinced of the stability of the press and are distracted by another activity. It is precisely for this reason that ensuring good adhesion of the first layer to the platform is very important for the successful completion of 3D printing.
Today there are many ways to improve the adhesion of the first layer to the bed. A lot of articles and recommendations have been written about this, so we will not talk about them. It is worth noting one of the simplest methods - is keeping the desktop of a 3D printer clean . Regular and thorough cleaning of the platform will not only improve adhesion, but will make printed models more beautiful and smooth.
In this article we will look at the best way to clean the 3D printer table, using the example of popular coatings:
Remember to be careful when using the methods below, as spilled liquid may damage the 3D printer. We recommend removing the bed from the printer before cleaning (if possible).
PEI sheet surface cleaning
Recently, PEI sheet has become a very popular material for improving adhesion in 3D printers. It provides excellent adhesion to various materials, and when it cools down, the printed model lags behind it very easily. The sheets are very simple and not fussy to use, and most often it does not require additional application of glue or adhesive tape.
Unfortunately, in order to achieve maximum efficiency, the PEI surface also requires regular and high-quality cleaning. If PEI is touched frequently, it can develop greasy spots that reduce adhesion to the material. Rough cleaning can also damage the surface and reduce sticking. Regular cleaning and maintenance of PEI will ensure that your models do not come off.
How to clean the surface of PEI
To clean this surface, we recommend using isopropyl alcohol (Chemical pure, odorless) with a concentration of more than 70%. You can use it with a smell, but it is very caustic and unpleasant, the room will need to be ventilated.
Wait for the platform to cool, then liberally soak a dry cloth or paper towel with alcohol and wipe the surface. This will remove a significant portion of the fats and oils from the bed.
Acetone is also good at dissolving plastic residues on the surface. In the same way, liberally moisten the cloth with liquid, then gently wipe the surface of the 3D printer desktop.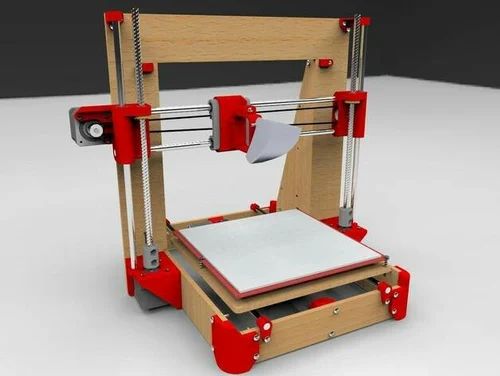 We strongly recommend doing this work in a well-ventilated area, as acetone is highly flammable and its vapors can penetrate the electronics of the device
If you have been using PEI sheet for quite a long time, and visually its resource has been significantly used up, then we recommend using fine grit sandpaper (1500+). With gentle, circular motions, sand the surface until light scratches and depressions are removed.
When should I clean?
Most manufacturers recommend cleaning the surface with isopropyl alcohol every 2 to 3 prints. After a few months of use, sand the surface and wipe thoroughly with acetone. If it is no longer possible to restore the surface by the listed methods, then replace it with a new sheet from PEI. The lifespan of such material varies depending on the brand and frequency of use of the 3D printer.
Glass Surface Cleaning
Glass is another very common 3D printer desktop material. Much more durable than PEI and similar surfaces. The glass plates provide a smooth and level surface at the bottom of the model.
This surface is usually used in combination with other aids (eg glue stick or hairspray) to improve the adhesion of the first coat. Such products are especially popular on tables that are not equipped with heating. Therefore, regular cleaning of the glass is necessary to prevent adhesive or varnish from sticking.
How to clean the glass platform
The easiest way to clean a glass plate is to use a scraper or a non-metal spatula. If the table is heated, then heat it until the material remains soft, after which they should be easily removed with a scraper.
Be careful when scraping. Depending on the scraper, the blade can be very sharp, so be careful not to scratch the surface. We recommend that you put your hand on the handle of the scraper, and with the other hand press down on its middle, so that the greatest force is directed downwards.
If this does not work, try wiping the glass with warm soapy water. Although simple, this method is very effective for removing hairspray, glue, and other adhesives. Keep in mind that this method is only recommended if the 3D printer allows you to remove the platform. Spilled water can seriously damage the heating element, power supply or other electronics of the device.
Dirt can also be removed with specialized cleaning agents. For example, wet alcohol wipes, window cleaner, isopropyl alcohol will also effectively wash away adhesive residue and restore the glass surface. However, do not take too strong cleaners. Such substances can severely damage the surface or even the 3D printer. In order to be sure to select a cleaning agent for your particular 3D printer, it is best to contact its manufacturer. Most often, they willingly make contact with users and willingly give advice.
When to clean the glass surface
Again, this will depend on how often you use the printer. We recommend cleaning the surface after each print to prevent buildup of glue or varnish. Such a procedure will not take much time, but the print will be more stable, and the resulting prints will have a beautiful and even surface. Once the models stop sticking (usually after a month), try washing the surface with soap and water. After about two to four months, you will have to resort to isopropyl alcohol or other specialty drugs. substances.
Cleaning adhesive tapes
Adhesive tape is another proven way to increase adhesion to the print platform. Today, this method is more common on 3D printers without the function of heating the desktop. Masking tape is the most common remedy, but so are Kapton and others.
One of the reasons for the popularity of such linens is their ease of use and relatively inexpensive cost. They are easy to stick to the surface and are available at almost any hardware store. However, there are also disadvantages: the tape quite often peels off when the printed model is removed, so it must be reapplied regularly.
How to clean?
Unfortunately masking tape is one of the most difficult to clean due to its fragility. however, we have found that gentle scraping is one of the most effective ways to clean it. With light pressure, evenly scrape off the remaining plastic thread from the surface, being careful not to tear it.
If the tape does break during cleaning, replace this area with a new strip. The main thing is not to overdo it and do not apply a thick layer, this can adversely affect the quality of the print. If the tape is full of holes and looks like Swiss cheese, then it needs to be completely replaced. Strip and scrape the old tape from the surface. Then wash the platform with warm soapy water to remove adhesive residue.
Once the old tape has been removed and the surface has been thoroughly washed, apply a new layer of masking tape or Kapton. Squeeze out any air bubbles if necessary.
When should I clean?
Masking tape wears out quickly and needs to be replaced much more frequently than PEi for example. We recommend lightly scraping off any plastic that has stuck to it after each print. Depending on the frequency of printing, you will need to change such a surface daily, weekly or once a month.
What is the best way to clean the platen after printing?
maintenance
I have occasionally had problems with excess filament sticking to the platen. There are ways to prevent this, but sometimes even these precautions are not enough. Over time, sediment can accumulate. I have seen this in some print shops but not in others.
Is there any best way to clean printbeds? I have used various typical cleaners in the past with varying degrees of success. However, I don't know if this will damage the printer over time.
The printer I use has a glass platen that I sometimes partially cover with blue masking tape while printing.
@HDE 226868, ♥23
Discussion
6 answers
▲ 10
-
If you print with ABS (or PLA), acetone will dissolve it.
Just pour a little on the table and wipe it off (be careful, acetone can damage tables that have a coating or plastic sheet on top of them, be sure to check that first).
-
Heating the table back up can make the plastic softer and lighter removed.
-
If you use tape on the table, you can remove it to remove plastic stuck to the tape.
, @ Eric Johnson
▲ 8
My usual solution for cleaning the glass table on my printer is a glass scraper (basically just a razor blade with a handle on it):
No matter what filament (abs/pla/nylon) or surface treatment (adhesive/adhesive tape/abs slurry) I used a glass scraper that always takes it off immediately and in the style I posted the photo of the blade , it is quite flexible and thin, it is also useful for cleaning the edge of prints that have stuck to the table.
, @ 1337joe
▲ 0
I use a razor blade scraper to remove sticky items. Before printing, I heat and flatten the build plate, then wipe it down with rubbing alcohol to remove oily fingerprints from it.
My Scraper
, @ EvilTeach
▲ 2
When I print PLA on a glass plate, I clean the glass with cold water and dishwashing liquid. Cold water! And no wiping! The cold water should wash all the dishwashing liquid "down to the ground". Now you have as clean glass as possible. Now the filament adheres to the glass much better than when the glass is not clean.
But of course this does not solve the problem of cleaning the HB after printing. To reduce this problem, I use a glue stick (paper glue). I don't know if this is common, but I like this technique.
Therefore, taking a clean glass, I smeared (smeared) some glue. It doesn't really matter if HB is cold or hot. This gives ME a VERY strong bond between the extruded filament and the glass. It is so strong that it is almost impossible to separate it by hand. I use a paper cutter.
Now you still have a thin layer of glue and you can print again / add another layer of glue (but not more than 2..3 times) or rinse it with hot water. After a few times, clean it well again with dishwashing liquid and cold water.
This technique is amazing.
, @ darth pixel
▲ 1
I have a glass table and use Scraperite plastic razor blades, specifically the black blade, to clean it. It seems to be the best alternative to a metal blade at the moment.
, @ Nick
▲ 2
I use hairspray directly on my glass table, then I just rub a little alcohol on a small piece of paper towel to clean it.