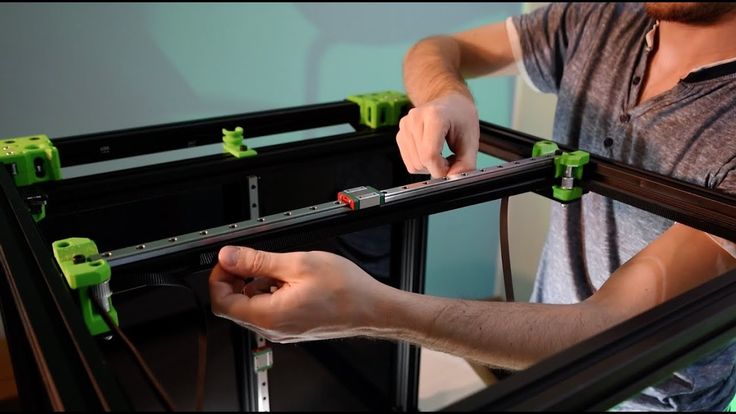
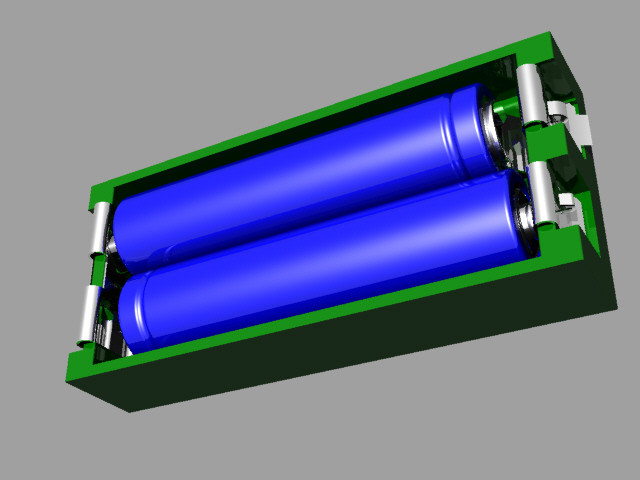
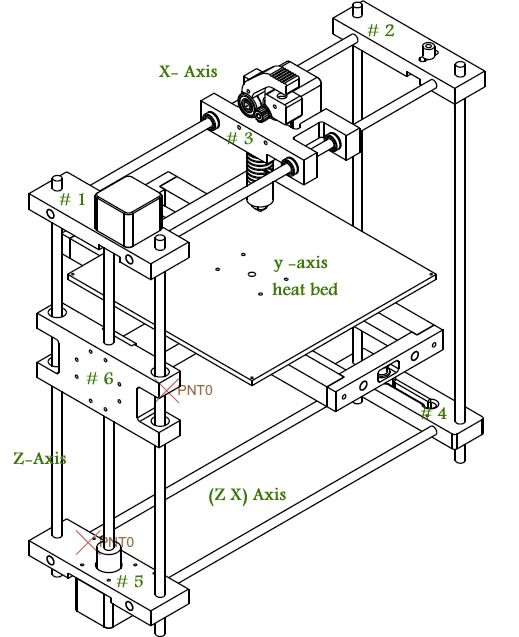
3D printer mechanical kit
Rat Rig V-Core 3.1 - Configurable kit
Project Page
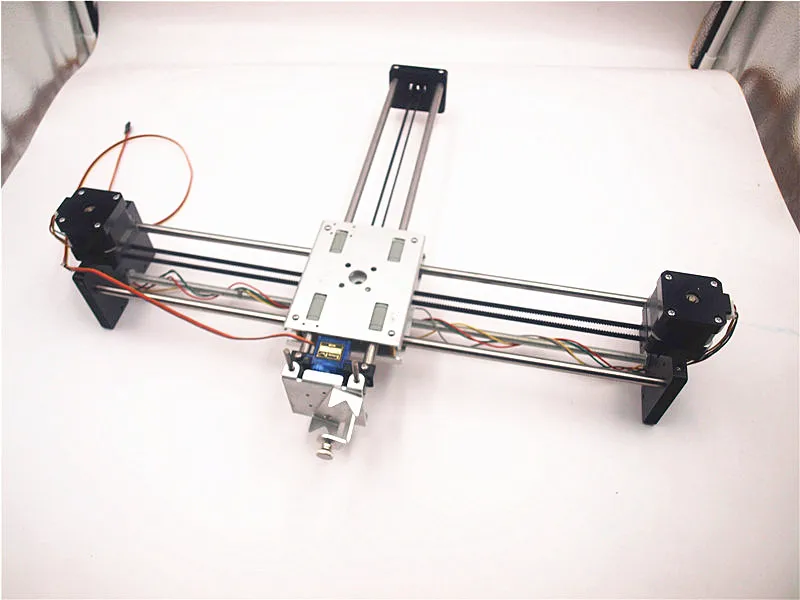
The V-Core 3 is a premium DIY kit for a CoreXY 3D Printer with no compromises. Learn everything about the V-Core 3 on the dedicated project page: v-core.ratrig.com.
Looking for a pre-configured machine?
This "Configurable kit" is meant for advanced users who know what they're doing and want to have control over what components go into their machine. If you're just looking for a kit as complete as possible and don't want too many choices, you should probably be looking at the V-Core 3 Standard Kit.
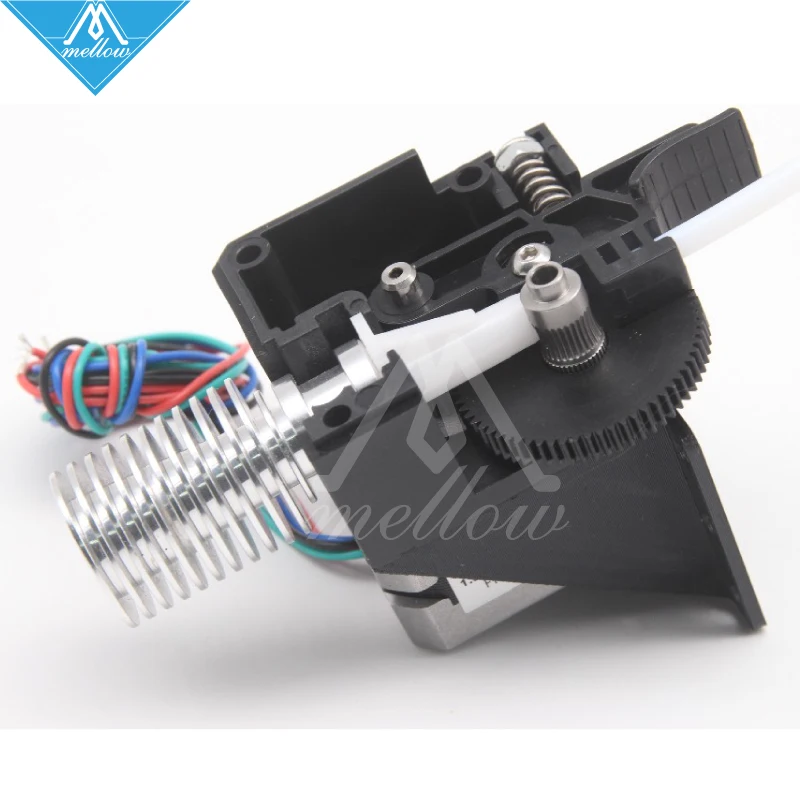
Compatible Extruders / Hot-ends
Via the EVA modular carriage system, the V-Core 3 currently supports many different extruders and hot-ends, allowing you to mount them on your machine in any combination you want.
You can check all available configurations at main.eva-3d.page
At the moment, we're only printing EVA parts for the extruders/hot-ends we supply. If you’d like to use other combinations, you will need to print the respective mounts yourself! STLs are available in the link above. Your EVA printed parts will be printed in accordance with the extruder/hot-end you select in the configurator. If you don't select an extruder or hot-end on the configurator, your printed part set will ship without those printed parts. In this situation, you can print the parts yourself using the STLs available in the EVA page linked above.
Not included
 Using 4mm thick polycarbonate sheets is suggested (CAUTION: thickness above 4mm is not advised as it will interfere with the XY motors).
To extend the cabling of your fans and bltouch:
2x 22AWG Cable 2 Conductors 1500mm
1x 22AWG Cable 5 Conductors 1500mm
To connect PSU, SSR and board:
3x 16AWG Cable 2 Conductors 500mm
Enclosure Kit
Learn more about the V-Core Enclosure Kit on the dedicated product page.
The V-Core 3 is a premium DIY kit for a CoreXY 3D Printer with no compromises.
This kit is the culmination of Rat Rig's accumulated years of experience designing, producing and distributing DIY 3D Printer kits worldwide. Originally introduced in 2017, the V-Core went through several iterations and multiple variants over time, through a process of continuously seeking user feedback to drive product development. The lessons learned over the years allowed us to understand what works and what doesn't, what features are most valued by users, and what choices ensure both quality and affordability. We've distilled all this knowledge into the V-Core 3, which was designed in partnership with Pawel Kucmus, a long time member of our on-line community and one of the most prolific contributors to the V-Core platform.
Precision
The V-Core 3 uses 3 lead screws to drive the Z axis of the machine. They move the bed down in small increments, at the end of each complete layer. The Z axis moves very slowly, so speed is not the priority - precision and resolution are. The V-Core 3 uses TR8X4mm lead screws instead of the TR8x8mm used in previous machines, effectively halving the pitch of the lead screw - this means that each rotation of the motor, now moves the bed half as much. This both doubles the Z resolution of your layers and multiplies the holding torque - always helpful when you're moving such a heavy bed, especially on the larger variants.
Robustness
While previous V-Core versions, like many other printers on the market, relied solely on 20 Series profiles, the V-Core 3 is fully built on a 30 Series aluminium frame. From screws and nuts to brackets and plates, everything is bigger, stronger and tougher.
- Frame made with 30x30mm T-Slot aluminium with a beautiful black anodization
- 4mm thick anodized aluminium plates
- 9mm Belts
- Weight of Z drivetrain and bed is distributed across the Z motor mounts - not on the motors themselves
Customization
- Available both as a complete kit and a configurable kit (for those who want to select their own electronics)
- Configurable options include LDO motors, Keenovo Heat pads, and multiple controller board options (from Duet3D, SKR, etc)
- 4 build volumes available as standard option: 200, 300, 400 and 500 mm3
- Full End Stop solutions
- EVA 3 Carriage System provides mounts for most popular extruder and hot end choices on the market
- Shipping with EVA 3.
 0.2
0.2
What is EVA?
EVA is an independently developed and maintained project that aims to be a single platform for many extrusion types.
Note that not all print head types (due to their physical dimensions) can reach the full print area.
EVA 3 is the next iteration of the EVA platform with which V-Core 3 is fully compatible.
Read more about EVA on: EVA 3 Documentation
Support
- Fully comprehensive step-by-step build guide (Both static and video)
- Fully comprehensive wiring and electronics guide for multiple controller boards
- Support configuration files for several firmware choices (Reprap, Klipper)
- Join our Facebook 3D Printer Community to connect with other V-Core users, share builds, knowledge, mods, and stay posted on all V-Core 3 developments.
Safety
- Wiring design includes multiple cable management parts, for cable clamping, guiding and strain relief
- Custom Keenovo Heat Pad with pre-wired 157ºC Thermal Fuse for extra safety (Optional).
 The wiring comes out of the pad slightly off-center, so it's neatly guided to the back of the machine without interfering with the bed mounting point at the back.
- For 120/220V Heat pad users, grounding point at the bed and fully isolated bed from the rest of the printer means that the printer frame is never conducting any dangerous voltages.
Convenience
- Designed for a far easier and quicker assembly than previous versions
- Separate chamber for electronics ensures heat insulation, short motor cable path, easy access to all wiring, and a very clean installation
*Panel for mounting electronics is not supplied, user is meant to source it locally. A 4mm thick polycarbonate sheet is suggested. Mounting screws and nuts are included as part of the base kit. DXF files with size, shape and hole patterns for the panels are provided on the project documentation.
Electronics Panel should not be thicker than 4mm, otherwise it will not fit in the available space.
Fully Enclosable
Enclosure Kit
The V-Core 3 was designed from the ground up with full enclosing in mind, with no need for an external enclosure. The design ensures that all motors and electronics are safely placed outside the printing chamber, so they are shielded from high temperatures, and no machine elements protrude from the frame, ensuring that the frame can be directly covered with panels from all sides.
Extended "Full Frame" for a fully enclosed work area
Double door access
Top and front easy access doors with foam seals
Magnetically latched doors with double handles
Easily remove the most convenient door depending on your printer position
New printed spool holder
The new printed spool holder can be assembled outside the enclosure
Suggested Filament Routing (Using PTFE Tube)
All motors outside the heated chamber
New full metal front idler mounts
Easier installation and maintenance
Optional "Split Panel" files and kit available for bigger printer sizes
Y-Axis bumpers for optional Y-axis sensorless homing
Modding
The V-Core 3 is the perfect printer for advanced users who like to tweak and tinker with their machine:
- Fully open-source design, with downloadable 3D models and part libraries freely available
- Frame is built on a modular platform of T-Slot and V-Slot profiles, which allow for endless possibilites when it comes to mounting all types of parts
- Vast catalog of stand-alone parts available for infinite upgradeability: screws, nuts, connectors, brackets, pulleys, belts, electronics, etc
- For some inspiration, check out the V-Core 3 Gallery with builds from users worldwide
Dimensions
Sample Prints / Parts
These images showcase 3D prints produced by V-Core 3 machines belonging to members of our community.
Acknowledgments
As an Open-source project, the V-Core 3 design is the result of prolonged brainstorming, testing, and collaboration between many active members of the international 3D Printer Community, who shared their knowledge and experience with our design team. As such, the machine inevitably draws inspiration from and builds upon many existing design elements that have been developed, shared, tested, modded, and iterated by the community at large. The nature of the open-source movement makes it often difficult to trace back where each idea was originally generated, making it hard to produce a comprehensive list of acknowledgments. Nevertheless, below we list a few names and projects that we would like to credit for their direct or indirect contribution/inspiration to the V-Core 3 platform (in no particular order):
- - Hypercube by Tech3c
- - Voron
- - BLV
- - Jubilee
- - Simon Davie
- - João Barros
- - Detlev Rackow
- - Márcio Pereira
- - Eduardo Oliveira
- - Mikkel Schmidt
- - Harald Wagener
- - Antonios Antzoulatos
- - Lukas Sinitsch
- - Tomasz Paluszkiewicz
License
This work is licensed under a Creative Commons Attribution-NonCommercial-ShareAlike 4. 0 International
You may share, remix and mod the design. By default, you may not use the design and its derivatives for commercial purposes, but if you request a commercial license from us, we may (and most likely will) grant you one, as long as we deem your goals are aligned with the best interests of the project and its users.
The spirit of the project is to remove barriers to innovation and focus on pushing the technology, working as a collective, inspiring each other and experimenting with new ideas. We are happy to foster a rich ecosystem of suppliers and services that empowers users by offering them more options and alternatives.
Videos
3D Printers - 3D Distributed
Home
3D Printers
3D Printers Designed By 3D Distributed- SolidCore CoreXY_WorkHorse Large Format 3D PrinterDIY 3D Printer Build Plans
The WorkHorse is a large scale machine platform for 3d printing.
Modular Scalable Linear Rails Balanced Carriage Pull Enclosure BOM utilizes most available parts All Metal Parts or 3D Printed Z-Axis: Independent Driven or Shared Belt Routing
DIY 3D Printer
Kits- See WorkHorse Printer
- See SolidCore CoreXY
Table Of Contents
- DIY 3D Printer Build Plans
- DIY 3D Printer Kits
- WorkHorse – Large Scale 3D Printers
- Workhorse and Workhorse XL 3D Printer
- WorkHorse 3D Printer
- Lead Screw Driven Motion
- WorkHorse Build Volume
- WorkHorse XL Build Volume
- Fixed Bed
- Configurable / Customizable
- WorkHorse 3D Printer
- Electronics
- Documentation
- SolidCore CoreXY
- Design Constraints In Large Scale 3D Printers
- Lead Screw & Ball Screw vs Belt Driven
- High Quality Lead Screw vs Cheap Lead Screw
- Lead Screw & Ball Screw Print Speed
- Lead Screw Pitch And Required Torque
- Building A Large 3D Printer
- Frame
- 3D Printing Large Objects
- Workhorse Printer Parts
- SolidCore Parts
WorkHorse – Large Scale 3D Printers
Workhorse 3D PrinterWorkhorse and Workhorse XL 3D Printer
- OPEN SOURCE
- LARGE BUILD VOLUME
- XYZ-axis Lead Screw Motion System
- Fixed Bed Moving Gantry
WorkHorse 3D Printer
The Workhorse Printer is a open-source designed by 3D Distributed.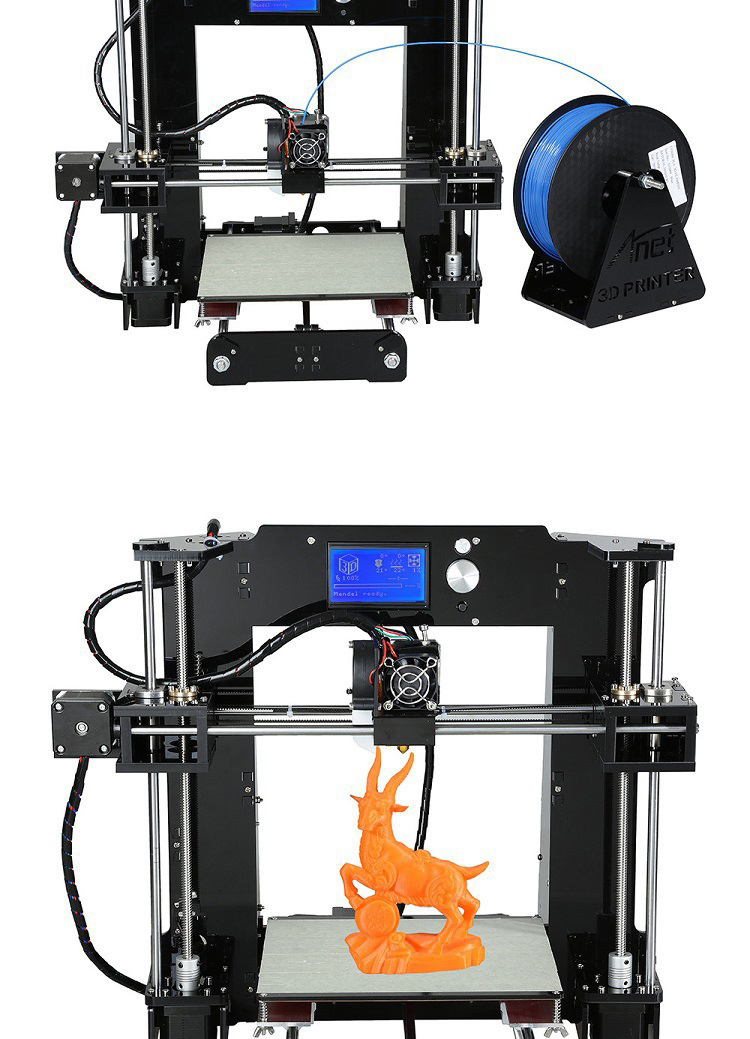 In this mechanical arrangement lead screw driven motion is used on the X,Y, and Z axis .
Lead Screw Driven Motion
Most 3d printers use belt driven motion in the x and y axis to increase print speed but a belt driven motion system may lose quality when more weight is applied to the gantry or carriage. The Workhorse utilizes Igus lead screw on the X and Y-Axis. The high helix pitch includes a twelve start thread to allow increased print speeds while maintaining the quality of a ball printer. The robust and rigid motion system is particularly useful in applications that add more weight to the gantry or carriage. Materials such as clay, chocolate, plastic pellet extrusion or other foods can increase weight that is moved around which results decreased quality or print speeds. We originally designed the fdm 3d printers to be driven by ball screws but quickly switched to multi-start lead screw to increase travel speed. If your looking for a belt driven configuration check out our new corexy kit.
WorkHorse Build Volume
- Build Volume – 650 x 350 x 350 mm
WorkHorse XL Build Volume
- Build Volume – 650 x 650 x 650 mm
Fixed Bed
While most large format printers use a moving bed that moves along the Z-Axis, the Workhorse’s fixed bed and moving gantry design is more ideal for the large scale 3d printing process.
Configurable / Customizable
The Workhorse 3d printer is available with custom mods and upgrades. We’ve several custom designed machines for many of our customers. If there is a specific size or requirement you just give us a shout. Additive manufacturing has many applications and we designed this modular platform to be adaptable and scalable for your industrial printing needs.
WorkHorse 3D Printer
- See WorkHorse Printer
- See WorkHorse XL
- See All Metal Part Store
Electronics
Workhorse Printer Electronics Control BoardWe recommend the Duet 3 by Duet3D.
See RepRap Firmware
Documentation
Google Drive Folder
See WorkHorse Documentation
See WorkHorse BOM
SolidCore CoreXY
SolidCore CoreXY 3D PrinterSee SolidCore CoreXY
See All Metal Part Store
see SolidCore BOM
SolidCore CoreXY 3D PrinterSolidCore CoreXY 3D Printer KitDesign Constraints In Large Scale 3D Printers
Larger Printers can be much more challenging to get the same performance as smaller printers due to rigidity, deflection and smoothness of gantry or bed motion. This relates to the typical speeds and forces applied to mechanical components while in motion. The idea is to reinforce areas that experience more force or deflection without increasing gantry weight or over designing in a way that may introduce mechanical binds or resonance.
Lead Screw & Ball Screw vs Belt Driven
There are many decisions to make when building a large format 3d printer. The wrong mechanical arrangement can compromise speed and quality. Lead screw is known for backlash but backlash can be eliminated using anti backlash nuts. Lead screw pitch is another critical decision to make. Most lead screws don’t have the lead to compete with speed but the precision can be well suited. Once dialed in, the repeatability is useful for long prints.
Ball screw or lead screw may not always be the right choice because of wobble and resonance. Large 3d printers that use belts require frequent maintenance as the belts need tightening or tensioning to prevent missed steps. Lead screws for the X and Y axis can be precise and reliable if properly implemented.
High Quality Lead Screw vs Cheap Lead Screw
Quality lead screws and ball screws cost much more but cheap lead screws can have tolerance issues. Longer ball screws may wobble at a distance and need support and rigidity. Although backlash is mostly a problem in XY-axis movements while the z-axis is the preloaded weight of the bed and gravity.
Lead Screw & Ball Screw Print Speed
A large stepper motor such as a Nema 23 must be used for the X and Y axis depending on the lead screw length. Issues with speed, resonance, artifacts can be a challenge in any 3d printer build but can be reduced by travel speed and acceleration but is compromised with slower travel speed the longer it takes to print an object.
Lead Screw Pitch And Required Torque
Lead screws are similar to a gear, when the pitch changes the lead and torque required to drive the system changes as well.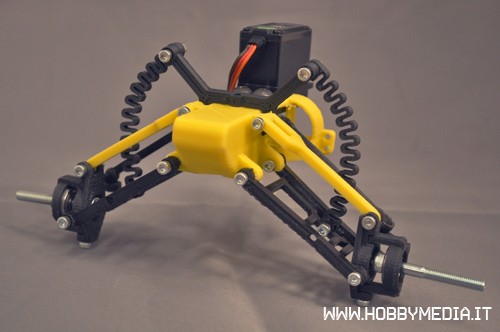 Most 3D printers use 1/16 or 1/32 microstepping but the resolution of 3d printed plastic can only be so precise. Larger stepper motors have more inductance and need more voltage to reach the same RPM. Increasing the step rate for the reduced travel rate of the drive, a higher voltage stepper driver and supply may be needed to reach ideal motor performance.
Building A Large 3D Printer
Workhorse Extruder CarriageThe best thing to do is keep the mindset that the printer you’re designing is going to be built to print “X.” Do you want a printer that prints long but short parts or do you want a printer that prints tall parts. You can increase all three directions but that’s where things get more challenging for repeatability and acquiring the needed speeds and quality. It’s totally possible and the many problems that may be introduced can be designed around.
3D Printer Carriage AssemblyFrame
Regarding the 3d printer frame rigidity, I would just suggest larger width extrusions depending on the length and adding gussets where needed. The only reason I go in such detail is because I get a lot of requests from people wanting me to design a printer with a “1000mm x 1000mm x 1000mm build area. The trick is to avoid the sacrifice of performance, speed and repeatability which becomes more and more challenging. The last thing you want is a really big 3d printer that’s really slow or has repeatability problems. You may or may not have the necessary design solution to avoid this scenario. From my experience the challenge is balancing rigidity, repeatability and reliability without exponentially increasing the price. Whether you’re aiming for a moving bed or moving gantry you need to add rigidity without over constraining the motion. You’ll experience this in z-axis repeatability between prints and bed leveling. For example, you probe your bed with an auto level routine followed by a mesh leveling routine. Everything is perfect depending on the flatness of your bed compared to rigidity of the overall system. Then the bed probe routine is followed by a G28 homing of the z-axis.
 An over constrained bed or gantry may experience some repeatability issues after traveling home and returning to the print surface which will result in a bad first layer. But let’s assume everything is good. So proceed to print your object. After the object is finished the next step is to remove the object.
3D Printing Large Objects
Workhorse-printing3d printing larger objects is going to be more difficult to remove and the process of removal will result in forces applied to the bed or gantry which will cause the bed or gantry to experience some sort of misalignment. So the following print will experience some sort of bed leveling issue resulting in a bad first layer. But your first layer is the most critical and will affect the rest of the print such as warping from bed adhesion or the object becoming loose from the bed. The longer the print takes the more critical layer adhesion becomes. But you can minimize this chain reaction by re-probing the bed before each print. But this takes a long time due to the increased number of points the probe maps out. You could reduce the number of points but a larger print bed will include more dips and peaks from stresses or bows. So you have to maximize the number of points used in probing so that the machine can compensate for each to get that first layer. Another issue to prepare for is the environment’s effect from the introduced heat of the printed object relative to the dimensional stability of the mechanical components and bed.
Workhorse Printer Parts
SolidCore Parts
Like this:
Like Loading...
Top 20 3D printed toys
Why 3D print toys? What toys can be 3D printed? 1. Mini monster truck 2. Surprise eggs 3. Gliders with elastic band 4. Folding sword 5. Micro catapult 6. Spinning top 7. Moving animals 8. Spirograph 9. Transformers 10. Toy tool set 11. Castle 12. Lego bricks 13 14. Edible toys 15. Anti-stress keychain 16. Chunky Trucks set 17. Sword rattles 18. Vikings Squigglepeeps 19. Math Spinner 20. Jumping Turtles Results
Today, 3D printing is developing and spreading very rapidly, gaining more and more popularity. And no wonder, because 3D printing is an invaluable tool for prototyping designs, creating mockups, fabricating parts, and more. At the same time, it is no longer difficult to buy a 3D printer at an affordable price even for home use. However, a 3D printer is not only a tool, it is also a kind of toy. A toy capable of creating other toys! Using a 3D printer to make toys gives you control over the material, color, size and other components, so the models you create with 3D printing will be unique!
But what if you don't have your own 3D printer and you need to print a toy or some part of it? It doesn't matter, in this case our 3D printing studio will help you! You only need to place an order by uploading the file of the desired finished model, after which our specialists will contact you to calculate the cost and resolve other possible issues.
Why 3D printed toys?
This is probably the first question that comes to mind, and it is not surprising, because often 3D printing can cost you more than the cost of such a toy in the store. But there are also a number of advantages of 3D printing, as well as cases when it would be more profitable and appropriate to turn to creating models on a 3D printer.
- As already mentioned, a toy printed on a 3D printer can be absolutely unique due to the ability to give it exactly the shapes, sizes and colors that you and your child want.
- Some toys can be difficult to find in the store, and their cost may exceed the cost of their printed copy.
- Sometimes you only need to replace one or a few broken or missing parts of a toy, such as a building toy. In this case, it will be much more profitable and more expedient to use a 3d printer than to buy a whole set for a high price.
- An important factor is, of course, the impressions of the 3d printing process itself, which will captivate both a child and an adult.
 And the positive emotions of your child from the toy you created will be the best reward!
 - And for those who are just getting acquainted with their printer and 3d printing in general, the process of creating toys will be an excellent, exciting simulator to improve their skills and gain experience.
Which toys can be 3D printed?
In the context of constant development and increase in the possibilities of 3D printing technology, you can create almost any toy on a 3D printer, but the result largely depends on the capabilities of your device, your abilities, as well as the time, resources and effort that you are willing to devote to this process. Therefore, more or less simple projects are most often created on a 3D printer. But the relative ease of manufacture does not mean boring finished products! Below we will give you a list of 20 interesting 3D printed toys that are not particularly difficult to create. Among these crafts you will find toys for children of all ages, including the smallest: mechanical products, motion figures, building blocks and even rattles! For each toy from the list, we leave a link to the finished model so that you can try them yourself. So let's get to know them better!
1. Mini monster truck
Two monster trucks. Source: Thingiverse
Not everyone can afford a monster truck, but if you have a 3D printer, you can print yourself a mini copy of it... which is almost as cool. Thanks to the all-printed suspension and removable discs that attach easily and without the aid of glue to the body, this truck is perfect straight from the printed surface.
You can even choose from a variety of body styles and wheels. And for a two-tone tire, stop printing the wheel at 19.8 mm and replace the filament.
Model files for download can be found here.
2. Surprise eggs
Surprise! Source: Twitter
Bigger is not always better. And often the most interesting thing is just a small size, and these 3D printed eggs with a surprise are an example of this.
These tiny cars with moving wheels and other accessories are amazing! Plus, you have plenty to choose from, as you can print surprise eggs with just about anything inside, be it a fire truck or even a fighter plane!
No support required for these models. We advise you to use at least 40% infill to make sure that small elements are both beautiful and durable. Given the number of such tiny parts these machines have, be prepared that printing them can be a real challenge for you, but with good calibration and fine tuning of your machine, everything will work out in the best way!
3. Elastic Gliders
Get ready to take off! Source: Thingiverse
With 3D printed gliders you will be able to “pull out” even more fun from ordinary rubber band ! Just 3 simple steps, and your glider will take off: hook it with an elastic band, pull it towards you and release it.
With this model on Thingiverse, you and your friends can take to the skies a whole fleet of these rubber gliders!
100% infill and a layer height of 0.1 mm are recommended for greater aircraft strength and longer life for thin wings.
4. Folding sword
Telescopic pirate sword. Source: Thingiverse
This toy may not be best given to a child when there are breakable items nearby. But in the right environment, telescopic swords will bring tons of fun and enjoyment to kids! From the designer of this folding pirate sword, you can also find models of telescopic katana, daggers and even lightsabers!
This Telescopic Pirate Sword is designed for printing at low speed using a 0.4mm nozzle. Also, successful printing requires a printer with a good retract and precise settings for Coast (turning off extrusion at the end of the layer print) and Wipe (“wiping” the nozzle at the end of the layer).
5. Micro Catapult
Hit all your enemies (or at least your deskmates). Source: Thingiverse
This little catapult is a great toy for kids and bored office workers alike. She can throw small crumpled pieces of paper and any other small things that will fit in her. Selected ammunition can fly about 2 meters, which is enough to hit unsuspecting victims at another table!
This model is an all-printed prefabricated assembly that does not require any supports or special adjustments. A minimum filling and layer height of 0.25 mm is sufficient.
Despite the fact that many catapults are made from PLA plastic, the author of the design still insists that this model is not for PLA, but for ABS plastic. We can also recommend PETG filament for this printing, which has the best qualities of PLA and ABS.
6. Top
The oldest toy for the whole family. Source: Thingiverse
As far as we know, the spinning top is one of the oldest toys in the world. In ancient times, tops were made from almost any material: from stone and wood to fruits and nuts. And now additive technologies allow you to make your own spinning top using a 3D printer! All you have to do is print this model, glue the pieces together and have fun with this simple yet fun toy!
Offered 0.2 mm layer height and 20% infill.
7. Moveable animals
Cute articulated octopus. Source: Thingiverse
Making flexible prints on a 3D printer has become completely affordable and common practice thanks to special filaments such as TPU. But what if we said that you don't have to use flexible plastics to create flex parts?
Using excellent hinges that are printed in one piece with the whole model, you can create movable flexing toys even from plastics such as PLA, ABS and PETG, without any additional settings and adjustments.
The standard specifies a layer height of 0.2 mm and an infill of at least 15%.
Most popular models:
- Octopus
- T-Rex
- Lizard
8. Spirograph
Convenient case for creativity at any time. Source: Thingiverse
Everyone knows the children's toy spirograph, which allows you to easily draw masterpieces with repeating geometric patterns. But this model went a little further and is a whole case containing a platform for drawing and a compartment for storing gears and paper. It fits easily into your pocket, backpack and bag, so you can take it with you and paint whenever you want!
The case has several levels.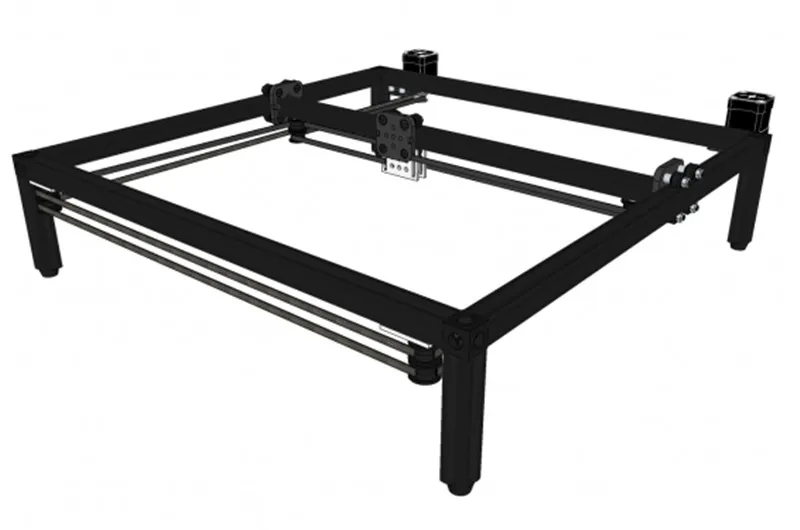 The lower level holds slips of paper for notes, drawing gears and, if desired, a small pencil or pen, if, of course, you can find one. The next level provides a secure, flat drawing surface so you can make art while walking! The top level has fixed gear teeth and holds the piece of paper in place.
A layer height of 0.2 mm and an infill of 20% or more is recommended. As a loop, a regular straightened 1.75 mm filament thread is used.
9. Transformers
Toys from the planet Cybertron. Source: Thingiverse
Transformers are a hugely popular children's toy to this day, so these Optimus Prime and Megatron are sure to please your kids.
This printed Optimus Prime transforms from a classic Optimus truck into a fully functional standing robot. And it's amazing, considering that you immediately get a ready-to-use all-printed model right from the printing platform, which does not even require supports!
But, of course, every Optimus needs an opponent to fight. Therefore, you can also print Megatron, but it should be noted that his model is more difficult to print and consists of two parts.
10. Set of toy tools
The first tools for little craftsmen. Source: Thingiverse
The Toy Tool Set is a great way to introduce kids to basic tools, their appearance, purpose, and how they work. Print your child's first hammer, screwdriver and pliers and he'll feel like a real craftsman!
The hammer is modeled to fit two pieces together with a screw, but some users simply glue them together, which is just as pretty. You can also use a hammer to assemble pliers: just lay the two pieces on a flat surface with the screw down and tap lightly a couple of times.
Model can be found here.
11. Castle
Build your own medieval world! Source: Thingiverse
This medieval castle playset is meticulously designed for 3D printing. Walls and towers are easily attached to each other with a simple connection.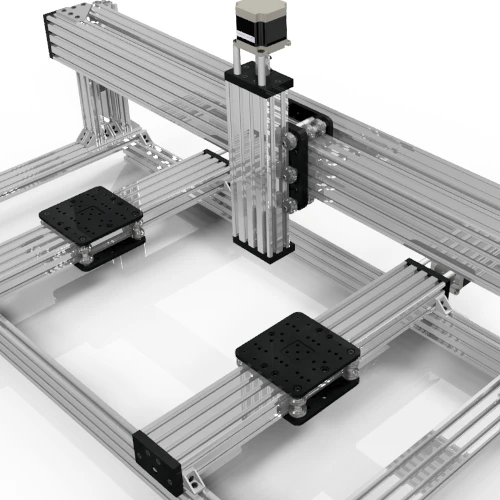 You can make as many details as you want to create a large or small original castle layout of your own! The set contains walls, towers, houses, characters, animals and a variety of props to add to the fun of this medieval set.
All parts are small enough to be printed comfortably even on 3D printers with a small printable area: 140x140x140mm. For such purposes, the Flashforge Creator Pro 2 3D printer is perfect, equipped with two independent extruders and has excellent printing accuracy. This printer will cope with the study of small details, and two extruders will help you print several parts at once or one part in two colors!
12. Lego bricks
Your favorite constructor is now more accessible! Source: Pinterest
LEGO is one of the most popular toys for children. At the same time, the cubes of this designer are made of ordinary ABS plastic. So, having your own 3D printer, you can print the missing/lost Lego bricks yourself or even some of your author's design of the details of this amazing designer! At the same time, you can use not only ABS, but also other 3D plastics: PLA and PETG are also great.
Thingiverse has a lot of Lego models, and we'll take a look at one of them. It's customizable model of several different LEGO and LEGO DUPLO pieces. These bricks are not completely identical to real Lego, but they are compatible in every way.
13. Ballista
Fire! Source: Thingiverse
Introducing a fully printed ballista model, ready to use right out of the box. One has only to set the string and load the projectile, and this ballista will impress you with its simplicity and good range of the arrow. As a bowstring, you can use several layers of thread or ordinary stationery gum.
Recommended to print in PLA or PETG with 90% coverage and 0.2mm layer height.
14. Edible toys
The Open Toys project turns ordinary vegetables into toys. Source: Thingiverse
The project was originally envisioned as a way to turn commonly discarded residual materials such as wood and cork into toys: helicopters, planes, cars and so on. But soon, wood and cork were replaced by more accessible and easily pierced materials: fruits and vegetables. With this project, you can turn ordinary food items into fun personalized toys.
15. Anti-stress keychain
Entertaining keychain. Source: Thingiverse
Add some flair to your keychain with this cool little toy. She will entertain you wherever you are!
This model is not the easiest, but try it and you will definitely succeed! Important print quality settings are "Outer Walls Before Inner Walls" and being extra careful with temperature. It is printed with supports and requires a certain, sometimes lengthy, post-processing. Remove not only supports, but also make sure that the surface of the part is smooth, otherwise it will cling and stutter. A scalpel or a 1 mm drill will do. Periodically rotate the gears to see where it still sticks, which is especially true when using PLA.
16. Chunky Trucks set
Two models from the fun and cute Chunky Trucks set. Source: Thingiverse
The adorable Chunky Trucks collection includes various unique models of small trucks, fun builders and even a movable barrier. The cars are specially designed so that even the smallest children can play with them. Unlike builders, who are not recommended to be printed for toddlers so that they do not try to put them in their mouths, but which will greatly amuse older children.
All models can be printed without supports. And for long truck life, at least 25% infill and three-wall use are recommended.
17. Rattleswords
Arm your warrior! Source: Thingiverse
Rattles are an integral part of all babies. But what if we move away from banal and boring designs and build a rattle in the form of a sword for your little warrior? This fun design will not only amuse your little one, but you too, as this rattle will be a lot of fun to print!
All corners of the model are rounded for safety. There are also two versions of the tip.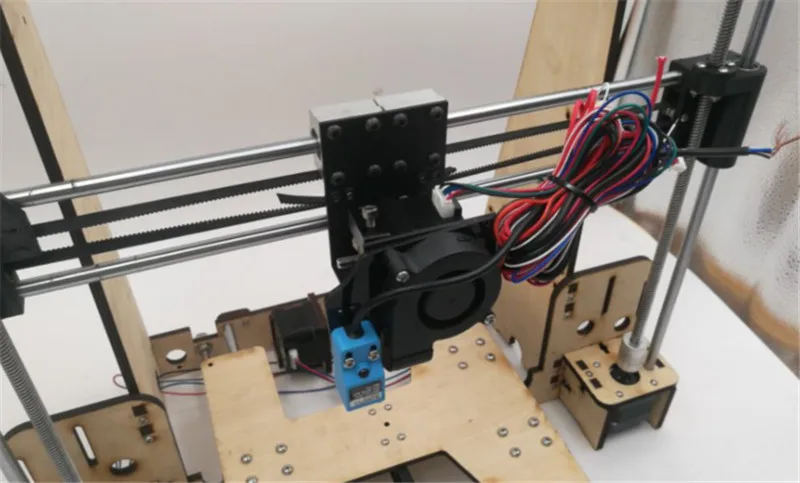 Initially, a gem was attached to the tip, but after some concern that the stone could slip off the tip and be swallowed by a child, a second version was created that did not include a gem.
Print two sets of peas first. Then, while printing the sword, throw them inside the blade. This will ensure that the peas stay inside the rattle forever. After printing all the elements, simply fasten them with superglue.
As with any printed toy, parental guidance is required. Be sure to throw away the toy if it breaks.
18. Viking Squigglepeeps
Three Viking Squigglepeeps set sail. Source: Thingiverse
Squigglepeeps is another kid-safe toy, this time with absolutely no glue required. These fun chubby Vikings and their boat are too big to choke on, making them suitable for kids of all ages. They look funny even in one color, but they will be even more beautiful if you paint them with child-safe paints! The model also absolutely does not require supports.
19. Math Spinner
A great way to have fun learning math! Source: 3Dtoday
This math spinner is the perfect companion for learning math. Moreover, it is suitable for all ages, because it is never too late to brush up on your arithmetic knowledge! You can print this finished model or modify it for yourself by removing or adding rings. This advanced design contains all the signs of addition, subtraction, multiplication, division, equality and inequality, as well as a pointer to the string to be solved! On the central insert there are special grooves for fixing. For this version, you will need to print 2 caps and 8 rings of numbers, the rest of the details are printed in a single copy.
Recommended coverage 25% and layer height 0.2 mm.
20. Jumping turtles
The variety of these turtles is amazing! Source: Thingiverse
Last but not least, jumping turtles! Agree, even the name sounds fun! And a variety of shell designs will give each turtle its own uniqueness. This model uses the same flex concept as the Mini Monster Truck above, making the Turtles bounce when you tap on the body. Also in this turtle, the head can be drawn into the shell.
The model is assembled with printed H-clamps and does not require glue. All parts are printed without supports. Also note that using the raft (rafts) and brim (margins) options can have a negative effect on the results if you don't then take the time to sand and clean the edges at the base.
If you have problems with head slip, you can try to print 1 of the 3 narrower shaft head files that the author has specially uploaded for this case.
Results
We hope you enjoyed this selection of toys for 3D printing, and you will definitely choose some option for yourself, because 3D printing of toys is not only fun and interesting, it is also a new experience and knowledge for both you and and for the child. But we have considered only some entertaining options from the many existing ones.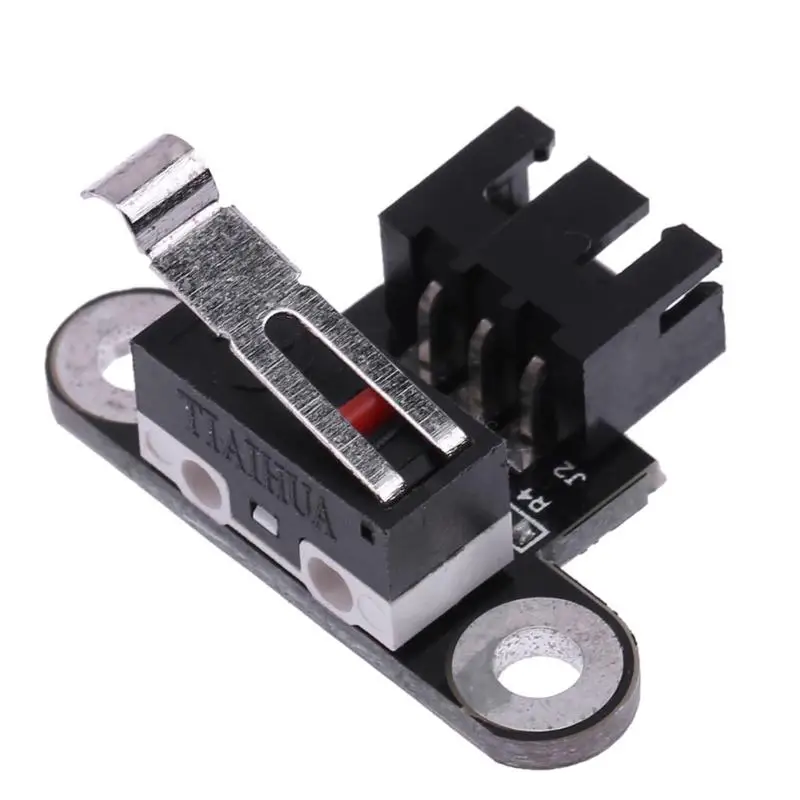 And, of course, you can create your own unique designs and implement them on your 3D printer or contact our 3D printing studio for this. And toys printed by you can serve as a great unique gift, which is also one of the reasons to buy a 3D printer for your home.
3D Printing in the Machine Shop: Lessons from A&M Tool
In manufacturing, success is always about speed. The ever-changing technology landscape offers manufacturers and machine shops the opportunity to increase their productivity by introducing new tools, but they also face the challenge of choosing technologies that can reliably and cost-effectively scale upgrades.
A&M Tool and Design has witnessed the evolution of precision and efficiency standards for over 65 years. At 19In 1948, the company began its activities as a small family mechanical workshop. This description is still true today, but, of course, in a modified version: next to highly skilled operators working on classic Bridgeport CNC machines, there are racks with eight support surfaces of the Mazak PALLETECH system, which can work without an operator 24/7.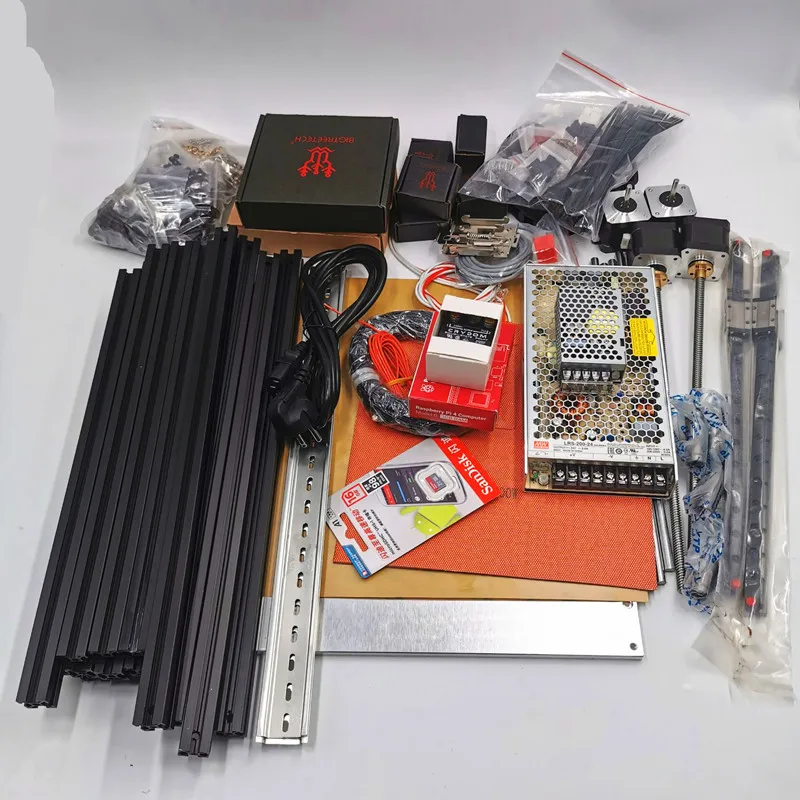
Over the years, the workshop has been modernized, supplementing reliable traditional technologies and modernized machines for the production of parts with new equipment and specialized machines for the production of aerospace, optical and robotic components. Clients include Boston Dynamics, LinkNYC, NASA, Goodrich and Corning.
In addition to mass production automation equipment such as PALLETECH, last year the workshop purchased an industrial grade desktop stereolithography (SLA) 3D printer to speed up projects and attract more engineers. Since then, they have scaled the scope of 3D printing from prototyping and demonstration models to manufacturing auxiliaries and final parts for specialized equipment.
"3D printing has become an invaluable tool in our toolbox," says Guido Jacques, vice president of operations at A&M.
A&M Tool and Design machine shop uses a wide range of technologies, from Bridgeport CNC machines to the SLA desktop 3D printer.
A&M Tool added the Formlabs Form 2 desktop 3D printer to its toolbox less than a year ago to speed up prototyping workflows and increase in-house production of low-cost parts.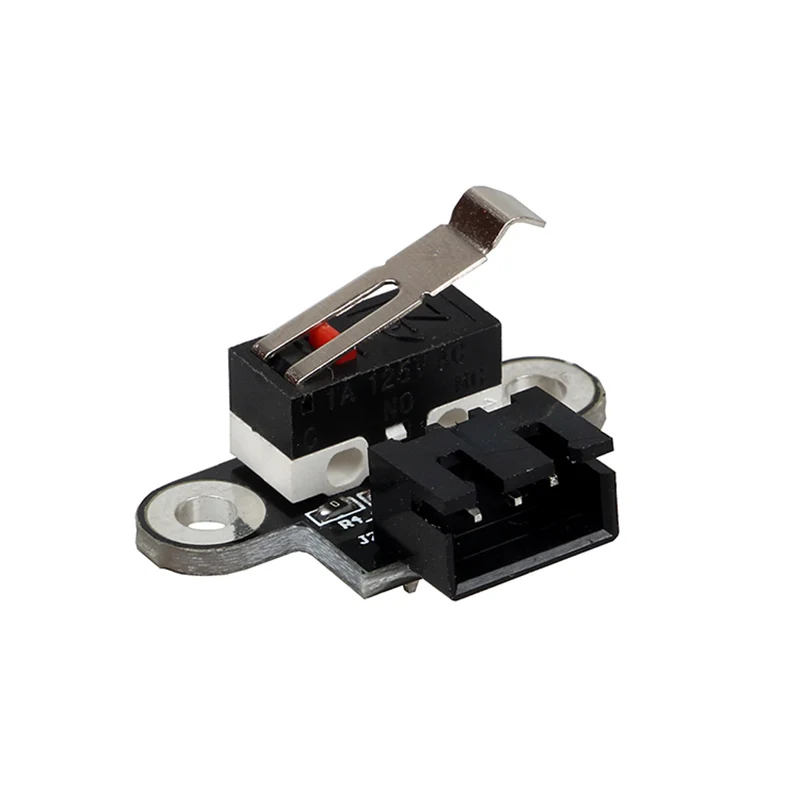
To effectively replace prototyping, which would otherwise be done through more labor-intensive workflows, 3D printing needed to be both cost-effective and accurate. Ryan Little, Mechanical Engineer at A&M Tool, after researching which 3D printer would best suit their needs, chose the Form 2.
“Among other things, we were looking for a 3D printer that could work autonomously and didn't require a lot of training to use,” says Little. We can use some of the CNC machines downstairs, but these are rarely free, and programming a CNC machine to do a complex job in Mastercam or on the controller itself can take hours. It takes 10 minutes to run a job in the Formlabs PreForm software and it really isn't that hard."
Changing tools and setting up CNC machines can take hours, while preparing a 3D print job takes less than 10 minutes.
Little and his colleagues regularly discover new opportunities to use cost-effective 3D printed plastic parts to improve workflows and projects.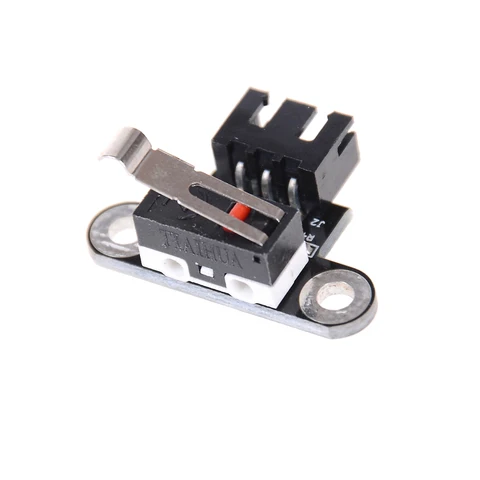 The printer serves as a workshop for fixing errors and speeding up deadlines, from prototyping to making production tools and printing final parts for temporary replacements.
In many cases, the decision comes down to the material: does it have to be metal? Can it be easily replaced with a polymer-based part?
“A lot can be done with a lathe. We can machine a shaft of a very specific diameter in 20 minutes and it will be a very precise job. But if it takes a machine operator five hours to program and 10 hours to fabricate, 3D printing will be preferable to machining,” says Little. — Compared to the world of machining, why choose titanium when this part can be made from aluminum. There is no need for titanium."
A&M Tool engineers regularly use the Form 2 3D printer to make prototypes, tooling and more
In the area of prototyping, the workshop began using 3D printed parts to test fit and functionality. 3D printing allows Little and his engineers to produce parts much faster and use all the hours available in the day, starting printing at night and getting parts ready for use the next day.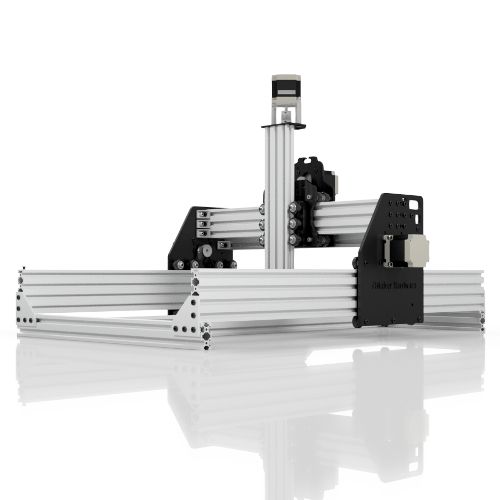 3D printing comes into play especially when it comes to shaped parts that are expensive and time consuming to manufacture on a CNC machine.
“The printer is almost like an auxiliary tool in addition to CAD,” says Little. — We produce a huge number of prototypes for different types of tools. If we didn't have the Form 2, many prototypes would remain digitally in CAD until the machining queue was cleared, and some parts would never be made or designed because it would be impractical."
Many of the parts manufactured by A&M are designed to resist fatigue and/or carry loads. To prototype strong, functional parts and assemblies that will be subjected to transient loads or tension, Little often uses Tough Resin, a Formlabs polymer. Learn more about Formlabs Engineering Resins or request a free sample to experience the quality yourself.
CNC programming requires skill and time. When a part does not need to be metal, 3D printing can be a practical tool for prototyping or manufacturing tooling to produce the desired part much faster and at a lower cost.
A&M engineers also use 3D models to facilitate interaction with machine operators and welders by turning complex drawings into physical models. Machine operators are increasingly making requests for models themselves.
“Sometimes a hole in a finished part is knocked out in the wrong direction, or a feature is on the wrong side, and it can't be fixed. This happens when the part is already pretty much complete and has to be started all over again,” explains Little.
- We have highly skilled machinists who can read drawings with so many callouts that you can hardly see the drawing itself behind them, but even they sometimes need more clarity, especially when there are complex geometric elements, such as undercuts. Now, if we have an assembly file or a SolidWorks file, we make a model of the part to scale and give it to them, and they love it. Everyone in the workshop is even starting to get used to it.”
In addition to prototyping, A&M has expanded its use of 3D printing to produce functional parts such as fixtures, and even some end pieces, from an ergonomic handle for a custom machine to a temporary sprocket clutch for one of their polishers.
In particular, when a delivered sprocket coupler for one of their large polishers turned out to be the wrong size two days before a major trade show, Little quickly designed and 3D printed a replacement in the correct size in Durable Resin. The printed clutch was used to run a 2 hp grinder motor.
When a sprocket clutch for a polisher ordered before a big show turned out to be the wrong size, Little 3D printed a temporary replacement in Durable Resin.
Clamps, fasteners and other special production tools are essential for efficient and effective production. Check out our 3D Printing Jig and Fixture Design Guide for helpful tips and practical ideas.
A&M Tool purchased one 3D printer less than a year ago and continues to find new applications and experiment with new materials.
“3D printing allows us to do things that would not be easy to do in the shop, such as creating geometric conditions that would be a nightmare to implement on a machine, etc.