At the UNI Foundry 4.0 Center, staff and students provide services targeted towards demonstration, education and consultation in additive manufacturing. Past clients have included small and large companies alike, as well as all five branches of the U.S. Department of Defense.
Industry Service
With unmatched expertise and equipment, we have the capability to use special materials and/or processes that aren’t yet commercially available to provide molds and cores to companies. We work with larger companies and industry associations for the acceptance and adoption of technology and then have the opportunity to move this technology down to smaller companies involved in the supply chain. Almost all of our additive manufacturing projects are integrated into production methodologies and sold to customers. In fact, our knowledge, expertise and direct industry outreach, the state of Iowa now has the most private companies using 3D sand printing technology in the United States.
Industry 4.0 Foundry Partnership
Foundries across the nation are under constant pressure to improve processes and overcome the challenges of this segment. The demands for accuracy and precision, as well as notable increases in the quantities, product range, and components, will continue to rise. The Defense Logistics Agency (DLA) and the National Center for Defense Manufacturing and Machining (NCDMM), acknowledge the situation and recognize the challenges and obstacles. By joining forces with two universities, the University of Northern Iowa (UNI) and Youngstown State University (YSU), foundries will be able to increase the adoption of Industry 4.0. Download the project brochure to learn more.
This project is sponsored by the Defense Logistics Agency Information Operations, J68, Research & Development, Ft. Belvoir, VA, and the DLA Troop Support, Philadelphia, PA.
Services
Hard foundry tooling for medium to high-pressure sand molding
PLA (FFF)
SLA Shell
Expendable investment patterns
PMMA
Wax
SLA QuickCast
PolyCast (FFF)
Investment casting tree assembly & shells
Printed sand molds and cores
Silica
Ceramic
Zircon
Chromite
Silica/zircon blends
Black iron oxide blends
Magnesium inhibitor blends
Robotic sand milling of cope & drag molds
Printed expendable patterns for lost foam casting (FFF)
Design for Additive Manufacturing
Dimensional analysis
Research & Development
Staff and students are continuously working on R&D projects to advance the additive manufacturing industry. Just a few highlights:
Developed new domestic printing materials that have reduced the cost of 3D sand printing by more than 80%
Assisted in the development of low-VOC non-flammable printer cleaning fluid that reduces fire, environmental and worker safety risks
Development of environmentally safe inorganic resin systems to be used in sand printing technology
Lab Capabilities
Production Lab
Student Engineering Center
Plastic Printing Lab
Robotic Mold Machining Center
Design Lab (in partnership with Hawkeye Community College)
UNI Foundry 4.0 Center Equipment
ExOne S-Max Sand Printer
ProMetal RCT S-15 Sand Printer
Hexagon Metrology 3 Meter Romer Arm with Laser Scanner
Arcam Spider Handheld White Light Scanner
Voxeljet Systems, VX1000 PMMA Printer
3D Platform Fused Filament Fabrication Plastic Printer
5-Axis Kuka Robotic Sand Mold Milling Cell
KEA Automation Robotic Shell Room System
FormLabs Form2 Printer
3D Systems ProJet 660Pro Color Jet Printer
3D Systems ProX 800 3D Stereolithography (SLA) Printer
3D Systems ProJet MJP 2500 IC Wax Printer
3D Printer Instructions | University of Illinois Laboratory High School
Diagram of Ender Pro 3 V2:
Spool - cylinder housing filament
Extruder - contraption used to heat and extrude filament
Bed - surface where filmanet is extruded
Steppers - wheels used to adjust the bed's height
Display - screen used to adjust printer settings, controlled by display knob
MicroSD Card Slot - port used to house microSD card
On/Off Switch - switch used to turn printer on or off
Uploading Your Model:
Pre-steps:
Log in to the desktop computer in the Maker Space using your Illinois NetID and password
Open the app "Ultimaker Cura" (use Window's search bar if necessary to find the app)
When using Ultimaker Cura for the first time:
Follow the set-up guide (skip signing in to the Ultimaker platform)
Add a non-networked printer --> Scroll down to "Creality3D" --> Select "Creality Ender-3 Pro" (no need to change machine settings)
Click "Finish"
USB adapter for microSD card
Steps:
Click the file icon in the top left and select your model from File Explorer
Click the blue "Slice" button in the bottom right
Insert a microSD card into a USB adapter (pictured right) --> Insert USB adapter into the desktop's USB port
Click "Save to Removable Drive" in the bottom right of Ultimaker Cura
Eject the USB adapter once saved
Using the 3D Printer:
Operating the Display:
Rotate the display knob left or right to change options and press the knob to select
Steps to Print:
Autohome Position (Steps 4 & 8)
Turn on the printer using the switch on the back of the printer
Remove the microSD card from the USB adapter and insert it into the 3D printer's microSD card slot (see diagram)
Use the display knob to set the bed temperature to 60ºC ("Control" --> "Temperature" --> "Bed Temperature")
Meet an easy-to-use desktop 3D printer with a large build area that delivers professional-grade precision. Designed for long, continuous, trouble-free operation.
The Ultimaker S5 combines a dual extruder system, an intuitive interface, advanced communication options and a filament control system. nine0003
Scale up your 3D printing experience!
Build Area: 330x240x300 mm The is the largest in the Ultimaker 3D printer line, yet still comfortable for desktop use.
Unsurpassed accuracy from the first to the last layer:
Advanced automatic multi-point calibration and advanced filament feed control let you go about your business while the 3D printer does its job. Advanced 3D printing environment The Ultimaker S5 features a closed chamber, new anodized aluminum print bed. nine0003
This solution will be useful, first of all, to engineers for printing with special materials. Also, a glass table is included with the 3D printer.
Filament control system.
You will no longer encounter the problem when printing fails because the filament ran out during printing. The material feed control system will automatically pause printing and notify you of the need to replace the material.
Two extruders. nine0012
The Ultimaker dual extrusion system, which allows printing in both colors and materials, is one of the most sought after on the market. Print with materials such as nylon, CPE or PLA, along with water-soluble PVA support, and easily realize various complex geometries.
Smart Print Cores.
Smart core system for fast replacement, customization and ease of setup. Print cores are available with nozzle diameters from 0.25 to 0.8 mm. nine0003
Productivity has never been so friendly!
The 3D printer is equipped with a 4.7″ color touch screen for easy navigation.
The updated menu will make it easy to work with the printer for both a specialist and a beginner. And before printing you can see a preview of your model.
The power supply is now integrated into the 3D printer body and does not take up additional space on the table.
As we know, a 3D printer is part of a successful 3D printing process. An important role is played by the software environment and applications. nine0003
The new Ultimaker APP allows you to easily control the 3D printing process on multiple 3D printers from a common local network, and receive important notifications from your 3D printers wherever you are.
Ultimaker S5 - built for collaboration.
Print via Wi-Fi, Ethernet or USB. Thanks to NFC technology, which is used in branded consumables, the printer automatically detects the installed spool. Over-the-air firmware update technology allows you to easily receive critical and important updates for your 3D printer. nine0003
More options with Cura Connect.
Combine several 3D printers connected to the network into a common managed pool and get a mini production line right in your office!
We'll keep you up to date with the latest Ultimaker news! Your iGo3D team Our groups in social networks:
VKontakte
Facebook
Instagram
Top 20 inexpensive 3D printers (from $199 to $1000)
3DPrintStory Reviews Top 20 Inexpensive 3D Printers ($199 to $1000)
Just 10 years ago, a 3D printer cost over $100,000. Today, you can easily find a cheap 3D printer for under $200. This is amazing. nine0003
Naturally, the lower the price, the more restrictions. Some of the printers on our list will not have a heated bed and the workspace will be small. Naturally, the quality of most of the models presented below cannot compete with more expensive counterparts.
But with a little patience and diligence, it is quite possible to achieve high-quality 3D printing on a printer that costs half the price of a flagship smartphone. And it's really cool!
Important note : All 3D printers in this top are supplied assembled by the manufacturer. If you have free time and want to spend less money, you can buy DIY kits and assemble the 3D printer yourself according to the instructions.
List of the best cheap 3D printers in the price range from $ 200 to $ 1000
3D Printer
Material for 3D Press
0123
459
Flashforge Finder
PLA
140 x 140 x 140 3
499
7 XYPRIZ 1.0 Pro
PLA
150 x 150 x 150
499
XYZprinting da Vinci Jr. Mix 2.0
PLA
150 x 150 x 150
599
Printrbot Simple
PLA
150 x 150 x 150
599
UP mini 2
PLA, ABS
120 x 120 x 120
599
Monoprice Maker Select Ultimate
PLA, ABS, exotic
200 X 20019
699
ROBO C29
PLA
1 127 PLA
127 PLA
127 PLA
127 PLA
127 PLA
AP0117
Dremel Idea Builder
PLA
230 x 150 x 140
899
Printrbot Simple Pro
PLA
200 x 150 x 200
999
Prusa i3 mk2
PLA, ABS, exotic
250 x 210 x 200
In the article we consider inexpensive 3Ds based etc. nine0003
If you want to buy them, even if you live in large cities such as Kyiv, Moscow, St. Petersburg, Minsk, it may turn out that these models will not be in the online stores of your city, or they may be with a decent mark-up relative to the cost that indicated in the article.
Since most of them are European / American, it is possible that they will not be in stores at all.
Therefore, before making a choice, I recommend looking directly at eBay, Amazon, Aliexpress, etc. - many sellers on these planforms deliver to the CIS countries within 1-4 weeks on average. nine0003
It is especially worth monitoring these platforms during the discount period - Black Friday or Chinese New Year (Aliexpress or Gearbest) - prices on such days can be 2 or more times lower than usual and it is worth waiting a few weeks.
Monoprice MP Select Mini ($199)
Probably the best 3D printer on our list. Why? Because the Monoprice MP Select Mini is an impressive development with a thoughtful, compact design at a very low price. This model has a quick-change steel material feed wheel, a cooler for cooling the nozzle, a color LCD screen, a heated table, plus the ability to transfer models for 3D printing via microSD or USB. nine0003
The heated bed and the wide temperature range of the extruder are especially pleasing, because for such a small price you get the opportunity to print in different materials: from ABS B to PLA or exotic materials like conductive PLA plastic, wood, metal-based composites and PVA.
For those who are worried about the lack of a guarantee - for such a price it is possible without it. This model is upgradeable. For example, you can install a new nozzle, change the table and add WiFi connectivity. nine0003
Small working space - 120 x 120 x 120 mm. Over time, this will definitely not be enough for you.
Specifications of cheap 3D printer Monoprice MP Select Mini
Printer type: FDM;
3D printing materials: ABS, PLA, exotic;
Working space: 120 x 120 x 120 mm;
Minimum layer height: 100 microns;
Number of extruders: 1;
3D printing speed: 55 mm/s;
Compatible with materials from other manufacturers: yes; nine0430
Heated table: yes;
Nozzle diameter: 1. 75 mm;
3D printer control panel: yes;
Connection: SD card, USB.
Back to the list of 3D printers
M3D Micro Retail ($249)
The M3D Micro 3D printer hit the market thanks to Kickstarter. This model was presented with an incredible price of $349.
The working space of the M3D Micro is 109 x 113 x 166 mm. There are several body color options. The company has implemented "Micro Motion Technology" - a set of innovative solutions - thanks to which you get excellent quality 3D printing at a small price. nine0003
Today, this inexpensive 3D printer already costs even less than the price announced on Kickstarter. You can buy it for $249 with a 12 month warranty. By the way, it is already possible to pre-order the next "pro" version.
Specifications of cheap 3D printer M3D Micro Retail
Printer type: FDM;
3D printing materials: PLA;
Working space: 116 x 109 x 113 mm;
Minimum layer height: 50 microns; nine0430
Maximum layer height: 350 microns;
Number of extruders: 1;
XY accuracy: 15 microns;
Open Source: no;
3D printing speed: 55 mm/s;
Compatible with materials from other manufacturers: yes;
Heated table: yes;
Nozzle diameter: 1. 75 mm;
Control panel on 3D printer: no;
Connection: USB.
Back to 3D printer list
XYZprinting da Vinci Mini ($289)
Da Vinci Mini is a successful attempt to make the 3D printer user-friendly. This model has only one button and 5 multi-colored indicators that reflect the current status of 3D printing. In addition, this affordable 3D printer is WiFi capable so you can control it over a network in your home, office or lab.
Unfortunately, you can only use the manufacturer's own 3D materials. On average, they cost 20% more than usual. However, the company also argues that the materials used (PLA) will be 100% non-toxic. nine0003
Specifications of cheap 3D printer XYZprinting da Vinci Mini
Printer type: FDM;
3D printing materials: PLA;
Working space: 150 x 150 x 150 mm;
Minimum layer height: 100 microns;
Number of extruders: 1;
Open Source: no;
Compatible with materials from other manufacturers: no;
Heated table: no;
Nozzle diameter: 1. 75 mm;
3D printer control panel: yes; nine0430
Connection: USB, WiFi.
Back to 3D printer list
Monoprice Maker Select V2($299)
The next cheap 3D printer with a good reputation is the Monoprice Maker Select V2.
This model is an analogue of the Wanhao Duplicator i3, which, in turn, borrowed the design from the Prusa i3. But this does not affect the quality, as the Monoprice Maker Select V2 is easy to use and gives excellent 3D printing results.
Monoprice Maker Select V2 design feature is that the power supply and control panel are placed outside the 3D printer. The working space of this model is 200 x 200 x 180 mm. And this is really a good indicator for the money. nine0003
Specifications of cheap 3D printer Monoprice Maker Select V2
Printer type: FDM;
3D printing materials: ABS, PLA, exotic;
Working space: 200 x 200 x 180 mm;
Minimum layer height: 100 microns;
Number of extruders: 1;
Open Source: software;
Compatible with materials from other manufacturers: yes;
Heated table: yes;
Nozzle diameter: 1. 75 mm; nine0430
3D printer control panel: yes;
Connection: USB, SD card.
Back to the list of 3D printers
New Matter MOD-t ($299)
New Matter is a young startup that offers a 3D printer MOD-t - An interesting design with a minimalist design. This cheap 3D printer is WiFi enabled so you can manage print settings and print from your computer, tablet or smartphone. The working space is 150 x 150 x 125 mm. Thanks to the case, the noise during its operation is reduced. But the most interesting and attractive thing about MOD-t is the price. Only $299. In general, this is an interesting, high-quality model.
Specifications of cheap 3D printer New Matter MOD-t
Printer type: FDM;
3D printing materials: PLA;
Working space: 150 x 100 x 125 mm;
Minimum layer height: 100 microns;
Number of extruders: 1;
Open Source: no;
Compatible with materials from other manufacturers: yes;
Heated table: no;
Nozzle diameter: 1. 75 mm; nine0430
Control panel on 3D printer: no;
Connection: USB, WiFi.
Back to the list of 3D printers
Printrbot Play ($399)
The Printbot Play is a very popular budget 3D printer that is often used in education. This inexpensive, reliable model, which is almost entirely made of metal.
The working space is 100 x 100 x 130 mm. Printbot Play has an extruder manufactured by the company itself - Alu Extruder v2. The body is made of powder coated steel and aluminium. SD slot provided. nine0003
You can upgrade the basic design of the Printrbot Play with a heated stand or increase the Y-axis stroke.
3D printing materials: PLA;
Working space: 100 x 100 x 130 mm;
Minimum layer height: 100 microns;
Number of extruders: 1;
Open Source: design and software;
Compatible with materials from other manufacturers: yes; nine0430
Heated table: no;
Control panel on 3D printer: no;
Connection: USB, SD card.
Back to the list of 3D printers
Wanhao Duplicator i3 Plus ($459)
The Wanhao Duplicator i3 Plus is an upgraded version of the popular Wanhao Duplicator i3 (which in turn is based on the Prusa i3).
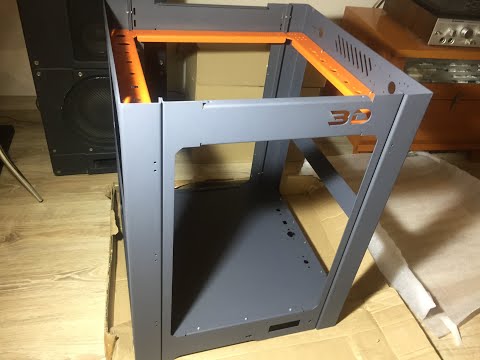
The main features of this cheap 3D printer are a large working space of 200 x 200 x 180 mm, a steel frame, electronics integrated into the design itself (previously it was taken out separately), a slot for a full-size SD card and a touchscreen display for control. nine0003
Wanhao Duplicator i3 Plus Cheap 3D Printer Specifications
Printer type: FDM;
3D printing materials: ABS, PLA, exotic;
Working space: 200 x 200 x 180 mm;
Minimum layer height: 100 microns;
Number of extruders: 1;
Open Source: design and software;
Compatible with materials from other manufacturers: yes;
Heated table: yes;
Nozzle diameter: 1.75 mm; nine0430
3D printer control panel: yes;
Connection: USB, SD card.
Back to the list of 3D printers
Flashforge Finder ($499)
FlashForge Finder is one of the newest 3D printers on our list. This affordable 3D printer offers an average working space of 140 x 140 x 140mm.
This Finder features a transparent sidewall design so you can view the 3D printing process from any angle. A color display is installed, it is possible to transfer data via WiFi network. The printer comes with some supplies and a USB flash drive, so you can start 3D printing almost immediately. nine0003
Specifications of cheap 3D printer FlashForge Finder
Printer type: FDM;
3D printing materials: PLA;
Working space: 140 x 140 x 140 mm;
Minimum layer height: 100 microns;
Number of extruders: 1;
XY accuracy: 11 microns;
Open Source: no;
Compatible with materials from other manufacturers: yes;
Heated table: no;
Nozzle diameter: 1. 75 mm; nine0430
3D printer control panel: yes;
Connection: USB, WiFi.
Back to 3D printer list
XYZprinting da Vinci Jr. 1.0 Pro ($499)
What's so special about the da Vinci Jr. 1.0 pro? This is a new model from XYZPrinting, which includes many advanced features, such as support for printing materials from other manufacturers and increased speed of 3D printing.
Also features an auto-calibration mechanism, a closed chamber with a unique cooling system, and a 0.3mm nozzle option for high-quality printing of fine model details. All in all, this is a great 3D printer with a lot of useful features and at a low price. nine0003
Specifications for cheap 3D printer da Vinci Jr. 1.0 Pro
Printer type: FDM;
3D printing materials: PLA;
Working space: 150 x 150 x 150 mm;
Minimum layer height: 100 microns;
Number of extruders: 1;
Open Source: no;
Compatible with materials from other manufacturers: yes;
Heated table: no;
Nozzle diameter: 1. 75 mm;
3D printer control panel: yes; nine0430
Connection: USB, SD card.
Back to 3D printer list
XYZprinting da Vinci Jr. Mix 2.0 ($599)
XYZprinting provides a wide range of low cost 3D printers. And paying attention to each model is quite difficult, although many of them are very interesting.
XYZprinting da Vinci Jr. Mix 2.0 stands out because it can print with two different materials and mix them to create multi-colored models. This dual-color 3D printing technology is rare in this price range ($500 to $1,000), so if you're interested in experimenting with multicolor printing, XYZprinting da Vinci Jr. Mix 2.0 is a great choice. nine0003
However, there is a drawback. This 3D printer is not compatible with materials from other manufacturers, so you will have to buy special materials from XYZprinting (as we mentioned above, they cost 20% more, but are not toxic).
Specifications of cheap 3D printer XYZprinting da Vinci Jr.
Mix 2.0
Printer type: FDM;
3D printing materials: PLA;
Working space: 150 x 150 x 150 mm;
Minimum layer height: 200 microns; nine0430
Number of extruders: 1;
Open Source: no;
Compatible with materials from other manufacturers: no;
Heated table: no;
Nozzle diameter: 1.75 mm;
3D printer control panel: yes;
Connection: USB, SD card, WiFi.
Printrbot Simple ($599)
Printrbot Simple is the flagship of the Printbot empire. This model has a great open design with a solid aluminum frame and a working space of 150 x 150 x 150mm. This inexpensive 3D printer comes fully assembled at a very good price. As you need and want to experiment, you can add a heated table and expand the workspace in the horizontal plane. nine0003
Specifications of cheap 3D printer Printrbot Simple
Printer type: FDM;
3D printing materials: PLA;
Working space: 150 x 150 x 150 mm;
Minimum layer height: 100 microns;
Number of extruders: 1;
3D printing speed: 80 mm/s;
Open Source: design and software;
Compatible with materials from other manufacturers: yes;
Heated table: optional; nine0430
Nozzle diameter: 1. 75 mm;
Control panel on 3D printer: no;
Connection: USB.
Back to the list of 3D printers
UP mini 2 ($599)
The UP mini 2 is a low cost 3D printer that packs in impressive design and functionality. For starters, it has a touch screen panel and the ability to connect via WiFi.
But the most interesting is further. Implemented power failure protection system. 3D printing will continue after the emergency stop. Built-in HEPA air filtration system. Automatic detection of the height of the extruder nozzle. A separate, closed container for the material, thanks to which it does not deteriorate under the influence of moisture from the environment. nine0003
Great 3D printer for a small price. The only thing that upsets me a little is the small working space - 120 x 120 x 120 mm.
Specifications of cheap 3D printer UP mini 2
Printer type: FDM;
3D printing materials: PLA, ABS;
Working space: 120 x 120 x 120 mm;
Minimum layer height: 150 microns;
Maximum layer height: 350 microns;
Number of extruders: 1;
Open Source: no;
Compatible with materials from other manufacturers: yes;
Heated table: yes;
Nozzle diameter: 1. 75 mm;
3D printer control panel: yes;
Connection: USB, WiFi.
Back to the list of 3D printers
Monoprice Maker Select Ultimate ($699)
The Monoprice Maker Select Ultimate is an extraordinary beast that combines elements from two leaders in the world of 3D printing - Zortax and Ultimaker. The Monoprice Maker has an aluminum perforated printing table, which was offered in the Zortax M200 (thanks to this table, the grip of the base of the model with the table is much better), and the software part is almost identical to Ultimaker 2 (very user-friendly interface and functionality). nine0003
This model uses a "Bowden extruder", that is, the feed blocks and nozzle are separated, unlike direct feed. This improves reliability and reduces the likelihood of 3D printing errors (although, most likely, it was necessary to sacrifice printing speed, as the weight of the printing unit increases). Given the cost, this is a good model, the analogues of which are much more expensive.
Specifications of cheap 3D printer UP mini 2
Printer type: FDM; nine0430
3D printing materials: PLA, ABS, exotic;
Working space: 200 x 200 x 175 mm;
Minimum layer height: 20 microns;
Number of extruders: 1;
Open Source: no;
Compatible with materials from other manufacturers: yes;
Heated table: yes;
Nozzle diameter: 1.75 mm;
3D printer control panel: yes;
Connection: USB, SD card.
Back to the list of 3D printers
Robo C2 ($799)
The Robo C2 is a small 3D printer with tons of connectivity options. Using a specialized application, you can monitor the status of 3D printing from your smartphone or tablet. It can be connected to a Chromebook. Thanks to the built-in slicing program, you do not need to install additional printing software.
Probably the most impressive is the integration with Amazon Alexa. Users can stop, cancel and check the status of 3D printing in real time using voice commands. nine0003
What does this inexpensive 3D printer offer? Working space 127 x 127 x 150 mm. The 3D printing speed is 300 mm/s and the resolution is 20 microns. There is a built-in 3.5'' color touch screen, a system for monitoring the amount of remaining material for printing, automatic calibration and a removable self-aligning print platform. The only drawback is that the table is not heated, so you have to use PLA plastic.
Specifications of cheap 3D printer Robo C2
Printer type: FDM;
3D printing materials: PLA;
Working space: 127 x 127 x 150 mm;
Minimum layer height: 20 microns;
Number of extruders: 1;
Open Source: software;
Compatible with materials from other manufacturers: yes;
Heated table: no;
Nozzle diameter: 1.75 mm;
3D printer control panel: yes;
Connection: USB, WiFi.
Back to the list of 3D printers
Wanhao Duplicator 4S ($829)
The Duplicator 4S has 2 extruders. It's essentially a copy of the MakerBot Replicator. Behind the steel body is the MK10 material feed mechanism, which is currently the easiest to use and most sought after in the market for 3D printer components.
One of the features of this model is a high-precision material feed wheel, which ensures the same filament feed speed. The Duplicator 4S is equipped with a 0.4mm precision nozzle. nine0003
Specifications of cheap 3D printer Duplicator 4S
Printer type: FDM;
3D printing materials: ABS, PLA, exotic;
Working space: 225 x 145 x 150 mm;
Minimum layer height: 100 microns;
Maximum layer height: 500 microns;
Number of extruders: 2;
XY accuracy: 11 microns;
3D printing speed: 40 mm/s;
Open Source: software;
Compatible with materials from other manufacturers: yes;
Heated table: yes;
Nozzle diameter: 0.4 mm;
3D printer control panel: yes;
Connection: USB, SD card.
Back to the list of 3D printers
Polar 3D Printer ($899)
Polar 3D belongs to a separate category of 3D printers in this top, since this model implements the polar coordinate system. This causes the table to rotate and the print head to move up, down, right, and left. nine0003
Thanks to the polar coordinate system, this 3D printer is powered by two stepper motors, so it consumes less power. In addition, it turned out to realize a larger size of the working area: 203 (table diameter) x 152 (Z coordinate) mm.
Rated $899, but there are special discounts for educational institutions. The discounted price is only $599.
Specifications of cheap 3D printer Polar 3D
Printer type: FDM;
Materials for 3D printing: PLA;
Working space: 203 (table diameter) x 152 (Z-coordinate) mm;
Minimum layer height: 50 microns;
Maximum layer height: 400 microns;
Number of extruders: 1;
3D printing speed: 40 mm/s;
Open Source: no;
Compatible with materials from other manufacturers: yes;
Heated table: no;
Nozzle diameter: 1. 75 mm;
Control panel on 3D printer: no; nine0430
Connection: USB, WiFi, SD card.
Back to 3D printer list
FlashForge Creator Pro ($899)
You've probably heard of this 3D printer. FlashForge Creator Pro is very similar to Makerbot Replicator 2X. This inexpensive 3D printer has 2 extruders, it has a steel closed body.
Other features include a table sizing system, and a guide screw that makes the guide system more stable and durable. The design is nothing special, but this model has earned positive reviews from the 3D community due to its reliability, versatility and ease of use. nine0003
Specifications of cheap 3D printer FlashForge Creator Pro
Printer type: FDM;
3D printing materials: ABS, PLA, exotic;
Working space: 225 x 145 x 150 mm;
Minimum layer height: 100 microns;
Maximum layer height: 500 microns;
Number of extruders: 2;
XY accuracy: 11 microns;
3D printing speed: 40-100 mm/s;
Open Source: design and software; nine0430
Compatible with materials from other manufacturers: yes;
Heated table: yes;
Nozzle diameter: 1. 75 mm;
3D printer control panel: yes;
Connection: USB, SD card.
Back to 3D Printer List
Dremel Idea Builder ($899)
The Idea Builder is plug and play. This 3D printer is designed by Dremel. It has a color touch screen display. Sufficiently large working space - 230 x 150 x 140 mm. Unfortunately, the table is not heated. On the other hand, since only PLA plastics can be used, this model is great for classrooms and teaching labs. nine0003
Specifications of cheap 3D printer Dremel Idea Builder
Printer type: FDM;
3D printing materials: PLA;
Working space: 230 x 150 x 140 mm;
Minimum layer height: 100 microns;
Number of extruders: 1;
Open Source: no;
Compatible with materials from other manufacturers: no;
Heated table: no;
Nozzle diameter: 1.75 mm;
3D printer control panel: yes; nine0430
Connection: USB, SD card.
Back to 3D printer list
Printrbot Simple Pro ($999)
Printrbot Simple Pro is a major upgrade of the original Simple. Same open design, no body. Like its predecessor, the Printrbot Simple Pro is compact and portable. All-metal construction for excellent vibration damping and shock resistance.
The main differences are the built-in color touch screen, the ability to connect via WiFi and the free cloud service (optional), which greatly improves the 3D printing process. Simple Pro has a 32-bit processor, which ensures smooth and fast movements. And at the same time, this model is included in our top 20 cheap 3D printers, since its cost is $999.
Specifications of cheap 3D printer Printrbot Simple Pro
Printer type: FDM;
3D printing materials: PLA;
Working space: 200 x 150 x 200 mm;
Minimum layer height: 50 microns;
Number of extruders: 1;
Open Source: design and software;
Compatible with materials from other manufacturers: yes;
Heated table: optional;
Nozzle diameter: 1. 75 mm; nine0430
3D printer control panel: yes;
Connection: USB, WiFi.
Back to 3D printer list
Prusa i3 Mk2 ($999)
This is one of the best 3D printers you can buy in this price range. All nodes are open-source licensed and part of the Rep-Rap project, so there are many copies around ... but all replicas are worse than the original.
The Prusa i3 Mk2 is equipped with a heated table that has technology to compensate for temperature differences in the center and corners. There is an automatic calibration system. And of course, amazing documentation. This is an extremely versatile 3D printer that you will 100% appreciate when you start printing with unusual materials such as PLA, PET, HIPS, Flex PP or Ninjaflex, etc. nine0003
The Prusa i3 Mk2 is a 3D printer that is constantly being developed and supported by the manufacturer. Its developer Josef Prusa regularly adds new features, software and design improvements (for example, the ability to color 3D print).

 Just a few highlights:
 5mm above it
 Also, a glass table is included with the 3D printer.
  And before printing you can see a preview of your model.
  Naturally, the quality of most of the models presented below cannot compete with more expensive counterparts.
  Mix 2.0
  nine0003
  This model has a quick-change steel material feed wheel, a cooler for cooling the nozzle, a color LCD screen, a heated table, plus the ability to transfer models for 3D printing via microSD or USB. nine0003
  75 mm;
  75 mm;
  75 mm;
  75 mm; nine0430
  75 mm; nine0430
 75 mm; nine0430
 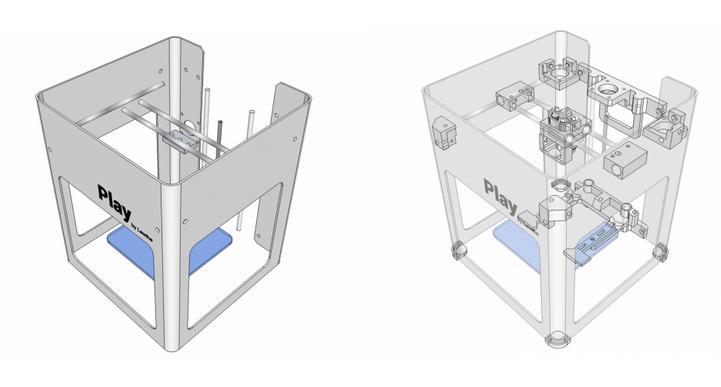 75 mm;
  Mix 2.0
  75 mm;
  75 mm;
 nine0003
  It's essentially a copy of the MakerBot Replicator. Behind the steel body is the MK10 material feed mechanism, which is currently the easiest to use and most sought after in the market for 3D printer components.
 75 mm;
  75 mm;
 75 mm; nine0430