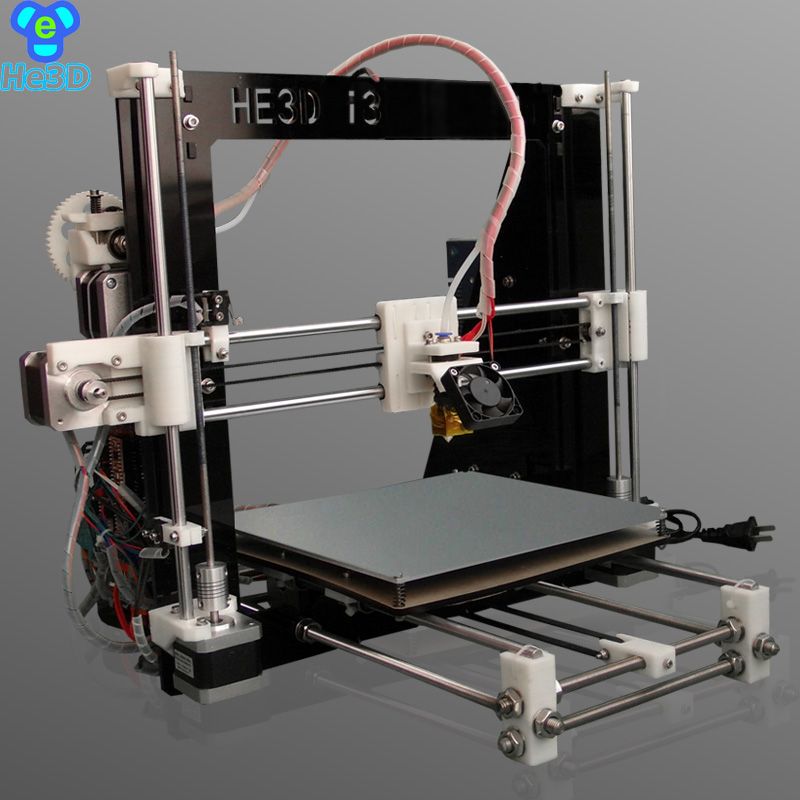
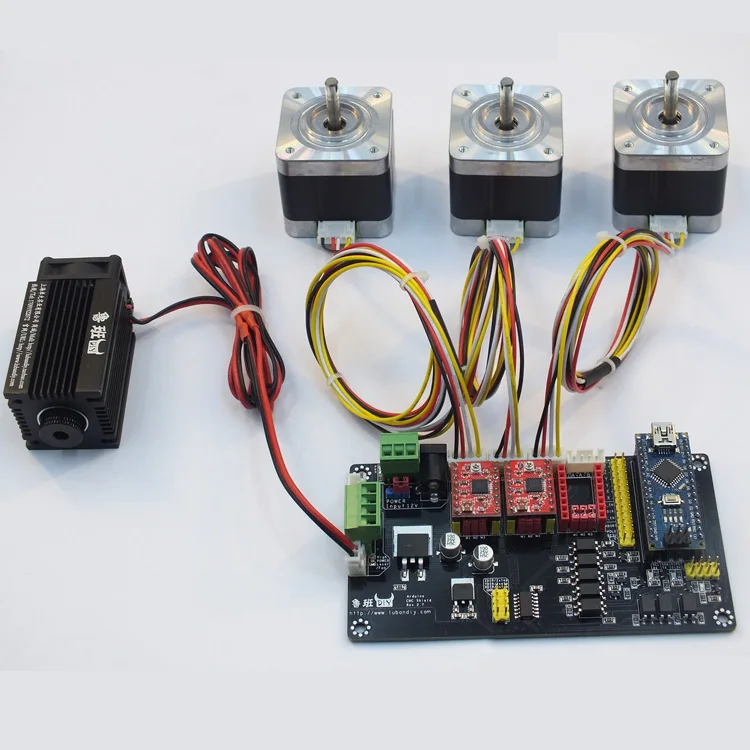
Machine control panel 3d printer
Leapfrog | Simplify3D Software
This page will help you setup your new Leapfrog® Creatr to use the All-In-One 3D printing software by Simplify3D™. The Creatr is available in a single extruder model and in a dual extruder model. If you are setting up a brand new Creatr, make sure that you have completed the Installation Guide on Leapfrog’s website. It will guide you through the unpacking your Creatr and the installation of your first spools of filament.
When you first open your software, you will be greeted by the virtual build plate and the main user interface. For now, let’s make sure that Simplify3D is set to the correct firmware configuration. By default Simplify3D is configured to the RepRap (Marlin/Sprinter) firmware, which is what the Creatr uses, but it’s always a good idea to double-check. To do this go to Tools > Firmware Configuration. The RepRap profile should already be selected.
Connecting to your Creatr
Now it’s time to connect to your Creatr! First connect the USB cable to your computer, then open the Machine Control Panel. To do this you can press Ctrl-P (Or Command-P on a Mac). You can also go to Tools > Machine Control Panel or click on the gear icon on the quick access toolbar. Next, you need to select the port that your printer will use to communicate to the software. After plugging in the printer, you may need to click the “Refresh” button for the new port to appear. On Windows, this is usually called COM#. Mac users will see multiple ports so be sure to select the one with USB in its name. You won’t have to change the Baud Rate, as the default setting of 115200 is correct. Once the correct port is selected, click “Connect”. If everything goes well the red connect button should turn green, which shows that you are now connected to your printer!
Controlling your Creatr
Once you’re connected to your Creatr, you can use the Machine Control Panel to manually control your machine in preparation for printing. The first thing you might want to check is that your motors are all connected and working properly. To do this, click on the “Jog Controls” tab, which will bring up the jog control panel where you will be able to manually move the printhead. You can move in 0.1, 1, 10, or 100mm increments along any of the axes as well as retract or extrude the filament. Remember that you are always moving the printhead relative to everything else. For example, clicking one of the +Z buttons will move the printhead away from the build plate. For the Creatr, this means that the build plate will actually move down.
Both extruders and the heated bed on the Creatr can also be controlled using the MCP. The red lights beside extruder and heated bed temperatures indicate when either of these heaters are turned on. You can select the right or left extruder through the “Active Toolhead” option. If you have followed the Installation Guide on the Leapfrog website, there should be ABS plastic mounted on the right extruder. For testing purposes, select the right extruder and enter “220” into the extruder temperature field and “80” into the heated bed field.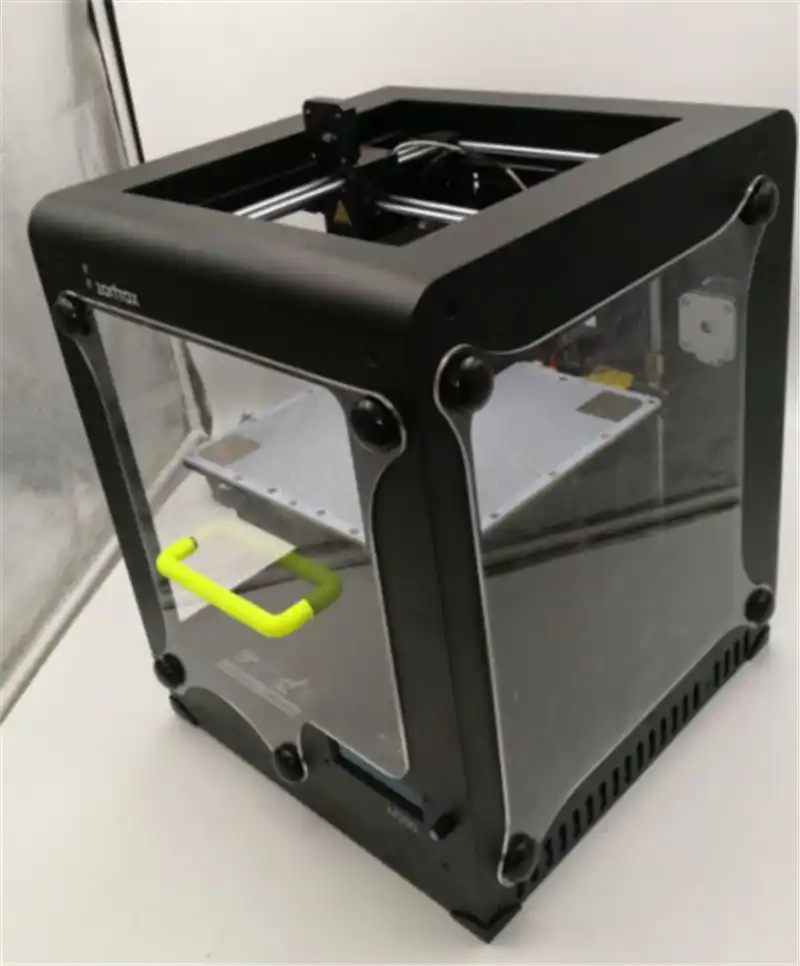 When you press “On” for either the extruder or heated bed, the red circle should light up and your temperature should begin rising. Note that the heated bed will take longer to heat up than the nozzle.
You can use the “Temperature Plot” tab to see a live view of the current temperatures on your Creatr. The red line indicates your extruder temperature and the blue line indicates your build plate temperature. The dotted lines indicate the desired setpoint temperatures. Before we try extruding from your nozzle, make sure the extruder temperature is heated up and stabilized. Go back to the Jog Controls tab and click on the 100mm extrude button. Watch the head extrude the filament. It is typically a good idea to preheat and prime your nozzle following these steps prior to beginning a print.
Starting Your First Print on the Creatr
You are now ready to import an STL file! Lets start with something simple. Download this treefrog STL file by MorenaP and import it into the program using the “Import” button. Your frog will drop down into the software as a 3D model. The next step is to center the model by clicking on the “Arrange” button.
Now you can start configuring your slicing settings by adding a process. If at any point you need some help, the software includes a Quick Start Guide that describes the basic procedures. To find it, go to Help > Quick Start Guide from within the program.
On page 5 of the Quick Start Guide is a tutorial on how to create and configure a new FFF process (FFF stands for Fused Filament Fabrication and this is the industry name for the type of 3D printing the Creatr uses). These FFF Settings determine exactly how the model prints and plays a critical role in the quality of your print. To create a new process you must click on the “Add” button. A process will pop up as “Process1” and the FFF settings window will emerge on your screen. For this simple part, you will only need one FFF process.
Simplify3D Software has made configuring settings extremely simple for Creatr users through the use of our pre-configured profiles. Select the ‘Leapfrog Creatr (right extruder)’ profile from the “Select Profile” drop-down menu and “ABS” for the “Auto-Configure for Material” container.
When you have finished changing your FFF settings, you can save them by clicking the “Save” button. After saving, press the “Prepare” button to create the machine instructions required for printing. The software will slice the part into a G-code file that the Creatr can read. The software will then prompt you to watch a preview of the print using our animated previewer. This will allow you to see what the print would look like before actually printing it on the Creatr.
Once you are satisfied with how your part looks click the red stop sign to exit the previewer. A window will pop up and ask if you are ready to print. Select yes and the MCP will appear. The printer may pause for a few seconds to stabilize the temperatures before printing. Once the desired setpoints have been reached the print will begin. In no time at all you will have your first printed part.
Troubleshooting
If you are on Windows and have trouble connecting to the printer, please make sure that you have installed the appropriate drivers following Leapfrog’s instructions
3D Printer Control Software | FlashCut CNC
CNC App & Retrofits
Plasma Torchmate UpgradesKnife-cuttingGeneral AutomationLatheWaterjetOxy-FuelLaserRouterMilling3D Printing
Overview
Controls
Accessories
Software
Retrofits
Gallery
Easily build three-dimensional objects with our advanced control of 3D printing technologies like FDM and liquid deposition. Advanced timing algorithms to control the flow, height and speed of the dispensed material allow you to make intricate, accurate parts.
+Quote
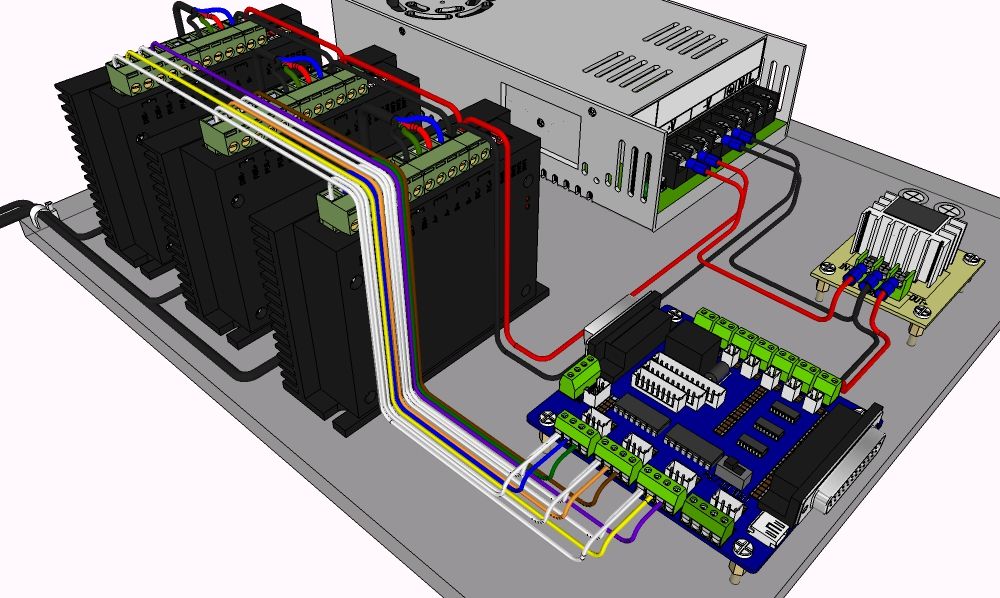
8 Channel Relay Box
8 Channel Relay Board with cable for connection to Signal Generator Board...
I/O Connector Kit for Classic I/O Expansion Board
I/O Connector Kit for Mini I/O Expansion Board
I/O Connector Kit for Mini I/O Expansion Board includes 18 pin MFJ connector and contacts. ..
..
Digital & Analog I/O Expansion Board for USB Signal Generator
Adds 24 inputs, 24 outputs, analog ins and outs to Signal Generator and Pro Series Control...
Mini IO Expansion Board
Easily adds 1 analog, 1 PWM & 2 relay outputs, 1 analog & 1 quadrature encoder or ...
Control Pendant with Joystick
24-function and 8-direction joystick pendant with programmable functions such as jogging a...
+Quote
Universal Relay Box
Convenient metal enclosure with 2 switched 110-240 VAC relays and 2 contact relays...
+Quote
15' 5 Pair Limit Switch Cable
10' cable harness for 5 input lines. Switches not included....
35' 6 Pair Limit switch cable
Plugs directly into input port of FlashCut CNC Controller for easy connection to most inpu.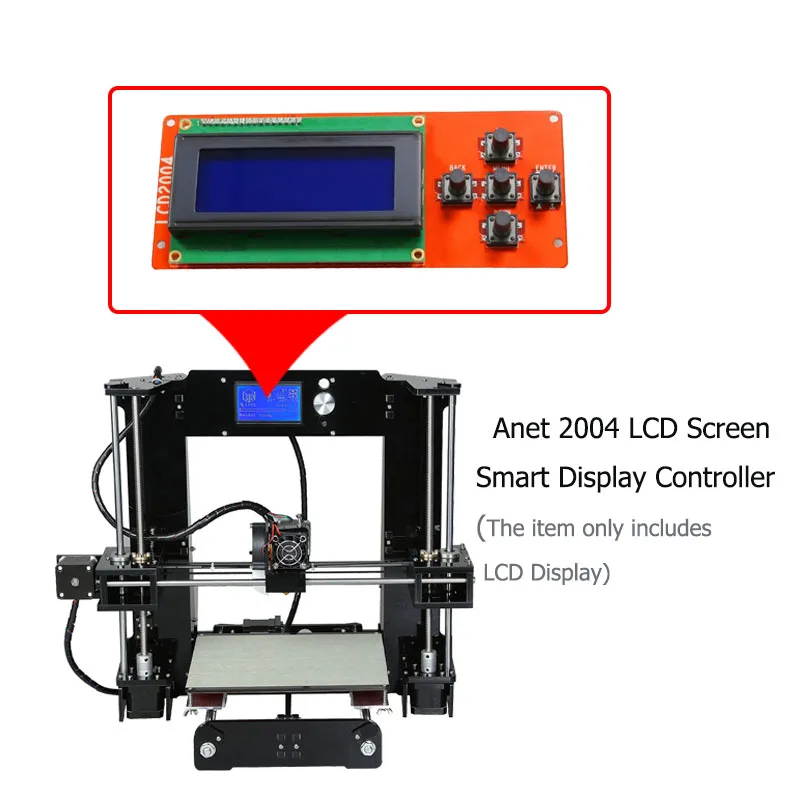 ..
..
25' 5 Pair Limit switch cable
Plugs directly into input port of FlashCut CNC Controller for easy connection to most inpu...
(5) industrial switches
Set of 5 industrial switches for rugged limit or home input lines. ...
+Quote
(5) Miniature Switches
Set of 5 miniature switches for general limit or home input lines....
Joystick Plus Pendant Board (A-la-carte feature)
8 position joystick for jogging in the XY plane including 45 degree angles....
Programmable Pendant Board (A-la-carte feature)
Programmable matrix board that allows you to add up to 144 physical switches to your contr...
FlashCut CAD/CAM/CNC V9 Standard for Plasma and Oxyfuel
Version 4.5 CNC Control Software
USA: (888) 883-5274
INTL: +1 (847) 940-9305
Contact Us
Request Equipment Quote
Dashboards
With the advent of 3D printers in our lives, the problem of manufacturing cases for all kinds of devices, devices and other "gadgets" has practically disappeared. However, judging by the materials published on this forum, the task of designing products - applying inscriptions, pictograms, icons, at least "for oneself" - is not being solved effectively enough.
I would like to share my modest experience in this direction, using the example of a simple power supply, made as a friendly help to one young talent, according to his terms of reference. nine0003
Everything was designed in CAD Compass-3d Home v18. Despite this, for sure, it can be repeated on any more or less serious CAD.
Power supply Uout. \u003d 5 volts _ + 1%, I max. \u003d 2 amperes, it turned out like this:
This is an assembly drawing of the power supply. As you noticed, the front panel, on the assembly drawing, is already framed in accordance with the customer's request. In finished form it looks like this:
Dimensions WxHxD = 125x37x146 mm
- Seal:
- standard branded ABS, "green"
- temperature ratings - 235/105
- nozzle - 0. 4 mm
4 mm
- layer thickness 0.2 mm
- wall thickness - 0.2 mm - 40%
- sticking to the table - hairspray
- supports everywhere, without blowing.
The idea of product design is as follows:
- on the selected surface, with CAD tools, a picture is drawn or text is applied
- the resulting image is extruded by cutting out a small amount
- the resulting surface is painted in the desired color
- the image of the panel with finished drawings is converted into graphics format
- the image is printed on paper or film with an adhesive surface fabricated surface
.Ol000 image sizes to graphic formats. for example in .png. We convert the image of the panel into a graphic format with a scale of 1:1 and print it on a laser printer. nine0003
I don't have a color laser printer, I use all kinds of "Copy *****" services, not expensive.
When printing panels on a printer, the product may “shrink”, which can critically affect the combination of the panel and the pattern. To solve this problem, it is more convenient to make a panel, take all measurements, and then adjust the print scale of the image.
We cut off everything unnecessary, stick it on the panel and everything that happened - that's what happened. You can cut and paste, you can stick a picture and cut out unnecessary in place. nine0003
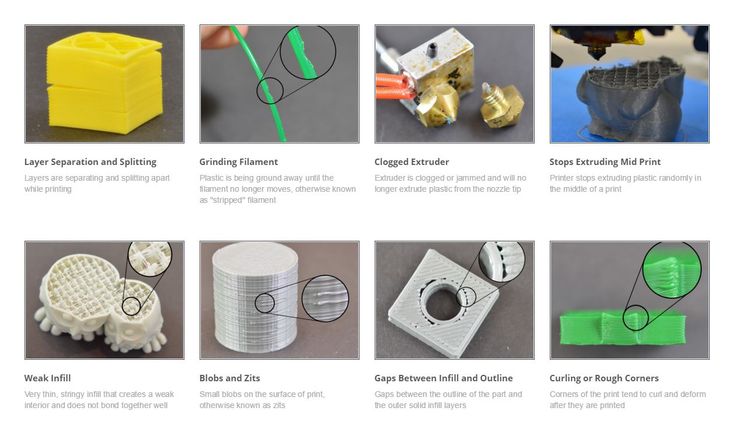
Note to the article: The manufacture of the panel was carried out by a person, let's say - "with a little accumulated experience in technical skills", for the first time. I did this on purpose to show standard errors and how to fix them.
Important:
- print patterns on a laser printer, the resulting image on paper or film is resistant to wear.
- When working with adhesive paper or film, use a very sharp cutting tool such as a craft knife or safety razor blade. Otherwise, pile or irregularities will be noticeable on the cut. nine0003
- the surface on which the pattern will be glued must be carefully prepared - it must be smooth, all bumps and dust particles removed. Otherwise, everything will appear through paper or film. Printing the panel "face down", processing the side surfaces, the edges of the holes with a brush dipped in solvent - solves this problem.
Disadvantages:
- difficult to cut small holes.
- it is difficult to stick drawings on large surfaces.
All these difficulties are overcome by desire and practice. Irregularities of paper cuts on holes can be masked by frames, bushings. Large printed surfaces, can be cut and segmented and so on. nine0003
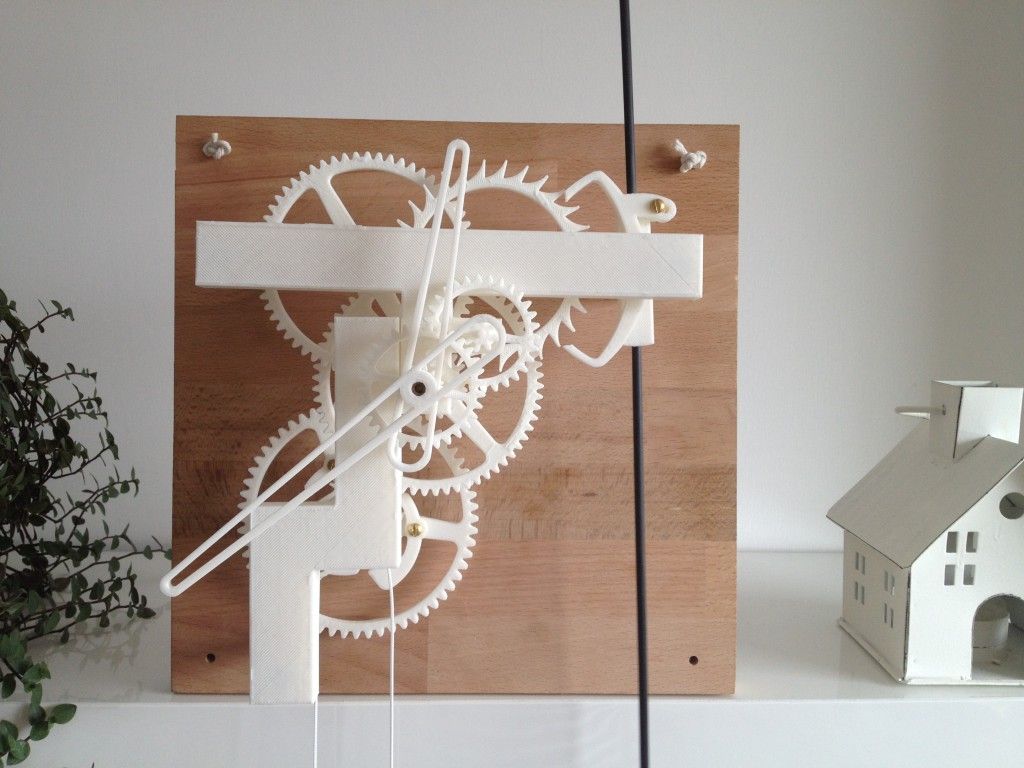
There are other design options for crafts: - look - "children's toy" and also - "example of design".
Maccabeus.
Equipment. Digital laboratory FABLAB
- Picaso 3D Designer
- MakerBot Replicator 2
- Dimension Elite
- Blueprinter
- Formlabs Form 2
- nine0119
Picaso 3D Designer
Picaso 3D Designer is a 3D printer from the Russian company PICASO , which uses technology that allows you to print with a record high accuracy of 5 9016 micron 5 9013! The heated chamber uses industrial printer technology and is ideal for printing large objects.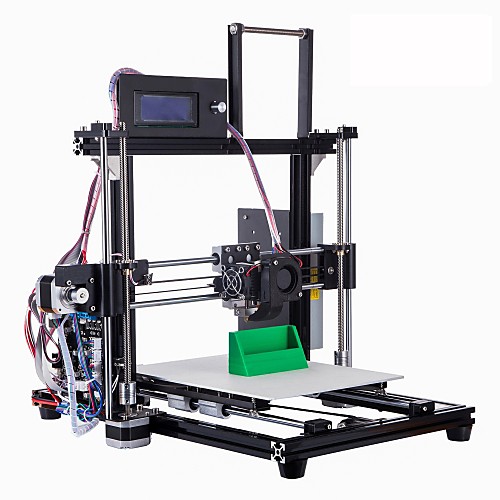 Picaso 3D Designer is designed in such a way that all the mechanics are hidden behind an ergonomic body. The printer has rather compact dimensions of 365×386×452 mm. The chassis of the printer is made of metal. Print area dimensions are 200 x 200 x 210 mm (L x W x H) . The automatic calibration mechanism is very useful, eliminating the problem of layer deformation when making complex models. The camera itself has the ability to set the temperature. This makes it possible to manufacture products that do not crack in layers as a result of thermal expansion.
| Print technology | FDM |
| Printable area | 200 x 200 x 210 mm |
| Print speed | up to 30 cm3/h |
| Minimum layer thickness | 50 micron [0.05 mm] |
| Positioning accuracy | XY: 11 microns; Z: 1. 25 micron 25 micron |
| Plastic thread diameter | 1.75±0.1 mm |
| Nozzle diameter | 0.3 mm |
| Media | ABS, PLA, HIPS, ASA, ABS/PC, NYLON, PET |
| Heated platform | Yes |
MakerBot Replicator 2
The MakerBot Replicator 2 3D Printer delivers superior product quality. For MakerBot Replicator 2 the following modes are defined: 340 micron - fast , 270 micron - plain , 100 micron - high . In the latter case, the thickness of the plastic applied to the product is comparable to the thickness of a standard sheet of paper. Environmentally friendly PLA plastic perfectly fits on a perfectly smooth surface. The chamber size is 410 cubic inches , which allows you to work with objects up to 28. 44 x 15.49 x 15.24 cm . Thanks to this improvement, the 3D printer is able to create quite large items , as well as many small items in one pass . The printer is controlled by proprietary software MakerWare . Thanks to a simple and understandable shell of the program, everyone can work with the device - you do not need additional training. The developers managed to reduce the printing time by software optimization of the process. Object details are considered in the most common formats - .stl and .obj. nine0136
| Print technology | FDM |
| Printable area | 285 x 153 x 155 mm |
| Print speed | up to 15 cm3/h |
| Minimum layer thickness | 100 micron [0.1 mm] |
| Positioning accuracy | XY: 11 microns; Z: 2. 5 micron 5 micron |
| Plastic thread diameter | 1.75±0.1 mm |
| Nozzle diameter | 0.4 mm |
| Media | PLA |
| Heated platform | No |
Dimension Elite
3D printer Dimension Elite belongs to the class of professional industrial 3D printers. The printer is capable of printing with two materials at the same time, and the closed chamber allows you to maintain the desired temperature for the entire printing period. Print chamber size 203x203x305mm. Installing and connecting the printer is quick and intuitive and easy to use. It is enough to press only one “print” button - and your virtual prototype will become a functional product in a matter of hours. With software Catalyst® EX , the build chamber automatically orients the STL file, splits it into layers, calculates the necessary support structure, specially generates the print head movement file in accordance with the model geometry, and sends it to the printer. For maximum efficiency, the printer's build chamber can accommodate multiple models at the same time. The printer works with the unique material ABSplus ™ and allows you to grow durable parts. Specially developed new ABSplus™ material is stronger than traditional ABS plastic. The work of parts as snaps, reaming holes, tightening with screws, gluing, sanding pliability are just some of the many advantages of this technology. Developers using Dimension Elite can build robust functional prototypes by finer detailing in the shortest possible time.
| Print technology | FDM |
| Printable area | 203 x 203 x 305 mm |
| Print speed | up to 15 cm3/h |
| Minimum layer thickness | 174 micron [0.174 mm] |
| Positioning accuracy | XY: 11 microns; Z: 1.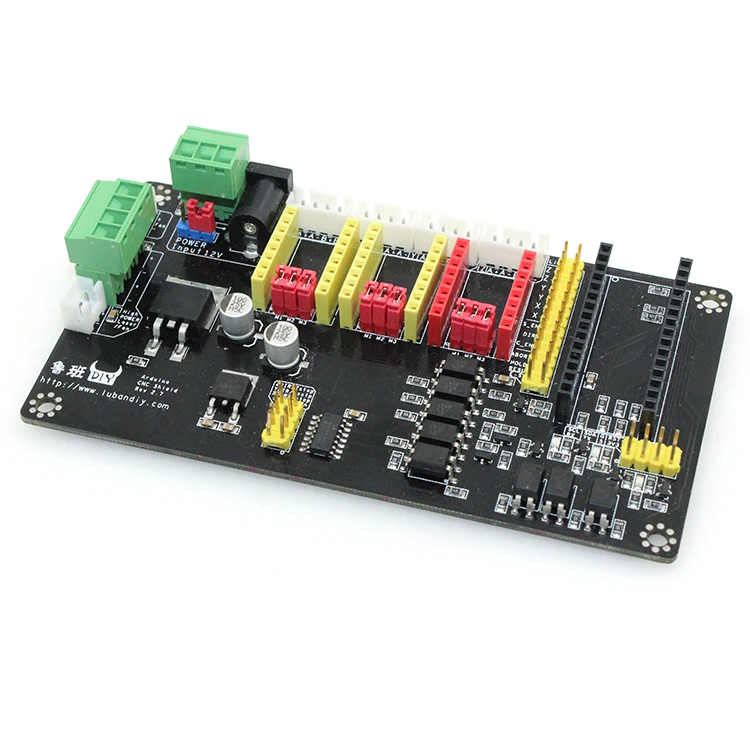 25 micron 25 micron |
| Plastic thread diameter | 1.75±0.1 mm |
| Nozzle diameter | 0.4 mm |
| Media | ABS+ |
| Heated platform | Yes |
Blueprinter
The Blueprinter 3D printer is a professional desktop 3D printing solution using the unique innovative SHS (Selective Thermal Sintering) technology. This technology is very similar to the expensive SLS (selective laser sintering) technology, but unlike SLS, which uses an expensive laser to sinter a composite material (polyamide), the Blueprinter 3D printer uses a thermal head. All unused thermoplastic powder can be 100% recycled, no support material, thermoplastic powder acts as support. The ease of maintenance of the device will allow even those who have never encountered 3D printing to work with it. Pour the thermal powder into the tray of the 3D printer, open the 3D image with a special program on your computer and click the "Print" button - that's all, then Blueprinter will cope with the task on its own. All information about the digital model is immediately downloaded to the printer, which allows you to turn off the computer after starting printing. The Blueprinter combines quality professional 3D printing technology with ease of use and low maintenance costs. This device is a great solution for those whose activities lie in the fields of engineering design and design, architecture and design. nine0003
| Print technology | SHS |
| Printable area | 160 x 200 x 140 mm |
| Print speed | up to 60 cm3/h |
| Minimum layer thickness | 100 micron [0.1 mm] |
| Media | Copolymer powder |
Formlabs Form 2
A new desktop stereolithography 3D printer from Formlabs. The device is ideally suited to the needs of designers who require jewelry precision. SLA printing allows you to achieve a resolution unattainable for the vast majority of printers using the layer-by-layer fusing method: the layer thickness is only 25 microns. Unlike the previous model, now the resin in the cuvette is automatically replenished from a special tank. The device is equipped with a system for supplying photopolymer resin through cartridges. The cuvette is heated so that the resin is always at the optimum temperature. Very nice and the presence of a preview of the printed object on the touch screen of the printer. nine0003
Form 2 print results are simply great: even the thinnest structures look perfect. Surfaces are smooth and even, so post-treatment is only needed where retaining structures are attached to the part. To remove adhering resin, you need to use isopropyl alcohol. The advantage of printing with resin (professional parlance, stereolithography) compared to conventional 3D printing with PLA or ABS filaments is that the variability in the material properties of the finished parts is much wider. In addition to the standard resin, which is suitable for most applications, there are resins that are more flexible, stiffer, or suitable for dental use. A special resin is specifically designed for the manufacture of molds for casting. In a 3D printer, a model of the molded part is created, which is printed in a special mass and then sent to the furnace. In this case, the printed part completely burns out and leaves a void in the mass. It can then be filled, for example, with a metal alloy. nine0003
| Print technology | SLA |
| Printable area | 145 x 145 x 175 mm |
| Minimum layer thickness | 25 micron [0.025 mm] |
| Laser size | 140 micron |
| Laser power | 250 mW | nine0160
| Polymers |
Roland MDX-20
Easy to use and compatible with many popular 3D CAD programs, the Roland MDX-20 is a 3D scanner and milling machine in one, ideal for many applications, from modeling and jewelry industry to injection mold making, rapid prototyping, small batch production and portable product design. The Roland MDX-20 is used to make test samples, reduce production errors, reduce time and cost when creating a new product. With a scan head installed, the Roland MDX-20 is capable of digitizing 3D objects, creating accurate computer models of them. By changing the scanning head to a milling head, the Roland MDX-20 becomes a complete 3D milling machine that can process jewelry wax, model materials, plexiglass and soft metals such as aluminum and brass. Working field 200 mm x 150 mm x 60 mm. The Roland MDX-20 scans a wide range of objects, including glass objects that are difficult for optical scanners, as well as soft objects such as plasticine models, fresh fruit, and more. Roland's unique RAPS technology allows you to scan with an accuracy of 0.05mm. Roland MDX-20 machines are equipped with a transparent housing that protects the user from contact with the tool during operation and collects dust and chips without interfering with the process. nine0003
Cutter GT
This is a full-fledged industrial-level three-axis CNC milling machine with working area 900x600x300 and additional 4th axis . A distinctive feature of this machine is the fast speed of movement of the milling head along the desktop and high rotational speed: up to twenty-four thousand revolutions per minute. The tolerance for the accuracy of the spindle stroke is three hundredths of a millimeter. Simultaneous movement in three planes makes it possible to form three-dimensional surfaces, wood milling in three planes. The CNC program has a thread cutting function. The machine can be controlled both with the help of a computer program, as well as from the machine control panel. Processing of all types of materials is possible: Milling on plastic, aluminum, firm grades of metals, granite. nine0003
Artec Eva Lite
3D scanner Artec Eva is a fast portable 3D scanner for professionals. Eva is the ideal choice when you need to quickly create an accurate 3D model of a medium-sized object with texture, such as a bust of a person, a die-cast car rim, or a motorcycle exhaust pipe. Eva scans objects in high resolution with accurate colors, which opens up almost unlimited possibilities for using this scanner.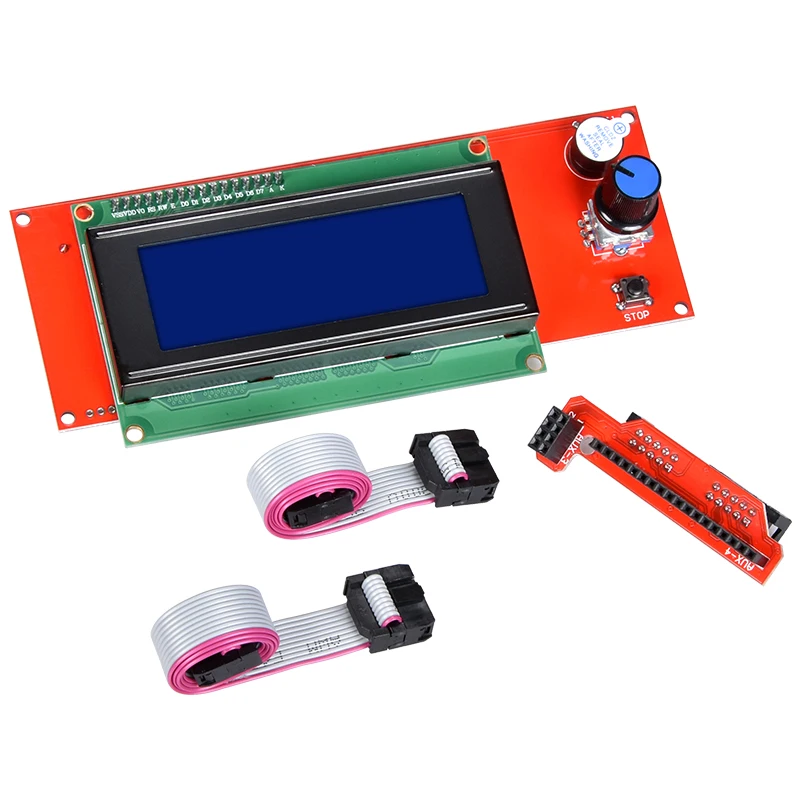 Eva is an incredibly lightweight, fast and versatile scanner. Ease of use, speed and accuracy have made the Eva scanner an indispensable solution in a wide range of applications such as rapid prototyping, quality control, computer graphics, heritage preservation, forensics, medicine, prosthetics, automotive and aerospace. Eva is used to develop unique products, innovate and improve efficiency in cutting-edge manufacturing areas. This scanner was used to create the first 3D portrait of the head of state, US President Barack Obama. nine0003
MakerBot Digitizer
MakerBot Digitizer allows you to create digital 3D models of real objects. You can scan an object and modify it on a computer, add details, reduce, enlarge, or simply print it on a 3D printer. The MakerBot Digitizer uses a laser beam to scan , and the process itself takes about 12 minutes on average . The result is STL file , which can be further processed in the appropriate software. The CAMM-1 PRO GX-640 is exceptionally reliable, flexible and easy to use. With the help of plotters, you can quickly prepare stickers, graphics for transport and shop windows, signs and templates with the highest cutting accuracy. The Spirit is equipped with DuraGuide laser head movement technology and Kevlar heavy duty belts to improve speed, accuracy and quality of work. The Wacom Cintiq 13HD graphic tablet will allow you to reach the pinnacle of mastery in drawing and drawing. The pen input method is accurate, the slightest touch and manipulation will affect the image quality. The wireless pen, which has a special stand, is pressure sensitive to 2048 levels of , and interchangeable tips allow you to choose the optimal thickness of the lines. The Wacom Cintiq 24 HD pen tablet is an interactive display designed for professional designers and experienced artists. inch touch screen 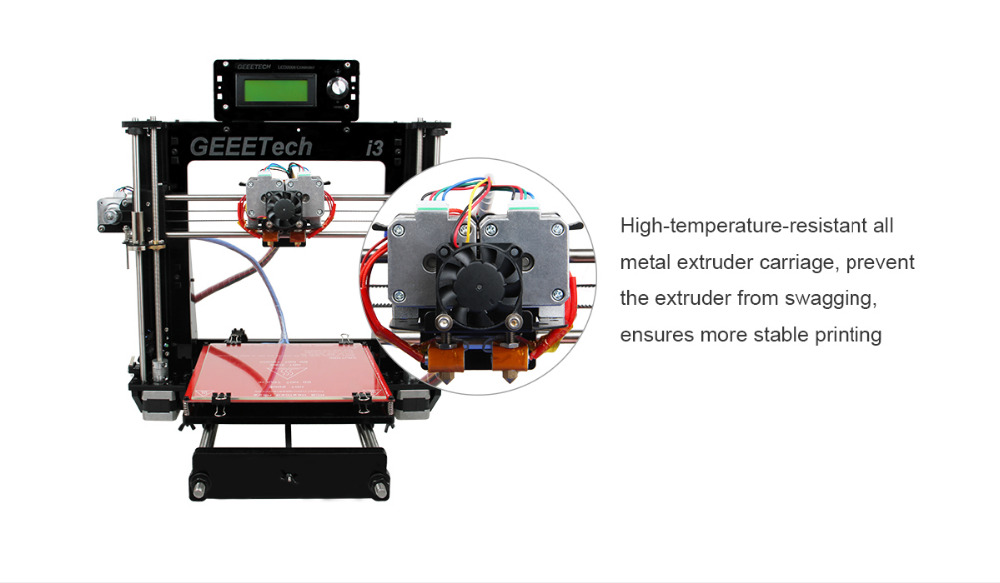 nine0573 The MakerBot Digitizer is useful in modeling, prototyping, and for saving 3D images of various objects. It is designed for objects that can "fit" into a cylinder with a diameter of 203 mm and a height of 203 mm, and is not less than 50 x 50 mm. Permissible mass of the scanned object is 3 kg. The resolution of the scanner is 0.5 mm. The accuracy of the transmission of overall dimensions is (+/-) 2 mm. The manufacturer notes the ease of use and the ability to save scanned data in common file formats that can be imported into CAD and 3D modeling packages. nine0003
 Roland CAMM-1 PRO
The plotters are equipped with an optical system that recognizes printed cut marks.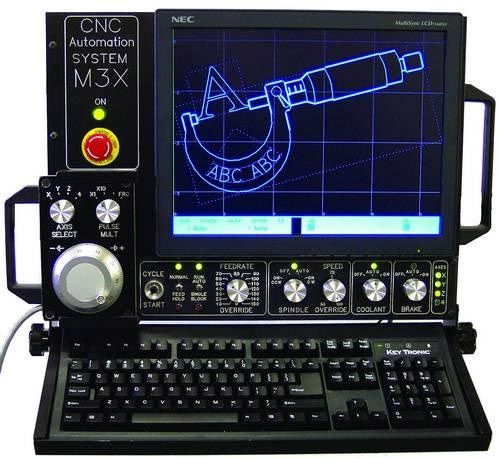 Create professional-looking prints with your printer and precisely cut them to contours with your plotter. This is a convenient option for printing and cutting products. nine0573 This machine is capable of cutting all conventional materials including vinyl, polyester, polyurethane, metallized film. A powerful motor and sufficient blade pressure will allow you to cope with more durable materials: flex, flock, rigid fluorescent and reflective vinyl. CAMM-1 PRO GX-640 cuts wide materials up to 184.2 cm . Buttons for the most important parameters are placed on the control panel of the device: cutting force, speed and starting point of the cut. Using eight presetting modules, the operator can easily select the desired options. nine0003
 Laser Pro GCC Spirit
Excellent engraving and cutting performance combined with high quality performance make the Spirit one of the best engravers. The LaserPro Spirit is a high quality machine with many smart features that meet the demands and needs of professionals. nine0135 LaserPro Spirit
 ) Reinforced Kevlar belts provide the most excellent quality high speed engraving Function Drag & Engrave allows you to freely move the laser head to the desired position on the table Various easy-to-use software features such as SmartCenter, Defocus by pen allow users to reduce setup time and achieve high quality output Patented SmartGuard fire alarm system. The device provides maximum safety when operating the machine. Workable materials: Wood, acrylic glass, stone, single-layer and multi-layer plastics, rubber, cardboard, paper, leather, glass, ceramics, vinyl film, coated metals. Works well with most organic materials. nine0003
 Wacom Cintiq HD13
 Extremely accurate color reproduction, high touch sensitivity - that's what you get using this device. The maximum resolution is 5080 lpi, working area size - 299x171 mm. The Wacom Cintiq 13HD has a 13.3" screen and is tilt adjustable.
 Wacom Cintiq HD24
 The Touch Strips on the back of the display make it quick and easy to zoom, scroll, change brush size, and more. There is also on-screen gesture support for Adobe Illustrator, MudBox, and other popular graphics applications. ExpressKeys can be configured to perform the functions that the owner uses most often. nine0003
Spray booth
Spray booths are modern high-tech and safe equipment that is actively used for painting various materials and parts. Spray booths OKS 0110.10 are distinguished by compact and convenient design, high degree of reliability and stability of operation, excellent quality of work performed, long service life, as well as the convenience and safety of the operator. The camera body is made of high-strength galvanized steel , which ensures stable and accurate operation of the equipment, as well as a long period of its efficient operation under high loads. The excellent quality of the paint and varnish treatment of the surfaces of parts and workpieces is guaranteed by the design features that allow to uniformly distribute the air stream throughout the working area of the machine. The machine is able to carry out high-quality surface treatment of workpieces with a variety of materials, which significantly increases its functionality. nine0135 Dry air filtration : using inertial type separator filters (have a high retention capacity and can withstand 15 kg of collected material per 1 square meter of material processing area), as well as filter systems made of non-woven material. This two-stage purification system guarantees 97% purification of the air used.
Workbench
Metal locksmith's workbench is designed for convenient organization of the workplace in workshops, in educational institutions. Workbench load - 300 kg . Load on a box - 30 kg. shelf load - 100 kg . The workbench is used as a space for assembling and processing products, equipped with hand and power tools: drilling machine, grinding machine, Drimel drill, sets of screwdrivers, clamps, pliers, wire cutters, etc.
HTC VIVE Pro
Complete immersive virtual reality workstation. The kit includes: helmet (HMD with cable), controllers (manipulators for interacting with virtual reality), base stations (for tracking the user's position inside the workspace), link box (for connecting the helmet to a PC via a USB 3.0 and DisplayPort cable), adapters power supply for base stations, controllers and link boxes. The laboratory has 2 sets for parallel or joint development and testing of VR applications. nine0003
Oculus Quest
All-in-one virtual reality system. Allows you to immerse yourself in virtual reality [almost] everywhere. The kit includes: Touch controllers (manipulators for interacting with virtual reality, movements are transmitted with high accuracy), Oculus Quest headset (HMD), 15 W power adapter, 2 AA batteries. To run the apps, you need a smartphone with the ability to install the official Oculus app and an Oculus account. The laboratory has 2 sets for parallel or joint development and testing of VR applications.