Tree support 3d print
Better looking prints with less wasted material
Arun Chapman15 March 2022
Guide
When used properly, supports allow you to print almost anything using an FFF printer. However, they can be a pain to use. You often need to tweak your support settings to get the best results and even then, they can still be difficult to remove and often result in blemishes on the surface of your model. Luckily, Ultimaker Cura has a second type of support structure called tree supports. On certain models, tree supports can use less material, be easier to remove, and they can leave your model with little to no scarring.
What are tree supports?
Tree supports are a type of support structure available in Ultimaker Cura. When
enabled, they are generated around a print to help support areas that would be
unable to print successfully without it. Unlike standard supports that generate
directly below the areas that need to be supported and nowhere else, tree
supports wrap around a print, starting thicker towards the bottom of the print
and getting thinner as it goes up. Tree supports also branch off at an angle with
only a thin tip of each branch touching the areas that needs supporting. The
result can look almost exactly like the branches of a tree.
Before we go into more detail about how tree supports work, we need to talk about regular supports and why they are needed.
What are supports and why are they needed?
Due to a little thing called gravity, when printing with an FFF printer, each layer of filament must be printed on top of a supporting layer below it. If there is nothing below to print on, the filament will be extruded in midair causing a failed print. It is possible to print in midair for a short distance as long as it’s between two supported areas, this is known as bridging. If, however, there is nothing to support it whatsoever, it’s called an overhang.
The red section in the middle is an overhang
The long flat section at the bottom is an example of bridging
Both bridging and overhangs are situations where supports may be required. All major slicers can generate supports. When you enable supports in your slicer, sacrificial structures are generated under your object to support the areas that would normally be impossible to print. These supports can then be removed after a print is finished. Supports are normally printed directly beneath the area that needs supporting like so:
The problem with this is that on a geometrically complex print with lots of overhangs, supports may need to be placed on top of some surfaces of the print to reach the overhang. That can lead to blemishes not only where the print needs support, but also on the area directly below.
There are workarounds in some cases and tweaking your support settings can reduce the surface damage. But in cases like this, tree supports are often a better alternative. We will primarily be talking about tree supports and how they can be used in this article. If you want to familiarize yourself with normal supports and their related settings, check out our dedicated article on the topic.
How do tree supports work?
Tree supports have one big trick up their sleeves, and that’s the ability to print at an angle, allowing it to wrap around a print and support hard to reach places. This behavior also means that tree supports touch the print in far fewer places than regular supports which results in a cleaner print with less surface imperfections.
Tree supports were originally created to minimize how much waste material is used when printing supports. As far as that goal goes, they were a success. You can expect to see significantly less material usage on complex prints that require lots of supports. In prints that use material, you can also expect to see lower overall printing times.
The only major downside to tree supports is a large increase in slicing times as the calculations that need to be made to generate tree supports are more complex than those made for normal supports. The smaller parts of tree supports near the top of each branch can also be difficult to print so poorly calibrated printers may have trouble printing these areas successfully and even well-calibrated printers may have difficulty when using hard-to-print materials like PVA and flexible materials. For this reason, it's recommended to use normal supports when printing soluble supports with PVA.
Once you have enabled tree supports in the settings and sliced the model, you can see how they will be printed by using the preview view.
It’s worth noting that SLA printers also use something called tree supports. These are very different to the tree supports used in Ultimaker Cura in both form and function.
Which settings to use?
As with normal supports, you have access to additional settings you can modify to change how tree supports are generated. If you want to learn how all of these settings work, check out the Ultimaker Cura Settings Guide plugin. If you want to access them, they can be revealed or hidden in the configure Cura settings menu. Below are a couple of the more important settings and what they do.
Support Placement: Support placement is a setting also available for normal supports. There are two options. Touching buildplate and everywhere. Selecting everywhere means that supports can print on top of the print itself whereas selecting touching buildplate means that tree supports will only start at the build plate and not be attached to the object anywhere but where it is supporting.
When selecting touching buildplate, tree supports are still capable of supporting areas that regular supports would only be able to reach by using the Everywhere option. However, there may still be some situations in which everywhere may be required when using tree supports.
Support Overhang Angle: This determines the minimum angle of overhang that requires support. Reducing this will result in more of the model being supported and increasing it means less of the model will be supported. What angle of overhang your printer can print without sagging or failures depends on your printer settings. As a rule, setting this at 50 degrees is usually a good place to start.
Tree Support Branch Angle: This determines the maximum overhang angle the support branches are allowed to print at. Increasing this will allow the tree supports to branch off at more extreme angles which means they will be able to reach more of the model without needing to rest on the model itself. This means less scarring. However, increasing this value too far will also lead to less reliability and a higher chance of print failure.
Tree supports were originally created as part of an internal research sprint where software
engineers could pitch a project and then spend work time trying to develop that pitch into a usable prototype. These research sprints were eventually opened up to other departments and became the Ultimaker-wide hackathon. The hackathon and its precursor are responsible for not only tree supports, but also another fan-favorite feature in Ultimaker Cura, lightning infill. As well as many other smaller improvements and optimizations.
Tree supports were originally pitched as a way to minimize waste filament use. Supports make up a huge portion of the waste material that is created with FFF printing and any reduction in how much support material is needed would also reduce this waste. While also having the beneficial side-effect of reducing printing time and costs.
When should you use tree supports?
Tree supports have a number of use cases to which they are particularly suited:
Ornamental prints
Tree supports leave less scarring and other blemishes on your final print so any print that needs to look good can potentially benefit from tree supports. In particular, complex geometric shapes such as busts or statues are well suited to the use of tree supports.
Budget prints
Certain prints can use less material when printing with tree supports as opposed to regular supports. That means less wasted filament and less overall cost. When printing the same model many times, this can add up.
Prints where normal supports are hard to remove
There are certain prints where normal supports can be incredibly difficult to remove. An example of this is where supports generate inside of a partially enclosed part of the print. Tweaking your support settings can often solve this but if you’re having difficulty removing supports, tree supports can often be a solution.
Parts with tight tolerances
Supports can leave behind excess material which may need to be cut or sanded away after the supports are removed. This can be a problem for any part that requires tight tolerances. Tree supports leave behind less excess material which means less post-processing is required for parts where that material may be an issue.
We hope this info helps you to get better prints. If you haven't used tree supports yet, download the latest version of Ultimaker Cura and try them out!
Download Now
It's Easy If You Do It Smart
Table of Contents
Tree supports are both efficient and neat. Learn why the Cura tree support setting has become one of our new go-to 3D printing tips.
One such outstanding free slicing program that many 3D printing enthusiasts use is Cura from Ultimaker. Although Cura has many beautiful features, tree supports are a unique trait that must be highlighted.
Continue reading to learn more about why tree supports are helpful, what models make the best candidates, and how to set your tree supports for success.
Why Cura Tree Support?
Let’s first discuss supports in general before we discuss what tree supports are specifically. In 3D printing, supports are essentially auxiliary objects that give overhanging features inclined more than 50 or 60 degrees support. The melted filament would otherwise “fall” into the empty space beneath it if there was no support for it. The same goes for any filament meant to be printed on top of the fallen filament. Even complete failures may result from this.
Regular supports are typically geometric or linear for the most basic support for the structures that will be printed on them. In contrast to standard supports, tree supports appear to have a “trunk” and “branches,” simulating the organic structure of a tree. The main advantage of using tree supports is that your final print will be much cleaner because they don’t touch the print as frequently as regular supports do.
Look More Closely to Cura Tree Supports
As briefly mentioned above, tree supports have a trunk-like structure that branches out and up in various directions onto your model. These end tips, printed hollow or with a specific infill density, effectively support the structure from below. You can modify the relevant settings, which we’ll go over in more detail later, to alter how the tree grows and where the branches end up.
Since the release of Cura 4.13.1, tree supports are no longer considered experimental. Still, they are also not set to the default state. You can enable them under the Support settings group, next to “Support Structure, ” if Advanced or higher settings are displayed. After that, you’ll see some more control options.
We’ll look at these possibilities and the kinds of models that benefit most from tree supports. But first, let’s discuss the purpose of using this particular setting.
Advantages of Cura Tree Support
Using tree supports has many advantages over regular or custom supports. Here are some of the main justifications for using tree supports.
Cleaner Surface Finishes
The main advantage of using tree supports may be this. Some design features, such as overhangs not directly above the print bed but somewhat over previously printed regions, would need to be generated on the outward-facing surfaces of the model itself if traditional supports were used. Tree supports have a clear advantage in this situation.
Since the branches of a tree come from the main structure and don’t touch the model, they are only placed where they are required. In other words, the model itself won’t leave behind artifacts from upright supports because the tree suppırt can lean where the print cannot. This is especially helpful when dealing with organic shapes like people and animals.
Less Material & Printing Time
Compared to standard supports, tree supports are made with less material usage. This is so that the entire tree, or even parts of it, can be printed hollow or with low infill density.
If you need a strong base (for example, to hold the model’s weight), you could print the trunk with more infill at the bottom and less or none as the supports branch out. You can print faster and save time and money by doing this.
While tree supports take much longer to calculate during slicing, they compensate for this in printing time. The printer takes less time to print because of its compact design, which results in fewer “travel” movements.
Easy Support RemovalTree supports don’t have “roofs” that support the entire model from below; instead, they make contact with the model at fewer points. This indicates that it is straightforward to separate when tree support is removed from a model.
Unlike conventional supports, there is no risk of the support system fusing with the model. The tree and branches may also separate if you print them with various densities.
Disadvantages of Cura Tree Support
You might wonder if there are any drawbacks given all of these advantages. The only one that comes to mind is the longer slicing time, as we already mentioned. But given the time you’ll save on printing, that seems like a good compromise!
Depending on your model or printing configuration, Cura might produce a non-ideal structure, but this is more likely a matter of taste than a functional issue.
Types of Models
After learning about tree supports and their advantages for 3D printing, the following questions remain: Which models should you use tree supports for, and are tree supports appropriate for all models?
What to Consider when to use Cura Tree Support
It is typically possible to decide whether or not using tree supports makes sense if you carefully analyze their positions, relative geometry, and overall structures. Unfortunately, there isn’t a set standard for this. The best way to determine whether a model is appropriate for tree support is to carefully review and consider its overhangs.
If your model includes intricate or complicated features that require support, that is another thing to consider. It’s frequently tricky to support these structures without endangering them when the support is removed. In particular, tree supports are more flexible and a better option for models with organic shapes.
Example Model
Let’s look at the model presented above to illustrate this process. Take note of the overhangs created by the chin, nose, and hair and the steep angle at the bottom.
Regular supports would leave tiny scuff marks on each of these surfaces if we used them. Common supports would also be difficult to remove and need a lot of material, possibly damaging the finer details in the process.
Using tree supports would significantly enhance the outcome because the entire support structure is removed as a solid piece with almost no marks.
In Summary
Busts, miniatures, and models with long overhangs and mid-air structures are frequently excellent candidates for using tree supports. Having said that, you should assess each print to ascertain which supports are most appropriate for your requirements.
Optimal Settings of Cura Tree Support
Even though tree supports have their own settings, they are remarkably similar to those used for regular supports. Let’s quickly review some of the important settings that are unique for tree supports:
- Branch Angle: This is the angle at which the support structure’s branches will split off from the main trunk.
 A lower value makes them more stable and vertical, whereas a higher value will increase the reach of your branch. 45 to 50° degrees is a good starting point if you’re unsure where to go.
 - Branch Diameter: Naturally, thicker branches will be more durable. Keep in mind that the diameter of the branch and the trunk must differ. For the majority of models, 2–3 mm is adequate.
- Branch Diameter Angle: The trunk’s degree of narrowing is determined by this setting. If the angle is zero, the trunks and branches will have the same diameter. In contrast, if the angle is increased, the bases will become wider, usually adding more stability. Go lower: between 0° and 3°, for features that are inherently supported. Go higher for strong overhangs: 3° to 5°.,
FAQ – Cura Tree Support: It’s Easy If You Do It Smart
How do you get Cura tree supports?
Since the release of Cura 4. 13.1, tree supports are no longer considered experimental. Still, they are also not set to the default (“Normal”) state. You can enable them under the Support settings group, next to “Support Structure,” if Advanced or higher settings are displayed. After that, you’ll see some more control options.
Are tree supports better 3d printing?
Using less material will also take less time to print overall. The only significant drawback of tree supports is a significant lengthening of slicing times because tree supports require more complex calculations than standard supports.
Why do tree supports take so long to slice?
Tree supports are notoriously slow because tree supports require more complex calculations than standard supports.
Are tree supports easier to remove?
The tree supports on most models might be more cost-effective, easier to remove, and leave little to no damage to the model.
Do tree supports use less filament?
As a general rule, tree supports use less material because they are hollow shells, which is good if you want to use less filament. The option to print tree supports with a low infill density is also available if you require more stability.
What are the best tree support settings for Cura?
Most recommend a Branch Angle of 40-50° for the best Tree Support settings. 2-3mm is a great starting point for branch diameter. Additionally, ensure your Branch Distance is set to a minimum of 6mm.
You ought to have mastered tree support by this point. So why not use them the next time you encounter a challenging overhang?
Let us know in the comments below or on our Facebook page to let us know your ideas, and we would appreciate seeing pictures of your works of art! Sign up for our free weekly newsletter to receive all the latest 3D printing info in your email!
Vertical and tree support settings for 3D printing optimization
Support settings
Almost all complex models cannot do without printing supports. The very technology of 3D printing, whether it be FDM or SLA/LCD, implies layer-by-layer growth of the model, but each new layer must be based on the underlying one.
When there are elements in the model that the printer will have to print in the air, supporting elements come to the rescue. They are printed with the main part and removed in post-processing.
Overhanging model example
It sounds simple, but many makers don't like support. Still, the printing of supporting structures means more material consumption, longer printing and post-processing. In addition, they are not always easily separated from the model, and the surface quality at the points of contact with the supports is worse.
In the past, 3D printers used to joke: “Print a model, remove supports and bandage, bandage, bandage!”. There was no such wide range of settings and the supports stuck tightly to the model. I had to cut them off with a knife, in the process my fingers often suffered.
Finished product after removal and cleaning of support structures
In this article, we will try to figure out which cases of support are needed and how you can optimize their printing. We will take the popular CURA slicer as an example.
Do you need support?
In what cases does the model need additional support? It’s worth clarifying right away that for each printer and material, the overhang angle settings will be slightly different.
For example, for PLA with good airflow, you can set a larger support angle in the settings than for ABS. For an illustrative example, you can print a small test on overhangs. But here are general recommendations from which you can build:
-
If the angle of overhang is greater than 45°, it is worth including the construction of supporting structures.
-
If the bridge is wider than 5mm, supports should be used (printers with good airflow can print long bridges without supports, but wide bridges may need additional support).
 To determine the capabilities of your printer, you can print a small test.
Bridges are sections of the model that are in the air between two supports. A 3D printer can print such elements without support. This will save time and reduce waste of plastic.
Bridge Print Test
Optimal Support Settings
Initially, CURA has few settings for reference elements. To enable the display of additional options, click the gear icon next to Support and select the required additional options in the menu that opens.
Menu for enabling additional settings for support elements
Support types
Lines (Normal)
CURA offers a wide range of support structure printing templates. Some templates are universal, some are more suitable for models of a certain shape
Filling templates for supports in CURA
Description of the most popular templates:
-
Zig-zag: One of the most popular - fast printing, easy to remove by hand without additional tools.
-
Grid: Provides a strong and stable support for the model. Quite difficult to remove.
-
Lines: Stable yet easily removable designs.
-
Concentric: Good for ball or cylinder models.
-
Triangles: This creates an extremely strong and stable support that will be difficult to separate from the model.
Basic settings for linear support structures:
-
Density: The density is set in the same way as for filling. The higher the density, the stronger and more stable the supports will be, but they will be more difficult to separate from the model. You can start with a value of 20% and change depending on the model.
-
Thickness of the infill layer: To reduce the printing time, you can increase the thickness of the support printing layer. After all, they don't have to look pretty.
 This value should be set as a multiple of the model layer thickness.
Arborescent (tree)
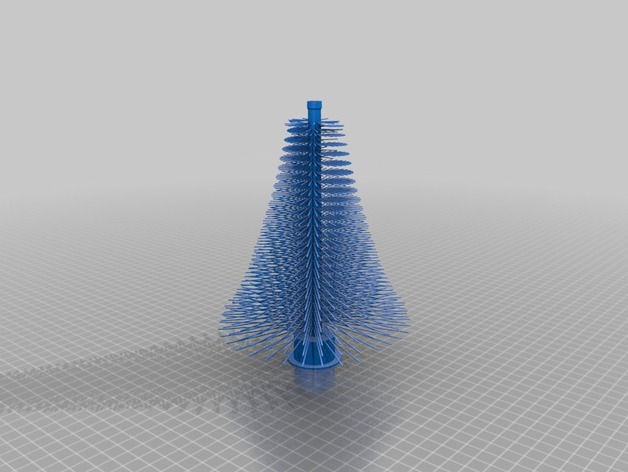
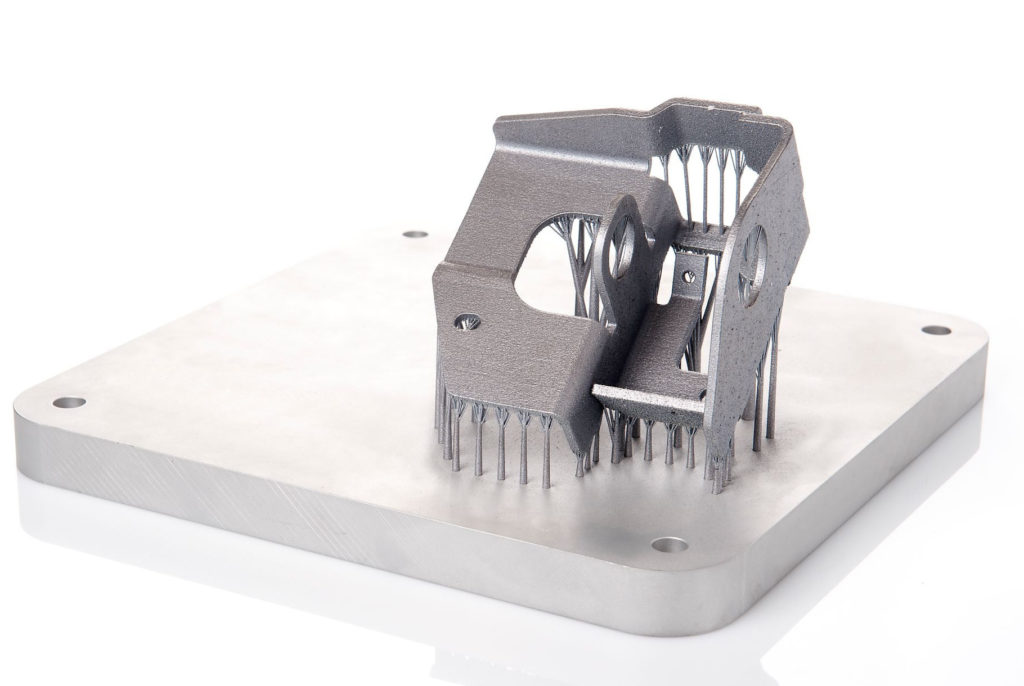
Tree support is an alternative to regular lines. Such a support resembles a tree - a massive hollow trunk with many branches that support the overhanging elements of the model.
Tree support example
Settings that can be changed for tree supports:
-
Branch angle: The maximum angle of inclination of the supporting branches. With a smaller angle, the “twigs” will be more vertical and stable.
-
Branch distance: distance between the supports at the points of contact with the model. The smaller this parameter, the denser the supporting structure will be.
-
Branch diameter: is the diameter of the thinnest branches of the supports. Thin supports are easier to remove from the model, but thick supports are more durable.
-
Branch Diameter Angle: The angle by which the tree support extends towards the base. If you set this parameter to 0, then the supports will be the same thickness at the entire height.
-
Model Collision Calculation: Resolution used to calculate the intersections of the main part and supports. The smaller this value, the more accurate and durable the supports will be, but they will be more difficult to separate from the model.
Do not forget that it will be problematic to separate a support that is too massive from the model.
Towers
For small ledges, CURA knows how to build small support towers.
Left turret used to support ledge, right normal support
Such turrets can be built for areas that need additional support, but their area is less than specified in the minimum support zone. For the rest of the model, normal support will be built. To keep the towers stable, they are printed massive at the base and tapered at the top.
Settings available for towers:
-
Tower diameter: The larger this value, the more stable the tower will be.
-
Maximum diameter supported by the tower: is the maximum size of the area (in XY axes) for which the towers will be used.
-
Roof angle: tower top angle. The smaller the angle, the flatter the top of the tower will be.
Basic settings
Support Location
After choosing the type of support, you need to decide how to place it. There are two options in CURA - everywhere or "from the table". This parameter determines whether the supporting structures will be built over the entire surface of the model or just from the table.
Left figurine with supports from the table, right everywhere
In most cases, the support from the table will be enough, but some particularly complex models should be printed with the “everywhere” setting.
Distance from model to support
The gap between the model and the support is an important parameter that determines the surface quality of the model and how difficult it will be to remove the support structures.
The gap can be set along the Z and X / Y axis.
- Gap Z : The larger this value, the greater the distance between the support and the model along the Z axis. Larger distance will make it easier to remove the support, but the surface of the model is unlikely to print perfectly. It is worth experimenting with this setting to find the ideal value for your printer. Don't forget to set the value to a multiple of the height of the model layer.
On the left photo, the gap along the Z axis is greater than on the right
X/Y Gap : X/Y gap between model and supporting structures. The greater the distance, the easier it is to remove the support. Generally, a larger X/Y distance will mean a better surface finish on the model.
On the left photo, the gap along the X / Y axis is greater than on the right
But if your model has a lot of small protrusions on vertical surfaces, it's worth lowering this setting.
Clearance priority.
Depending on the shape of the projection of the model, the gap along the Z axis may “conflict” with X/Y. To do this, you can set the gap priority in the settings.
Left X/Y gap priority, right Z gap priority
Usually the Z clearance is more important, but you should focus on the geometry of the model.
Overhanging corner
With this setting, you can set the angle of overhang at which the protrusions on the model already need additional support. The default value is 45°. However, depending on the model, material, printer, this angle can be increased or decreased.
65° support angle left, 45° right
If you want support to be built under bridges only, set the angle to 90 degrees. If you want to support every protruding element of the model, set the value to 0°.
Additional settings
Minimum support zone
This parameter defines the minimum area for which additional support is required. It will save some material and time by not creating support for small ledges where they are not needed.
Support pooling distance
This setting allows you to combine supports that are nearby. When two supports are closer to each other than this value, they will be automatically merged.
This makes the supports more stable. But it is worth remembering that too dense supports will be difficult to remove from the finished model.
Border
This setting allows you to print a border inside an array of supports. It is necessary to increase the adhesion of the support structure to the printing table and increase the stability of supports with a small base.
Left border off, right border on
Horizontal extension
When the overhangs are small, it can be difficult for the printer to print thin supports. In order to increase the strength of the support, you can adjust the horizontal extension. This option allows the support structures to be wider than the overhang of the model.
On the left model, the horizontal support extension is less than on the right
Printing with two extruders (soluble materials)
With the advent of 3D printers with two extruders, it became possible to print the main model and supports with different materials. For example, use soluble plastics so that you do not have to manually clean the printed product from supports.
When using soluble materials, it is possible to almost completely eliminate the gap between the model and the support, which will positively affect the surface of the finished product.
To save material, you can print only a part of the support from a soluble material - for example, only in places of contact with the figure.
Soluble Support Miscellaneous
Totals
A large range of support settings in 3D printing can be intimidating at first for a novice user, but it is not necessary to use all the parameters at once. For many models, the default settings in CURA will suffice.
Some makers dislike support structures so much that they prefer to cut the model into several parts and glue it after printing. Sometimes this can be a really good solution, but more often than not it will make post-processing of the finished product longer. After all, you have to grind all the places of gluing.
But in order to achieve a higher quality of the finished product, it is still worth mastering the art of arranging and setting up supports for a 3D model.
3D Printing Support Structures - Complete Guide
An Easier Approach to Caliper Structures
Caliper Structures for 3D Printing - The Complete Guide
Everything you need to know about caliper structures used in 3D printing. Feel free to use overhangs and bridges in your models!
Caliper structures: If you have a lot of experience with FDM 3D printing (FDM - deposition layer modeling), you may have found yourself in situations a couple of times in which you had to use such structures. An FDM 3D printer creates a 3D object by sequentially applying layers of thermoplastic materials. In this case, each new layer rests on the layer below it. If the model has an overhang that is not supported from below, it will likely sink or even fall off, and you will need to print additional support structures to ensure successful printing.
Caliper structures are seen as a necessary evil in 3D printing. On the one hand, they are absolutely necessary for models with dangerous overhangs or bridges. On the other hand, the cost of materials rises, finishing work is added, and there is a risk of damage to the surface of the model. Therefore, proper application of printed caliper structures is a very important aspect of 3D printing complex models.
Caliper structures in 3D printing: 3 easy steps to success
In this article, we will cover everything you need to know about support structures used in 3D printing. Detailed explanations are provided later in the text.
WHEN DO YOU NEED THEM?
In general, when a model has an unsupported overhang or bridge, caliper structures may be required to enable 3D printing. The figure below shows overhangs and bridges using the letters Y, H and T.
A classic example of overhangs and bridges using the letters Y, H and T.
Caliper structures are not needed for all overhangs - 45 degree rule
Caliper structures are not needed for all eaves. As a general rule of thumb, if the overhang slopes less than 45 degrees from vertical, it can be printed without the use of caliper structures.
Support structures are required for overhangs greater than 45 degrees from vertical.
3D printers provide a slight (barely noticeable) horizontal displacement between successive layers, i.e., the applied layer is placed on the previous one with a slight displacement. This ensures that overhangs are printed that do not deviate too much from the vertical. Anything less than 45 degrees can be supported by previous layers, and anything above that number can't. A value of forty-five degrees is considered a break line.
This statement is best supported by the examples of the letters Y and T. The two slanted parts of the letter Y have an angle of less than 45 degrees with respect to the vertical. Therefore, if necessary, the letter Y can be printed without using any caliper structures performed by 3D printing.
For overhangs in the letter Y, printing of support structures is not required. But for overhangs in the letter T - yes. (source: 3DHubs online production platform)
On the other hand, the protruding parts of the T are at an angle of 90 degrees from vertical. Thus, in this case, for the 3D printing of the letter T, the use of support structures is a necessary condition, otherwise the result will be a nightmare (see the figure below).
Without caliper structures, it is not possible to print the letter T properly (source: 3DHubs online manufacturing platform)
2
Not all bridges need supports - the 5 mm rule.
As with overhangs, supports are not required for all bridges. A rule of thumb that has been proven in practice is that if the bridge length is less than 5 mm, the printer is able to print it without the need for a caliper structure.
This uses the bridging printing method, in which the printer stretches the hot material over short distances and prints it with minimal sagging.
However, if the bridge length is greater than 5 mm, this method does not work. In this case, it is necessary to additionally print support structures.
Bridges longer than 5 mm cannot be printed without support structures. Notice how they warp and deform.
TESTING PRINTER'S ABILITY TO PRINT OVERHANGS WITHOUT SUPPORT
The rule of thumb that if an overhang slopes less than 45 degrees from vertical, it can be printed without the use of support structures is just a rule of thumb. Much depends on the printer, its condition and the materials used. Printers that are in poor condition may not print 35 or 40 degree overhangs from vertical.
Before printing a model with overhangs, it is recommended that you evaluate the printer's ability to print small overhangs.
This is easy to do. Simply download the Massive Overhang Test print model from the Thingiverse website and print it. This model presents overhangs from 20 to 70 degrees in 5-degree increments.
Overhang print test model from Thingiverse website (source: Thingiverse website)
Determine the angle at which the printer starts to print abnormally. This is the maximum overhang angle at which the printer can print without support. It is recommended to remember it for making further decisions on the need to use support structures.
DISADVANTAGES
Like many things in life, the use of support structures in 3D printing has certain weaknesses. There are several of them, so let's look at them.
1
Increased material costs
Support structures require additional materials. In this case, these designs after printing must be removed and thrown into waste.
When using 3D printing at the manufacturing level, the focus may be on the cost per model. If this is your hobby and you are limited in funds, then, for sure, this is also not indifferent to you.
3D printing of caliper structures means an obvious additional cost per model. Caliper structures require material that is subsequently removed and discarded, so any 3D caliper structures go to waste, which increases the cost of the printed product.
2
Print time increase
3D printing of support structures also increases print time as the printer prints additional volumes. It is quite obvious that the additional time spent depends on the number and height of the caliper structures.
3
Additional finishing
Additional finishing is required when printing support structures. (source: Formlabs)
3D printed support structures are not part of the model. They are used as a support for parts of the model during printing. This means that at the end of printing, there is an additional need to remove these structures before the model is ready for use.
In a production setting, extra work means additional costs for the model.
4
Risk of product damage
Left: Printing with supports. Middle: Removal of calipers with product damage. Right: Removal of calipers without significant damage to the product. (source: 3DHubs online manufacturing platform)
3D caliper structures come into contact with the walls of products and often stick to them. They are the only means of providing support under overhangs and bridges. If care is not taken when removing 3D caliper structures, defects may remain on the surface of the product. In the worst case, part of the model may break off along with the 3D support structure.
In general, there are significant disadvantages when using support structures. Therefore, here's another tried-and-tested rule: Minimize the use of 3D support structures and add them only when necessary . The following sections will explore the application of this principle, starting directly from the computer-aided design (CAD) stage and ending with printing.
GEOMETRY OF THE CALIPER STRUCTURE
Two types of support structures are commonly used: tree-like ("tree") and linear/"accordion".
Tree calipers
The tree caliper is a tree structure that serves as a support for the overhangs of the model. Calipers of this type only come into contact with the overhang at certain points.
3D caliper tree structures (source: Flashforge)
The advantage of using a 3D caliper tree structure is that it can be removed more easily without significant damage to the underside of the overhang. However, it should be noted that this type of caliper is only suitable for non-flat overhangs, such as the tip of the nose, toe or arch.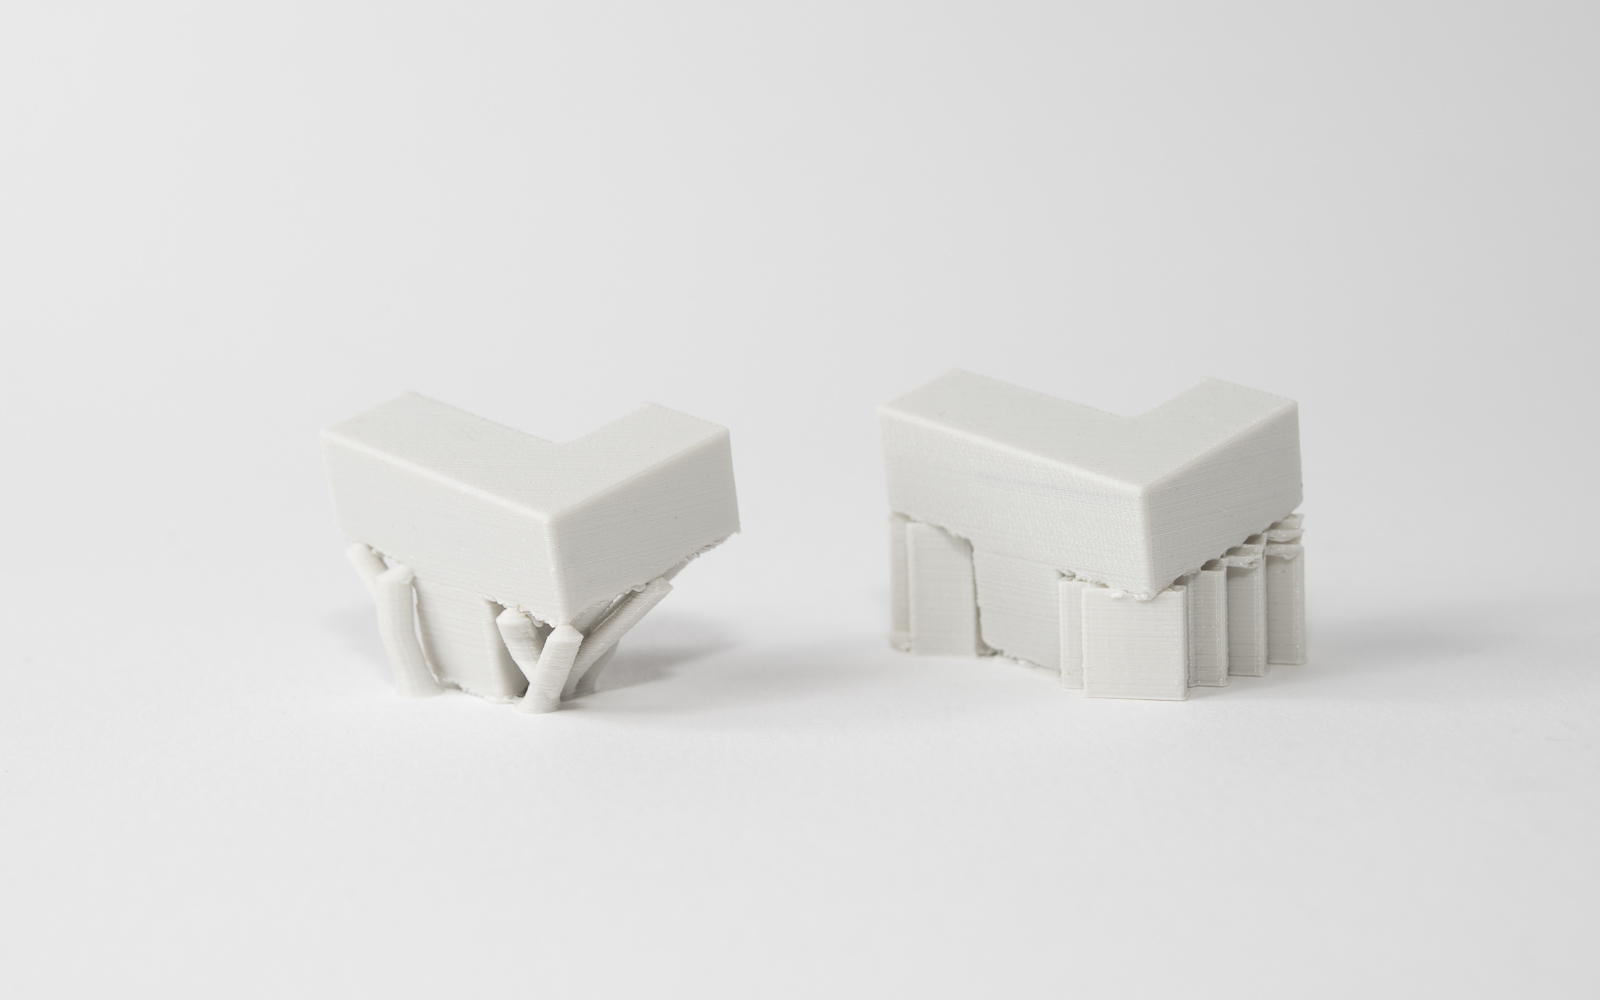 For flat overhangs, it does not provide sufficient stability.
Linear support or "accordion"
This is the type of support most commonly used in 3D printing. It consists of vertical posts that are in contact with the overhang over the entire surface. This type of caliper is suitable for any overhangs and bridges. However, it is more difficult to remove without damaging the surface of the model.
Linear 3D support structures (source: Flashforge)
TYPES OF SUPPORT STRUCTURES BY REMOVAL DEGREE
1
Tear-off 3D support structures
Single-extruder printers use tear-off support structures by default.
If you have one extruder, you have to use the same material to 3D print the support structures that is used to print the model. Of course, the density of the caliper structures can be adjusted to be much lower than the density of the model, but this is the only remedy that can be applied to the material of the caliper.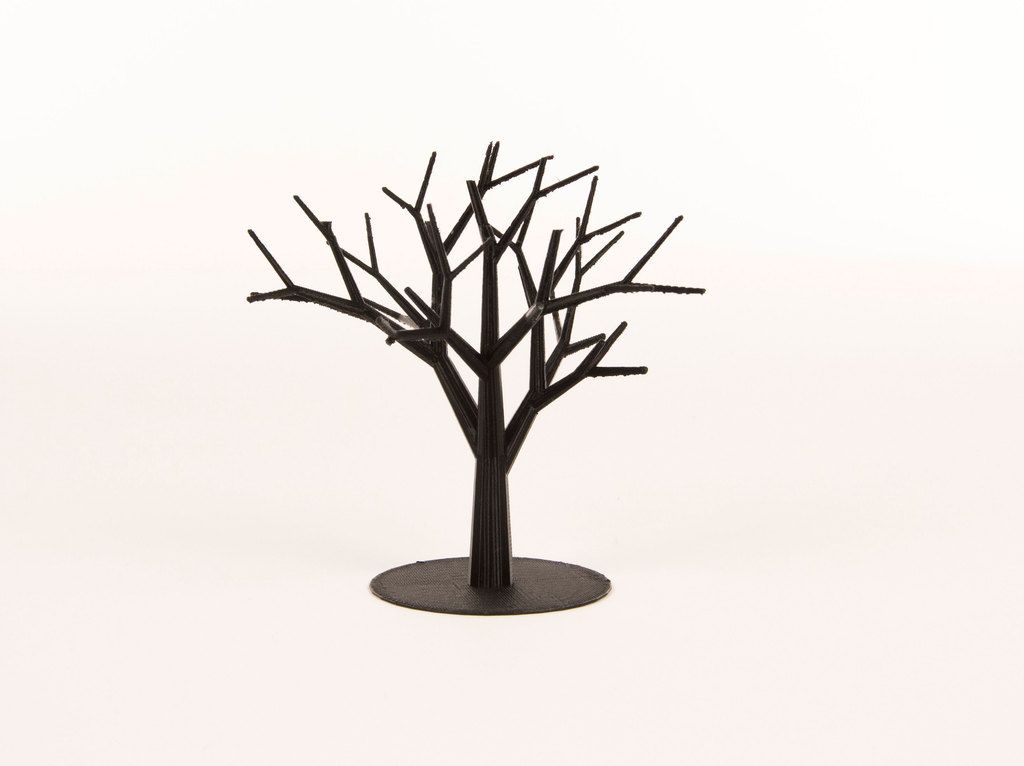
Since the model and 3D caliper structures are made from the same material, the only way to separate them is to either break off the caliper by hand or carefully cut it off with a knife.
These removal methods carry a high risk of damage to the model, and during removal, you must use the proper methods and be extremely vigilant and careful.
2
Dissolvable 3D calipers
Dissolvable calipers are easier to remove, but requires a printer with two extruders.
If you have a dual extruder printer, you have a better choice. You can load one extruder with PLA for model printing and the other with water soluble material such as PVA or limonene soluble material such as HIPS (polystyrene) for caliper structure printing. At the end of printing, it is enough to simply remove the support structure by washing off by immersing the model in water or limonene.
This removal method reduces the risk of model damage and simplifies finishing, making it ideal for complex prints.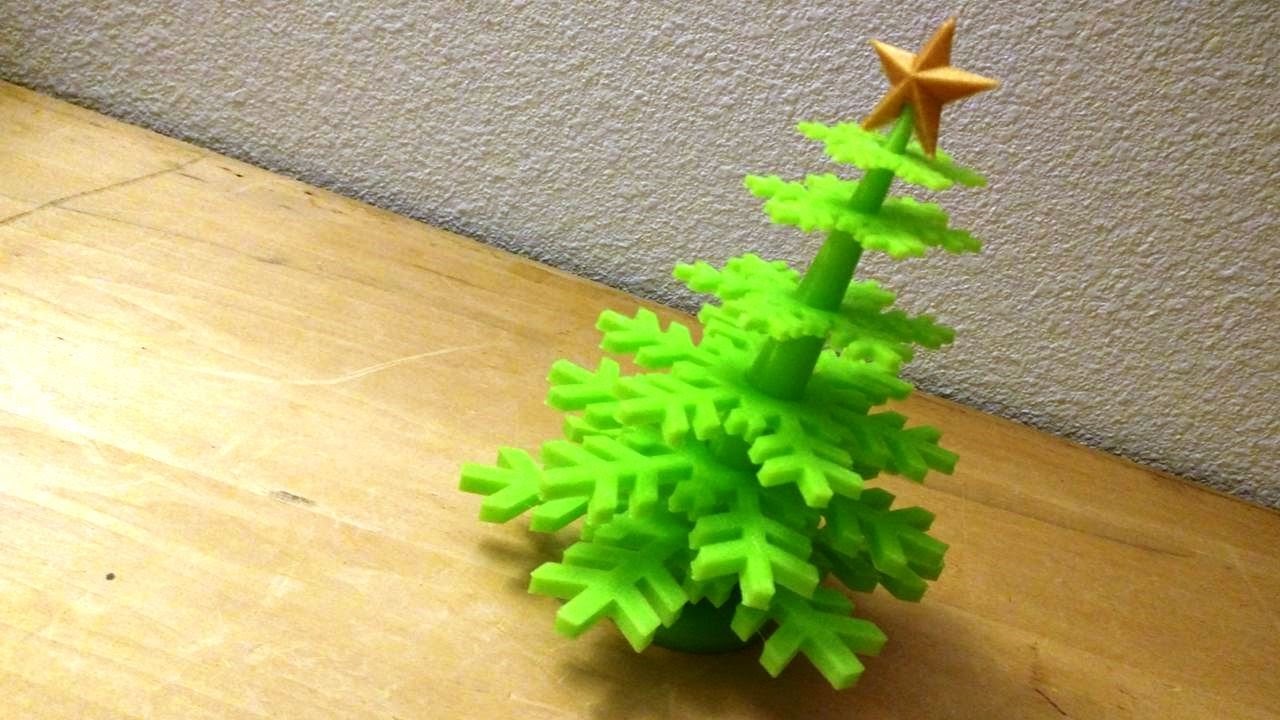
HOW TO REMOVE 3D SUPPORT STRUCTURES
Because 3D caliper structures are difficult to remove and can damage the model, here are some tried and tested techniques for removing them properly.
- First you need to determine which support structures are completely open and can be easily reached with your fingers. Try prying these calipers off with your fingers. Exercise caution. Extreme caution. If this operation is performed correctly, most caliper structures should come off without much effort.
- Then take a tool to remove 3D support structures that are difficult to reach. There are many opinions about which tools are best. You can use needle-nose pliers, a spatula, or a utility knife. You can also use all these tools together.
- When using a knife or scraper, it is a good idea to heat up the model or blade. This contributes to better delamination of the 3D support structures. A small butane torch will help, but care must be taken not to damage the model.

- Handle utility knives with care as they are very sharp.
- Sandpaper is also excellent for removal. When wet grinding with fine-grained sandpaper (from 220 to 1200), not only the removal of 3D caliper structures is performed, but also the model is polished. For best results, it is recommended to spray the part with water and sand in smooth, light strokes until the desired surface finish is achieved.
Wet sanding can be used to remove residual 3D caliper structures and smooth the surface of the model (Source: Formlabs) scratches and surface defects. Nail polish is great for partially or completely covering these marks.
If you are interested in how other users solve this problem, it is recommended that you view the web page on the best ways to remove supports, calipers and filament structures - Best ways to remove foundations, caliper structures and other external filaments.
MINIMIZING 3D CALIPER STRUCTURES WITH SMART DESIGN
Integrating 3D caliper structures into the model
One way to avoid the use of caliper structures in 3D printing is to use additional elements in the model that perform a similar function. Sculptors have been using this technique for centuries. As an example, consider the sculpture "Venus the Conqueror" by Antonio Canova.
Venus the Conqueror, sculptor Antonio Canova
Here the right arm is an overhang but rests on pillows. The left leg is another overhang, but here the folds of the toga serve as a support.
The next example is the Guardian model by @fantasygraph. As a support for the legs and buttocks of the model, he guessed to use a dress flowing in folds. The left hand rests on the spear lowered down.
@fantasygraph's Sentinel is a prime example of how support structures can be integrated into a model.
Integrating 3D support structures into a design is more art than science. It is necessary to find such elements that fit into the overall design and at the same time can be a support for overhangs or bridges. If done correctly, the model will be more beautiful and the printing process will be freed from unnecessary 3D caliper structures, which means saving time, money and labor.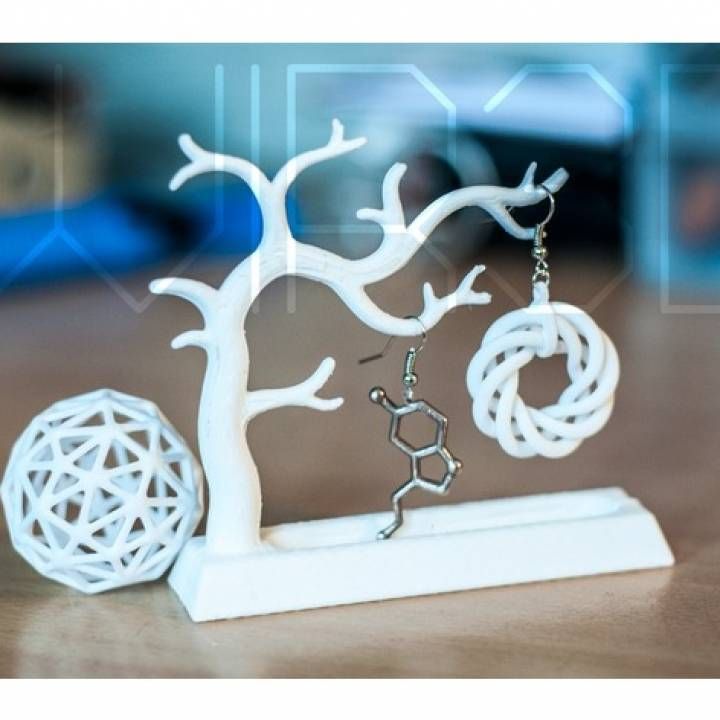
Bevels
Another way to get rid of 3D support structures is to use bevels. With proper chamfering, dangerous overhangs can be turned into innocuous structures with angles less than 45 degrees.
For example, if you have a smoothly falling or folded edge, you can replace it with an edge with an angle that does not require supports. Such an angular pattern is called a bevel.
Left: Gradually rounded edge that requires supports. Right: A beveled edge that can be printed without 3D caliper structures (source: Rigid Ink)
Similarly, if your model has a hole, you can turn it into a bevelled teardrop hole. For the most part, this won't ruin the overall aesthetic of the model, but will help reduce the amount of 3D support structures needed to print the model.
Beveled hole (Source: Markforged)
MINIMIZING 3D SUPPORT STRUCTURES BY REORIENTATION
. For example, it is much better to print the open box shown below with the open side up.
You can often minimize the use of 3D support structures by properly positioning the model on the build plate (Source: Markforged)
Below is a more non-trivial example, again from designer @fantasygraph. This is a model of a man with a horizontally outstretched arm pointing forward and to infinity.
If you print the model as it is, you will need to support your left hand. And it, in fact, is a long overhang with an angle of 90 degrees.
Removing the supports will most likely leave imperfections on the underside of the arm. To avoid this, you can rotate the whole model by 45 degrees and simply add a support for its base. In any case, the quality of the basis of the model does not really matter. Thus, it is possible to print a model with fewer 3D caliper structures and save the left hand from damage.
A simple and ingenious solution. Maybe you can do it too?
PRINTING OVERHEADS AND BRIDGES WITHOUT 3D SUPPORT STRUCTURES
In the previous sections, attention was drawn to the fact that, if possible, you should try to use as little 3D support structures as possible. However, this means that it will often be possible to find yourself in a difficult situation in which the risk of model instability is inevitable. To minimize these risks, here are a few general tips.
- Make sure the 3D printer is in optimal condition.
- Cool the printed material as quickly as possible. The longer the material cools, the more likely it is that the bridge or overhang will warp or fall off. To do this, it is necessary to maximize the cooling capacity of the layers by cooling fans. Also, reduce the print temperature to the lowest possible.
- Reducing the print speed also speeds up cooling and is especially helpful when printing longer bridges and complex overhangs.
- It is recommended to print with the minimum layer thickness. Less layer thickness means less weight applied with each pass of the print head. In addition, it contributes to faster cooling of the material.
SUPPORT STRUCTURE SETTINGS IN CURA PROGRAM
Sometimes you simply cannot do without 3D support structures.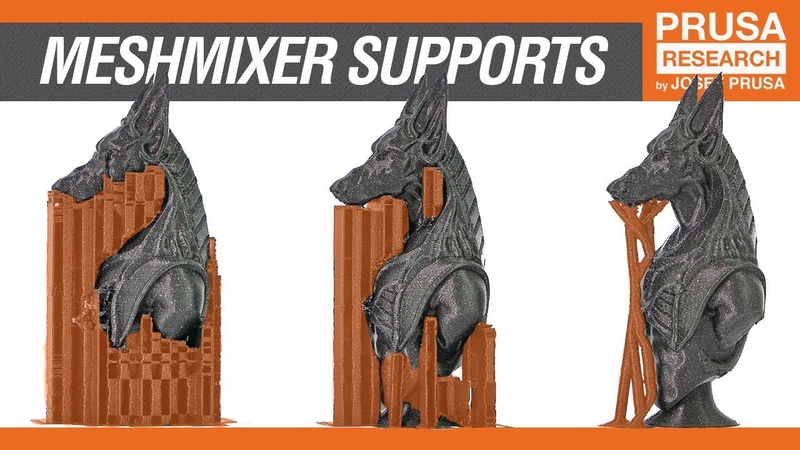 But even in this case, every effort must be made to ensure the stability of the 3D support structures, so that they do not consume a lot of material, they are easily removed and do not damage the surface of the model.
The layering manager has many additional functions for fine-tuning support structures. Most layering programs can automatically create calipers, but they also have a manual mode that lets you add or remove calipers anywhere. In addition, the layering manager has many different settings to control the following aspects of the caliper structures.
- Location of 3D supports
- Strength of 3D supports
- Easy removal after printing
- Damage to the printed surface
In this article, we decided to focus on Cura, one of the most popular free layering software.
Cura has a number of settings related to support structures located in the Support section of the Custom Settings menu. With the correct setting of these settings, you can create 3D support structures that meet most of the basic requirements.
1
Enable automatic creation of 3D support structures for unstable models
Let's start from the beginning. How can I check if a model needs additional supports?
This is easy to do with Cura. Immediately after importing the model into Cura and placing it on the virtual working base, you should pay attention to the areas colored in red. These are the areas where Cura found instability. It should be noted that, possibly, areas without supports will not be visible until the camera is rotated.
If the bottom of the part is painted red where the model touches the work base, don't worry that there is no support underneath. This problem will be solved by a working base. Small red areas at the top of holes or between two structures are called bridges and Cura will process them automatically.
You should start to worry if there are other parts highlighted in red. First you need to activate the automatic creation of support structures in order to ensure that these red areas are successfully printed. To do this, just check the Generate Support checkbox in the Support section.
So, the function of automatic creation of support structures is activated, but no external changes to the model occur. The reason is that Cura does not show support structures in the default Solid view. To view the generated 3D support structures, you must change the view mode to Layer View (View layers). The material of the calipers (lines and volume) will be displayed in turquoise. You need to move the layer slider up and down to see where the support is added to the model.
2
Tree support or linear support selection
Support tree structures in Cura
Cura creates 3D linear support structures by default. Version 3.2 beta of Cura provides the option to use tree supports instead of the default linear ones.
3
Controlling the position of 3D supports
Two types of support structures in Cura: Everywhere and Touching Build plate
When you activate the option to create support structures, the Placement item automatically appears in the Support section. The Placement option provides the ability to control the approximate location of support structures. There are two options: Everywhere and Touching Build plate. The Everywhere option is selected by default.
When the Everywhere option is selected, Cura 3D attempts to create support structures where they are needed. This means that not only 3D caliper structures will be created that will be placed on the working base, but also caliper structures that will be based on the details of the model. This is the rational choice for most cases, as it guarantees the necessary support for all unstable areas.
However, if you select the Everywhere option for very complex models, the model may be completely covered with the material used for the calipers. If there is no such intention, you just need to set the Touching Build plate option in the Placement settings. This option will create 3D caliper structures under the hanging parts of the model only between the working base and the model.
4
The Enable Support Roof option can improve the surface finish of overhangs, but will incur some additional cost.
Since the overhang of the model is always printed on top of the 3D support structures, the optimal surface finish of the parts is not always guaranteed. And in this case, the hidden setting Enable Support Roof can help.
The arch of the support is a dense layer in the upper part of the caliper structure, which does not detract too much from the quality of the surface of the overhangs. When this option is activated in the Cura 3D program, by checking the appropriate box, a better quality finish is obtained. But this improvement comes at a cost, as removing the caliper structures becomes more difficult than usual when choosing this option. This option is only recommended if the surface quality of the overhang is important to the finished part itself.
5
Prevent 3D support structures from damaging the outer walls of the model by using the Support X/Y Distance setting
Sometimes 3D support structures are too close to the outer wall and leave traces on the outer surface of the model.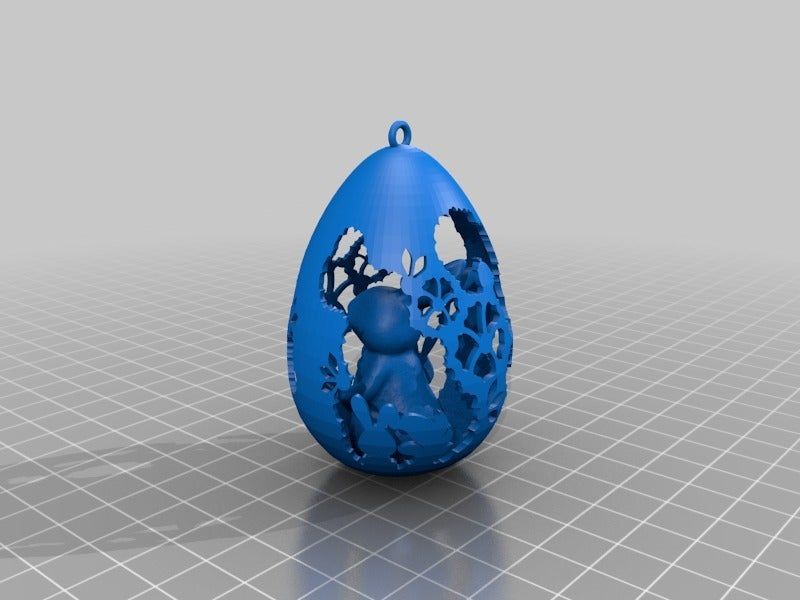 This can be avoided by using the hidden Support X/Y Distance setting in the Support section.
In Cura, the Support X/Y Distance setting generally controls the minimum allowable distance between the model's vertical walls and the support structure in the X-Y plane. If the 3D support structure damages or sticks to the walls, you can increase this value in 0.2 mm increments until the walls are smooth. However, it is highly recommended to ensure that there are no small overhangs protruding from the outer walls, which would be left unsupported by leaving a small distance between the support and the walls. With these small overhangs, you may even need to decrease the X/Y distance instead of increasing it. Otherwise, printing will fail.
6
Z Distance setting to allow easier removal of 3D support structures model layers. The Cura software creates this weaker connection by leaving a certain space between the top and bottom of the support structure and the model - this space is known as the Z distance.
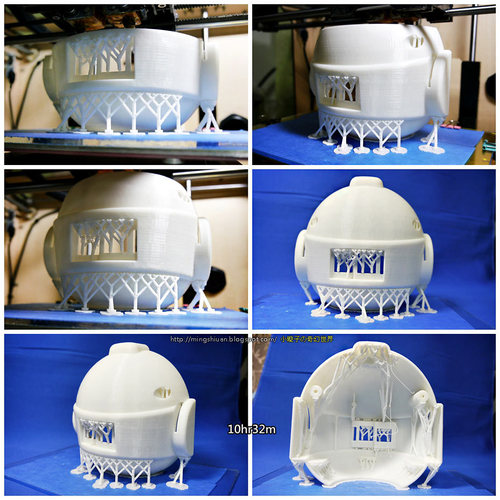
By setting the hidden Z-Distance settings in the Support section, the 3D support structures can be more easily separated from the model. The default value of this setting is equal to the height of the layer. So if the layer height is 0.1mm, the default Z distance will also be 0.1mm.
If the support material is difficult to separate from the model, it is recommended to increase this value in increments of layer height until it separates cleanly. Cura may or may not provide additional support for any particular layer. Unfortunately, half layer values do not exist. That is, if the Z Distance value of 0.2 mm is too large for printing with a layer height of 0.1 mm, and the Z-Distance value of 0.1 mm is not enough, there are no other options for setting the Z Distance value.
7
Selecting the right 3D caliper structure to strike the right balance between strength and ease of removal
Support patterns in Cura
Cura provides one of seven 3D caliper patterns. The pattern can be changed using a hidden setting called Support Pattern in the Setting section.
In most cases, the default pattern, Zig Zag, provides the best balance between strength and ease of removal. Other scheme options: Triangles (Triangles), Lines (Lines), Grid (Lattice), Concentric (Concentric), Concentric 3D (Concentric 3D) and Cross (Cross). If the default schema doesn't work, you can experiment with other options. Each provides a different balance between strength and ease of removal.
Caliper structures are a necessary evil in 3D printing. They are needed to print complex overhangs and bridges on the model. But when soluble 3D support structures cannot be used, it is recommended to try to minimize their use. We've covered situations where 3D caliper structures aren't needed and mentioned a few creative tricks for printing without them.
However, often the overhang or bridge may be such that a support structure has to be used. In this case, you need to change the layering settings so as not to waste too much material and not damage the model during the removal of supports.